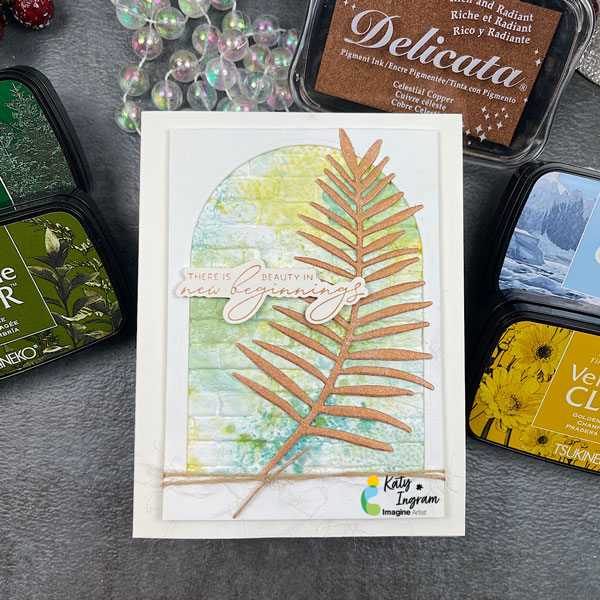
Hello Friends! Katy here with my latest video! In todays video I create an easy background with some VersaFine Clair Inks. In the video I see if I can replicate an ink smooshed background I made earlier using the same technique. I usually can’t! There always seems to be something a little different. Check out the video and see if I was able to do it. I also showcase the Copper Delicata ink coloring a die cut. I just love the results and I think you will too. Video has all the details. Thanks for watching.
Other Products Used Hot Pressed Watercolor paper Brick 3D Embossing Folder Palm Frond Die-The Greetery- Any Large Leaf dies will do. Ivory/Natural Cardstock Neenah Classic Crest Natural Card Base 120Lb White Cardstock Twine Any Sentiment
Step 1: Trim a piece of watercolor paper a little bit larger than an A2 sized cardbase (4.5” x 5.75”) and watercolor smoosh the panel with Gray Flannel Memento Ink mixed with water on acetate packaging. Allow the panel to dry. Then repeat the process with Pearlescent Lavender Brilliance Ink and then finally with Champagne Delicata Ink.
Step 2: Stamp stars on watercolor paper with Paradise VersaFine Clair ink. Repeat the process so make the blue of the ink darker. Then heat emboss with clear embossing powder. Then die cut with the corresponding die.
Step 3: Press Blue Belle VersaFine Clair Ink onto another piece of watercolor paper and then use this paper to die cut the sentiment. Die cut two pieces of scrap paper with the same sentiment die and glue the three layers together for dimension.
Use the corresponding shadow die to die cut a vellum shadow layer and glue behind the sentiment.
Step 4: Spray the background panel with Paris Dusk Fireworks! Craft Spray through a stencil. While the spray is still wet, remove the stencil and spray the panel with Summer Sky Fireworks! Craft Spray to move both colors of spray. Splatter some of the light blue areas of the panel with Paris Dusk Fireworks! Craft Spray. Allow panel to dry.
Step 5: Trim the background panel to about 4” by 5.25” and then distress the edges with a pair of scissors. Press the edges of the panel into the Gray Flannel Memento Ink pad and then heat emboss with more clear embossing powder. Next, glue the sentiment onto the center-right and the Star was attached with foam tape.
Step 6: Stamp a sub-sentiment on a small piece of watercolor paper with more of the Blue Belle VersaFine Clair ink and then heat embossed it with more of the clear embossing powder. Then distress the edges with scissors and then press the edges into the Blue Belle VersaFine Clair Ink.
Step 7: Attach the sub sentiment onto the panel with more of the foam tape. Then glue the whole panel onto an A2-sized white cardbase to finish the card.
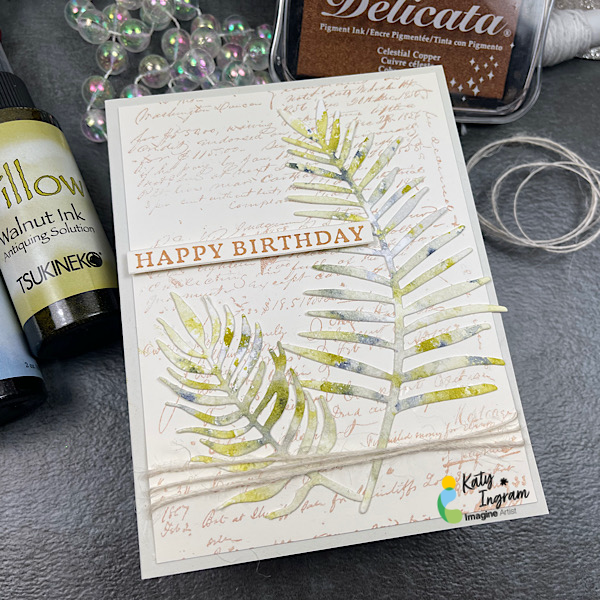
– Hello Friends! Katy here with my latest video! In todays video I create a mixed media birthday card with Walnut Inks, dies and some copper Delicata ink. I add some twine and pop up my sentiment with some foam. All key elements to creating a beautiful mixed media card. Video has all the details. Thanks for watching.
Hot Pressed Watercolor paper Script Stamp Palm Frond Die-The Greetery- Any Large and small Leaf dies will do. Ivory/Natural Cardstock Barely Gray Card Base Twine Happy Birthday Sentiment Strip
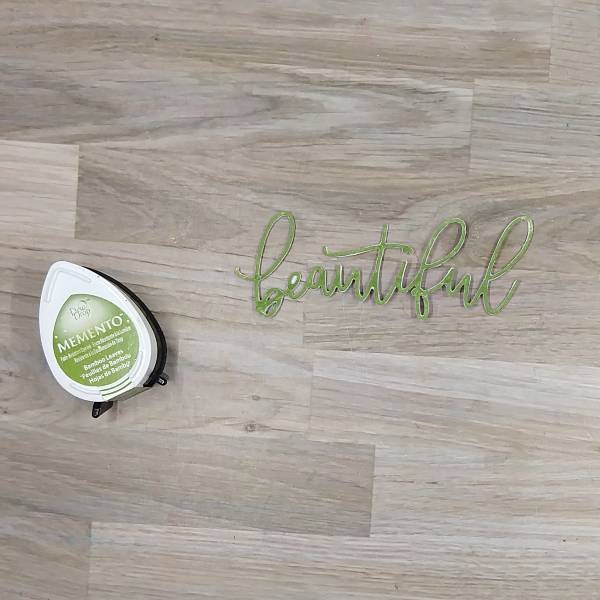
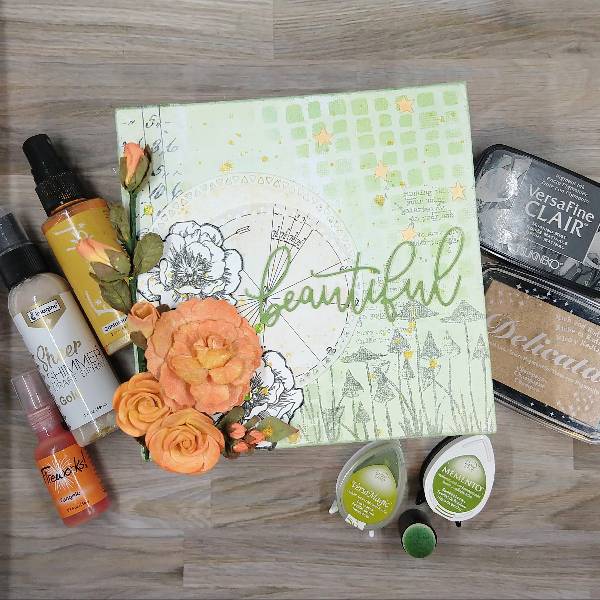
Last month, I made a jar for my younger kid and wanted to focus on my older kid in February. I made this piece for them while they were taking their ACT test! I decided to personalize the panel to feature some things they like–math and numbers, nature, space and mushrooms. This mixed media piece features sprays, ink, collage, stenciling, and cloth flowers. It was a wonderful way to spend an afternoon and I hope it inspires you to consider making something similar.
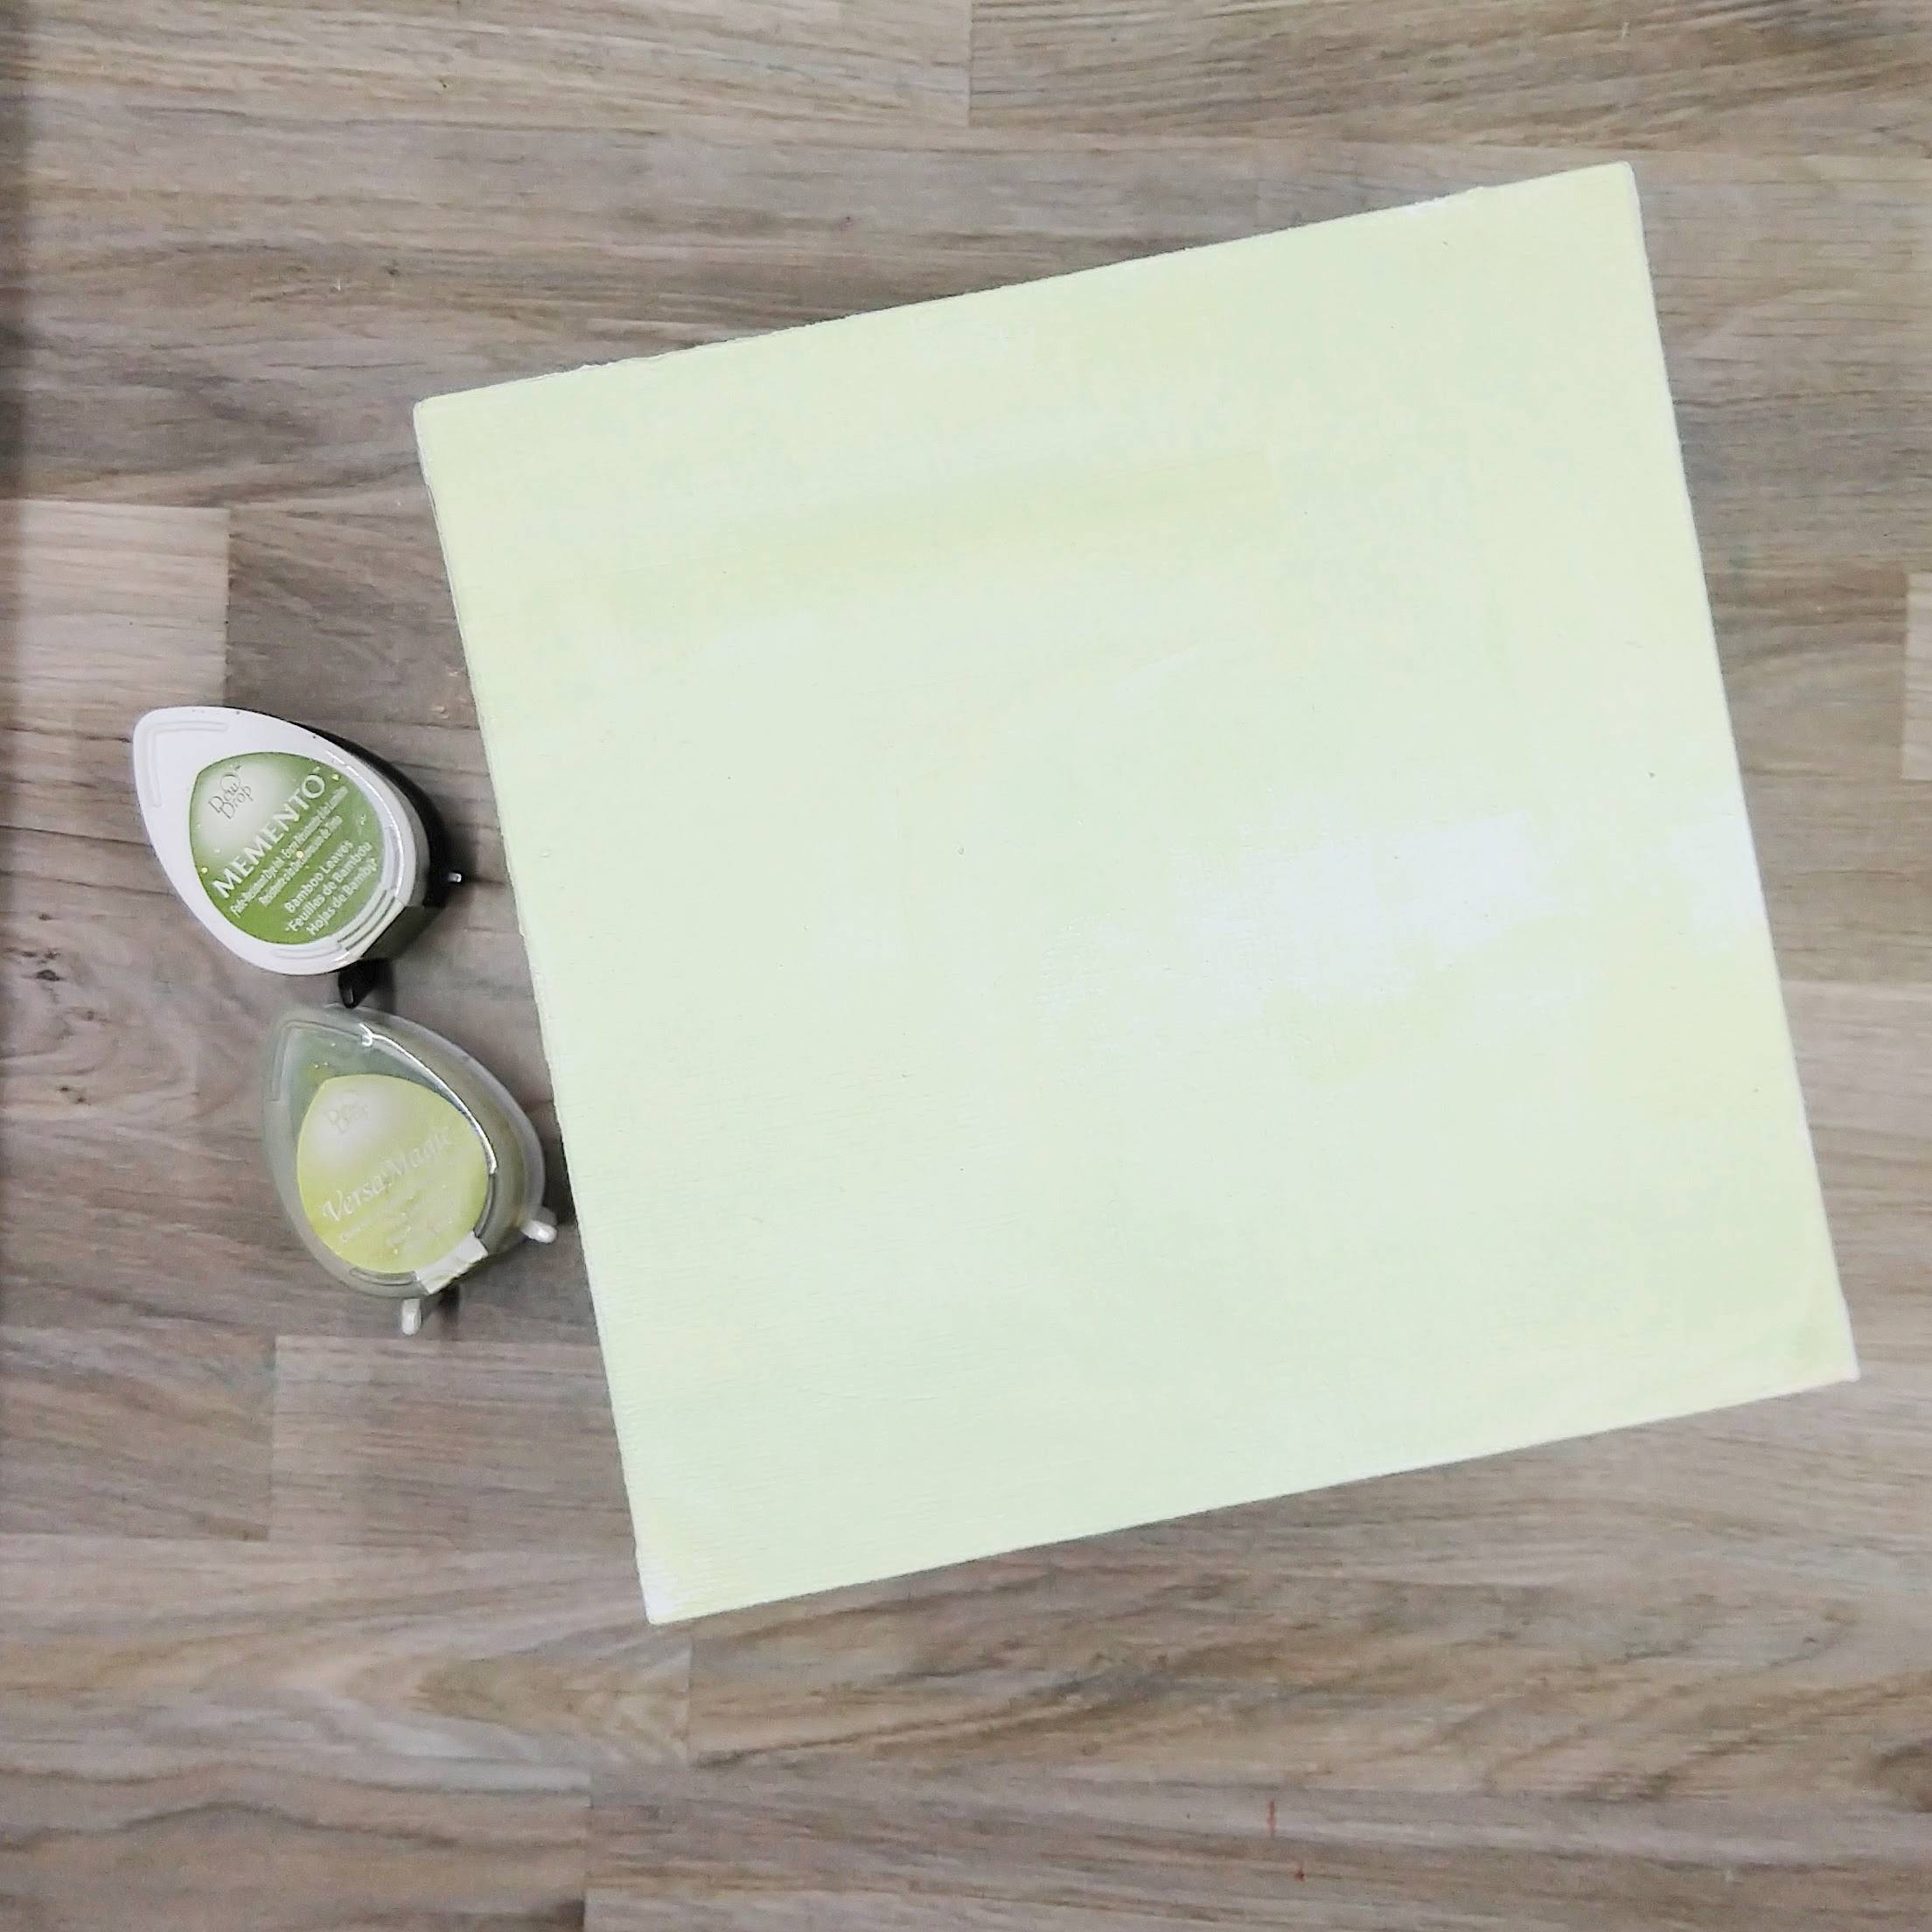
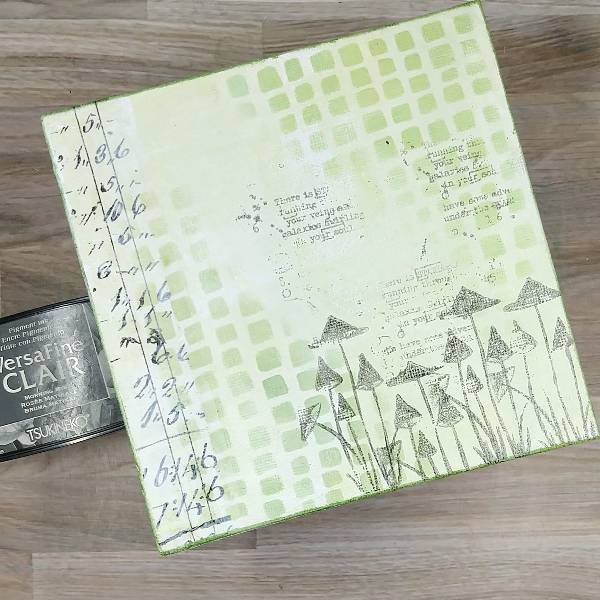
Step 1: Paint gesso onto a 6×6” canvas panel and let dry. Then mix a small amount of gesso with Tea Leaves VersaMagic chalk ink on a palette (or a piece of plastic packaging) to create a very light green tin. Repeat the process with more gesso and Bamboo Leaves Memento ink to create a slightly darker green tint of gesso. Using a wide paintbrush, brush both the lighter and the darker green gesso across the panel randomly. Allow to dry a second time. (Or if you are feeling impatient, dry with a heat tool.)
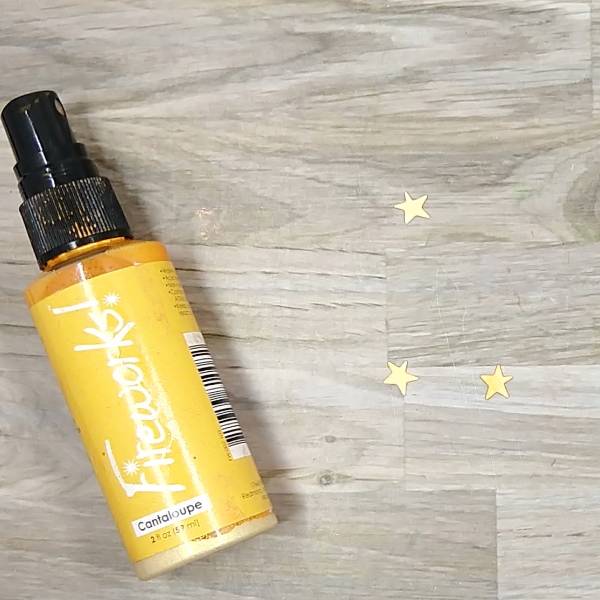
Step 2: Using a smaller paintbrush, paint the entire surface of each paper flower’s petals with Cantaloupe Fireworks! Shimmery Craft Spray and then paint the edges with Tangelo Fireworks! Shimmery Craft Spray. Allow to dry.
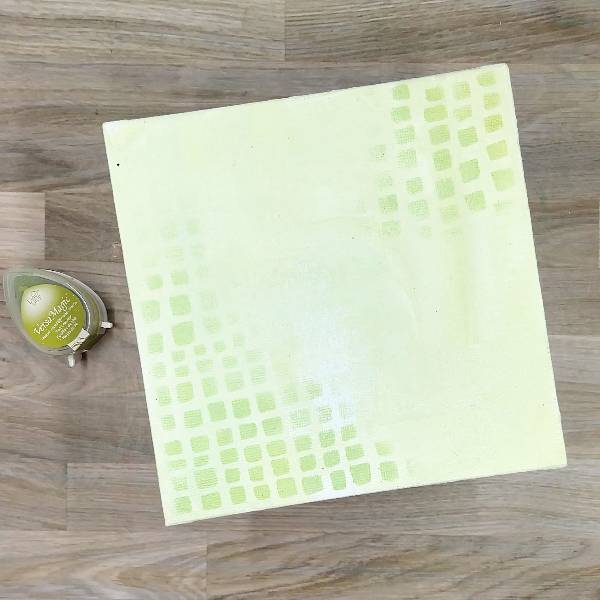
Step 3: Using a sponge dauber, blend Tea Leaves VersaMagic Chalk Ink through a stencil on the upper right and lower left corners of the panel. Allow to dry.
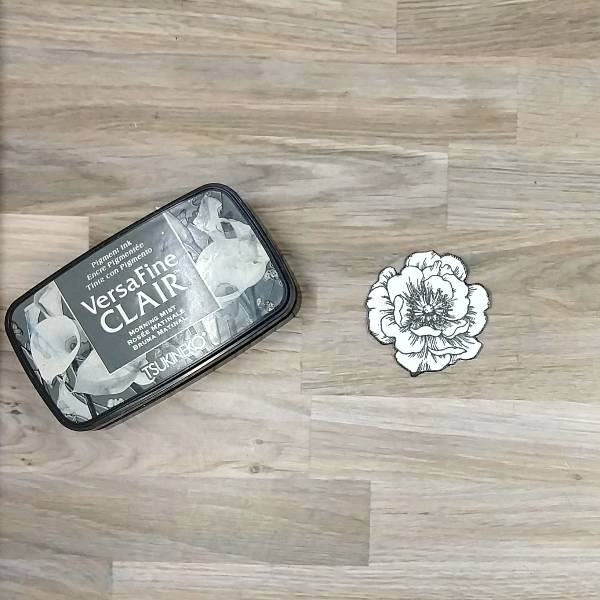
Step 4: Stamp a mid-sized flower with Morning Mist VersaFine Clair ink. Heat emboss with clear embossing powder. Fussy cut the flower and then press the edges along the edges of the flower with more of the Morning Mist VersaFine Clair ink to disguise any imperfections left behind when fussy cutting and heat emboss a second time with clear embossing powder.
(When I took the picture I had intended to only include one stamped flower. Later, when assembling the panel, I realized I needed another flower and so repeated the process to make two flowers in total.)
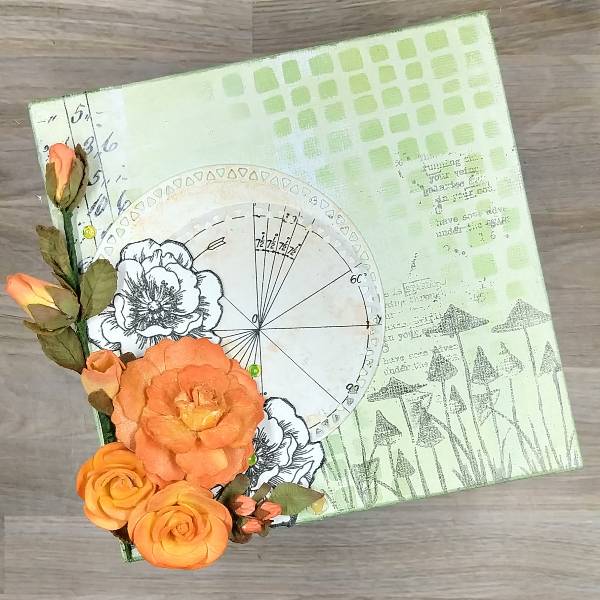
Step 5: Press the Campagne Delicata ink pad onto watercolor paper. When dry, die cut the watercolor paper with a large circle in a nesting circle die set. Then spray with Gold Sheer Shimmer Craft Spray and allow to dry.
While drying, die cut a piece of collage paper with the next sized down circular die (not pictured).
Step 6: Return to the canvas panel. Cut out a vertical strip of collage paper and glue it to the left side of the panel. Paint over with leftover gesso on the paint brush (from steps 1 and 3). Add more stenciled texture by blending Bamboo Leaves Memento Ink through the same stencil on the lower left corner of the panel. Then add ink along the edges of the panel by running the Bamboo Leaves Memento Ink pad along the edge.
Step 7: Partially stamp the center of a small stamp multiple times across the upper and mid right side of the panel with Morning Mist VersaFine Clair ink by adding ink to the central part of the stamp (the text) and wiping away the ink from the edges of the stamp and then pressing just the center of the stamp onto the panel. Repeat the process 3 times.
Then stamp a small mushroom stamp multiple times on the lower right side of the panel with more Morning Mist VersaFine Clair ink, sometimes moving the stamp higher and lower on the panel to change the heights of the mushrooms. Allow the ink to dry.
Step 8: Start to assemble the panel. Glue the die cut watercolor paper circle (step 5) and the collage paper circle together and then glue onto the panel. Then glue the stamped flowers and the 3D paper flowers onto the lower left part of the card. Glue yellow and clear sequins around the flowers.
After I assembled the panel, I realized that it wasn’t done and needed something more.
Step 9: Die cut a scrap of watercolor paper and use Cantaloupe Fireworks! Craft Spray to paint them yellow with a small paintbrush.
Step 10: Press Bamboo Leaves Memento Ink onto another scrap of watercolor paper and then die cut the paper with a sentiment. Then use scrap cardstock to die cut two additional layers of the sentiment. Glue all three layers together for dimension.
Step 11: Splatter the panel with Gold Sheer Shimmer Craft Spray, making sure that gold splatter landed on the petals of the 3D flowers. Glue the beautiful sentiment and the stars onto the panel to finish the card.
Other • AALL & Create – stamp – Astroventurer (#912)–used for the sentiment in the background • Alt Alternatives – 6×6” Economy Cotton Canvas Panel • Catherine Pooler – sequin mix – Saint Lucia • Concord & 9th – die set – Botanical die set (beautiful sentiment) • 49th and Market – Salt (white colored) Paper Flower 8 pack • Gina Marie Designs – die set – Mosaic Triangle Edge Circle • Golden – Gesso Semi-Opaque Acrylic Primer • Lavinia Stamps – stamp – Slender Mushrooms • Simon Says Stamp – stamp set – Beautiful Flowers • The Crafter’s Workshop (TCW) – stencil – Square Stones (TCW1087s) • Tim Holtz and Idea-ology – collage paper – Archives (TH94366) • Tim Holtz and Sizzix – die set – Creative Cutouts die set (for the stars) • Clear Embossing Powder • Heat tool Scissors • Wide paint brush • Small paint brush • Glue • Watercolor paper
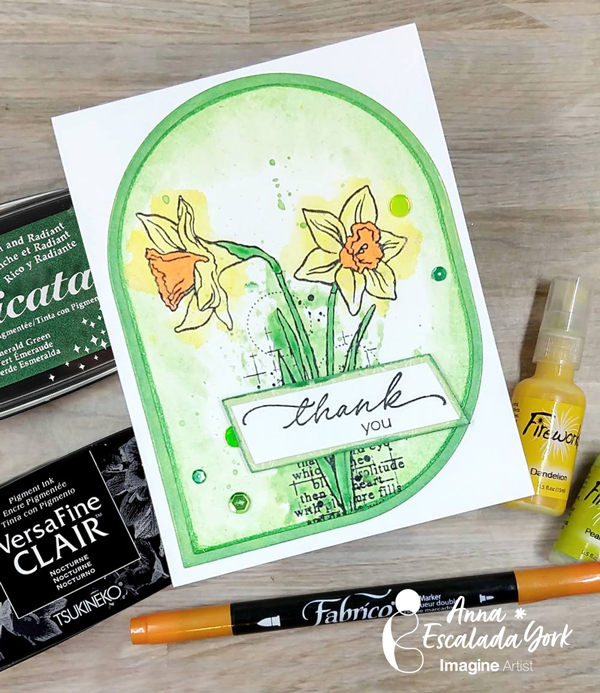
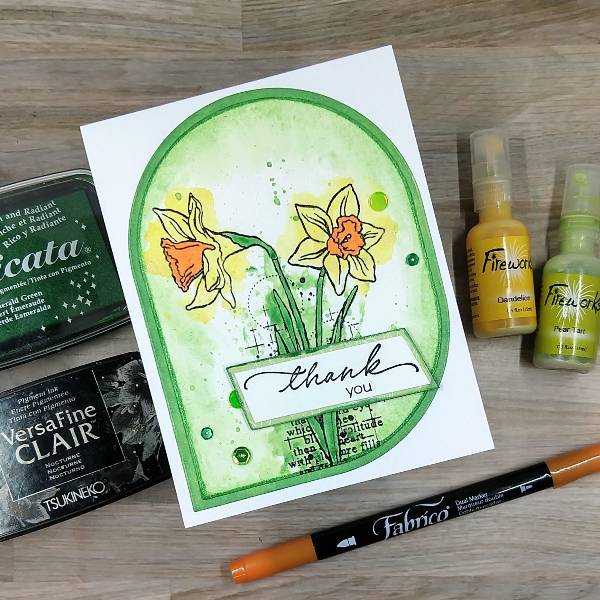
After winter holidays, my family always needs thank you notes. I really love this wonderful daffodils stamp set and wanted to use it to make one of those cards.
Skill: Intermediate Time: 1.5 hours
Directions:
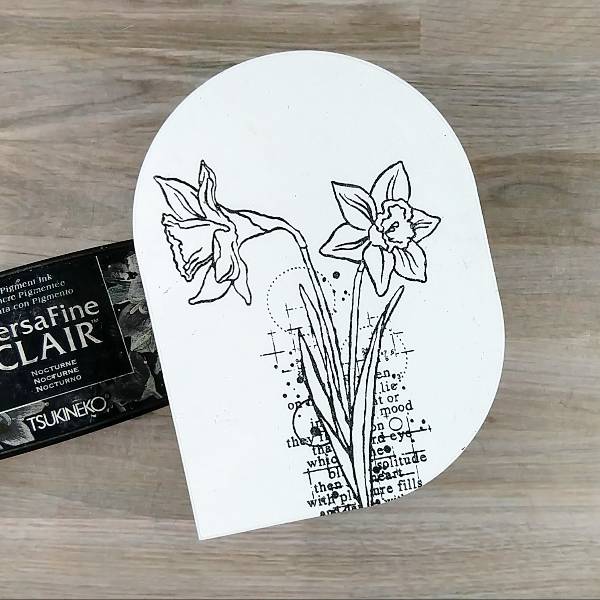
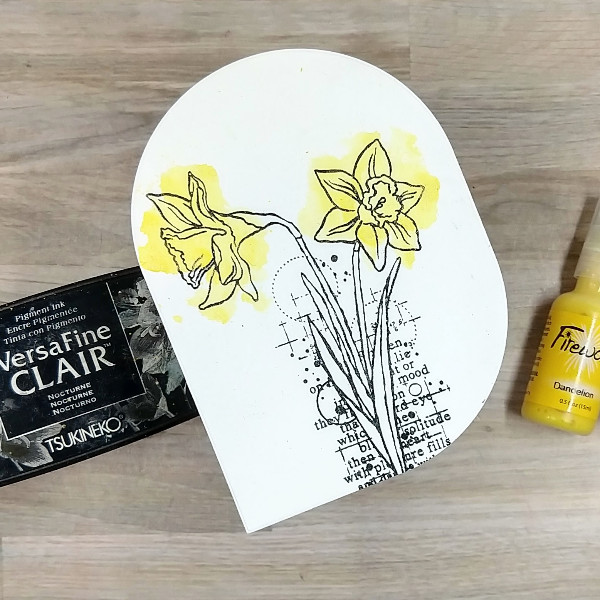
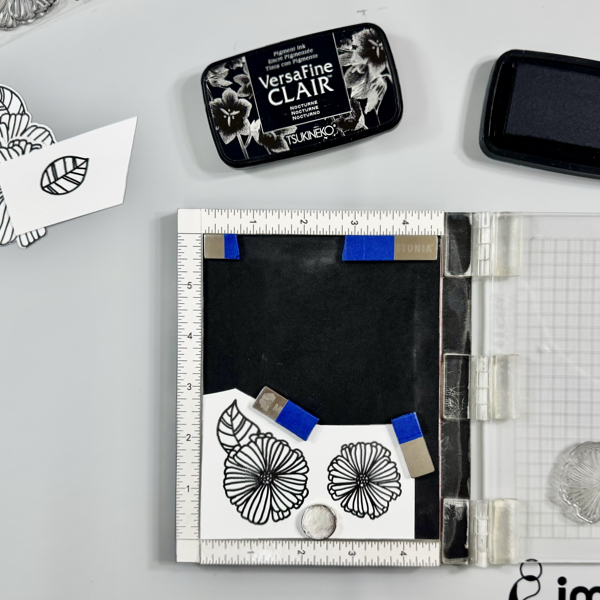
Step 1: Stamp the main floral stamp on a piece of watercolor paper with Nocturne VersaFine Clair ink. Heat emboss with clear embossing powder. Then die cut the image with a mid-sized background panel die
Step 2: Spray Dandelion Fireworks! Craft Spray onto acetate packaging and watercolor smoosh the two flowers.
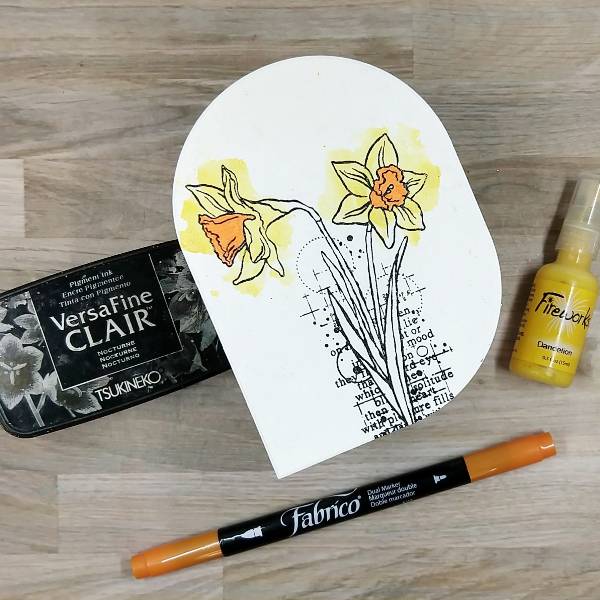
Step 3: Color the corona (the central part of the flower) with the Tangerine Fabrico Dual Marker.
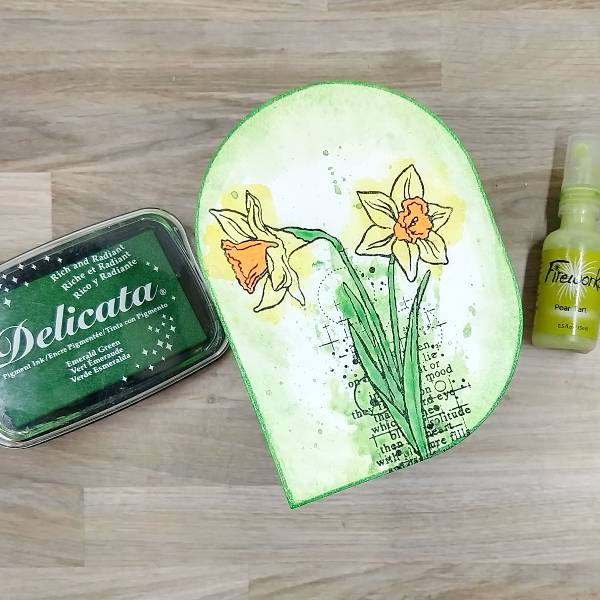
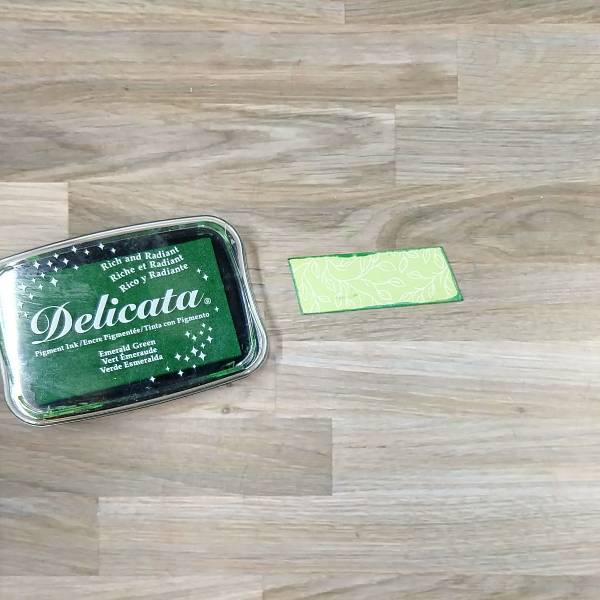
Step 4: Press the Emerald Green Delicata ink pad onto acetate. Then spray Pear Tart Fireworks! Craft Spray onto the same acetate. Mix the ink and spray together. Press the acetate onto the daffodil’s stem and leaf. Then paint the leaf and stem with the remaining green mix. After the image has dried, spray the mix with water to dilute the green. Paint the sides with this lighter color green watercolor. (I ended up using my finger to spread the watercolor the way I wanted, but I don’t mind getting messy!) After this layer dried, press the Emerald Green Delicata ink pad onto the edge of the die cut. Heat emboss the inked edge with more clear embossing powder.
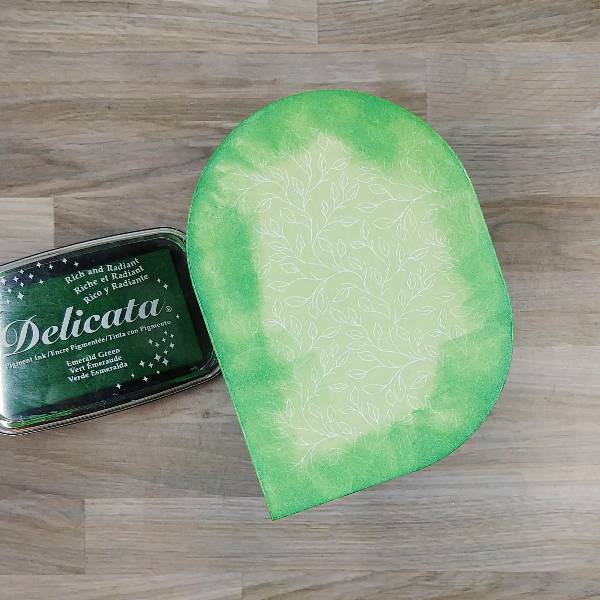
Step 5: Die cut light green patterned paper with the next-largest die from the background panel die cut set. Brush the Emerald Green Delicata ink around the edges of the panel to mask the pattern and make the green more intense.
Step 6: Stamp the sentiment with Nocturne VersaFine CLair ink and heat emboss with clear embossing powder. Then trim the sentiment with a paper trimmer.
Step 7: Trim a piece of the same light green patterned paper a little bit bigger than the sentiment strip with the paper trimmer. Press the edges into the Emerald Green Delicata ink pad and heat emboss with clear embossing powder.
Step 8: Assemble the card. Glue the two panels together. Glue the sentiment strip onto the light green, slightly bigger strip. Then attach the sentiment strip to the card panel with foam tape. Glue green and yellow sequins around the sentiment and daffodils. To finish the card, glue the whole thing onto an A2-sized white card base.
Other • Altenew – foam tape – Instant Dimension Foam Tape • Catherine Pooler – sequin mix – North Pole • Simon Says Stamp – die set – Squovals • Visible Images – stamp set – Golden Daffodils • Clear Embossing Powder • Glue • Green patterned paper • Watercolor paper • A2-sized white card base
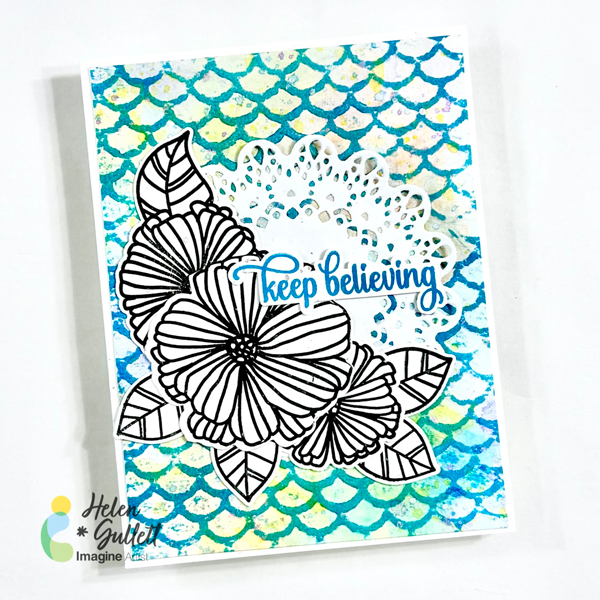
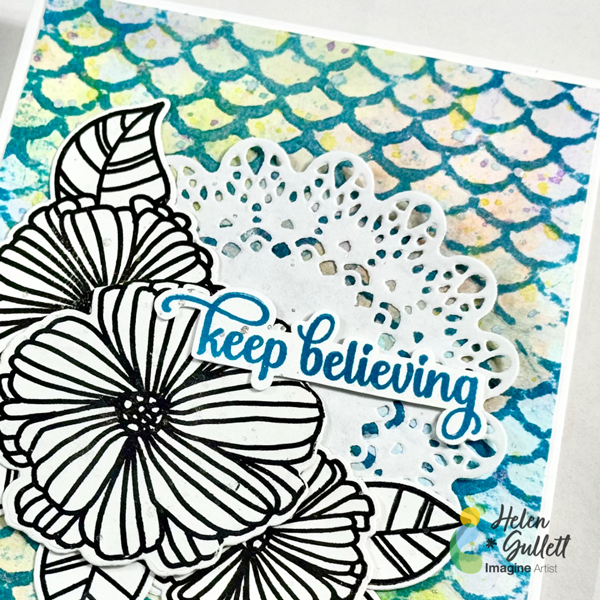
Hello crafty friends! Today we are going to make this floral mixed media card with some ink-smooshing, ink-swiping, ink-splattering, and embossing techniques.
Let’s get crafting!
Skill: Intermediate Time: 15-30 minutes
Direction:
Step 1
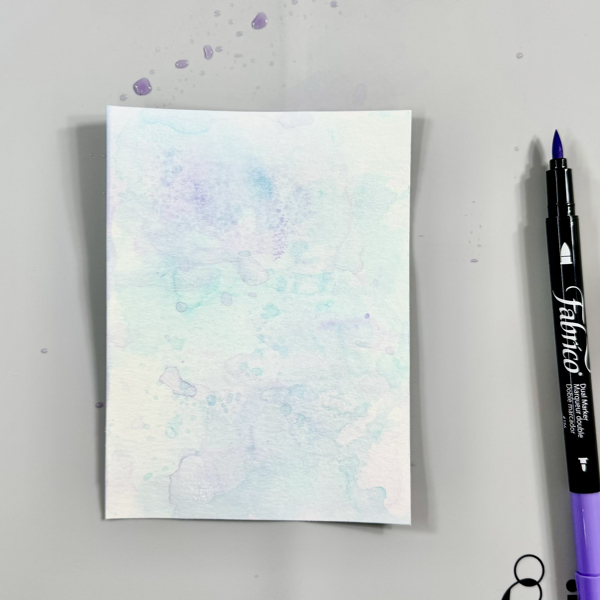
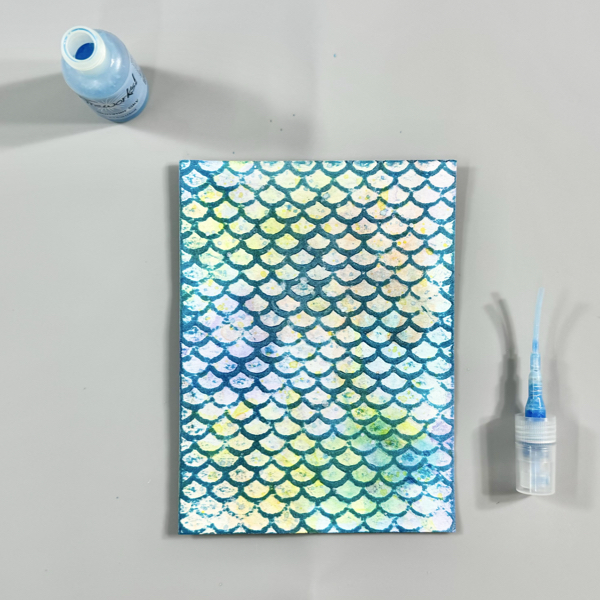
Starting with creating the watercolored background panel by cutting a piece of 140 lb watercolor cardstock into 4 ¼ inch x 5 ½ inch. To pick out the color combo, make sure you pick the colors that won’t turn into a muddy color when they are mixed together.
Scribble some of the Tropical Lagoon Fabrico Marker on the craft mat and then spray it lightly with some water. Then, smoosh the watercolor cardstock to the watercolor ink on the mat. Pick it up and dry the watercolor ink on the panel with a craft heat gun. Repeat it until you like the result.
Clean the craft mat with the Staz-On All Purpose Stamp Cleaner and paper towel.
Step 2
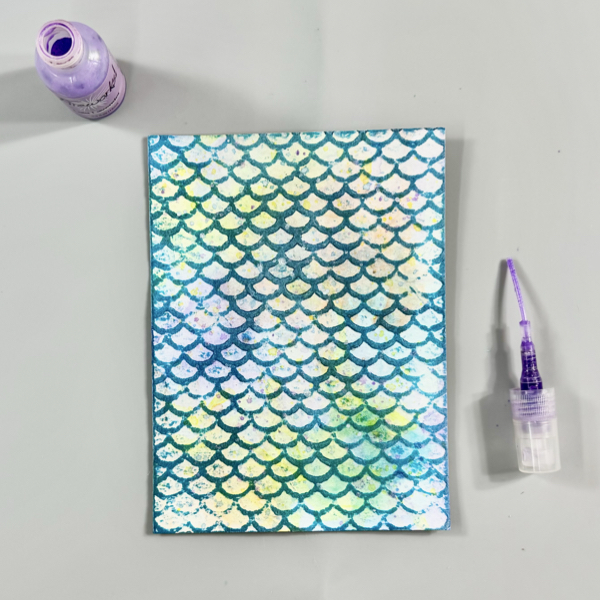
Scribble some of the Peony Purple Fabrico Marker on the craft mat and then spray it lightly with some water.
Then, smoosh the watercolor cardstock to the watercolor ink on the mat. Pick it up and dry the watercolor ink on the panel with a craft heat gun. Repeat it until you like the result.
Clean the craft mat with the Staz-On All Purpose Stamp Cleaner and paper towel.
Step 3
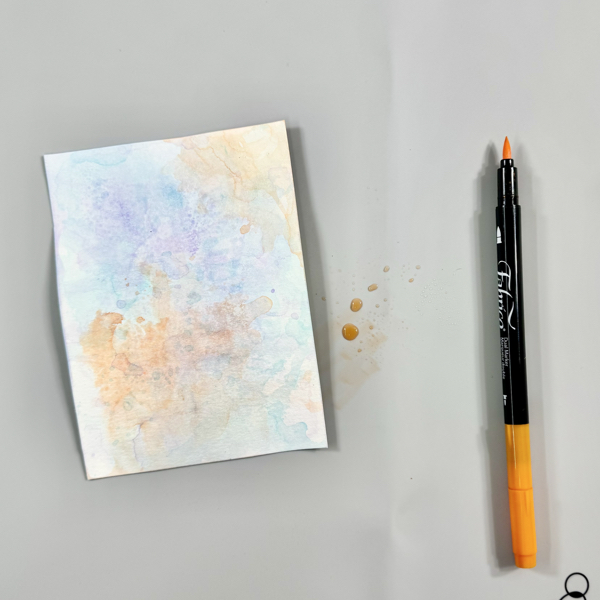
Scribble some of the Tangerine Fabrico Marker on the craft mat and then spray it lightly with some water.
Then, smoosh the watercolor cardstock to the watercolor ink on the mat. Pick it up and dry the watercolor ink on the panel with a craft heat gun. Repeat it until you like the result.
Clean the craft mat with the Staz-On All Purpose Stamp Cleaner and paper towel.
Step 4
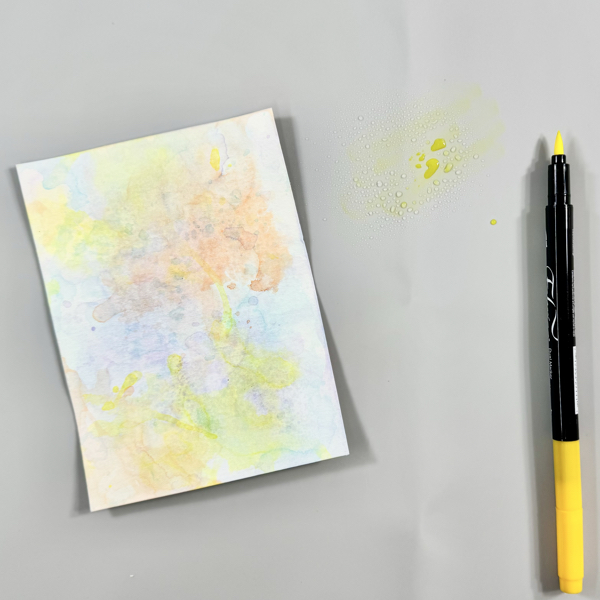
Scribble some of the Lemon Yellow Fabrico Marker on the craft mat and then spray it lightly with some water.
Then, smoosh the watercolor cardstock to the watercolor ink on the mat. Pick it up and dry the watercolor ink on the panel with a craft heat gun. Repeat it until you like the result.
Clean the craft mat with the Staz-On All Purpose Stamp Cleaner and paper towel.
Step 5
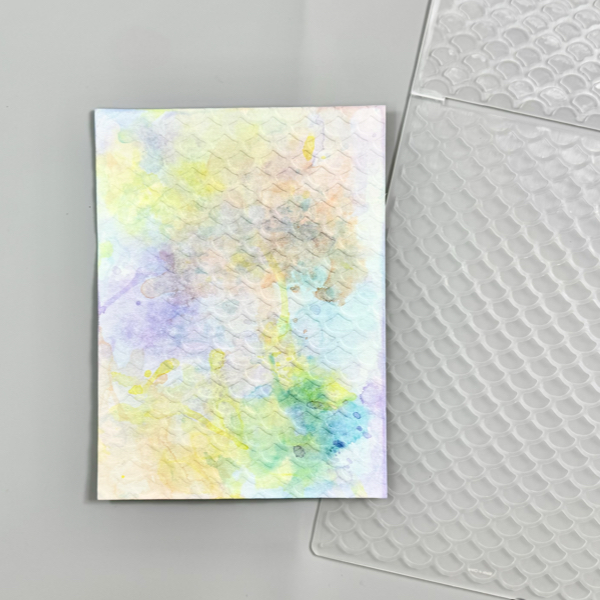
Once the watercolored panel dried well, put it inside the embossing folder, and then run it through the machine.
Step 6
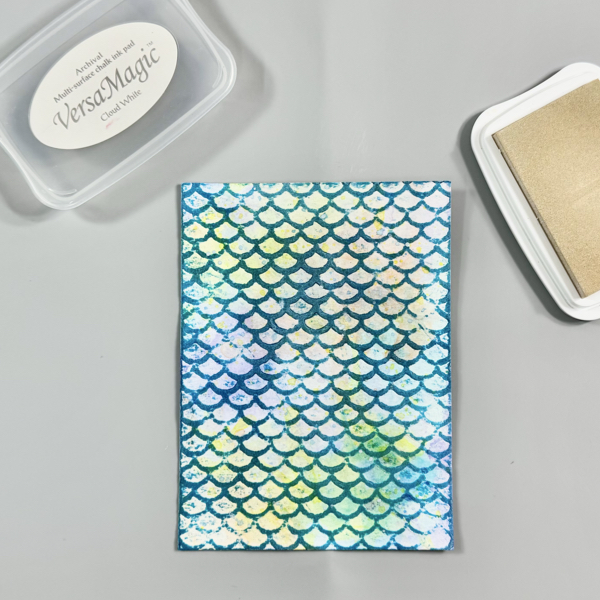
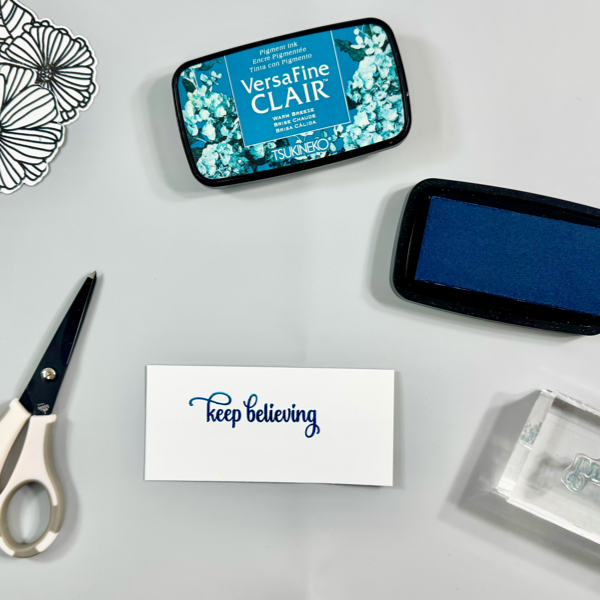
Swipe the VersaFine Clair Warm Breeze ink directly on the embossed part of the panel.
Make sure you swipe the ink lightly and smoothly, do not press down the ink pad to the paper. The juicer (good amount of ink) ink pad, the better.
Dry the ink on the panel with a craft heat gun.
Step 7
To tone down the bright color, swipe some of the VersMagic Cloud White ink on the panel.
This is an optional step, if you prefer a more subtle color background instead of bright color.
Dry the ink on the panel with a craft heat gun.
Step 8
Shake the Fireworks! Shimmery Craft Sprays bottles before you use it to make sure the ink inside mixes well.
Open the top of the spray and use it (or small round brush) to add some splatters of the Summer Sky Fireworks! Shimmery Craft Spray on the panel.
Dry the splatters of ink on the panel with a craft heat gun.
Step 9
Next, open the top of the spray and use it (or small round brush) to add some splatters of the Lulu Lavender Fireworks! Shimmery Craft Spray on the panel.
Dry the splatters of ink on the panel with a craft heat gun.
Step 10
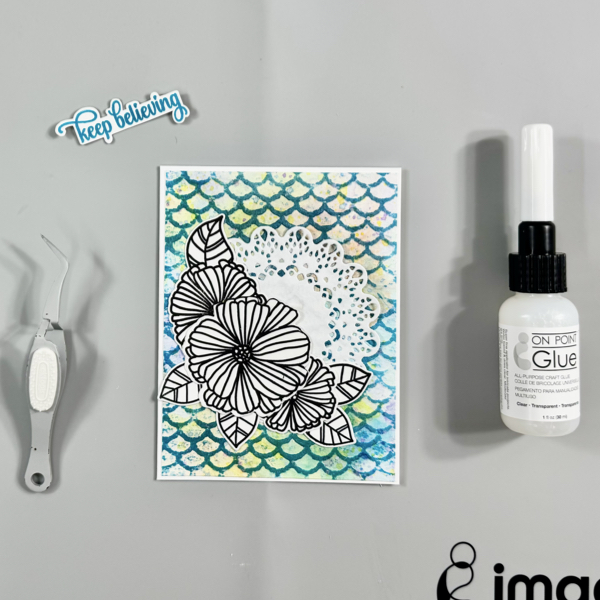
Stamp the flower and leaf images on a white cardstock using the VersaFine Clair Nocturne ink pad with a stamping tool (or acrylic stamping blocks).
Dry the stamped images with a craft heat gun.
Step 11
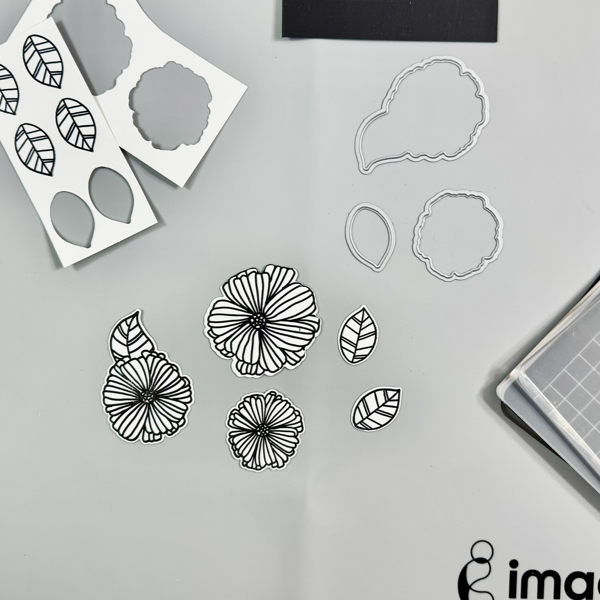
Cut all the stamped flowers and leaves with their matching die set, or you can fussy cut them using micro-tip scissors.
Step 12
Stamp the sentiment on a white card stock using the VersaFine Clair Warm Breeze ink pad with a stamping block.
Dry the stamped sentiment word with a craft heat gun and then fussy cut it with a micro-tip scissors.
Step 13
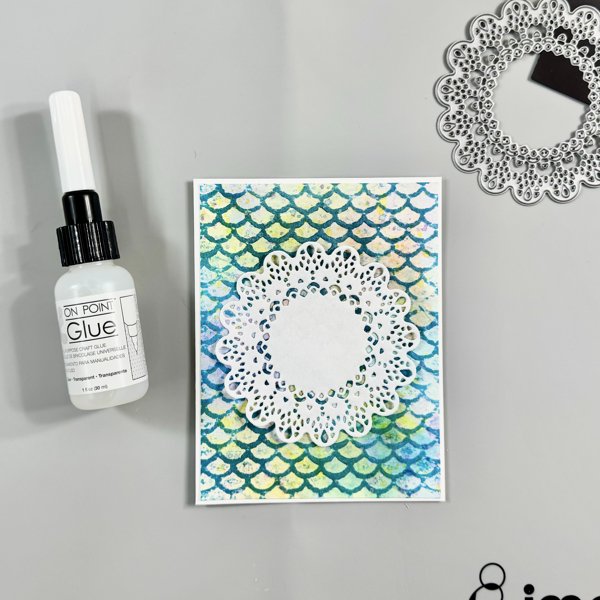
Trim the background panel into 4 inch x 5 ¼ inch using a paper trimmer.
Add the background panel to an A2 card base with the On Point Glue.
Step 14
Cut a piece of white paper (copy paper works great) with the Delicate Doily die to create your own doily paper mat.
Add the doily paper to the card with the On Point Glue.
Step 15
Add the flowers and leaves to the card with On Point Glue.
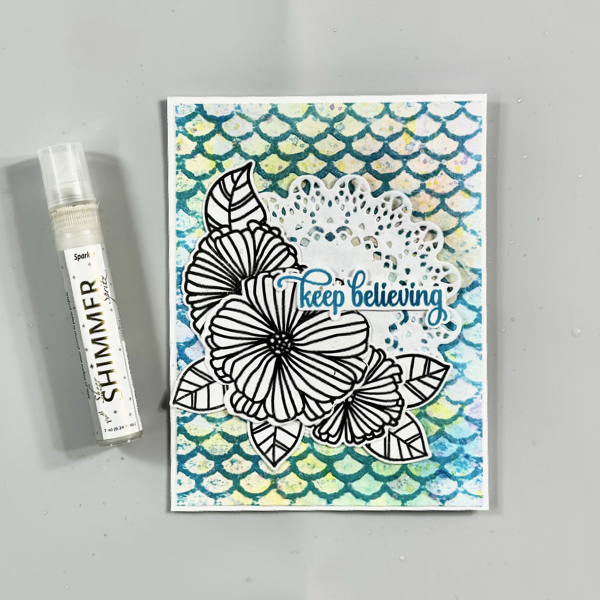
Then, add some of a thin foam to the sentiment with On Point Glue and add it to the card with the same glue.
Step 16
Add more shimmer to the card by spraying and splatting some of the Sheer Shimmer Spark Spray.
The ink-smooshing, embossing, ink-swiping, and ink-splattering techniques give an amazing texture look to the background of this card.
And those layers of doily, flowers, leaves, and sentiment add more dimension to this mixed media card.
I hope you will give this tutorial a try and play around with different colors to see the surprise you will get for your cards. Thanks so much for stopping by our blog today.