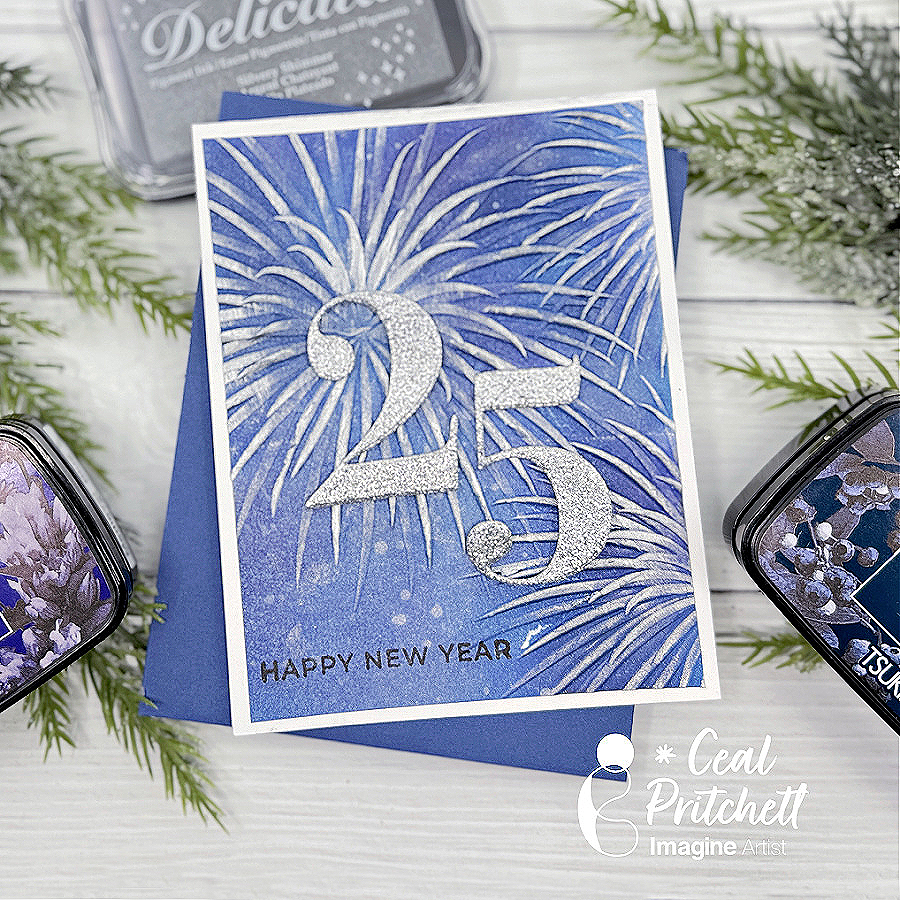
Hello crafty friends! It’s Ceal, here. Today I am sharing a New Year’s card with yo.
Skill Level: Intermediate Time: 45 mins
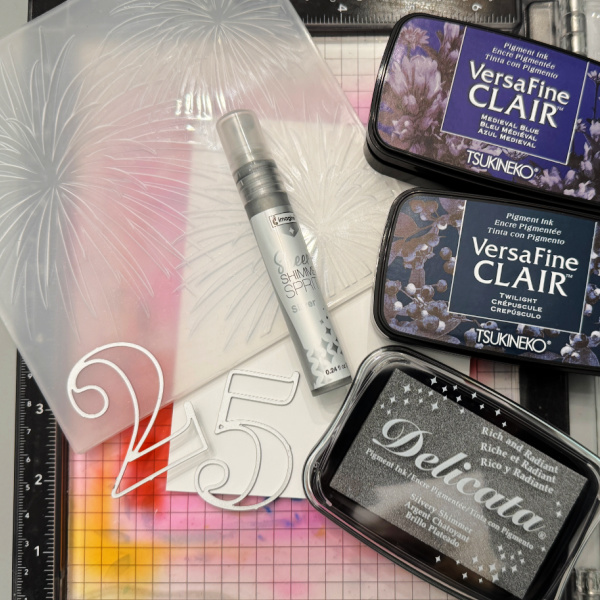
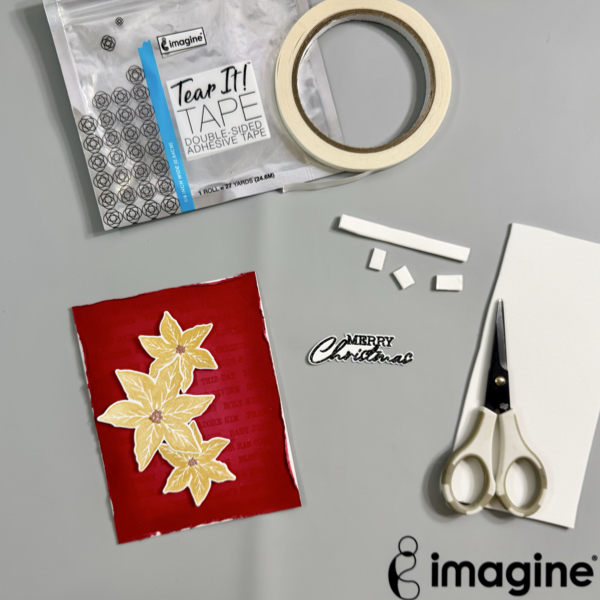
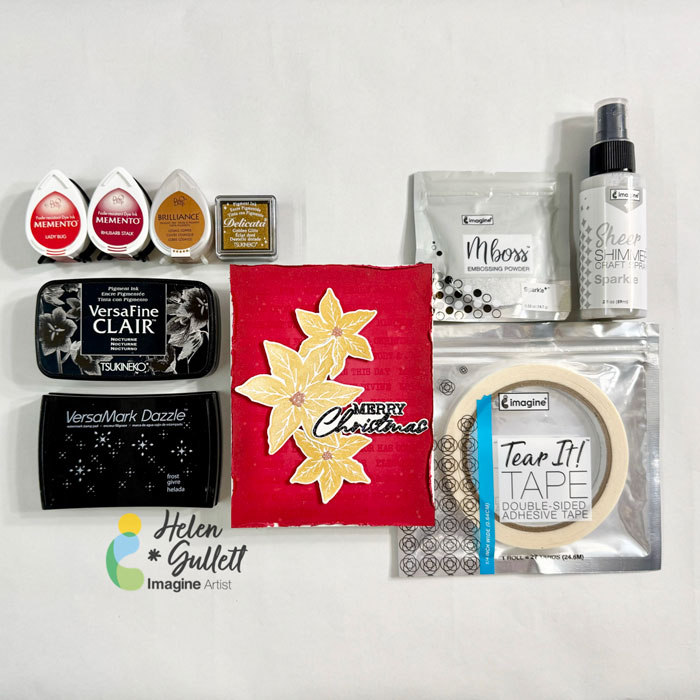
Directions: Gather your supplies. You will need an embossing folder, two different colors of dark ink, metallic ink, shimmer spray, number dies, and glitter paper.
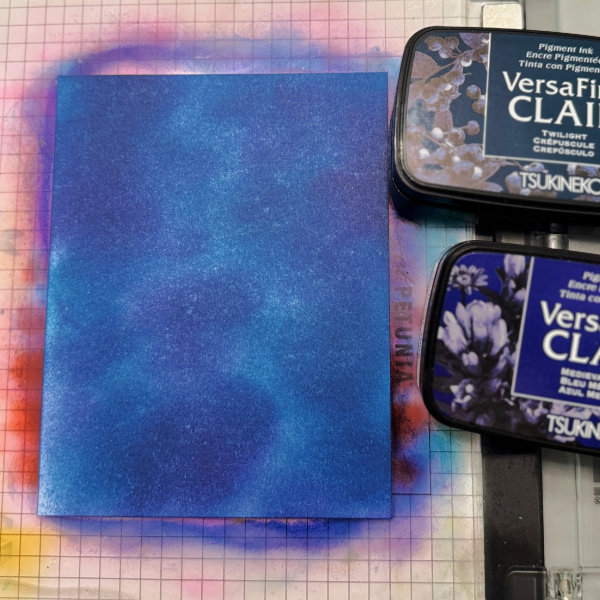
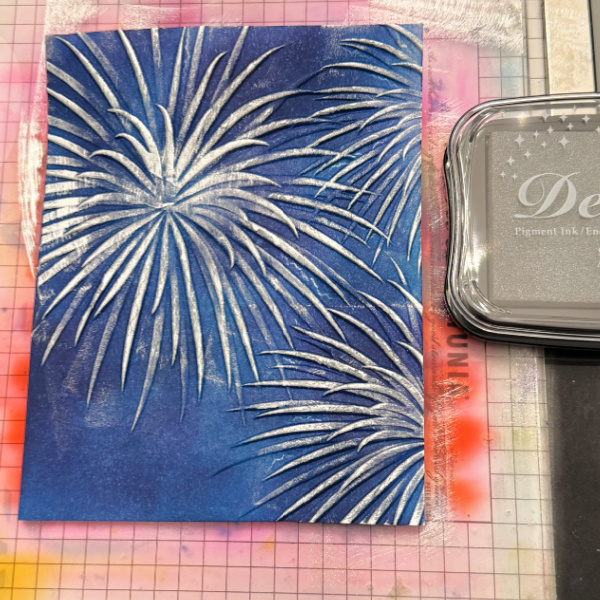
Step 1: Blend the two dark inks together on a panel cut to 4x 5.25 to give the appearance of a night sky.
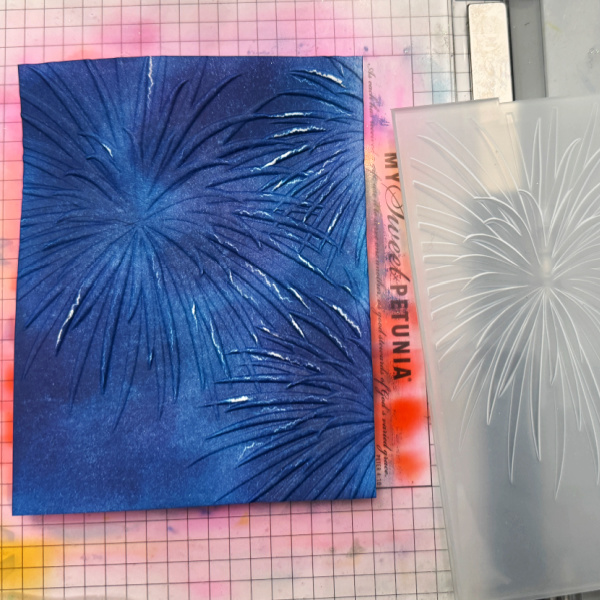
Step 2: Run the blended panel through the die cutting machine with a 3D embossing folder.
Step 3: Rub a metallic ink pad over the raised areas of the panel.
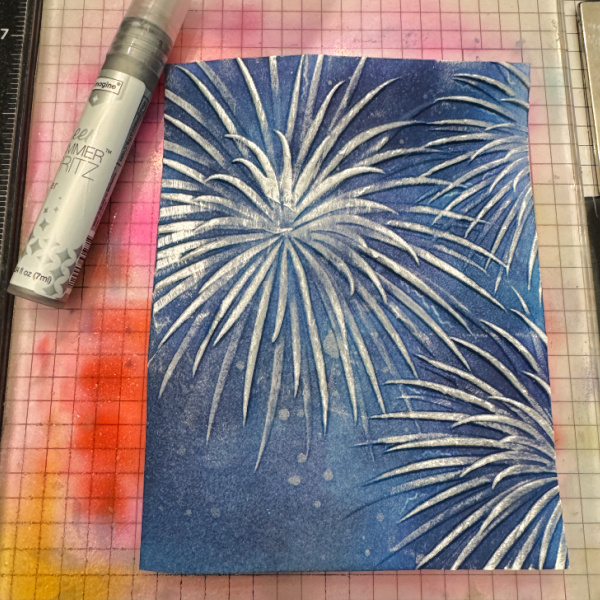
Step 4: Spray a shimmer spray over the panel to give it more sparkle.
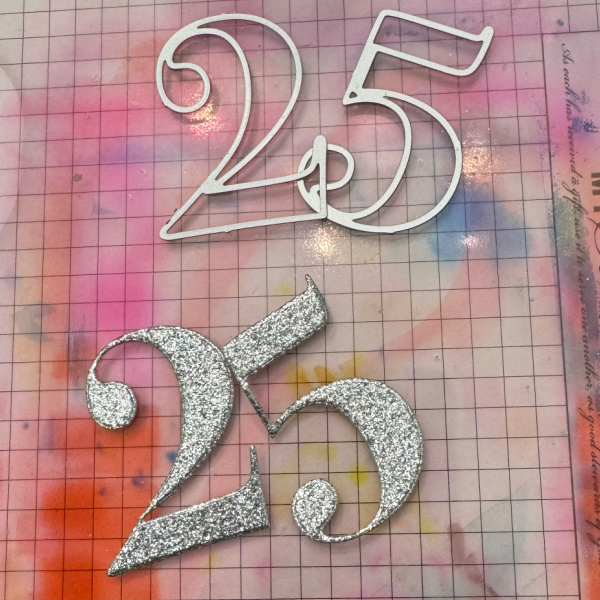
Step 5: Cut the number 2 and 5 out of glitter paper.
Step 6: Add number to the panel and adhere the panel to the card base. Stamp the sentiment on panel.
Fireworks embossing folder – Altenew Fancy Die Number 2 – Hero Arts Fancy Die Number 5 – Hero Arts Happy New Year Stamp – Taylored Expressions Glitter paper – Altenew
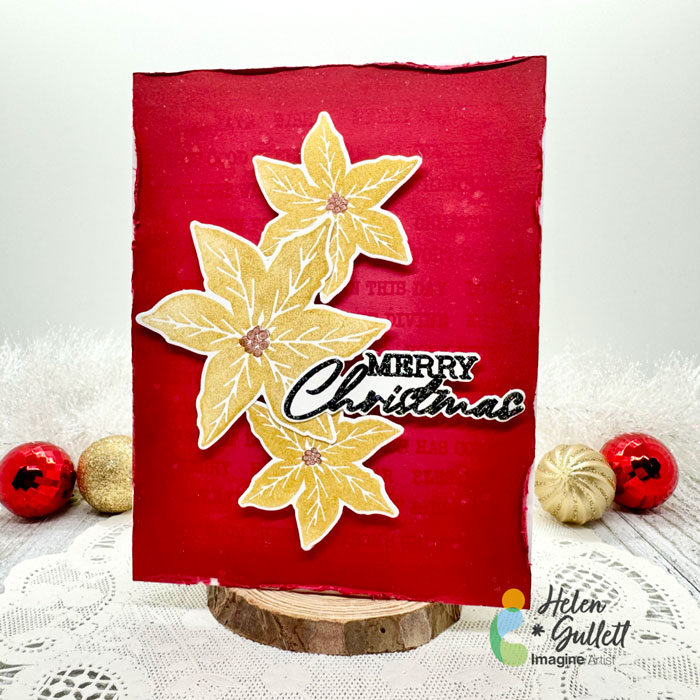
Hello crafty friends! It’s the time of the year to start making some Holiday projects. As for me, I love making and sending handmade Christmas cards. Today, I wanna share how to make this CAS Christmas Poinsettia Card.
Let’s get crafting!
Skill: Intermediate Time: 15-20 minutes
Direction:
Step 1
Cut out a piece of any color cardstock into 4.25 inch x 5.5 inch that you want to use as your background panel.
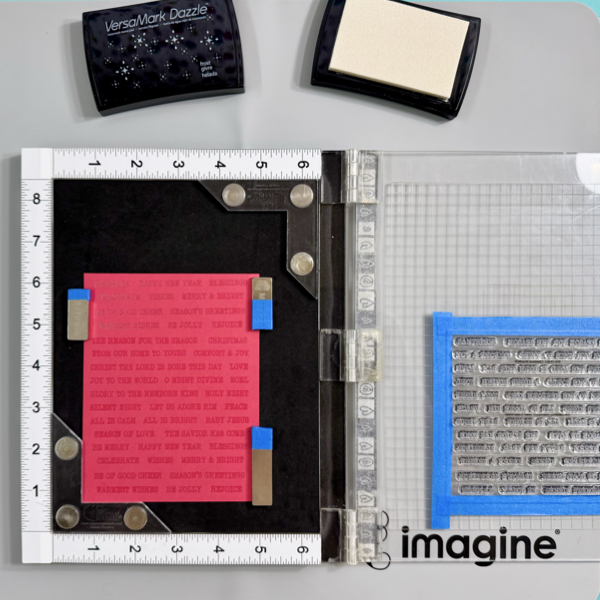
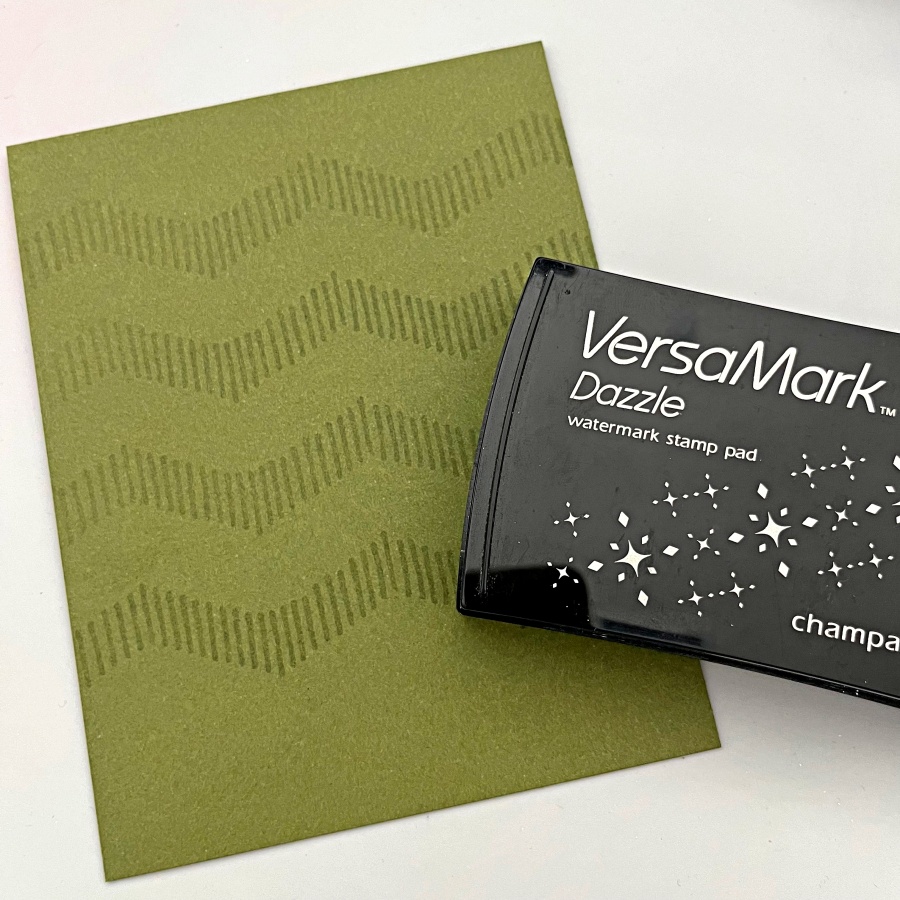
I used all the words on the stamp set I used so I taped the whole sheet on the stamping tool lid instead of taking it out one by one. You can use any word stamp set you have to create a similar background pattern.
Stamp the words on the cardstock using VersaMark Dazzle. Make sure to cover the whole panel.
Step 2
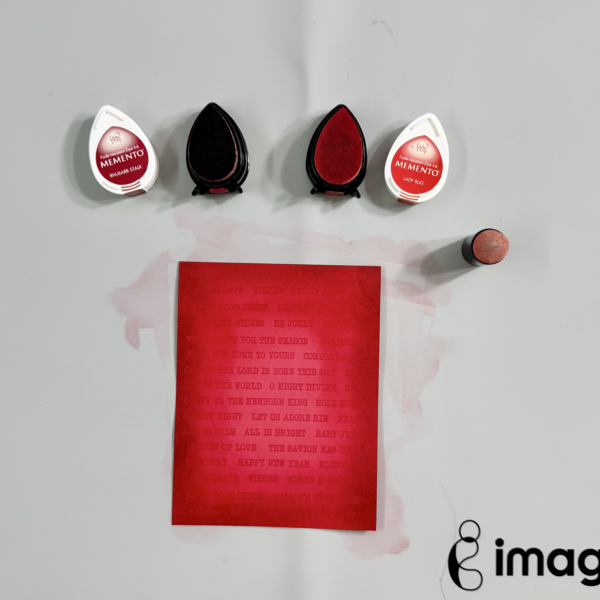
Add some darker shadow to the edges of the background panel using Memento Dew Drop ink pads and finger sponge dauber.
First, add the Lady Bug ink on the panel, then add the Rhubarb Stalk ink, and then add the Lady Bug ink again to blend them together.
Step 3
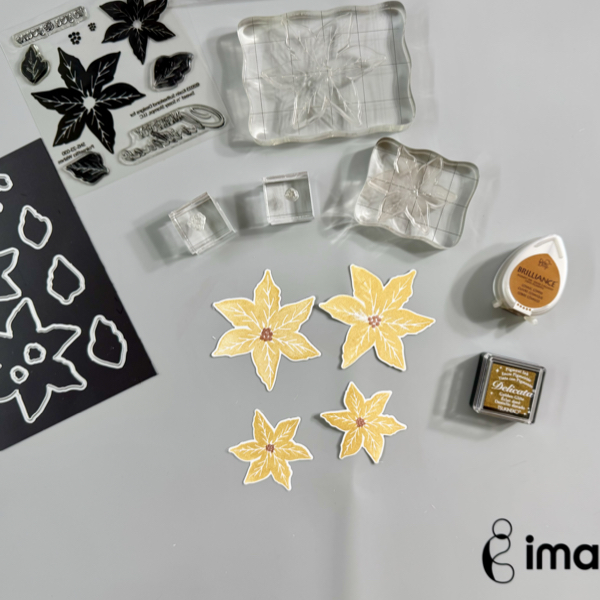
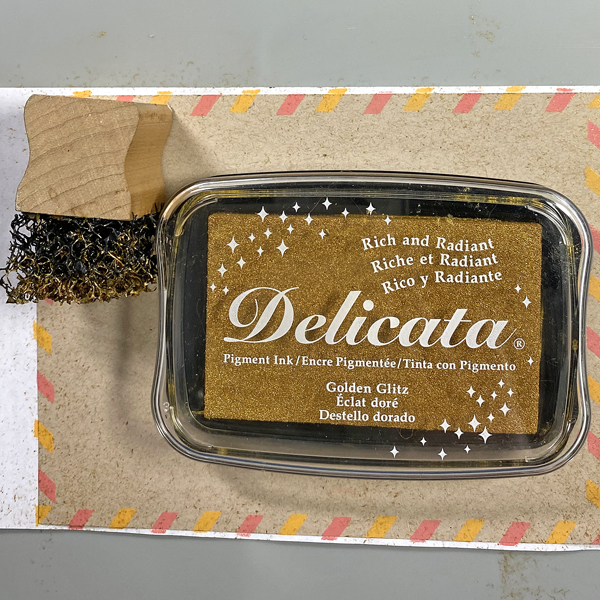
Stamp each layer of the poinsettia flower with the Delicata Golden Glitz ink.
Stamp the middle buds part of the poinsettia with the Brilliance Cosmic Copper ink. Dry the stamped images with a craft heat gun.
Cut each of the images with their matching dies, or you can fussy cut them if you don’t have the matching dies.
Step 4
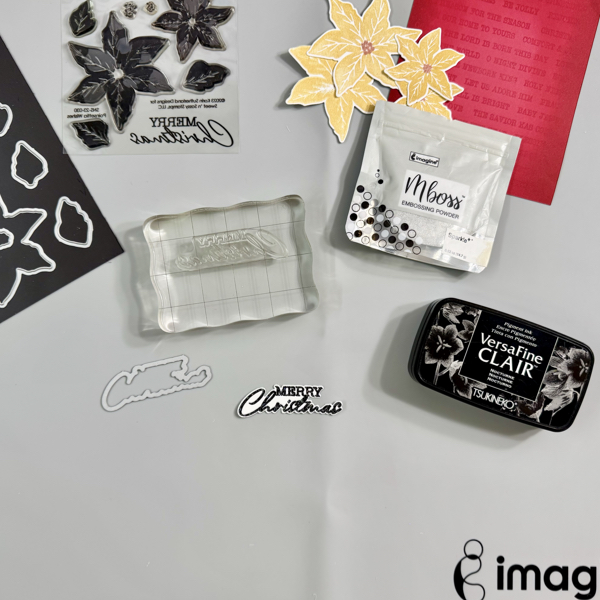
On a piece of white cardstock, stamp the sentiment with VersaFine Clair Nocturne, and then add some of the Sparkle Mboss Embossing Powder, then heat set it with a craft heat gun.
Cut the sentiment with the matching die set, or you can fussy cut it with scissors if you don’t have a matching die.
Step 5
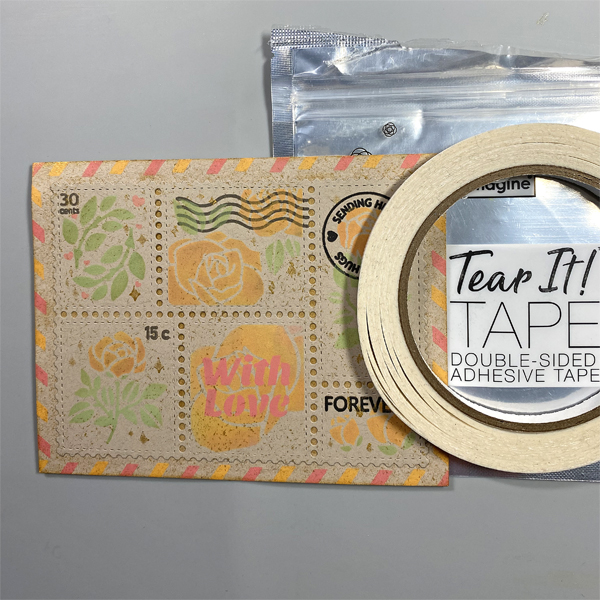
Distress all edges of the background panel with distresser tool or scissors. Add the background panel to the card base with some of the Tear It! Tape.
Add the poinsettia flowers and the sentiment to the card with some of the fun foam and Tear It! Tape for some dimension.
Step 6
For more extra sparkle to the Christmas card, add some splatters of the Sheer Shimmer Craft Spray using a fan brush.
Use the craft heat gun to dry the splatters.
Hope this Christmas card gives you an idea to start your Holiday projects. Thank you for stopping by our blog today. Have a fabulous day!
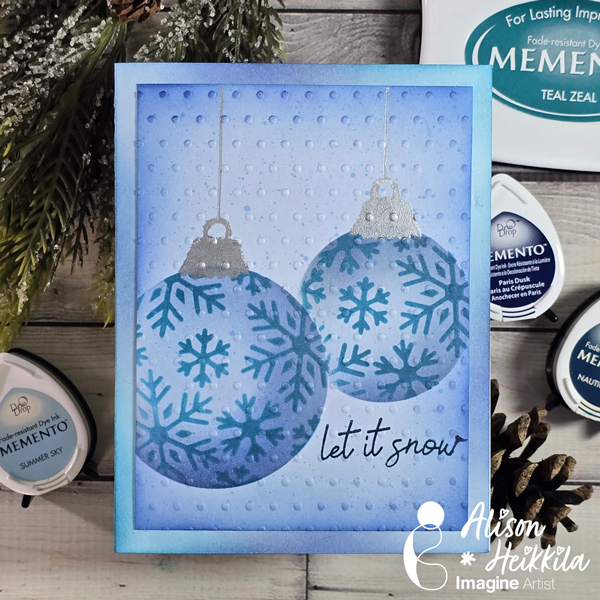
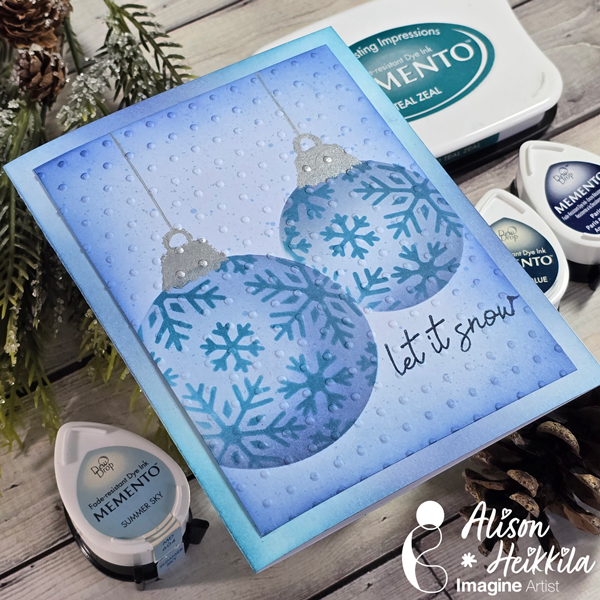
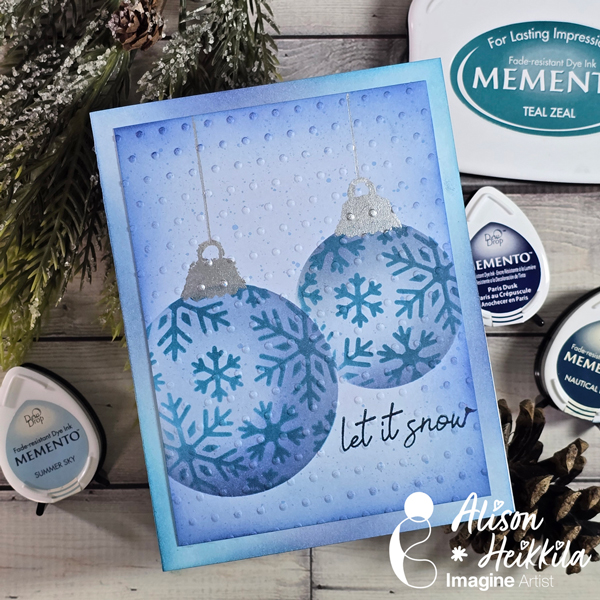
Hello! Alison Heikkila here. For my latest video for Imagine, we’re making a holiday card with snowflake ornaments. This is a great card for beginners, or for someone who likes to batch many cards. You can feel free to change up the colors as you like, but I love making cards with a limited palette from time to time.
Skill Level: Beginner Time to Complete: 15-20 Minutes
*Some affiliate links are used in this post. That means that if you shop through these links, I may receive a small compensation, at no cost to you.
Here is the YouTube video. If it doesn’t play properly, please click HERE.
I love the dimension we created by ink blending our colors a certain way. This is a really fun stencil set, and you can really play with different colors as much as you like. I’ll have another video for Imagine soon. Thanks so much for stopping by. Have an inspiring day!
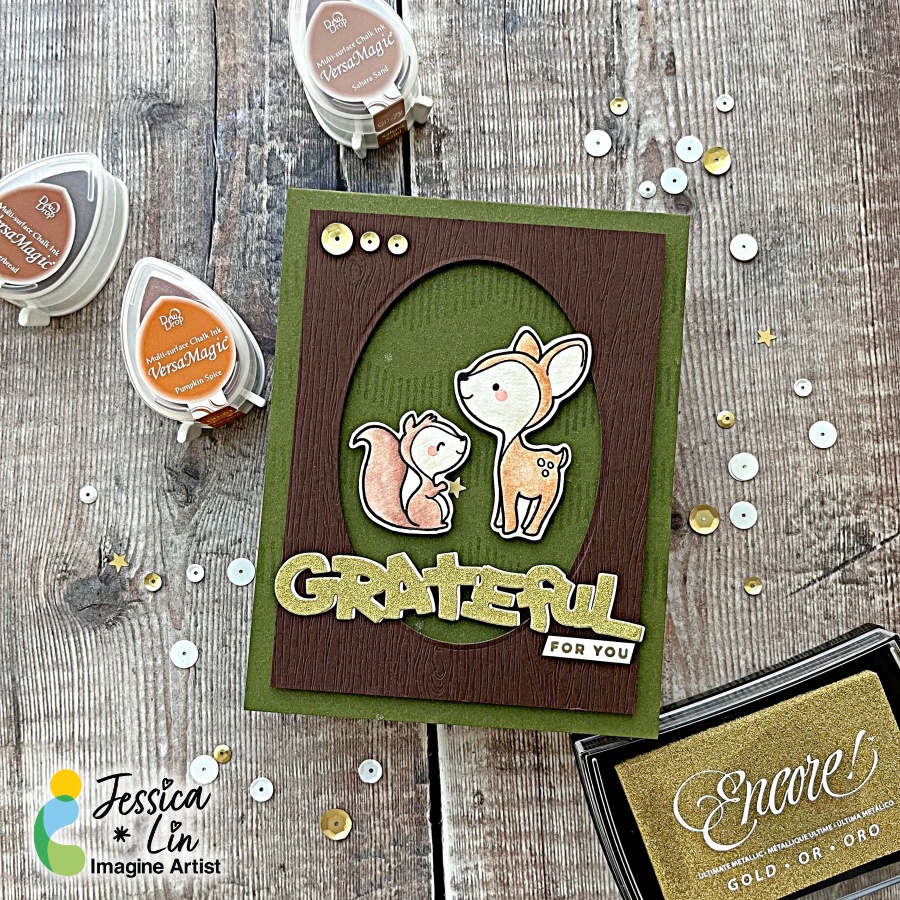
Hi everyone! It’s Jessica here and welcome back to another card tutorial. Thanksgiving is coming up and I love to make cards to express my gratitude! Today I’m also watercoloring with various ink pads from the VersaMagic, Brilliance and Delicata ink lines. Let’s begin!
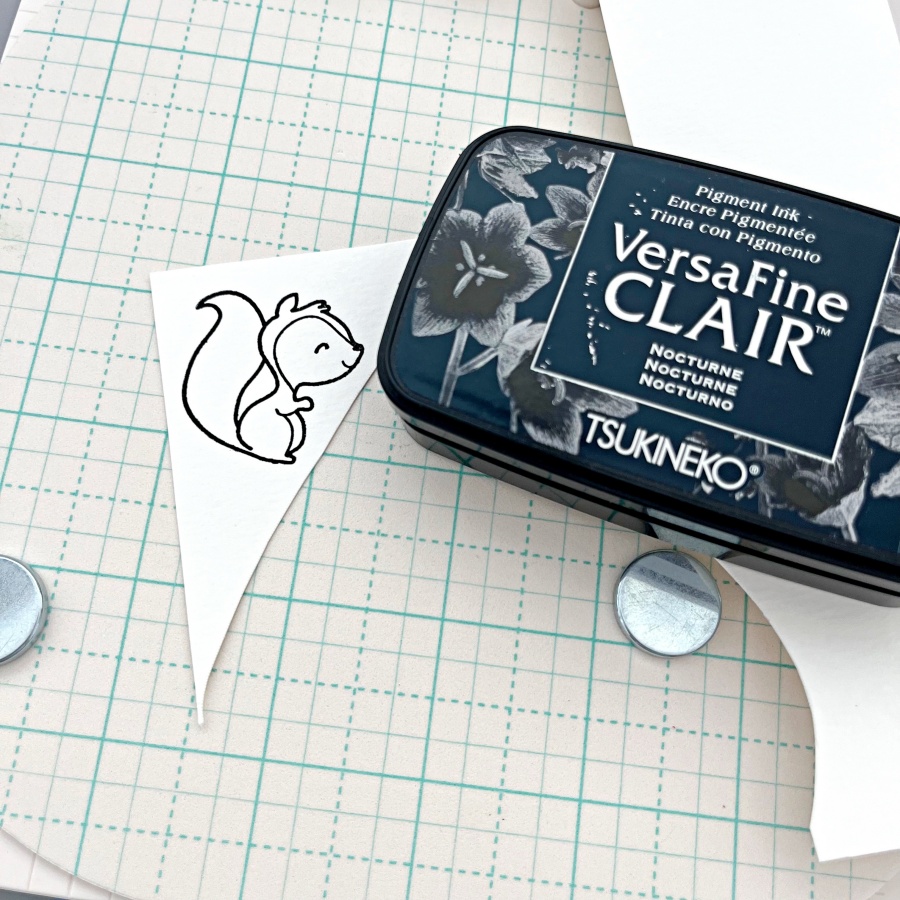
Step 1: Stamp the critter images from The Greeting Farm Wood Friends stamp set with VersaFine Clair Nocturne ink. This is my favorite black ink for stamping and it’s perfect for watercoloring.
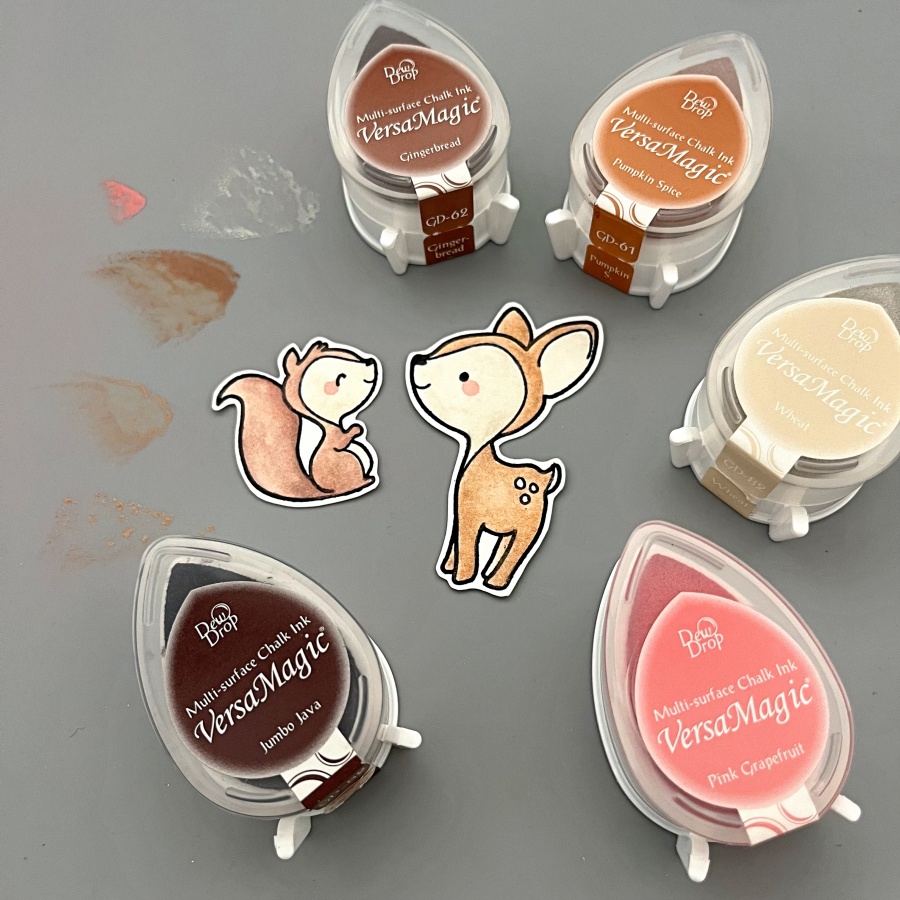
Step 2: Color the images with VersaMagic inks. I used Gingerbread, Pumpkin Spice and Wheat for the deer, and to add some shimmer and shine, I watercolored a layer of Celestial Copper from the Delicata ink line. For the squirrel, I used Sahara Sand and Jumbo Java as the base color and added Cosmic Copper Brilliance ink as an accent. VersaMagic, Delicata, and Brilliance ink pads are all pigment inks and I love that you can mix and match the colors for maximum creativity. For the final touch, I added small amounts of Pink Grapefruit to create their rosy cheeks.
Step 3: I decided to use Stampin’ Up!’s Mossy Meadow cardstock as the cardbase since it’s a nice foresty color. I also stamped some geometric striped pattern with my VersaMark ink pad. Did you know that you could stamp with VersaMark as well? It’s known for being the best ink for heat embossing, but I also stamp with it quite often to create additional interest to the background.
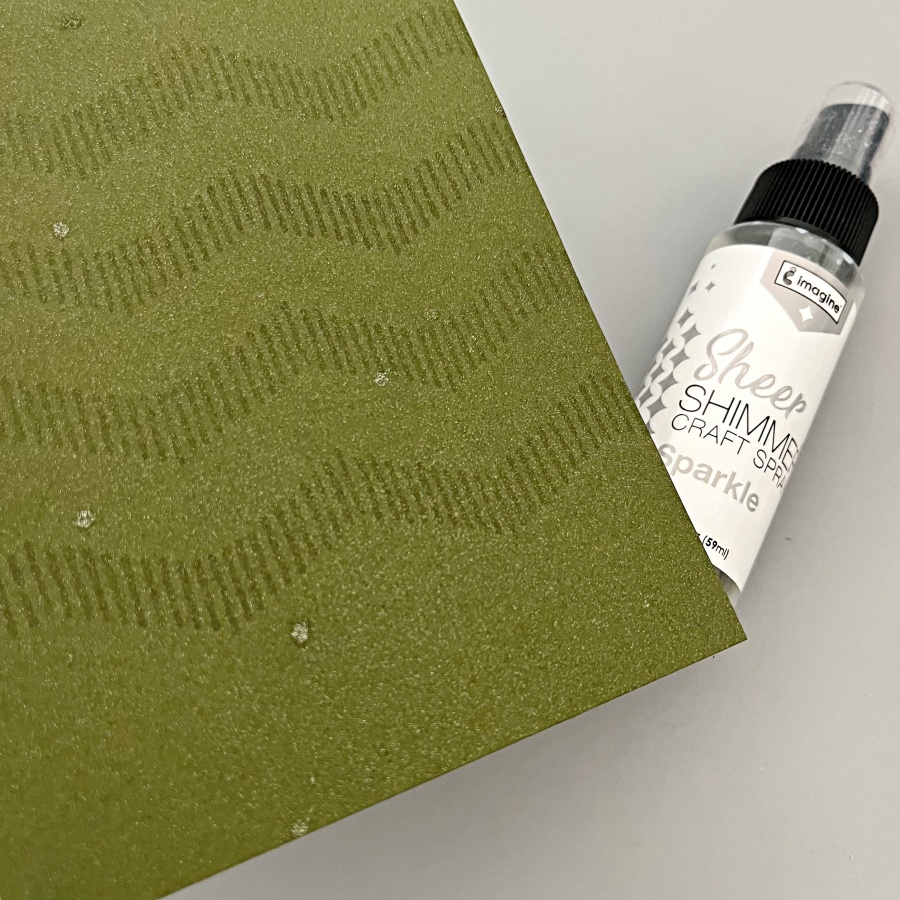
Step 4: Then I spritzed on a layer of Sheer Shimmer Spray in Sparkle. I wish you could see the shimmer in real life! The photo does not do its justice. The shimmer is just so beautiful and it truly transformed this simple card base.
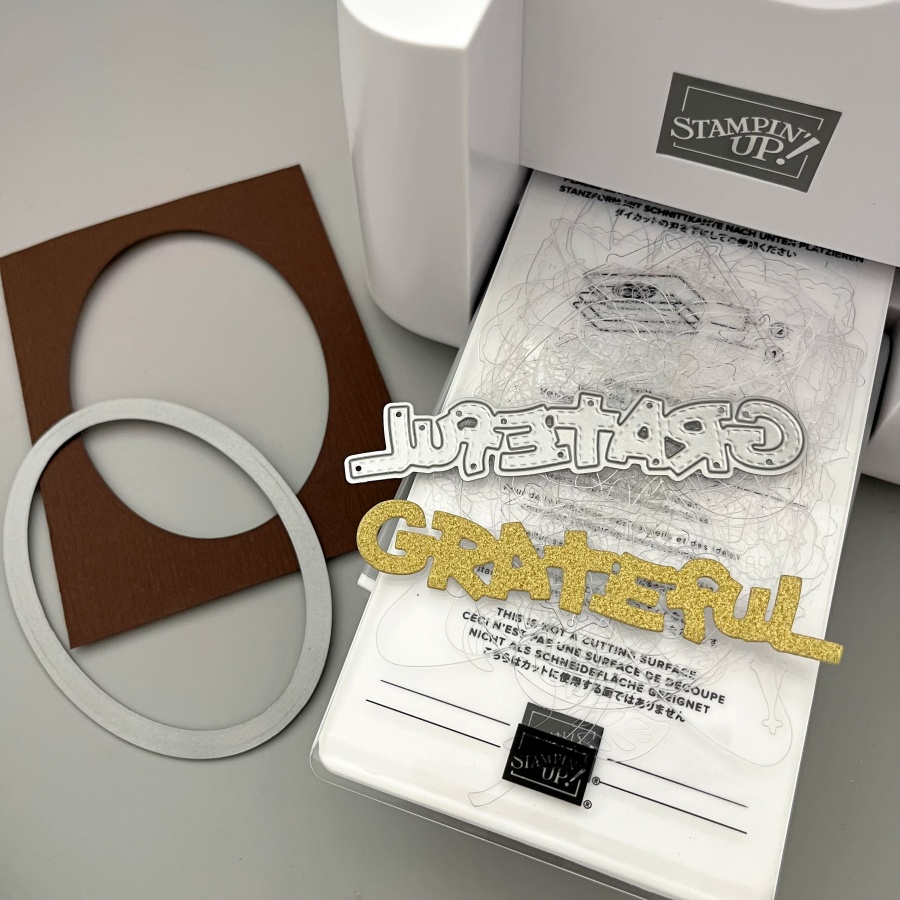
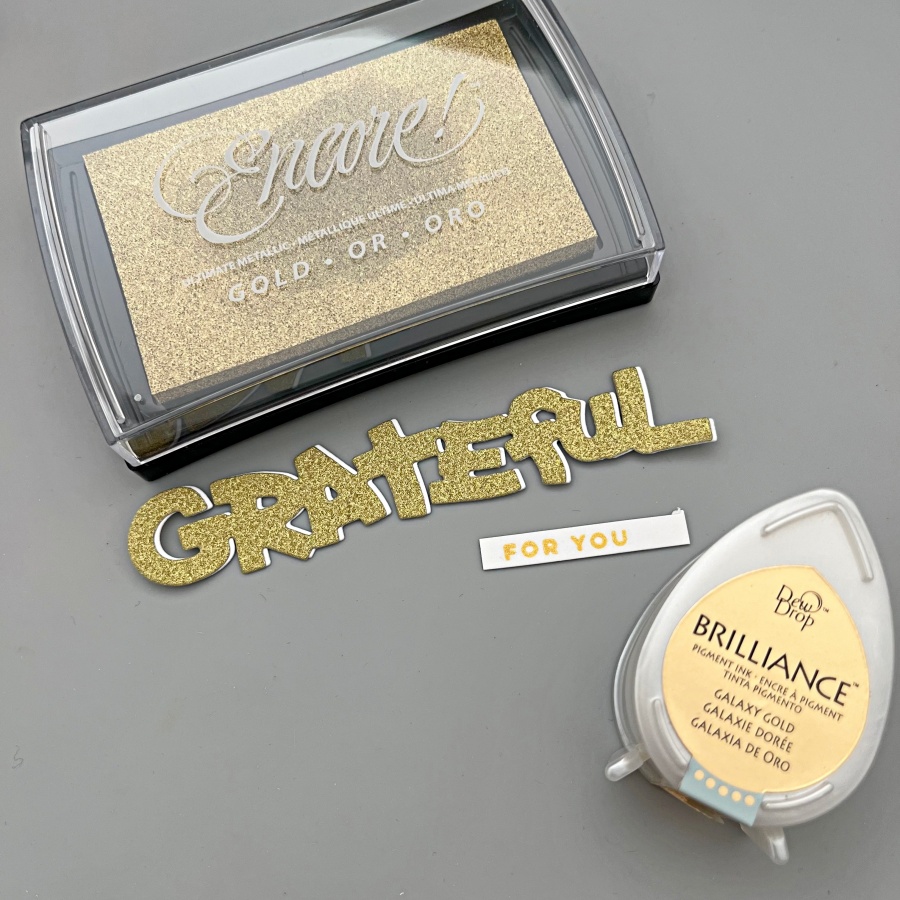
Step 5: Next, I die cut an oval panel as a frame for the little critters, and I die cut the Grateful sentiment from gold glitter cardstock as well.
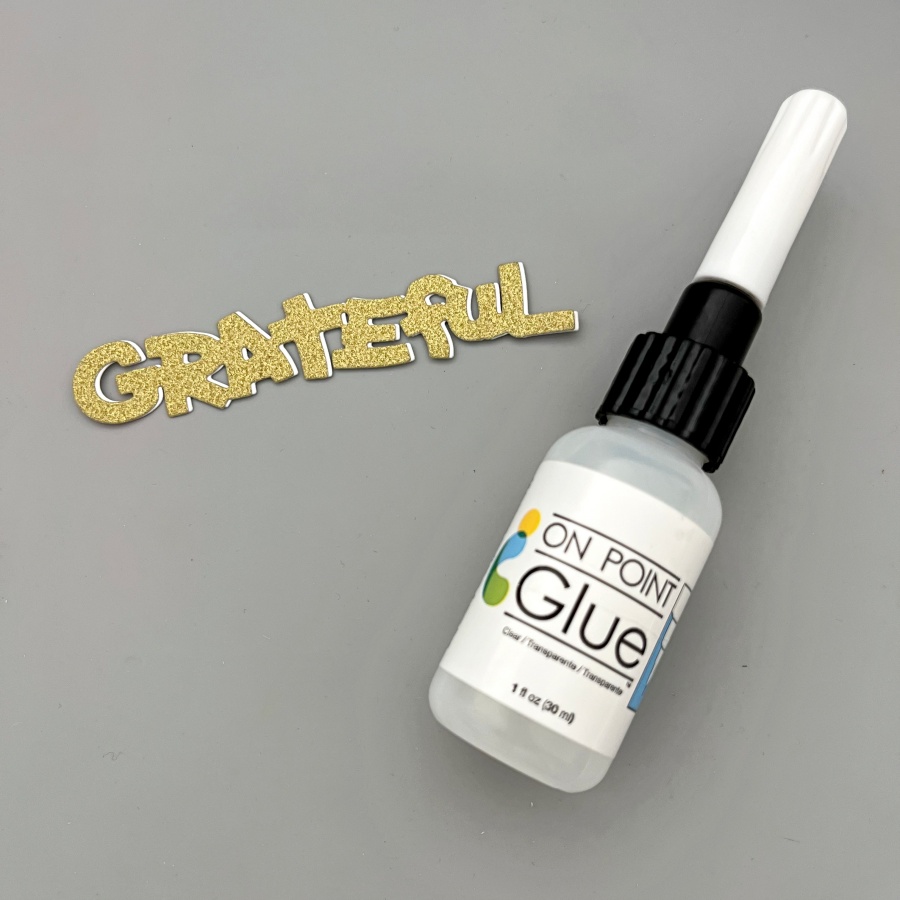
Step 6: To make the sentiment stand out a little bit more, I die cut again using white cardstock and layered it underneath the gold one. This creates a subtle shadow effect. The On Point Glue has a fine tip nozzle that makes applying small amounts of glue so easy. If you work with intricate dies all the time, I recommend having this glue in your stash!
Step 7: Finally, I stamped the “For You” stamp in gold as well to complete the sentiment. Initially I picked the Brilliance Galaxy Gold ink pad as it is my go-to gold ink, but I realized that the tone is slightly too warm compared to the gold glitter cardstock I used. So I
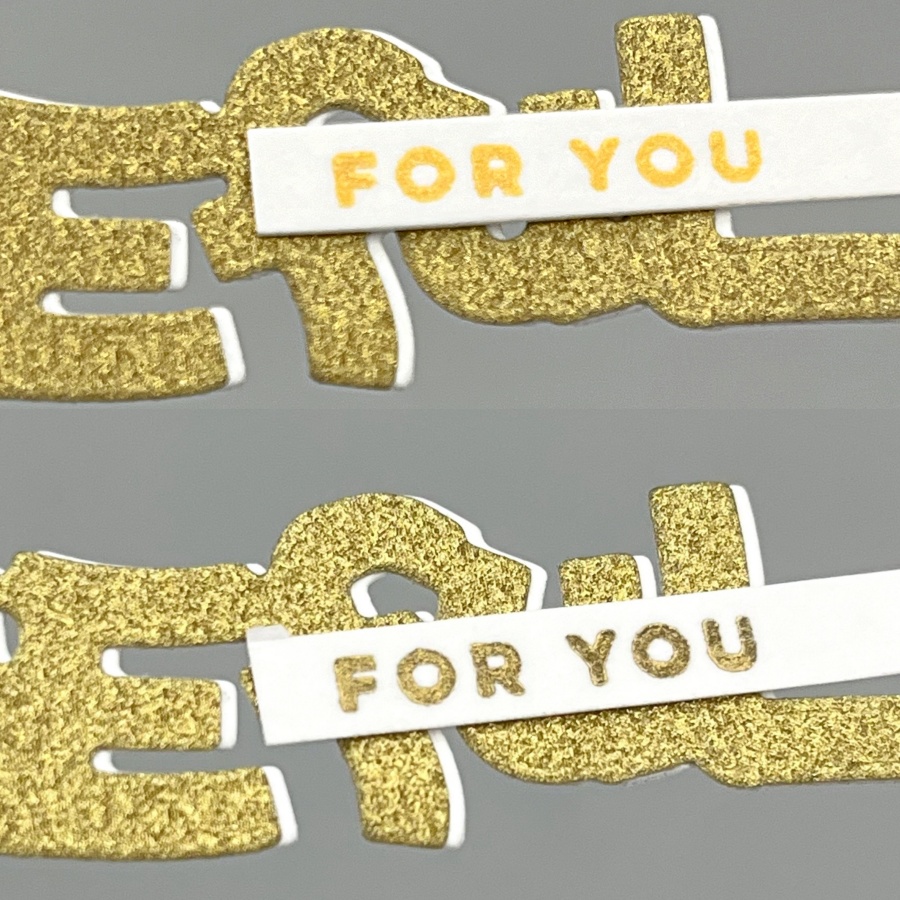
re-stamped with Gold Encore ink instead. I have a close-up comparison below as well.
The picture on the top used Brilliance Galaxy Gold and the one below used Encore Gold. Brilliance Galaxy Gold is a really yellow, sunny kind of gold while Encore Gold shows a cooler tone. The finish is different between the two as well! Brilliance ink pads are shimmery and the Encore line is metallic.
-Hi, I am Amalia. In today’s video, I dive into the creative process by simply playing with my supplies—something I often do when I’m unsure how to start a project. I used Tsukineko inks to experiment with different backgrounds, and while they didn’t all turn out perfect, I was still able to create some beautiful results. One background turned into an elegant design, and another led to the creation of a cute critter—an axolotl, which is a fascinating salamander known for its adorable smile and unique ability to regenerate its limbs. Join me as I explore the fun and sometimes unexpected outcomes of just letting creativity flow! When you don’t know what to do, just play!
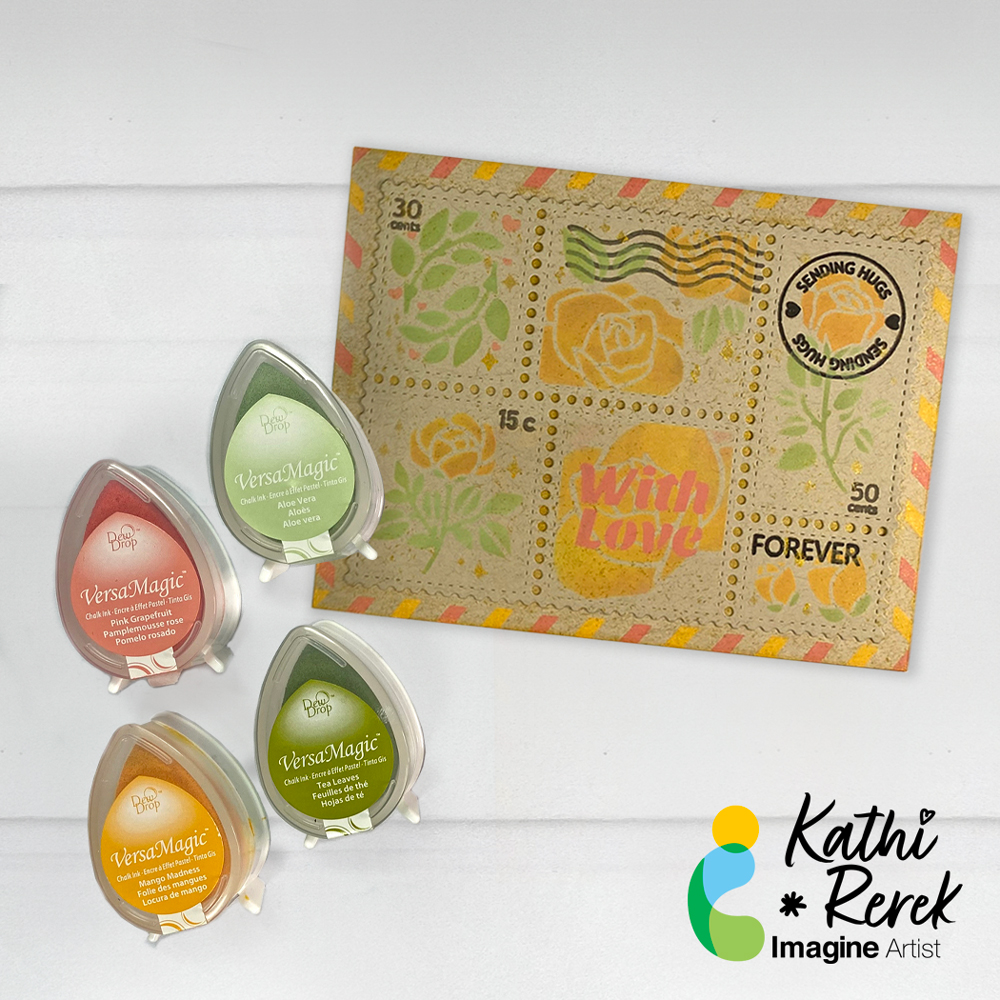
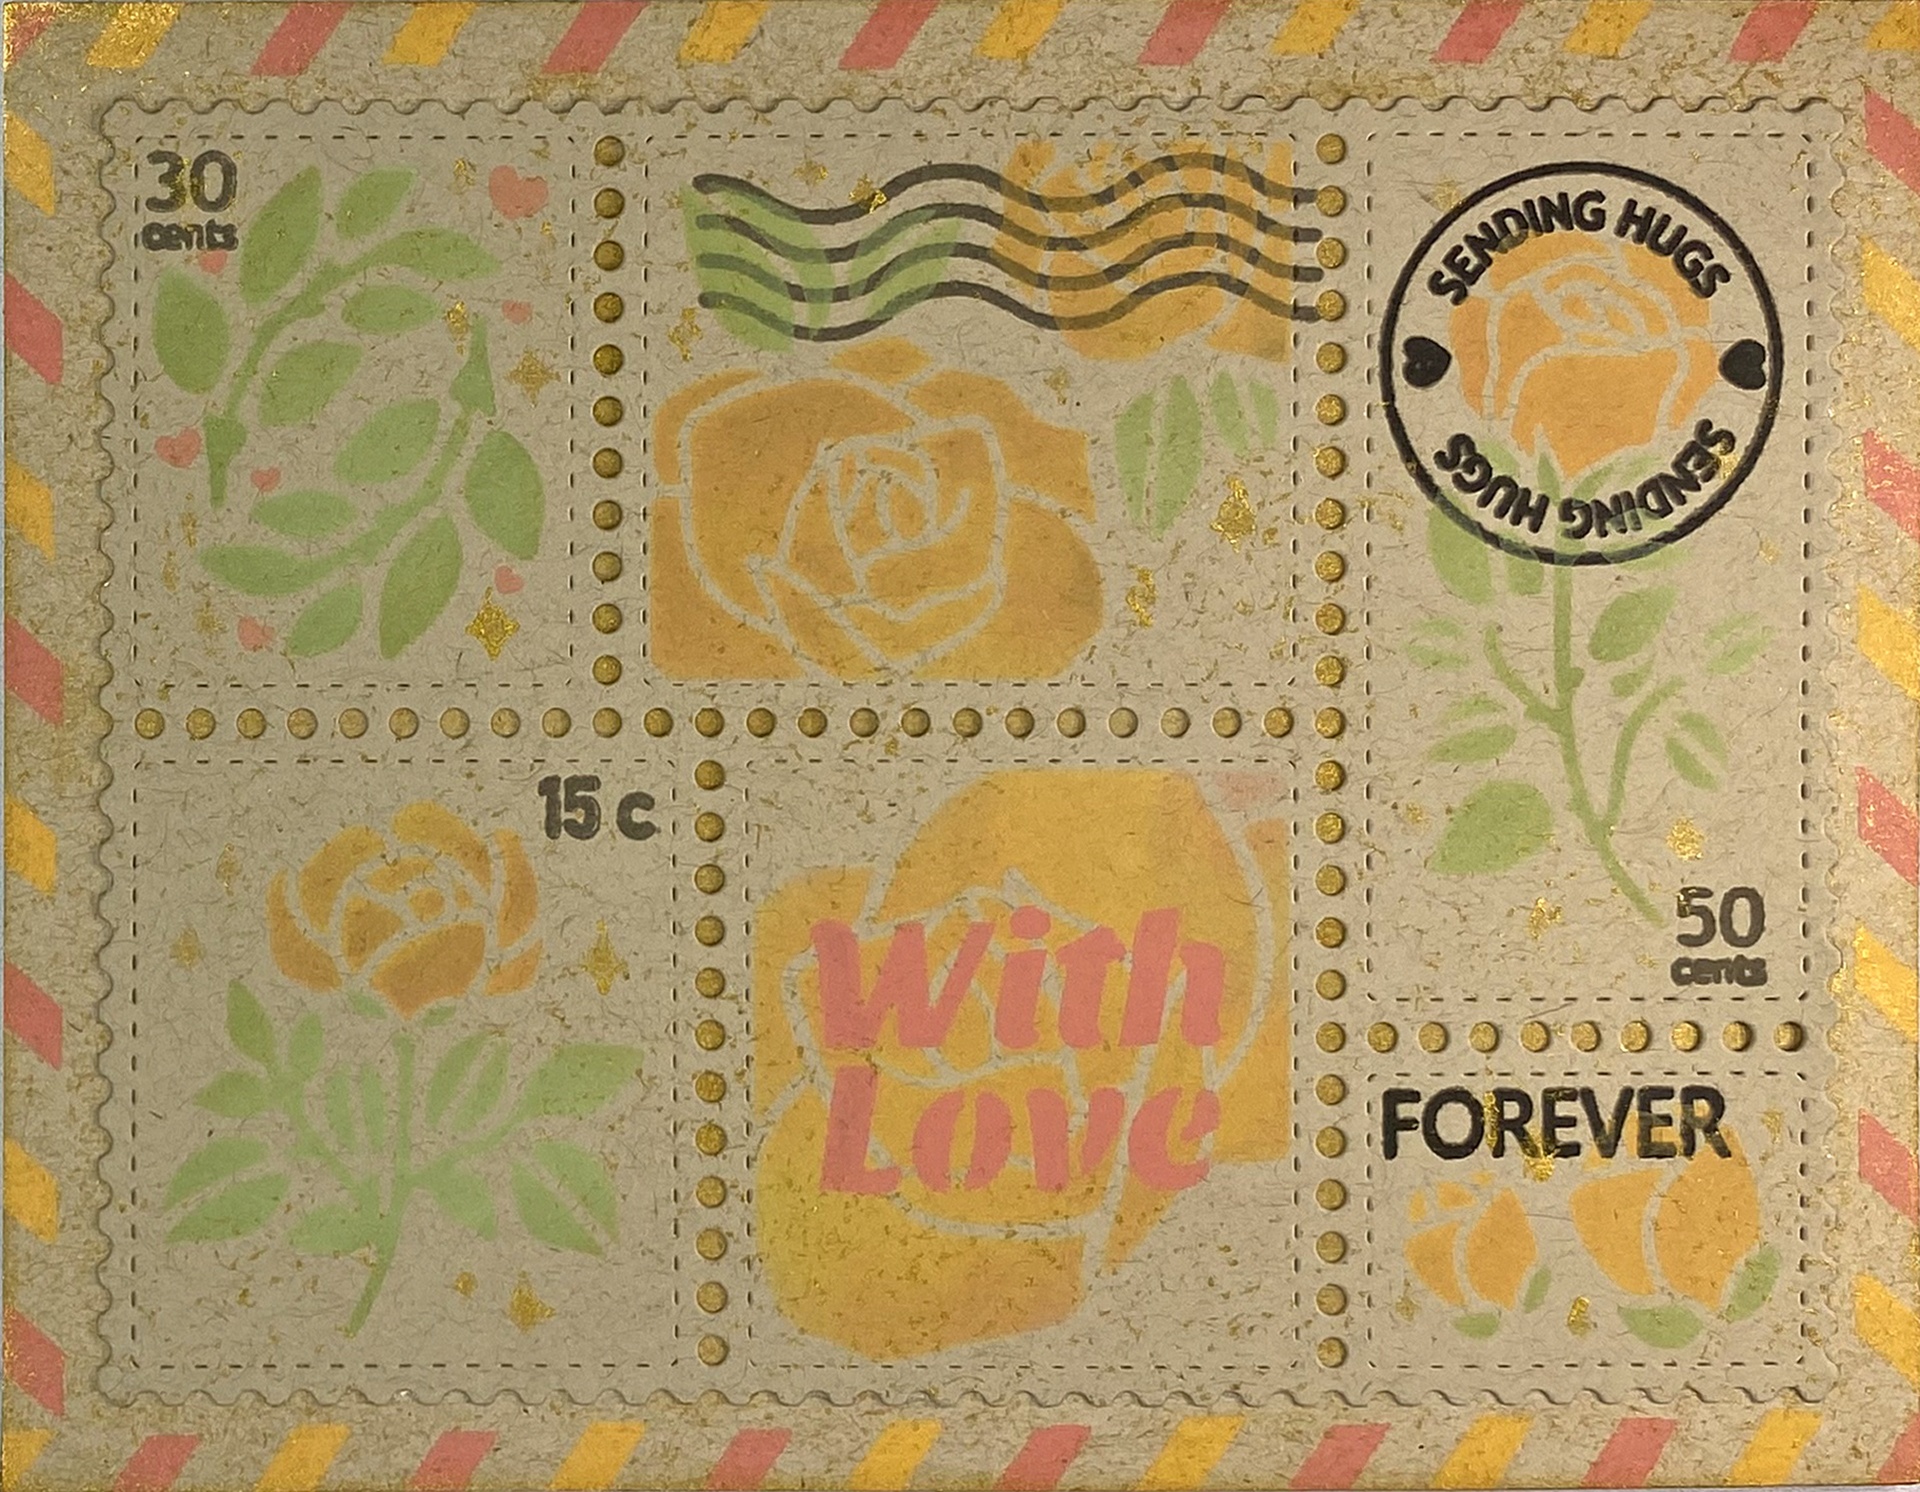
It’s summer and the roses are in full bloom. Let’s make a Rose Postage Card with VersaMagic and Delicata Inks!
Skill Level: Intermediate Time: 1.5 hours
Directions:
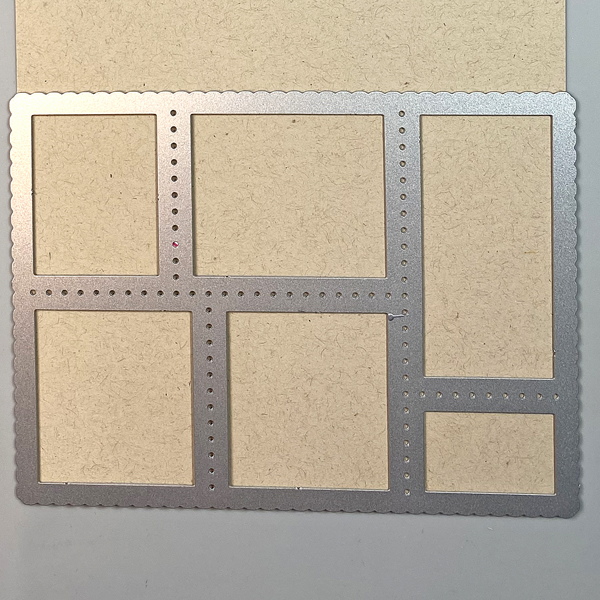
Step 1: Use the Postage Collage die to cut Desert Storm cardstock.
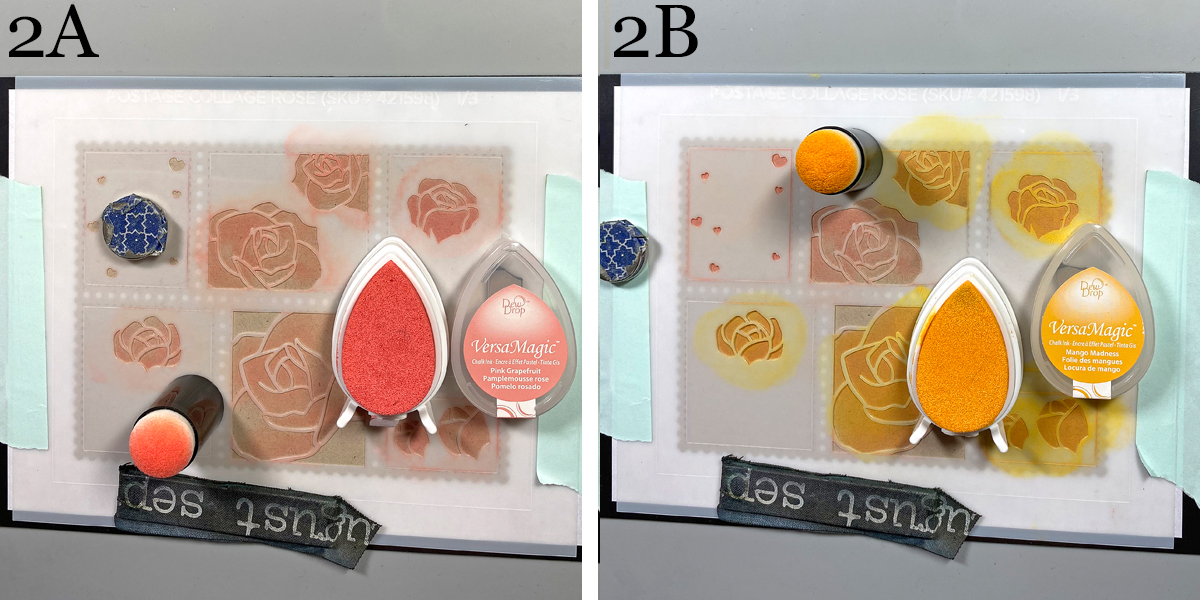
Steps 2A and 2B: Place a magnetic panel onto the cardstock panel. Use temporary adhesive to secure the Rose Postage Collage die-cut to a piece of scrap paper. Use magnets and low-tack tape to secure the first Rose Postage Collage Stencil to the die-cut. Use a Sponge Dauber to apply Pink Grapefruit VersaMagic Ink over the stencil onto the die-cut (2A). Use another Sponge Dauber to apply Mango Madness VersaMagic Ink over the stencil onto the die-cut, blending the ink as you go (2B).
Keep the Postage-Collage Die-cut panel in place. Remove the stencil and clean. Heat set the collage panel.
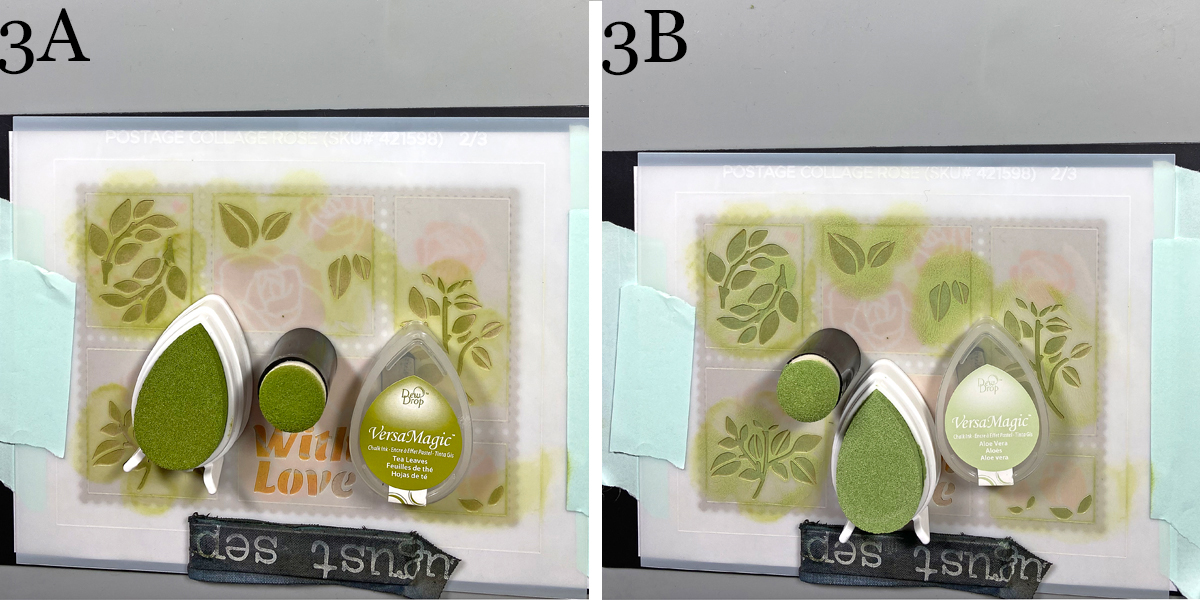
Steps 3A and 3B: Use magnets and low-tack tape to secure the second Rose Postage Collage Stencil to the Postage Collage die-cut. Use a Sponge Dauber to apply Tea Leaves VersaMagic Ink over the stencil onto the die-cut (3A). Use another Sponge Dauber to apply Aloe Vera VersaMagic Ink over the stencil onto the die-cut, blending the ink as you go (3B). Keep the Postage-Collage Die-cut panel in place. Remove the stencil and clean. Heat set the collage panel.
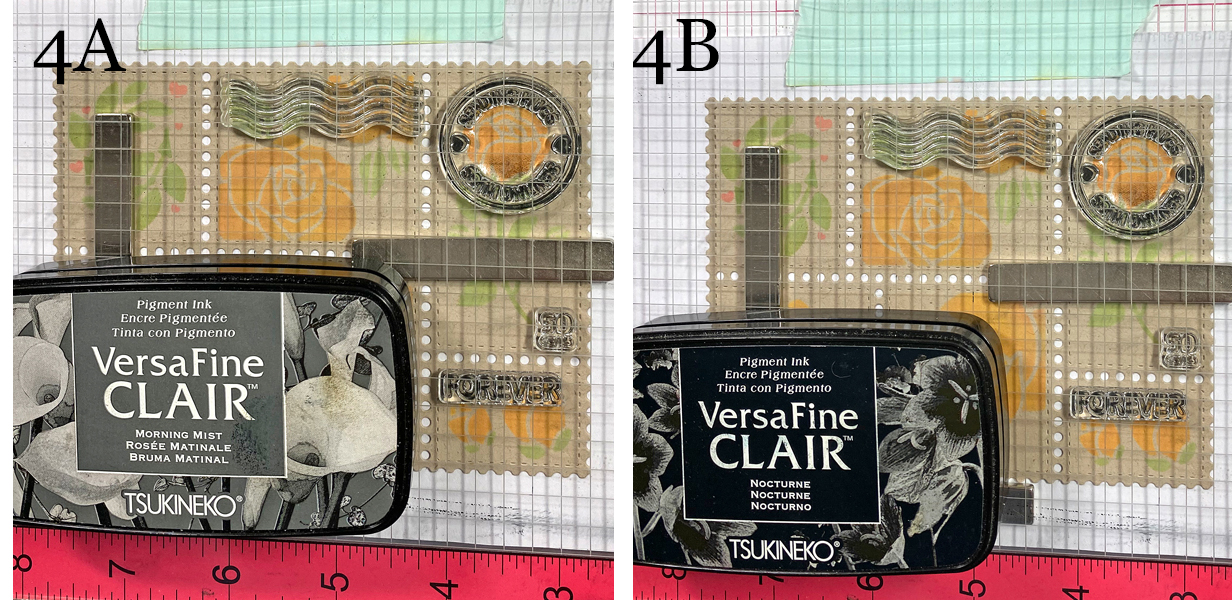
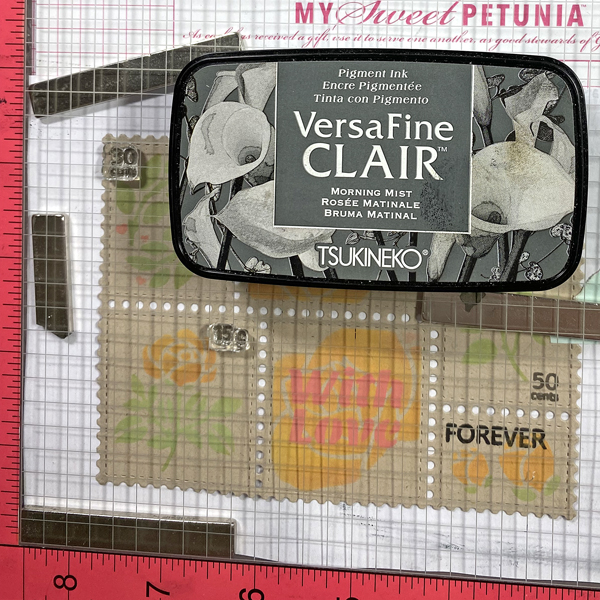
Steps 4A & 4B: Move the Postage Collage Die-cut panel to the base of a stamping platform. Secure with magnets. Position the postmark, cancellation, cost, and “forever” stamps from the Postage Collage Stamp Set facedown on the panel. Press the platform’s lid onto the back of the stamp, lift, ink the stamps with Morning Mist VersaFine Clair Ink, and stamp (4A). I re-inked and stamped some of the stamps with Nocturne VersaFine Clair Ink to add visual weight.
I decided that I wanted to add the words “With Love” from the second Postage Collage Stencil and that I wanted to add more stamped postage items to the collage.
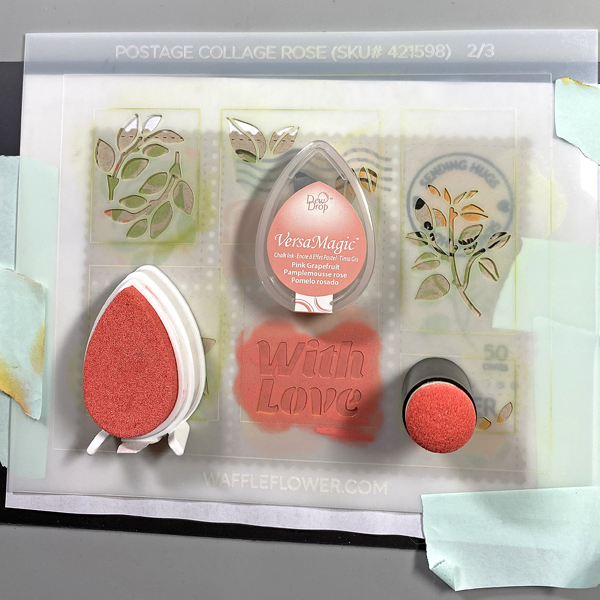
Step 5: Move the Rose Postage Collage Die-cut back onto the magnet panel and secure the second Postage Collage Stencil with magnets and low-tack tape overtop. Re-use the Sponge Dauber from Step 2A to apply Pink Grapefruit VersaMagic Ink over the “With Love” words on the stencil onto the Postage Collage Die-cut panel. When done, lift the stencil, clean it, then heat set the Postage Collage Die-cut panel.
Step 6: Place the Postage Collage Die-cut Panel again onto the base of a stamping platform and secure it with magnets. Place additional postage stamps from Postage Collage Stamp set facedown on the image panel. Press the platform’s lid onto the back of the stamp, lift, ink the stamps with Morning Mist VersaFine Clair Ink, and stamp. When done, remove the Postage Collage Die-cut Panel and heat set.
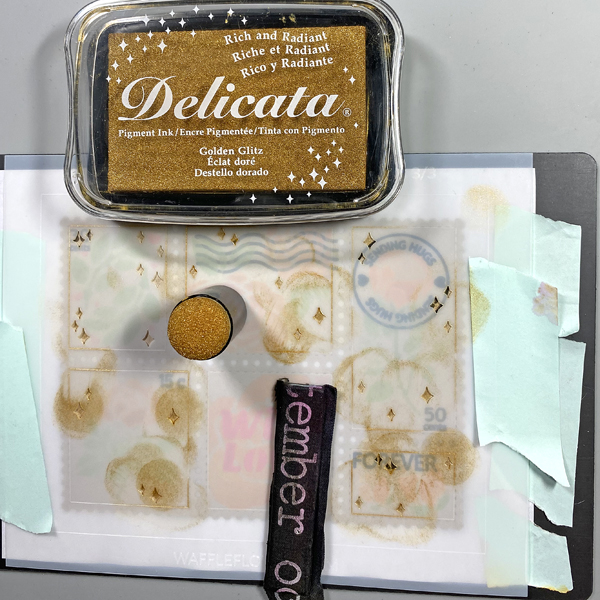
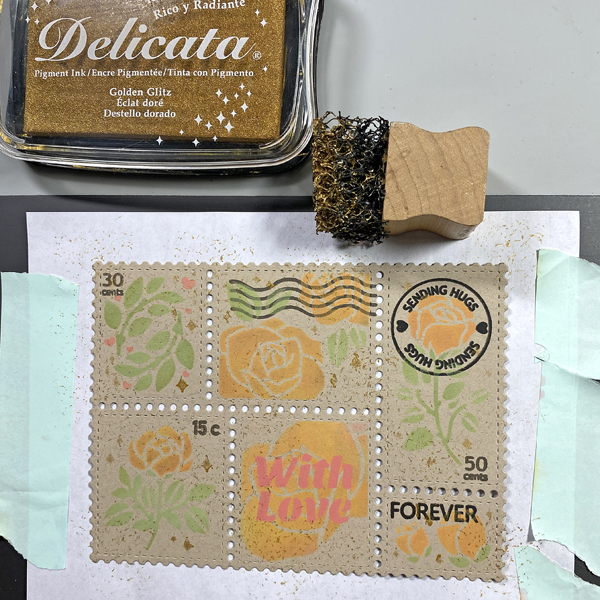
Step 7: Move the Rose Postage Collage Die-cut panel back to the large magnet panel. Use magnets and low-tack tape to secure the third Postage Collage Stencil to the Postage Collage Die-cut panel. Use a Sponge Dauber to apply Golden Glitz Delicata Ink over the stencil onto the Postage Collage Die-cut panel.
Step 8: Use the pouncy tool to apply Golden Glitz Delicata Ink randomly over the Postage Collage Die-cut panel. Heat set the panel and set it aside.
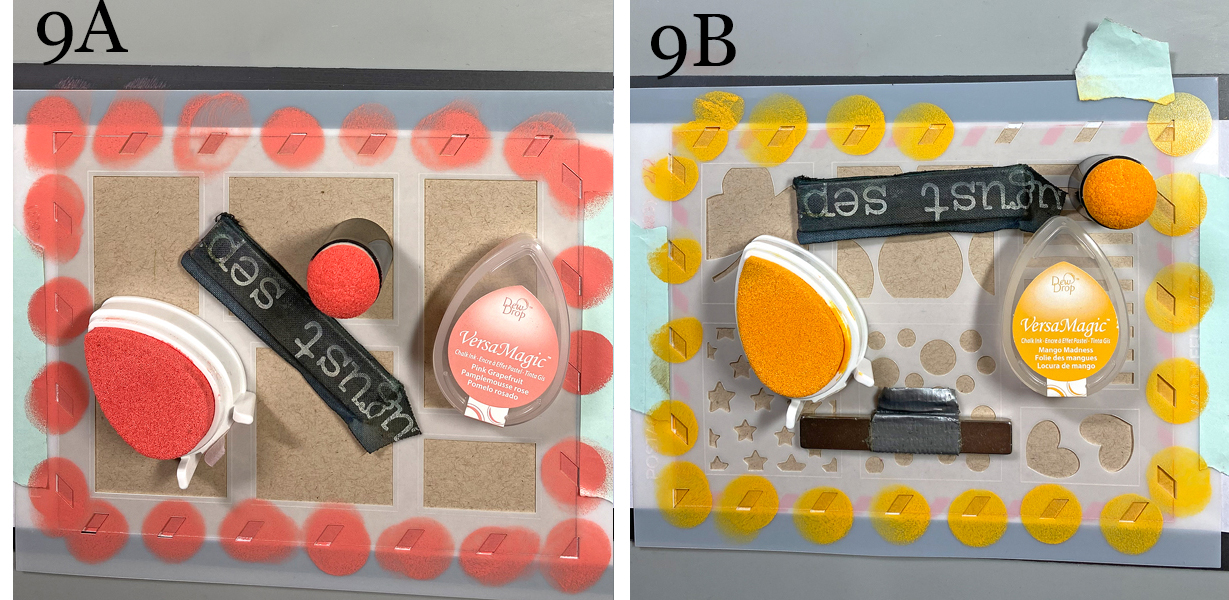
Steps 9A and 9B: Cut a piece of Desert Storm cardstock to 5.5” x 4.25”. Use temporary adhesive to secure this panel to a piece of scrap paper. Use magnets and low-tack tape to secure the first Postage Collage Stencil to the die-cut. Use a Sponge Dauber to apply Pink Grapefruit VersaMagic Ink over the stencil onto the die-cut (9A). Remove the first stencil and heat set the panel.
Use magnets and low-tack tape to secure the second Postage Collage Stencil to the panel. Use a Sponge Dauber to apply Mango Madness VersaMagic Ink over the stencil onto the die-cut (9B). Remove the stencil and heat set the panel.
Step 10: Use the pouncy tool to apply Golden Glitz Delicata Ink all over the panel. Heat set.
Step 11: Use Tear-It! Tape to adhere the Postage Collage Die-cut panel to the 5.5” x 4.25” panel, then use to adhere the panel to an A2 card cut from the same cardstock.