Hi everyone! I’m so excited to share the new Sheer Shimmer Stix with you! These handy, little guys come with dauber heads, so you can apply shimmer easily without the mess of a spray. We also have a new Rose Gold color and it’s *absolutely* gorgeous. Check out my video and see how you can use them to “watercolor” these images within 3 minutes!
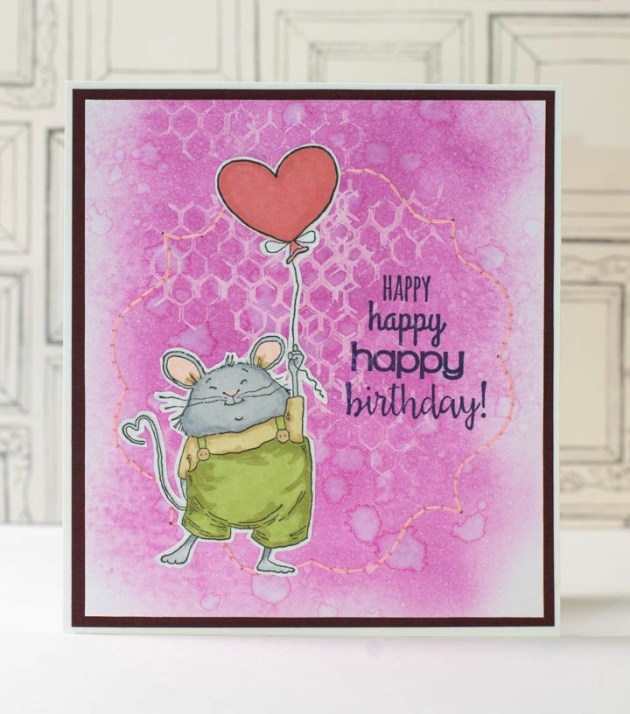
For my card today I wanted to create a dreamy background and for that, I used a few Memento Inks and a Jumbo Dauber to add a well-blended background. Next, I added a few spatters of Sheer Shimmer on the card to add the beautiful shine. I stamped the critters using Nocturne VersaFine Clair ink and quickly colored them with few Memento Markers and water. I fussy cut the images and adhered it on the inked card panel. I finished the card with a sentiment in black.
Make your colors pop and become more vibrant by using layers of ink on top of each other and add a magical spray of Ink Potion to it. A quick resist effect and stenciling adds to this fun love inspired Valentine’s Day card in shades of red.
Skill: Intermediate Time: 30 minutes
Directions
Step 1
Adhere a stencil (brick design) to a piece of white cardstock. Use Sweet Plum and Love Letter Memento Luxe ink pads and blend color through the stencil.
Step 2
Leave the stencil in place for this step. Use an ink blusher and a small amount of gloss texture paste and swipe it over the stencil. Using a small amount at a time will prevent the paste from seeping underneath the stencil. Carefully remove the stencil and leave to dry. Wash your stencil immediately.
Step 3
Trim your stenciled panel smaller to fit onto the front of a card. Use a heart stencil and modeling paste to add a stenciled design to your background. Leave the paste to dry.
Step 4
Once the paste is dry, spray Lady Bug Fireworks over the right side of the panel to add color. Mist the entire panel with Ink Potion no.9 and see how all the colors pop. The resist from the glossy paste leaves the design clear only letting the ink sit inside the open spaces adding more color in selected areas.
Step 5
Use VersaFine Clair Glamorous and stamp onto white cardstock using a background design. Die-cut small and large hearts out of the stamped piece.
Step 6
Ink the panel around the edges using Memento Rich Cocoa to highlight the color even more. Adhere the hearts using foam tape for dimension. Emboss a sentiment and adhere to the large heart. Add ink splats in red, white, brown and black. Finish off your card with diamante.
Our lovely color of the month is ‘Passion Red’. What a perfect choice for a bright blooming flower card! I wanted to create a soft water-color painted look on my card, and all I needed was my water-soluble Memento and VersaMagic stamping inks and my Craft Mat as my palette.
Tsukineko ink pads come in several beautiful red colors, so I chose a few of my favorite reds and used them both for coloring the card background and for painting the beautiful Penny Black flower image. The trick was to stamp the main image twice and to layer the fuzzy-cut image on top of the stamped background; by using this technique the main image on the finished card has a beautiful, crispy edge, and while painting you don’t need to worry about the wet color running over the stamped lines!
Skill: Intermediate Time: 1.5 hours
Directions
Step 1
Stamp flower image with VersaFine ink on white watercolor or mixed media paper. Apply ‘Red Magic’ VersaMagic ink on the Craft Mat. Using a hint of water pick up the rich, creamy color with a brush and color the background. Apply more red pigment on the bottom, and mix the color with water to create a lighter color for the top of the card. Do not mind painting over the stamped image; it will be covered with a second image layer later. Let air dry or dry with a heat gun.
Step 2
Add texture to the painted background. Stamp random patterns here and there using red ‘Lady Bug’ Memento color. Keep the stamp in your hand (do not attach to an acrylic stamping block) and bend it while stamping.
Step 3
Re-stamp the main flower image on another sheet of white mixed media paper. Color the image using a water brush and a few hues of red ink. I used Memento ‘Lady Bug’, bit darker red ‘Rhubarb Stalk’, dark purple ‘Sweet Plum’, and VersaMagic ‘Red Magic’ for coloring the background. Use the Craft Mat as your palette and apply more ink if needed. Once dry, cut out the image.
Step 4
Glue the fussy cut image on the background. Trim the background to size.
Step 5
Color the letters for the sentiment word. Press each chipboard letter on clear VersaMark ink. Pick up the letter with a tweezer, dab into copper embossing powder, and heat-set the powder by heating the chipboard on the Craft Mat. Glue letters on a strip of vellum. Fold ends of the vellum strips on the card background and secure them with double-sided tape. This will keep the strip in place; there’s no need to glue it on the card front.
Step 6
Mat card front on striped patterned paper and attach on the card base. Done!
Who wants to “Make things happen” in 2019? I sure do and that is what inspired me to make this 4” x 6” Art Journal page featuring a variety of Imagine products. The tutorial includes how to use your Craft Mat to create a watercolor background effect with irRESISTible sprays as well as how to create a watercolor palette for detail coloring with Memento inks.
Skill: Beginner Time: 1 hour
Directions
Step 1
Apply VersaFine Clair (Medieval Blue & Teal Zeal) to a 4” x 6” Art Journal panel with Jumbo Daubers.
Step 2
Spray panel with Ink Potion No. 9 and encourage the ink to blend.
Lay the panel, facedown, into the wet ink and lift. Set aside and allow to dry.
Step 5
Spray Teal Zeal irRESISTible ink directly onto the panel in a few key areas. Allow to dry.
Step 6
With VersaFine Clair in Nocturne, randomly stamp script across the panel.
Step 7
Spray Art Journal Panel with Sheer SHIMMER Craft Spray in Sparkle. Allow to dry.
Step 8
Stamp the four-butterfly image (from the Tim Holtz Alterations French Flight stamp/die set) on to the panel with VersaFine Clair in Nocturne. Stamp the image just off center and then to the left of the panel.
Step 9
From the same Butterfly stamp set, stamp the large butterfly image into a piece of white cardstock with VersaFine Clair in Nocturne.
Step 10
Apply three colors of Memento (Morocco, Teal Zeal, Elderberry) directly onto your Craft Mat and then add water; use like you would watercolors to paint the butterfly image. Allow to dry.
Step 11
Spray the butterfly image with Sheer SHIMMER Spray in Sparkle. Allow to dry.
Step 12
With the coordinating die from the stamp set, die cut the butterfly image.
Step 13
Adhere black thread, in a circle pattern, underneath the butterfly and then mount to panel with double-sided foam tape (directly over the previously stamped image).
Step 14
With a paintbrush, apply GooseBumps Clear Texture Spray to butterfly. Allow to dry.
Step 15
Edge panel with VersaFine Clair in Nocturne and then embellish with adhesive pearls.
Step 16
Add sticker sentiment “Make It Happen” below the colored butterfly.
Step 17
Add the pages, back panel and metal rings to transform this project into an art journal.
Whenever you want to create interesting, bit grungy textures on a card background, I suggest you use acrylic paints for stamping! For this technique, you can use any pattern stamp you have in your stash and choose any colors to match to your main images.
Skill: Intermediate Time: 1.5 hours + drying time
Directions
Step 1
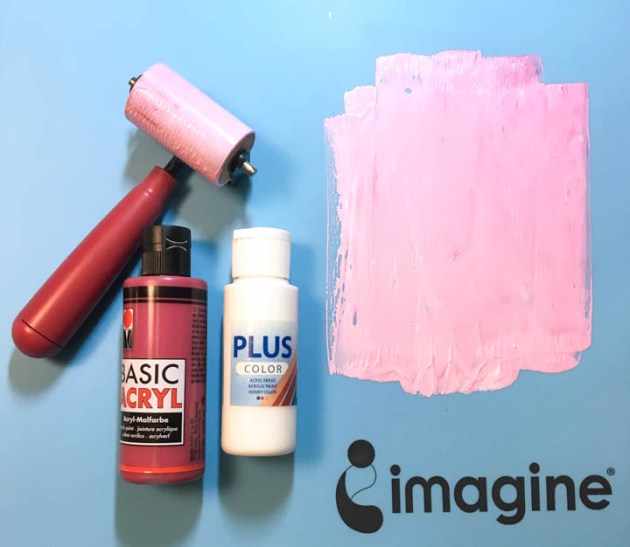
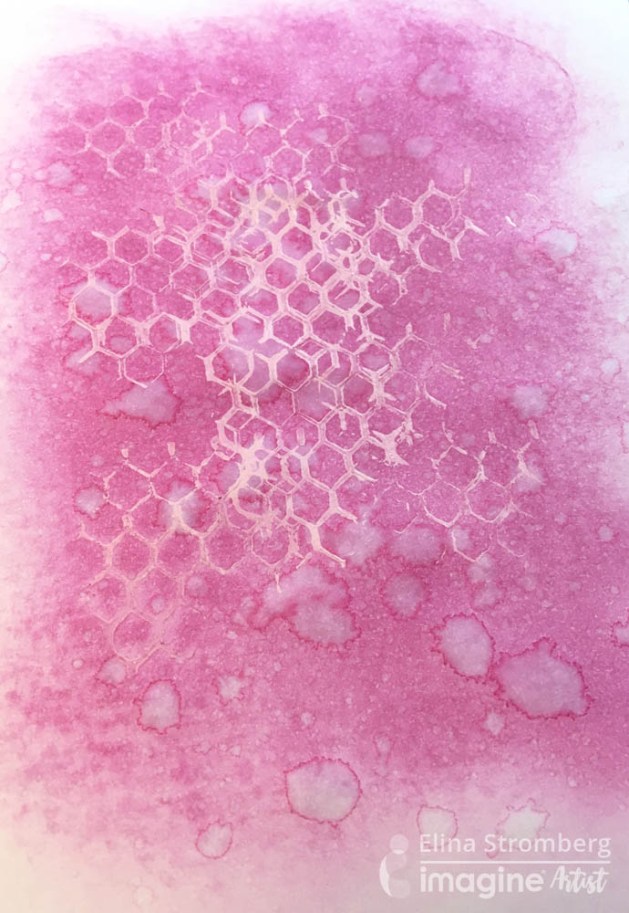
In this technique your Imagine craft mat will become handy: First, you use it as your palette for mixing the paints. Then you brayer the paint to a thin layer, add a hint of water should the paint be too heavy and then use the mat as your stamping pad. Simple and easy! The only thing to remember is to clean your stamp right after stamping. If the paint dries on your stamp it will be very difficult to remove. However, cleaning your craft mat you can do later; even if the paint is sticking to it, just mist the paint with water and wipe the mat clean with a baby wipe. Should there still be some paint left, just use a drop of hand sanitizer and your mat will look as good as new! Apply acrylic paint of your choice on the craft mat. I mixed white and red to get a beautiful light pink. Brayer the paint to a thin layer. Use the paint as your stamping pad. Keep the stamp in your hand, bend it, and stamp random patterns on the white paper. Let dry.
Step 2
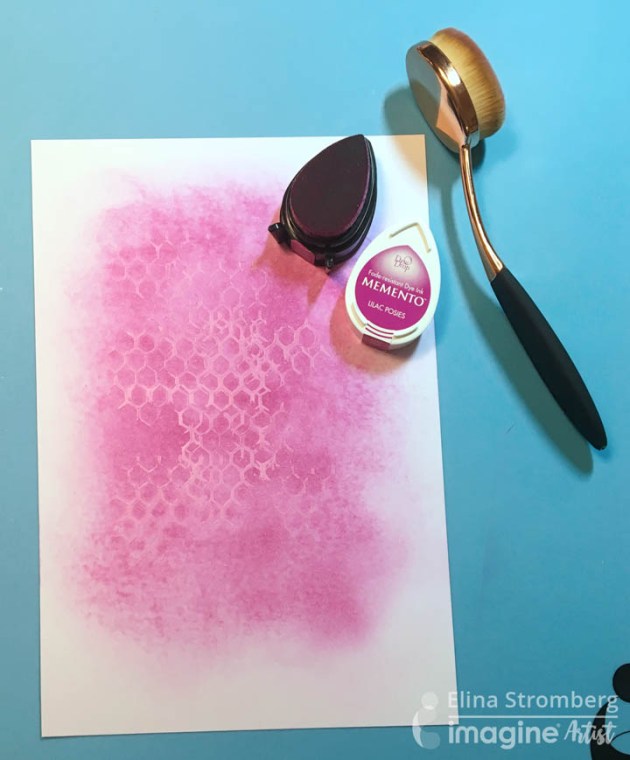
Ink the background with a matching ink color. If you used a light acrylic paint color, use a darker ink. On a darker paint, a lighter ink color will best highlight the stamped pattern.
Step 3
Mist the inked pattern with water. Press the wet paper with a paper towel to pick up the excess ink. Let dry.
Step 4
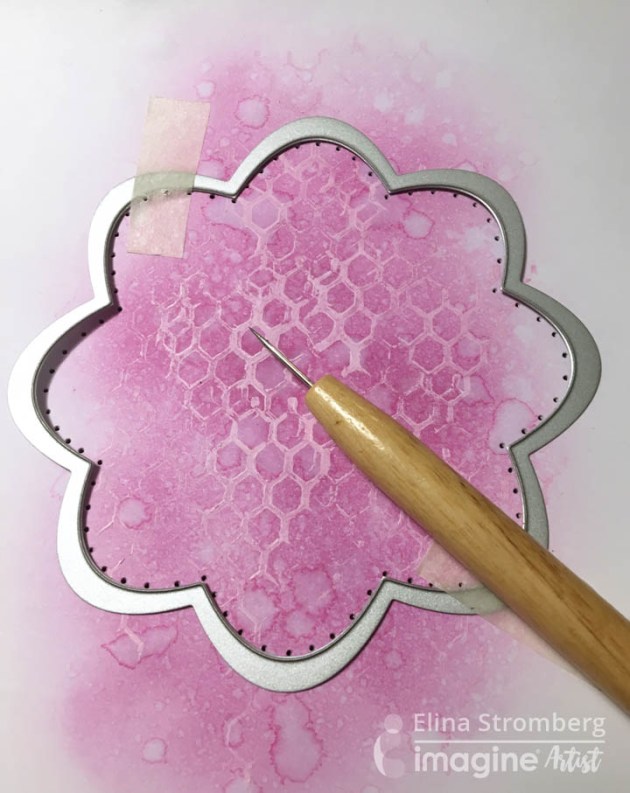
Use a plastic stencil or a nesting metal die as your stencil and create a punched frame in the middle of your background. Secure the stencil with masking tape before starting. For punching, use a paper piercing tool or a darning needle. Place paper on an old mouse pad for easy punching and for protecting your crafting table.
Step 5
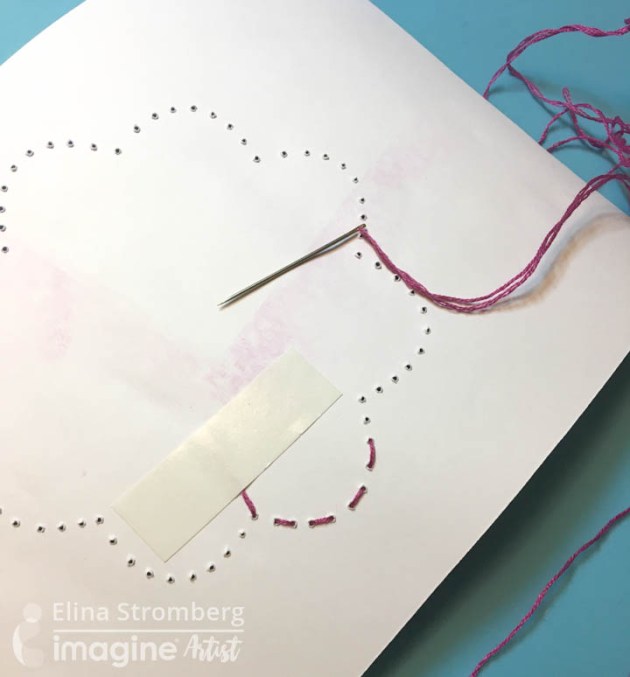
Sew a frame on the background using a straight stitch and three strings of embroidery yarn. Secure the end of the yarn on the back with double-sided tape.
Step 6
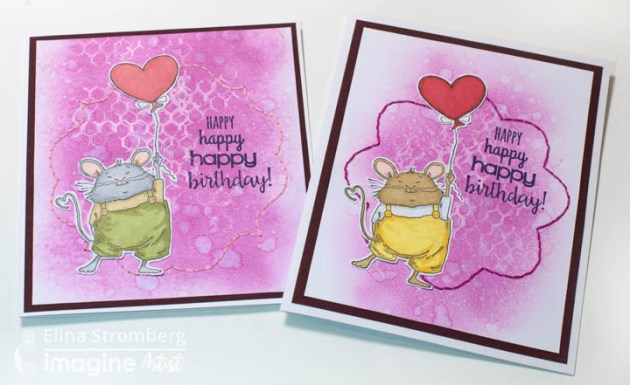
Stamp, color, and cut out your main image. Glue on the card front. Trim card to size, mat on a white card base. I used the same technique also for an ATC background; I think it looks quite nice, too!