Learn How to Transform Paper Flowers with Mboss, Ink, and Shimmer Sprays

by Jessica Lin

Hi everyone! Have you been enjoying the 3D projects for this month so far? I hope you are! Today I have a floral wreath project to share with you. Besides showing how you can assemble your own paper flowers, I’m also teaching you 3 ways to transform your die cuts! The before and after is as different as night and day and the extra steps definitely bring the flowers to life. Be sure to check out the video and see it for yourself!

Skill: Intermediate
Time: 1 hour (depending on the number of flowers)

Directions

Supplies

Imagine
Other
  • Wreath
  • Glue Gun
  • EK Success Anti-static Powder Tool
  • Stampin’ Up – Flower Frenzy Bigz L Die, Bouquet Bigz L Die
  • Cardstock – pink, teal, purple, green, yellow, white

Learn How to Create Wedding Ring Clay Bowls

by Iris Rodriguez

Learn How to Create Wedding Ring Clay Bowls and color with All purpose ink in rose gold

Spring is here, the weather is getting nicer and the wedding season is upon us. One of the smallest details that has the biggest meaning at a wedding, is the ring. In this post, I will demonstrate how to make two different DIY ring bowls using air-dry clay and All-Purpose inks. Using Imagineā€™s newest stunning Rose Gold All-Purpose ink, I demonstrate how to make a Rose Gold flower ring bowl. I will also show you how to add shading and depth by making use of the All-Purpose ink Vintage Wine, a dark burgundy color.

Skill:Ā Intermediate
Time:Ā 1 Hour to make the bowls, 2 days total for bowls to air dry

Directions

Step 1

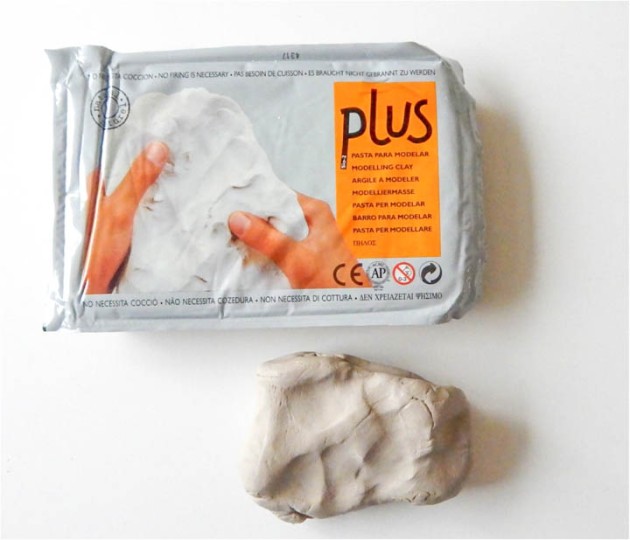
For this project, I used Activa Plus clay. This clay is fine, moist, malleable, firm, but not hard. It is an air-dry clay. Keep the clay moist by spraying a little water. Adding water also makes it softer. When the clay is wet, it is beige like color, and when dry it turns off white color. The rate that it dries will depend on the thickness of the project and room temperature. The drier the room, the faster it dries.

Step 2

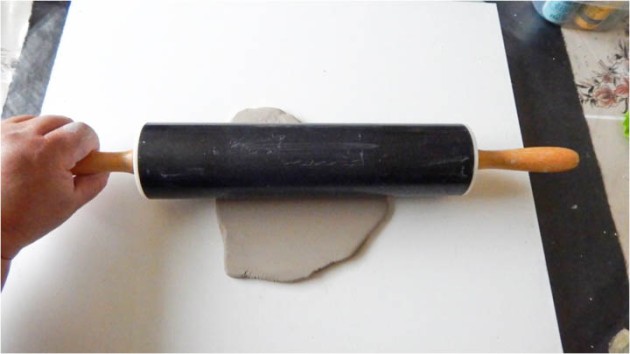
Roll out a sheet of clay. You can use a roller normally used roll out dough or use a clay roller.


Step 3

The clay is usually very smooth when itā€™s rolled out. If it is not, then smooth out the clay with your fingers, rib tool or wet sponge.


Step 4

Using a stylus, draw out the desired shape. Use can also a template or other items you can place over the clay and trace. If you change your mind, remove the line by smoothing out the clay.

Step 5

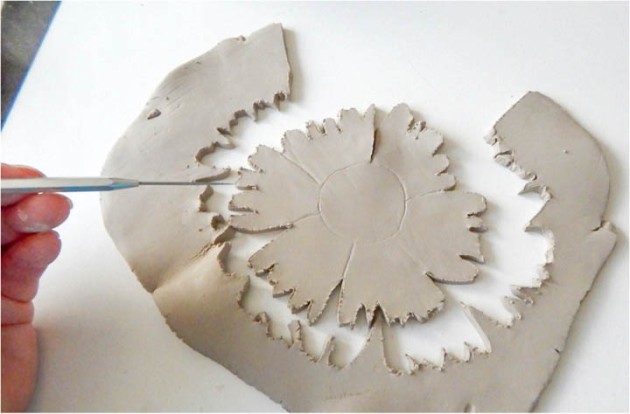
Using a clay needle tool or knife, cut out the shape.


Step 6

Smooth out the edges with your fingers or tools. Draw the petalā€™s ridges with a hard-edged tool. Sculpt the stamen by using a stylus or the pointy end of a paintbrush.


Step 7

Place the clay bowl into a real bowl or other object and allow it dry for one to two days. It will take on the shape of the object. To determine if itā€™s dry, take a look at the natural clay color; it will turn an off-white when dry. Also, if the clay feels cold then itā€™s still wet.


Step 8

Paint the clay with the Vintage Wine All-Purpose ink with a paintbrush. Heat set the ink with a heating tool or allow the ink to air dry more than half-hour. Allow the ink to dry completely before proceeding.
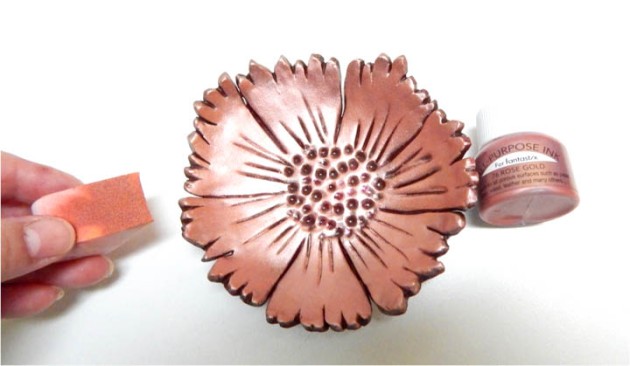
Buy Rose Gold Ink at the Imagine Shop

Click the image above to see the Rose Gold Ink on the Imagine Shop

Step 9

Using the Inkblusher, sponge on the Rose Gold All-Purpose ink. Tap gently in an up and down motion, ensuring that it does not get into recessed areas. Heat set the ink with a heating tool or allow the ink to dry for about 10 minutes. Because it is sponged on, the ink dries fairly quickly. The color intensity will be determined by the number of layers used. I used four thin layers for my bowls. Allow each layer to dry before proceeding.


Step 10

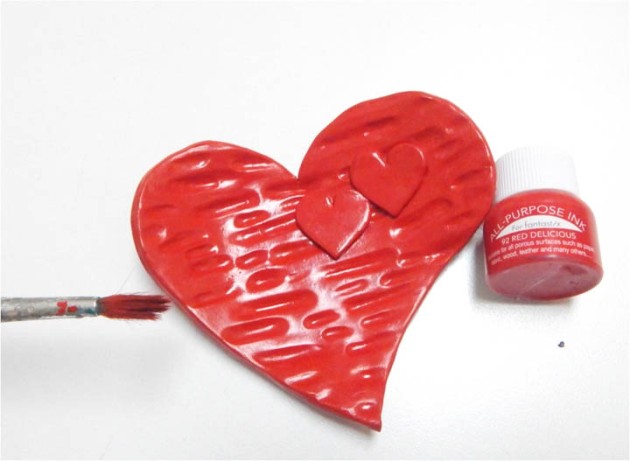
Following steps 2-6 to make the heart-shaped bowl. For this bowl, I made heart templates out of cardstock paper and added the texture by making indentations with a clay stylus tool or you can use the pointy end of a paintbrush.

Step 11

Paint the heart bowl with Red Delicious All-Purpose ink. Heat set the ink with a heating tool or allow the ink to dry for more than a half-hour.


Step 12

Paint one layer of the Vintage Wine All-Purpose ink.


Step 13

Wipe off the ink from the raised areas with a baby wipe or cotton cloth. Do not use a paper towel. It will stick to the clay and ink, as they are porous surfaces. It is very important to seal the bowls. It protects the ink and clay from liquids and dust. Best of all, it looks purposely finished. You can use a spray sealant like 3M/Krylon or brush on a water-based varnish or polyurethane.

Supplies

Imagine

ā€¢ Craft Mat
ā€¢ All-Purpose Ink – Vintage Wine, Rose Gold, Red Delicious

Other

ā€¢ Activa Plus Self Hardening Clay – White
ā€¢ Modeling clay tools
ā€¢ Sealer (spray, or polyurethane)

Watercolor a Rose in 3 Minutes with Rose Gold Shimmer Stix

by Jessica Lin

Watercolor a Rose in 3 Minutes with Rose Gold Shimmer Stix

Hi everyone! I’m so excited to share the new Sheer Shimmer Stix with you! These handy, little guys come with dauber heads, so you can apply shimmer easily without the mess of a spray. We also have a new Rose Gold color and it’s *absolutely* gorgeous. Check out my video and see how you can use them to “watercolor” these images within 3 minutes!

Skill: Intermediate
Time: 3 minutes

Directions

Supplies

Imagine

ā€¢Ā Sheer Shimmer Stix – Rose Gold, Sparkle – http://bit.ly/2lSt6SK
ā€¢ Memento Dew Drop Inkpad – New Sprout – http://bit.ly/2g8OWzf
ā€¢Ā VersaFine Clair – Norturne – http://bit.ly/2ERrIYC
ā€¢Ā Craft Mathttp://bit.ly/2ypJtwb
ā€¢Ā On Point Gluehttp://bit.ly/2CY5TJt
ā€¢Ā Tear It! Tapehttp://bit.ly/2y4RlFM

Other

ā€¢Ā Stampin’ Up Petal Palette Clear-mount stamps
ā€¢Ā Stampin’ Up Petals & More Thinlits Dies
ā€¢Ā Big Shot Machine
ā€¢Ā Cardbase
ā€¢Ā Cardstock
ā€¢Ā Paintbrush

See How to Stencil with Sheer Shimmer Stix

by Martha Lucia Gomez

See How to Stencil with Sheer Shimmer Stix Rose Gold and Silver

Hello crafty friends! Today, I am showing you how to use the new Sheer Shimmer Stix with a stencil. It is a fabulous dauber applicator that you can apply and control at the same time. Take a look at my card:

Skill: Intermediate
Time: 1 hour

Directions


Step 1

I used Calypso Coral card stock to create the card base and the second layer is whisper white card stock. First, I took a stencil and secured it over the layer with masking tape. Next, I used Silver and Rose Gold Sheer Shimmer Stix added the shimmery color over the free areas of the stencil. The direct-to-paper application with the dauber top is super easy.Ā The paper dries immediately and the shimmer touch is amazing!


Step 2

In a separate piece of whisper white card stock, I stamped flowers and leaves from the stamp set Wild Rose from Pretty Pink Posh with VersaFine Clair Nocturne and embossed with clear embossing powder. Next, I colored the center of the flowers with a dauber using two different colors of Memento Ink, Desert Sand and Peanut Brittle. For the leaves, I used two different greens of Memento Markers, Pear Tart and New Sprout. Next, I splattered the entire stamped piece with Sheer Shimmer Spritz Rose Gold using the spray tube to splatter the drops.


Step 3

Finally, I fussy cut my flowers and leaves with my scissors, resized the stenciled layer and pasted it directly over the card base. Then, I arranged and pasted the flowers on the lower part of the card. I completed this look adding a shimmering touch to the petals of the flowers with the Dauber Top of Frost Sheer Shimmer Stix and stamped the sentiment over a banner calypso coral with VersaFine Clair Nocturne. I used a Spanish Sentiment included on the new stamp set SueƱa Alto from RG Studio 360. I am fascinated with the performance of the new Sheer Shimmer Stix Dauber Tops, you can keep the control of the color, you can mix tones and you can add just in the place that you want!

Supplies

Imagine
Other
  • Stencil
  • Wild Rose Stamp Set from Pretty in Pink Posh
  • SueƱa Alto Stamp Set from RG Studio 360
  • Card stock – Calypso Coral, Whisper White from Stampin Up
  • Double-Sided Foam Tape

Announcing Sheer Shimmer Stix

We are so excited to tell you about a new product that will be hitting the market soonā€”not only is Sheer Shimmer going to be available in Rose Gold, but also in an all-new easy applicator! Sheer Shimmer Stix can be held like a pen to swipe the dauber top applicator over aĀ projectĀ surface to effortlessly and cleanly apply the elegant sheer shimmer you already love.

Sheer Shimmer Stix Color Swatches:

Quick Facts about Shimmer Stix

  • Same elegant Sheer Shimmer effect as the sprays
  • Swipe-on application for controlled results
  • Stix dauber top allows for quick, uniform, large surface area application

Keep your eye on the blog all month where our artists are going to show you some awesome technique ideas for this new product and the announcement they are ready to order!

Give Some Hope With Delicata Inks

by Nadine Carlier

Breast Cancer Awareness Hope Card by Nadine Carlier IC

Happy last day of September! With tomorrow being the first day of October and with October being the month for breast cancer awareness I thought a hope card was fitting. Plus, the new Delicata Rose Gold and Pink Shimmer made the perfect pink ribbons. I wish my handwritingĀ was better for the sentiment “hope” that I wrote using a Fantastix but if we wanted perfect cards all the time we would just go buy a Hallmark card. šŸ™‚

Watch my video tutorial below to see how I created myĀ card. Enjoy!

Skill: Beginner
Time: 30 min.

Supplies

Imagine
Other

Visit our YouTube ChannelĀ for more inspirational videos and subscribe to get updates for when we post new videos.