Create Your Own Fairy Tale Card

By Anna Escalada York

I am a big fantasy nerd, and was so excited when we were given the option to share a fairy tale project with you this month.

Skill: Intermediate
Time: 1.5 hours

Directions:

Step 1:
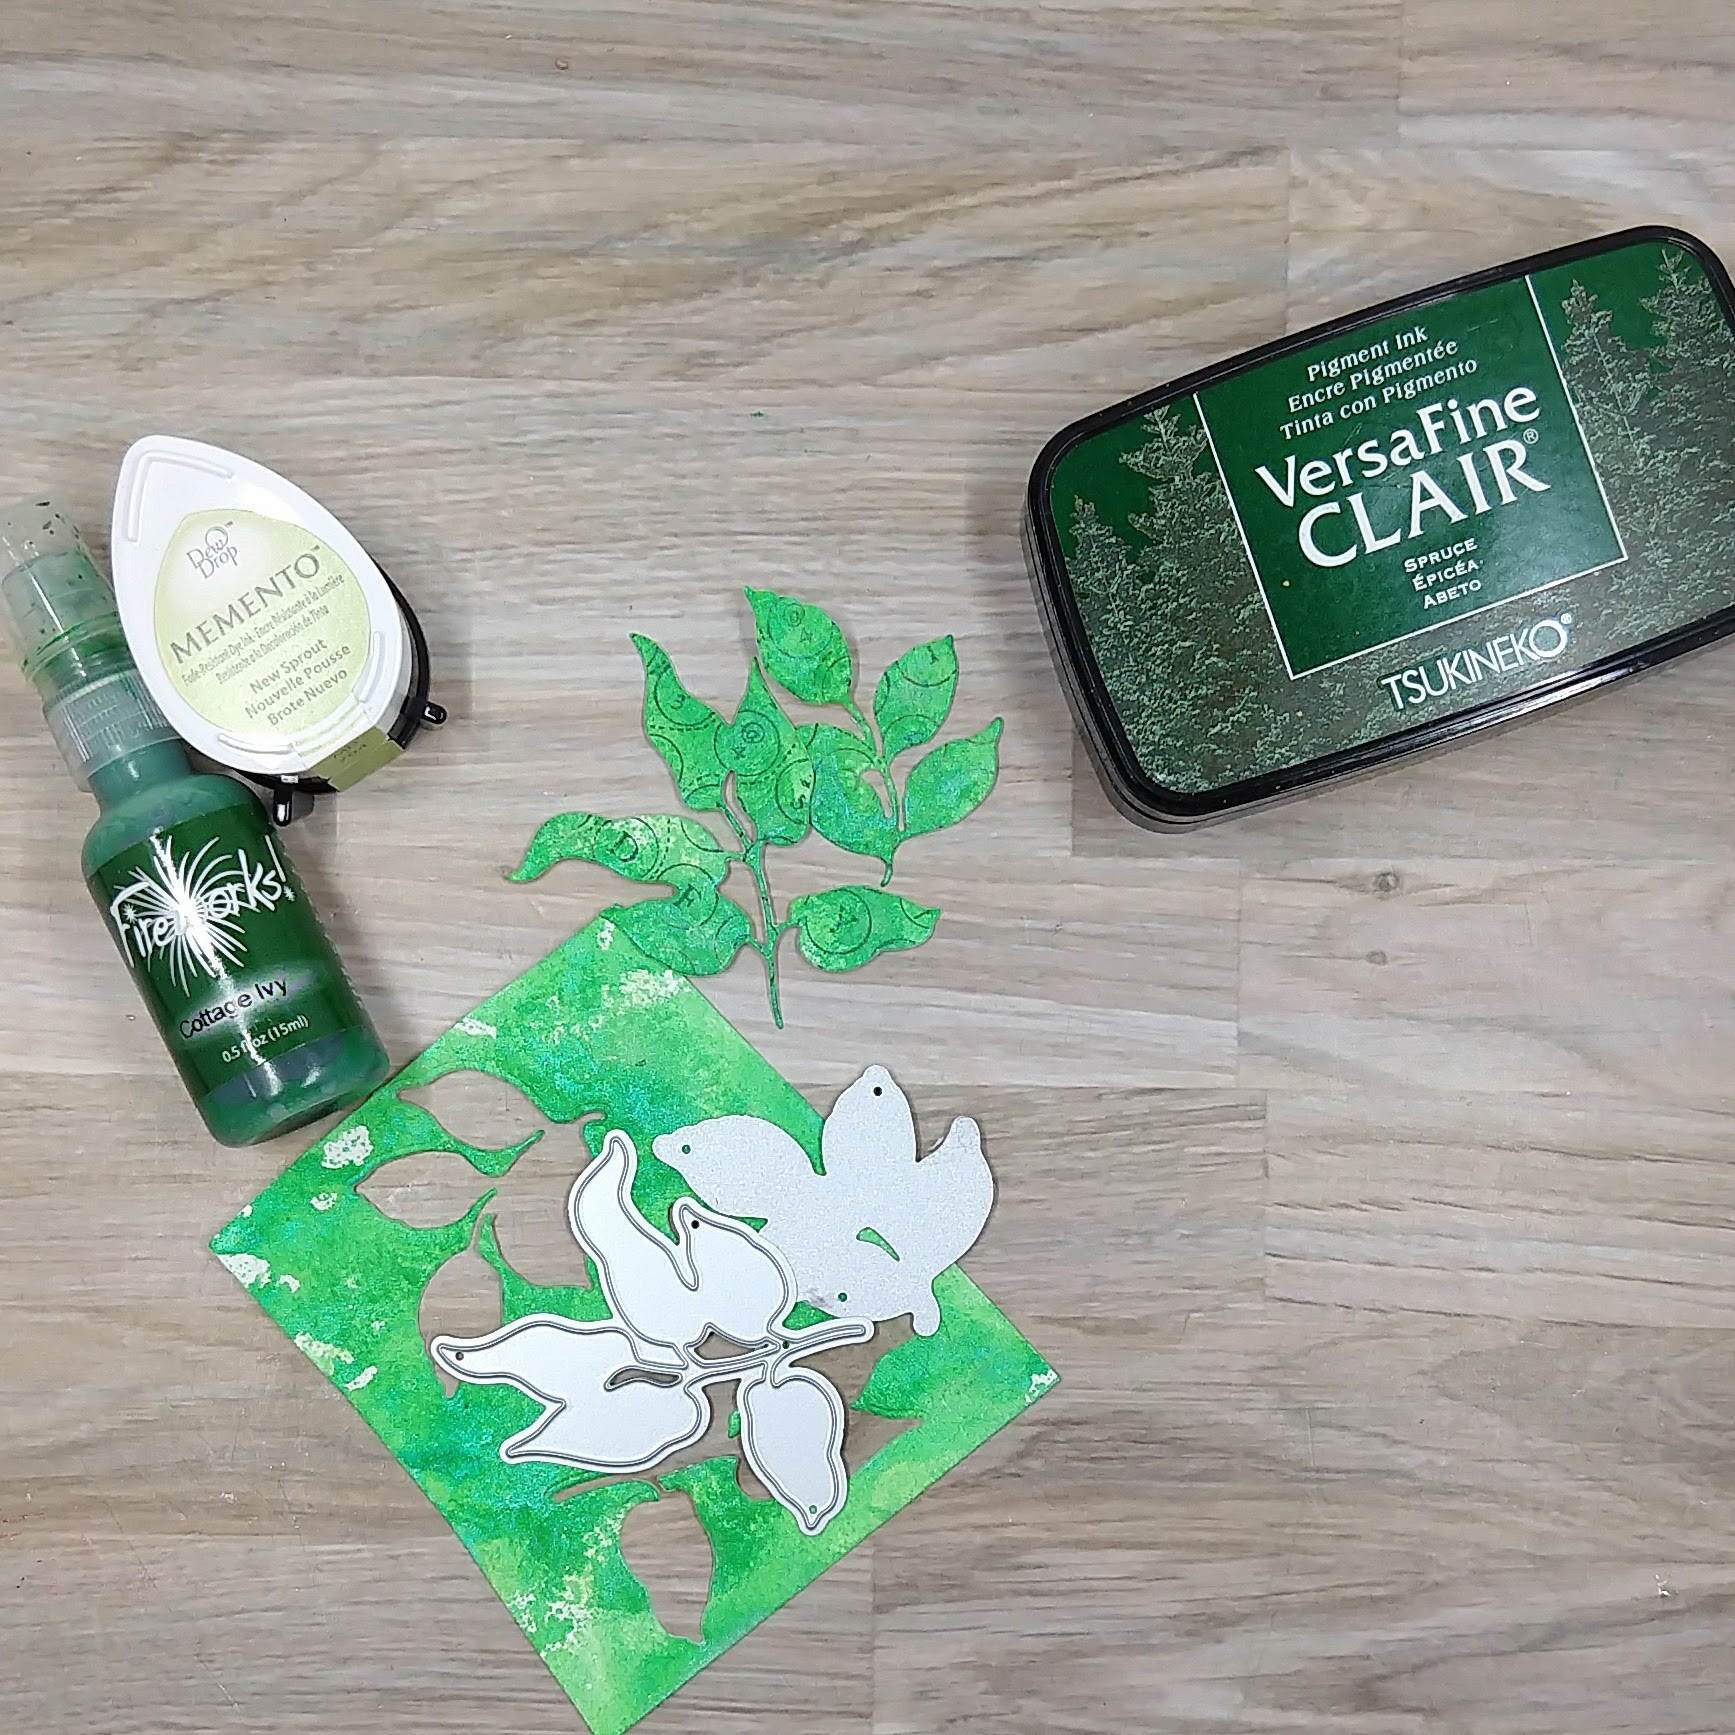
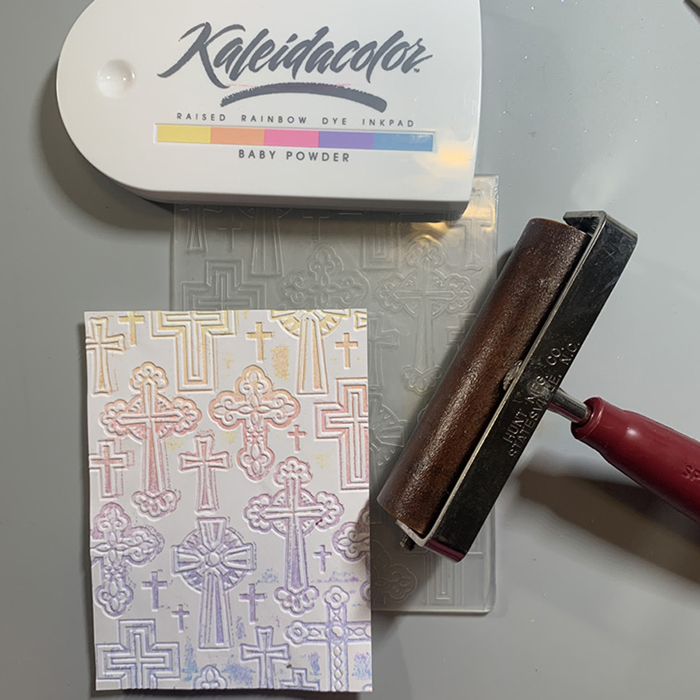
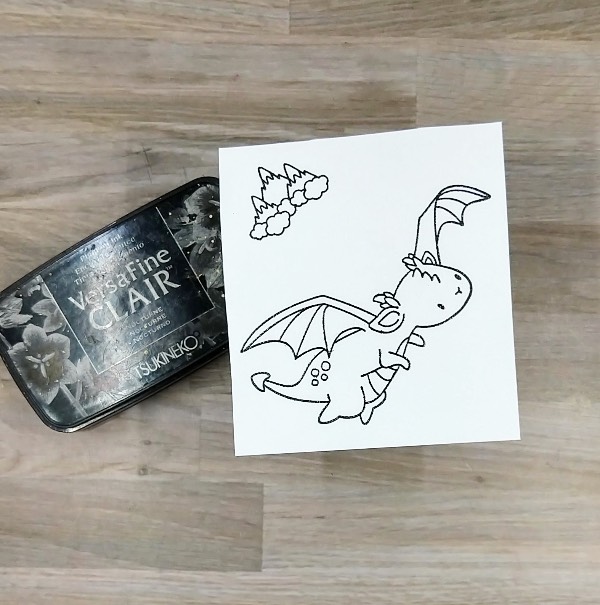
Stamp a dragon and a small mountain range on watercolor paper with Nocturne VersaFine Clair Ink and heat emboss them with clear ink. Then die cut both images with their corresponding dies.
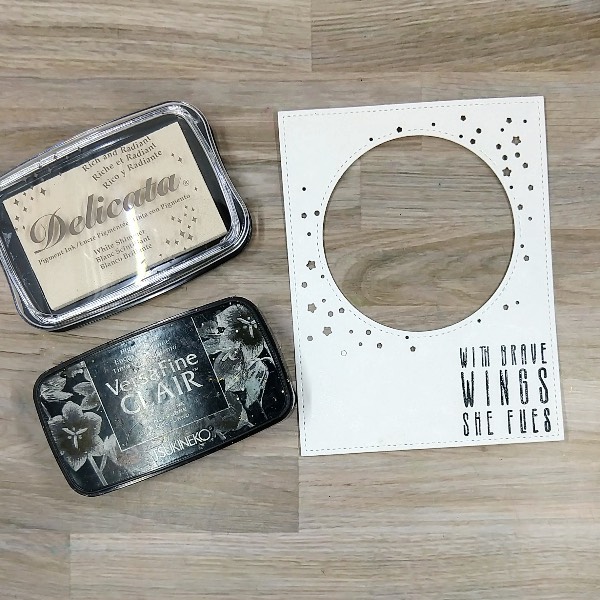
Step 2:
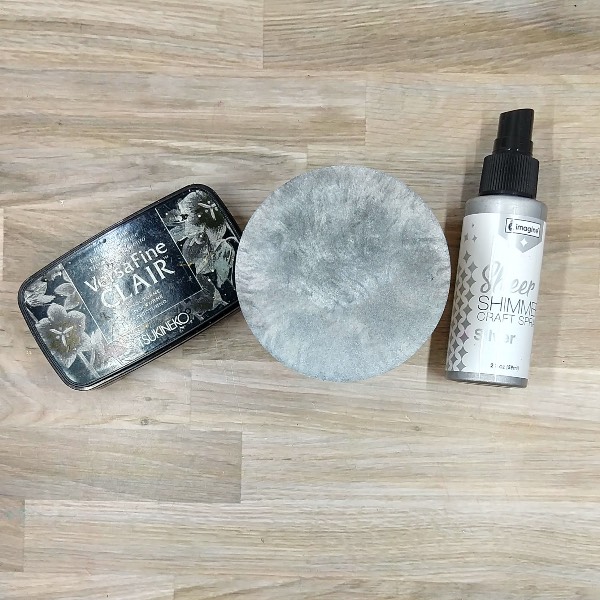
Die cut a piece of watercolor paper with an A2-sized background die. Take the circular die cut element from the die cut watercolor paper and using an old sponge dauber–which has some parts of the sponge missing due to heavy use–to rub more Nocturne VersaFine Clair ink across it. Then spray the die cut circle with Silver Sheer Shimmer Craft Spray. Set aside to dry.

Step 3:
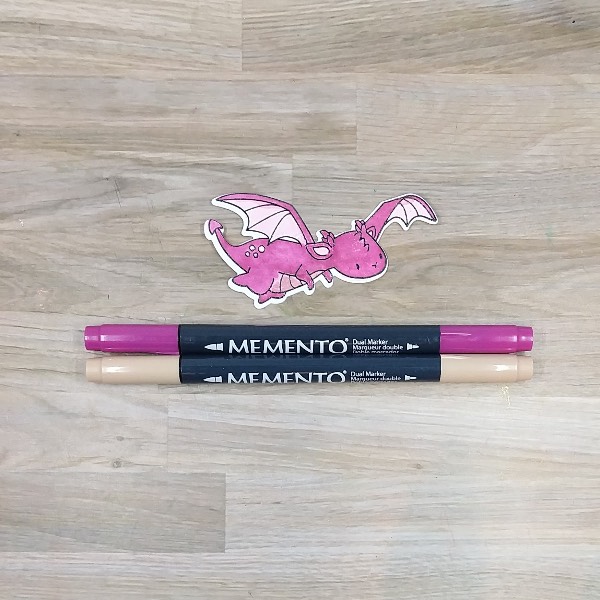
Color the die cut dragon with Desert Sand and Lilac Posies Memento Dual Markers.

Step 4:
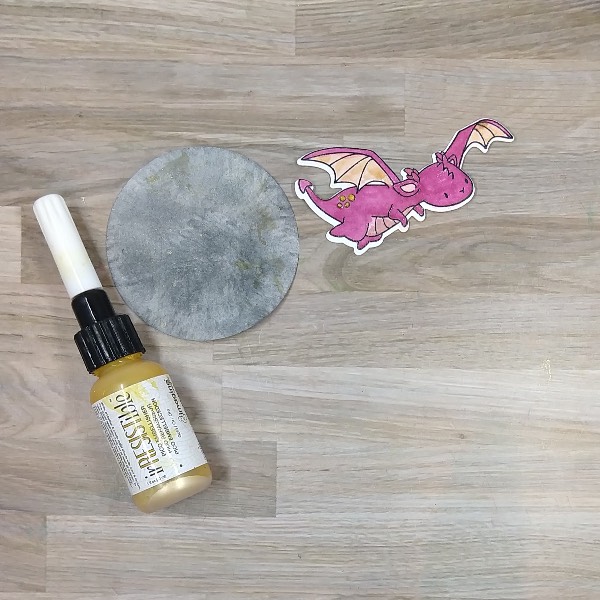
Add Gold irRESTible medium onto the 4 freckles on the dragon’s hip using the Pico Embellisher. Then mix some of the Gold irRESTible medium with water and splatter the black die cut circle.

With the remaining irRESTible medium mixed with water, paint the wings and belly of the dragon to add some shine. Set aside to dry.

Step 5:
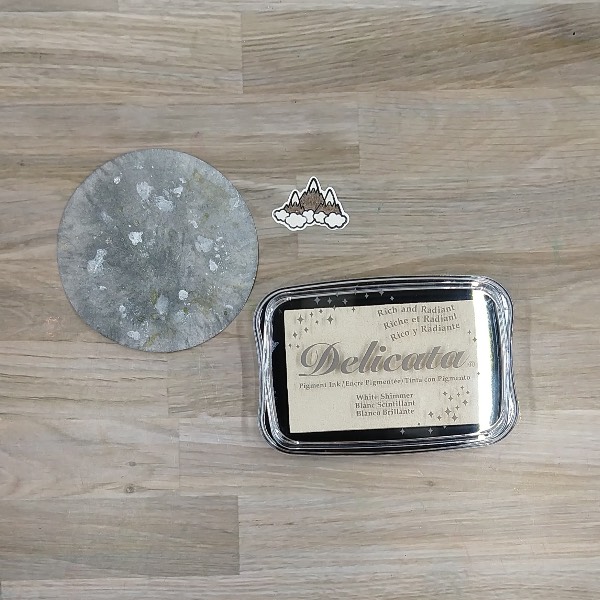
Color the mountains with Rich Cocoa Memento Dual Marker. Then press a White Shimmer Delicata Ink pad onto some acetate packaging and spay with water. Use this shiny watercolor to paint the clouds and snowy tips of the mountains. (While you can’t see this in the picture, the Delicata ink added some subtle shine to the image.) Watercolor smoosh the remaining watercolor onto the circular die cut and allow everything to dry.
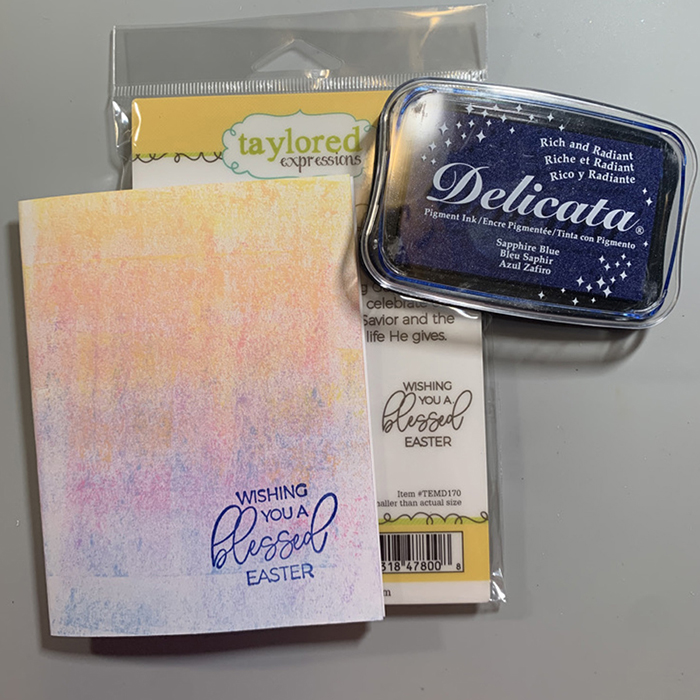
Step 6:
Returning to the die cut watercolor panel from step 2, stamp a sentiment on the lower right corner of the panel with Nocturne VersaFine Clair Ink and heat emboss with clear embossing powder. Then press more of the White Shimmer Delicata ink mixed with water onto the panel to add some sparkle. Allow to dry.

Step 7:
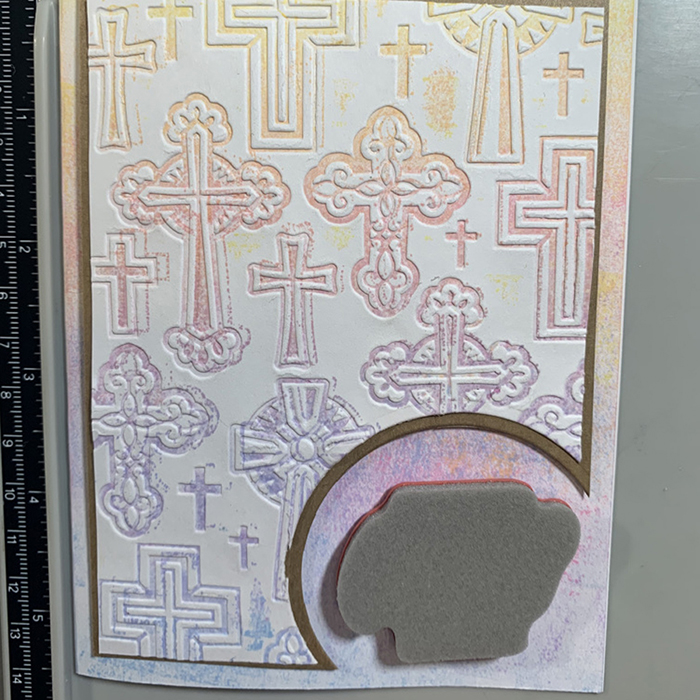
Assemble the card. Glue both parts of the watercolor panel onto an A2-sized white card base. Glue the mountain range as well as gold stars and rhinestones onto the panel. Then attach the dragon with foam tape to give her some dimension to finish the card.

Art Supplies

Imagine
• Delicata Ink – White Shimmer
• irRESTible Medium – Gold
• Memento Dual Marker – Desert Sand
• Memento Dual Marker – Lilac Posies
• Memento Dual Marker – Rich Cocoa
• Sheer Shimmer Craft Spray – Silver
• VersaFine Clair Ink – Nocturne
• Sponge Dauber

Other
• Altenew – foam tape -Instant Dimension Foam Tape
• Altenew – stamp set – Block Sentiments (retired)
• Mama Elephant – die set – Midnight Cover
• Mama Elephant – die set – Me and My Dragon
• Mama Elephant – stamp set – Me and My Dragon
• Scrappy Tails Crafts – embellishments – Starry Christmas Night mix
• Clear Embossing Powder
• Heat tool Glue
• Watercolor paper

Create a One-of-a-Kind Multimedia Thank You Card

By Anna Escalada-York

I used to be intimidated by the idea of multimedia cards, but all they are cards that have different types of products. This card features stamping, watercoloring with sprays and Amplify! Ink, and embossing.

Skill: Intermediate
Time: 2 hours

Directions:

Step 1:
Spray Sweet Plum Fireworks! Shimmery Craft Spray onto a 6” x 6” stencil and then flip the stencil over and gently press the stencil onto a piece of watercolor paper. Repeated this process with and Rose Gold Sheer Shimmer Craft Spray, partially overlapping part of the stencil on the watercolor paper. Repeat the process a few times, overlapping the stencil a few times and then set the panel aside to dry.

Step 2:
The next three steps use a layered floral stamp set. Stamp the outline of the flower with Nocturne VersaFine Clair ink onto another scrap of watercolor paper and then heat emboss with clear ink.

Step 3:
Stamp the second layer of the floral layer stamp set with Pink VersaColor ink onto the flower.

Step 4:
Stamp the third layer of the floral layered stamp set with Charming Pink VersaFine Clair ink. Then heat emboss with more clear embossing powder.

Step 5:
Die cut the flower with the corresponding die.

Step 6:
Use a sponge dauber to ink blend more Pink VersaColor ink onto the flower using a matching stencil–using more ink and pressure on the outer petals, and less ink and less pressure on the inner petals.

Step 7:
Press New Sprout Memento Dye Ink onto a scrap of watercolor paper to start to add green textured color onto the watercolor paper.

Step 8:
Spray Cottage Ivy Fireworks! Shimmery Craft Spray onto the same scrap of watercolor paper. Allow to dry.

Step 9:
Die cut leaves out of the green watercolor paper using two leaf cluster dies.

Step 10:
Stamp Spruce VersaFine Clair Ink onto a woodblock typewriter key stamp and press the die cut leaves onto the stamp. Set the leaves aside to let the ink dry.

Step 11:
Die cut the inked watercolor paper from step 1 with the second-largest die in a nesting A2-sized die set.

Step 12:
For more texture and interest on the panel, use the Gold irRESISTible Pico Embellisher’ fine tip applicator to add the medium directly onto part of the stencil. Then flip over the stencil and press it onto the watercolor panel. (You may want to put a paper towel over the stencil before pressing or you will probably get some on your hands.)

Step 13:
Run more Pink VersaColor ink along the edges of another piece of watercolor paper to make the edges pink. Then die cut the panel with the largest die from the nesting A2-sized die set from step 11.

Step 14:
Add a small drop of Black Radiant Neon Amplify! onto another sponge dauber and press the dauber onto the same woodblock typewriter stamp and partially stamp the smaller panel multiple times.

A couple of smudges were mistakenly stamped onto the panel, which were mostly dealt with by splattering more Black Radiant Neon Amplify! mixed with water onto a piece of acetate and then splattered onto the panel.

Step 15:
Die cut another piece of watercolor paper with a sentiment die and then spray the die cut multiple times with Rose Gold Sheer Shimmer Craft Spray.

Step 16:
Assemble the card by gluing the leaves and sentiment onto the smaller panel. Attach the flower to the panel with foam tape. Then glue the two panels together and glue them both onto an

A2-sized white card base. Finally, glue sequins around the flower.

Art Supplies

Imagine

• Amplify! Radiant Neon pigment ink – Black
• Fireworks! Shimmery Craft Spray – Cottage Ivy
• Fireworks! Shimmery Craft Spray – Sweet Plum (retired)
• irRESISTible – Gold Pico Embellisher
• Memento Ink – New Sprout
• Sheer Shimmer Craft Spray – Rose Gold
• VersaColor Ink – Pink
• VersaFine Clair Ink – Charming Pink
• VersaFine Clair Ink – Nocturne
• VersaFine Clair Ink – Spruce
• Sponge Daubers

Other

• Altenew – foam tape
• Altenew – die set – Amazing Things
• Altenew – die set – Just Leaves
• Altenew – stamp set – Amazing Things
• Altenew – stencil set – Amazing Things
• American Crafts – stencil – Storyteller Radiate
• Catherine Pooler – sequin mix – Sofia
• Pink & Main – die set – Notched Corner
• Simon Says Stamp – die set – Bold Thanks
• Old woodblock • typewriter key stamp
• Clear Embossing Powder
• Watercolor paper
• Die cutting machine
• Scissors
• Glue

Two Watercoloring Techniques with StazOn Studio Glaze

By Katy Ingram

Hello Friends! Katy here and today I am sharing two ways to watercolor with StazOn Studio Glaze. 

In today’s video tutorial I am sharing two watercolor techniques. The first is traditional watercoloring with a watercolor brush and the second technique is the popular ink smooshing technique. Both are great ways to use StazOn Studio Glaze and I hope you hive it a try. Check out the video to see the process in action. I hope you enjoy and thanks for stopping by. 

Skill: Beginner, Intermediate, Advanced

Time: 2 hours

Art Supplies

Imagine Products:

• Brilliance Moonlight White Ink 

• VersaFine Clair Twilight 

• VersaMark Ink

• Sheer Shimmer Spray Sparkle 

• irRESISTible Pico Embellisher Teal Zeal 

• irRESISTible Pico Embellisher Shimmer 

• 1/4 inch Tear It Tape 

• Mboss Embossing Powder White 

• StazOn Studio Glaze Claret 

• StazOn Studio Glaze Gothic Purple 

• StazOn Studio Glaze Blue Hawaii 

• StazOn Studio Glaze Midnight Blue 

• StazOn Studio Glaze Cactus Green 

Other Products Used:

• Spellbinders Arches Dies

• Ellen Hutson Mondo Sakura

• Simon Says Stamp Beautiful Flowers

• The Greetery Pretty Postmarks

• Princeton Neptune Watercolor Brushes 2/4Round

• Hot Pressed Watercolor Paper

How to Create a Vellum Valentine’s Treat Bag 

By LeeAnn McKinney

Hello friends and fellow crafters, LeeAnn here with a treat bag for Valentine’s Day that I created using vellum, cardstock, a stamp, a couple dies and some eat embossing.

Skill Level: Intermediate

Time: 25 Minutes

Directions:

Supplies Used

Imagine:

• On Point Glue

• VersaMark Dazzle

• Red MBoss –

• Tear It! Tape

Other Supplies:

• Gina K Designs Heavyweight White Cardstock

• Darice Heat Tool

• Kat Scrappiness Happy Valentines Day Die with Shadow

• Kat Scrappiness Stitched Scallop Tag Die

• Kat Scrappiness Say It with Hearts Stamp Set

• Gemini Junior Die Cutting Machine

How To Create a Mixed Media Valentine

By Katy Ingram

Hello Friends! Katy here and today I am using a variety of products to create this Love You card.

In today’s video tutorial I do some ink blending with VersaFine Clair Verdant and Warm Breeze. I haven’t used these two colors for ink blending before and they blended really well and the colors coordinate perfectly together. I used a heart stencil with VersaFine Clair Paradise to blend over the ink blended panel and then added some Sheer Shimmer Stix in Frost for a bit of shimmer.  I also pulled out some irRESISTible Spray in Paris Dusk and Silver to create some splatter. I finished the panel off by die cutting the words love and you with some metallic blue cardstock. Check out the video to see the process in action. I hope you enjoy and thanks for stopping by. 

Katy

Skill: Beginner, Intermediate, Advanced

Time: 30 minutes 

Directions:

Art Supplies

Imagine Products

• VersaFine Clair Verdant

• VersaFine Clair Warm Breeze

• VersaFine Clair Paradise

• Sheer Shimmer Stix-Frost

• irRESISTible Spray Paris Dusk

• irRESISTible Spray Silver

• irRESISTible Pico Embellisher Teal Zeal

• irRESISTible Pico Embellisher Silver

• 1/4 inch Tear It! Tape

Other Products Used

• Miss Ink Stamps Hand Drawn Hearts Stencil

• Layering Hearts Dies

• scrapbook.com/Pinkfresh Love and You Dies

• Blending Brushes

Pastel Easter Card Made Easy with Kaleidacolor

2022-March-Neva-EasterCard-Step9-Beauty_700x700

By Neva Cole 

See how to use the Kaleidacolor ink pad to create a pastel Easter Card with subtle style that can be completed in a short amount of time.  Layering with contrasting cardstock and texture added with embossing folders gives this card great dimension.

Skill:  Beginner

Time:  30 Minutes.

Directions:

2022-March-Neva-EasterCard-step1
Step 1

Trim white cardstock to 8.5″ x 5.5″ to make card base.  Fold in half and use a rubber brayer to ink the front of the card with Kaleidacolor in Baby Powder.  Move the brayer to fully cover the card and re-ink brayer as needed to create a well inked surface.  Pay attention to direction of ink pad and brayer to avoid mixing the ink colors beyond the ombre look.

2022-March-Neva-EasterCard-step2

Step 2

Trace the outside of a cross die on craft cardstock to create a matching layering piece.  Fussy cut the layer three time or use a electronic die cut machine to cut three layers.  Glue the layers together with OnPoint Glue.  Using a wet glue allows a little time to wiggle the layers into perfect position.

2022-March-Neva-EasterCard-step3

Step 3

Place die on white cardstock and die cut and pressure emboss with rubber mat.  Use a make-up sponge rolled to pick up ink in the same ombre of the Kaleidacolor ink pad and ink through the die onto the raised embossed areas.  Die cut two more layers and glue the colored die cut to the top of the first two white layers.

2022-March-Neva-EasterCard-step4

Step 4

Ink the raised portion of the embossing folder with Kaleidacolor Baby Powder in the same color direction as the card base.  Pressure emboss a 3.75″ x 5″ section of white cardstock.  The ink will transfer to the indentations of the design.

2022-March-Neva-EasterCard-step5

Step 5

Trim a section of Kraft cardstock to 4″ x 5.25″.  Layer the assembled parts of the card without adhering them together to determine the placement of the sentiment.  I choose the appropriate size circle die to die cut the corner of the pressure embossed white cardstock.

2022-March-Neva-EasterCard-step6

Step 6

Using the next size smaller circle die and pressure embossed white cardstock to determine placement of the smaller circle die on the Kraft cardstock and die cut.

2022-March-Neva-EasterCard-step7

Step 7

Determine placement of sentiment and remove the layers.

2022-March-Neva-EasterCard-step8

Step 8

Stamp the sentiment in Delicata Sapphire Blue.

2022-March-Neva-EasterCard-Step9-Beauty_700x700

Step 9

Adhere the layers of the card together.  The Kraft cardstock layer is adhered with dimensional foam adhesive.  All the other layers used Tear It! Tape for best adhesion.

Art Supplies

Imagine
Other
  • Brayer
  • Spellbinders Crosses Two, Standard Circles Large and Small
  • Darice Crosses Embossing Folder
  • Scan n Cut
  • Taylored Expressions Inside Scoop Easter Blessings
  • Dimensional Foam Adhesive
  • Make-up sponge