Triple-Step Stamped Card Made Simple with Memento Ink

Feb_22_Neva_SoKindofYouCard_IG_2

By Neva Cole 

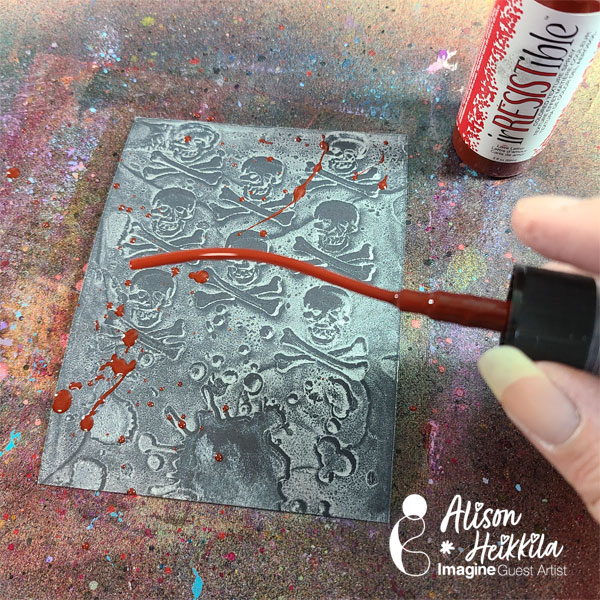
See how to use the Memento ink line to created a cohesive matching layered card in just a few steps.  The beauty of this particular method is you may make a number of cards depending on your needs in more than one color scheme as shown in the bonus step.  Finishing touches use irRESISTible Pico Embellisher, VersaMark Clear ink, and Embossing Powder.

Skill:  Beginner

Time:  30 Minutes plus drying time.

Directions:

Feb_22_Neva_SoKindofYou_Step_1
Step 1

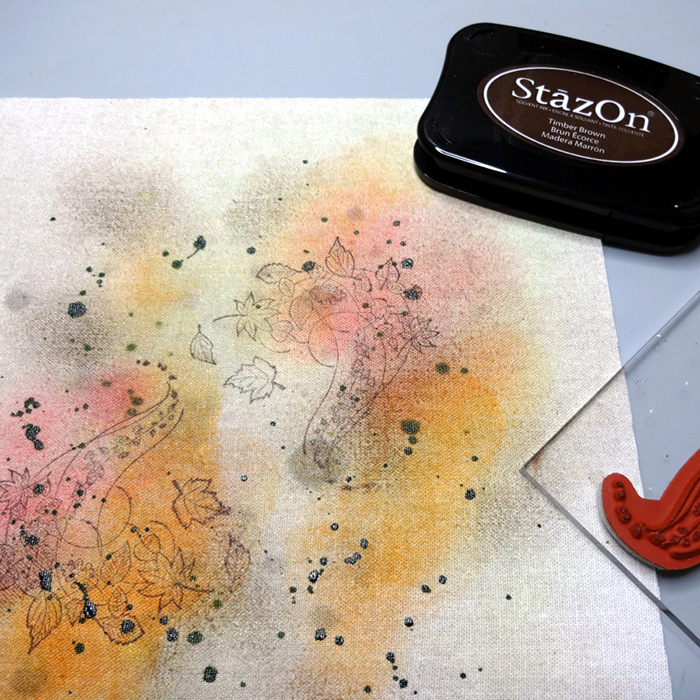
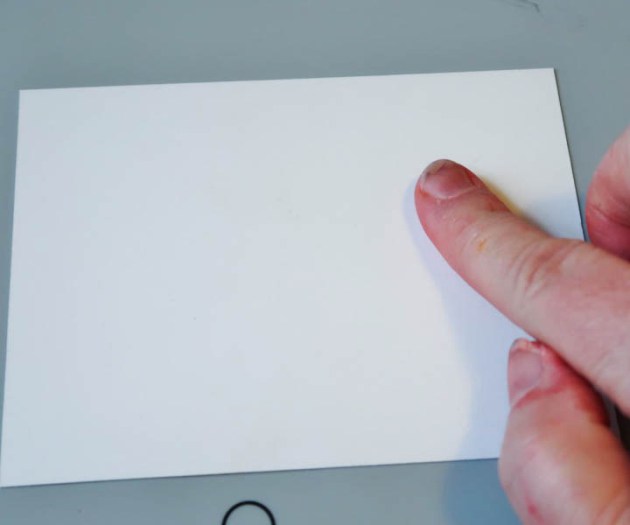
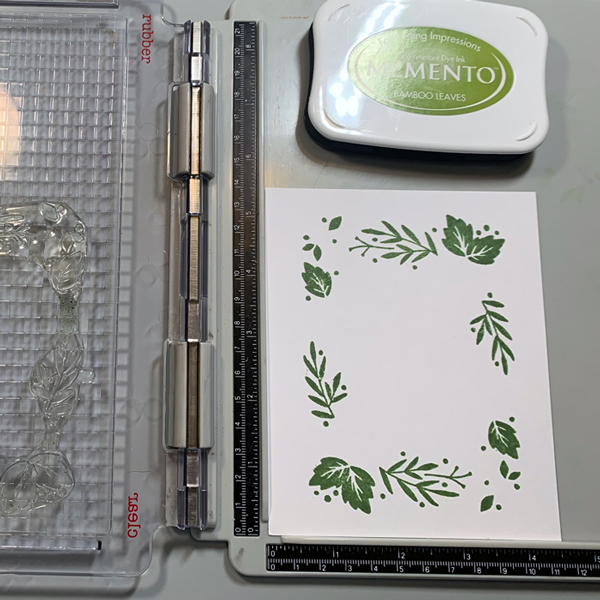
Trim white cardstock to 4.25″ x 5.5″, this will allow a quicker placement in step 2 on the stamp platform.  Center Image “A” from the Concord & 9th Triple-Step Floral Frame Stamp on the white cardstock and then adhere to the stamp platform.  Ink Image “A” with Memento Bamboo Leaves.  Double or triple stamp the image to create even darker images.  (If doing multiple cards, continue stamping Image “A” until you have your desired quantity.)

Feb_22_Neva_SoKindofYouCard_Step_2

Step 2

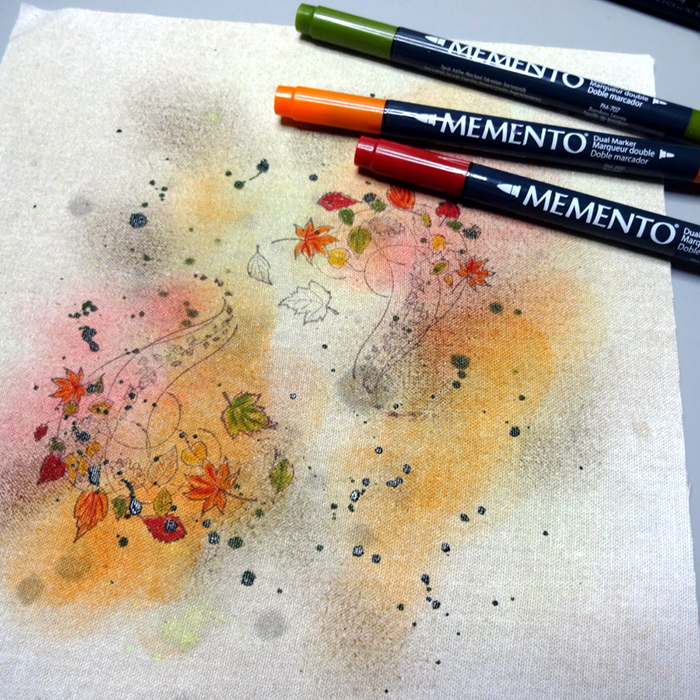
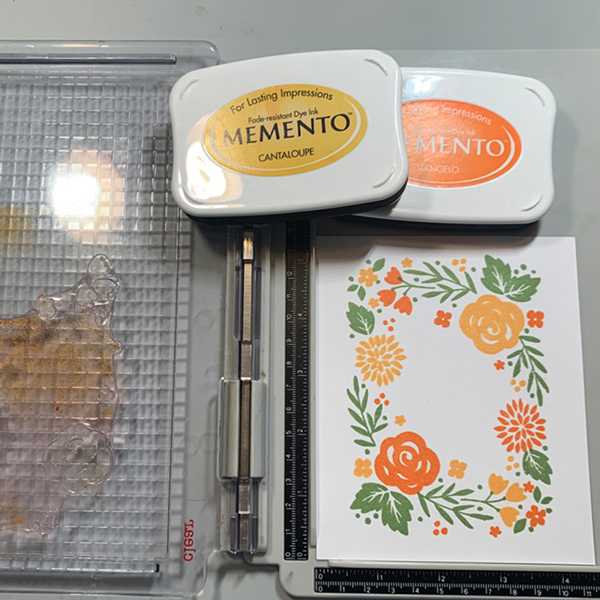
Place Image “B” from the Concord & 9th Triple-Step Floral Frame Stamp on the white cardstock so the small tulip shaped flowers line up with the stems.  Look directly down through the stamp to judge the placement of the stamp.  In this version Memento Cantaloupe is stamped first.  Turn the image 180 degrees and double check image placement, then stamp in Memento Tangelo.  (If doing multiple cards, continue stamping Image “B” until you have your desired quantity.)

Feb_22_Neva_SoKindofYou_Step_3

Step 3

The stamp set has two stamps that will add the center of the roses and an additional layer to the small tulip shaped flowers.  Use the same method as Step 2 for placement.  If the center of the rose is slightly off, stamp again until the white area is inked.

Feb_22_Neva_SoKindofYou_Step_4

Step 4–Bonus

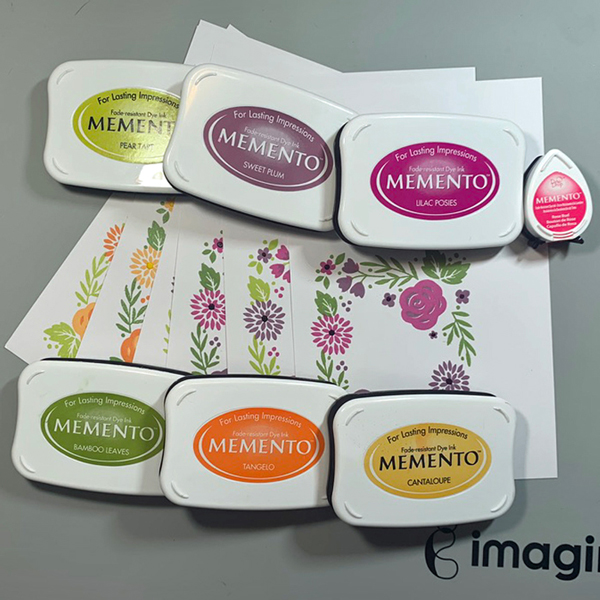
Shown are the additional card fronts stamped during my session of triple-stamping.  Once the layering stamps were in place I like to make multiple stampings for future use.

Feb_22_Neva_SoKindofYouCard_Step_5-B

Step 5

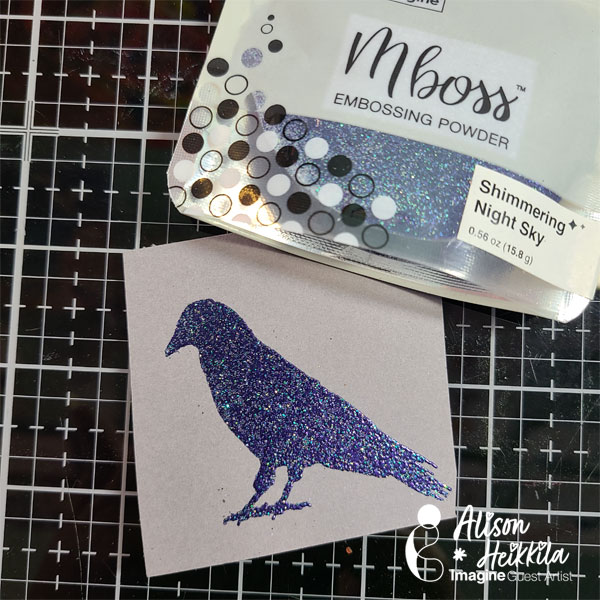
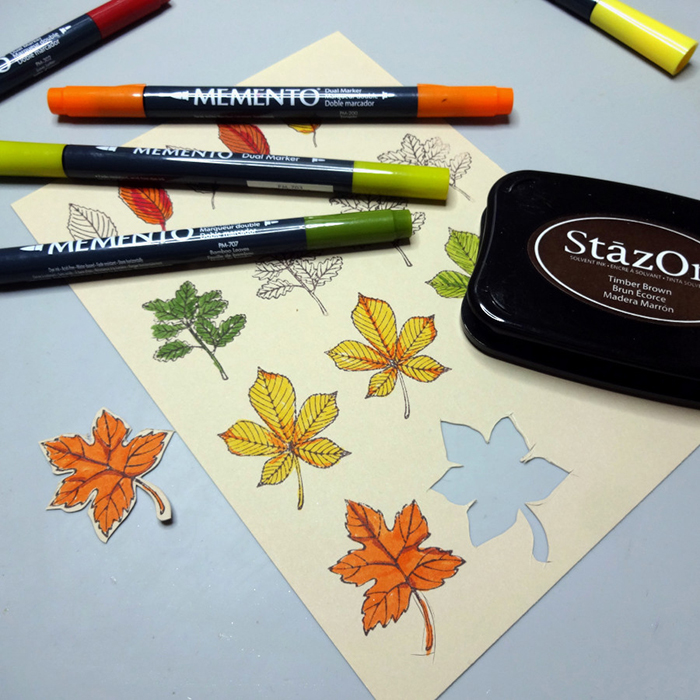
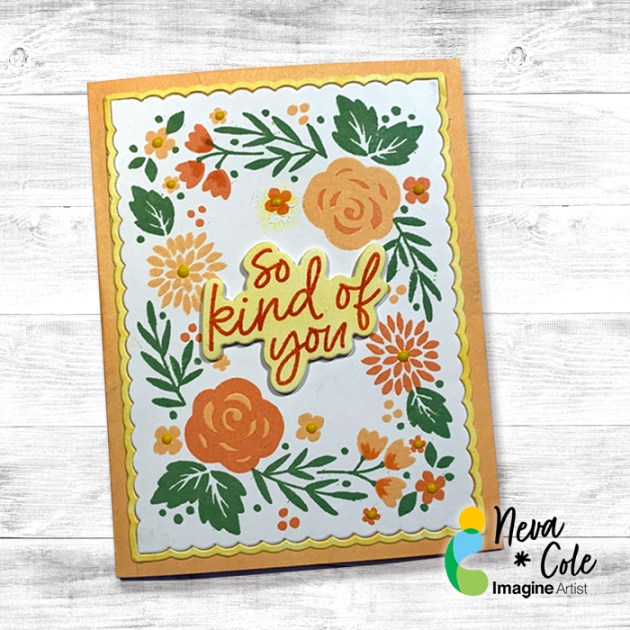
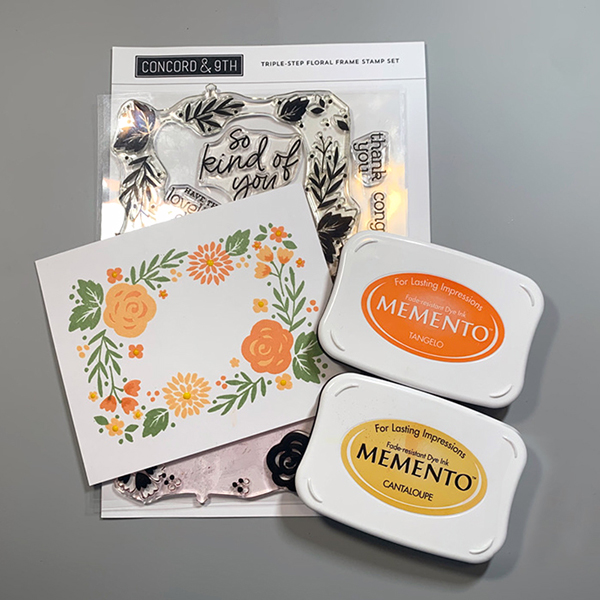
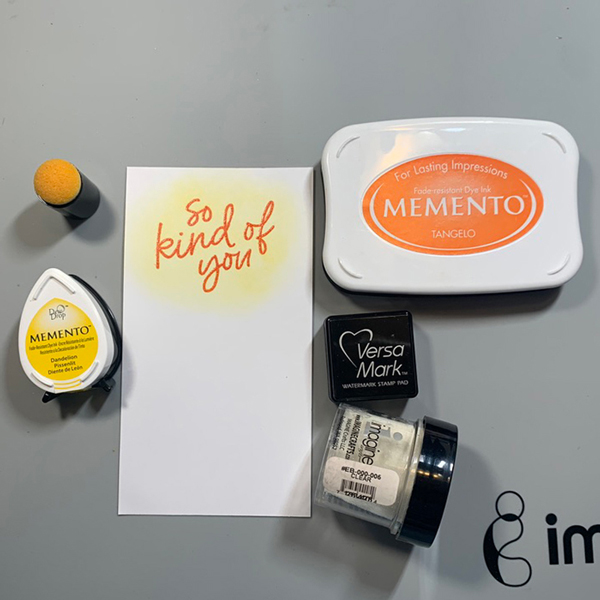
Stamp “So Kind of You” in Memento Tangelo using a stamp platform.  Stamp over the image with VersaMark Clear ink and heat emboss with clear embossing powder.  Use an ink blusher with a light hand to color around the image, the embossed sentiment will resist the ink.  This sentiment has a matching die to allow you to die cut before adhering to your card front.

Feb_22_Neva_SoKindofYouCard_Step_6

Step 6

Trim white cardstock to 5.5″ x 8.5″ and fold in half to create an A2 card base.  Ink the edges using an ink dauber with Memento Cantaloupe.  The card front die also creates a very narrow border, this one is inked with Memento Dandelion using an ink dauber.

Feb_22_Neva_SoKindofYouCard_Step_7

Step 7

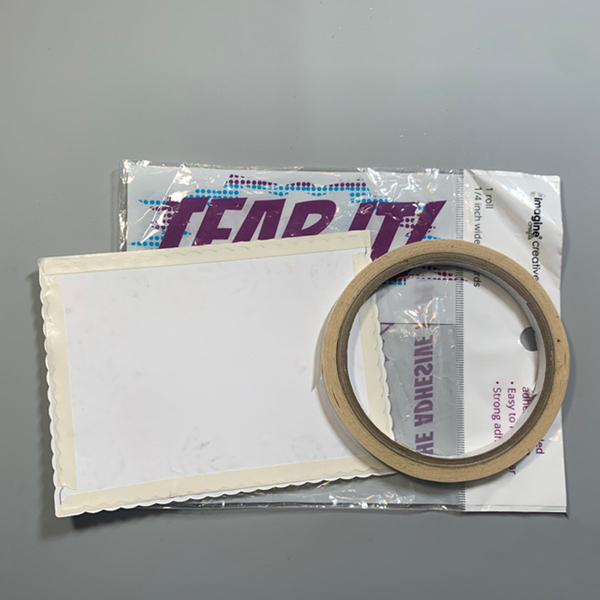
Place the card front face down and align the Dandelion border to the card front.  Carefully place Tear It! tape around all four edges of the card front.  Take time to “catch” the border without having the Tear It! tape show on the front.

Feb_22_Neva_SoKindofYouCard_Step_8

Step 8

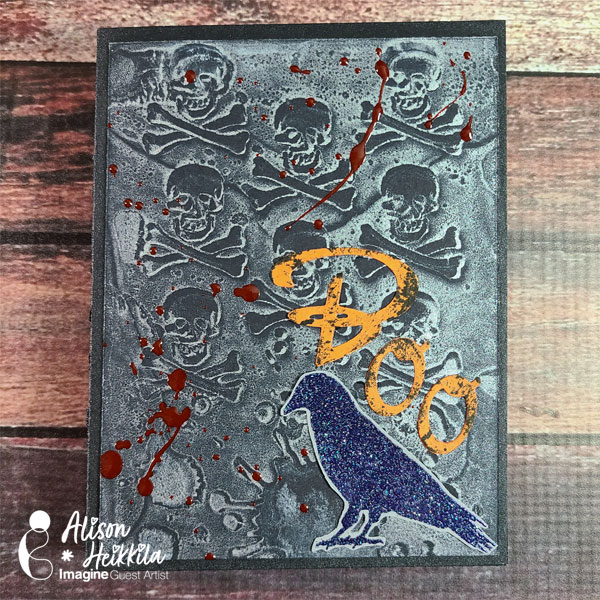
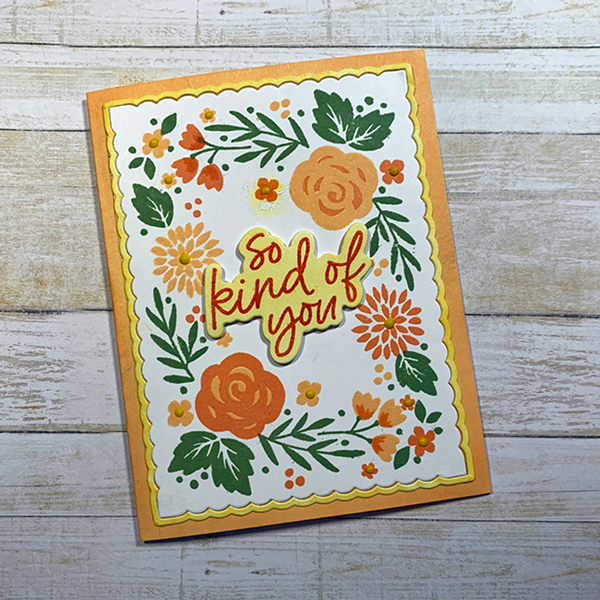
Adhere card front to card base and add the die cut sentiment with dimensional foam adhesive.

Feb_22_Neva_SoKindofYouCard_Step_9

Step 9

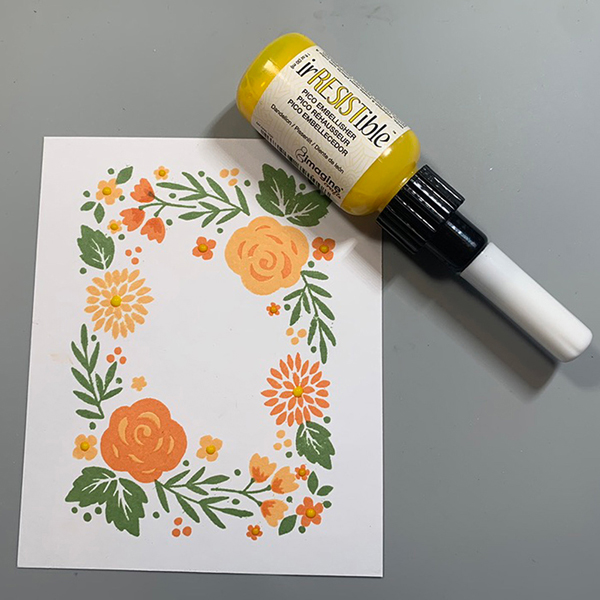
Learn from my mistake!  Add the irRESISTible Pico Embellisher in Dandelion AFTER the card is assembled to the center of the flowers besides the roses.  The irRESISTible Pico Embellisher will retain the rounded shape after drying.  When I die cut the card front after adding the irRESISTible Pico Embellisher the dots were flattened.  However it was an easy rescue as another layer of the irRESISTible Pico Embellisher added the rounded dimension back to the flower centers!

Art Supplies

Imagine
Other
  • Concord & 9th Triple-Step Floral Frame stamp and die
  • White cardstock
  • Dimensional foam adhesive
  • Stamp platform

How to Make a Spooky Card

Crow-10-600

By Alison Heikkila –

Halloween is a great time to experiment with deeper shades, interesting textures, and unique combinations. Things don’t need to be pretty or perfect…in fact, the weirder and more off-kilter they are, the better! Let’s use a variety of Imagine products to make a spooky card for Halloween.

Skill Level: Beginner to Intermediate
Time: 30 Minutes, including drying time

Directions:

Crow-1

Step 1:

Apply Silvery Shimmer Delicata Ink Refill to a 6×6 gel printing plate and roll out with a brayer.

Crow-2

Step 2:

Lay your stencil on to the gel plate. Using a piece of scrap paper, rub the negative space areas to pick up the ink. Pull the print. You won’t be using this print for this project, but you can save it for another time.

Step 3:

Lift the stencil off of the plate.

Step 4:

Lay a piece of 4″ x 5 1/4″ black cardstock on top of the plate, where the stenciled image is. rub the paper on to the plate firmly, making sure to rub all areas to ensure a clean pull.


Crow-3

Step 5:

Pull the print.

Crow-5

Step 6:

Splatter irRESISTibles Spray in Love Letter on to the gel print. I open the bottle and tap the straw to get nice, big splatters. Let dry.

Crow-4

Step 7:

On a piece of gray cardstock, stamp a solid or silhouette image with VersaMark ink. I used a crow.


Step 8:

Sprinkle Shimmering Night Sky Mboss powder on to the inked image, tap off the excess, and heat set. Then, you can fussy cut the image out.

Crow-6

Step 9:

Die cut your sentiment out of a deep orange cardstock.

Step 10:

Using Tuxedo Black Memento Ink, press the front side of the letters into the pad gently. Memento ink pads have a wonderful texture, which will work perfectly with our creepy card.

Step 11:

On a black A2-sized card base, ink the edges with Black Shimmer Delicata Ink.


Step 12:

Adhere all of your elements on to the card base.


Crow-7

Art Supplies:

Imagine:

• Delicata Ink in Black Shimmer
• Delicata Reinker in Silvery Shimmer
• irRESISTible Spray in Love Letter
• VersaMark Ink
• Mboss in Shimmering Night Sky
• Memento Ink in Tuxedo Black

Other:

Black, Orange and Gray cardstock
Tim Holtz: Crossbones Stencil, Crow Stamp
6×6 Gel Printing Plate
Alphabet Dies

Learn How to Make An Autumn Shadow Box


2021-sep-kyriakos-autumn-shadow-box-horizontal_main

By Kyriakos Pachadiroglou

– Combine natural wood pieces, paper and a house shape cut from SHEET metal to capture the colors of the shadow and create a shadow box to decorate your home. Color a piece of fabric with MEMENTO inks and Fireworks! Shimmery Craft Sprays to create a background in earth color shades and place natural wood and paper leaves colored with MEMENTO Markers.


Skill: Advanced

Time: 1 Hour


Directions:

2021-sep-kyriakos-autumn-shadow-box-step1

Step 1

Place Tear It! Tape on the back base of the shadow box and cover it with the cotton fabric.


2021-sep-kyriakos-autumn-shadow-box-step2

Step 2

Spray with the Fireworks! Shimmery Craft Spray and let them dry.


2021-sep-kyriakos-autumn-shadow-box-step3

Step 3

Distress the fabric with MEMENTO Tangelo, Lady Bug and Desert Sand ink pads using Sponge Daubers. Sprinkle some drops of irRESISTible Bamboo Leaves color.


2021-sep-kyriakos-autumn-shadow-box-step4

Step 4

Stamp with the Blowing Leaves stamp and the StazOn Timber Brown.


2021-sep-kyriakos-autumn-shadow-box-step5
Step 5

Color the leaves with MEMENTO Markers.


2021-sep-kyriakos-autumn-shadow-box-step6
Step 6

Stamp leaves and color them with the MEMENTO Markers adding details with darker ones. Cut around the leaves to separate.


2021-sep-kyriakos-autumn-shadow-box-step7

Step 7

Stamp the Autumn sentiment with StazOn Timber Brown and cut around.


2021-sep-kyriakos-autumn-shadow-box-step8

Step 8

Cut a house shape using the full length of a SHEET metal postcard.


2021-sep-kyriakos-autumn-shadow-box-step9

Step 9

Color the SHEET metal house with StazOn Timber brown and Black Cherry ink pads and cover with the GlazOn matte.

2021-sep-kyriakos-autumn-shadow-box-step10

Step 10

Glue the slices of the wood on the fabric background and add the paper leaves.

2021-sep-kyriakos-autumn-shadow-box-step11

Step 11

Finally place the SHEET metal house, the sentiment and any further embellishments.

2021-sep-kyriakos-autumn-shadow-profile

Art Supplies:

Imagine

Fireworks! Shimmery Craft Sprays- Desert Sand, Rich Cocoa, New Sprout

MEMENTO Ink Pads – Tangelo, Lady bug, Desert Sand, Dandelion

irRESISTible – Bamboo Leaves

StazOn – Timber Brown, Black Cherry

MEMENTO Dual Tip Markers – Love Letter, Dandelion, Cottage Ivy, Pear Tart

SHEET Metal – Postcard

GlazOn – Matte

Tear It! Tape

Sponge Daubers


Other

Shadow Box Framed

Card Stock White

Cotton Fabric

Slices of Wood

Crackerbox & Suzy stamps – Autumn Shows, Blowing Leaves

Glass Beads


Create a “Hello Friend” Card with Pico Embellisher

by Iris Rodriguez

Create a "Hello Friend" Card with Pico Embellisher

I love stamps as much as the next crafty person. Sometimes, I like to hand draw my own images though. Did you know you can draw your images with Imagine’s irRESISTible Pico Embellisher? IrRESISTible is a texture medium; which adds dimension to your project. It comes with a fine-tipped applicator for writing or making doodles. For the background, I used various All-Purpose Inks to create a watercolor painted look and then drew on top with the Pico Embellisher.

Skill: Beginner/Intermediate
Time: 30 minutes

Directions


Step 1

Determine how many colors of All-Purpose Ink. Prepare a water container for each color, so that you do not contaminate the colors; also, avoids running the risk of your ink turning into a mud color. Use a different for each color, or wash the brush between each color if using the same brush.


Step 2

First, wet the area with plain water. Place a small amount of ink into one of the ink wells. Add water to the ink and brush onto the paper.


Step 3

Repeat the same process for each color. Do not blend the colors; just lay them next to each other. Dry the paper.


Step 4

Brush on Creative Medium in order to seal in the All-Purpose Ink. Draw your image using Zeal Teal irRESISTible Pico Embellisher. If you are not used to this medium, first practice drawing on a piece of scratch paper. Always squeeze out the Pico Embellisher onto scratch paper to eliminate the bubbles, before applying to your project. Finally, stamp on sentiment and assemble the card.

Supplies

Imagine
Other
  • Watercolor paper
  • Ink well palette dish
  • Paintbrush
  • Cardbase – black

Learn a Simple Smoosh Technique Using Memento Inkpad

by Melissa Andrew

Learn a Simple Smoosh Technique Using Memento Inkpad

Today, I show you a simple technique using your Memento DewDrops. You don’t need stamps when you have fabulous inks! I choose colors of Memento that work well together for an interesting background.

Skill: Intermediate
Time: 30 minutes

Directions

Supplies

Imagine
Other
  • Catherine Pooler Stamp – Feathered Friends
  • Catherine Pooler Chevron Divide Coverplate
  • White Cardstock
  • Bristol Smooth Paper
  • Copic Alcohol Markers

Use a Mirror Technique to Create a Cute Mermaid Card

by Roni Johnson

Use a Mirror Technique to Create a Cute Mermaid Card

Imagine’s Craft Mat is a handy tool to have in your crafting arsenal. Not only is it great for keeping your work surface clean but there are many techniques you can use it for as well. Take the above card for example. Can you tell which mermaid is stamped and which one is a mirror image? Bet you can’t tell, can you? Find out the answer below….

Skill: Beginner
Time: 45 minutes + dry time

Directions


Step 1

Stamp the desired image on to the Craft Mat using VersaFine Clair ink. VersaFine Clair is an excellent choice for mirror images as there is a nice open time and it creates such a crisp clean image when stamped.


Step 2

Place a piece of cardstock over the image stamped on the Craft Mat and burnish with your finger.


Step 3

Carefully lift the paper. Wipe the excess ink from the Craft Mat with a damp cloth. It’s as simple as that. You may finish the card as desired. Did you know that the Craft Mat is also a great palette for water coloring? Simply scribble Memento Dual-Tip markers onto the craft mat. You may then blend and pick up the inks with a water brush.


Step 4

To finish off the example I stamped a second mermaid directly to paper and added a sentiment.


Step 5

I then watercolored the image as desired using Memento Dual-Tip Markers and a water brush.


Step 6

I added a bit of Shimmer Pico Embellisher to various areas to add a bit of shine and sparkle. The green-tailed mermaid was the mirror image.

Supplies

Imagine
Other
  • White Cardstock
  • Hero Arts – Mermaid Kisses
  • Waterbrush