By Helen Gullett
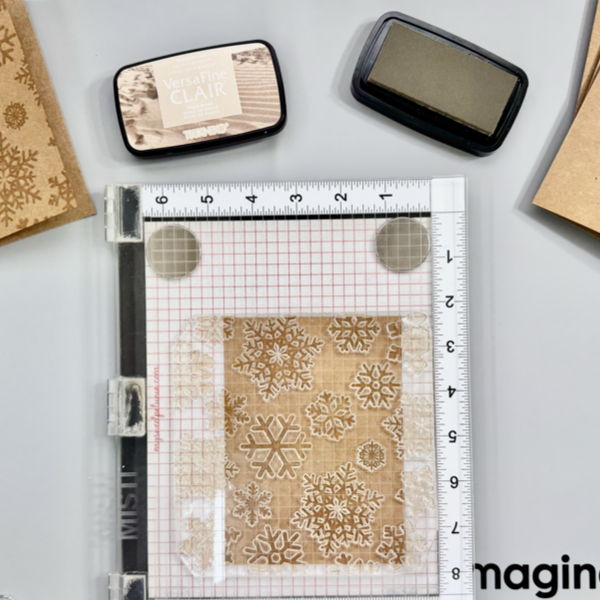
Hello crafty friends… ‘Tis the season when I like to mass-produce handmade holiday cards. So, today we will make a set of five snowflake cards using some cardmaking techniques such as stamping, die cutting, and heat embossing.
Skill: Intermediate
Time: 30 minutes
Direction:
Step 1
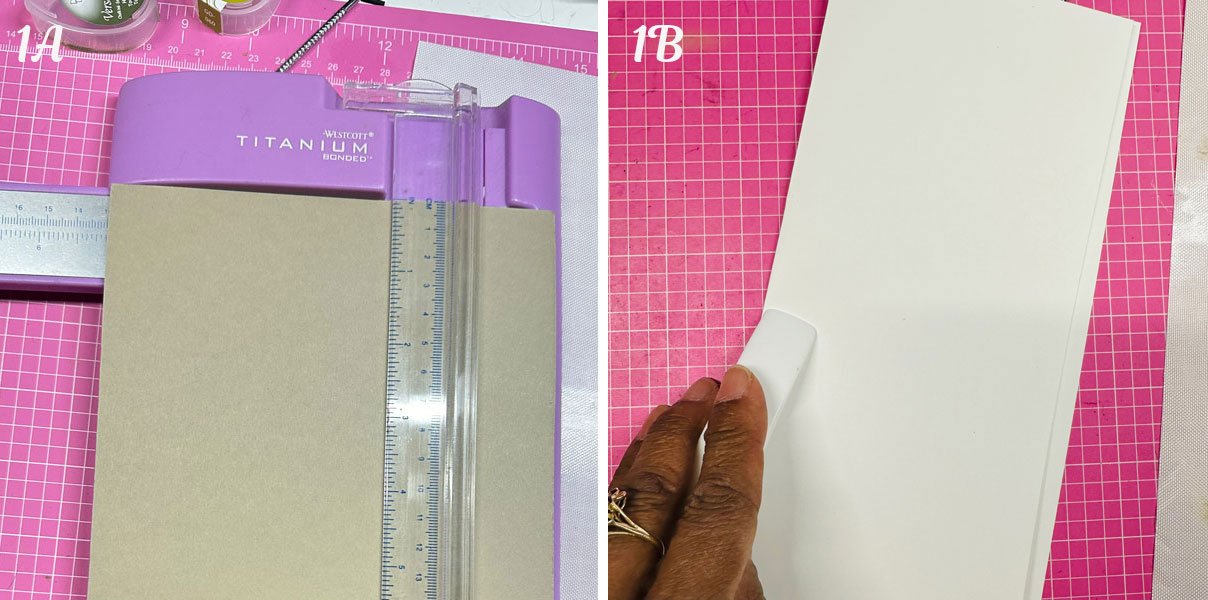
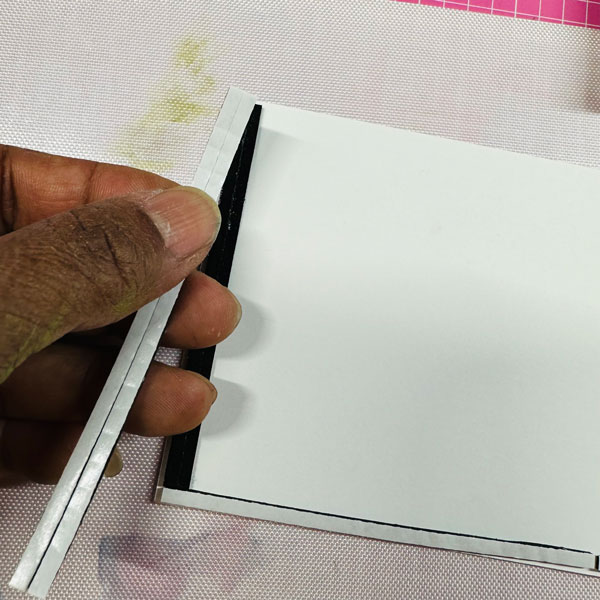
Make two card bases out of one 8.5 inch x 11 inch kraft cardstocks by cutting it in half. You can cut two or more cardstocks to make more card bases all at once. Score in the middle of the cardstock and fold it into an A2 card base.
Put the card on the stamping tool and start stamping it with the large snowflake background using VersaFine Clair Sand Dune ink pad.
Set them aside and let the ink to dry.
Step 2
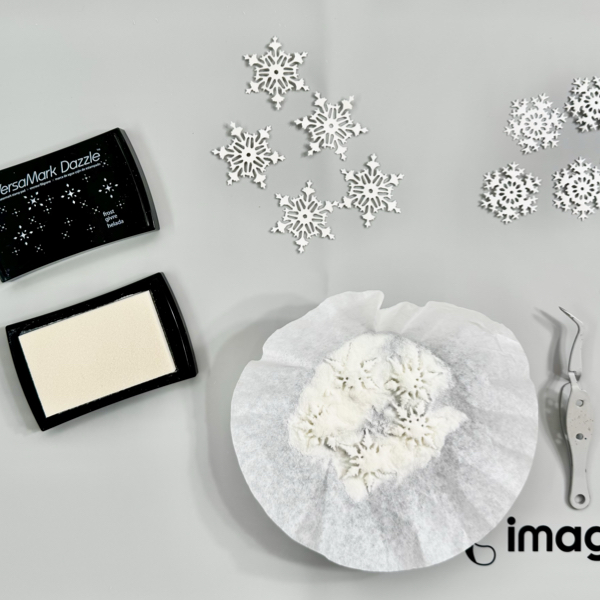
Cut out a bunch of snowflakes with the small snowflakes die set out of the white cardstock.
On each of the snowflakes, add the WaterMark Dazzle Frost ink, then add some of the clear embossing powder, and heat it up with a craft heat gun.
Step 3
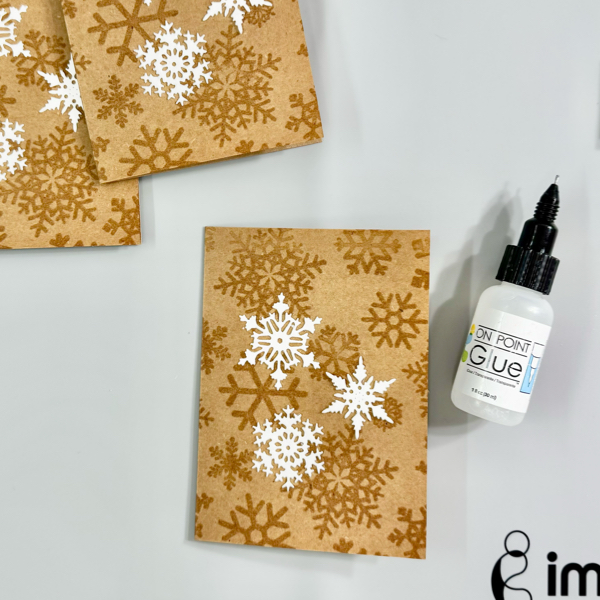
Add 3 snowflakes on each of the card fronts using the On Point Glue.
Set them aside until the glue dries well.
Step 4
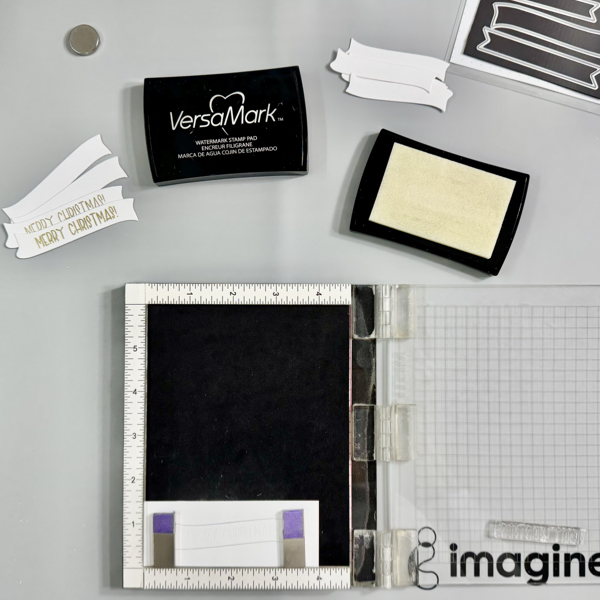
Die cut the banners for the sentiment with one of the Banners dies. Do not throw away the negative cut out, you can use it as a holder when stamping the sentiment.
Place a banner back inside the negative cut out, hold it with the magnet, and stamp it with the sentiment using the VersaMark Original ink pad. After the stamping, add some of the gold embossing powder, then heat it up with a craft heat gun.
Repeat the step for all the banners.
Step 5
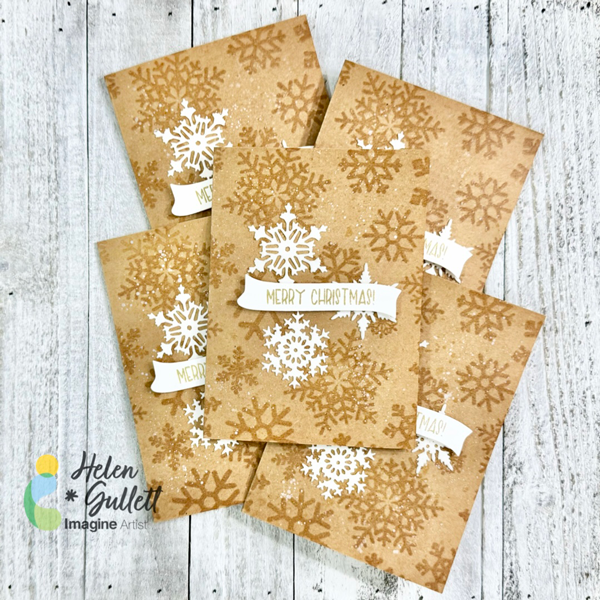
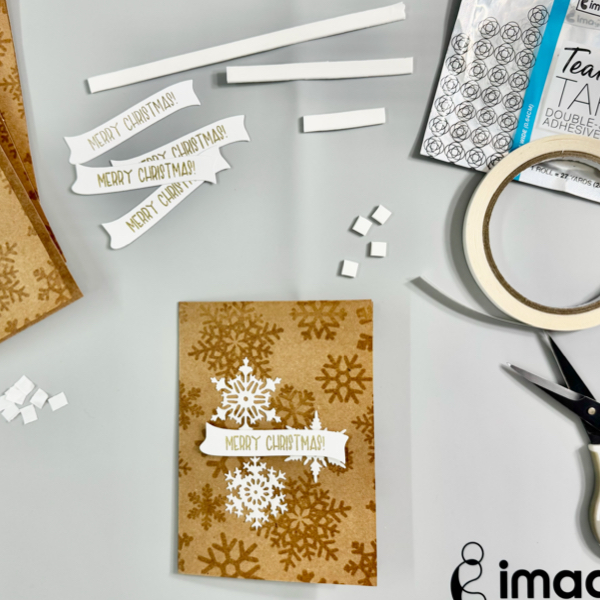
Add some of the Tear It! Tape on both sides of a piece of white fun foam to make your own foam tape.
Add some of the foam tape on the back of a banner and add it to the front card.
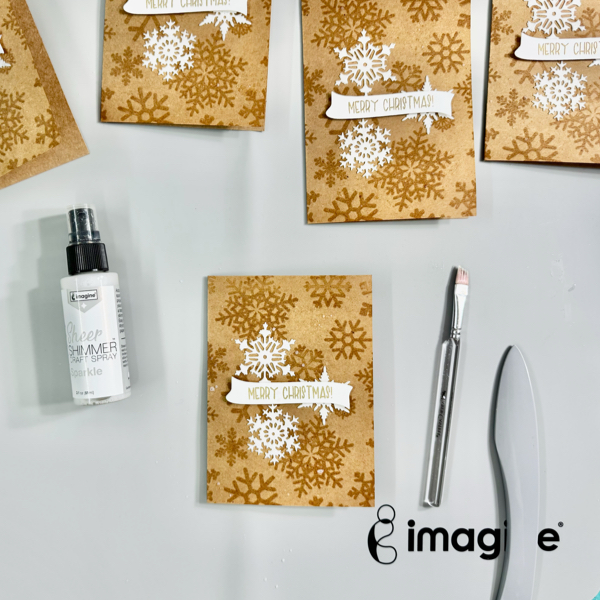
Step 6
Add some shimmer to the card by adding some splatters of the Sheer Shimmer Spray – Sparkle using a small flat or round brush.
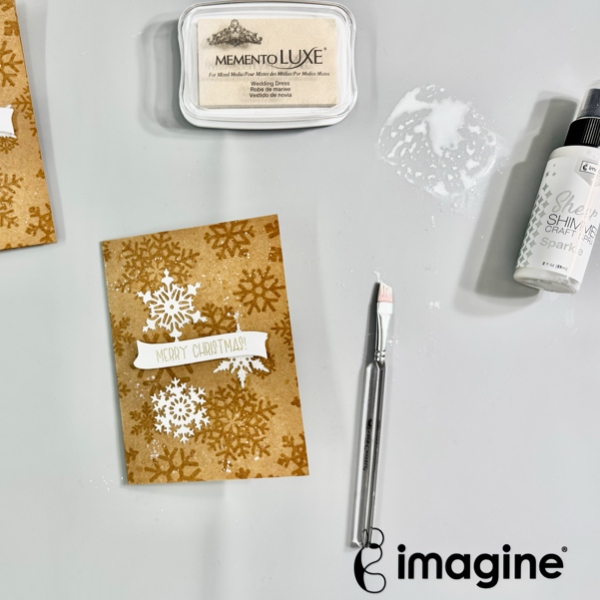
Step 7
To add extra snowy effect to the card, a mix of Memento Luxe Wedding Dress ink and Sheer Shimmer Sparkle spray on the craft mat. Add some more splatters of the white sparkly ink using a small flat brush to the card front.
Use a craft heat gun to dry the whole front card.
All done.
I hope you like this mass-produced snowflake card idea. You can make a bunch of cards with only one design in a short crafting time.
Thank you for stopping by our blog today. Have a wonderful day!
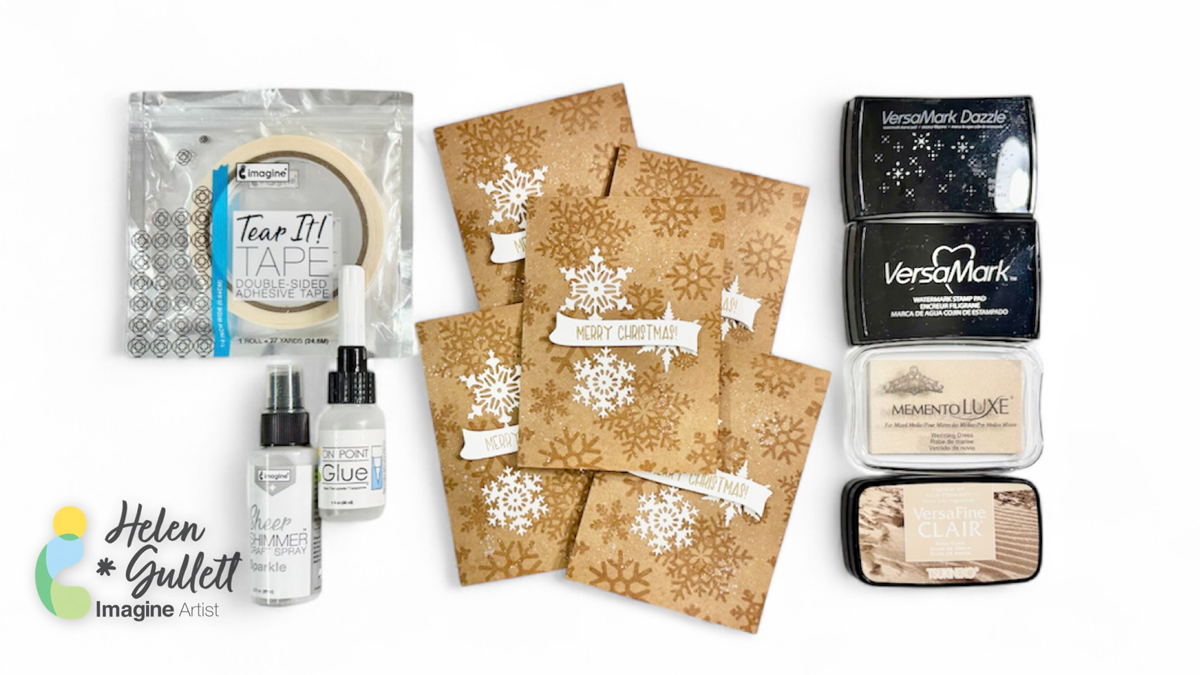
Craft Supplies
Imagine Crafts:
- VersaFine Clair (Sand Dune)
- Memento Luxe (Wedding Dress)
- VersaMark (Original and Frost)
- Sheer Shimmer Spray (Sparkle)
- Tear It! Tape
- On Point Glue
- Imagine Craft Mat
- Staz-On All Purpose Stamp Cleaner
Others:
- Lantern Light Stamp Set (Creative Worship Stamps)
- Large Snowflake Background Stamp Set (Creative Worship Stamps)
- Small Snowflake Die Set (Creative Worship Stamps)
- Banner Die Set (Creative Worship Stamps)
- Stitched Tags Nesting Die Set (STAMPlorations)
- Clear embossing powder
- Gold embossing powder
- Kraft Cardstocks
- White Cardstocks
- Small flat paint brush
- Stamping Tool
- Stamping Blocks
- Die cutting machine