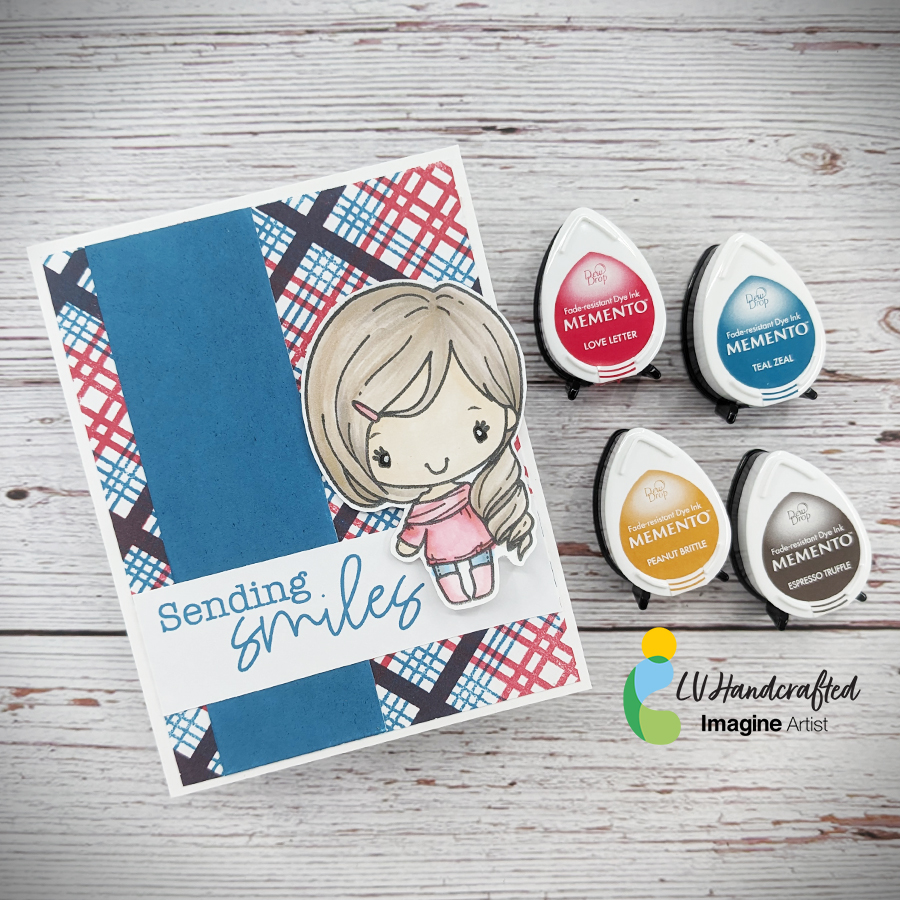
– Hello friends! This is Linh (or LV Handcrafted on all the socials). In today’s video I’m showing how to use your Memento Dew Drop inks to create a perfectly coordinated card. First, I created a background using Love Letter and Teal Zeal to create a plaid. I made a custom ink color by over-stamping multiple times with both colors! I used Teal Zeal to create a coordinating solid color cardstock by just swiping it across white cardstock. Finally, I smooshed Love Letter and Teal Zeal and used a waterbrush pen to color in my stamped image. For the skin, I used Peanut Brittle and for the hair I used Espresso Truffle.
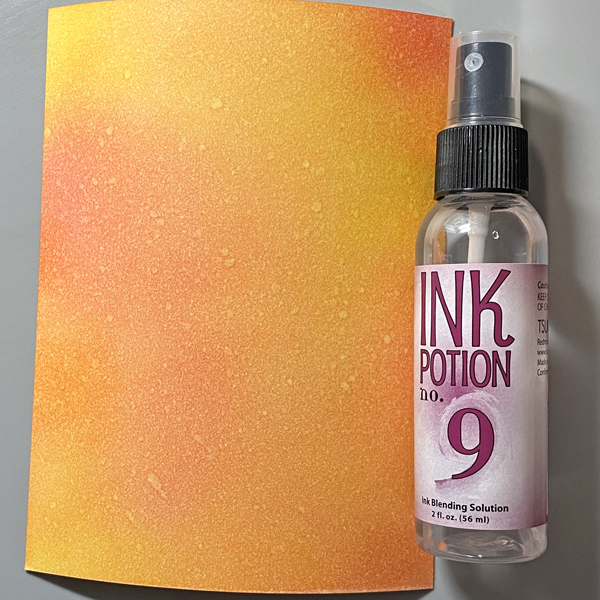
Sponge Dandelion Memento randomly over a 4” panel of Bristol paper or other hydrophilic paper. Repeat with Canteloupe, Tangelo, and Rose Bud until the panel is covered with colors and the inks are blended.
Step 2:
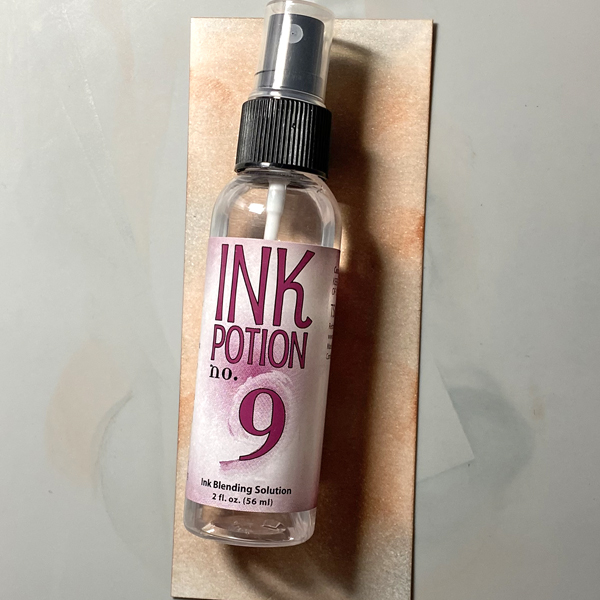
Spray the panel with Ink Potion No. 9. Let the solution sit for a minute. Heat set.
Step 3:
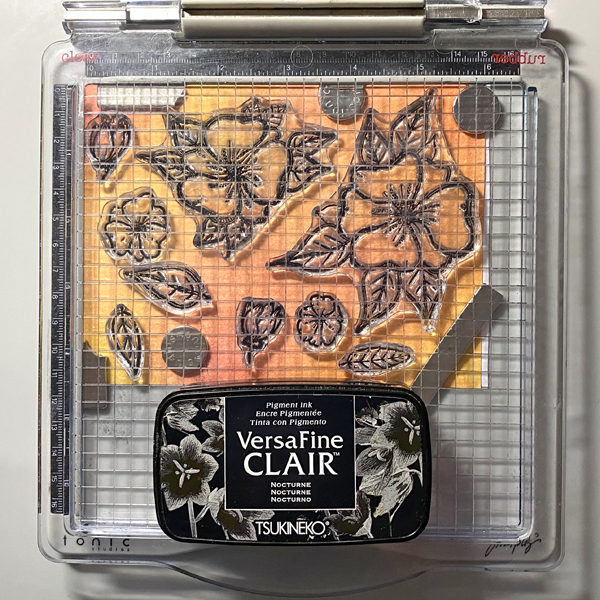
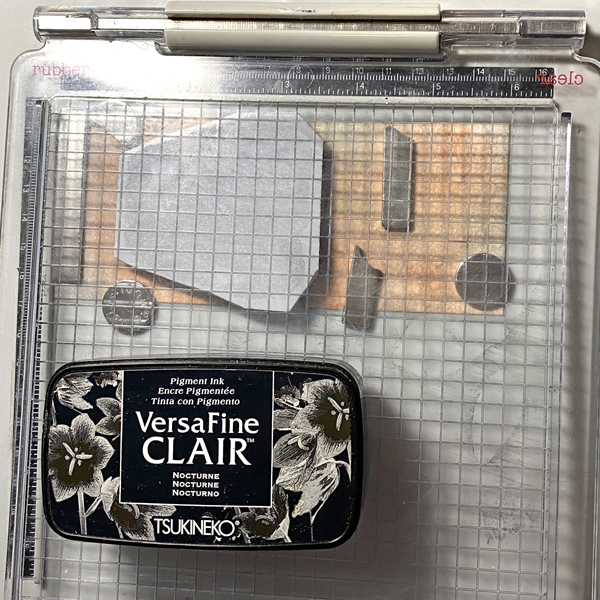
Use magnets to secure the ink-sponged panel to a stamping platform. Arrange the flower and leaf clear stamps from the Florals Set 1 facedown on the panel. Ink the stamps with Nocturne VersaFine Ink and stamp. Heat set the panel.
Step 4:
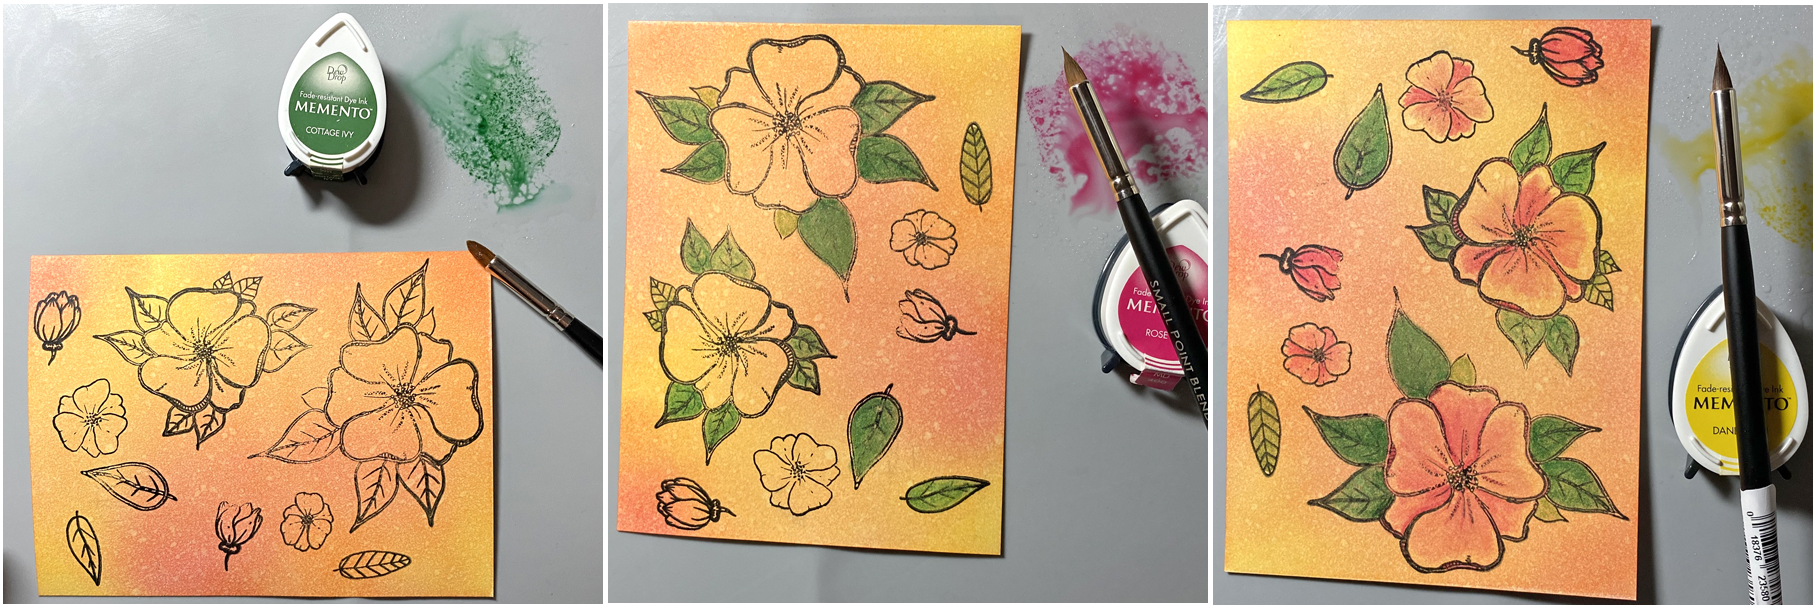
Smoosh the Cottage Ivy Memento Dew Drop Ink Pad onto the craft mat. Mist with water. Use a paint brush to apply diluted green ink to the leaves. Repeat this process with New Sprout and Bamboo Leaves Memento Ink to color the other leaves.
Smoosh the Rose Bud Memento Dew Drop Ink Pad onto the craft mat. Mist with water. Use a paint brush to apply the ink to the flowers. Repeat this process with Dandelion Memento ink pads.
Heat set the panel thoroughly.
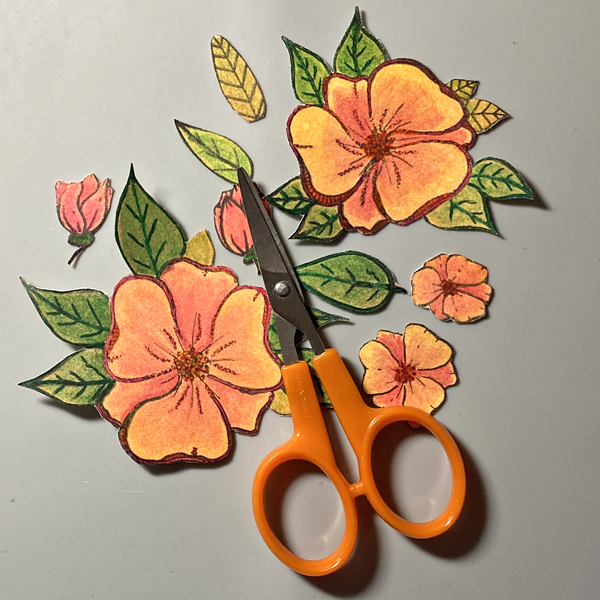
Step 5:
Fussy-cut the flowers and the leaves. Edge with a dark marker.
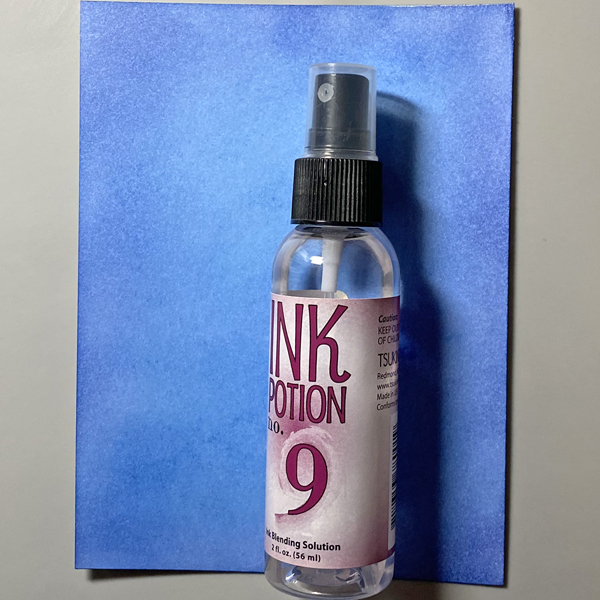
Step 6:
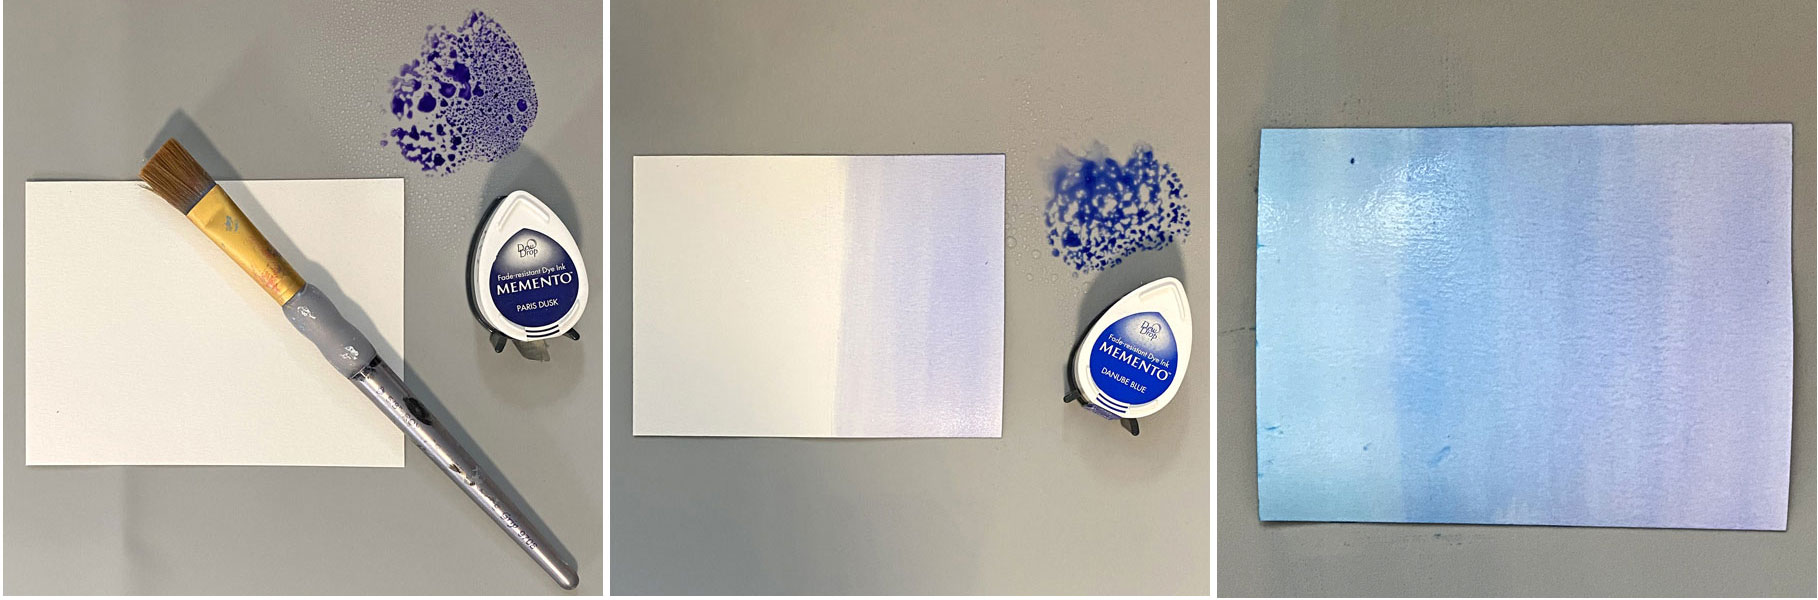
Sponge a 4.5 x 6” panel of Bristol paper with Blue Danube and Paris Dusk Memento Ink onto the panel to create a blended blue background panel.
Step 7:
Spray the panel with Ink Potion No. 9. Let the solution sit for a minute. Heat set.
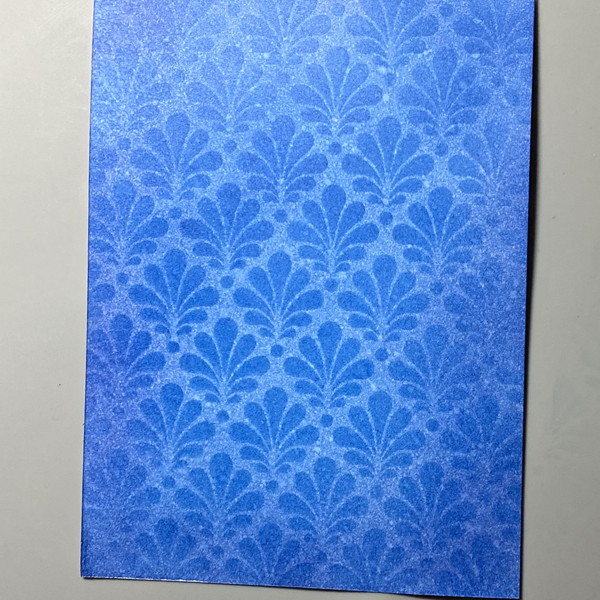
Step 8:
Use removable tape to secure the inked panel to the back of the Ornate Stencil.
Sponge Blue Danube Ink over the stencil onto the panel.
Remove the stencil and heat set the ink.
Trim the panel to 4.25”. Add the washi tapes to the bottom of the panel as shown.
Edge the entire panel with Nocturne VersaFine Clair and heat set.
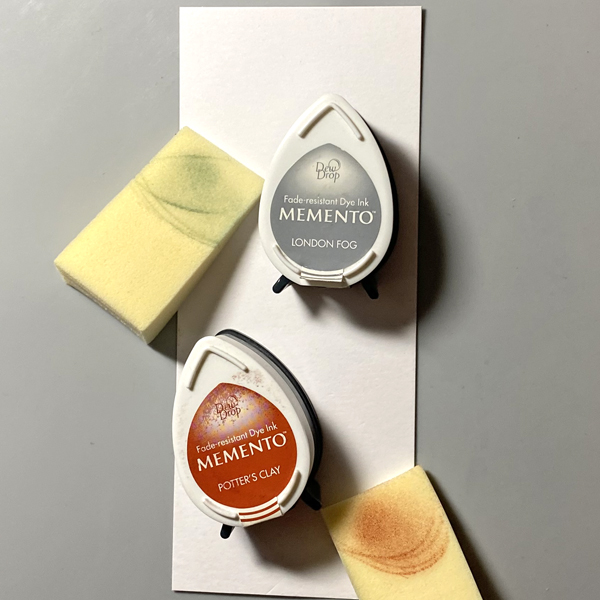
Step 9:
Sponge a 2.5” strip of Bristol paper with Potters Clay and London Fog Memento Ink onto the strip until it is covered with blended ink.
Step 10:
Spray the panel with Ink Potion No. 9. Let the solution sit for a minute. Heat set.
Step 11:
Secure the strip onto the Stamping Platform. Position the Terracotta Pot Eclectic Rubber Stamp facedown on the strip. Ink the stamps with Nocturne VersaFine Ink and stamp. Heat set the panel.
Step 12:
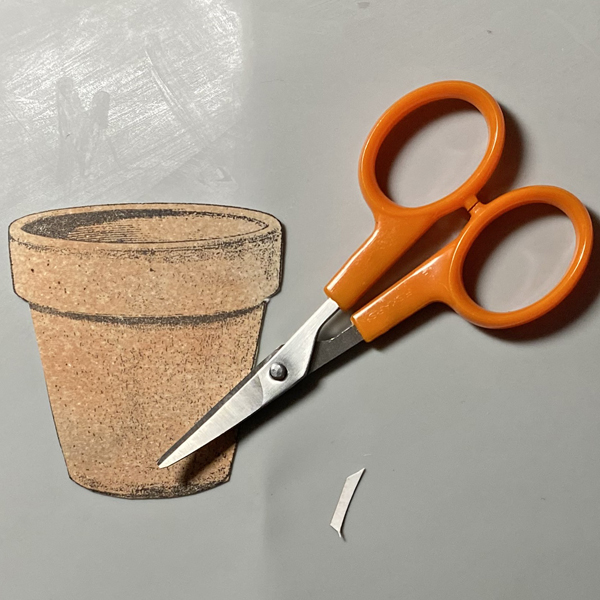
Fussy-cut the planter.
Step 13:
Smoosh the Potter’s Clay Memento Dew Drop Ink Pad onto the craft mat. Mist with water. Use a paint brush to shade the planter.
Edge the planter with a black marker. Heat set the planter.
Step 14:
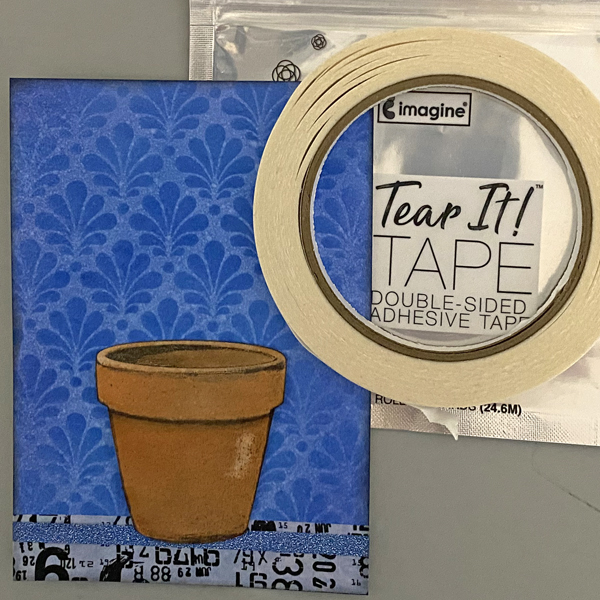
Use Tear It! Tape to adhere the Terracotta pot to the image panel.
Step 15:
Use foam adhesive to adhere the flowers to the card front. Add the sentiment sticker to the top left.
Step 16:
Cut a piece of Raven cardstock to 9” x 6.25”, score at 4”, and fold to form a card.
Use Tear It! Tape to adhere the image panel to the card.
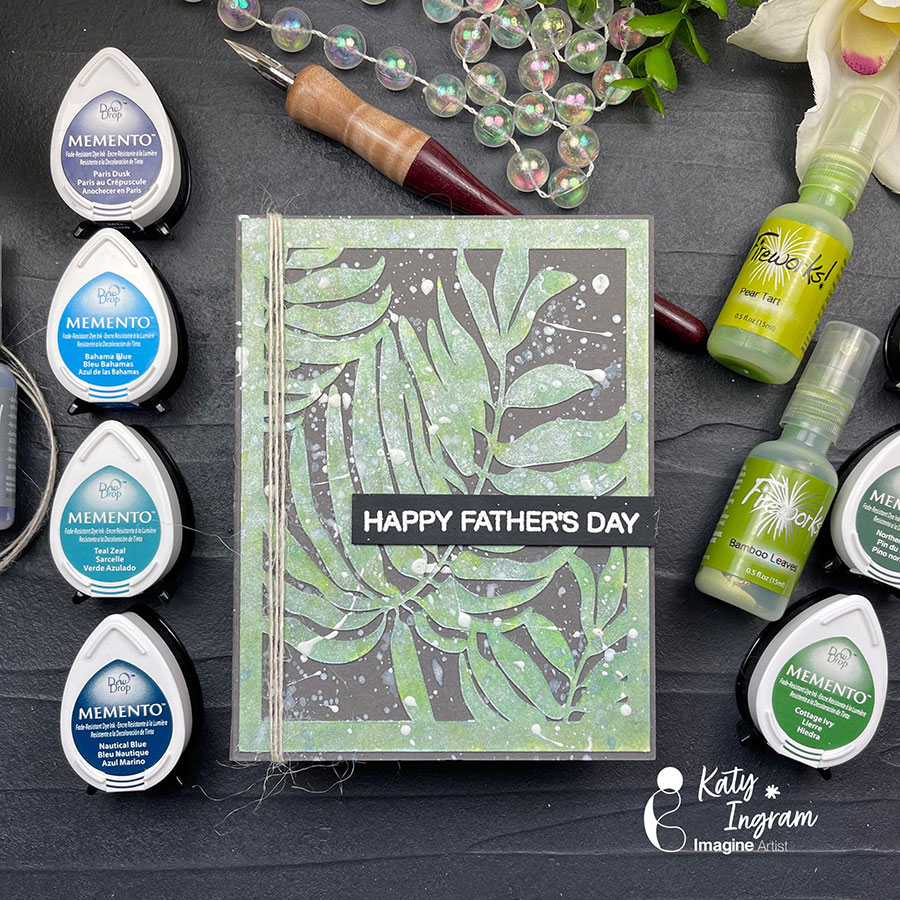
Hello Friends! Katy here and today I am sharing how I blended my Fireworks! Sprays with Memento Ink pads to create some custom colors.
In todays video tutorial I am use some Fireworks! Pear Tart, Bamboo Leaves and London Fog sprays mixed with Memento inks in greens and blues to create a Father’s Day card. I find any type of leaf foliage works really well for masculine cards and this one is no exception. I added some splatter with remaining blues and London Fog Fireworks! and also used some irRESISTible spray in Wedding Dress to complete the look. The video below has all the details, check it out below.
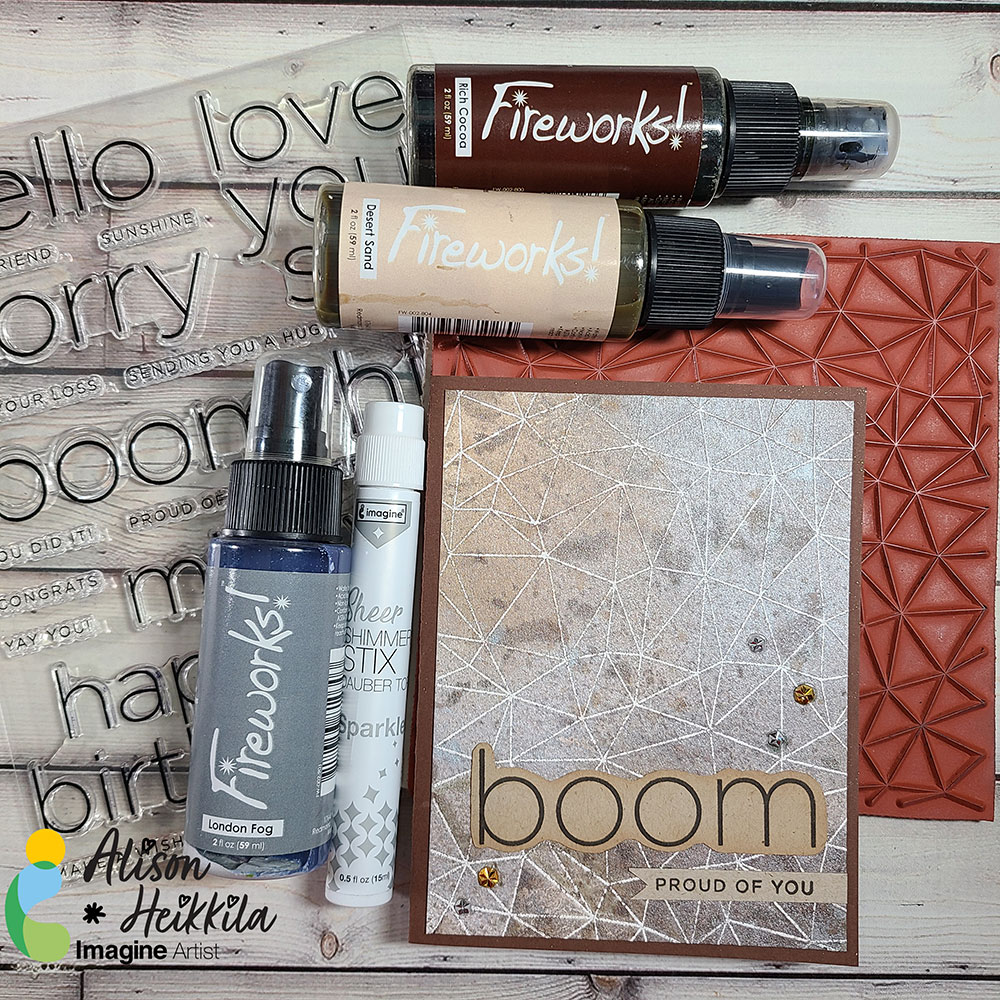
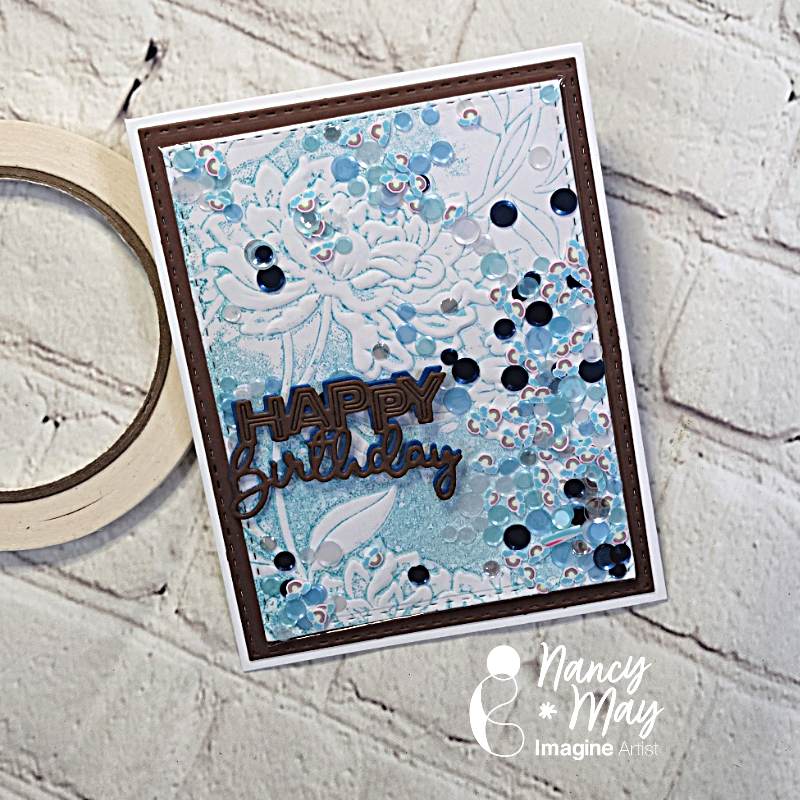
– Hello! It’s Alison Heikkila. Today we’re going to play with some Fireworks! Sprays on an emboss resist background. It’s a great masculine card, but I prefer to call it non-gendered. By changing up the background stamp and/or the colors, you can make this card as unique as the person you’re giving it to.
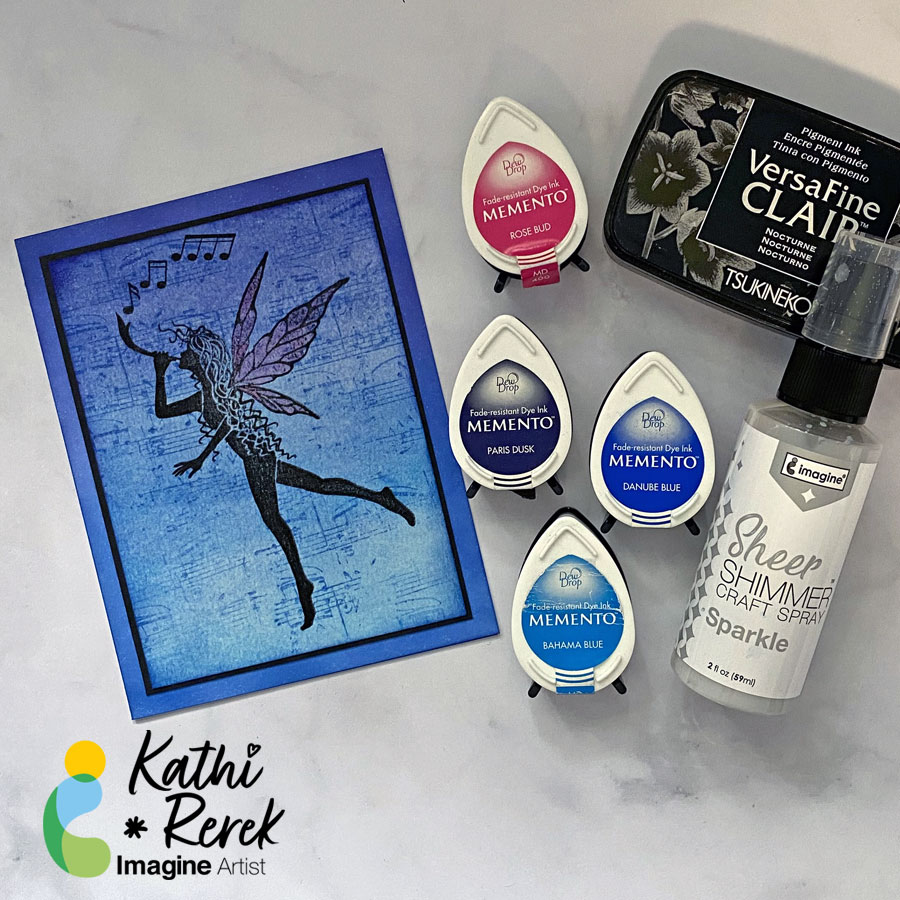
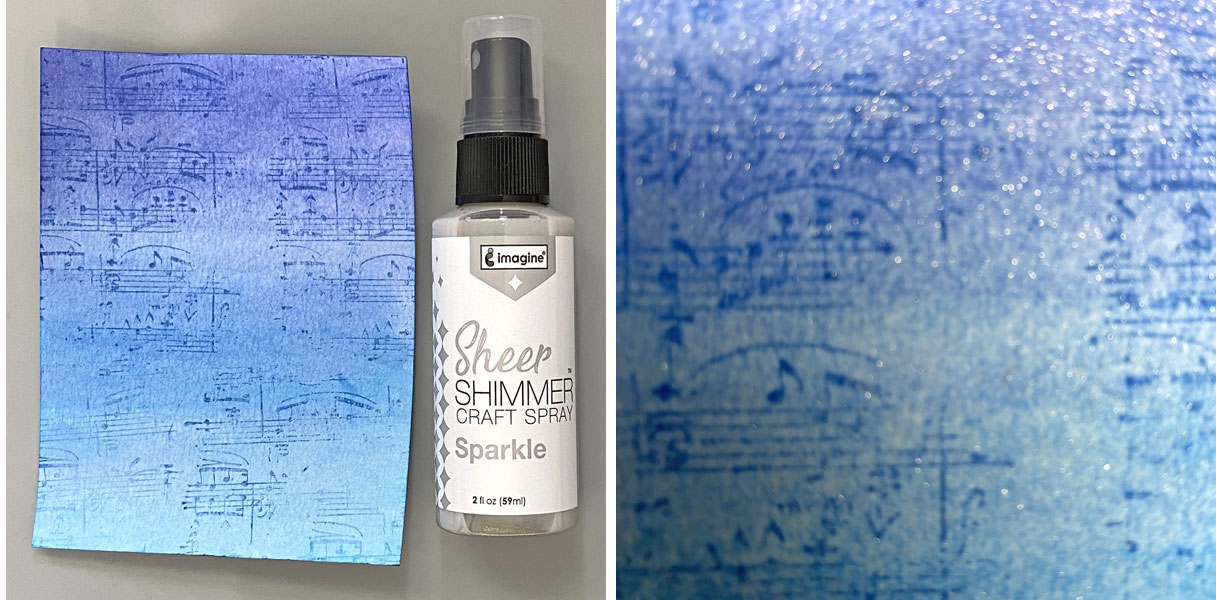
Greetings! It’s Kathi here to show you how to create fairy card with a magical shimmer using Memento Inks and Sheer Shimmer Sparkle Spray.
Skill Level: Beginner to Intermediate
Time: 1.5 hours
Instructions:
Step 1:
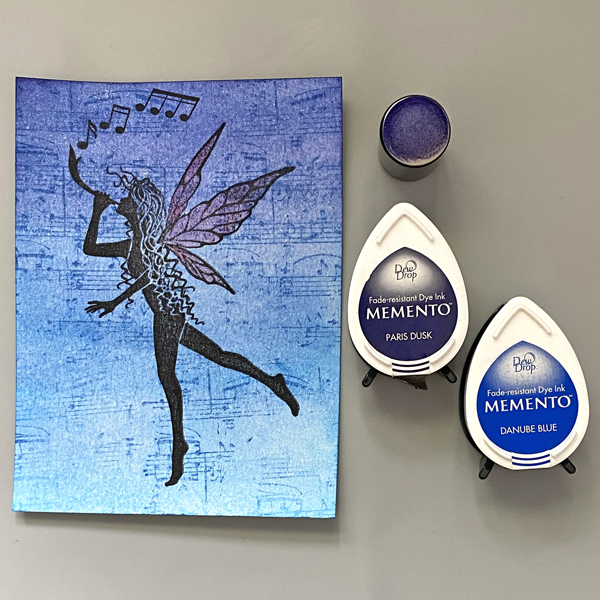
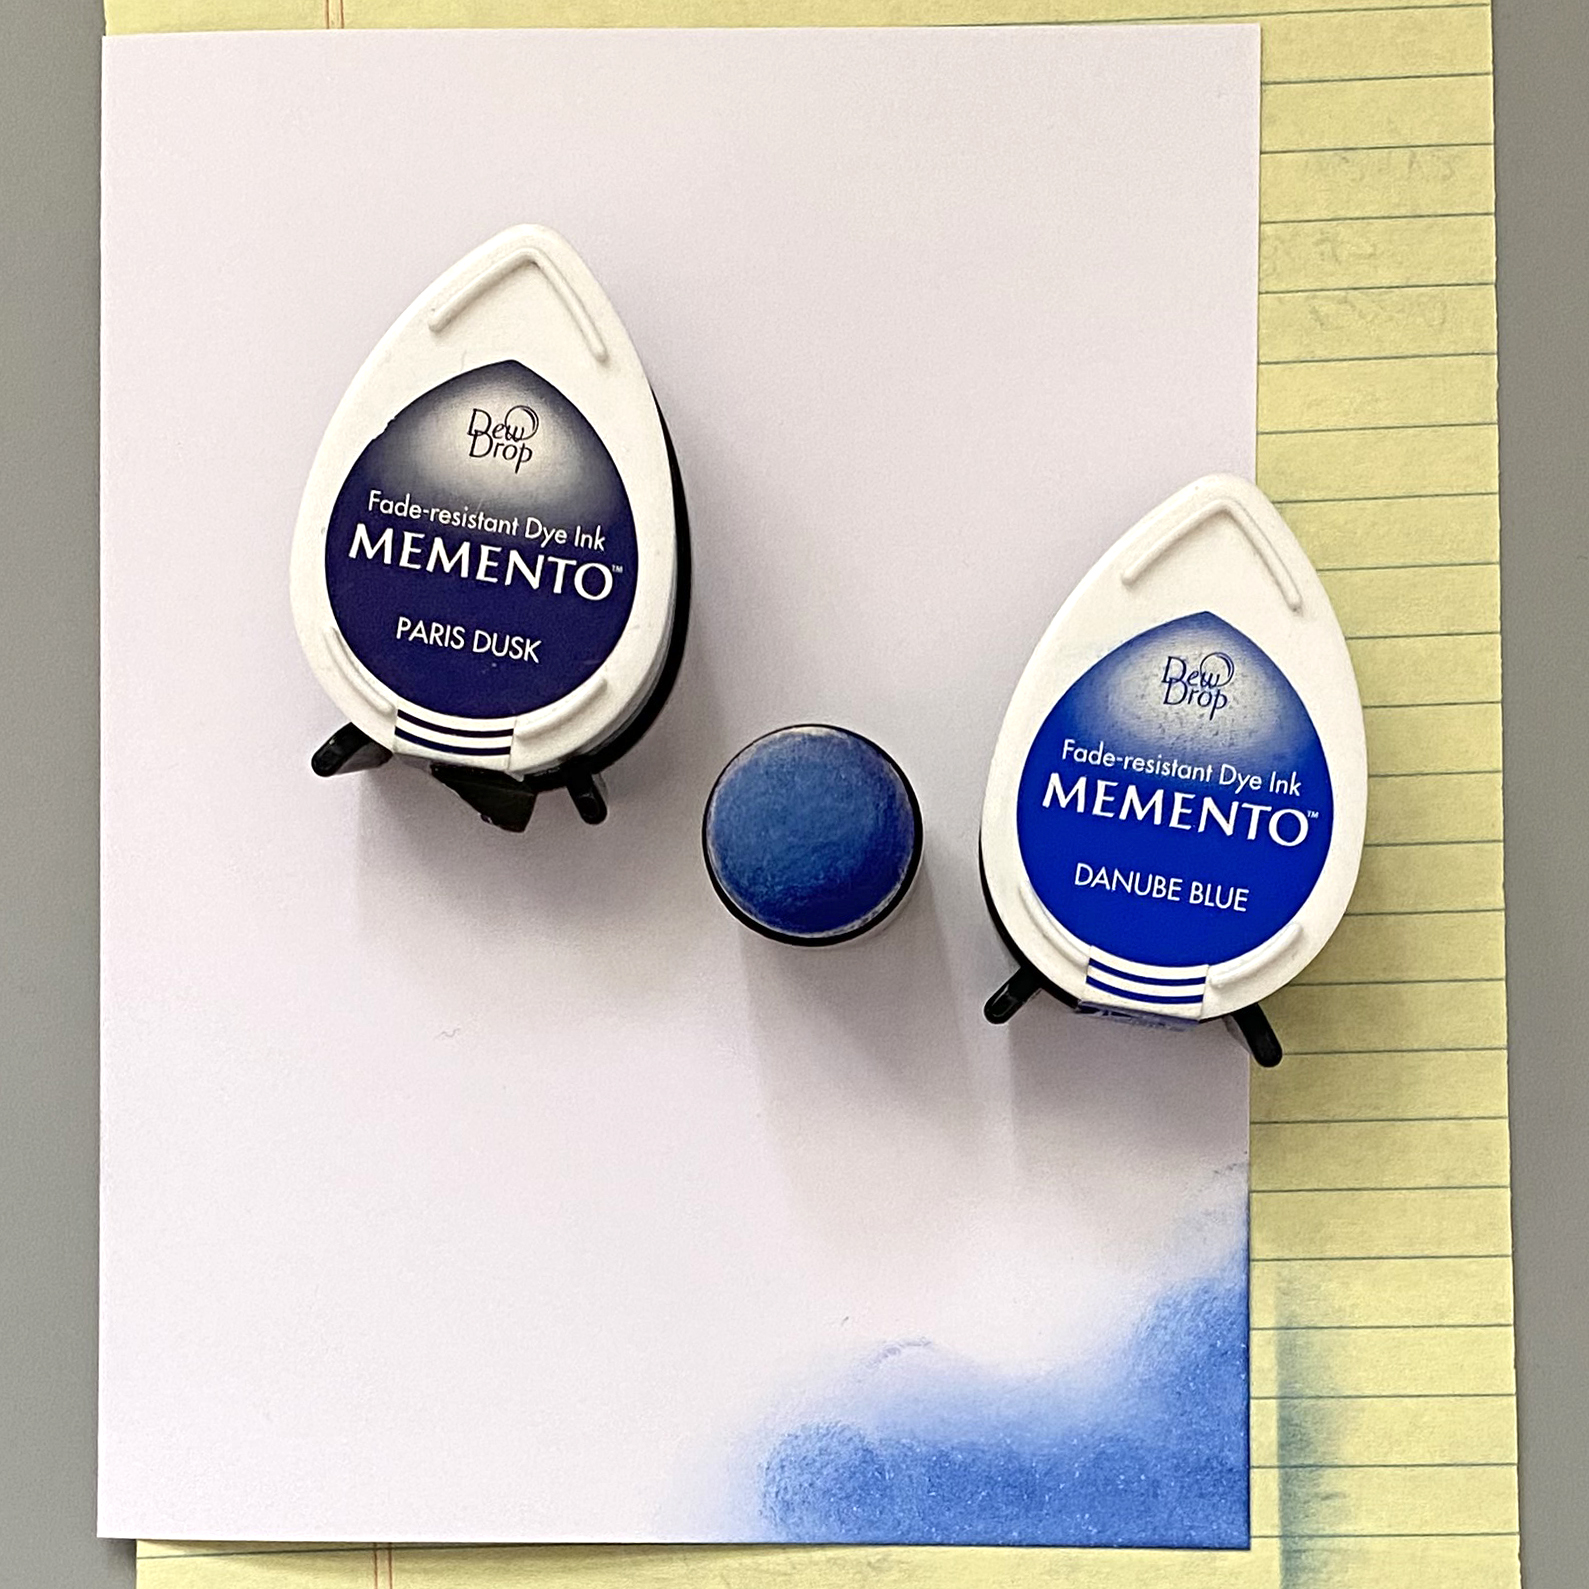
Smoosh Paris Dusk Memento Dew Drop Ink onto the craft mat. Mist with water and use a paint brush to apply diluted ink to the right edge of a 5.25” x 4” panel of watercolor paper.
Repeat with Blue Danube and then with Bahama Blue Memento Dew Drop Ink Pads until the entire panel is inked. Heat set the panel.
Step 2:
Ink the Sheet Music Texture Red Rubber Cling Stamp with Blue Danube Dew Drop Ink and randomly stamp onto the panel.
Step 3:
Spray the panel with Sheer Shimmer Sparkle Spray. Heat Set and admire the sparkle!
Step 4:
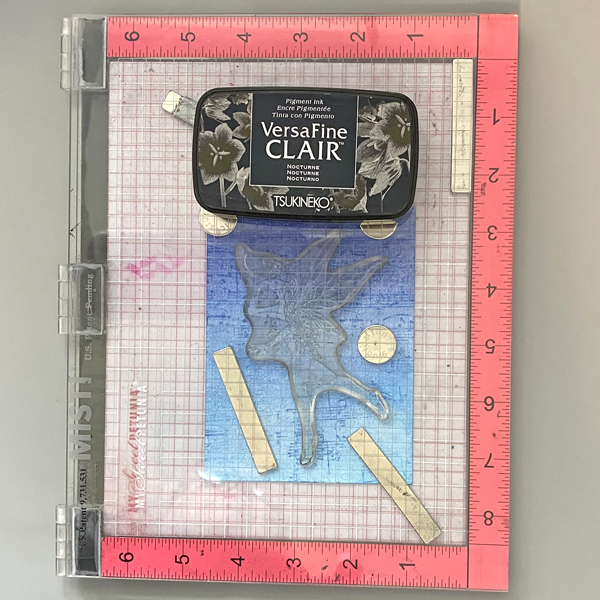
Using a stamping platform, position the Trinity Fairy Clear Stamp onto the image panel. Ink with Nocturne VersaFine Clair Ink and stamp. You might need to re-ink and stamp to achieve a clear impression.
Remove the panel from the stamping platform and heat set.
Step 5:
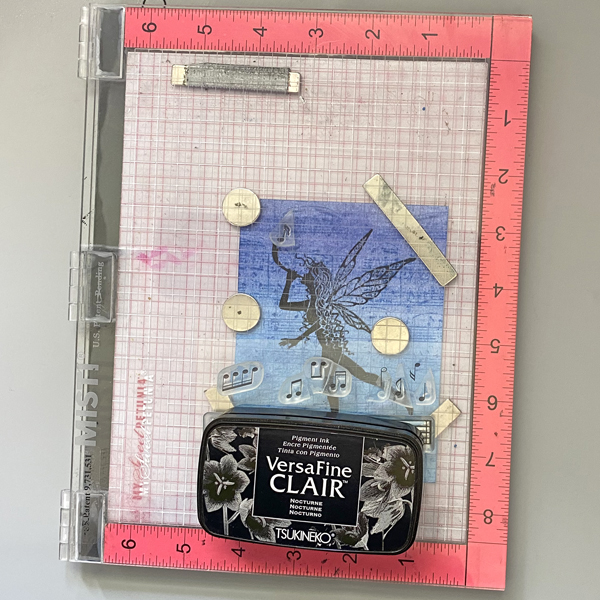
Place the image panel back onto the stamping platform. Position one of the notes from the Music Notes Small Clear Step Set facedown above the fairy’s horn. Ink the stamp with Nocturne VersaFine Clair Ink and stamp.
Remove the note stamp from the stamping platform. Place another note stamp from the same set, slightly to the right of the previously stamped note. Ink and stamp with Nocturne VersaFine Clair Ink and stamp.
Remove the second note stamp from the stamping platform. Place the four notes stamp to the right of the other notes. Ink the stamp with Nocturne VersaFine Clair Ink and stamp.
Heat Set the notes.
Step 6:
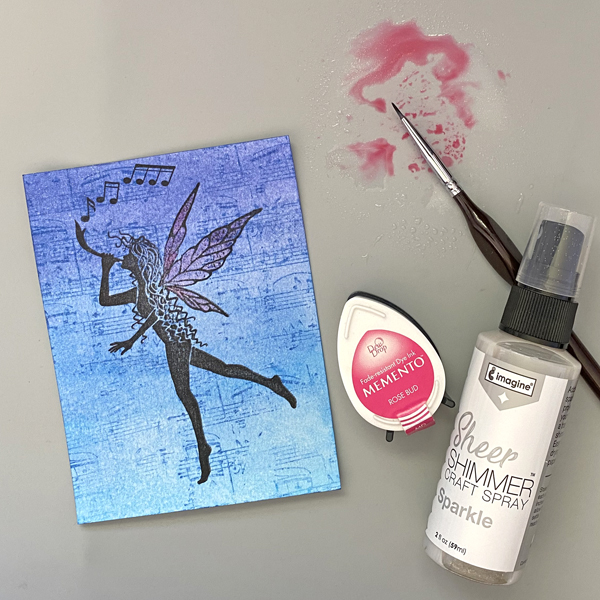
Smoosh the Rose Bud Memento Dewdrop Ink pad onto the craft mat. Mist with Sheer Shimmer Sparkle Spray.
Use a paint brush to apply the shimmery pink ink to the fairy’s wings. Heat set.
Step 7:
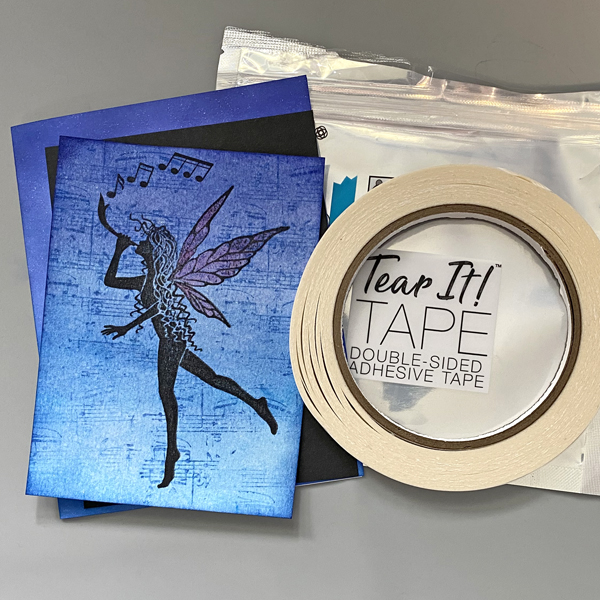
Trim the image panel to 3 5/8” x 4 7/8”.
Use a Sponge Dauber and Paris Dusk Memento Ink to edge the top part of the image panel. Use the Sponge Dauber and Blue Danube Memento Ink to edge the bottom part of the image panel.
Step 8:
Create an A2 card from white cardstock. Insert a piece of scrap paper into the card.
Use Sponge Daubers to ink the periphery of the white card with Paris Dusk and Blue Danube Memento Inks.
Step 9:
Cut a piece of black cardstock to 3 3/4” x 5”.
Use Tear It! Tape to mat the image panel with the black cardstock panel, then use the tape to adhere the matted panel to the inked card.
Last time we met we created a bunch of backgrounds together, using a few different inky mediums and a gel plate, along with some other supplies. This time we are going to turn one of those inky backgrounds into a lovely card. For the sake of time, we are only making one on screen, but I have 3 BONUS shaker cards to show you as well, so stick to the end!