“Sending Warm Greetings” Holiday Card

By Helen Gullett

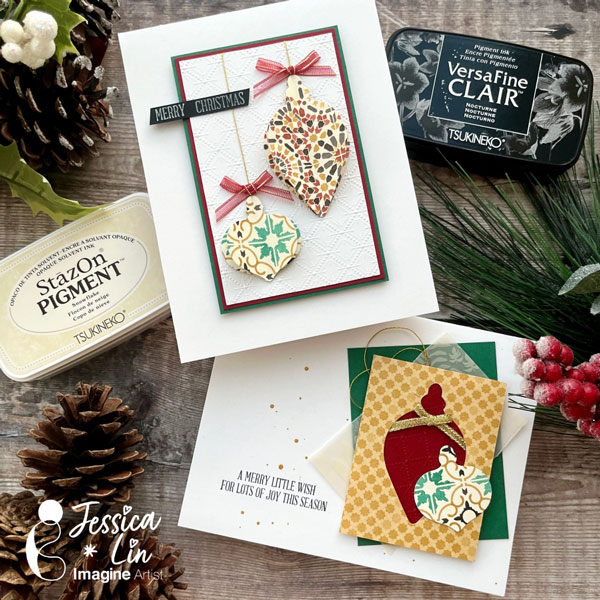
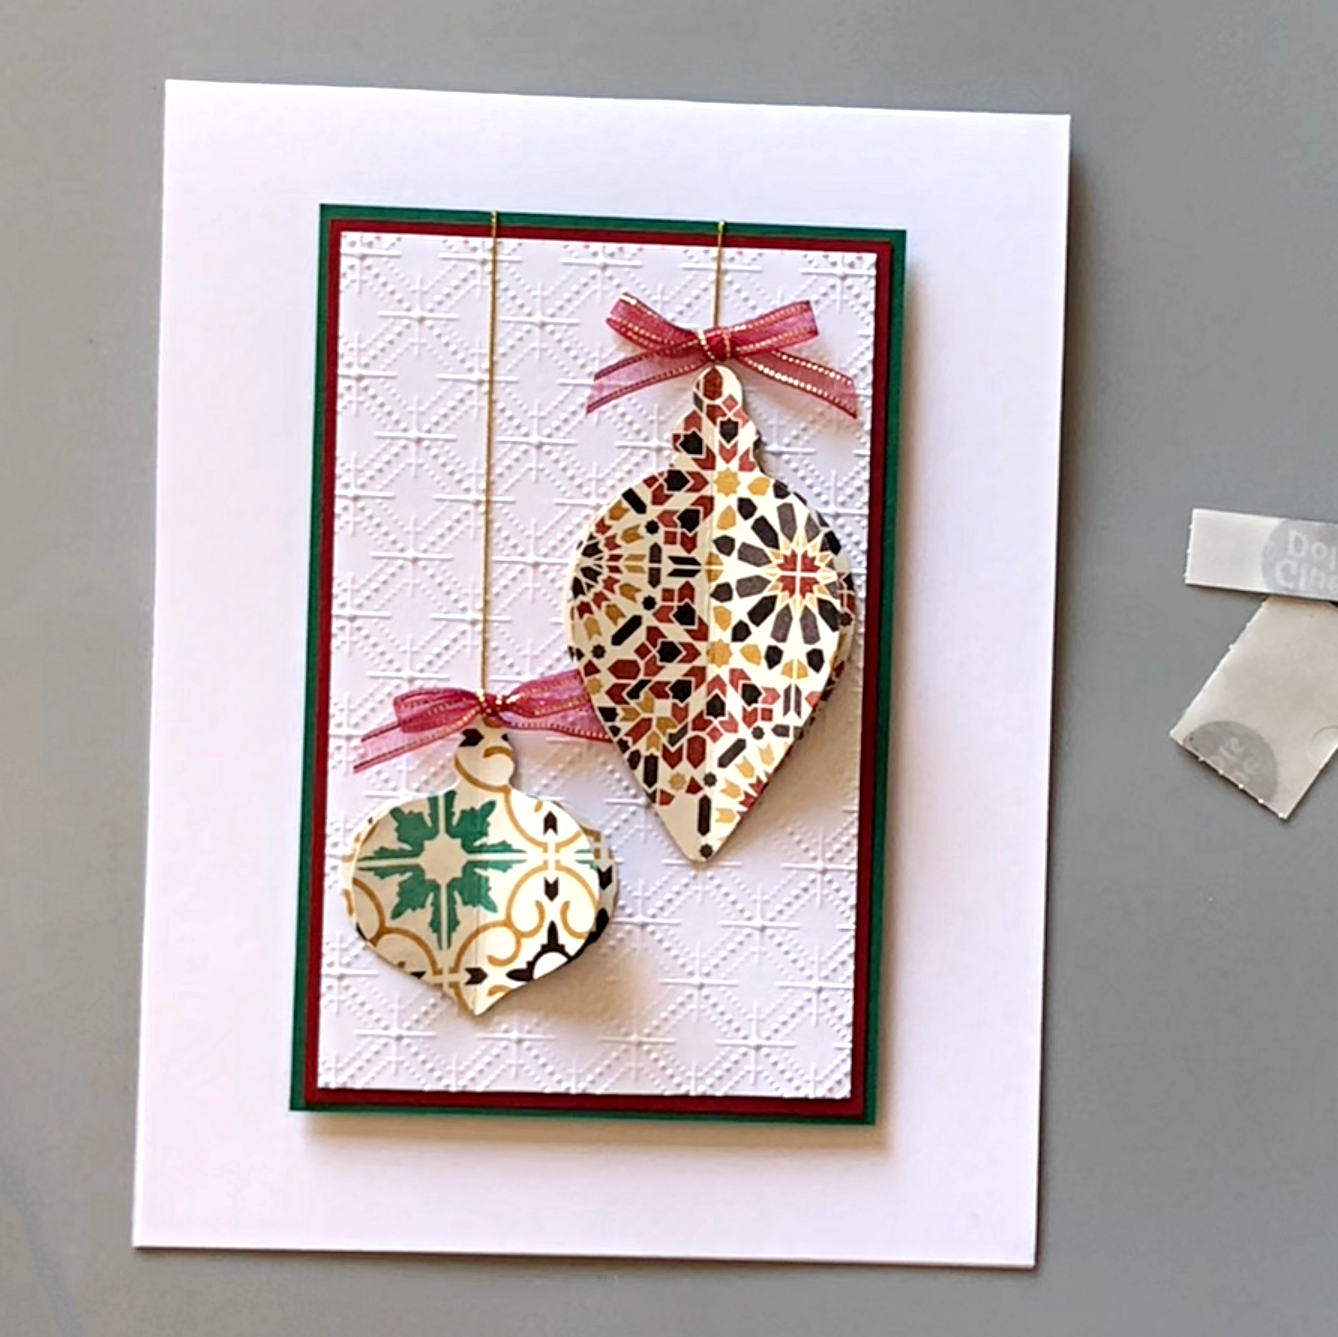
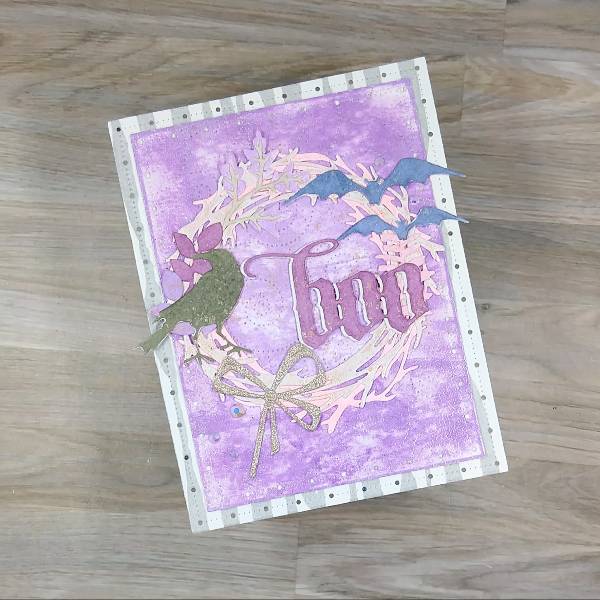
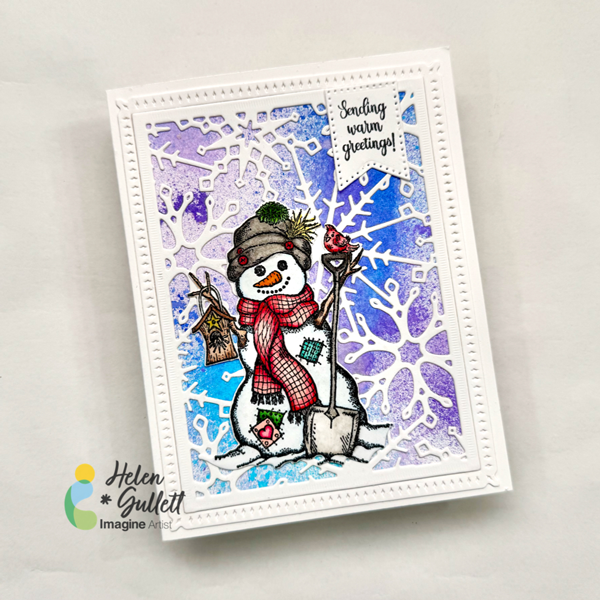
Hello crafty friends! Winter is here and today we are going to make this winter theme card to send some warm greetings to friends and family. Let’s get crafting!

Skill: Intermediate
Time: 15-20 minutes

Direction:

Step 1

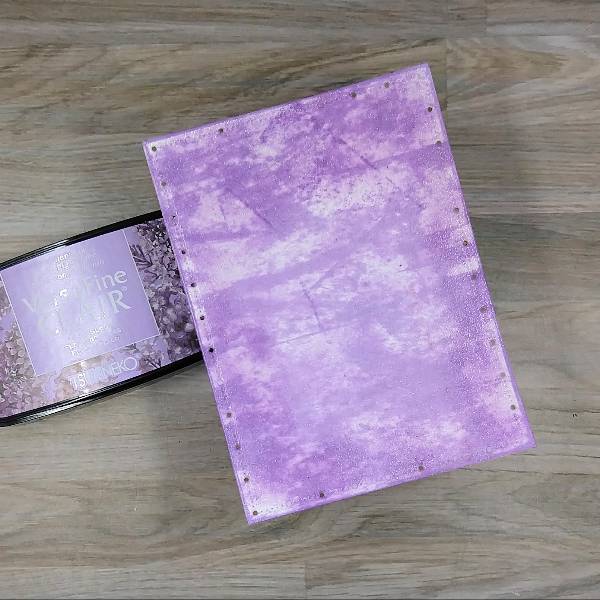
Cut out a piece of the heavyweight white cardstock into 4.25 inch x 5.5 inch.

Put it on the craft mat and make sure there is nothing around it since we are going to play with some craft sprays!

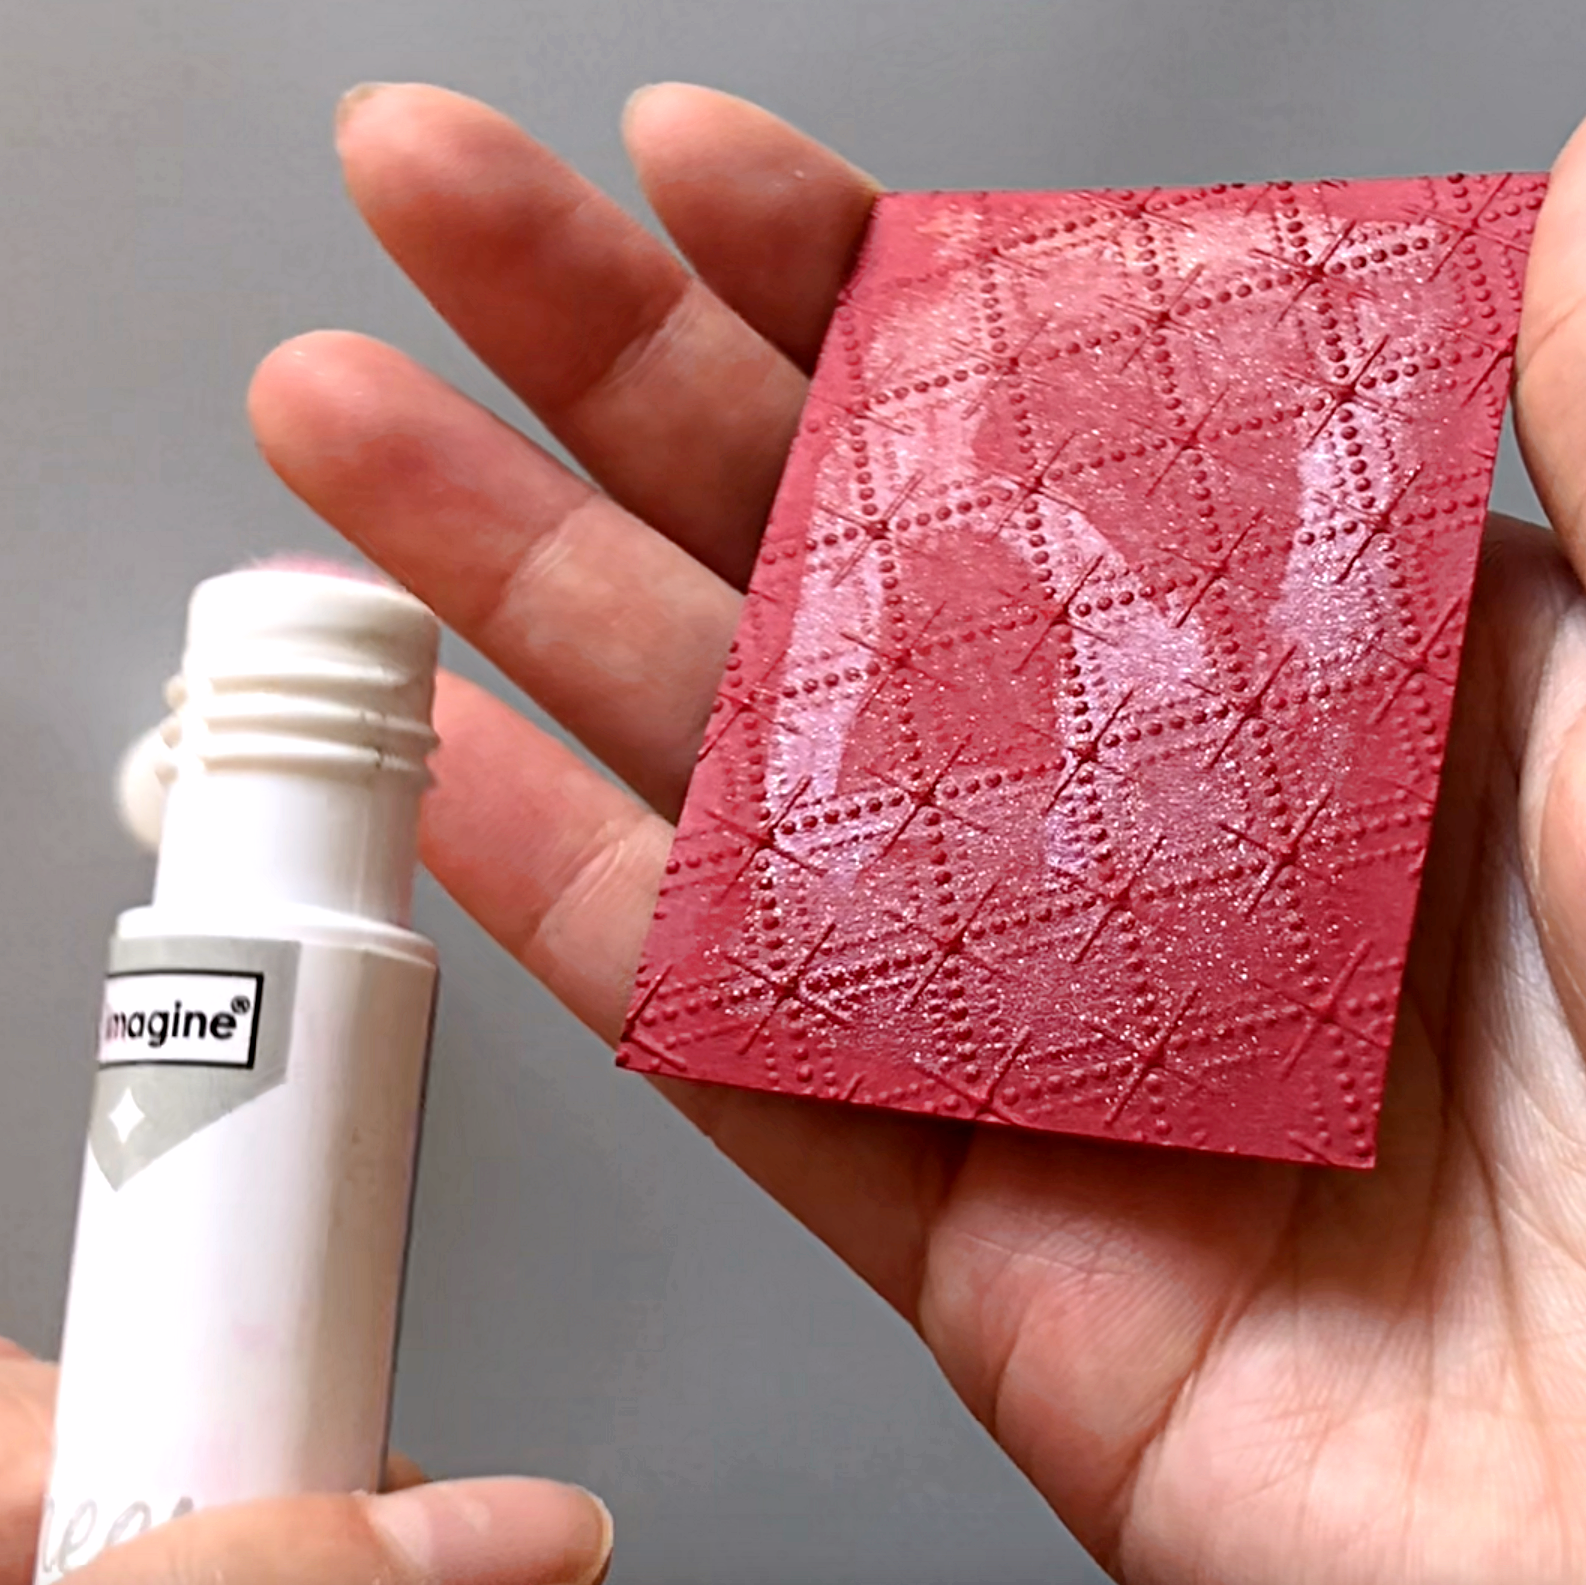
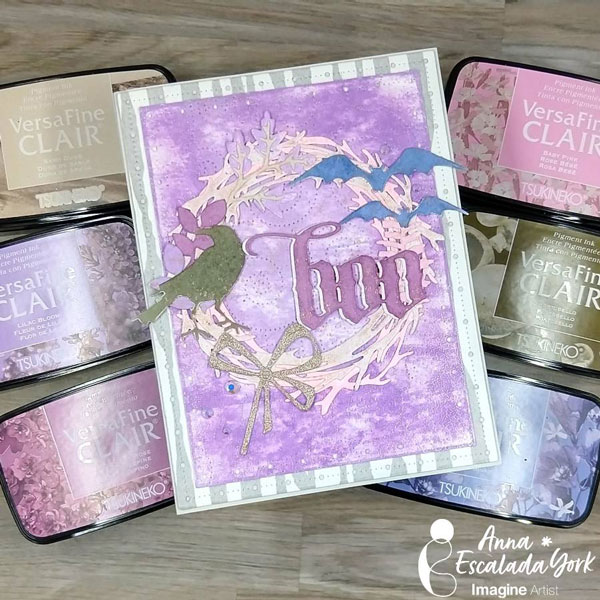
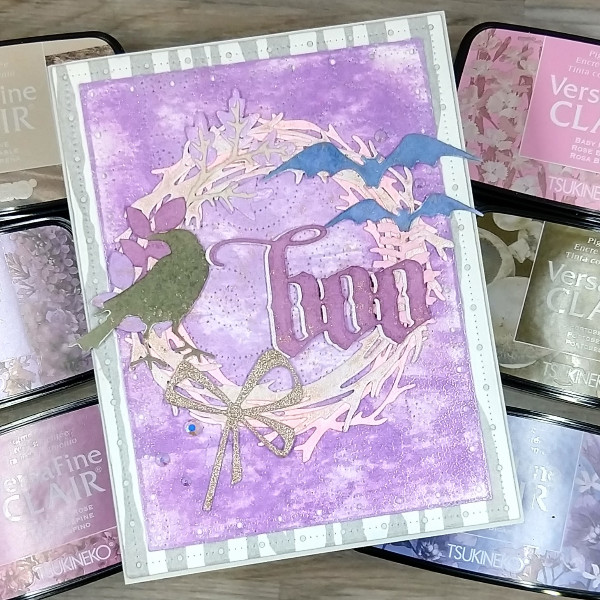
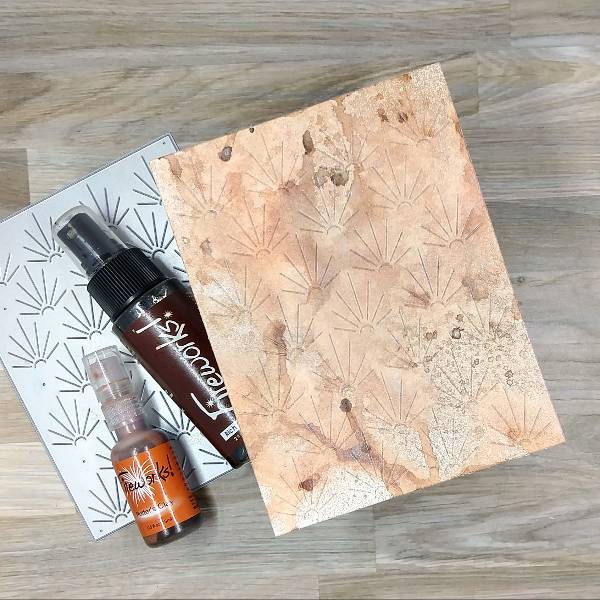
Start randomly spraying some of the Fireworks Shimmer Craft Sprays (Lulu Lavender, Grape Jelly, Bahama Blue, Paris Dusk) on the cardstock to create the background panel.

Set aside to dry or speed up the drying process with a craft heat gun.
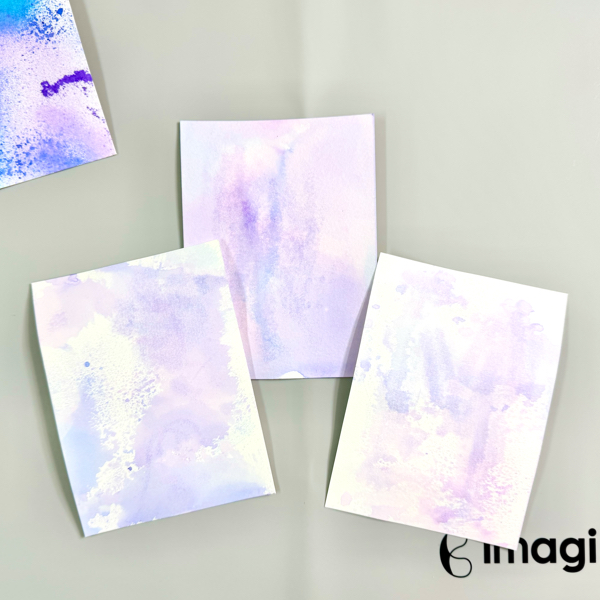
Step 2

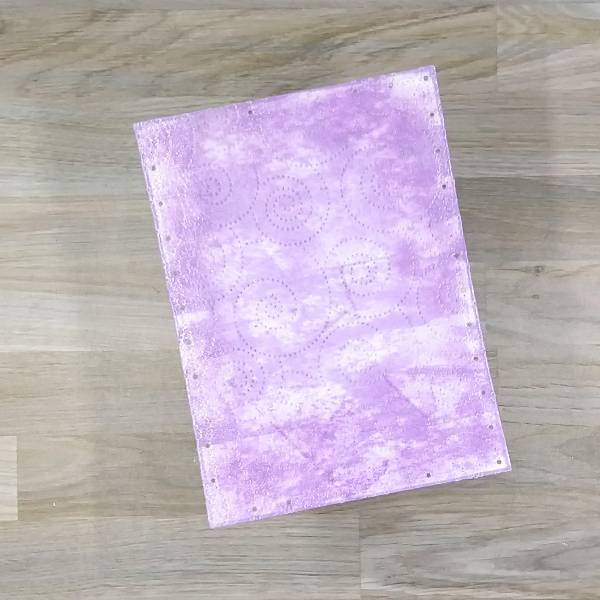
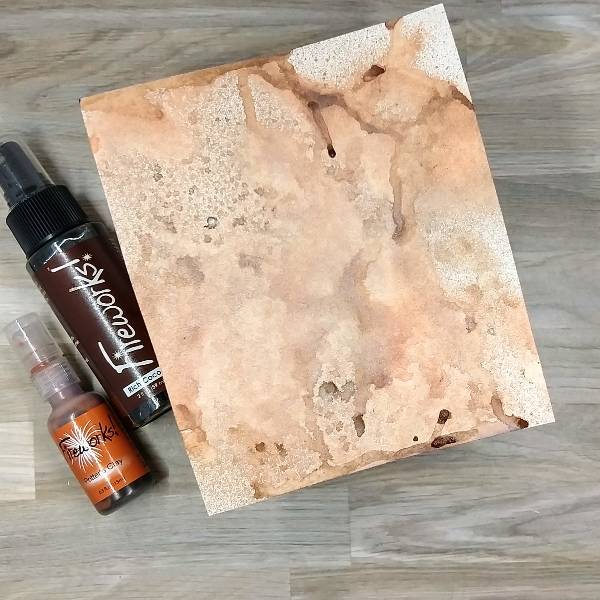
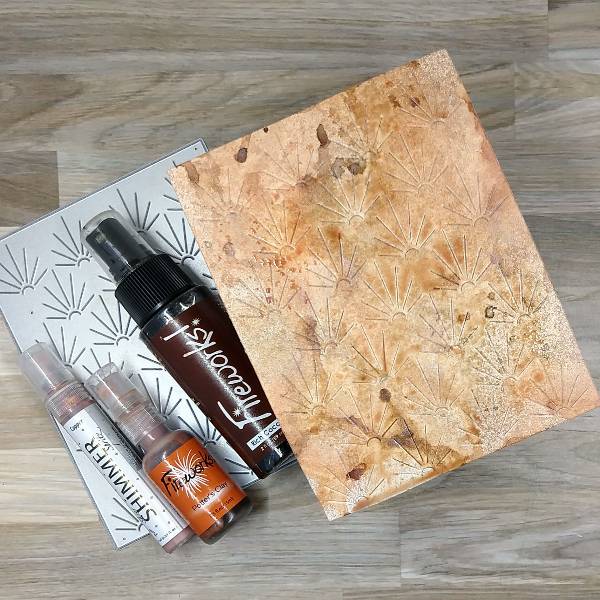
After removing the cardstock, do not wipe off the extra inks on the craft mat.

Grab a couple more cardstocks to create more background panels.

Spray extra water to get lighter colors effect on the cardstocks.

Set them aside to dry or speed up the drying process with a craft heat gun.

Step 3

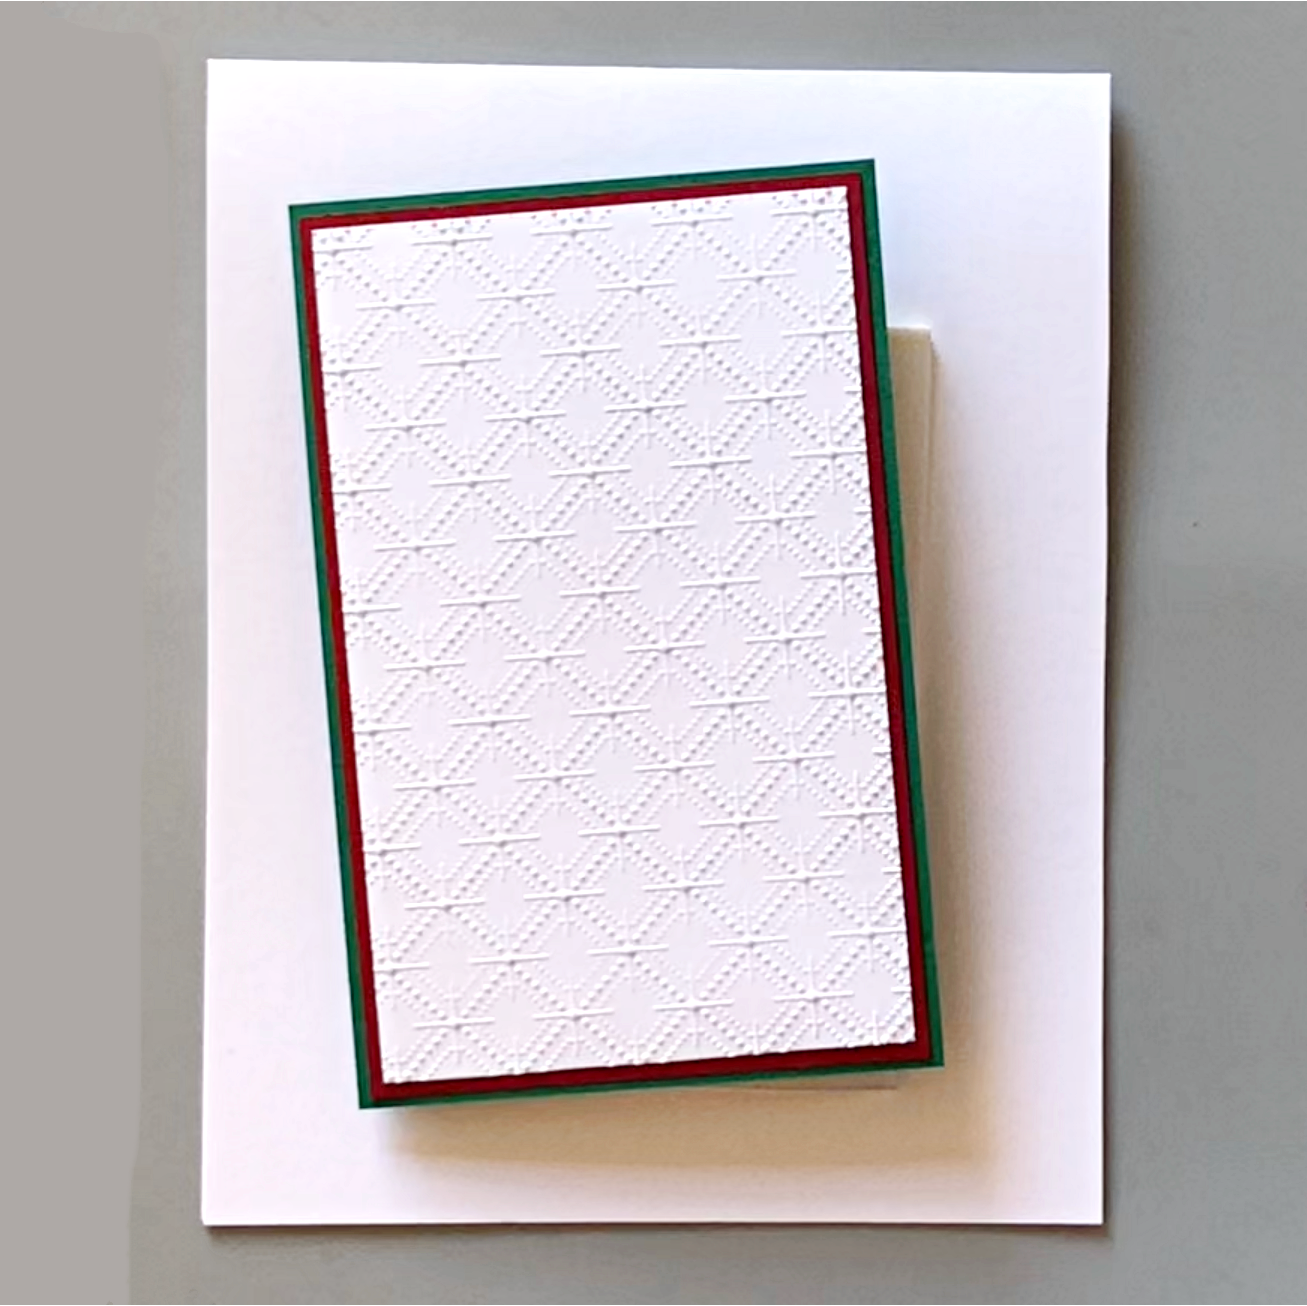
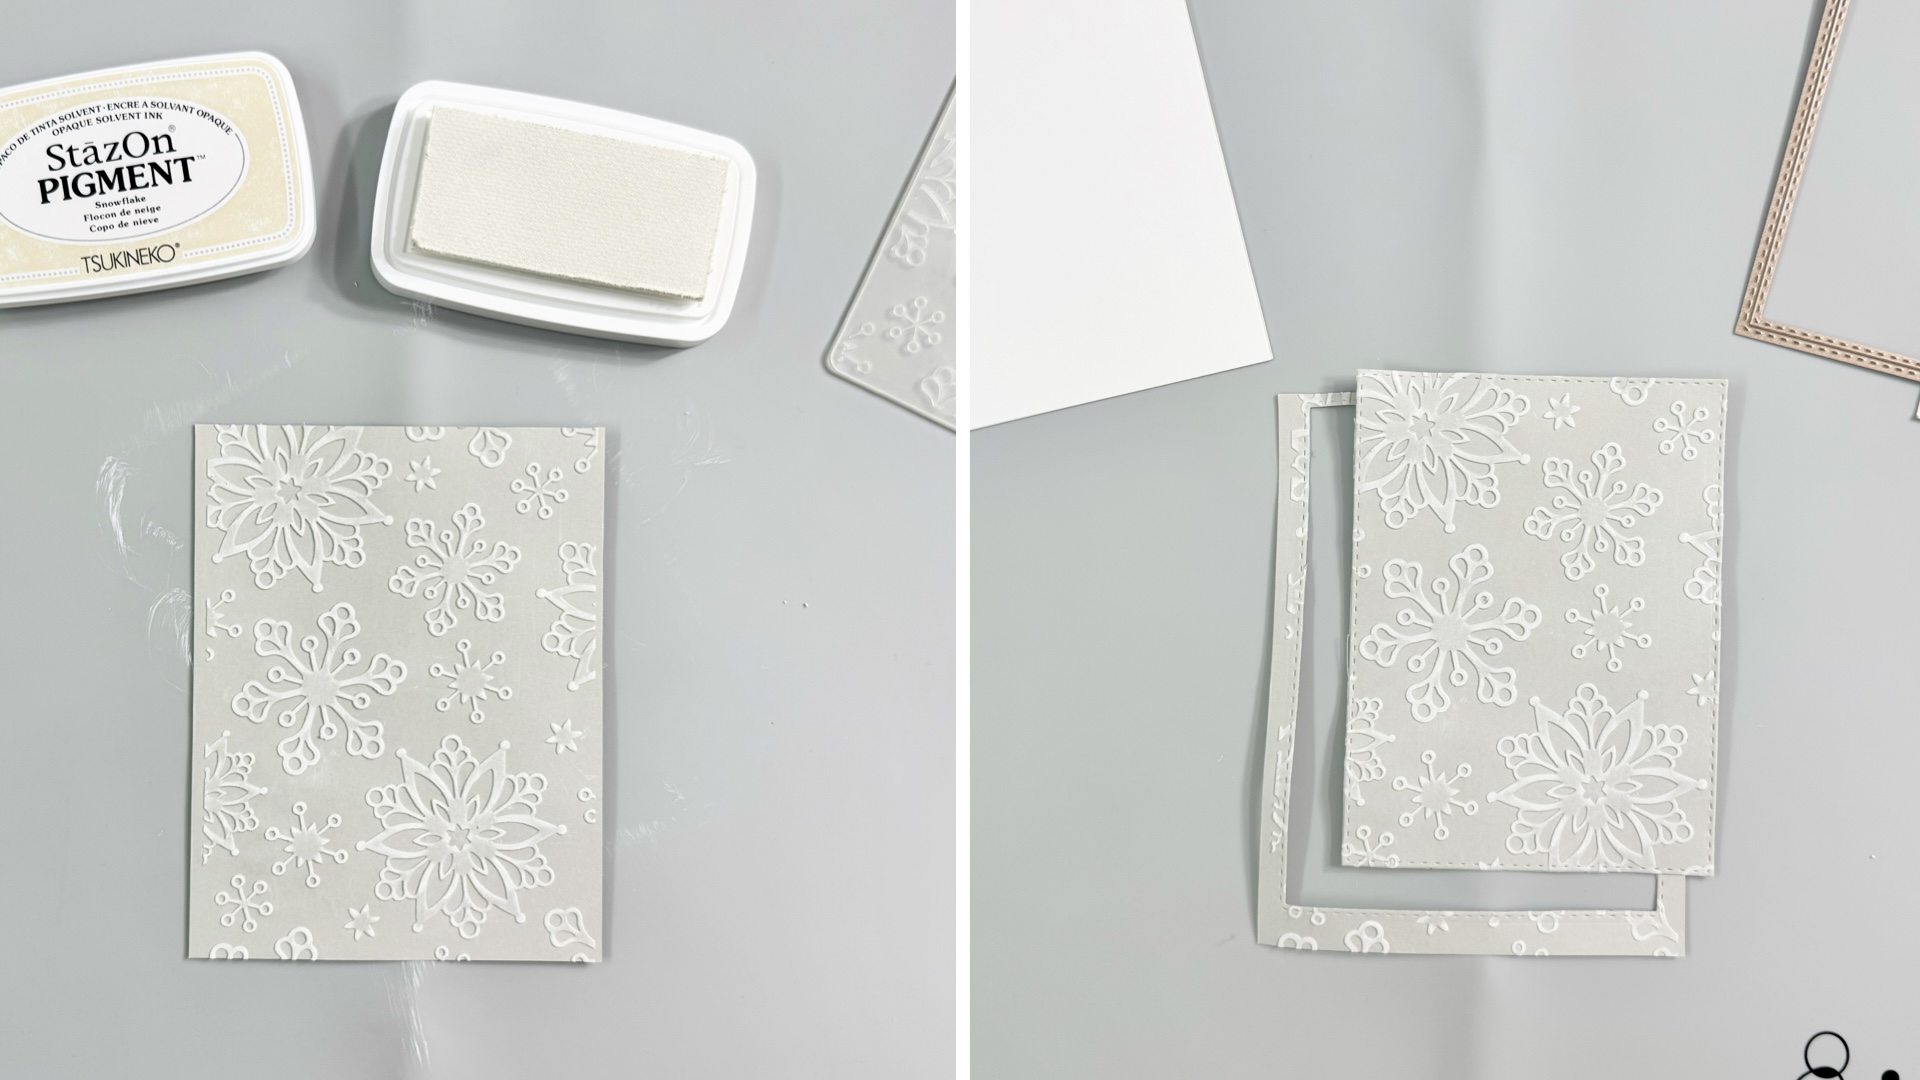
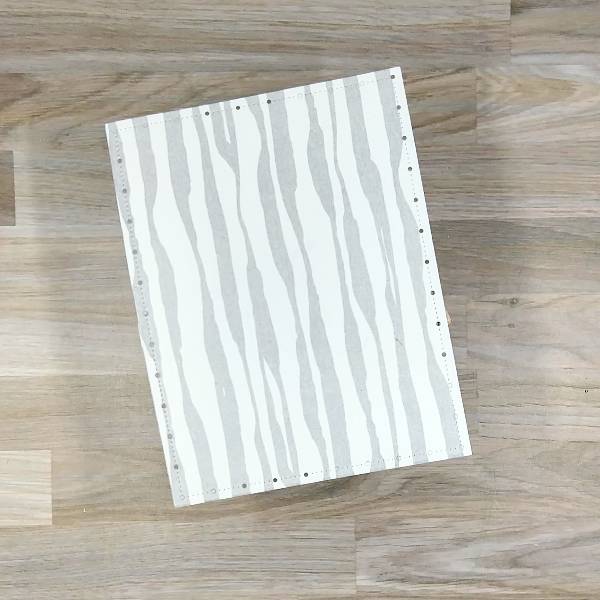
Cut another piece of heavyweight white cardstock with the snowflake background die using the die-cutting machine.

I added extra shim when cutting it because I used an intricate background die.
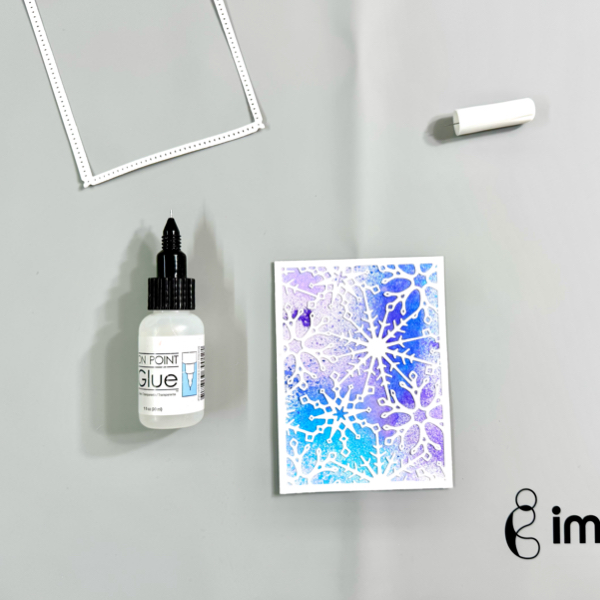
Step 4

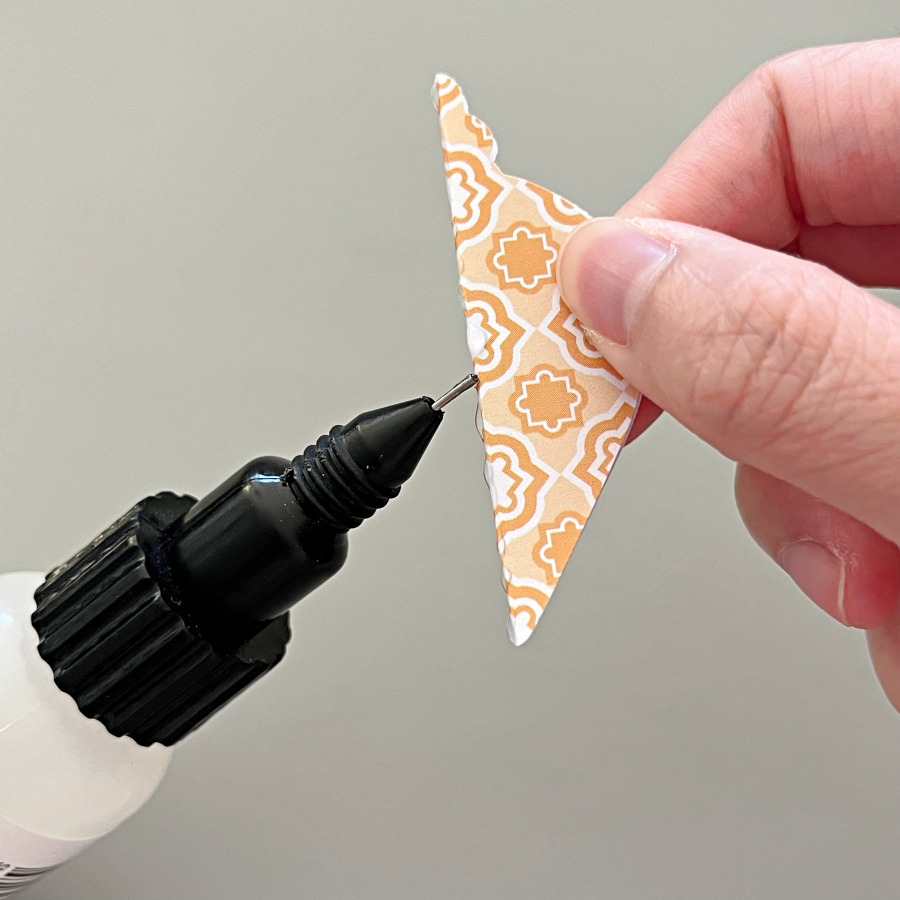
Add the sprayed background panel to the card base with some of the On Point Glue. Press firmly for a few seconds until the glue dries.

Add some of the On Point Glue to the back of the cut out snowflake background panel. The fine point is perfect for this intricate die cut panel. Add it to the card and press firmly for a few seconds until the glue dries.
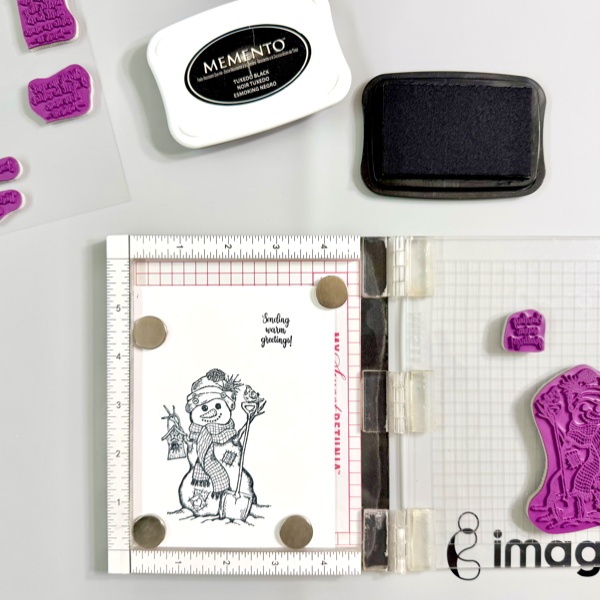
Step 5

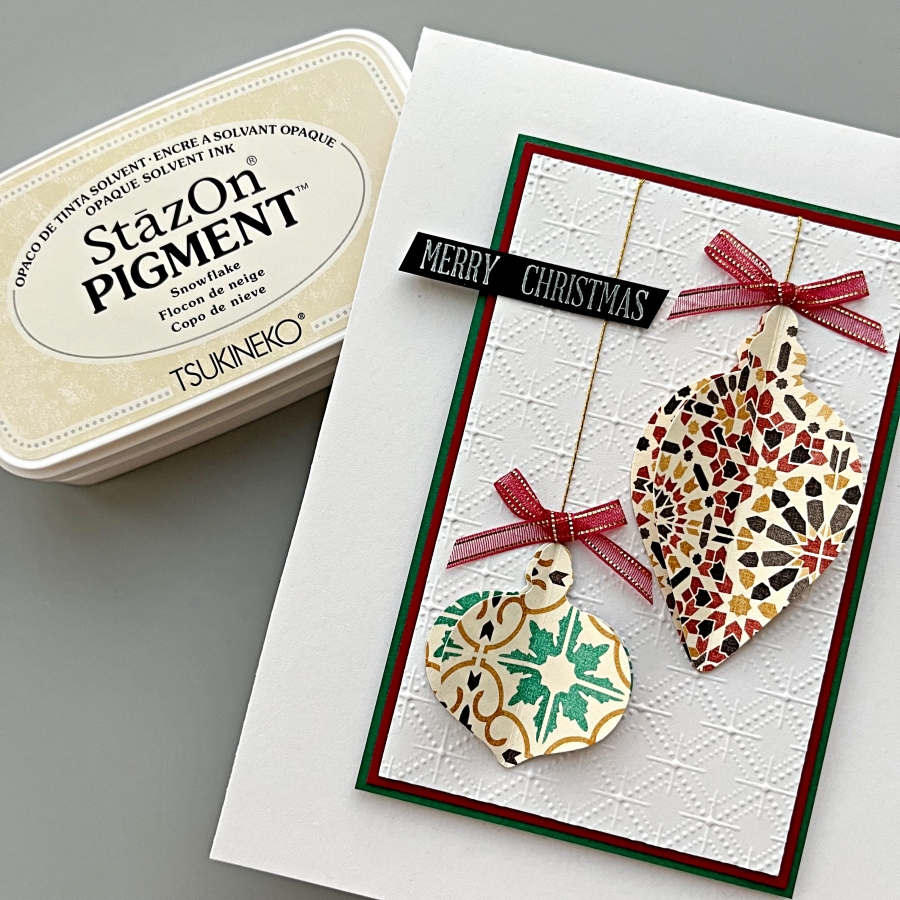
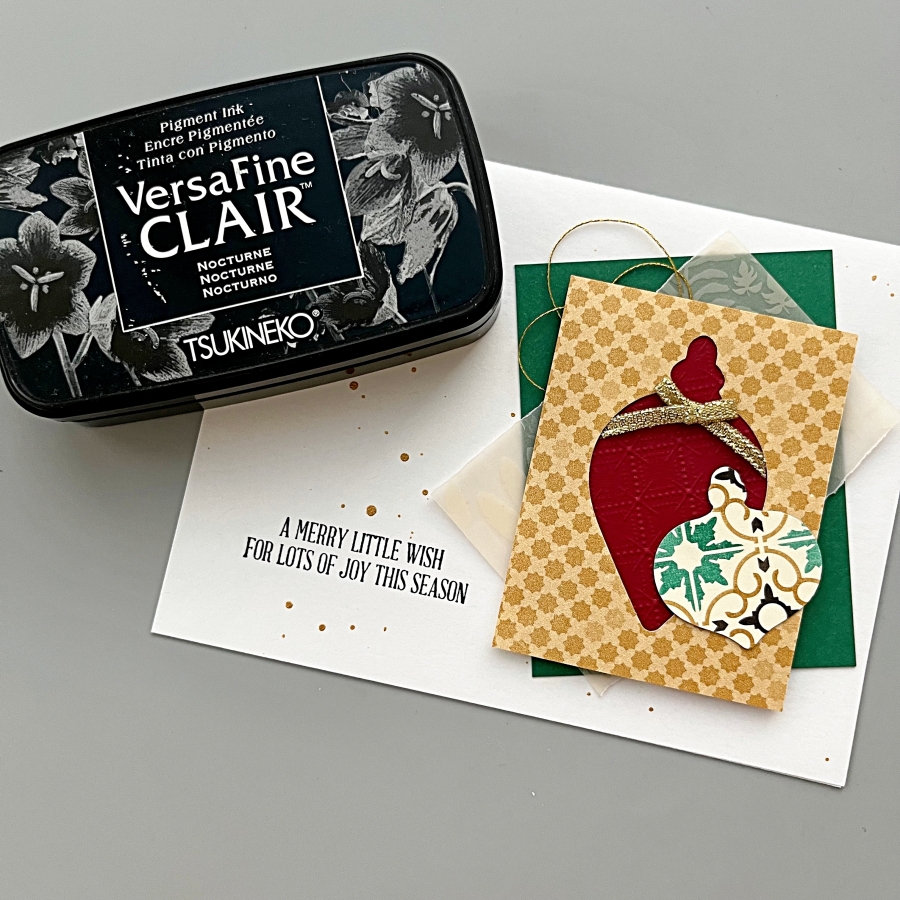
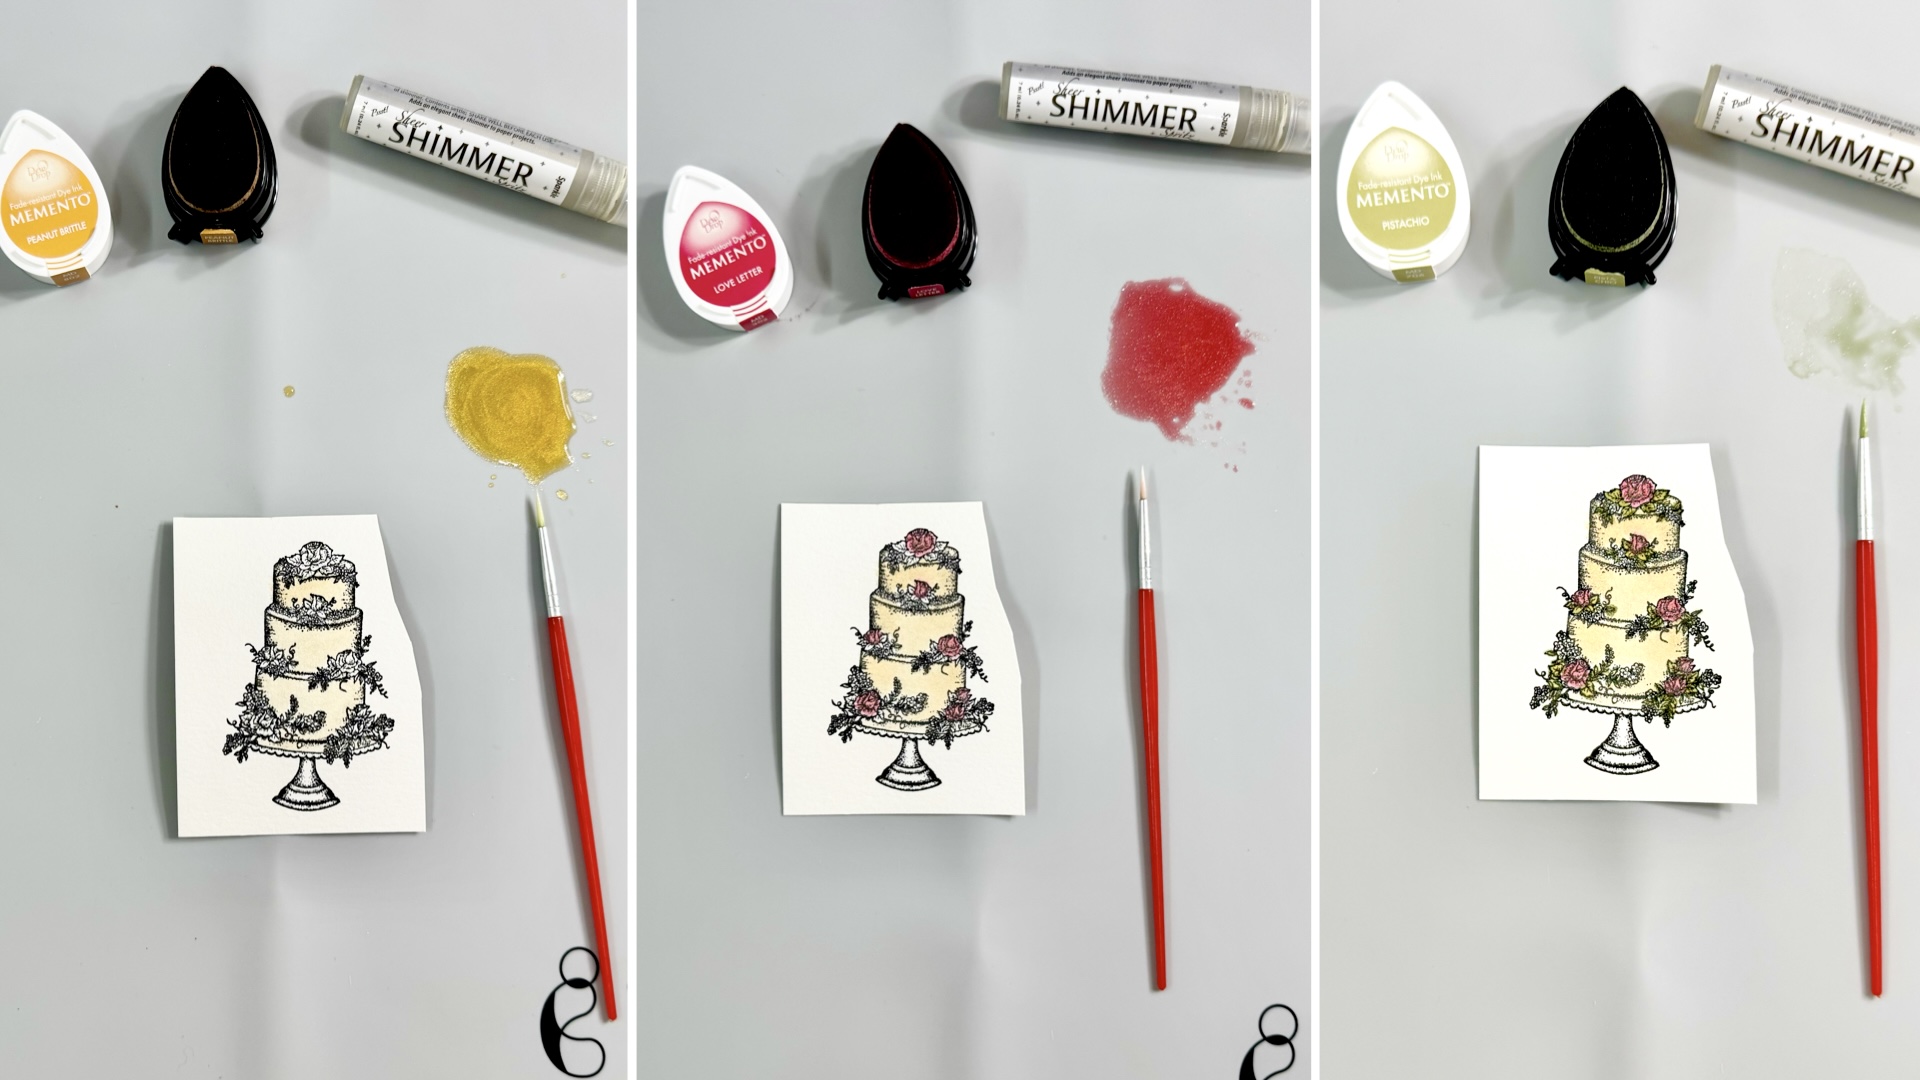
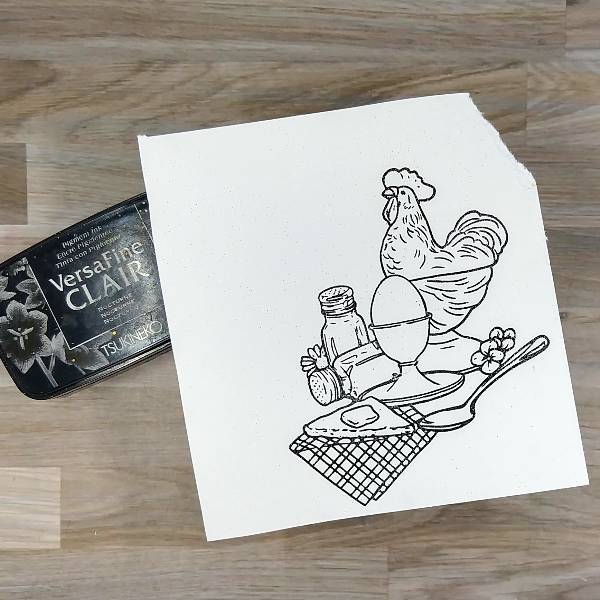
Stamp the snowman image and sentiment on a piece of heavyweight white cardstock with Memento Tuxedo Black ink pad.

Step 6

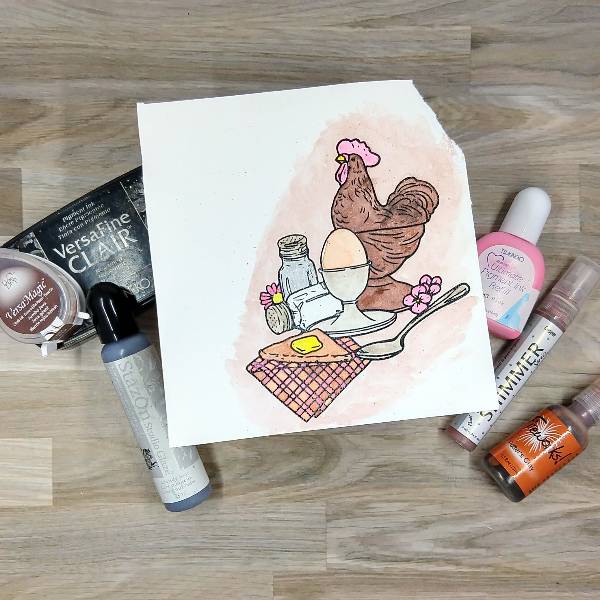
Color the snowman image with alcohol markers.

Cut out the snowman with a matching die (or fussy cut it with scissors).

Cut out the sentiment with a small banner die.
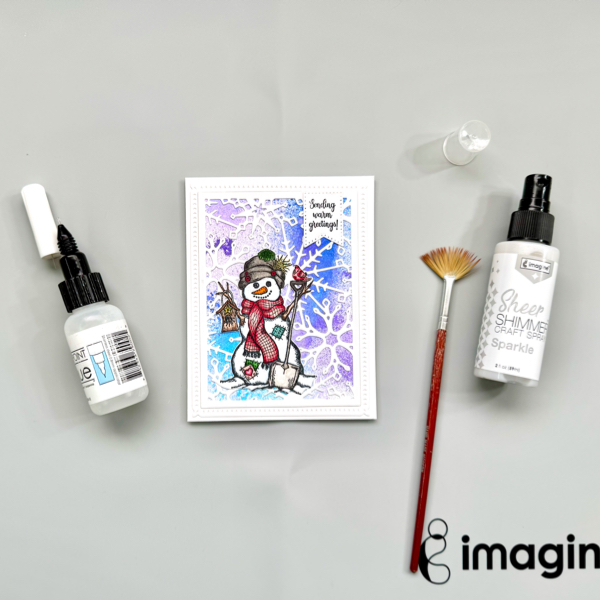
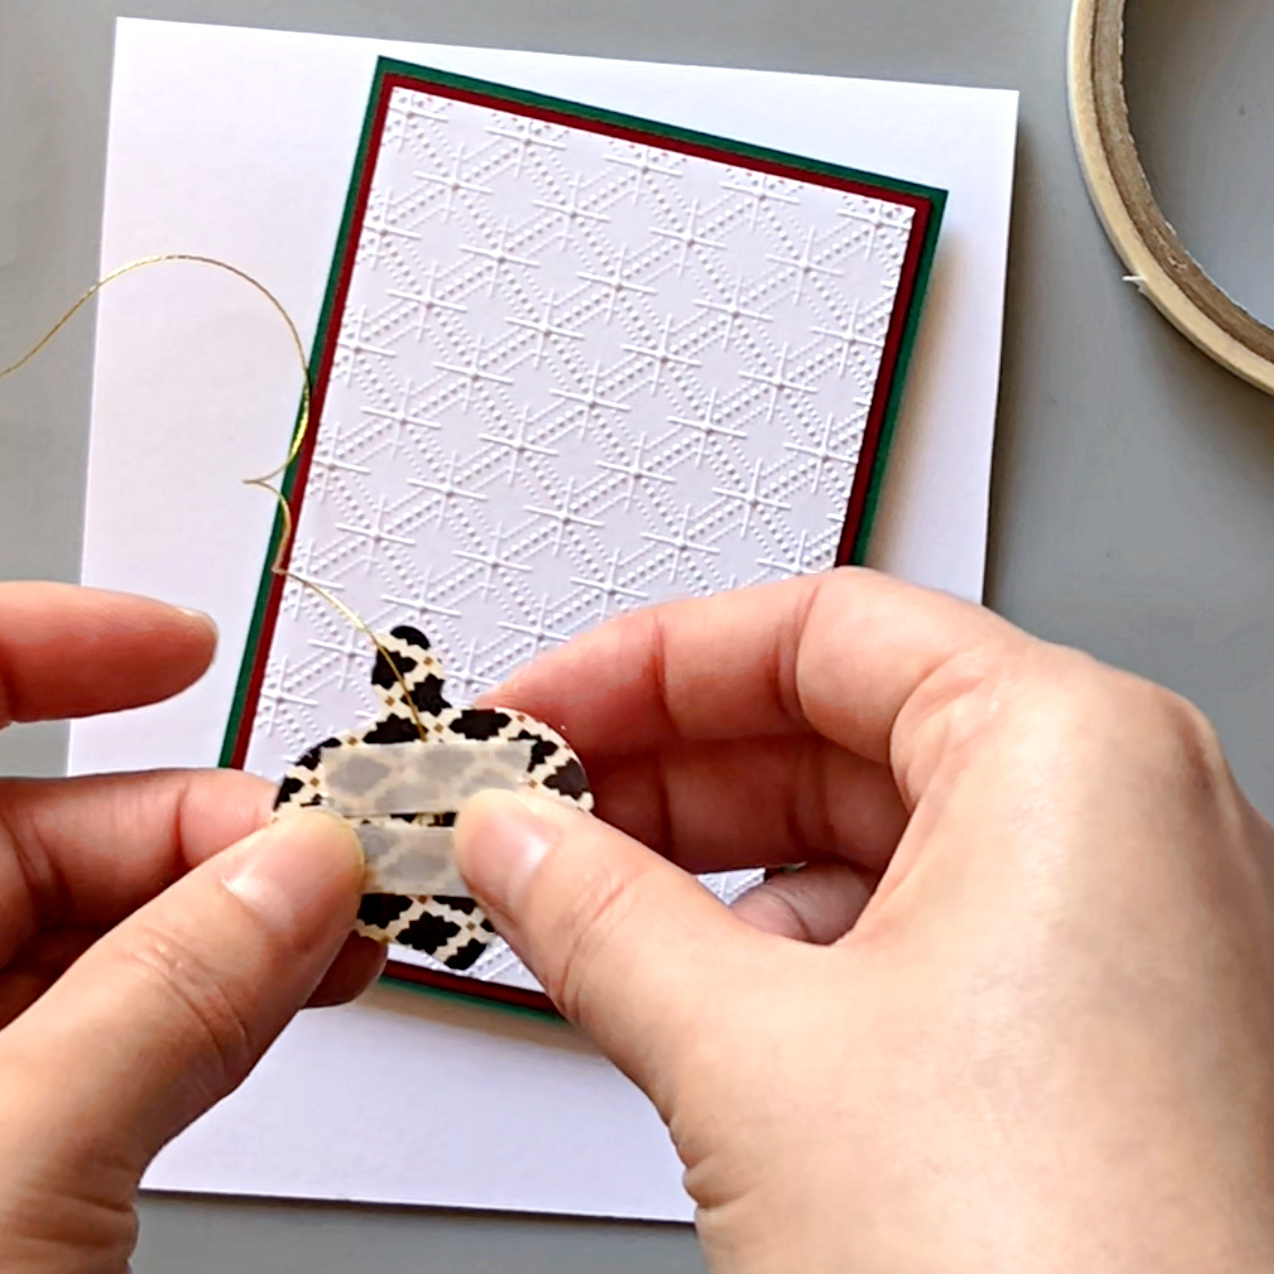
Step 7

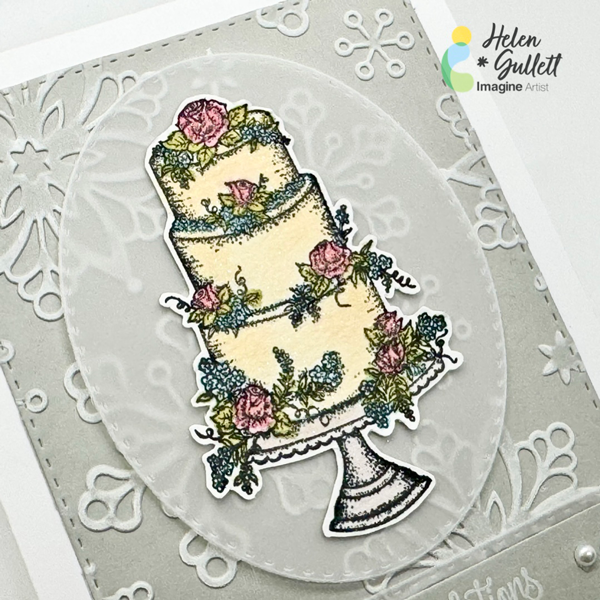
Add both snowman and sentiment to the card with On Point Glue.

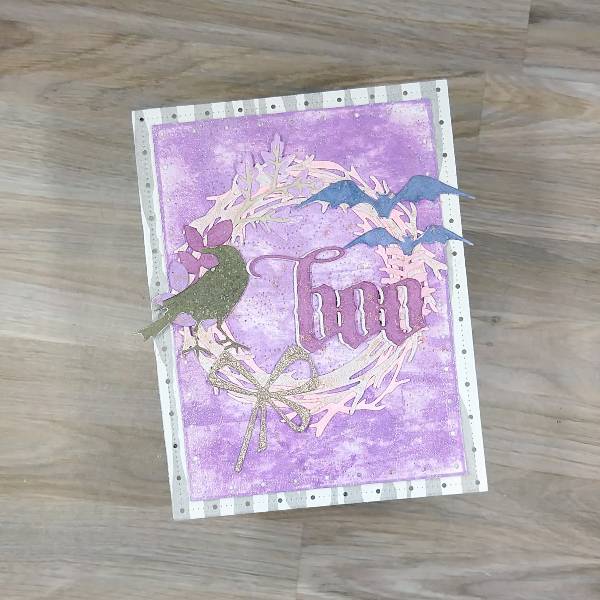
Add extra shimmer to the card with some of the Sparkle Sheer Shimmer Craft Spray. I used a fan brush to add the splatters to the card.

Use a craft heat gun dry the splatters on the card.

The card is done… I can say this picture cannot justify the shimmer and sparkle on this card. But I love how this card turned out to be! I hope you will give it a try.

Thanks for stopping by our blog today. Have a wonderful day!

Craft Supplies

Imagine:

Others:

  • White As Snow stamp and die set (Divinity Designs)
  • Snowflake Sky die set (Divinity Designs)
  • Large Banners die set (Divinity Designs)
  • Altenew Artist Markers
  • Heavyweight White Cardstocks
  • MISTI stamping tool
  • Craft heat gun
  • Fan brush
  • Paper trimmer
  • Die cutting Machine

Quick & Easy Christmas Cards using Ornament Punches

By Jessica Lin

Skill Level: Beginner
Time: 30 minutes

Hi everyone, it’s Jessica here. Quick & easy cards are so fun to make, and they are perfect for holiday mass production too! I made several versions today using some punches, and I hope you’ll enjoy this quick tutorial.

Step 1:
Use Stampin’ Up!’s Gleaming Ornaments punches with patterned paper to create the christmas ornaments. Each ornament needs two pieces; one unscored and one scored in the middle.

Step 2:
Apply On Point Glue onto the folded crease (backside of the patterned paper) and adhere to the unscored punch piece. Hold in place for 20-30 seconds while the glue dries.

Step 3:
Prepare 3 pieces of cardstock and adhere them together with Tear It Tape. The largest size measures 2 3/4‘’ x 4 1/4‘’, the medium size measures 2 5/8‘’ x 4 1/8‘’, and the small size 2 1/2‘’ x 4’’.

Step 4:
Attach a piece of gold thread to the back of the ornament with Tear It Tape, and adhere to the layered background. Attach the other end of the gold thread to the back of the green cardstock layer.

Step 5:
Adhere tiny bows to the top of the ornaments with glue dots.

Step 6:
Stamp the sentiment on black cardstock using StazOn Pigment ink. Adhere both the sentiment strip and the layered panel to the card base with Tear It Tape.

Step 7:
For the second version of the christmas card, I used the negative pieces from the punches and layered red, embossed cardstock underneath. Generously apply the Sheer Shimmer Stix in sparkle to add additional shimmer.

Step 8:
Adhered the patterned paper pieces onto the card base and stamp the sentiment using VersaFine Clair Nocturne ink. For a finishing touch, splatter on gold acrylic paint with a paint brush.

Imagine Supplies:

Other Supplies:

  • Stampin’ Up! – Punch – Gleaming Ornaments Punch Pack
  • Stampin’ Up! – Stamps – A Wish for Everything
  • We R – Tool – Precision Press
  • Gold thread
  • Thin red ribbon
  • Glue Dot
  • White, green, red, black cardstock

Make a Beautiful Winter Wedding Card

By Helen Gullett

Hello crafty friends!

Today, I want to share with you this Winter theme wedding card that you can make to have it ready in your handmade card stash.

Skill: Intermediate
Time: 15-20 minutes

Direction:

Step 1
Cut out a piece of light gray cardstock into 4.25 inch x 5.5 inch.
Run it through your embossing machine with the snowflake embossing folder.
Lightly rub the StazOn Pigment ink up on top of the embossed cardstock to add the white color on the snowflake.
Since it is pigment ink, the ink will take a longer time to dry so you can use a craft heat gun to dry the ink.
Cut it with one of the Double Stitched Rectangle Dies.

Step 2
Stamp the wedding cake image on a piece of watercolor cardstock with VersaFine Clair Nocturne ink using a stamping tool. I stamped the image twice to get a bolder print on it.
Memento Dew Drop and Sheer Shimmer Sparkle to create sparkle watercolor paint. Dab the ink on the craft mat and add some of the sheer shimmer, mix together.
First paint the cake with the Peanut Brittle ink. Dry the watercolor paint with a craft heat gun after painting.
Next, color the flowers with the Love Letter ink. Dry the watercolor paint with a craft heat gun after painting.
Then, color the leaves with the Pistachio ink. Dry the watercolor paint with a craft heat gun after painting.

Step 3
Then color the berries and other branches with the Teal Zeal ink. Dry the watercolor paint with a craft heat gun after painting.
Last, color the base stand with the Gray Flannel ink.  Dry the watercolor paint with a craft heat gun after painting.
Fussy cut the wedding cake with micro-tip scissors.

Step 4
Cut out a piece of vellum paper with one of the double stitched oval dies and one of the double stitched pennant flag dies.
Stamp the sentiment on a piece of gray cardstock with StazOn Pigment Snowflake ink pad using the stamping tool.
Cut the sentiment with the smaller size of the double stitched pennant flat dies that match with the vellum.

Step 5
Add the embossed background to the card base with Tear It! Tape.
Add the wedding cake on the oval vellum with some of the On Point Glue, then add them to the card with some of the Tear It! Tape.
Stack the vellum pennant and sentiment pennant together using some of the Tear It! Tape and add them at the bottom of the cake with the same tape.
Embellish the card with some of the white gems using the On Point Glue.

I wish I could capture the sparkle glitter watercolor paint on the cake with my camera. But I love how this Winter theme wedding card turned out, and hopefully you will like it too!

Thank you for stopping by our blog today. Have a fabulous day!

Craft Supplies

Imagine Crafts:

Others:

  • Long Lasting Love Stamp Set (Divinity Designs)
  • Double Stitched Rectangle Dies (Divinity Designs)
  • Double Stitched Oval Dies (Divinity Designs)
  • Double Stitched Pennant Flags Dies (Divinity Designs)
  • Snowflake Embossing Folder (Darice)
  • Neenah Solar White Cardstock
  • Neenah Grey Cardstock
  • Watercolor Cardstock
  • Bazzill Vellum Paper
  • White Gems
  • Small round water coloring brush
  • MISTI stamping tool
  • Micro-tip scissors
  • Paper trimmer
  • Die cutting Machine and plates
  • Craft heat gun

Create a Spooktacular Halloween Card with VersaFine Clair’s Latest Colors!

By Anna Escalada York

In today’s card, I used many of the new VersaFine Clair Ink colors to make another Halloween card.

Skill: Intermediate
Time: 1.5 hours

Directions:

Step 1:
Die cut leaves and stems out of watercolor paper. Ink blend the fern-y shaped leaf with Baby Pink VersaFine Clair ink and the individual leaves with Lilac Bloom VersaFine Clair ink. I pressed the stem die cut into the Sand Dune VersaFine Clair ink pad and the leaf cluster die cut into the Lilac Bloom VersaFine Clair ink pad. These were all set aside.

Step 2:
A sparkly piece of rose colored cardstock was die cut with a bow die cut.

Step 3:
Two bats and a crow were die cut out of watercolor paper. The crow die cut was pressed into the Portobello VersaFine Clair ink pad and the two bats were pressed into the Very Peri VersaFine Clair ink pad.

Step 4:
Press a die cut leaf cluster and boo sentiment die cuts into the Hawthorn Rose VersaFine Clair ink pad.

Not pictured: die cut a piece of sparkly white cardstock with the same boo sentiment. If desired, also die cut scrap cardstock twice with the same sentiment. Glue the sparkly white cardstock behind the boo sentiment so that the white sparkly cardstock peeks out on the side (like a shadow).

If adding the two layers of scrap cardstock layers behind the sentiment, trim the second o (the one on the right side) off both layers so that when it gets glued onto the wreath, it lays flat.

Step 5:
Die cut the wreath twice–once out of watercolor paper and once with more of the white sparkly cardstock. Spray the watercolor paper wreath with Angel Pink Fireworks! Shimmery Craft Spray and the white sparkly cardstock wreath with Rose Gold Sheer Shimmer Craft Spray. Set aside to dry.

Step 6:
Die cut another piece of watercolor paper with a smaller panel die cut. Roughly ink blend the panel with more of the Lilac Bloom VersaFine Clair ink. Then swipe the panel with the ink pad in a variety of directions and the edges of the panel. Add Clear Mboss embossing powder to the edges fo the panel and heat emboss.

Step 7:
Add a piece of patterned washi tape to a piece of scrap cardstock and die cut with a larger panel die cut. (If you don’t have washi tape, use patterned paper or a colored piece of cardstock.)

Step 8:
Run the smaller card panel through the die cutting machine with the plate die to add some additional texture.

Step 9:
Glue all of the die cut elements together. Start with the two wreaths, with the pink layer underneath the rose gold sparkly wreath on the top, making sure they are off set. Then glue the leaves, the crow and the bats along the wreath. The bow is glued down on the lower left part of the wreath. Glue the wreath onto the purple panel. The sentiment was glued down next. Gle the whole panel onto the larger, washi tape panel. Then splatter the whole thing with more of the Rose Gold Sheer Shimmer Craft Spray. Let dry.

Step 10:
Glue the frame gems on the lower left and upper right parts of the panel.

Step 11:
Glue the whole thing onto an A2-sized gray cardbase.

Art Supplies

Imagine

Other

  • Crafty Meraki – Embellishments – Meraki Sparkle Clear
  • Gina Marie Designs – Die set – Big and Little Chain Rectangle die set
  • Simon Says Stamp – Die – Detail Swirls Plate wafer die
  • Sizzix and Tim Holtz – Die set – Vault Foliage Wreath Thinlits dies
  • Sizzix and Tim Holtz – Die set – Vault Gothic Portraits Thinlits dies
  • Sizzix – cardstock – Rose Gold Opulent Cardstock
  • Watercolor paper
  • White glittery cardstock
  • Die cutting machine
  • Paper Trimmer
  • Scissors

Make a Playful Axolotl Card Using Reinkers

By Amalia Montano

-Hi, I am Amalia. In today’s video, I dive into the creative process by simply playing with my supplies—something I often do when I’m unsure how to start a project. I used Tsukineko inks to experiment with different backgrounds, and while they didn’t all turn out perfect, I was still able to create some beautiful results. One background turned into an elegant design, and another led to the creation of a cute critter—an axolotl, which is a fascinating salamander known for its adorable smile and unique ability to regenerate its limbs. Join me as I explore the fun and sometimes unexpected outcomes of just letting creativity flow! When you don’t know what to do, just play!

Skill: Beginner to intermediate
Time: 20 minutes

YouTube Video Link: https://youtu.be/fYdX1cxbpaE

Craft Supplies:

Imagine Products

• Delicata Ink Refills- Golden Glitz, Pink Shimmer, Ruby Red 
• Sheer Shimmery Craft Spray – Sparkle 
• VersaFine Clair – Pinecone, Nocturne or Morning Mist 
• Ultimate Pigment Ink Refill- Cardinal, Pink and Canary 
• Craft Mat

Other Products:

• Clear Acetate 4.25″x5.5″- Heat Resistant
• A2 Card Bases Pre Cut & Pre Scored
• Thanks A lot’l Stamp Set
• Super Sentimental Stamp Set
• Gina K. Designs | Pick & Stick Tool
• Crystals

Amalia from Cool Cakes and Craft with Amalia on YouTube

https://www.amazon.com/shop/coolcakesandcraftswithamalia

Let’s Make an Eggcellent Card

By Anna Escalada York

In today’s post, I made a card featuring earthy colors.

Skill: Intermediate
Time: 1.5 hours

Directions

Step 1:
Spray a piece of watercolor paper with Rich Cocoa and Potter’s Clay Fireworks! Spray.

Step 2:
Die cut the sprayed panel with a panel die.

Step 3:
Spray the same panel with Copper Shimmer Spritz spray.

Step 4:
Stamp another piece of watercolor paper with Nocturne VersaFine Clair ink. I chose to heat
emboss the image with clear embossing powder.

Step 5:
Color the image. I used a variety of mediums mixed with water to color the image.
– I colored the rooster jar with Jumbo Java VersMagic Chalk Ink mixed with water.
– The salt and pepper shaker tops, the egg holder and spoon with Cloudy Sky StazOn
Studio Glaze mixed with water.
– The rooster’s comb and wattles plus the flowers and the pink parts of the napkin with
Pink VersaColor Pigment ink refill mixed with water.
– Potter’s Clay Fireworks! Spray mixed with water was used to paint the toast, the napkin,
the egg and the background.
– I used a yellow glitter brush marker to color the beak, butter, and the center of the
flowers.
– I painted some Copper Shimmer Spray over the rooster.
Finally, I added some sparkle with a sparkle pen on the salt and pepper shakers.

Step 6:
After the stamped image dried, die cut the stamped image with the corresponding die.
(Optional step: Die cut a scrap piece of cardstock and glue this scrap die cut behind the
stamped and colored layer for dimension and strength.)

Step 7:
I used my paper trimmer to trim the panel. I then ran my Jumbo Java VersaMagic Chalk Ink
around the edges of the panel to create a border.

Step 8:
Stamp a sentiment on a piece of watercolor paper. If desired, heat emboss with clear
embossing powder. Then trim the sentiment strip.

Step 9:
Run the Jumbo Java VersaMagic Chalk Ink around the edges of the sentiment to create a
border.

Step 10:
Die cut a piece of white glitter cardstock. Glue the white die cut glitter cardstock onto the
background panel. Glue the breakfast scene (the main stamped image) over the white glitter
cardstock. Then glue the sentiment onto the lower corner of the panel. Let the glue dry.

Step 11:
Glue the whole panel onto an A2-sized white card base.

Step 12:
Glue sequins around the main stamped image to finish the card.

Products Used:
Imagine:
Fireworks! Shimmery Craft Spray – Potter’s Clay Fireworks! Shimmery Craft Spray – Rich Cocoa Sheer Sheer Shimmer Craft Spray – Copper
StazOn Studio Glaze – Cloudy Sky VersaColor Reinker – Pink
VersaFine Clair ink – Nocturne VersaMagic Chalk Ink – Jumbo Java

Other:
Catherine Pooler Designs – Sequins – Mazatlán
Erin Lee Creative – Glitter Cardstock – Cotton Cardstock (retired) Hero Arts – Stamps – Eggcellent
Hero Arts – Dies – Eggcellent
Hero Arts – Dies – Nesting Circle Infinity dies Reverse Confetti – Die – Deco Cover Panel (retired) Sakura – Glitter Gel Pen – Gelly Roll Stardust pen
Scrapbook.com – Glitter Brush Marker – Sunshine Yellow Clear embossing powder
Watercolor paper Paper Trimmer Scissors
Glue