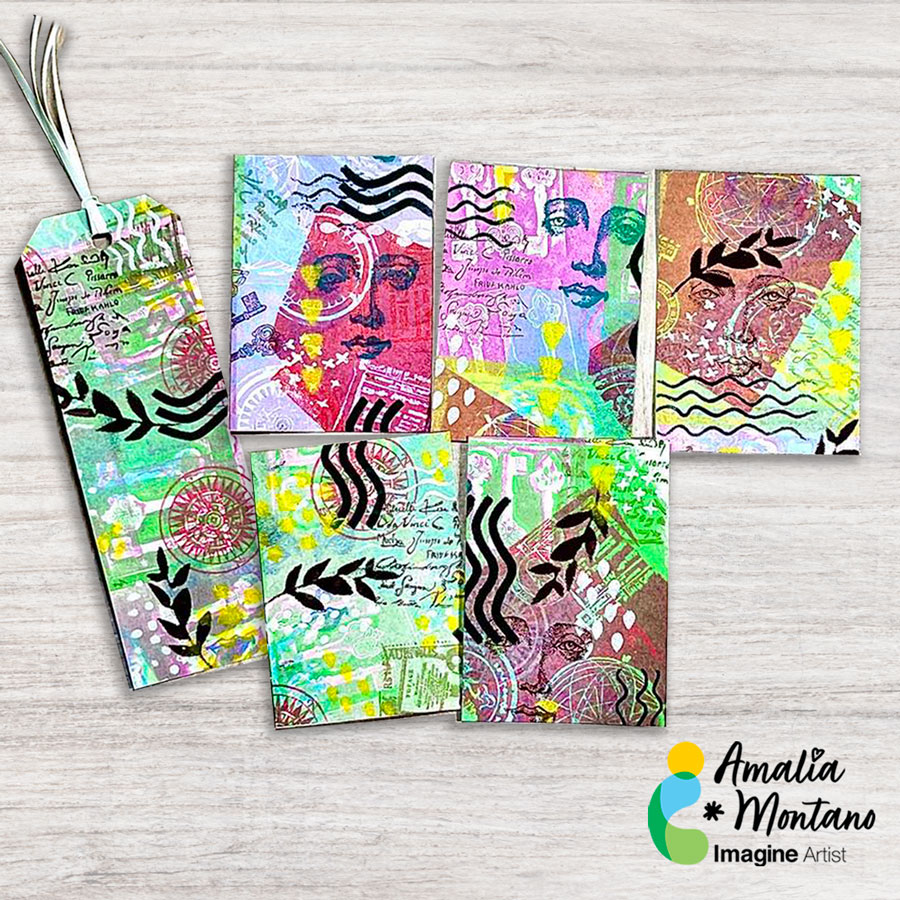
Hello, friends! Amalia here with a project from Imagine. In this video, I’m using the new VersaFine Clair ink colors to create masterboards, which will later be cut into ATCs and a bookmark. VersaFine Clair inks are highly pigmented and provide a perfect stamp impression on the first try. Their vibrant colors are ideal for watercoloring, as they won’t bleed when wet. I’ll also be incorporating stamps, stencils, and stamping foam to bring these ATCs and the bookmark to life.
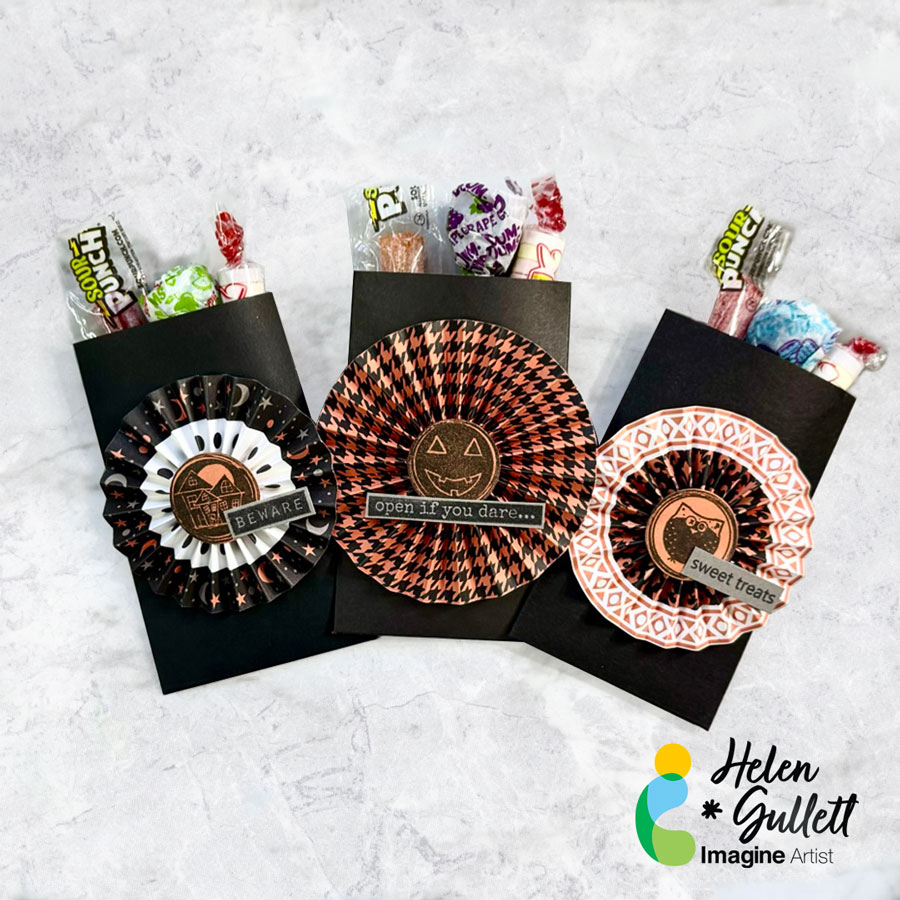
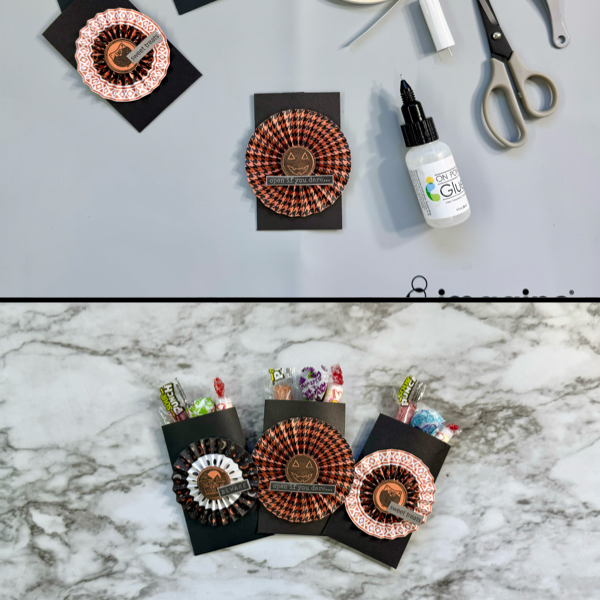
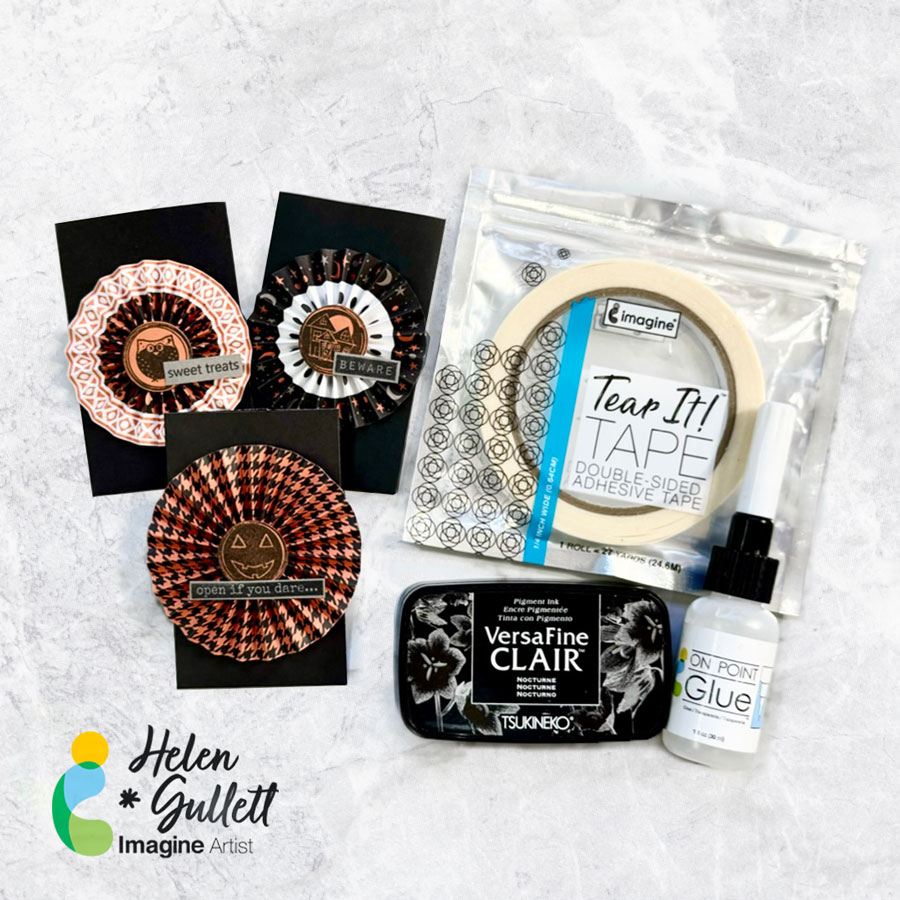
Hello crafty friends! October is here and Halloween is just right around the corner. Today, we are going to make these Halloween treat bags. It is easy and fun to make for giving away treats on Trick-or-Treat day.
Let’s get crafting!
Skill: Intermediate Time: 15 minutes
Direction:
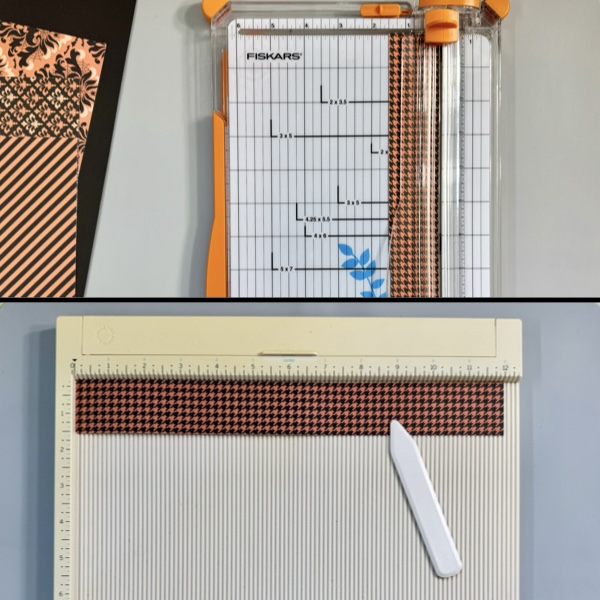
Step 1 We are going to make the paper ribbon pinwheel. It is better using double-sided pattern scrapbook paper, but one-sided paper will work too. First, cut out some pattern papers into 1.25 inch x 12 inch paper strips. For a smaller size, you can cut your paper into 1 inch x 12 inch.
After cutting your paper strips, score the paper in ½ inch using the scoring board.
Step 2 Fold the paper strips following the scoring lines. You can use a scoring folder tool to make the folded part crisper.
Snip off the last folded strip (one of the ends is okay).
Added a piece of Tear It! Tape on the last folded strip and connect it to the other end of the paper.
Step 3 Punch a black cardstock (or any matching color cardstock) using a 1 inch punch tool or you can cut using any circle die set.
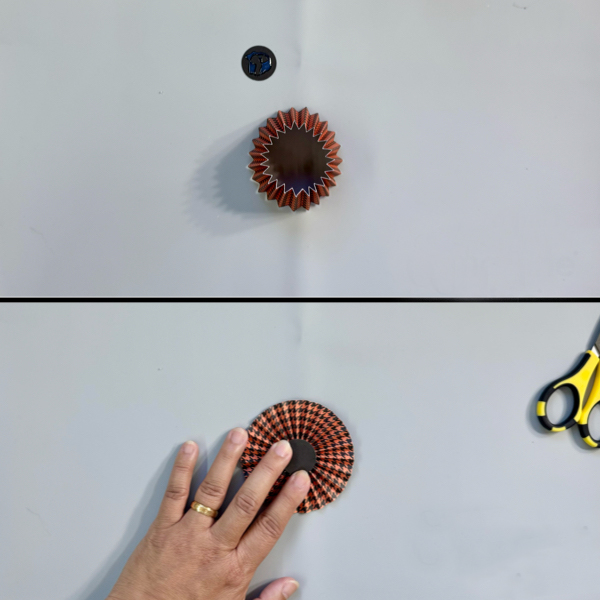
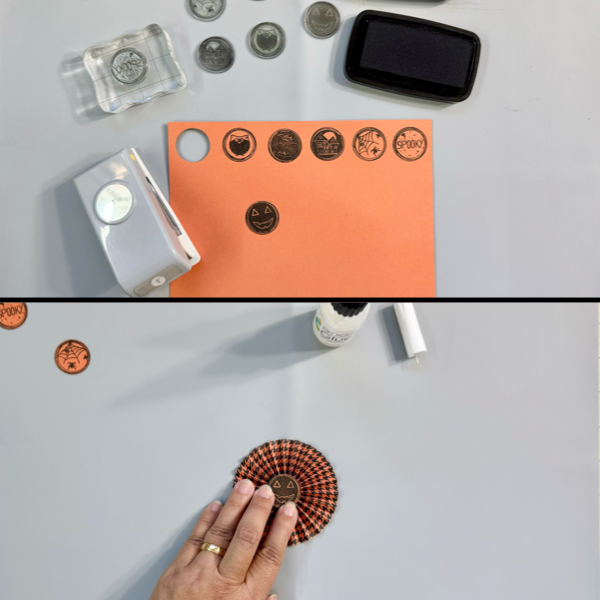
Add some of the On Point Glue on the circle cardstock and add it to one of the sides of the pinwheel. Firmly press it down for a few seconds to make sure the glue dries well. Or you can put a couple stamping blocks on it while you are working on the next one. This is the back of the pinwheel.
Step 4 On a piece of orange cardstock (or any matching color cardstock to your patterned paper), stamp the images.
Use the 1 inch punch to punch each of those stamped images.
Add some of the On Point Glue on the back of the circle and add it to the front of the pinwheel in the middle. Firmly press it down for a few seconds to make sure the glue dries well. Or you can put a couple stamping blocks on it, then do the same thing to the other pinwheels.
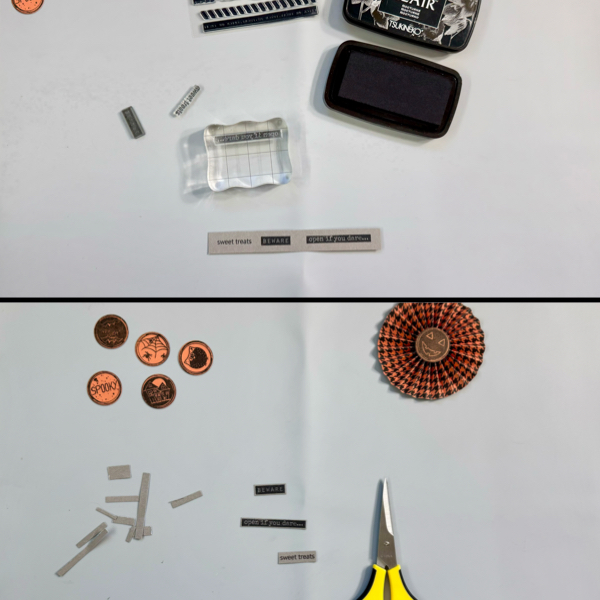
Step 5 On a piece of gray cardstock (or any matching color cardstock to your patterned paper), stamp the sentiments with VersaFine Clair Nocturne ink pad.
Use the scissors to trim the sentiments.
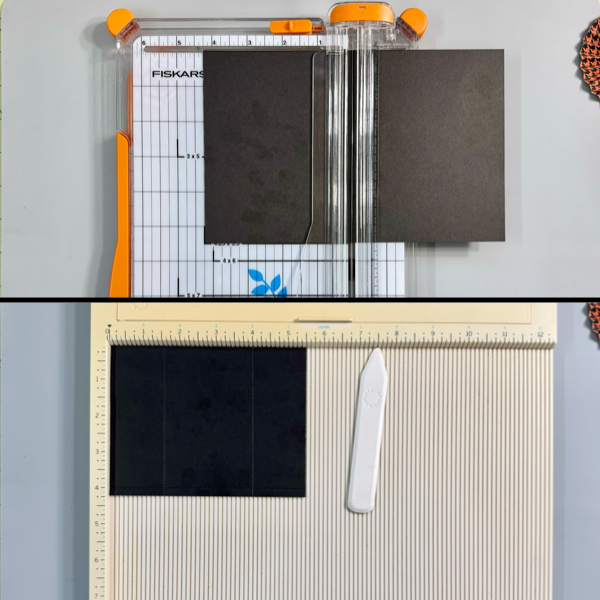
Step 6 Cut a couple of black cardstocks into 4.25 inch x 5.5 inch
Using the scoring board, score the cardstock at 1.5 inch and 4 inch, and then score the bottom at ¼ inch.
Step 7 Use the scoring bone folder to fold the cardstock.
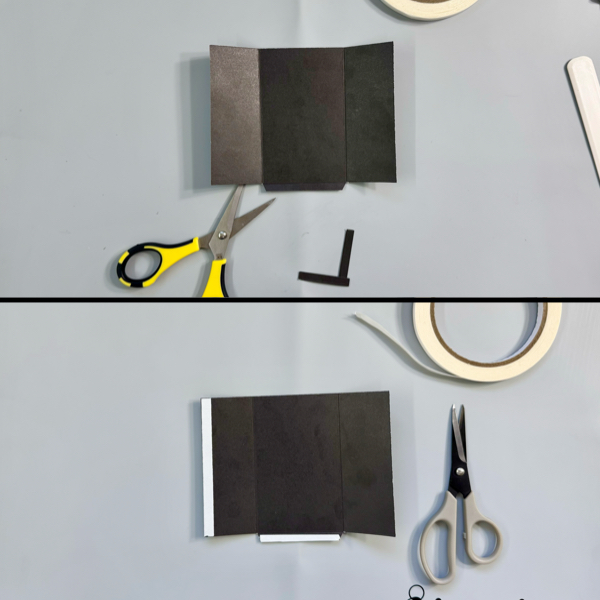
Cut on the scoring line at the bottom of the 2 sides only, leave the center, and fold the bottom flap.
Add some of the Tear It! Tape at the left side and also at the bottom flap. Remove the tape backing off.
Fold the right side first, and then the left side, press firmly to make sure the tape adheres well. And then fold up the bottom flap to close the bottom, press firmly.
Step 8 Add some of the On Point Glue on the back of the sentiment strips and then add them to the pinwheels.
And then add some of the On Point Glue on the back of the pinwheels and add them to the front of those treat bags. Wait a few minutes until the glue to dry well before you fill them up with candies.
Aren’t those treat bags cute for giving away some candies on Trick-or-Treat Day? You can make them for your kids’ classmates also. They are big enough for 3 or 4 candies. Thank you for stopping by our blog today. Have a fabulous day!
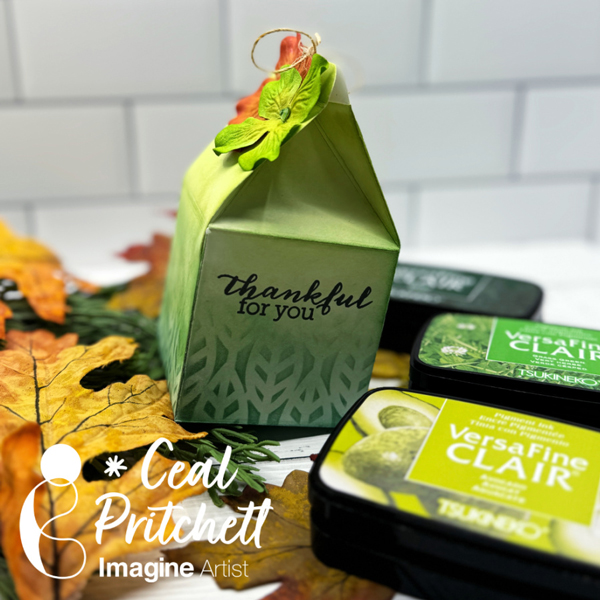
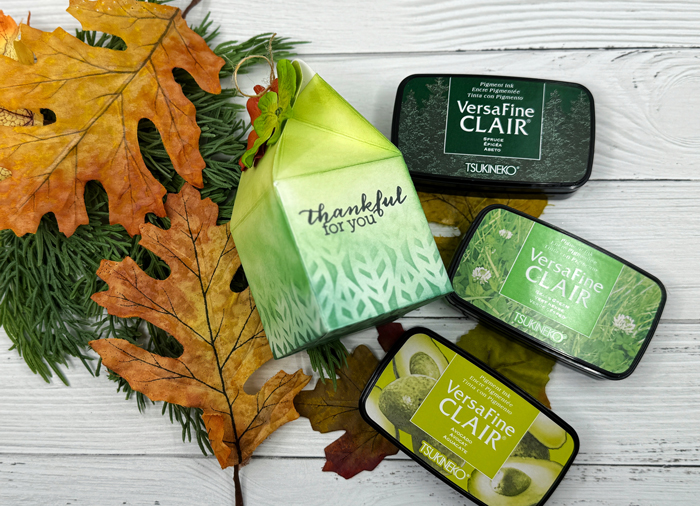
Hello crafty friends! Today I am sharing how to create this milk carton treat box
Skill Level: Beginner Time: 30 minutes
Directions:
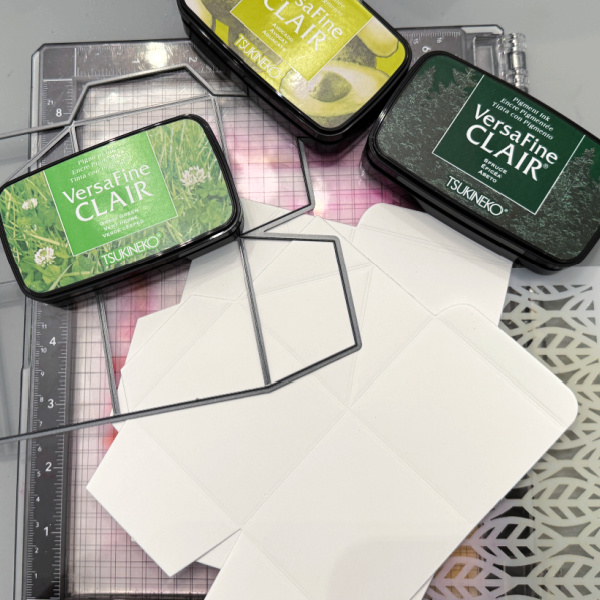
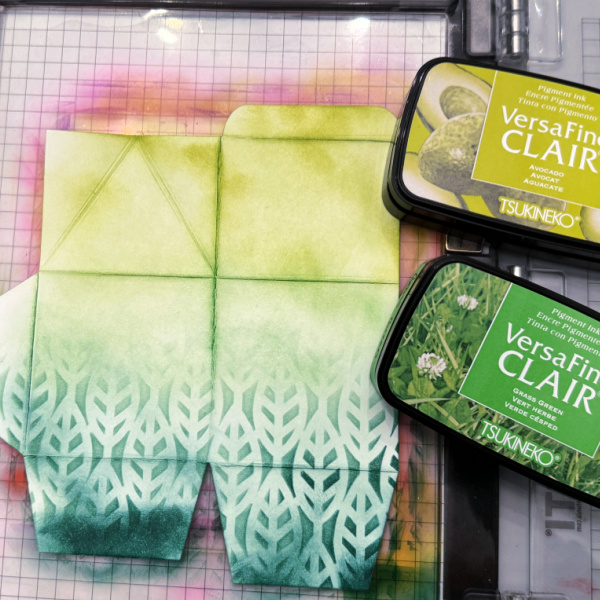
Gather your supplies. You will need a treat box die (I am using a tailored Expressions) a stencil and three colors of ink (I am using VersaFine Clair new colors) White cardstock cut to 6 x 8.5
Step 1: Cut out two pieces of the die using white card stock. Place one of the pieces down on a stick mat to hold it in place. Place the stencil over it and ink the bottom third of the die with the darkest ink color.
Step 2: Remove the stencil and ink the next third using the medium color of ink and the last third with the lightest color of ink. Repeat this process for the next piece.
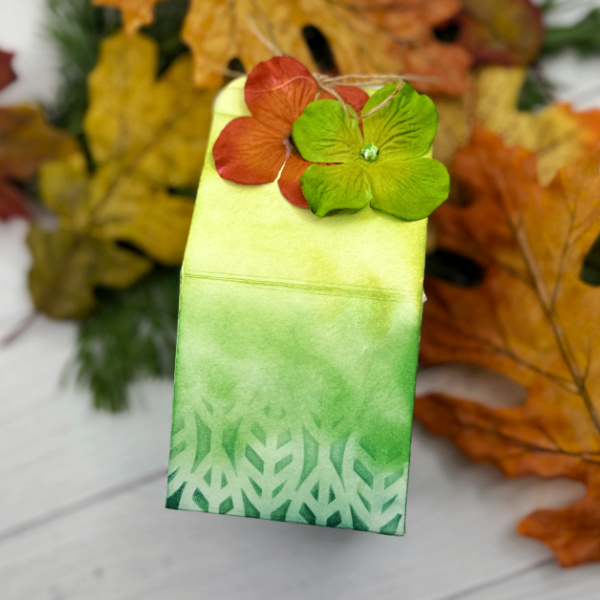
Step 3: Assemble the carton and embellish. I used some embellishments from my stash.
Other products: Neenah Classic Crest Solar White 80lb Cardstock – CutCardStock Milk carton die – Taylored Expressions Stencil – Ink On 3 Embellishments
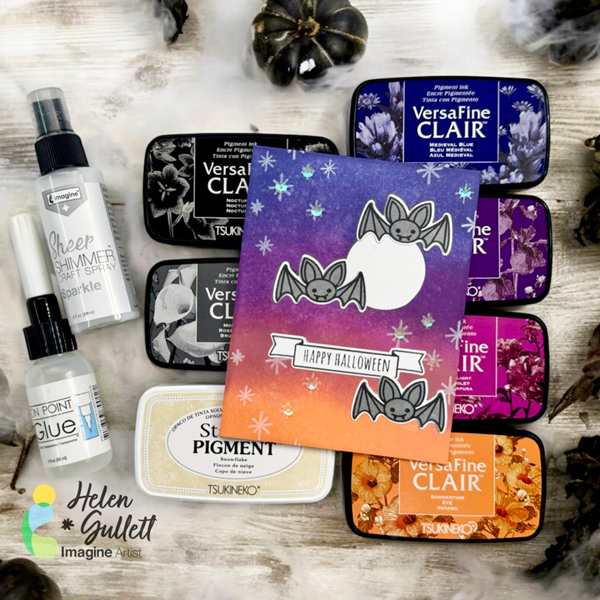
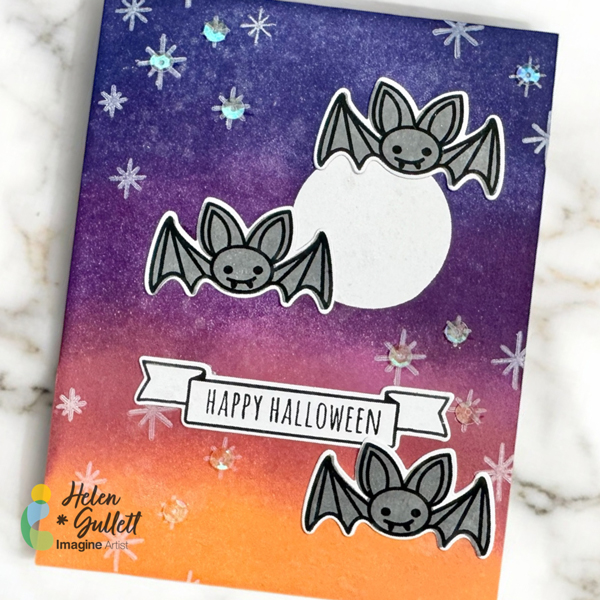
Hello crafty friends! Today, we are going to make this Halloween theme card using color blending techniques with VersaFine Clair ink pads and stamping with Staz-On Pigment ink pad. Let’s get crafting!
Skill: Intermediate Time: 15-20 minutes
Direction:
Step 1
Cut out a piece of white cardstock into 4.25 inch x 5.5 inch.
Cut a piece of masking paper using 1 inch circle punch or any circle die. Peel off the backing of the masking paper and add it to the cardstock.
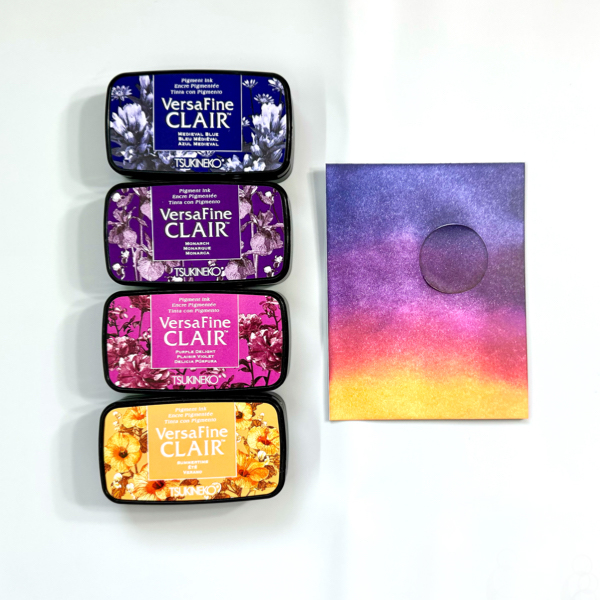
Start adding each color on the cardstock using a blending brush one by one. Colors I used for this background are VersaFine Clair: Medieval Blue, Monarch, Purple Delight, and Summertime. You can repeat adding colors until you are happy with the blended colors.
Step 2
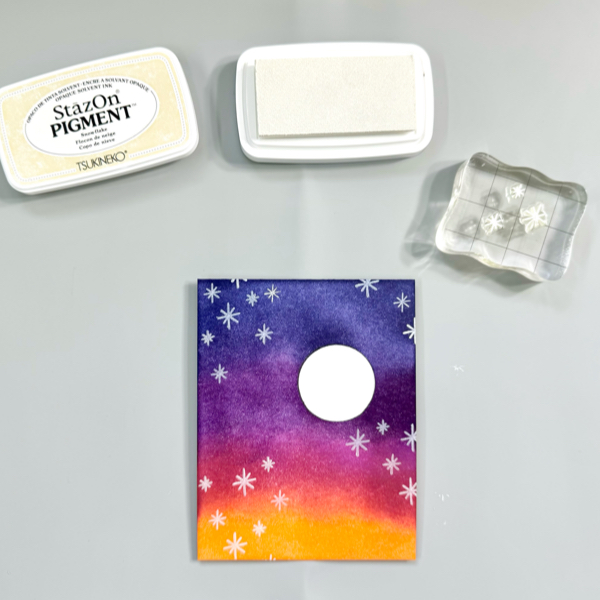
Next step is randomly stamping the small star images on the background using the Snowflake Staz-On Pigment Ink Pad. This white pigment ink is opaque and the white ink sits on top of other colors.
Remove the masking paper of the cardstock.
Step 3
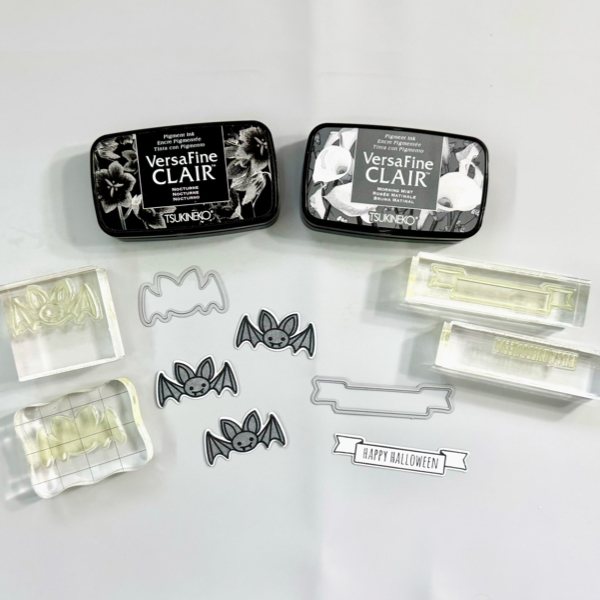
On another piece of white cardstock, stamp the bat outline stamp with VersaFine Clair Nocturne ink pad.
Put the bat solid stamp in the stamping block and add some VersaFine Clair Morning Mist ink pad on it, line up the bat solid stamp on top of the stamped bat image, and stamp.
Stamp the sentiment and banner image with VersaFine Clair Nocturne ink pad on a white cardstock.
Cut them with the matching die set, or fussy cut them with scissors.
Step 4
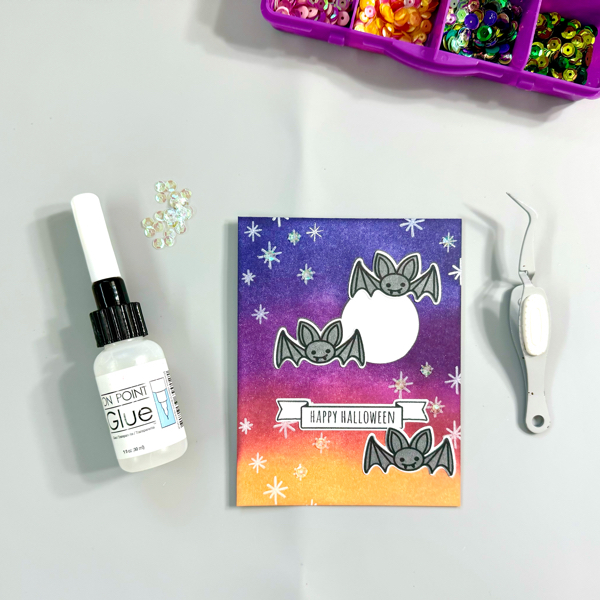
Add the background mat to the card base with some of the On Point Glue. Press firmly for a few seconds until the glue dries.
Add the bats and sentiment banner to the card with On Point Glue.
Optional, you can add some extra sequins to the card, or just leave as it is.
Step 5
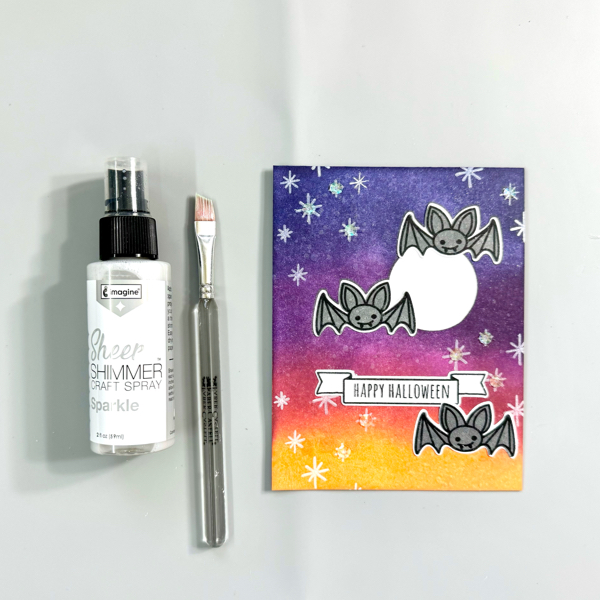
For extra shimmer, I added some Sheer Shimmer Sparkle spray on the card with small flat brush.
Aren’t those bats too cute to spook? I hope this Halloween card can put a smile on your face, too. Thank you for stopping by our blog today. Have a fabulous day!
In today’s card, I used sprays and and ink-blending to make a Halloween card.
Skill: Intermediate Time: 1.5 hours
Directions:
Step 1: Stamp the Death’s-Head Moth stamp onto a piece of white watercolor paper with Nocturne VersaFine Clair ink. Emboss with Clear Mboss powder.
Step 2: Spray a pre-die cut panel of watercolor paper with Lilac Posies Fireworks! Shimmery Craft Spray and Rose Gold Sheer Shimmer Craft Spray. Allow the panel to dry.
Step 3: Color two corner filigree stamps–one at the top right corner and one at the lower left corner–with the Sweet Plum Memento Marker directly and then stamp the sprayed panel. Flip the panel 180 degrees (so the top is now the bottom) and repeat the process to add a stamped image to each corner.
Step 4: Ink blend Perfect Plumeria VersaMagic Chalk Ink around the border of the card panel, overlapping with the stamped decoration just added. Then ink blend the edge of the panel with Midnight Black VersaMagic Chalk Ink.
Step 5: Die cut a piece of black watercolor paper with a frame die. Then spray the die cut with Rose Gold Sheer Shimmer Craft Spray and let dry. If desired, repeat this process to add more shine and color.
Step 6: Fussy cut the Death’s-Head Moth, then use a sponge dauber to ink blend the outer part of the wings with Perfect Plumeria VersaMagic Chalk Ink.
Step 7: Spray the moth with Angel Pink Fireworks! Shimmery Craft Spray and allow to dry.
Steps 8 and 9: Stamp a border and a sentiment on a piece of watercolor paper with Nocturne VersaFine Clair ink. Heat emboss with Clear Mboss embossing powder. Then fussy cut the border. Then ink blend the edges of the sentiment with Perfect Plumeria VersaMagic Chalk ink with a sponge dauber. Then lightly spray the sentiment with Rose Gold Sheer Shimmer Craft Spray. Allow the spray to dry.
Step 10: Glue the frame, Death’s-Head Moth and sentiment onto the background panel.
Step 11: Die cut a piece of sparkly black cardstock with a larger panel die cut. Glue it behind the sprayed panel as a matte layer.
Step 12: Glue embellishments onto the panel and finish the card by gluing the whole thing onto an A2-sized card base.
Other • Crafty Meraki – Embellishments – Meraki Sparkle Gold • Erin Lee Creative – Paper – Las Vegas Sparkly Cardstock • Gina Marie Designs – Die set – Big and Little Chain Rectangle die set • Whimsy Stamps – Stamp Set – Exquisite Beauty stamp set • Whimsy Stamps – Die Set – Forever Cameo Frames die set • Watercolor paper • Paper Trimmer • Scissors • Glue
Hi everyone! It’s Jessica here and I’m excited to share a patterned paper trick with you today. If you like to save scraps of pretty paper, but are unsure how to use them, I highly recommend trying out today’s technique!
Skill: Intermediate Time: 30 minutes
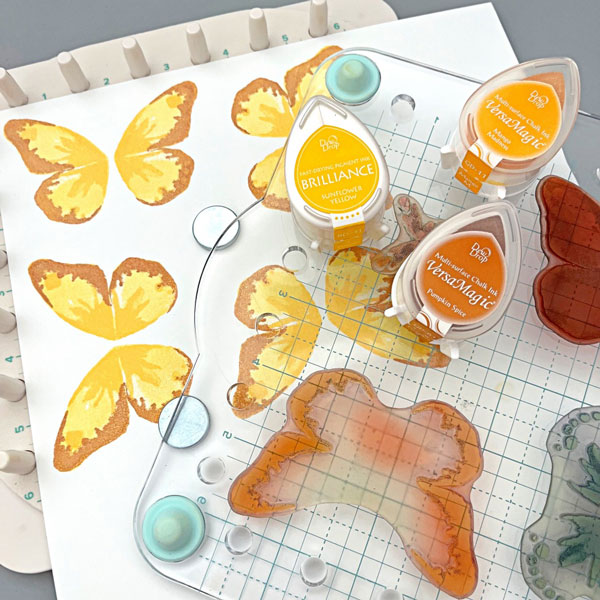
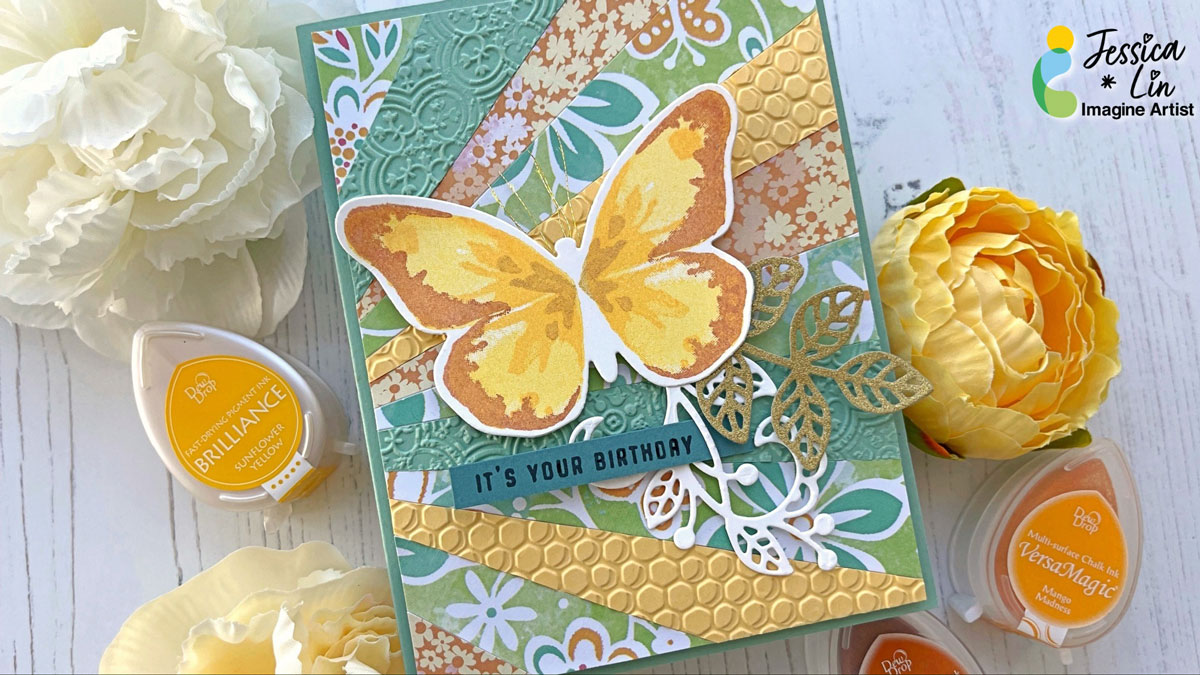
Step 1: The focal image of today’s card is this butterfly stamp from Watercolor Wings. It’s one of my favorite layering stamp sets of all time. I used Brilliance Sunflower Yellow for the base layer. Then I stamped the second and third layers with VersaMagic Mango Madness and Pumpkin Spice. I did add a fourth layer using Brilliance Galaxy Gold as well (not pictured).
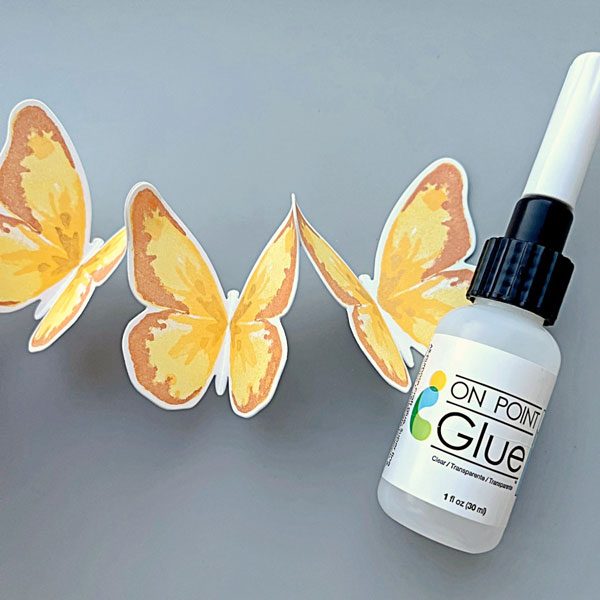
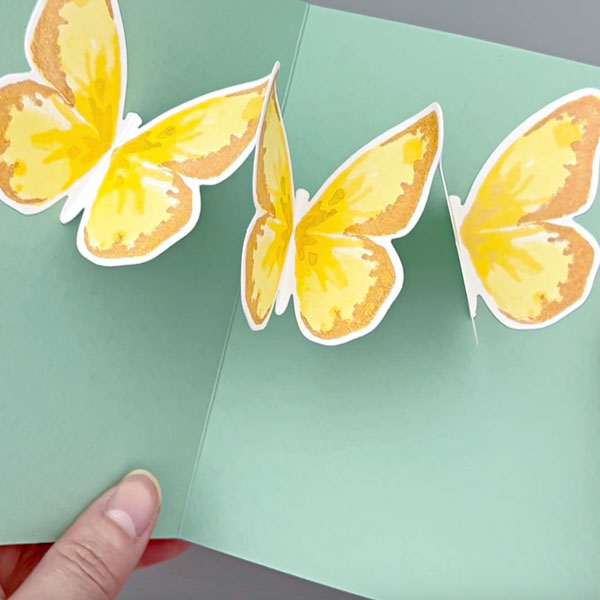
Step 2: Die cut the butterfly images with Bold Butterfly dies. Then adhere the tips of the butterfly die cuts with On Point Glue. This would create a string of butterflies for a surprise pop up mechanism inside the card (next photo).
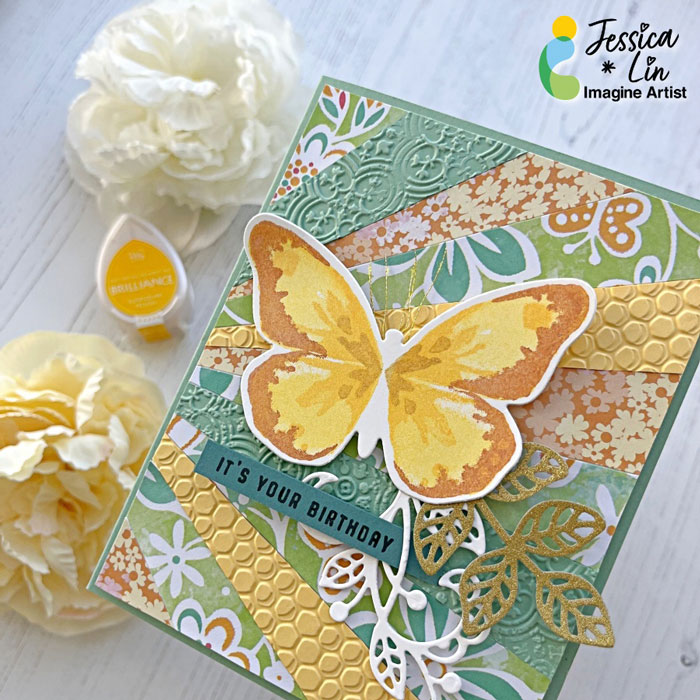
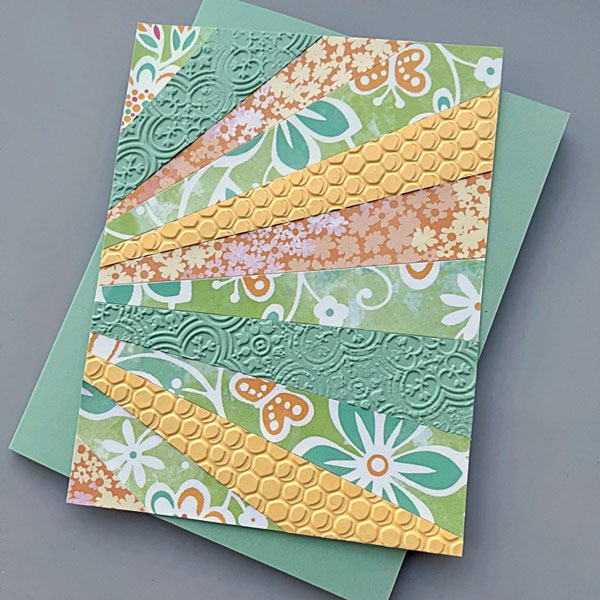
Step 3: To make the patterned paper background for the card front, trim your patterned paper scraps to 1 x 6’’. Then cut each piece diagonally to create long, triangular shapes. I used Stick It adhesive to cover the entire background panel and adhered the patterned paper pieces on top. However, you could use whichever adhesive you prefer. Once the entire panel is covered, trim off the hanging pieces on the edges.
Step 4: Lastly, adhere the last butterfly along with any additional foliage die cuts. And the card is complete!