Create a Frosted Blue Season’s Greetings Card

by Martha Lucia Gomez

Create a Frosted Blue Season's Greetings Card

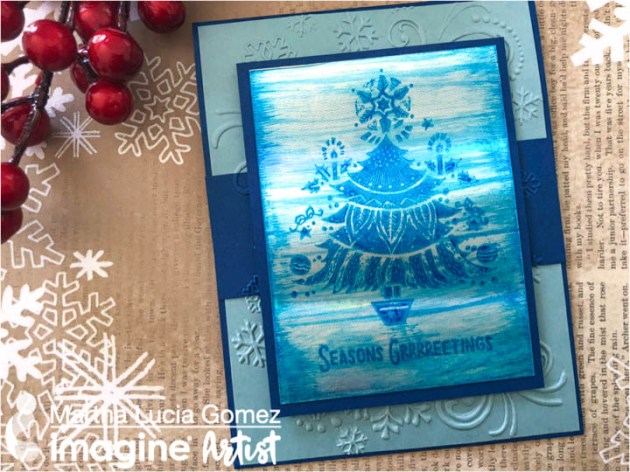
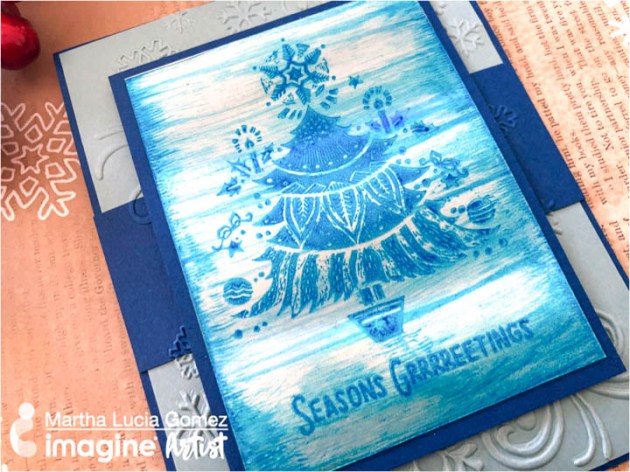
Today I have something “cool” to make! I use an ice technique and “frosted blue” color challenge to create a Season’s Greetings holiday card. To make this technique you only need StazOn Ink, metallic paper, VersaMark and embossing powder to obtain a good shine in your project.

Skill: Intermediate
Time: 30 minutes

Directions


Step 1

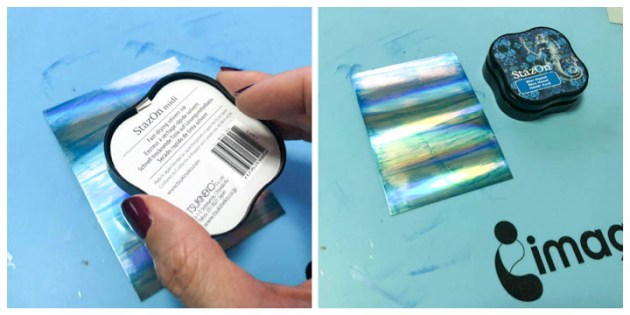
I started with a piece of Silver Foil Sheet from Stamping Up. I decided in advance which stamps I wanted to use and I cut the paper a little bigger of the stamps to create the ice look. Then I applied the ink directly with the StazOn Inkpad Blue Hawaii from left to right and then repeated the process but from right to left.


Step 2

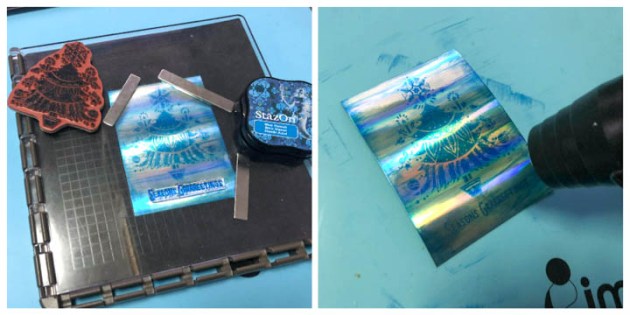
The idea is to create intermittent horizontal lines and have the borders a little darker. Depending on the brand of the foil paper that you are using, you will need to use a stamping tool to stamp the images with the same StazOn Ink Blue Hawaii. Sometimes the first attempt is not the best definition of the image but it depends on the paper. After stamping your images, you need to dry the ink with the heat tool. Don’t put you heat tool too close to the surface to avoid burning your paper. You can use rubber stamps or clear stamps with StazOn Ink, don’t think that it will damage your clear stamps, it is a false assumption with this brand (see Nadine’s Myth Buster video). Just use StazOn stamp cleaner after to keep your stamps in good condition.


Step 3

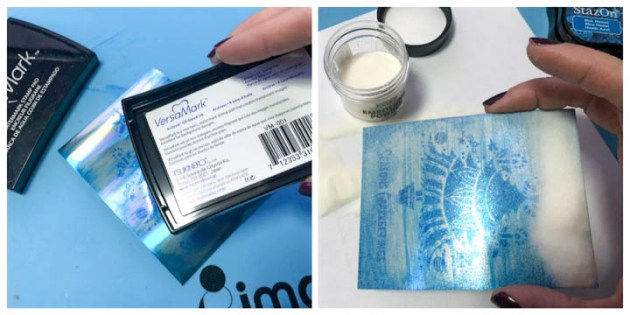
When the StazOn ink is totally dry, take the VersaMark and apply the ink directly over the stamped images. Cover the entire surface with Clear Embossing Powder and activate the powder with the heat tool. You will have a glossy and shiny look that will create the icy look over the blue. You can mat this piece using cardstock to notice the difference of materials.


Step 4

To finalize my card, I created a card base using Blueberry Bushel Cardstock for the card base and Coastal Cabana for the second layer. I embossed the second layer with an embossing folder and created a belt using the same color of the card base and aligned a piece with the same embossing folder.

Supplies

Imagine
Other
  • Tree Stylish Stamp by Crackerbox & Suzy Stamps
  • Big Shot or any die cut machine
  • Embossing Folder
  • Stampin Up – Silver Foil Sheet, Blueberry Bushel cardstock, Coastal Cabana cardstock
  • Dimensionals or double-sided foam tape

Learn How To Create Cards With Versatile Vellum

by Elina Stromberg

Learn How To Create Cards With Versatile Vellum

As a paper crafter, I’m sure you’ve come across a material called vellum. Hundreds of years ago ‘vellum’ was used to describe a thin, yet durable paper made from calf’s skin, but today this translucent, parchment resembling specialty paper is made from cotton and pulp. Vellum is usually white, but it is available in various other colors, too. Vellum’s unique characteristics have made it a popular material among paper crafters. However, some crafters consider vellum to be a bit tricky material to work with and knowing a few tips and tricks may help in the process. The best way to get familiar with the versatility of vellum is just to start playing and experimenting. Let me share with you a couple of ideas of how I like to use this great material.

Layering vellum on patterned paper

Vellum is translucent so it can be placed over a patterned background without completely hiding the underlying pattern. This characteristic is a great way to calm down a busy background, and if you place other elements on the vellum layer they will not blend into the background pattern.
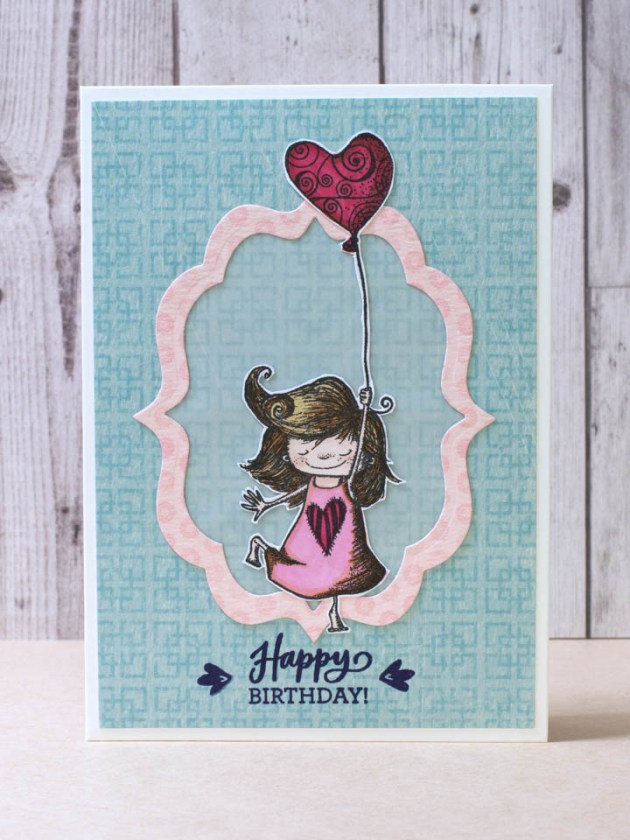
Layering vellum on patterned paper

Transparency of vellum has its pros and cons. The background pattern will show through, but so will most of the adhesives that you need to use for attaching vellum on the background. However, lightweight vellum does not require too much adhesive to stay in place, and the trick is to use glue only on spots that you can cover later with other elements like frames, cut-out images or sentimetns, flowers, sequins, enamel dots, buttons etc. For some projects, a stapler is a good option for fastening, and on other projects, a metal brad will do the trick.
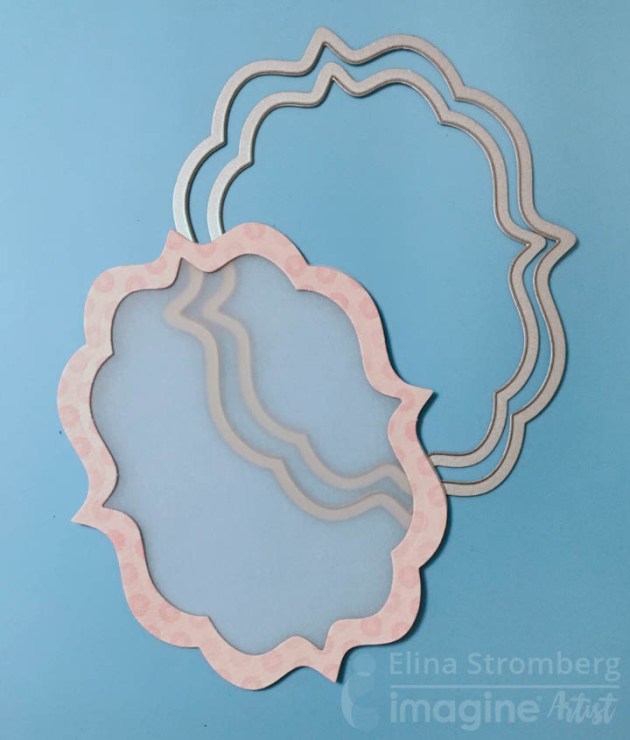
In my card sample, I die-cut a paper frame that I used for hiding the glue marks.

In my card sample, I die-cut a paper frame that I used not only as a fun layout element, but also for hiding the glue marks where the vellum is attached to the background.


Heat embossing

Vellum is a great material for heat embossing. Same supplies (VersaMark and Embossing Powders) can be used for vellum and for paper, and the melted powder will stick as it does on paper.
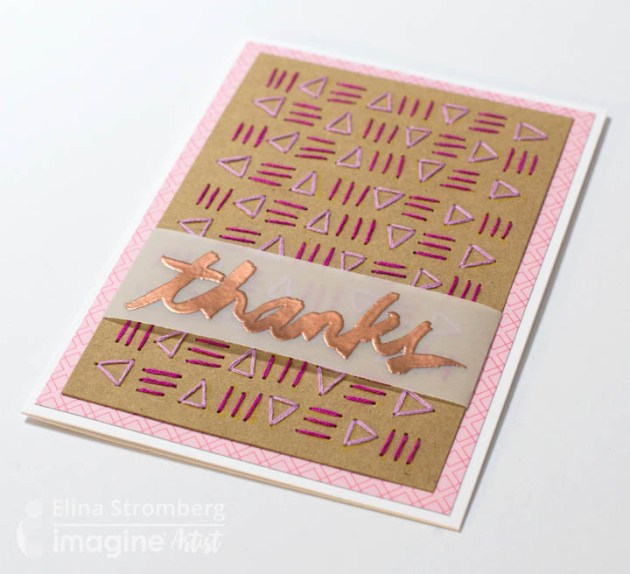
Simply heat emboss the text on a piece of vellum and attach the strip on the card.

Translucent vellum takes heat embossing to a new level, providing new possibilities to layer stamped elements. This is especially the case with stamped sentiment texts that in some cases are tricky to position on a card. Simply heat emboss the text on a piece of vellum and attach the strip on the card. While the vellum will highlight the raised text, its translucent background will let the underlying pattern to show through too.

Coloring with inks or watercolors

Vellum can be colored with markers, pencils, paints, inks, and watercolors. Vellum does not absorb wet media too well and a watercolor painted vellum surface may start to curl. However, this vellum characteristics can be utilized for creating beautiful vellum flowers where you can use the curling as an advantage:
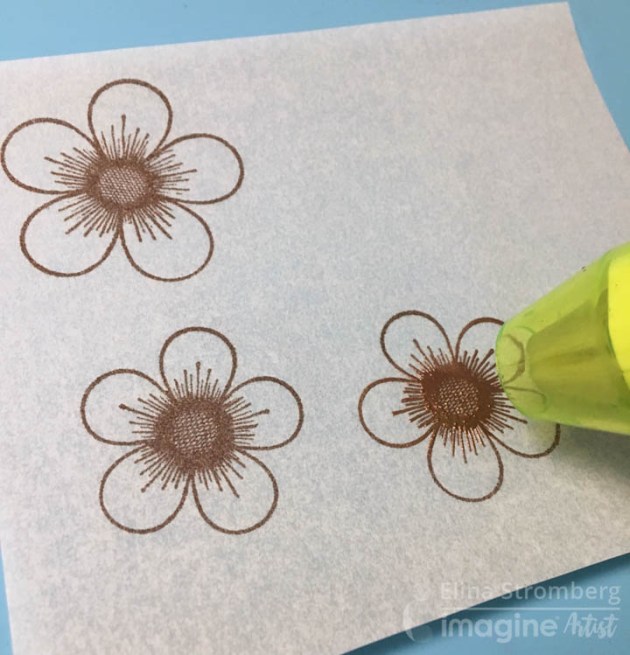
I started with stamping and heat embossing simple flower images on a piece of vellum.
I started with stamping and heat embossing simple flower images on a piece of vellum.


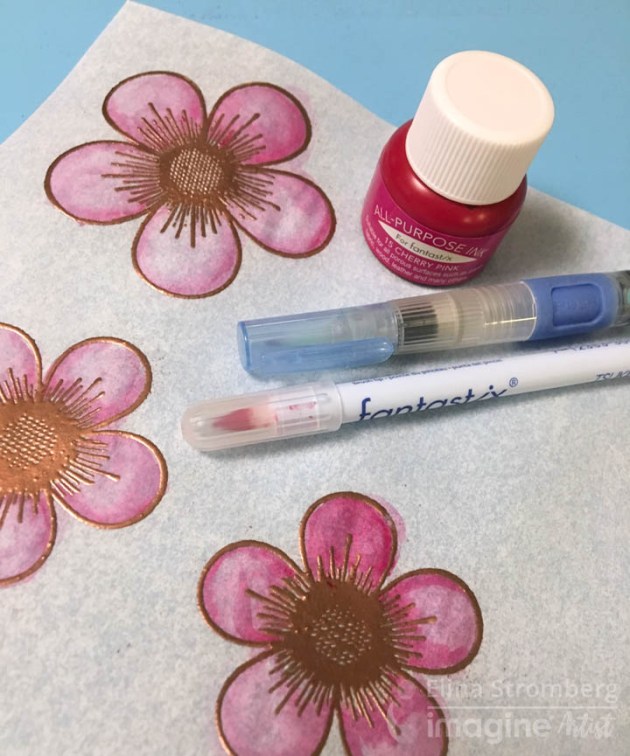
I colored the flowers with All-Purpose Ink in Cherry Pink, adding with a water brush quite a rich amount of water on the petals

I colored the flowers with All-Purpose Ink in Cherry Pink, adding with a water brush quite a rich amount of water on the petals. While vellum was still a bit moist, I cut out the flowers and dried the color with a heat gun.
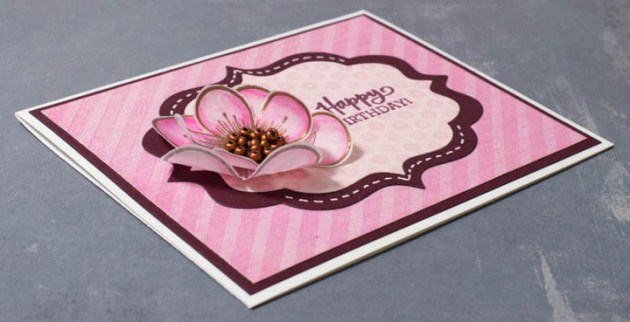
On this card the background is heat-embossed also, using clear embossing powder.

Using the heat gun to dry the wet inks curled up the flower petals, and by layering two stamped flowers I created a beautiful 3-dimensional flower to be used on a card.

If you are not big on heat embossing, Delicata and Brilliance inks will dry on vellum without heat embossing. Remember though that it will take longer to dry on vellum than on standard cardstock.

Dry embossing

Vellum has a smooth finish that can easily be dry-embossed. The result looks amazing, as the embossed lines turn from frosty white to bright white. If you’re using embossing folders and a die-cutting machine, make sure that you’re applying as little pressure as possible on the folder. A detailed image and heavy pressure will easily break the vellum. I prefer using a stylus for dry embossing vellum. In this technique, I place the piece of vellum on a surface that is a bit soft, like the Imagine Craft Mat or a mouse pad, and trace the lines with a stylus. It’s important to apply just enough pressure to change the vellum from translucent to white, as a stylus can also tear or punch the vellum if too much pressure is used.
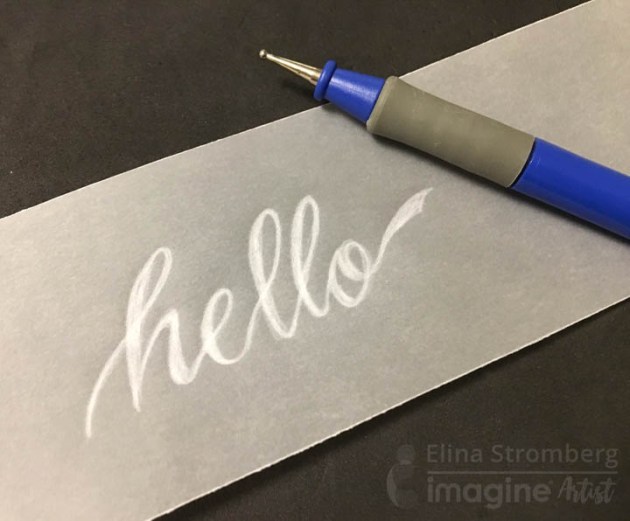
With a stylus, you can write texts, doodle swirls or draw

With a stylus, you can write texts, doodle swirls or draw. Instead of free-hand drawing, you can also use a stencil as your guidance. Just place a stencil on the vellum and trace the pattern with a stylus:

Instead of free-hand drawing, you can also use a stencil as your guidance.

I attached the vellum panel on the card with a few stitches on each edge as I did not want to frame it for this layout. Instead of hand-stitching, I could have used a sewing machine for attaching; it works just as well!
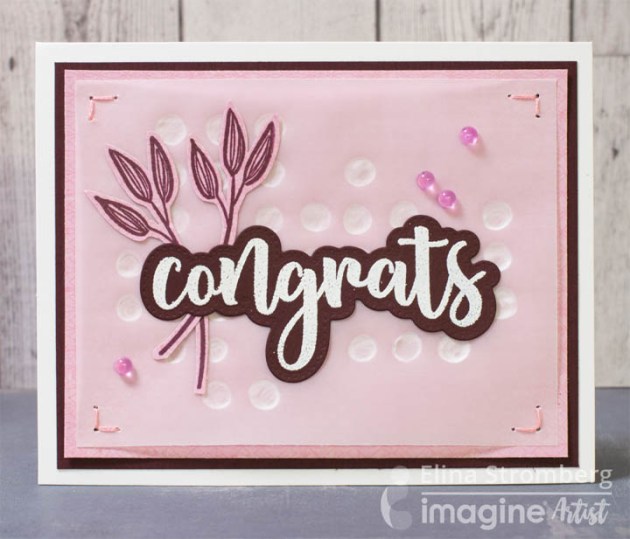
I used this dry-embossed vellum background for a simple card project. The dry embossed pattern adds a whimsical element that does not compete with the bold sentiment.

Hope these ideas inspire you to use vellum on your craft projects. I’m sure you will love the versatility of it!

Supplies

Imagine
Other
  • American Crafts – Vellum
  • Stamps: Carabelle Studio – ‘Little girl with ball’, Visible Image – ‘Somewhere In Time’, Honey Bee – ‘Congrats’, Stampin’Up! – ‘Diagonal Stripe’, Jasmine Jones+Studio Calico – ‘Happy Birthday’, Altenew – ‘Freeform Greenery’.
  • Other stamps: “Thanks” sentiment, Flowers
  • Sizzix – Nesting dies
  • Fiskars – Stylus
  • Dot stencil
  • Water brush
  • Cardstock
  • Card bases
  • Embroidery yarn & needle

Use a Ghosting Technique to Create a Unique Christmas Card

by Martha Lucia Gomez

Use a Ghosting Technique to Create a Unique Christmas Card

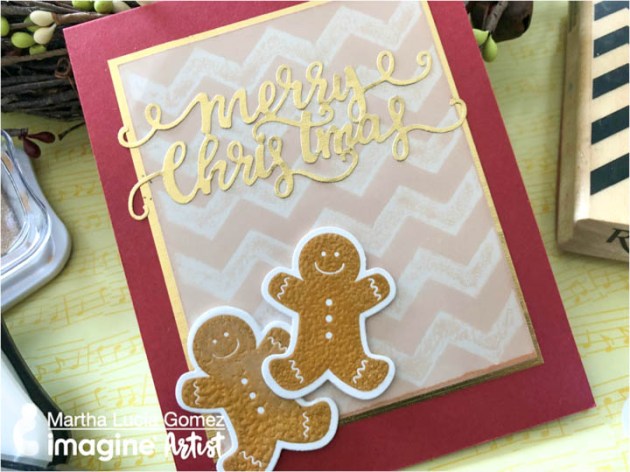
Hello everyone! Ghosting technique was one of the first techniques that I learned in cardmaking crafts and today I am sharing with you a lovely way to incorporate this ghosting technique in a Christmas Gingerbread Card. To realize this technique you only need glossy card stock and VersaMark ink to stamp the ghost image. In my project, I am using a Chevron Background from Recollections, but let me show you the process!

Skill: Intermediate
Time: 1 hour

Directions


Step 1

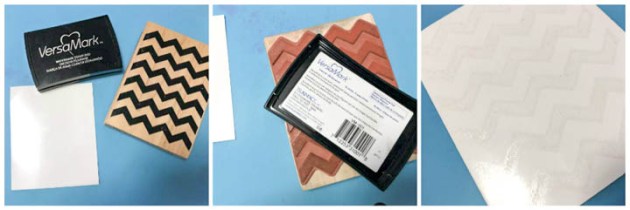
Take a piece of white glossy card stock and ink your stamp or stamps with VersaMark Ink and stamp directly over the glossy side and set this piece aside for a few minutes so the ink can dry.


Step 2

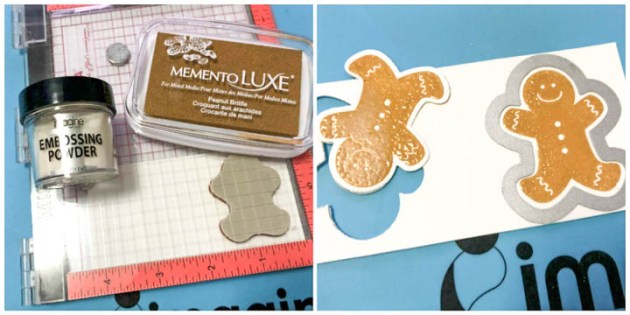
On a regular piece of cardstock, stamp the holiday-themed images that you want to use to decorate your card. I used a gingerbread image from a Stampin Up Set. I stamped the images with Memento Luxe Peanut Brittle and Clear Embossing Powder that I activated with the heat tool. Then I cut the gingerbread with the corresponding die cut.


Step 3

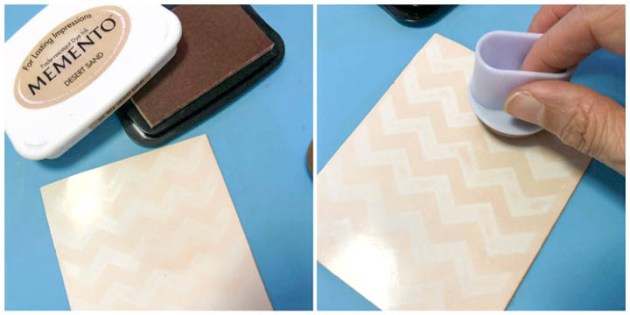
When the glossy card stock was totally dry, I sponged several times in circular motion with Desert Sand Memento Ink. If you want you can also use a brayer to create the resist effect.


Step 4

To finalize the card, I resized the glossy layer and created a gold mat using Gold Starstruck Rinea Foiled Paper and pasted this layer directly over the Cherry Cobbler card base. Then I cut the sentiment Merry Christmas using the same Gold Starstruck Rinea Foiled Paper with a Gina Marie Design Die Cut and pasted it over the chevron background and pasted the gingerbread using dimensional dots or tape. You can use any type the stamps to create this technique, not necessarily background stamps, all depends on the theme that you wanted to use in your card.

Supplies

Imagine
Other
  • Stampin Up – Scentsacional Season Stamp Set & die cut (retired)
  • Recollections – Chevron Background
  • Stampin Up – Cherry Cobbler Card Stock, White Glossy Card Stock
  • Rinea Foiled Paper – Gold Starstruck
  • Gina Marie Designs – Merry Christmas die cut
  • Dimensional tape or dots


Create a Grey Plaid Poinsettia Handmade Christmas Card

by Martha Lucia Gomez

In this world, we want to buy everything we like and see, but sometimes experimenting and recreating is part of the fun. Today, I am sharing with you a card that I made using beautiful single pieces that I combined with “necessity” because I don’t have a plaid stamp! I am crazy with the fabulous plaid designer papers that I saw during this season but I decided to create my own pattern just using two colors of VersaFine Clair Ink and without embossing to make it more rustic.

Skill: Advanced
Time: 1 hour

Directions


Step 1

I took a stamp set from Peek-a-Boo Designs that includes a lot of different stripes and selected just two or three to be used on my card. I positioned the stripes in my Stamparatus and stamped stripe by stripe using for the wide strip VersaFine Clair Morning Mist and for the thin VersaFine Clair Nocturne.


Step 2

When I was satisfied with the vertical pattern I decided to add a horizontal different design to make the plaid more interesting. To stamp these lines I only used VersaFine Clair Nocturne. Since the top of the Stamparatus has grids, was very easy to follow the pattern just moving the paper and not the stamps. I left this stamped piece side for a few minutes.


Step 3

In a separate piece of whisper white cardstock, I stamped with VersaMark Ink one festive poinsettia included on the stamp set Poinsettia Tangle from Dare2B Artzy and covered it with Silver Embossing Powder that I melted with the heat tool. I fussy cut poinsettia with my scissors.


Step 4

With the leftover cardstock, I used three colors of Fireworks to create a soft green tone that at the same time show me a little shimmer. I used Fireworks Shimmery Craft Spray in Cottage Ivy, New Sprout, and Bamboo Leaves. After the piece of cardstock was totally dried and cut some leaves using a die cuts from Prima.


Step 5

To finalize my card, I resized the background and arranged all the pieces over Real Red cardstock and as a final touch, I die cut the word believe in Real Red cardstock and black foam. I pasted both die cuts using On Point Glue and sprayed with Sheer Shimmer Frost. With a Memento Marker, I colored the center of the poinsettia. Sometimes, by exploring and practicing, you can discover amazing things that you can do using only your inks and this card is a perfect example.

Supplies

Imagine
Other
  • Cardstock – Whisper White, Real Red
  • Peek a Boo Designs – It’s Plaid Time Stamp set
  • Dare2B Artzy – Poinsettia Tangle
  • Simon Says Stamps – Believe Die Cut
  • Foam Black

Use Simple Shapes to Make Holiday Cards

by Jennifer Vanderbeek

Use Simple Shapes to Make Holiday Cards

There are so many cute and fun stamps and dies on the market these days for the holidays that it’s truly tough to resist them. I don’t know about you but there’s only so much room in the budget and the stamp storage to go around, so I’m always happy to come up with ways to use the things I already have and getting more mileage out of my tools and supplies. To that end, these cards use patterned stamps that are not holiday-specific and simple shapes you can cut with basic dies, punches, or even just scissors. These simple shape cards are also perfect for crafting with kids in preparation for the holidays!

Skill: Intermediate
Time: 1 hour depending on the number of cards

Directions

Supplies

Imagine

• Delicata – White Shimmer, Pink Shimmer, Ruby Red
• VersaFine – Olympia Green
• VersaMark – Champagne Dazzle
• Embossing Powder – Gold, Clear
• All-Purpose Ink – Vegas Gold
• StazOn Studio Glaze – Claret
• irRESISTibles Spray – Wedding Dress
• Fantastix – Brush Tip
• Creative Medium – Shimmer
• Palette Knives
• Tear It! Tape
• On Point Glue

Other

• Cardstock – Dark green, Green, Royal Blue, Burgundy, Cream, Yellow
• Patterned Paper – Red with White Dots
• Pencil
• Fiskars – Scissors
• Darice – Heat Tool
• Acrylic Blocks
• Stampers Anonymous – Doily Stamp
• Studio Calico – Make a Wish stamp set
• Joy Clair Stamps – Lovely Swirl Background stamp
• Our Daily Bread – Vine Background stamp
• Simon Says Stamp – Merry and Bright stamps
• Bo Bunny – Sentiments Stamp
• Marvy Uchida – Star Punch
• My Favorite Things – Pierced Oval Stax dies
• Lawn Fawn – Stitched Circle Frames dies
• Sizzix – Big Shot Plus
• Bone Folder
• Ribbons & Threads

Learn How to Create Christmas Magic

by Kyriakos Pachadiroglou

Learn How to Create Christmas Magic

Share the magic of Christmas with silver embossed stars and feathers in a turquoise color. The interchange of stripes covered with Creative Medium and the stamped tracing paper with VersaColor add depth to the background and give a sense of a screen. The multiple layers of the Creative Medium used and then heated, create a rough texture on the paper.

Skill: Intermediate
Time: 1 hour

Directions


Step 1

Cover a piece of watercolor paper at least the size of the card will be used with Creative Medium Iridescent Turquoise. Use a heat tool to dry and overheat the paper. The Creative Medium will start making baubles. Repeat the process at least 3 times to give the surface a rough look.


Step 2

Cut stripes of the watercolor paper in various widths and in 6 inch long (one inch less than the card used here).


Step 3

Stamp the tracing paper with the swirls design of the stamp set and the VersaColor Turquoise ink.


Step 4

Cut strips of the stamped image in various widths and in 6 inch length.


Step 5

Use Tear It! Tape to set the watercolor and tracing paper stripes on the front of a card base.


Step 6

On a piece of watercolor paper, on the smooth side, color with the VersaColor Turquoise and Celadon ink pads.


Step 7

Stamp with VersaMark the same stamp design as above. Cover with Imagine silver embossing powder and heat set.


Step 8

Die cut stars in different sizes from the embossed paper.


Step 9

Make a circle of the craft wire, glue with hot glue and continue with the feathers.


Step 10

Use the On Point Glue to place the paper stars, while the main star, set it with some foam tape to raise from the front. Add rhinestones with the On Point Glue.


Step 11

Remove the words from the sticker and set them on a piece of tracing paper and then glue on the card.

Supplies

Imagine
Other
  • Tracing paper
  • Viva Decor – Peacock feathers stamp set
  • Star dies
  • Die cutting machine
  • Heat tool
  • Feathers
  • Jewelry wire
  • Rhinestones
  • Canson watercolor paper
  • Craft creations – Peel off stickers, Christmas words
  • Hot glue gun
  • Foam tape