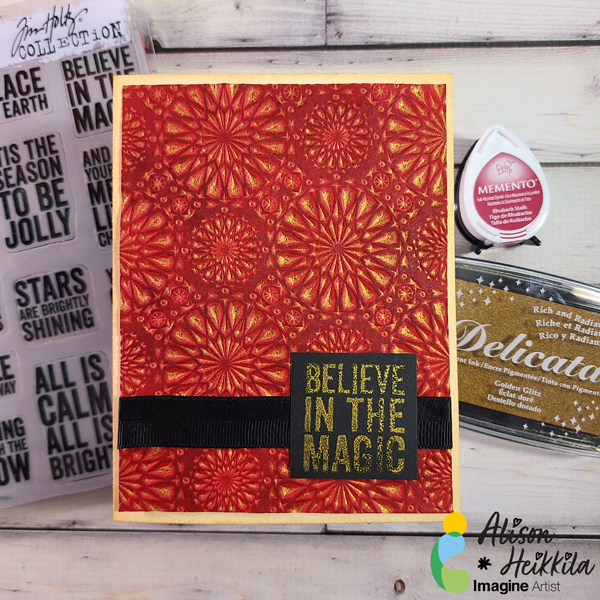
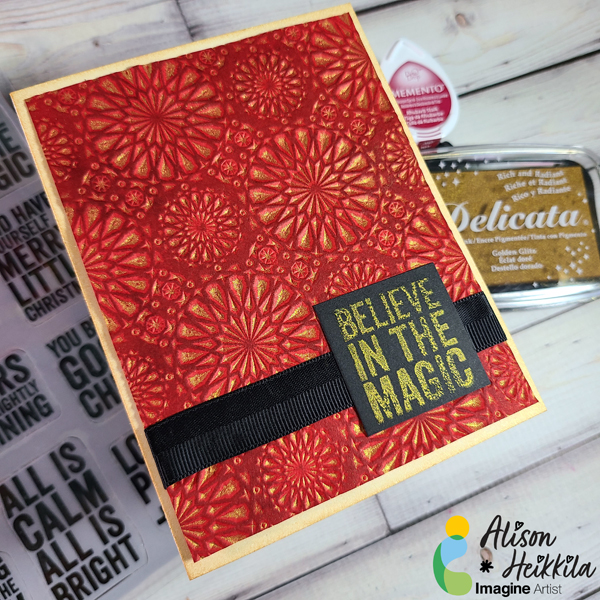
Greetings! It’s Alison Heikkila. I recently watched a video from Jennifer McGuire that was all about inking embossing folders to create beautiful inky and dimensional cards easily. I wanted to give her techniques a try using inks from Imagine. I also decided that this would be a great opportunity to make a Christmas card. You can check out my YouTube video below.
Skill Level: Beginner Time to Complete: 15 minutes
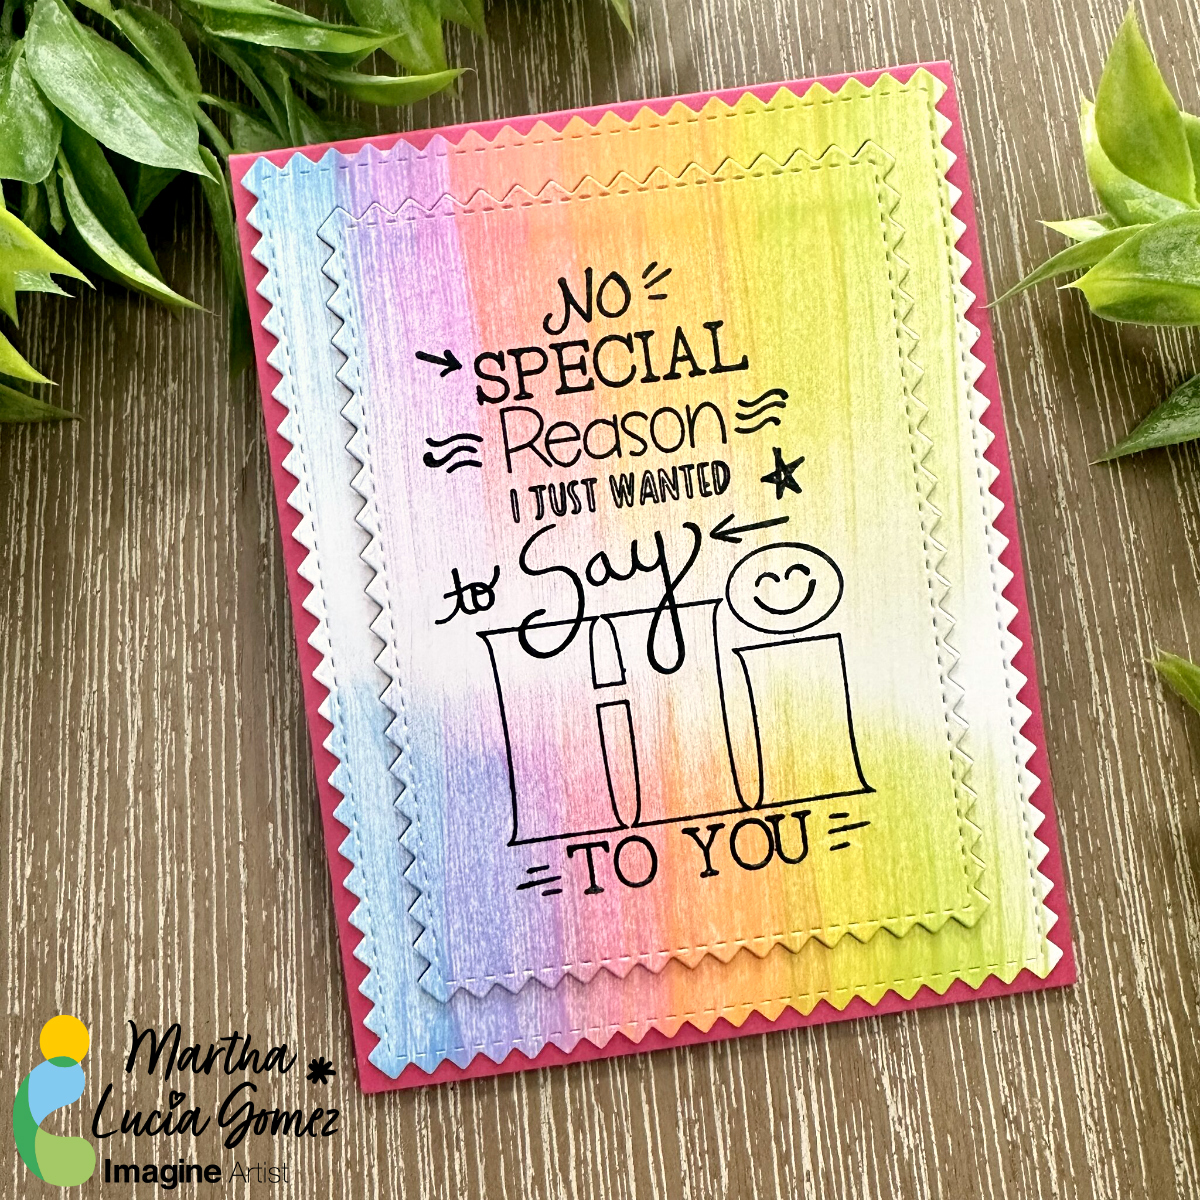
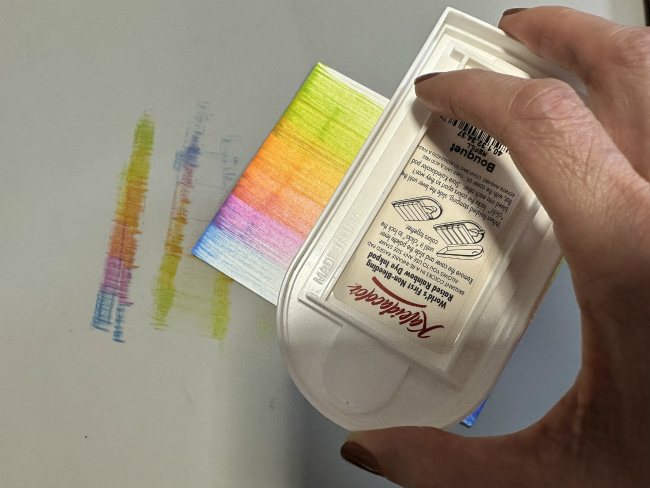
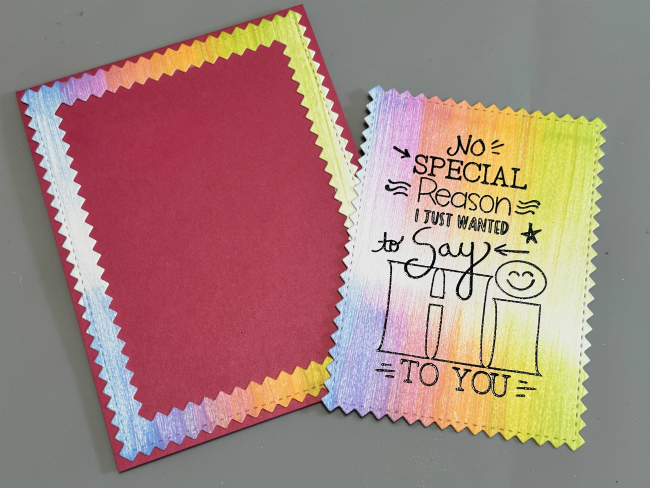
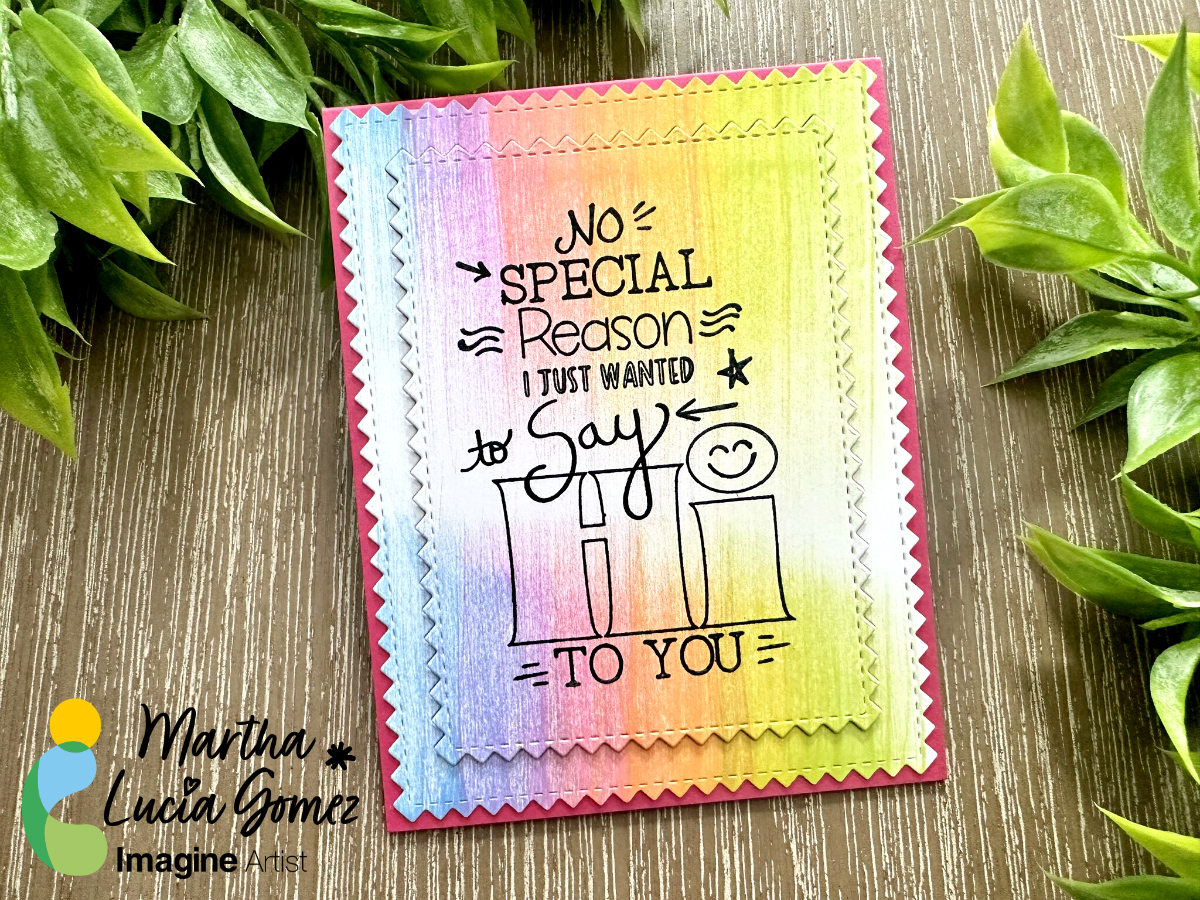
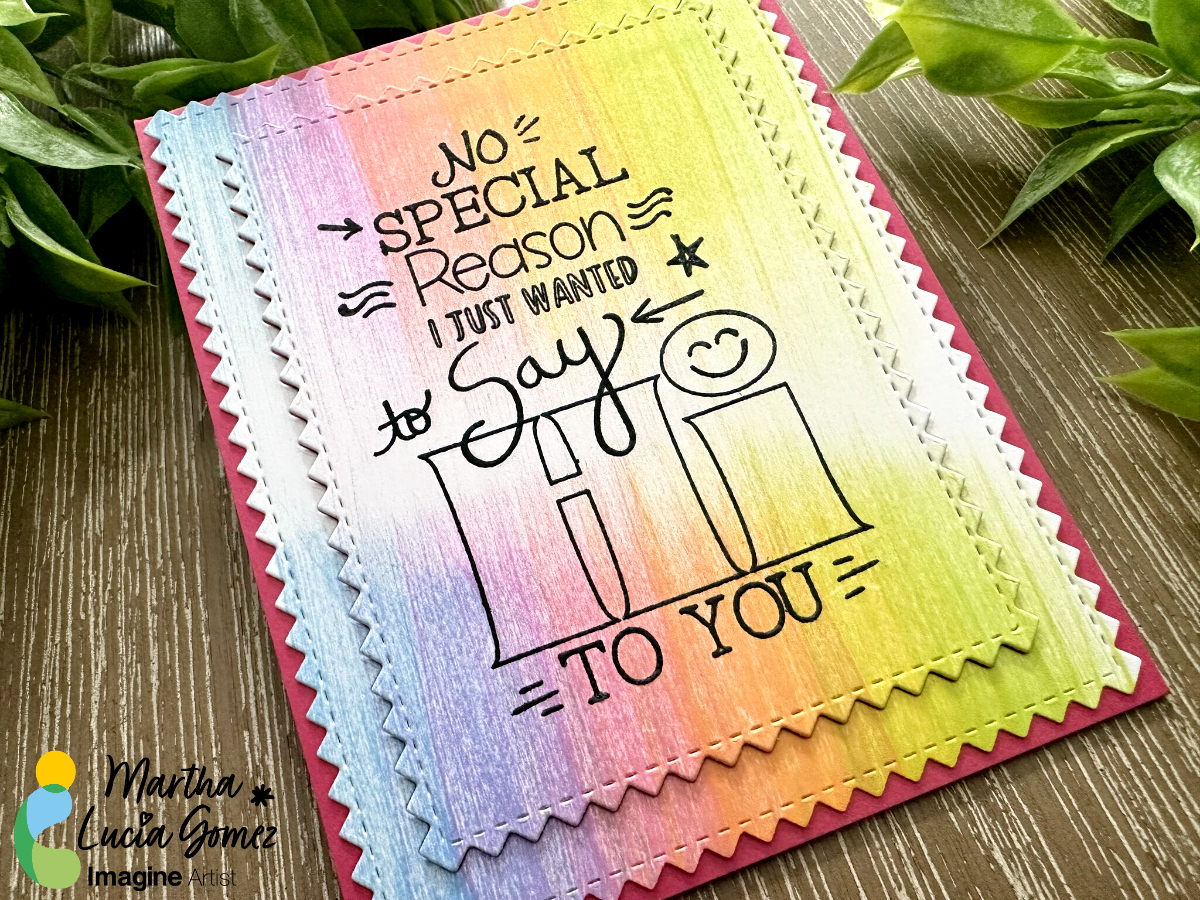
Hello crafty friends! Today, I have a new tutorial to create backgrounds. On this opportunity I am using the Swipe Ink Technique. Basically, you swipe the ink pad over your cardstock but this time we are using Kaleidacolor Inks that has 5 different colors in one single ink pad or swipe.
Skill: Intermedia Time: 60 minutes
Directions:
Step 1:
Pick your favorite Kaleidacolor Ink Pad. To make my project, I selected the Bouquet and white smooth cardstock.
Step 2:
Active your swipe putting together all the colors of your ink pad. Place the cardstock over the mat and softly swipe the ink over the paper without up your hand. If you want, you can go from up to down in a single swipe or in any direction. In my sample, I stopped in the middle and turn around the cardstock to repeat the process and have the center of the cardstock clean or without color.
Let the ink dry naturally before continuing with the next steps or repeat the process to create your own layout.
Step 3:
When the inked cardstock is totally dry, you can resize it or die cut It. Also, you can stamp over it, just like I made. I stamped a larger image over the center of the inked panel with VersaFine Clair Nocturne and heat embossed it with clear embossing powder. Then, I resized the layer with Zig Zag Stitched Rectangles.
Step 4:
To add more interest to the card, I pasted the large frame with Tear It! Tape over the card base. Then, I pasted the small rectangle with crafty foam tape to have more dimension.
Thanks for stopping by and remember, you don’t need to create complicated projects. Just use the best inks and let your creativity shine!
Hello! Alison Heikkila here and I have a new YouTube video for Imagine today. We are going to start off with a little experimenting with a Gel Press, and then we’ll move on to finish a card. I love to try different inks and techniques on the Gel Press, and even if they don’t work out as I had hoped, the monoprints can always be used at a later date in a different way.
Skill: Intermediate-Advanced Time to Complete: 30 minutes
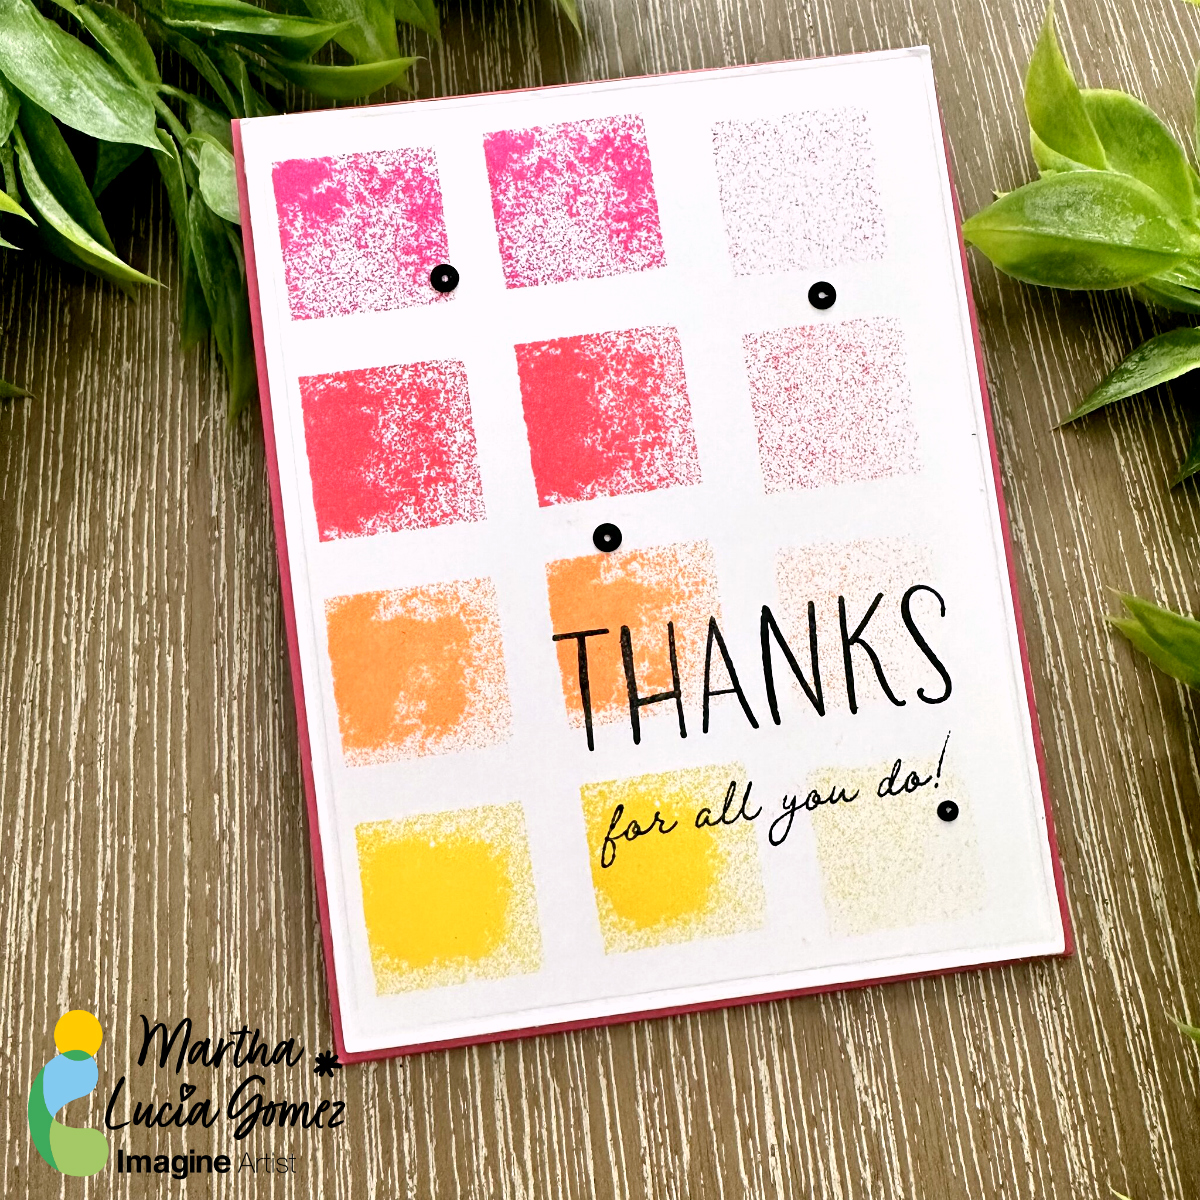
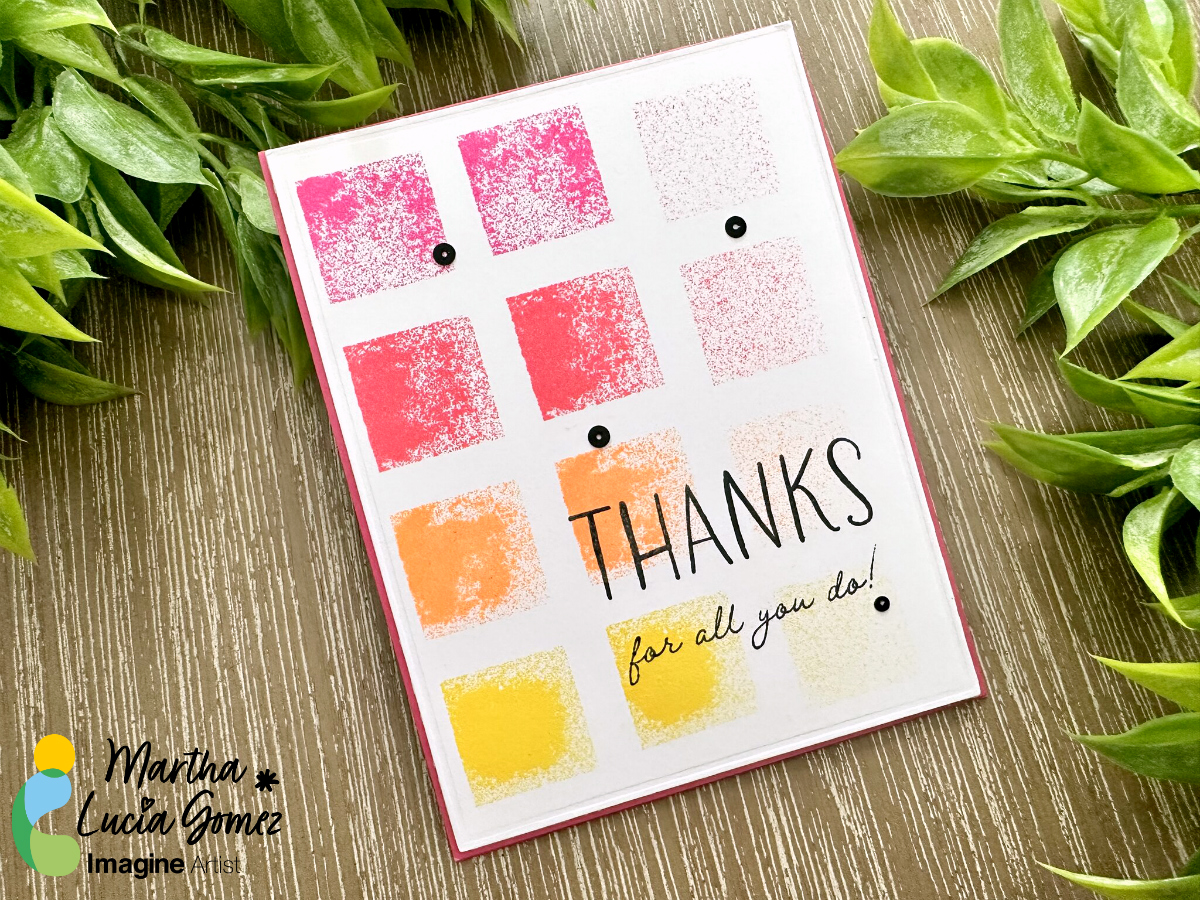
Hello crafty friends! Today, I have the easiest and simple tutorial to make a unique thank you card or any type of cards. Let me share the project with you.
Skill: Beginning Time: 60 minutes
Directions:
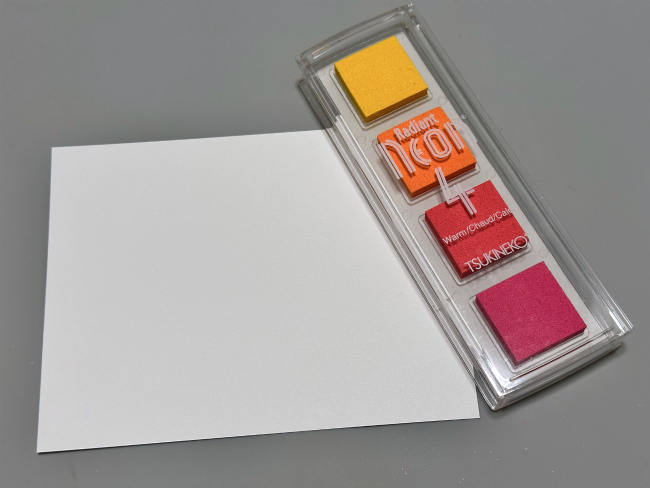
To make my model, I decided to use Radian Neon 4 Warm for two reasons. The first one is because I love the colors of this set of inks and the second, because Radian Neon brings the opportunity to create textures.
Step 1:
Select the colors of inks that you want to use in small sizes pads. For this idea, you can use any of our 4 Inkpads or small presentations like the Dew Drop of other inks, like Brilliance, VersaMagic, Delicata or Memento, just to mention some.
Step 2:
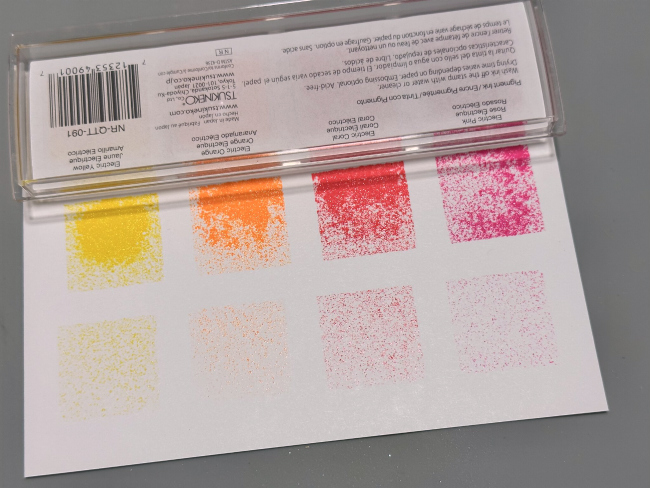
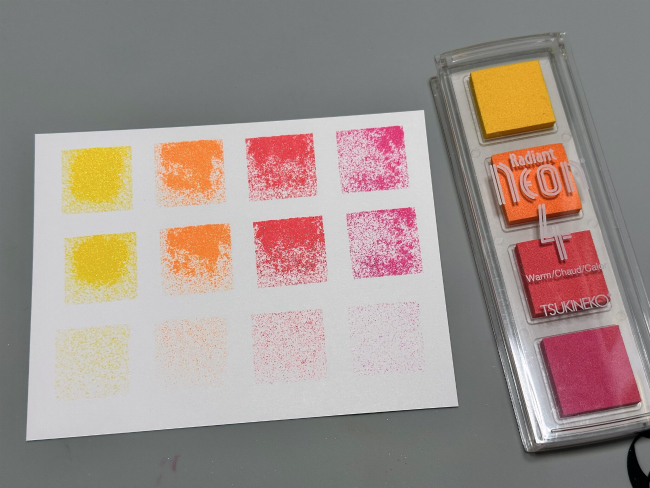
Place the entire ink pad over the cardstock in the direction that you want the colors. I press mine three times over the card under different pression to obtain different textures in each color.
Step 3:
Let the ink dry naturally or speed the process with a heat tool. If you want, you can cover the stamped blocks of ink with clear embossing powder and emboss them with the heat tool, to obtain a better texture.
Step 4:
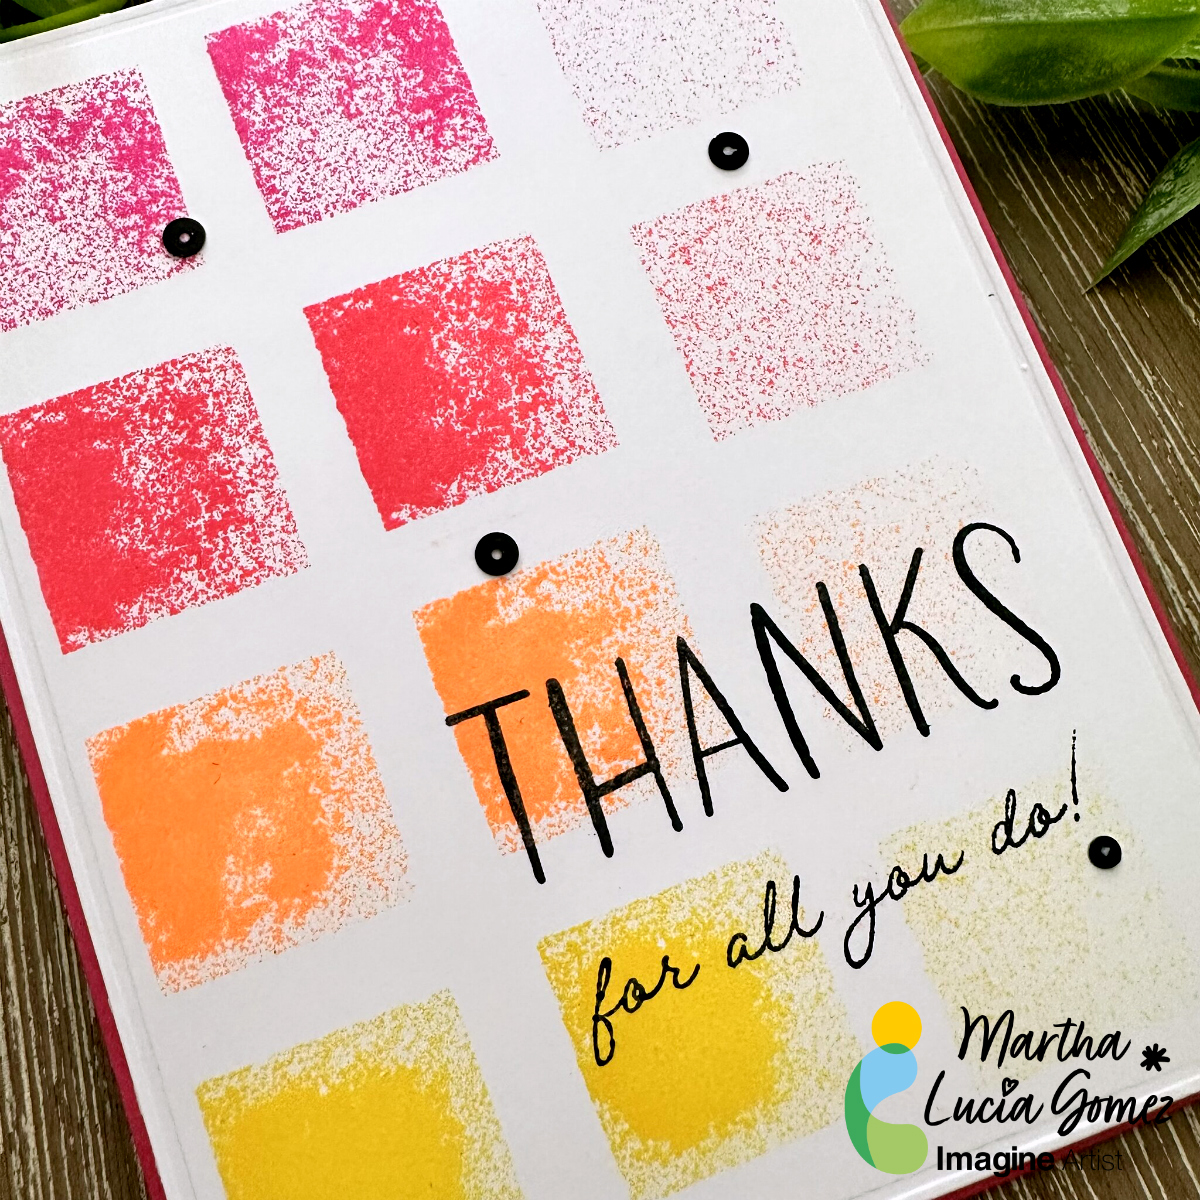
Stamp a sentiment over the color blocks using VersaFine Clair Nocturne to add a major contrast over your card.
Step 5:
Heat embosses the sentiment with clear embossing powder and paste the decorated layer over your card base.
As you can see this is a really simple way to use your ink pads as stamps. Depending on the pression and intensity that you apply over the ink pad or 4Ink Pad, you will obtain different looks.
Thanks for stopping by and remember, you don’t need to create complicated projects. Just use the best inks and let your creativity shine!
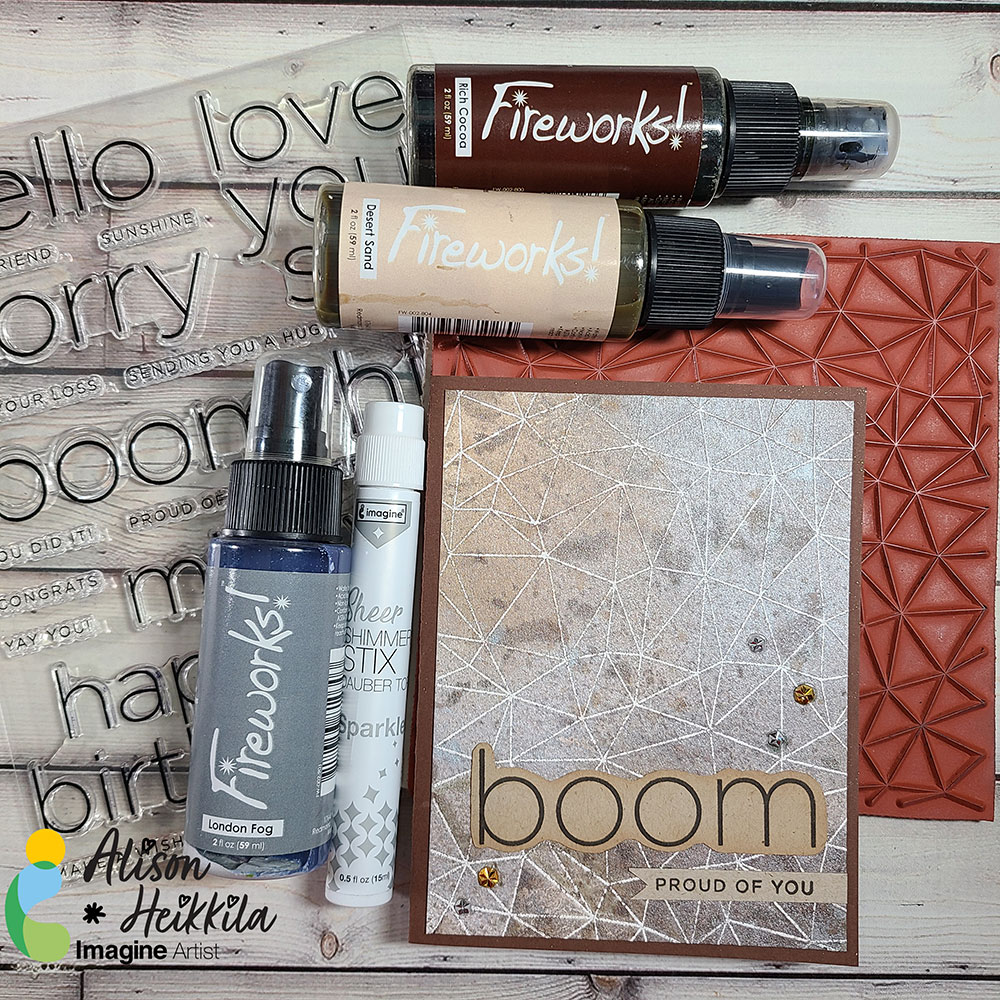
– Hello! It’s Alison Heikkila. Today we’re going to play with some Fireworks! Sprays on an emboss resist background. It’s a great masculine card, but I prefer to call it non-gendered. By changing up the background stamp and/or the colors, you can make this card as unique as the person you’re giving it to.
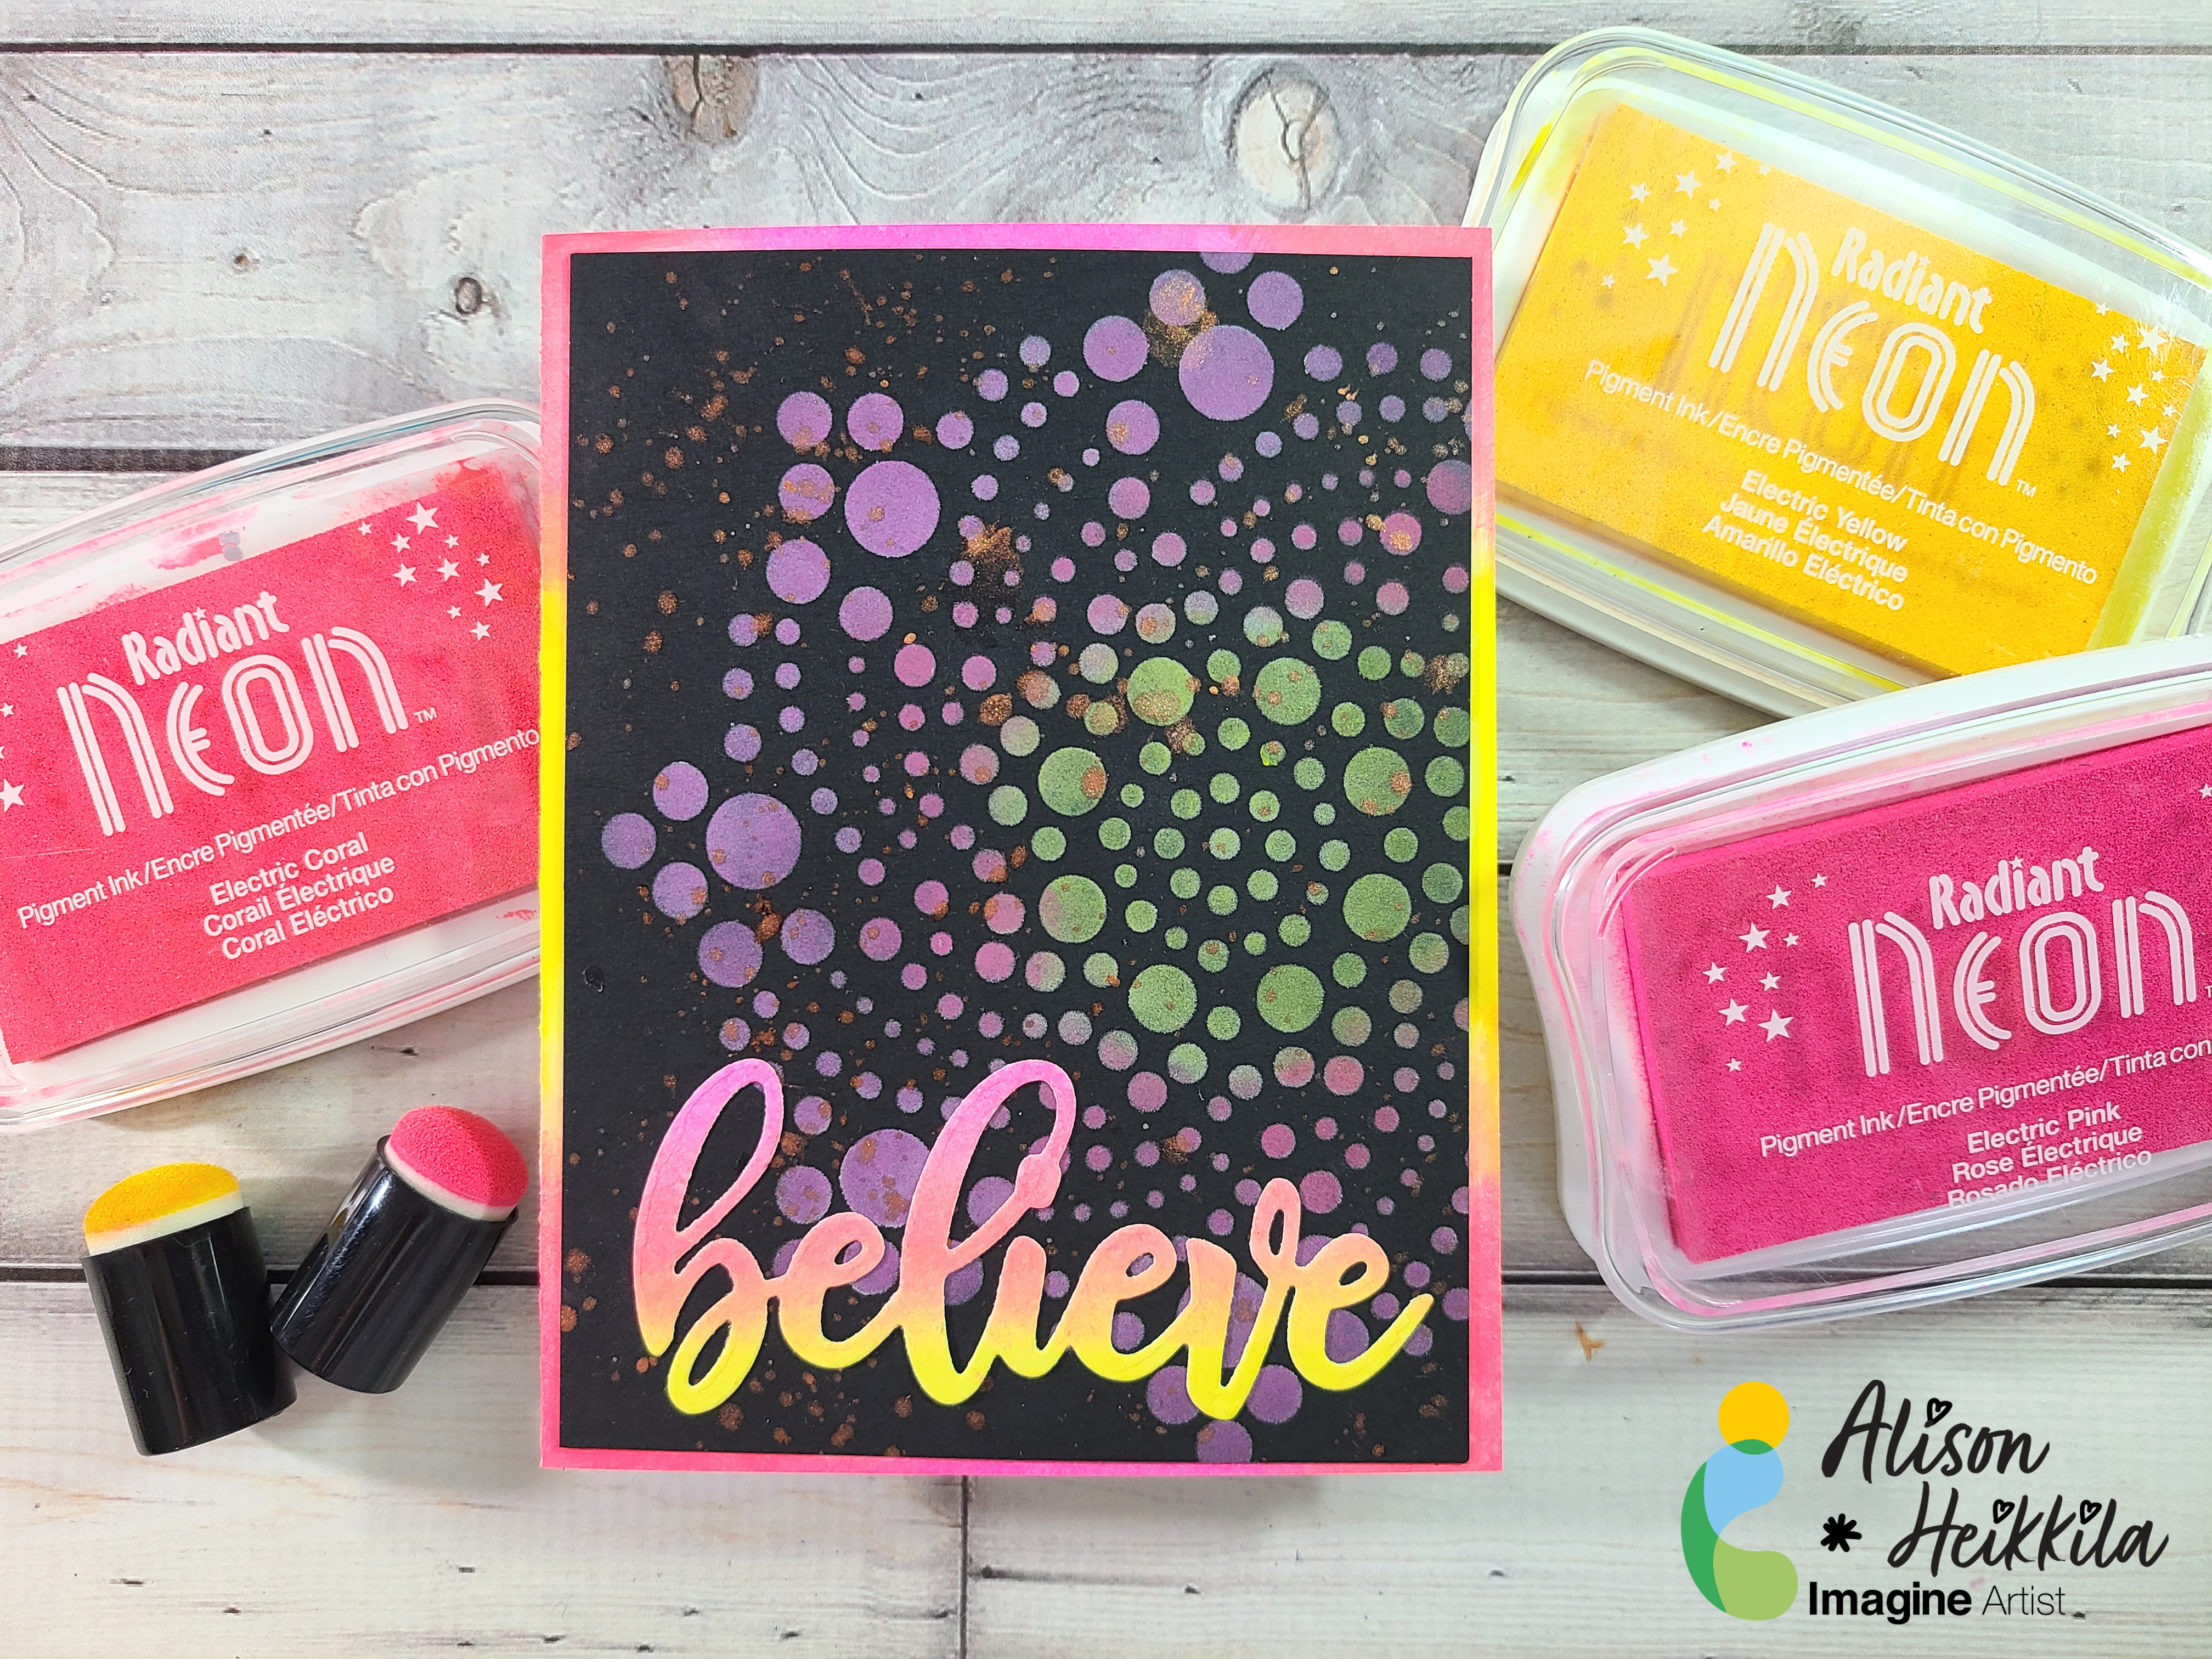
Hello! @AlisonHeikkila here. Let’s play with some Radiant Neon Inks on black and white cardstock. I use 3 of the 7 colors in a few different ways on this card. These techniques are fun and not complicated. I hope you’ll try them with your favorite stencil soon.