Learn How to Upcycle an Old Jar into a Mystical Fairy Lantern

by Roni Johnson

I don’t know any little girl that didn’t want to be a fairy when they were little…some of us have never forgotten that dream and love fairy’s to this very day. Here’s a way to sprinkle a little fairy dust in your home with this upcycled DIY Fairy Lantern craft!

Skill: Intermediate
Time: 1 Hour

Directions


Step 1

Wash and dry a glass jar that you will use to create the lantern. Cut a fairy silhouette or cut out from black cardstock. Apply a layer of On Point Glue to the paper die-cut. Apply a layer of On Point Glue to the die-cut.


Step 2

Press the fairy to the inside of the jar front. Note: If you have a fairy stamp you can exchange that for the fairy die cut and stamp it on the outside of the jar with StazOn Pigment Ink.


Step 3

Glue a bit of moss to the bottom of the jar so that when the lantern is lit it will look like she is standing in a bit of foliage or plant life.


Step 4

Stamp flowers images on the other 3 sides of the jar using StazOn Pigment Ink. Silhouette flowers work best but use what you have.

Step 5

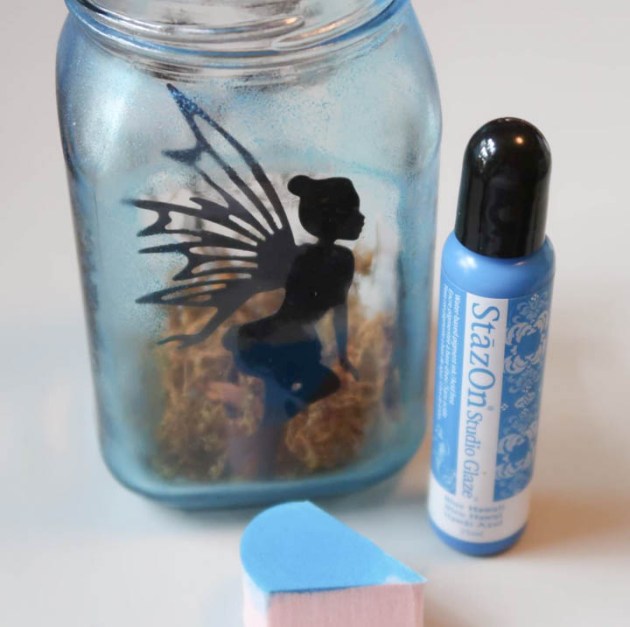
Sponge Blue Hawaii StazOn Studio Glaze to the corners, top and bottom areas of each side with an Ink Blusher sponge and let dry.

Step 6

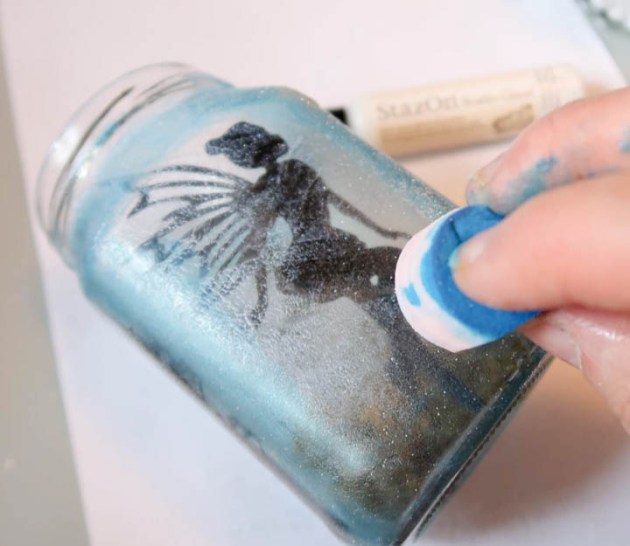
Sponge on a coat of Wedding Dress (white – dries frosty) StazOn Studio Glaze over the entire jar and let it dry.


Step 7

Sponge on a second coat of the Wedding Dress Studio Glaze on one side of the jar and immediately sprinkle with Mboss Sparkle embossing powder. Shake off the excess and reserve for the next side.


Step 8

Set the jar on the craft mat and heat the embossing powder to melt. Let it cool! Note: the jar will become very hot during this process. Do not try to pick it up as you will burn your fingers.


Step 9

Repeat steps 9 and 10 on the rest of the jar. When the jar is fully covered it is now time to move on to the lid. Sponge Piano Black StazOn Pigment Ink over the writing on the lid.


Step 10

Add desired embellishments to the lid and top of the jar. Wrap wire around an LED flicker light so you can insert it into the jar with ease.


You now have an amazing little fairy lantern to light your way! Use this tutorial to create decorations for a summer party, birthday or any fun outdoor event!

Supplies

Imagine
Other
  • Mason Jar
  • Posh Paper Supplies – Fairy die cut
  • Hobby Lobby – Pearl Trim, Garland
  • Prima – Flowers
  • Heat Tool
  • Battery Operated Candle
By The Sea Mixed Media Scrapbook Layout

by Nadine Carlier

By The Sea Mixed Media Layout by Nadine Carlier IC

I used several different colors of the new Mboss Embossing Powder on some my layout along with some blue Fireworks! Sprays to create a beautiful by the sea mixed media scrapbook layout.
Watch my video below to see how I did it. Enjoy!


Skill: Advanced
Time: 1 hour

Supplies

Imagine
Other

Visit our YouTube Channel for more inspirational videos and subscribe. Make sure to click the bell to get updates when we post new videos.

Create a Live, Laugh, Love Greeting Card

by Iris Rodriguez

Create A Live Laugh And Love Greeting Card

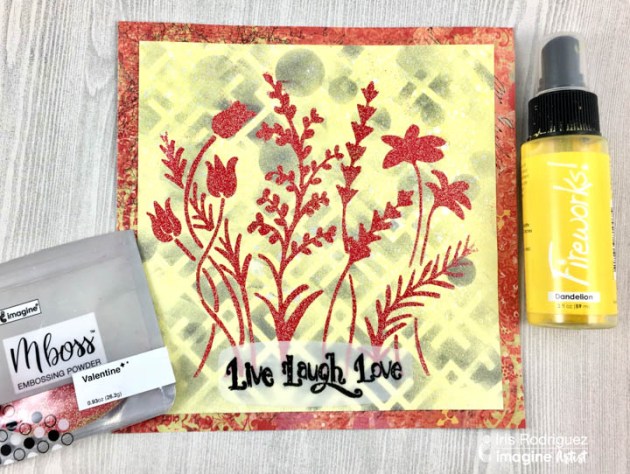
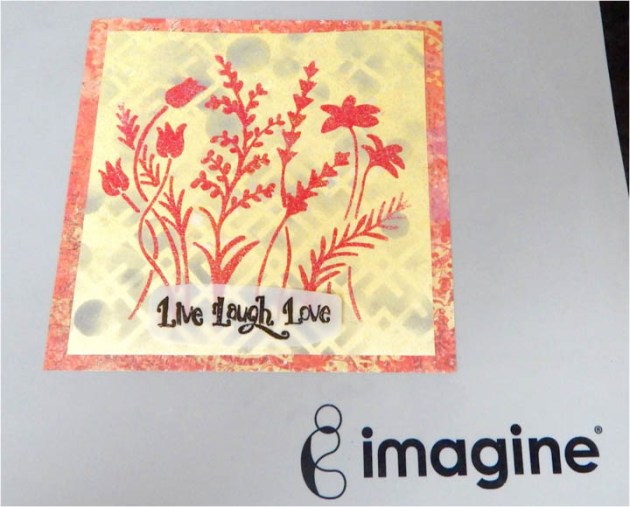
When I made this I was feeling a little down. So what do you do when the going gets tough? Make something bright and cheery, of course. Using Imagine’s new Mboss embossing powder, I made this bright “Live, Laugh, Love” card. I used the Valentine Mboss embossing powder; a beautiful glittery color combination red and gold. For the background, I used the Dandelion Fireworks Craft Spray which is the perfect bright shimmer spray ink.

Skill: Beginner
Time 30 minutes

Directions


Step 1

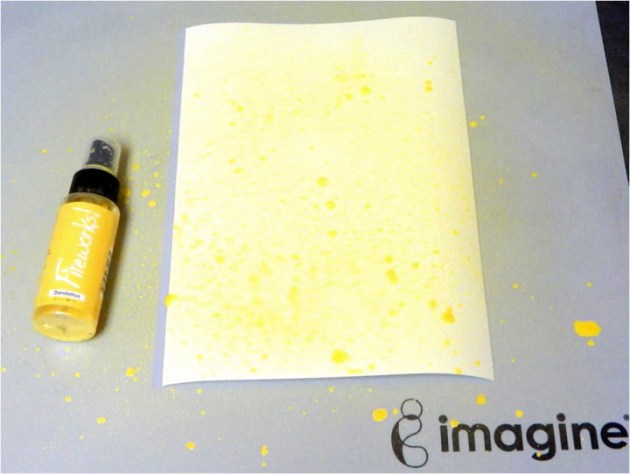
Lightly spray the paper with water, while the paper is wet, spray on the Dandelion Fireworks Craft Spray. Dry paper.


Step 2

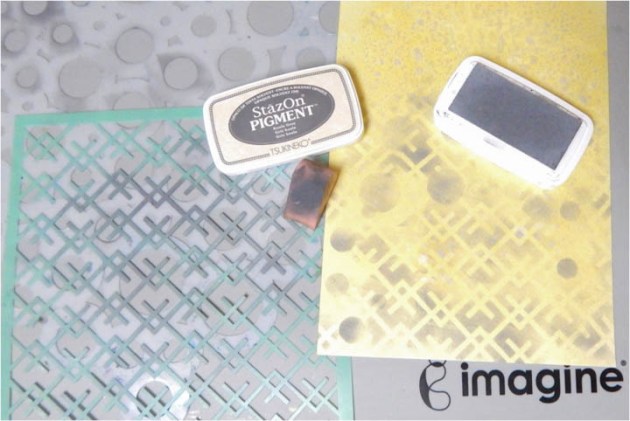
Stencil two different type patterns, to give it variety, with the Koala Gray StazOn Pigment ink.


Step 3

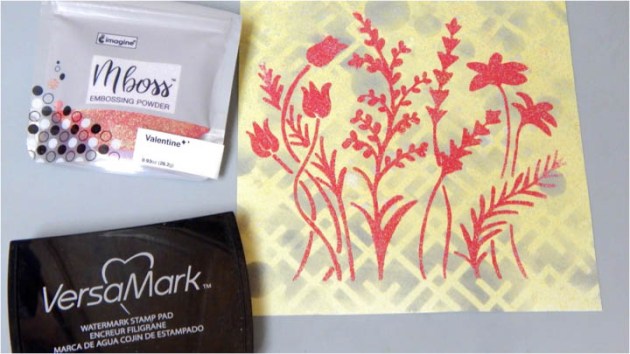
Apply VersaMark ink through the stencil using an Inkblusher. Emboss the Valentine Mboss embossing powder.


Step 4

Add the sentiment “Live, Laugh, Love” and assemble the card.

Supplies

Imagine
Other
  • Mixed Media Paper
  • Heidi Swapp-Geometric Stencil
  • The Crafters Workshop-Circles Stencil 12×12; Wildflowers stencil 6×6
  • Sentiment Stamp

Easy Masking Technique To Get An Ombre Effect

by Nadine Carlier

Green Ombre Card by Nadine Carlier IC

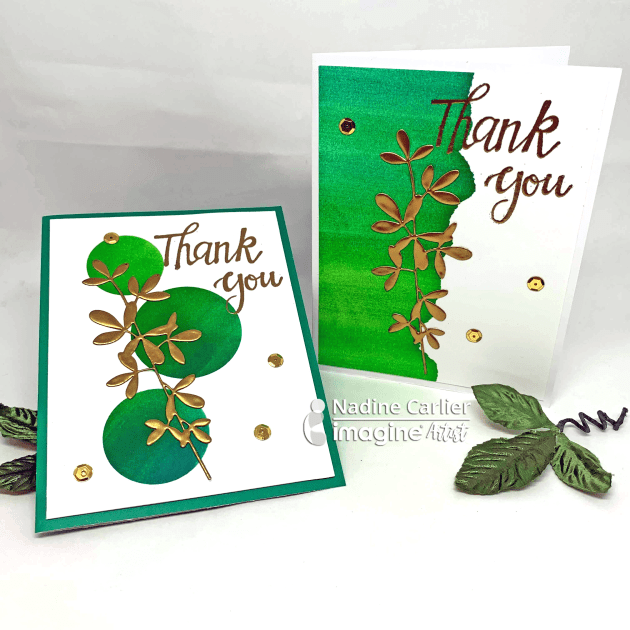
I used some simple masking techniques with some Kaleidcolor Ink to create the ombre effect on my cards. To see just how easy it was to do, watch my video below to see how I did it. Enjoy!

Skill: Intermediate
Time: 10 min per card

Supplies

Imagine
Other

Visit our YouTube Channel for more inspirational videos and subscribe. Make sure to click the bell to get updates when we post new videos.

Learn to Create a Quick and Easy Wood House with Walnut Crystals

by Iris Rodriguez

Learn to Create a Quick and Easy Wood House with Walnut Crystals

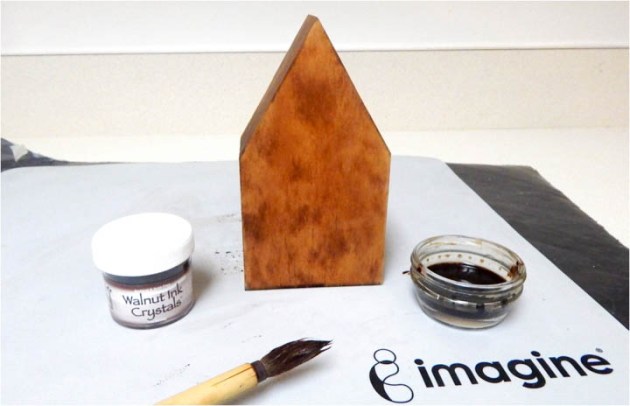
This is a fun easy peasy DIY Home Décor project made using a wooden house and walnut ink. The house can be purchased at most craft stores or if you’re a woodworker, just cut out a 4×4 into a house shape. I colored the house with Walnut Ink Crystals and embossed images with Imagine’s new Mboss White embossing powder.

Skill: Beginner
Time: 30 minutes + drying time

Directions


Step 1

Mix a few Walnut Ink crystals into a small amount of water. The crystals dissolve quickly and the amount you use will determine the density and rich color of the ink. Once you have mixed the crystals, brush on the Walnut Ink. Let the ink dry completely. You can use a heating tool or allow it dry naturally, which takes about an hour.


Step 2

Apply VersaMark ink through the stencil with an Inkblusher. Add the White Mboss embossing powder and apply heat to melt the embossing powder. The embossing powder is 100% opaque so the final result is beautiful showing embossed images on the sides on the back. That’s it! Now you have a nice home décor, custom made by you.

Supplies

Imagine
Other
  • Wooden House
  • Folk Art-Flower Stencil
  • Paint brush
  • Small dish

Learn An Elegant Embossing Resist And Blending Technique

by Martha Lucia Gomez

Learn An Elegant Embossing Resist And Blending Technique

Hello crafty friends! Today, I want to share a “Hello” greeting card using the technique of color blending and emboss resist. I have always enjoyed mixing different techniques together and emboss resist is one of the most versatile. What I show in this card making tutorial is with this option you can create a rich color background before embossing and then apply extra layers of color to enhance the effect. See how I created this elegant card below.

Skill: Intermediate
Time: 30 minutes

Directions


Step 1

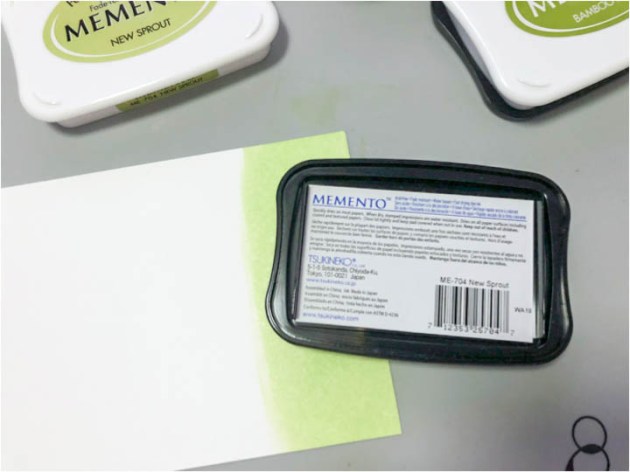
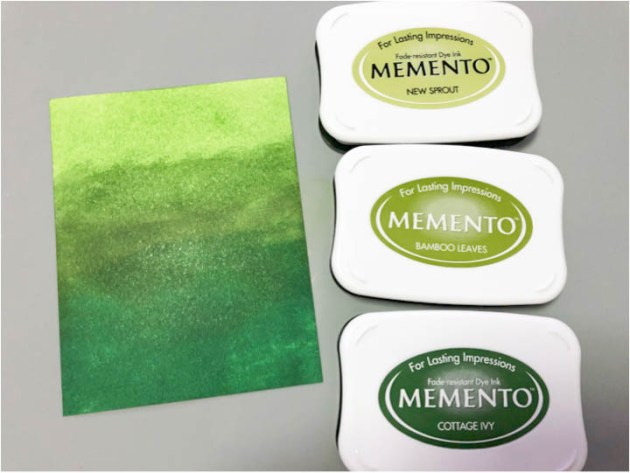
To make this card, I used three different green colors of Memento Ink. I started with the lightest New Sprout, continue with Bamboo Leaves and finalized with Cottage Ivy.


Step 2

Over a whisper white piece of card stock, I applied the ink directly with the ink pad, just rub it softly and blend the colors. When I was totally satisfied with the colors, I let the paper dry very well before to continue with the next step. I used my heat tool to speed up the process.


Step 3

I stamped a background stamp over the inked layer using the embossing buddy or anti-static pad, VersaMark Ink and Clear Embossing Powder.


Step 4

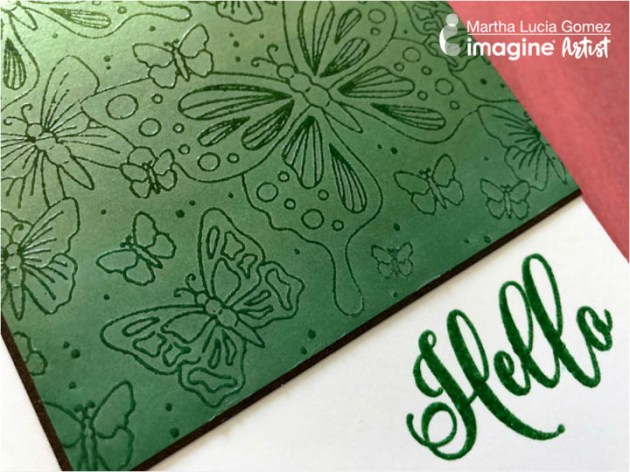
After heat embossing and using an InkBlusher, I applied Delicata Pigment Ink in White Shimmer directly over the heat embossed background. At this stage, you will notice how the embossed butterflies fine lines did not absorb the pigment ink and the background color looks softer.


Step 5

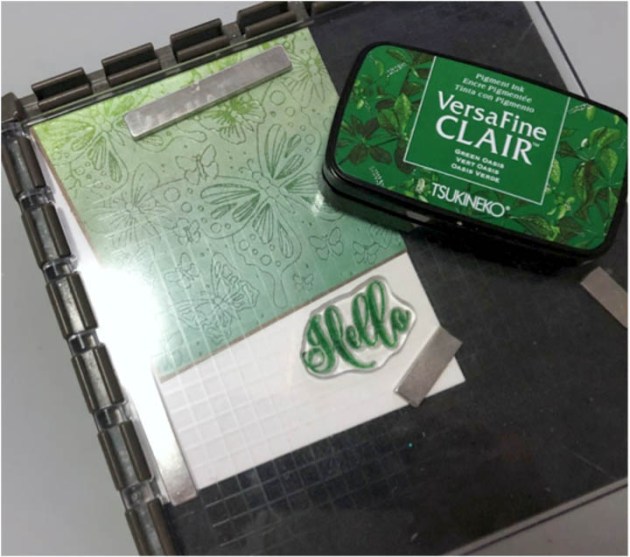
To finalize the card, I resized the layer, pasted it over the mat and card base and stamped one sentiment using VersaFine Clair Green Oasis and embossed it with clear embossing powder.


Step 6

You can use this technique using a single color of ink for the background or mixing different colors. The most important is that you use white pigment ink to make the color tones soft and enhance the embossing.

Thank you for stopping by!

Supplies

Imagine
Other
  • Cardstock – Whisper White, Dark Brown
  • Stamp Sets – Blossom & Butterflies, Friendship Greetings
  • Stamparatus or Misti Stamping Tool
  • Embossing Buddy
  • Heat Tool