See How To Create An Amazing Card Using Mboss

by Roni Johnson

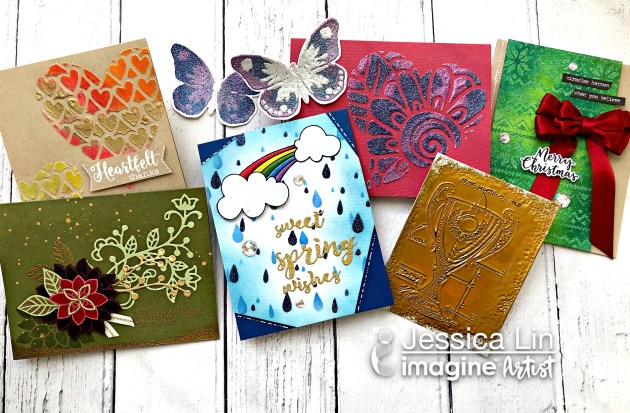
Bring up the word embossing in a group of paper-crafting people and 9 times out of 10 they are going to say they only use embossing to outline a stamped image. Well, embossing is so much more than that. Today, I want to share one of my favorite embossing techniques that I like to call “painting” with embossing powder or in this case, Imagine’s new Mboss Embossing Powders! In addition to the traditional white, black, clear, silver and gold they have a wide range of color and spectacular glittery powders to work within cardmaking projects.

Skill: Intermediate
Time: 30 minutes

Directions


Step 1

Cut a piece of cardstock to the desired size. If desired, swipe or dust the cardstock with an anti-static tool/bag.


Step 2

Position the stencil over the piece of cardstock.


Step 3

Use a sponge dauber to apply VersaMark ink over the upper third of the stencil.


Step 4

Remove the stencil and shake the first color of Mboss powder over the wet ink. I started with Shimmery Night Sky. Shake off the excess powder and return it to the handy stand up pouch for future use.


Step 5

Heat the powder to melt; let cool before moving to the next step.


Step 6

Carefully reposition the stencil over the already embossed area of the card and ink up the middle third of the card again using the sponge dauber and VersaMark ink.


Step 7

Sprinkle the next color of Mboss Embossing Powder over the inked area; shake off excess and return it to the pouch.


Step 8

Use the heat tool to melt the powder.


Step 9

Repeat steps 2-5 for the final third of the card. And you’ll be left with an amazing design bursting with color, texture, and dimension.


Step 10

Mount the panel on a black card base using Tear It! Tape; stamp the sentiment with Nocturne VersaFine Clair ink on scrap paper and affix it to the card using On Point Glue.

Supplies

Imagine
Other
  • The Crafters Workshop – Mandala Stencil
  • Rubber Stamp Tapestry – Sentiment
  • Heat Tool
  • White & Black Cardstock

Create an Underwater Scene with Mboss Shimmering Night Sky

by Melissa Andrew

In today’s tutorial, I show you how to use your Mboss embossing powder in Shimmering Night Sky to create an underwater scene. Together with Fireworks spray and Memento ink you can create a gorgeous card straight from a mermaid’s home, complete with sea critters. I show you beginning to end how to create a sea-filled, embossed, and watercolored card.

Skill: Intermediate
Time: 45 minutes

Directions

Supplies

Imagine
Other
  • Whimsy Stamps Die – Card Builder 1
  • Picket Fence Studios – Little Coral Girl stamp set
  • Heat Tool
  • Watercolor paper
  • Copic markers
  • Cardstock – White, Blue Shimmer
  • Paper trimmer
  • 6 round paintbrush
  • Antistatic tool

Create A Unique Embossed Spiral Design On A Greeting Card

by Martha Lucia Gomez

Hello there! Today, I have a Mboss Spiral card that I made featuring the new Mboss Embossing Powder from Imagine. I had the opportunity to buy this spiral background stamp a long time ago during a vacation but I never used it. I couldn’t find exactly what project this spiral shape would fit with. Now that Imagine has released the Mboss Embossing Powder, I made decided to use it for an embossing color blend project.

Skill: Intermediate
Time: 1 hour

Directions


Step 1

I started my process using basic black card stock and the small inkpad (or cube) of the VersaMark. I placed my stamp inside of my stamping tool and applied the ink starting in the center. I stamped this part and covered with Valentine Mboss. Then I removed the card stock and melted the powder with the heat tool. I repeated the process several times using Princess Party, Birthday Party, Sparkle, and Lucky Stars. I applied VersaMark in a circular way to keep the spiral shape.


Step 2

I resized the stamped layer and added a whisper white mat before to paste over the basic black card base. I finalized the card adding a die cut flower and sentiment that I stamped with Memento Ink Lilac Posies.

Supplies

Imagine
Other
  • Cardstock – Basic Black, Whisper White
  • Spiral Background Stamp
  • Stamparatus or Misti Stamping Tool
  • Spellbinders Shapeabilities – Lovely Lilac Etched die Good Vibes
  • Double-sided foam tape

5 Next Level Heat Embossing Techniques with Mboss

by Jessica Lin

Six greeting cards made with different heat embossing techniques using Mboss embossing powder by Imagine

Hi everyone! Today’s video is all about heat embossing—from stamp layering with embossing powder, creating a faux branding iron look, to stenciling with VersaMark… these techniques really take heat embossing to the next level. If you like heat embossing and are eager to learn new tips and tricks, this video is a must-watch!

Supplies

Imagine
  • VersaMark – ink pad, VersaMarker
  • Mboss – Gold, Clear, Shimmering Night Sky, Birthday Party, Hologram, Lucky Stars
  • Craft Mat
Other
  • Stampin’ Up – Flourishing Phrases Bundle, Watercolor Wings Bundle
  • Stampers Anonymous – High Society Blueprint
  • Stamplorations – Kathryn’s Rainbows
  • Crafter’s Workshop – Stencil Template – Raindrop
  • Tim Holtz – Holiday Knit Stencil
  • Stamparatus or other stamping platform
  • EK – Anti-static Powder Tool
  • Wagner – Heat Tool
  • Acrylic block
  • Cardstock – colors of choice
  • Watercolor paper


Create An Interesting Background With Mboss Embossing Powder

by Elina Stromberg

Mboss embossing powders are the latest addition to the Imagine product range. I hope you’ll get a chance to play with these new powders soon; there are so many amazing colors to choose from! In addition, Mboss powders come in several gorgeous shimmering glitter versions that are perfect for creating self-made paper embellishments and beautiful card backgrounds!

Skill: Intermediate
Time: 1 hour

Directions


Step 1

I wanted to try the Mboss powders on a stamped background. Use a circle punch to ink the paper with VersaMark, sprinkle Mboss in Valentine, and heat set. I think it looks cool! Love that golden sparkle together with the bright red!


Step 2

On kraft cardstock, stamp the main Kitten image with VersaFine Clair in Acorn. Detail with color pencils and fussy cut the kitten.


Step 3

Stamp “Hello Sunshine” on a scrap piece and mount on a flag. Assemble all the pieces together on the embossed paper, mount on dark red paper. Apply washi tape and adhere kitten stamped image. A cute card made in just 30 minutes!

Supplies

Imagine
Other
  • White card base
  • Cardstock – dark red paper, kraft
  • Patterned papers – Red
  • Suzy Stamps – Kitten stamp
  • Color pencils
  • Scissors
  • Washi tape

Let’s Mboss It

by Nadine Carlier

MBoss Fish Card by Nadine Carlier IC

This card is dressed with the new Mboss Embossing Powder from top to bottom.
Watch my video below to see the different techniques I used to create my card. Enjoy!

Skill: Intermediate
Time: 30 min

Supplies

Imagine
Other

Visit our YouTube Channel for more inspirational videos and subscribe. Make sure to click the bell to get updates when we post new videos.