Learn the Basics of Stenciling

by Iris Rodriguez

Learn the Basics of Stenciling

Stencils are a great tool to use for creating images and effects on just about any creative project. You can decorate a  journal with them, create card backgrounds and textures, use in your paintings, or in home décor projects. Imagine’s inkpads, inks, sprays, and texture mediums can all be used with stencils. In addition, Imagine has you covered with applicators such as Sponge Daubers, Palette knives, and Stipple brushes. In this article, I’ll discuss some ways to organize, use with different products, proper care and cleaning your stencils.

Organizing Your Stencils

There many ways to organize your stencils. One excellent way is to search crafting, office and home goods stores for options on storage containers. Whichever you choose, it’s important to lay them flat. I think on of the best ways to keep them flat is to use dividers in storage bins or drawers. File folders can be found in office supply stores. Label your dividers by type, theme, or designer. Another way to store stencils in a three-ring binder book inside plastic page protectors. Place color cardstock paper so that you can see the stencil and maximize storage by storing two stencils on one sheet.

If you have an open crafting space then hang stencils with metal hook clips on a rack. I like the idea of hanging my stencils because I can easily go through them and find what I am looking for. I punch a hole in the corners of my stencils and place them in a binder ring.

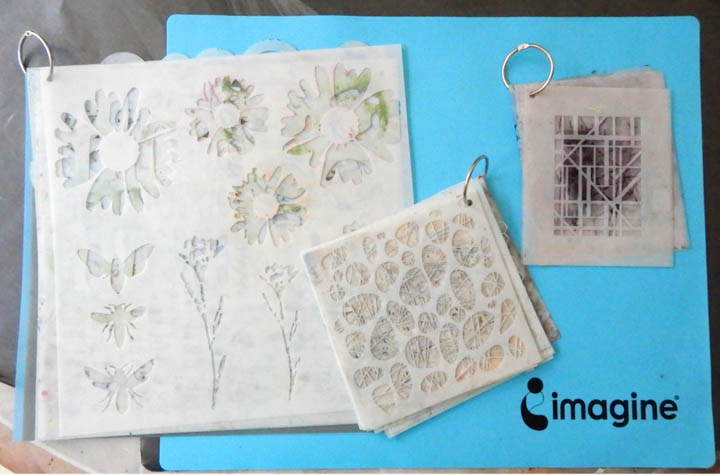
I have an IKEA wooden shelving unit to store my crafting storage bins. I’ve attached long screws on the side to hang my stencils. Hanging them freed up space and I can easily access them. Some alternatives are to hang them on a clothes hanger with a metal hook or binder clips, store them flat in bins or drawer or hang them on revolving wire three-tier shoe rack with a metal hook or binder clips.

Stenciling with Imagine Inks

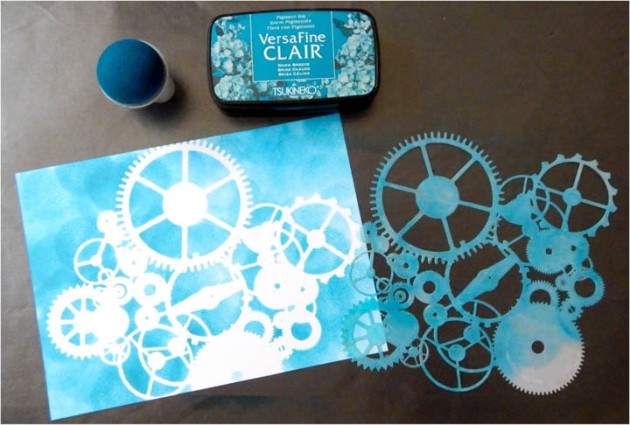
Imagine’s Inkblushers and Sponge Daubers work great with stencils because the soft sponge material presses ink down past the edges of the stencil’s details. The sponges produce sharp edges and finely detailed inking better than most other tool. If you have a highly detailed stencil, the sponge materials are especially handy for getting into small and intricate opening, or getting around the tight areas of the stencil.

Stenciling with All-Purpose Ink and Inkblushers. Add a couple of ink drops to your crafting mat and pounce the Inkblusher over the ink. Inkblushers are highly absorbent and work well with Imagine’s All-Purpose Inks.

Inkblushers can also be used to stencil with acrylic paints. Like with inks, you can get clean edges and good detail. Wash the Inkblusher under running water immediately. If you cannot get to the sink right away, wipe off as much paint as you can and then keep it in water, like your paintbrush water. If left out without being washed, the paint will dry and harden the Inkblusher. Unfortunately, the paint cannot be washed out. However, all is not lost; only the area that had the paint will harden, and not harden the entire sponge. Using your scissors, cut off the piece with the hardened paint and continue to use.

Imagine’s Jumbo Daubers provide fine detailed inking. The handle allows you to have great control and pressure over the stencils. Imagine’s Jumbo Daubers also work great Acrylic paints. Add a few drops of paint to your craft mat, pounce the Dauber on the paint, then pounce the Dauber onto a clean area on your mat. Get the paint evenly on the Dauber and avoid globs of paint. If you get too much paint on the Dauber, it will go under the stencil.
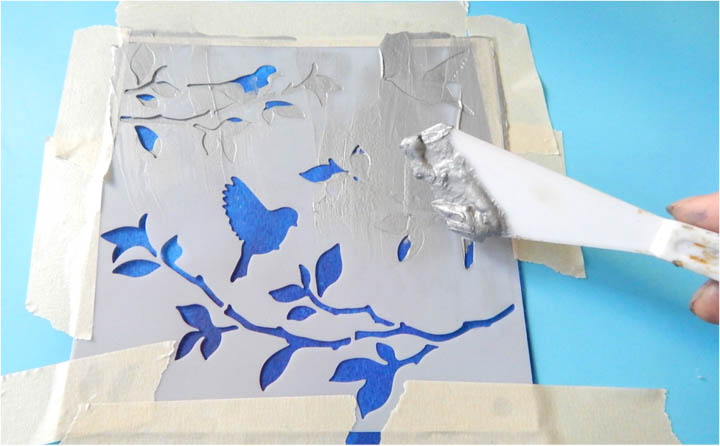
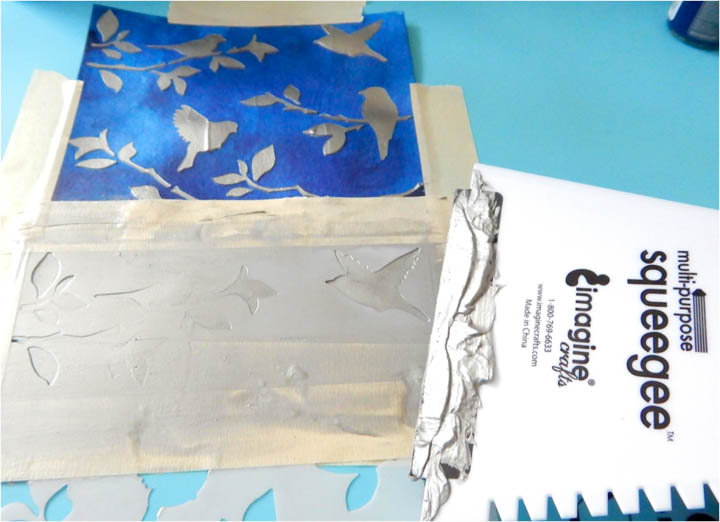
Imagine’s Creative Mediums are smooth acrylic pastes that provide yummy textures for any project. This is where stencils are very different from stamps because you can create an image with texture. Use Imagine’s palette knives and Squeegee to add the Creative Medium. Silver Metallic Creative Medium using a palette knife. Imagine’s Multi-purpose Squeegee has a wider surface; perfect for using with larger stencils with large openings. Use a palette knife to add the medium onto the Squeegee.
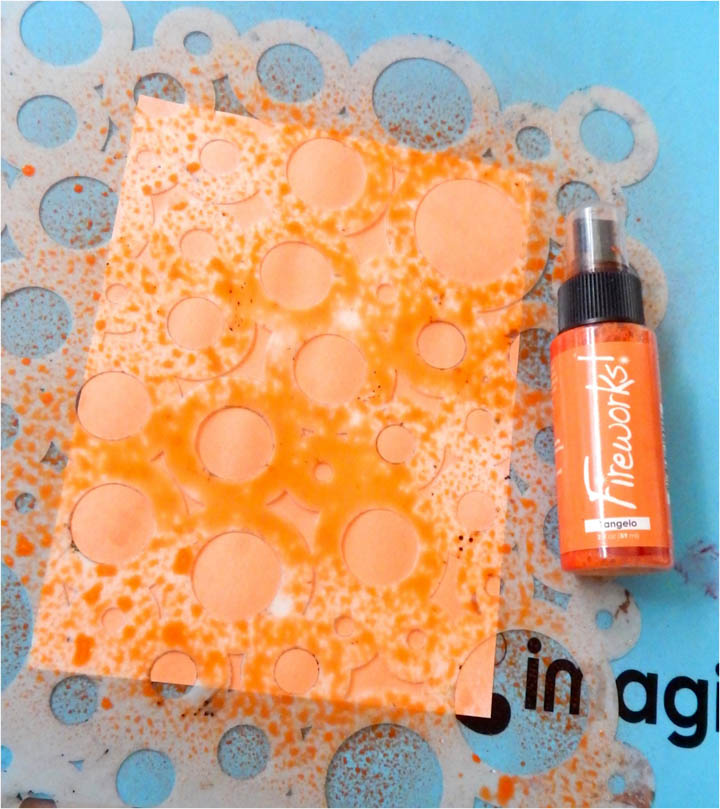
Imagine’s Fireworks Craft Spray makes stenciling a breeze. To get clean patterns, start spraying from the outside edges of the paper and spray inwards. Change up the starting point and spray. By starting from the outside, avoids harsh spray edges or heavy splotches of ink. Clean up is easy, simply wipe off your stencil and craft mat with a dry paper/cotton towel. To double down on the stencil effects you can “stamp” the wet ink from the stencil onto another piece of cardstock.
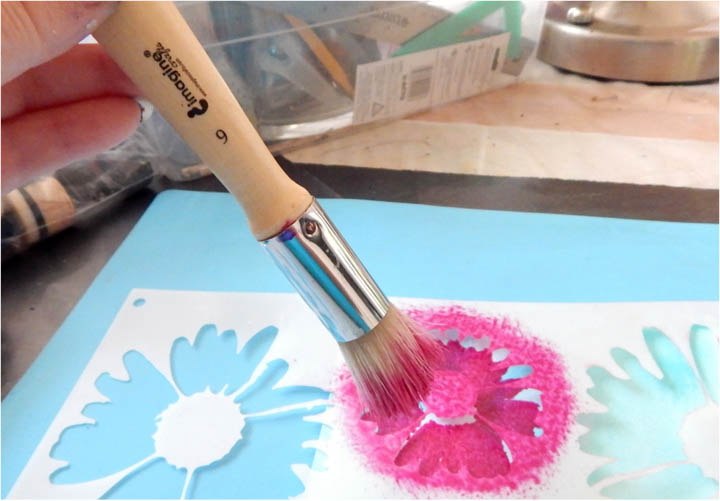
Create unique effects with Imagine Stipple brushes. These brushes have a flat, firm bristle head for stippling. It can be used on just about any surface. They are great for stenciling on fabric for getting into the grain. This creates patterns of fine dots by pouncing the brush onto the substrate. Scumble by brushing at a slight angle in a random fashion. This creates brushstrokes and because of brush’s firm bristles, it won’t get under the stencil.

Cleaning the Stencils
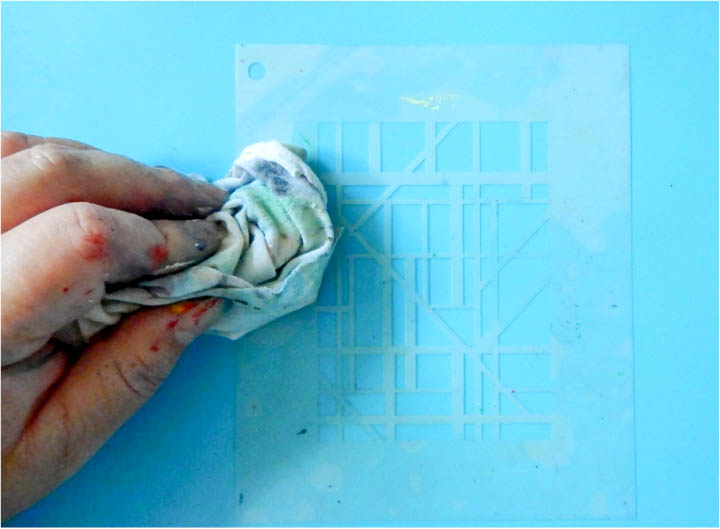
One of the hardest things about working with stencils is cleaning them. Even so, keeping your stencils clean will help to maintain clean edges, last longer and you’ll have a clean stencil for your next project. The key to success for keeping stencils clean, regardless of the medium, is to clean them immediately with a wet paper/cloth towel or baby wipe. Depending on the medium you will have ink/paint residue.

When using pigment inks, All-Purpose Ink, or dye inks, wipe the stencil immediately with a wet paper/cloth towel, or baby wipe. Since these inks are water-based the stencil will clean up quickly and completely. When using permanent inks, simply wiping the stencil off with water, will not get it clean. Use a stamp cleaner or Rubbing Alcohol to clean your stencil. Imagine’s StazOn All-Purpose Stamp Cleaner works well for cleaning ink off your stencils. Dab the cleaner on the stencil and wipe with a dry paper/cloth towel. The cleaner tends to leave a little bit of an oily residue. Simply wipe it off with a clean wet paper/cloth towel.
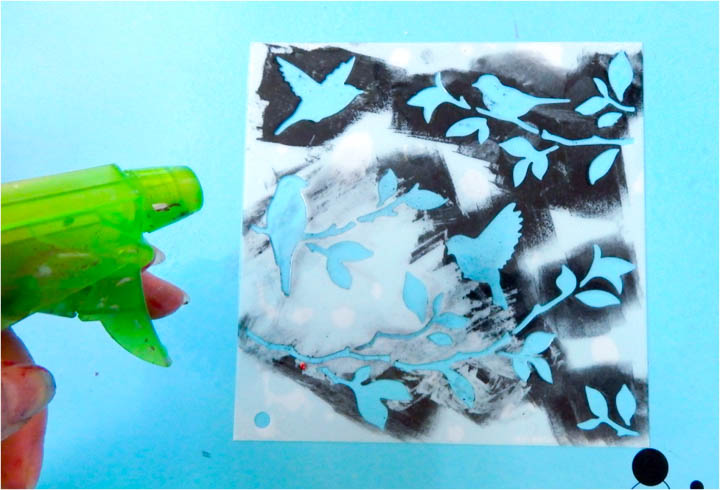
Acrylics paints are harder on stencils than inks. Acrylic paint can leave heavy buildup on your stencils and distort the edges. As with inks, clean the stencil immediately after using with a wet paper/cloth towel or baby wipe. Get as much paint off of it, as possible.

Use a cleaning or nail brush and soap to clean your stencils. Mix handwashing/dishwashing or Artist Painter’s type soap with water in a container. Dip the brush and scrub the paint off the stencil. Lay the stencil flat and rub gently, avoid bending the openings.

Sources

http://www.shellybailey.com/2014/03/project-life-2014-title-page-and.html

Source: https://www.sadieseasongoods.com/stencil-storage-magazine-rack/

Source: http://www.arthappy.me/paint-storage-display-idea/

Source: http://www.arthappy.me/paint-storage-display-idea/

Create an Industrial Mixed Media Look with Walnut Ink

by Iris Rodriguez

I like abstract art and assemblages in crafting! The mixed media style can be created with just about anything; inks, paints, found objects…there are no rules. For today’s tutorial, I wanted to create an abstract assemblage art combined with the vintage, grungy, industrial look using Imagine’s Walnut Ink.

Skill: Intermediate
Time: 1.5 hours

Directions


Step 1

Stamp the texture images with VersaMark ink on watercolor paper. Add Imagine’s Embossing Powder in White and heat set.


Step 2

Brush on the Eucalyptus Walnut Ink. Dry paper.


Step 3

Brush on the Walnut and Java Walnut Inks.


Step 4

Let the paper fully dry.


Step 5

Stamp more texture images with Spiced Chai StazOn ink.


Step 6

On a separate piece of watercolor paper stamp the round images with the VersaMark ink. Add Imagine’s Embossing Powder in White and heat set. Brush on Java or Walnut inks or a combination of both. Vary the colors on the circles. Dry paper. Cut out the circles.


Step 7

Color the gears and brads to make them all the same color with Chai Staz-On ink. Heat set the gears and brads if you’d like to speed up the dry time.


Step 8

Attach the gears to the circles with the brad. Place the circles in the desired area on the background paper. Do not glue the circles yet. It’s easier to bend and wrap the wire if the circles are not glued down. Wire wrap around each gear and brads, ensuring that the wire goes under the gear. Do not let the wire press down on the circles, it will bend the paper.


Step 9

Turn the circles upside down, add glue to the back of the circle and onto a piece scrap piece of chipboard.


Step 10

Adhere the chipboard pieces on top of the brad’s backing. This will secure brads and gears and give the circles dimension by giving them a little height. Glue the circles onto the background. Add dark brown backing and you’re done.

Thank you for stopping by the Imagine blog! I hope you give this abstract art project a try.

Supplies

Imagine
Other
  • Impression Obsession stamps – Seth Apter Edges, Planetarium
  • Watercolor paper
  • 20 gauge steel wire
  • Metal Gears
  • Brads
  • Chipboard
  • Brush

Watch a Video on Watercoloring with Memento Markers & VersaFine Clair

by Melissa Andrew

Watch a Video on Watercoloring with Memento Markers and VersaFine Clair!

Pets are the best! It is often that a dog or a cat is not simply a dog or cat but a member of the family. In today’s tutorial, I create a card with a pet theme using Memento Markers, VersaFine Clair, and clear embossing powder. The combination of these three craft items and the pet imagery really makes a gorgeous and simple creation. Memento Markers are versatile water-based markers so you can watercolor with them, add fine detail and create stunning backgrounds. Join me as I show you how.


Supplies

Imagine
Other
  • Whimsy Stamps – Shaker Maker Banner Die Set, An Unbreakable Bond
  • Paper Trimmer
  • Heat Tool
  • Canson Watercolor Paper
  • Cardstock – White

Send Birthday Wishes and Puppy Dog Kisses

by Elina Stromberg

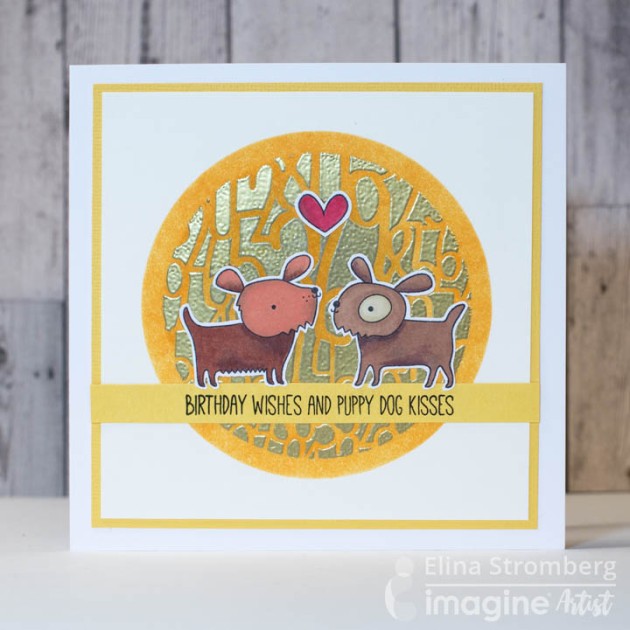
Send Birthday Wishes and Puppy Dog Kisses. Use Gold embossing.

Our color of the month is Golden Glow. Gold is an excellent choice for July a month filled with bright sunshine and sparkle! In today’s tutorial, I create this sweet birthday card theme with two puppies that are colored by hand. This time I used a golden color for decorating the background of a cute birthday card. I love how it turned out!

Skill: Intermediate
Time: 1 hour

Direction

dabbing clear VersaMark on the background, remove the masks, and heat-emboss the revealed pattern using Gold Embossing Powder.
Step 1

For decorating the card background I used two stencils that I layered on top of each other. I placed the number themed pattern stencil on the card background and masked with a circle stencil. Create the pattern with heat embossing by dabbing clear VersaMark on the background, remove the masks, and heat-emboss the revealed pattern using Gold Embossing Powder.

yellow ‘Cantaloupe’ Memento ink
Step 2

Place another, slightly larger circle stencil on the heat-embossed area, and inked the round background area with yellow ‘Cantaloupe’ Memento ink. This step made the background less busy, letting the stamped, colored, and fuzzy-cut main images pop. When the background was ready I stamped and colored the puppy images on white cardstock. When fuzzy cutting I left a thin area around the images, which made the cutting a lot easier as not all the finest details needed to be cut out.

My Favorite Things Top Dog collection
Step 3

The cute puppy stamps are from My Favorite Things Top Dog collection. The extra copies can be used for trying out new color combinations, but they also become handy if something goes wrong with coloring and you need to start over. I used Promarker alcohol markers for coloring, so for stamping it was important to use a water-soluble Memento. Tuxedo Black was just the right choice for that step.

My Favorite Things Top Dog collection

Supplies

Imagine
Other
  • Cardstock – White
  • Carabelle Studio – Number stencil
  • Two circle stencils
  • My Favorite Things – ‘Top Dog’ stamp
  • Glue
  • Promarkers
  • Scissors
  • Masking tape
  • Cardbase

Say “Hello How are You” with a Handmade Greeting Card

by Arjita Sepaha Singh

Say "Hello How are You" with a Handmade Greeting Card

Hello! How are you? Sometimes we need to simply reach out and say hi to an old friend! In today’s video, I created a very organic and easy card using VersaFine Clair and VersaMagic Chalk ink. I blended three Blue inks on a piece of Iris paper (slightly glossy) with a sponge dauber. I used an arrows stencil and added white and blue ink using finger daubers. To finish the card I heat embossed a sentiment and matted it on a white card base.


Supplies

Imagine
Other

Design a “Live Wild & Free” Themed Bicycle Card

by Jowilna Nolte

Design a "Live Wild & Free" Themed Bicycle Card

Summer can be busy with a hype of activities outside! But just in case there are days when you feel like staying inside you can beat the heat with a cardmaking session. In this tutorial, I go over some basic techniques that you can use on a variety of designs. This beautiful bicycle theme card in shades of gold that is perfect for those summer crafting days reminding us to be young and wild and free. Enjoy!

Skill: Advanced
Time: 1 hour + dry time

Directions


Step 1

Cover a piece of smooth white cardstock using VersaFine Clair in Golden Meadow by tapping the ink repeatedly onto the cardstock.


Step 2

Once the inked piece is dry stencil a pattern using Creative Medium Iridescent Pink over the yellow and let dry.


Step 3

Paint a layer of All-Purpose Ink in Vegas Gold over the entire background. I used a small amount of water with the gold.


Step 4

Mist the background with Fireworks Shimmery Craft Spray in Cantaloupe to add a touch of orange to the gold and yellow on your background.


Step 5

Trim the background smaller to fit onto a square 4 x 4” card. Add summer decorative elements for a fun card inspiring activity and fun this summer break. Once the inks are all dry they give you a lovely golden glow shimmer with a surprise pink from the Creative Medium showing.

Supplies

Imagine
Other
  • Cardstock – White
  • Jowilna Nolte – dot pattern stencil
  • Short Cuts Craft
  • Kaisercraft – Bicycle image, “Young, Wild & Free” embellishments
  • Diamanté