Double Stencil Technique On A CAS Card

by Nadine Carlier

CAS Card by Nadine Carlier IC

Layering stencils is an easy and fun way to create a background on your cards and still have a clean and simple look. Watch my video below to see how easy it is.  Enjoy!

Skill: Intermediate
Time: 30 minutes

Supplies

Imagine
Other

Visit our YouTube Channel for more inspirational videos and subscribe to get updates when we post new videos.

Learn to Emboss with a Stencil

by Martha Lucia Gomez

Purple and lavender Hello Friend handmade card featuring Memento Inks by Tsukineko available from Imagine.

Hello Fellow Crafters! Today, I am sharing some of my favorite stencil techniques with you! Layering stencils are trending now and we can create beautiful designs and make techniques with the different patterns. I am sharing an all textured card with a “Hello Friend” greeting. This month our challenge is stencils and the Color of the Month is Lavender.

Skill: Intermediate
Time: 30 minutes

Directions


Step 1

Select the color of cardstock and the stencils that you want to use. I am using Wisteria Wonder cardstock and the Layering Dahlia A & B Bundle Stencil from Altenew. Use the layers with different colors of ink. In my sample, I am using Memento Ink in Lulu Lavender and Grape Jelly. Apply the soft color on the stencil with more free areas and the dark color on the detailed stencil. To create the first layer of texture, place the stencil over the stenciled layer in the corresponding place.


Step 2

Create a special sandwich on your big shot to make the embossing. Remember that the pressures of cutting machines are different so you need to test and listen to your version. In my big shot the correct sandwich is:

  • Closed Platform
  • Rubber Pad
  • A piece of cardstock (shim)
  • Stenciled card layer
  • Stencil
  • Embossing Plate

Paste the ensemble sandwich easily through your die cut machine to emboss the stencil design and voila, you will have the first textured.


Step 3

Now it’s time to create the traditional embossing over your card. To make this I am using a Stencil Word from Jillibean Soup. Secure the stencil over the stenciled layer. Apply VersaMark directly with the ink pad over the “Hello”. Remove the stencil and cover the stamped word with Embossing Powder in White. Melt the powder with the heat tool. Paste the stenciled layer over a whisper white card base. Stamp a complement of the word and paste it over the card with On Point Glue.

Supplies

Imagine
Other
  • Altenew – Layering Dahlia A & B Bundle Stencil
  • Hampton Art – Hello stencil from Jillibean Soup
  • Big Shot – Rubber Mat
  • Glue Dots
  • Cardstock – Wisteria Wonder, Whisper White
  • Big Shot Die Machine
  • Masking Tape

Create Two Matching Cards with One Stencil Application

by Kassy Tousignant

Create Two Matching Cards with One Stencil Application

Stencils and Fireworks Shimmery Craft Spray are a match made in heaven! Stencils can be used in so many different ways and here I show you a cool technique to get more use out of your stencils and maybe see them in a different way. I was able to make two cards rather quickly with one ink application.

Supplies

Imagine

• Fireworks Shimmery Craft Spray – Grape Jelly
• GooseBumps – Sparkle
• Creative Medium – Clear
• Tear It! Tape
• IrRESISTible Pico Embellisher -Tuxedo Black

Other

• Carabelle Studio – stencil
• Prima – Black gesso, Flowers
• Nuvo – Crystal drops
• Fine jute string
• Creative Embellishments – chipboard frames
• Glue Dots
• Cardbase

Color of the Month for August is Lavender

The Color of the Month for August is Lavender. We love this soft purple color and with summer in full gear, the lavender is blooming in full. We are reminded of how well this color compliments green leaves and also is the favorite of honey bees. With cardmaking and scrapbooking, lavender is a must-have to express sensitivity and delight! Imagine and Tsukineko offer several products to help achieve this beautiful color. Ink swatches such as Memento in Lulu Lavender, Brilliance in Pearlescent Purple, and All-Purpose Ink in Wisteria are great examples! In the meantime, we have a couple of sneak peeks of this month’s tutorials for you!

Kyriakos Pachadiroglou creates Lavender Feather Earrings 

Martha Lucia Gomez creates a beautiful Geometric Butterfly Card

Roni Johnson goes stencil crazy with this Mixed Media Stencil Art

Stay tuned to the Imagine Blog for more inspiration!

Make a Faux Batik Prints with GooseBumps Texture Spray

by Arjita Sepaha Singh

Make a Faux Batik Prints with GooseBumps Texture Spray + Fireworks Shimmery Craft Spray

Batik is a technique of wax-resist dyeing applied to whole cloth this technique originated in Indonesia. I tried to mimic the batik effect using Goose Bumps Dauber and used it to create a resist. I used a leaf stamp and dabbed it with GooseBumps and created an impression on white paper. Then I added firework sprays to get the beautiful green background. I also heat embossed some leaves on vellum and adhered them on to the card to finish it.

Supplies

Imagine
Other

Create a Bright and Fun High Contrast Card Design

by Elina Stromberg

Create a Bright and Fun High Contrast Card Design

Best summer craft projects are fun and easy to make. On a sunny summer day, you don’t want to spend time in collecting a large number of tools and materials, but rather create something beautiful quickly, using just a few basic supplies you’ll always have at hand.

Skill: Beginner
Time: 30 minutes per card

Directions


Step 1

For these flower cards, you first create your own patterned paper using repeated floral images and your favorite ink colors. Then you decorate the front of your card with a panel cut from the self-made patterned paper, add a stamped sentiment on top, and your card is ready! Isn’t that just the perfect recipe for a summer day craft project!

Step 2

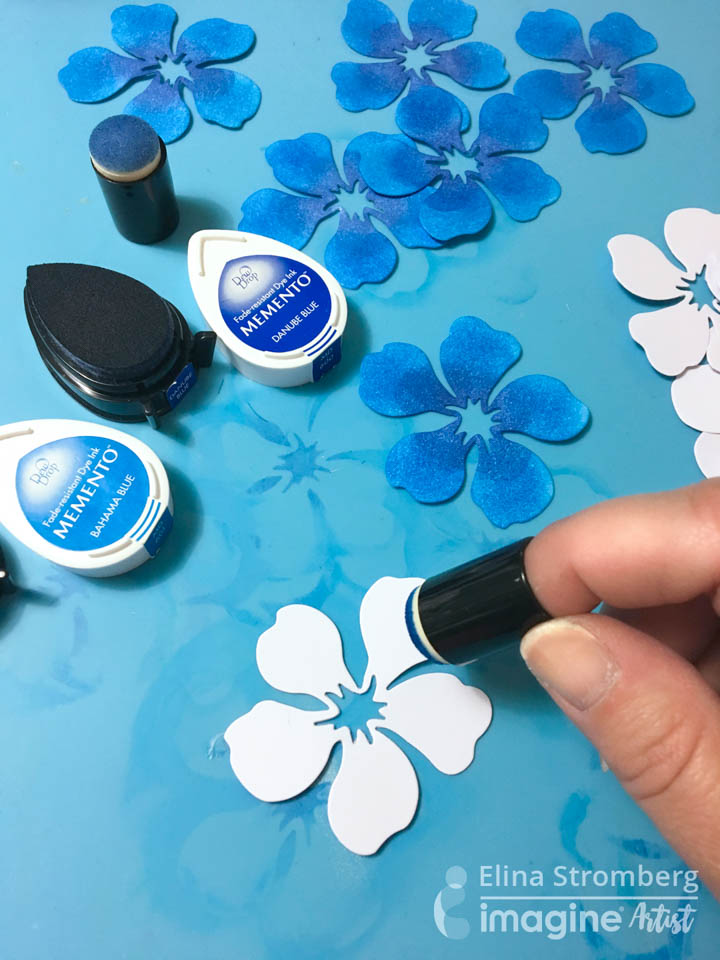
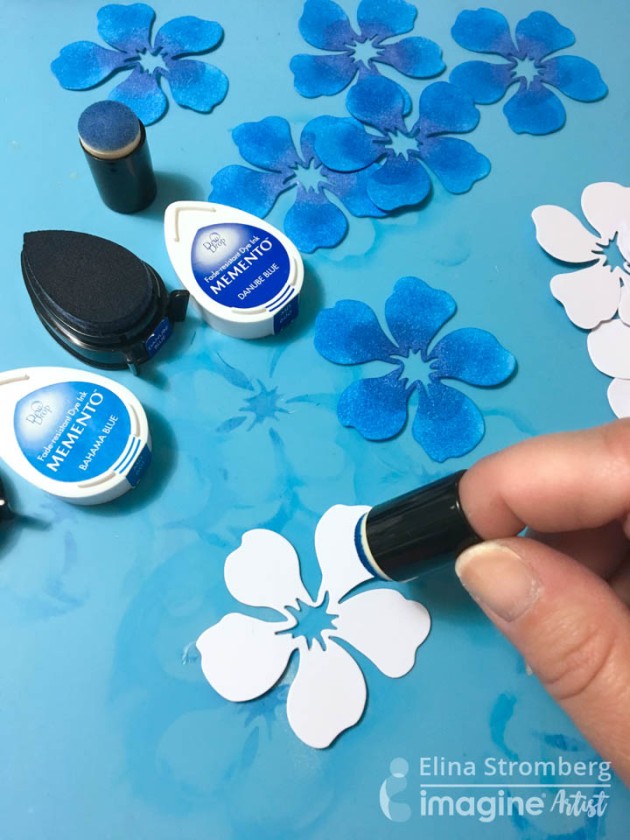
Using white cardstock, die-cut, punch, or free-cut with scissors a pile of flowers. Color the flowers with your favorite ink colors. For these sample cards, I used two blue Memento inks: Bahama Blue and Danube Blue. If you want to let the ink colors mix, mist the flowers with water and let dry.


Step 3

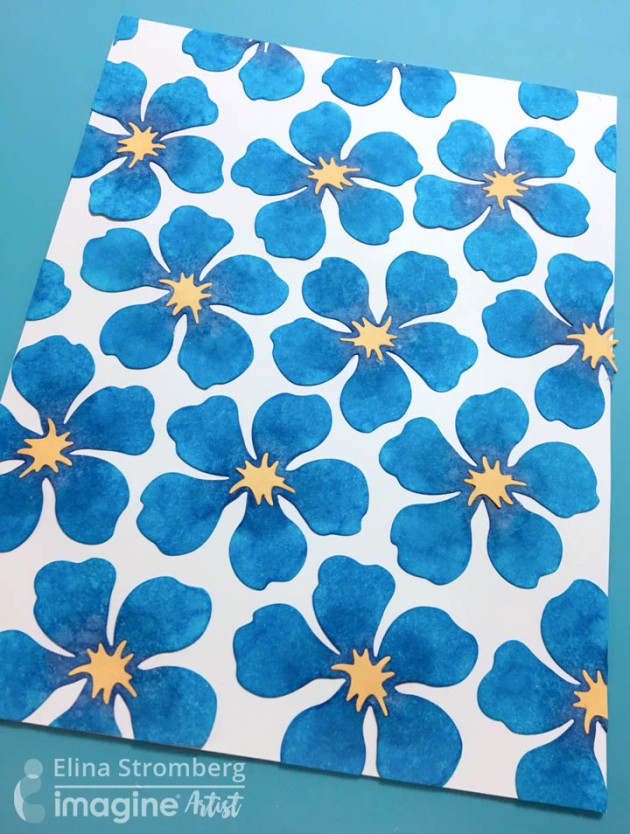
If your flowers have separate centerpieces, color them, too. Glue the inked flowers on a piece of white cardstock. Leave some white space between the flowers. Let dry.

Step 4

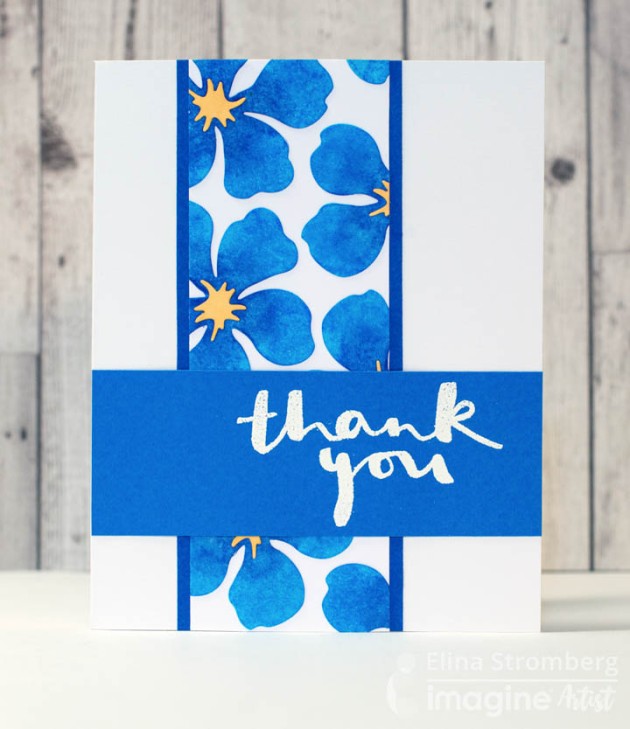
Using scissors or a paper trimmer cut a panel from the decorated flower paper. Mat the panel on a piece of matching color cardstock, and glue on the card front. Stamp “Thank You” or “Hello” with VersaMark and heat emboss sentiment on a piece of solid color cardstock. Glue panel on a card front.


Supplies

Imagine

Other

  • Scissors
  • Paper trimmer
  • Glue
  • StudioCalico – ‘Thank You’ stamp
  • Sizzix – ‘Hello my Friend’ stamp, Floral die
  • Cardstock – Dark Blue, White
  • Cardbase – White