Project Swap: Inspire with Herringbone Art

Project Swap: Inspire with Herringbone Art

Welcome to another set for our Artist Project Swap with Nadine and Roni. For the Month of May, we challenged our artists to exchange tutorials and create each other’s designs in order to see how each of our artists interprets style and choices. The receiving artist did not know who designed the project, nor did they receive any images! In today’s post, Roni gives the directions and recommended supplies list and Nadine created the project.

Inked Herringbone Background by Nadine Carlier

Herringbone Background by Nadine Carlier

I absolutely loved swapping projects with Roni Johnson! This project was not something I would have ever thought of making on my own but I really enjoyed making it. I didn’t have all the exact same products that she used but was able to improvise with no problem. Besides, I prefer not to copy something exactly and put my own twist on it.

I made a video showing how I created my project. Watch it below!

Skill: Intermediate
Time: 1 hour

Supplies

Imagine
Other

Visit our YouTube Channel for more inspirational videos and subscribe to get updates when we post new videos.

Original Design by Roni Johnson

Helpful Tips and Tricks: How to Take Amazing Photos of Craft Projects

by Martha Lucia Gomez

Helpful Tips and Tricks: How to Take Amazing Photos of Craft Projects

With the ever-growing popularity of social media platforms, particularly Instagram, crafters have been talking about how to take better photos of our projects. Since not all of us are professional photographers, and we don’t all have “the perfect tools”, I would like to talk about how to take great photos of your work without having to be a pro-photographer.

Style your photos creatively

These are important elements to focus on when taking a photo of a project:

  • the backdrop or background
  • main focus – which is always your project
  • props or supporting elements to make the focus shine
  • the camera

Backgrounds

With clear and simple photos you need to have a neutral base or background, like white, grey, ecru, cream or even brown tones like wood. Since most of us don’t have professional lighting, set your background up where it is in natural light, and make sure it is a large enough base to place your card or project. Try using dark colors in the background to help the project colors pop.

You can set up your background so that your project can be laid flat or standing up. I find that I can capture more details by taking photos of my cards flat on a surface with the camera located directly above it. Also, if you have a small space to take your photos, this option is perfect because it requires less space and can make it easier to incorporate other elements.

With flat photos, remember your backdrop is the most important part. If you are creative you don’t need to buy expensive elements, you can use everyday household items and surfaces as the background. The most important thing is to keep in mind the colors and textures. A brightly colored element next to your project can round out the scene and support the focal point, but being able to use it as the background will be trickier, tho can work on occasion.

You can use wood surfaces, floor boards, ceramic tiles or designer textured papers, as well as other supplies to add some depth to the photos. You can also use elements like designed plates, which can be easily found in home decor stores. My favorite is HomeGoods because I can buy just one plate, placemat or napkin. Neutral colored fat quarters found at the fabric store is another cheap option.

Supplies or Photo Props

With staging photos, it is nice to add a few elements alongside your card or project—but these cannot compete with the main focus object i.e. your crafting project. You can use many items as photo props. I use a lot of flowers and greenery, my favorites are made of silicone because the fabric flowers don’t look real to me. But definitely, my favorites photo props are the craft supplies. Supplies like inks, stamps, stencils, color pencils or markers, and die cuts are perfect elements to support your project. Extra embellishments like buttons, sequins, washi tape and twines are also great, but always be careful with the color combinations. My suggestion is to start with the neutral items first that won’t compete with your project. If you still aren’t finding what you like, just look around your home and you might find gorgeous elements that you can borrow for a few minutes as part of your photo.

Camera

With today’s technology, you really don’t need to have a professional camera. Cell phones like the iPhone or Samsung make it possible to take amazing photos. To make them work best, use natural light source and keep an eye out for any shadows across your photo. Also, think about a good angle to take the photo. Always start by making your lens parallel to the project front, and then play with the angle from there. My last helpful hint is very simple but important: always clean the lens of your camera or phone before taking the photos. Because we touch our phones so often it is easy for the lens to become dirty.

I hope you found these tips useful. Just remember to stay open to learning new ideas and most importantly have fun! Thank you for stopping by the Imagine blog and don’t forget to share!

Upcycle a Thrift Store Find with VersaMagic DewDrops

by Kassy Tousignant

Upcycle a Thrift Store Find with VersaMagic DewDrops video tutorial.

I love giving old things new life. I found an old metal flower decor piece at a thrift store and I just couldn’t resist a little upcycle love. In today’s video, I show you how to use products like VersaMagic chalk ink and irRESISTible texture sprays to color metal pieces to mount on a stenciled canvas. This product is still as vibrant and rich on metal as it is on paper.

Skill: Advanced
Time: 1.5 hour + dry time

Supplies

Imagine
Other
  • Prima – Plaster paste, Art Stones
  • Waverly stencil
  • Liquitex – Super Heavy Gel
  • Twine
  • Canvas board
  • White Gesso

See How to Make a Paper Rainbow Pinwheel Wreath

by Roni Johnson

See How to Make a Paper Rainbow Pinwheel Wreath with VersaMagic Ink.

It’s April! Can you believe it? I wanted to make something fun for summer to hang on our front door and I think this rainbow pinwheel wreath is just the ticket. It’s bright, cheerful and welcoming to all who grace our doorstep. I decided to use 21 different colors of VersaMagic ink to grace my rainbow but of course, any color theme would be perfect for this project. The complete color list can be found in the supply list below.

Skill: Intermediate
Time: 4 hours

Directions


Step 1

Cut eight 5-inch squares, seven 4-inch squares, and six 3-inch squares from white cardstock.


Step 2

Pencil in lines from corner to corner. Draw a 1-inch circle in the center of each square.


Step 3

Punch a hole in each triangle near the corner as shown.


Step 4

Sponge ink on the lined side of the cardstock. Only a portion of each triangle needs to be colored.


Step 5

Flip the square over and stamp the desired pattern on each of the triangles. Repeat steps 4 & 5 until all of the squares have been inked.


Step 6

Cut along the penciled lines from the tip to the edge of the circle. Fold each triangle over to the center, line up the holes and secure with a brad.


Step 7

Repeat steps 7 & 8 until all squares have been turned into a pinwheel.


Step 8

Cut out a wreath shape from chipboard.


Step 9

Hot glue largest pinwheels to the wreath first, fill in blank areas with the medium and small pinwheels. A stack of foam board was used to elevate the smaller pinwheels above the larger ones.

Supplies

Imagine
  • VersaMagic DewDrop – Aegean Blue, Aquatic Splash, Key Lime, Malted Mauve, Mango Madness, Night Sky, Oasis Green, Ocean Depth, Perfect Plumeria, Persimmon, Pink Grapefruit, Pink Petunia, Pixie Dust, Pretty Petunia, Purple Hydrangea, Red Magic, Sea Breeze, Spring Pansy, Tea Leaves, Thatched Straw, Turquois Green
  • Sponge Dauber
  • Craft Mat
Other
  • Rubber Stamp Tapestry – Posy Flower; Dot Flowers
  • Cardstock
  • Crop-A-Dile Hole Punch
  • Brads
  • Chipboard
  • Foam Board
  • Hot Glue Gun

Learn How to Upcycle Wine Bottles with Paper Mache

by Iris Rodriguez

Spring is coming and in some places, it’s already starting to look like spring with the beginning of sunny weather. To celebrate the change of the season, I like altering bottles of every type such as wine, liquor, and Coke bottles. Each one has it’s own potential and beauty. Today’s project is an altered wine bottle, made to look like flowers are springing out (pun intended) with a real zipper and paper mache to cover the glass. This project takes time! Paper mache takes longer to dry so to start this project please carve out a couple days for its completion. As part of my color palette, I was inspired by Pantone’s Color of the Year, Ultraviolet. For my version of Ultraviolet I used Fireworks! Shimmery Craft Spray Grape Jelly and Lulu Lavender. This altered bottle makes a beautiful home décor, centerpiece or just a nice gift.

Skill: Advanced
Time: 2.5 hours + 1 day drying time

Directions


Step 1

Select a bottle, remove labels and wash it inside and out. Dry completely.


Step 2

Measure the zipper on the bottle, determined where it should open and adjust slider accordingly.


Step 3

Glue cardstock paper on each side of the zipper, ensuring that the paper is on front facing side of the zipper. Add paper starting from the top of the zipper to where the slider is located. The paper helps to glue the zipper on the bottle and still allows for adjustments to the opening.


Step 4

Glue tissue paper around the area where the zipper will be placed. The tissue makes for a porous surface to color and to glue on the zipper. Let dry.


Step 5

Glue the zipper onto the bottle.


Step 6

Mix the Sculptamold or other paper mache product with water. Mix in small sprinkles of water at a time until the desired consistency is achieved, which should be similar to cottage cheese. Mix a small portion at a time. Be careful but quick because it sets fast.


Step 7

Apply the paper mache with a palette knife around the outside of the zipper. Work time is short—about 15 mins before it begins to set. Spray a little water to smooth the surface. (After it has set, you won’t be able to change it much.) Paper mache is very porous and takes the ink sprays very nicely. It is messy, however. It is water soluble, so clean up is fast and easy. Let the bottle dry for one day or more.


Step 8

Apply more paper mache or molding paste through stencils. The pattern will not come out crisp and clear because of the bumpy surface but that’s what makes it artsy! Let dry.


Step 9

Color the bottle with Fireworks Shimmery Craft Sprays.


Step 10

Color paper flowers with the Fireworks. If you want some dilution of color without dilution of Sparkle, add Sheer Shimmer in Sparkle. (Also, if you wanted to keep some white, make them match by just adding Sheer Shimmer.)


Step 11

Spray Fireworks onto the smooth side of the watercolor paper. Dry it completely. Stamp and emboss the butterflies with Tuxedo Black Memento Luxe and black embossing powder. Fussy cut the butterflies. For the antennas soak a piece of embroidery thread in glue. This will stiffen the thread. Cut little pieces for the antennas and glue to the back of the butterflies.


Step 12

To make a decorative bottle stopper use a dresser pull knob.


Step 13

Apply gesso to the dresser pull knob then color with the Grape Jelly Fireworks Craft Spray. Then seal the knob with the spray sealer.


Step 14

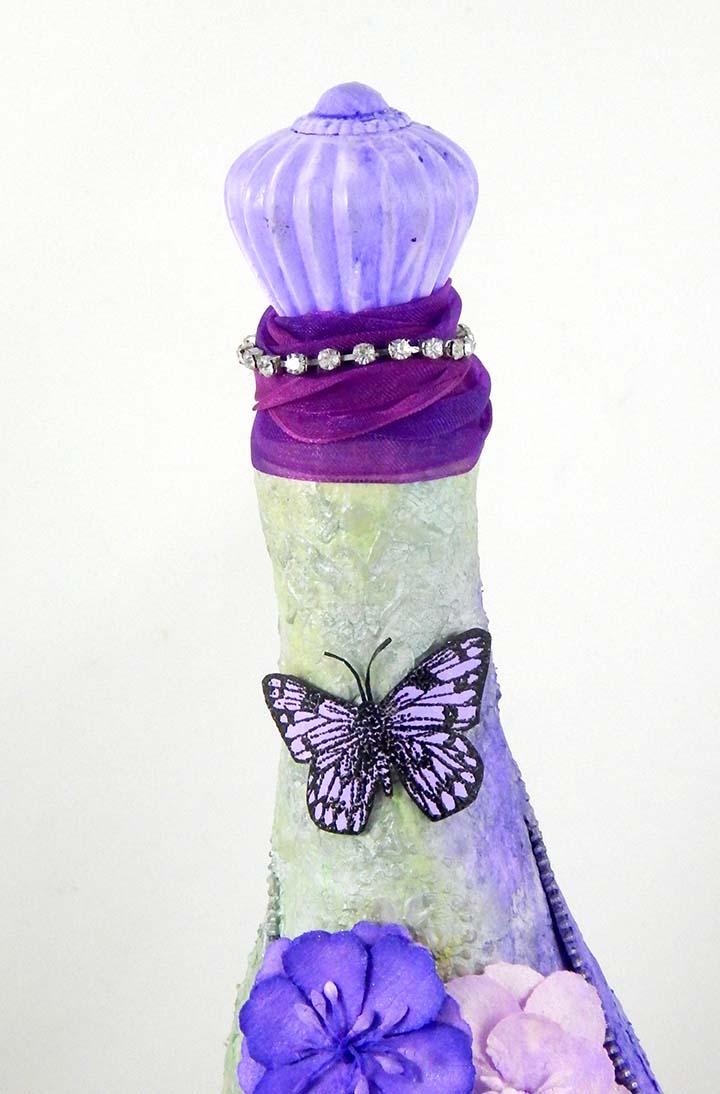
To adhere the knob to the bottle, use a natural cork and glue. The cork usually expands when it is popped out the bottle, so in essence, it’s hard to stick back in the bottle completely. However, you can shave down the cork with a serrated knife. This image shows the cork before and after.


Step 15

Screw in the dresser pull knob into the cork. Apply E-6000 adhesive. An alternative to using a cork, adhere the dresser pull knob with a two-part Epoxy clay.


Step 16

Place the corked knob in the bottle.


Step 17

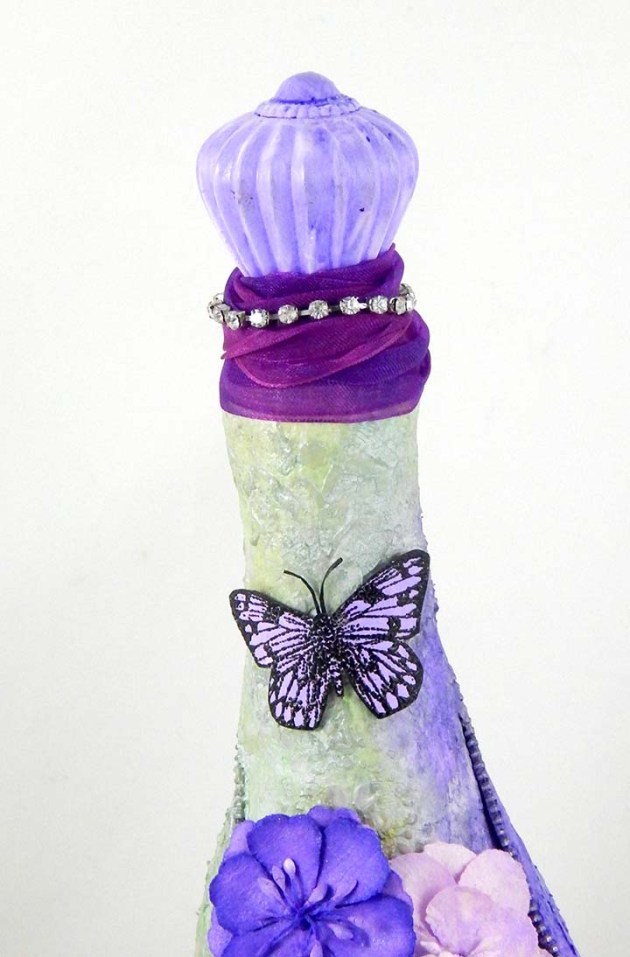
Phew! Almost done. All that is left to do is to put it together. Glue the flowers in the area between the open zipper, tucking them under the edges. Glue butterflies around. Spray a little bit of sealer over the entire bottle.

Step 18

The pull knob’s neck area will need a ribbon to cover the seam and glued cork. Embellish the bottle with charms, rhinestones, chains.

Supplies

Imagine
Other
  • Glass bottle
  • Zipper
  • Paper flowers
  • Embellishments – ribbon, rhinestones, charms
  • Butterfly stamp
  • Sculptamold or other paper mache product
  • Molding paste (optional)
  • Cardstock – white
  • Watercolor paper
  • Gel Glue
  • E-6000
  • Cork
  • Dresser pull knob
  • Stencils
  • Gesso
  • Krylon – Spray Sealer
  • Embroidery thread – black

Learn How to Upcycle Cork Coasters

by Elina Stromberg

Learn How to Upcycle Cork Coasters

A while ago, I found a pile of old cork coasters in my kitchen cabinet. I had not used them in years and was just about to throw them away, but then I realized they were perfect for small home décor items. Maybe the beautiful material made me change my mind. Nowadays cork is truly a trendy material in craft projects, so I thought I should try to turn the old coasters into something nice and new. And I’m so glad I did!

Skill: Beginner
Time: 30 minutes

Directions


Step 1

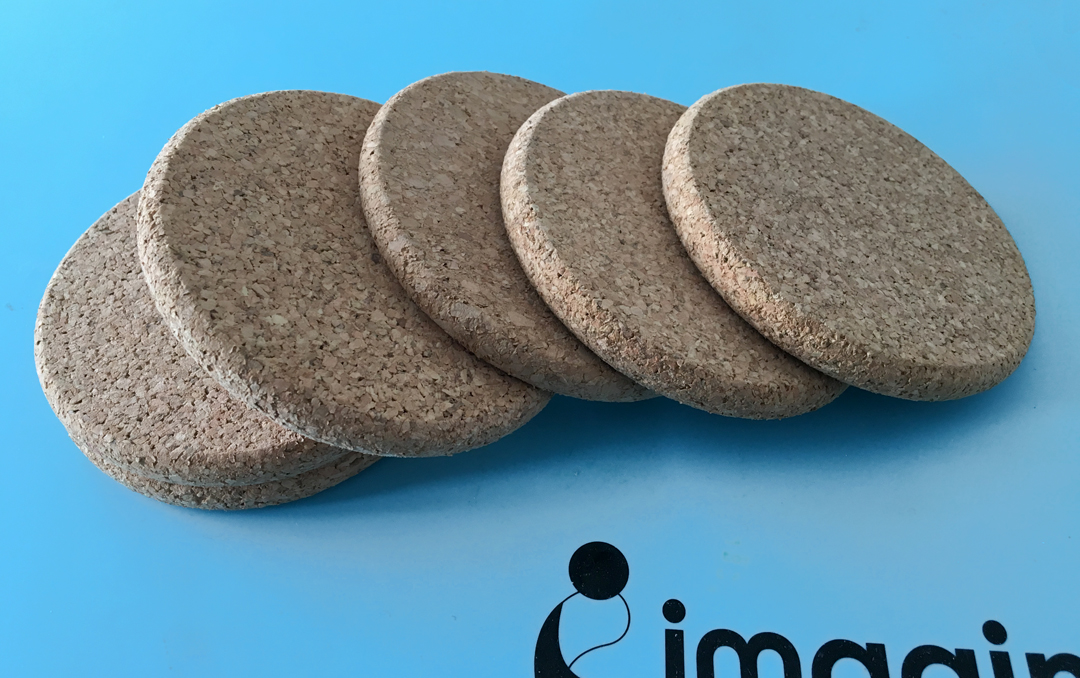
Remove dust and stains from the coasters.


Step 2

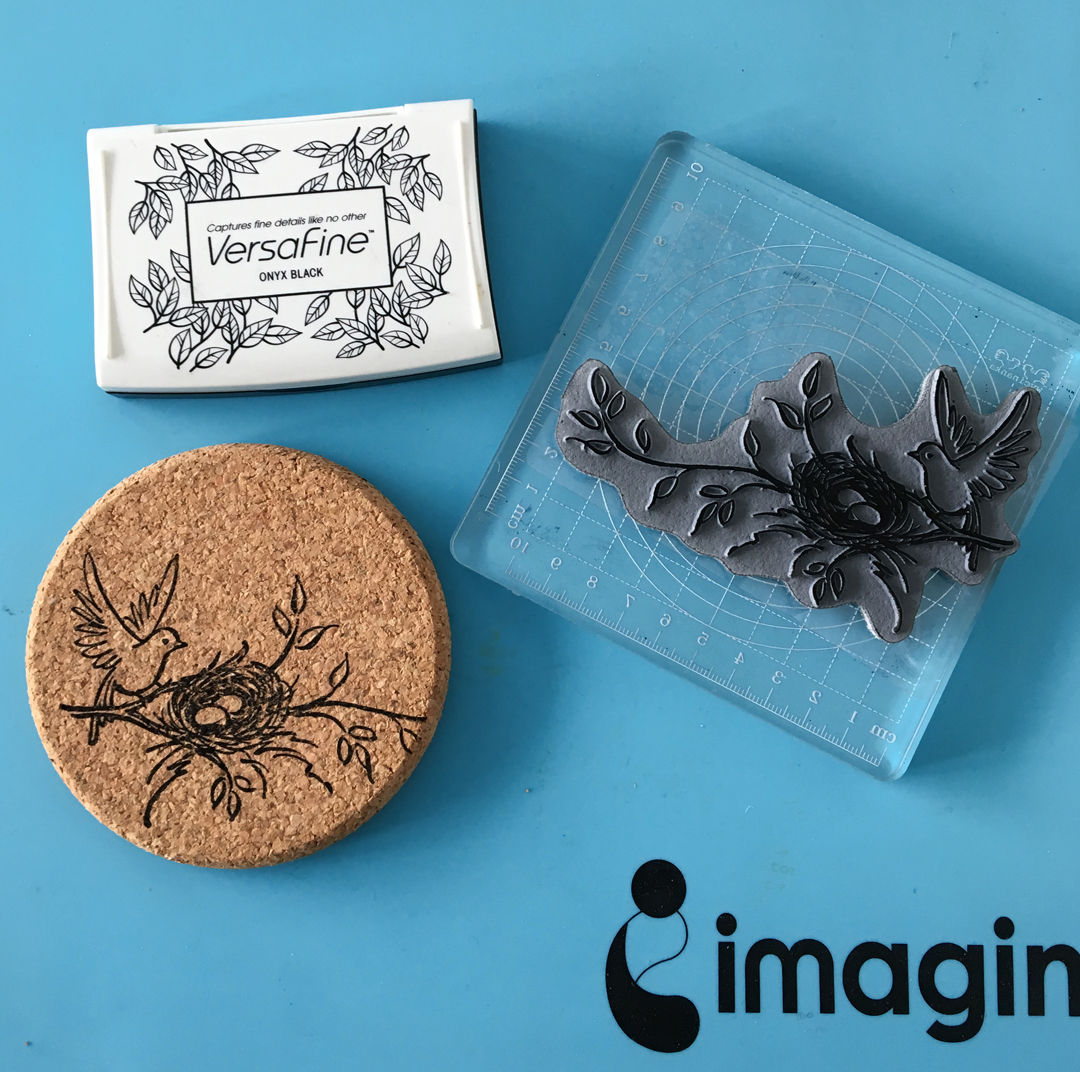
Stamp the images using Onyx Black VersaFine. When stamping, press the stamp firmly on the cork surface. VersaFine is a great ink for solid image stamping and since it is a dense ink it should stamp on the cork well.


Step 3

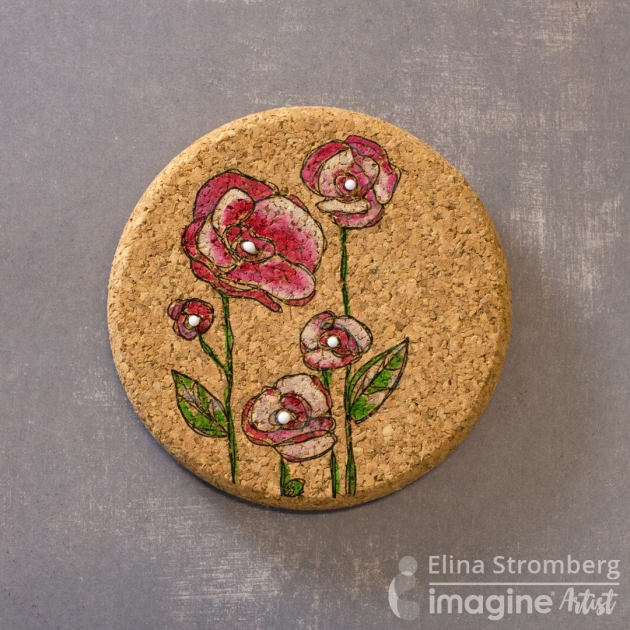
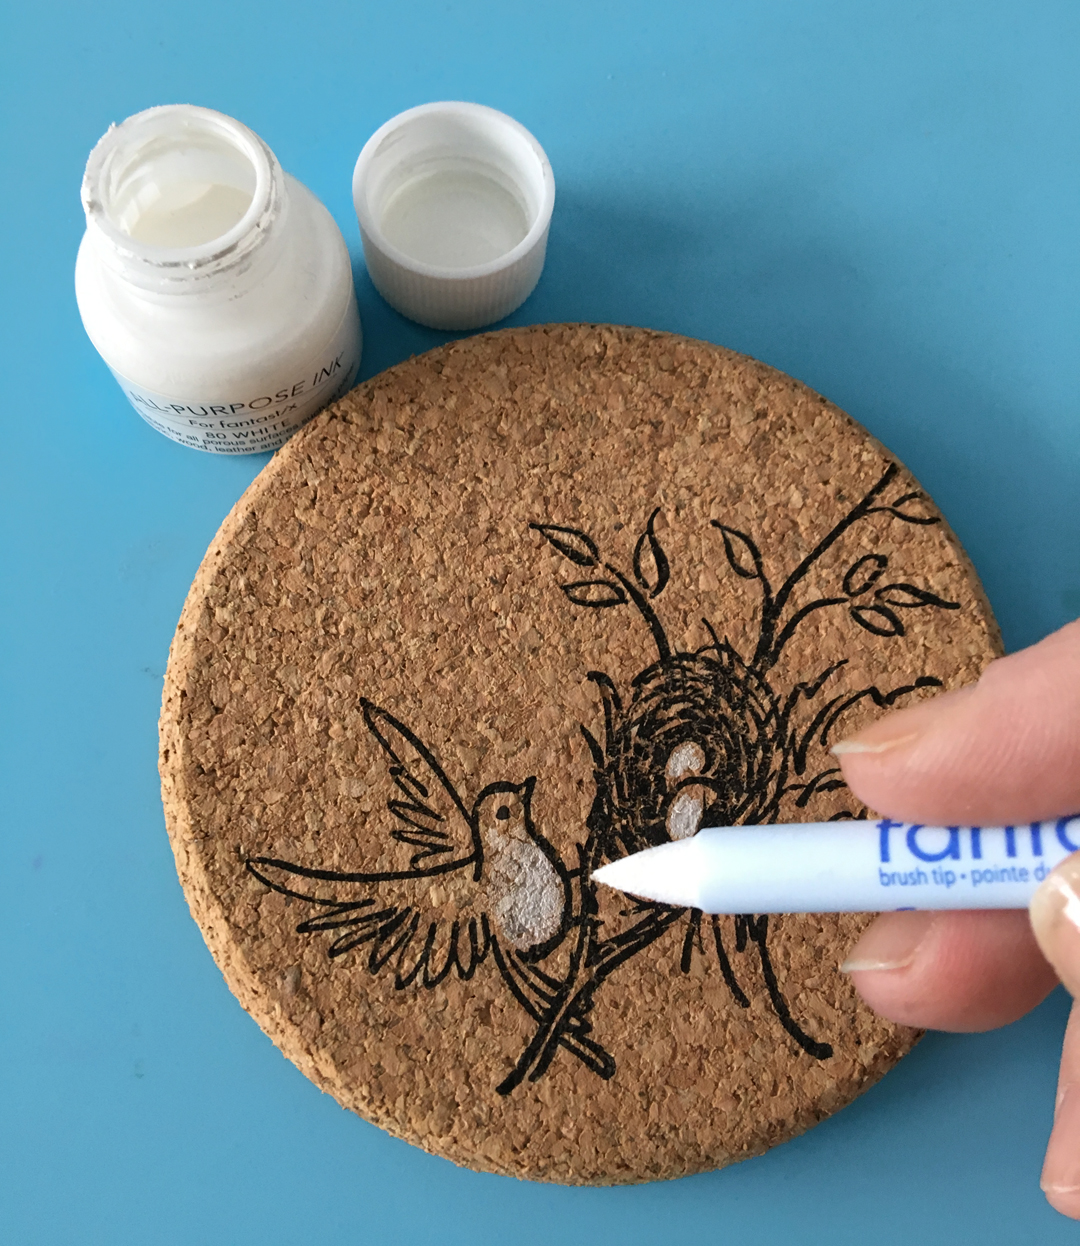
Color images with All-Purpose Ink. Use irRESISTible Pico Embellisher in Wedding Dress (white) for decorating the stamped and colored images with dimensional paint dots. Let dry.


Step 4

Using a new Fantastix, color in the leaves with All-Purpose Ink in Spring Green.


Step 5

To finish this project, continue stamping and coloring the remaining coasters in your set. You have the option of making all 4 or 6 of your coasters different or repeating the same image for all. If you want to hang the decorated coaster on the wall, attach a loop on the back of the coaster with a strong adhesive.

Supplies

Imagine
Other
  • Cork Coasters
  • Stampendous – Nesting Bird Stamp
  • Acrylic block for stamping