Learn How To Upcycle A Pencil Holder With Embossing Powder

by Iris Rodriguez

Learn How To Upcycle A Pencil Holder With Embossing Powder

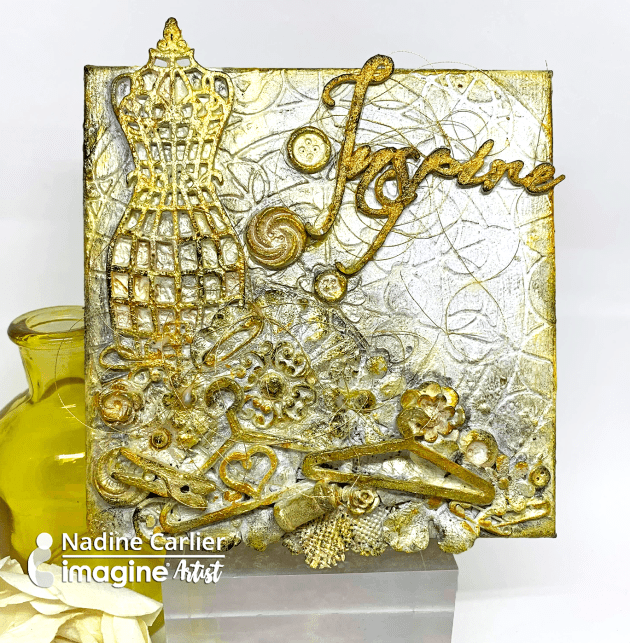
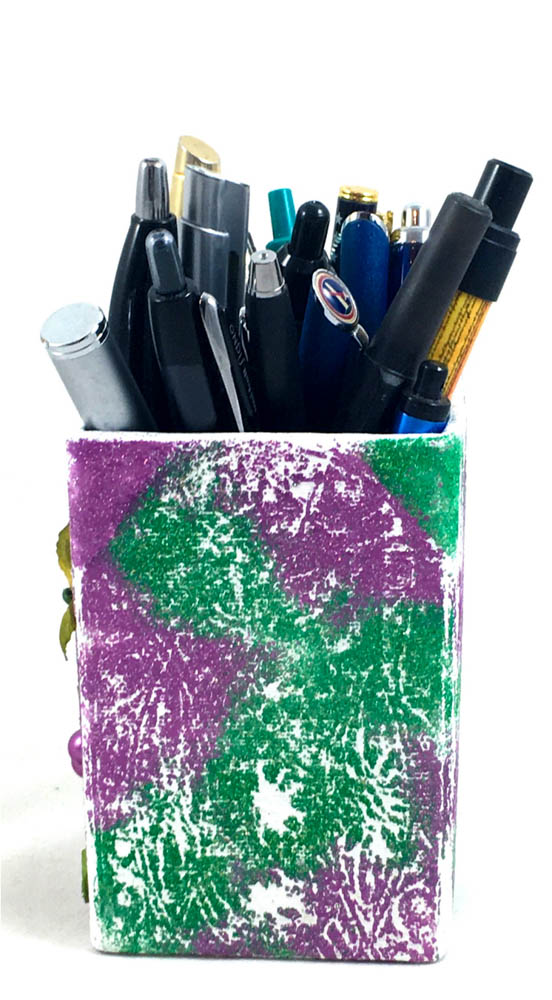
I just love how the glittery combination of Imagine’s new Mboss Embossing Powders shine. I made this cute pen and pencil holder with Princess Party (silver and purple combination) and Lucky Stars (gold and green combination). I love the way these two colors work together to transform a pencil box from neutral colors to bright vibrant home decor.

Skill: Beginner
Time: 1 hour

Directions


Step 1

Select a cardboard-based pencil box. A plain box works as well. If it has designs it can be covered with gesso.


Step 2

Apply the gesso to the pencil box making sure to paint on enough layers to fully cover the current design. Allow to fully dry.


Step 3

Stamp the textured image with the VersaMark ink. Apply Mboss embossing powders in Lucky Stars and Princess Party. Apply one color in random areas. Shake off the excess on a clean scrap piece of paper and place back in the bag. Apply the second color in the areas that do not contain embossing powder. Shake off the excess on a different clean scrap piece of paper and place back in the bag. Melt the powder with a heat tool.


Step 4

Glue on the flowers.


Step 5

Apply embossing powders on all sides, if desired.

Supplies

Imagine
Other
  • Rubber Stamp
  • Pencil Holder
  • Prima Marketing – Vine Flowers
  • Gesso
  • Paintbrush
  • Adhesive

Learn How To Make A 3D Cube Jewelry Element Using StazOn Pigment

by Kyriakos Pachadiroglou

Learn How To Make A 3D Cube Jewelry Element Using Stazon Pigment

“In geometry, a cube is a three-dimensional solid object”, according to Wikipedia, and that’s exactly what I was aiming for in creating a unique jewelry piece. The perfectly flat and square Sheet metal pieces were the best option to build a cube that would make a modern, out of the ordinary, piece of jewelry. The shiny surface of the Sheet metal was slightly moderated by pressing the metal pieces on the StazOn Pigment ink pad surface that gave a patterned result. Adding stamped designs using VersaMark and black Mboss embossing powder to the sides of the cube created a lovely contrast between the silver, white and black colors in the piece.

Skill: Intermediate
Time: 1.5 hours

Directions


Step 1

Press the Sheet Metal shapes on the StazOn Pigment Inkpad in Snowflake and remove carefully to avoid sliding on the surface. Let them dry (it really doesn’t take long).


Step 2

Align the Sheet Metal shapes on a stamping platform with the butterfly stamp. Make sure the corners with holes meet. Cover with the VersaMark Watermark inkpad and press.


Step 3

Cover with the Mboss Embossing Powder in Black and heat set. Let cool before touching.


Step 4

Align the metal pieces with the stamped side downwards and apply hot glue on the joint edges. Quickly fold to create an L shape.


Step 5

Continue adding metal pieces by gluing on the un-decorated side of them. There should be corners with 3 holes lined up together on opposing corners of the cube.


Step 6

Cut 16 inches long pieces of the cord and pass them through the holes.


Step 7

Add beads on both sides.


Step 8

Set jewelry clasps and align length.

Supplies

Imagine
Other
  • Waxed cord
  • Jewelry beads
  • Jewelry peices – clasps, jump rings, caps
  • Jewelry Pliers
  • Heat tool
  • Hot glue gun and glue
  • Stamping platform (optional)
  • Kaiserkraft – Tigerlily stamps

Creating an irRESISTible Background with StazOn Pigment ink for Lavinia Stamps

by Melissa Andrew

Creating an irRESISTible Background with StazOn Pigment ink for Lavinia Stamps

Today, I share a very simple and fun technique using the irRESISTible Pico Embellisher in a new way. Importantly, I show you how to use StazOn Pigment ink over the Pico since StazOn is perfect on slick surfaces. Finally, I use a beautiful fairy stamp as a silhouette to finish our card project.

Skill: Intermediate
Time: 20 minutes

Directions

Supplies

Imagine
Other
  • Lavinia stamp – Flower Fairy
  • White Card Stock
  • Misti Stamping Platform
  • Masking Tape
  • Canson – Watercolor Paper

How To Make A Mixed Media Canvas in Gold Shimmer

by Nadine Carlier

inspire-canvas-by-nadine-carlier-web

Imagine has so much more than just inks! They have lots of mixed media products too. I used several of them to create my mixed media canvas.
Watch my video below to see how I did it. Enjoy!

Skill: Advanced
Time: 1 hour + dry time

Supplies

Imagine
Other

Visit our YouTube Channel for more inspirational videos and subscribe. Make sure to click the bell to get updates when we post new videos.

Learn How to Upcycle an Old Jar into a Mystical Fairy Lantern

by Roni Johnson

I don’t know any little girl that didn’t want to be a fairy when they were little…some of us have never forgotten that dream and love fairy’s to this very day. Here’s a way to sprinkle a little fairy dust in your home with this upcycled DIY Fairy Lantern craft!

Skill: Intermediate
Time: 1 Hour

Directions


Step 1

Wash and dry a glass jar that you will use to create the lantern. Cut a fairy silhouette or cut out from black cardstock. Apply a layer of On Point Glue to the paper die-cut. Apply a layer of On Point Glue to the die-cut.


Step 2

Press the fairy to the inside of the jar front. Note: If you have a fairy stamp you can exchange that for the fairy die cut and stamp it on the outside of the jar with StazOn Pigment Ink.


Step 3

Glue a bit of moss to the bottom of the jar so that when the lantern is lit it will look like she is standing in a bit of foliage or plant life.


Step 4

Stamp flowers images on the other 3 sides of the jar using StazOn Pigment Ink. Silhouette flowers work best but use what you have.


Step 5

Sponge Blue Hawaii StazOn Studio Glaze to the corners, top and bottom areas of each side with an Ink Blusher sponge and let dry.


Step 6

Sponge on a coat of Wedding Dress (white – dries frosty) StazOn Studio Glaze over the entire jar and let it dry.


Step 7

Sponge on a second coat of the Wedding Dress Studio Glaze on one side of the jar and immediately sprinkle with Mboss Sparkle embossing powder. Shake off the excess and reserve for the next side.


Step 8

Set the jar on the craft mat and heat the embossing powder to melt. Let it cool! Note: the jar will become very hot during this process. Do not try to pick it up as you will burn your fingers.


Step 9

Repeat steps 9 and 10 on the rest of the jar. When the jar is fully covered it is now time to move on to the lid. Sponge Piano Black StazOn Pigment Ink over the writing on the lid.


Step 10

Add desired embellishments to the lid and top of the jar. Wrap wire around an LED flicker light so you can insert it into the jar with ease.


You now have an amazing little fairy lantern to light your way! Use this tutorial to create decorations for a summer party, birthday or any fun outdoor event!

Supplies

Imagine
Other
  • Mason Jar
  • Posh Paper Supplies – Fairy die cut
  • Hobby Lobby – Pearl Trim, Garland
  • Prima – Flowers
  • Heat Tool
  • Battery Operated Candle

See How to Upcycle a Thrift Store Vase

by Kassy Tousignant

See How to Upcycle a Thrift Store Vase

Here is another upcycled project from me! I really love giving old, tired objects new life. I can always count on my All-Purpose Ink to help freshen things up!

Skill: Advanced
Time: 1 hour + dry time

Directions

Supplies

Imagine

•  On Point Glue
•  All-Purpose Ink – Sky Mist, Blue Bayou, Lemon Yellow
•  Creative Medium – Clear

Other

• Gesso – White
• Glass Vase
• Paintbrush
• Resin flowers
• Prima ephemera
• Paper napkin
• String