Hello friends! This is Linh (or LV Handcrafted on all the socials). Today I’m playing with Fireworks! I start off by using what would normally be used to create a shaped 3D flower and I cut it out of a scrap piece of cardstock to use as a stencil. I lined that over black cardstock and sprayed the Grape Jelly Fireworks! Then I rotated the flower stencil to offset the petals. I sprayed the Lulu Lavendar Fireworks! And without shifting the stencil, I sprayed a bit of the Lilac Posies. What’s fabulous about these Fireworks! sprays is they are opaque and as you can see are gorgeous even on black cardstock. They have a beautiful shimmer and shine!
Hello friends! This is Linh (or LV Handcrafted on all the socials). Why buy colored cardstock or specialty card when you can make your own!
Skill: Intermediate
Time: 20 minutes
To make solid color cardstock,
Step 1.
Swipe a panel of white card stock with VersaMark watermark ink. It might be hard to tell if you have good coverage, if you tilt your card panel, you should be able to see a shiny surface where you have inked.
Step 2.
Before the ink dries, pour any colored Mboss powder. Knock off any excess into the original zip-sealed bag.
Step 3.
Then using a heat gun, melt the embossing powder on your panel. And there you have it! Your very own shiny solid color cardstock.
Repeat Steps 1-3 If you missed some spots or if you want some areas to be a little darker. Be careful not to overheat your card.
To take your new cardstock to the next level…
Step 1.
Swipe your embossed panel with VersaMark watermark ink again.
Step 2.
Before the ink dries, pour either Mboss Sparkle Powder or Mboss Iridescent Powder over your panel. Knock off any excess into the original zip-sealed bag.
Step 3.
Then using a heat gun, melt the embossing powder on your panel. Be careful not to overheat your card. Now you’ve taken a plain Mboss powder and given it some extra shine!
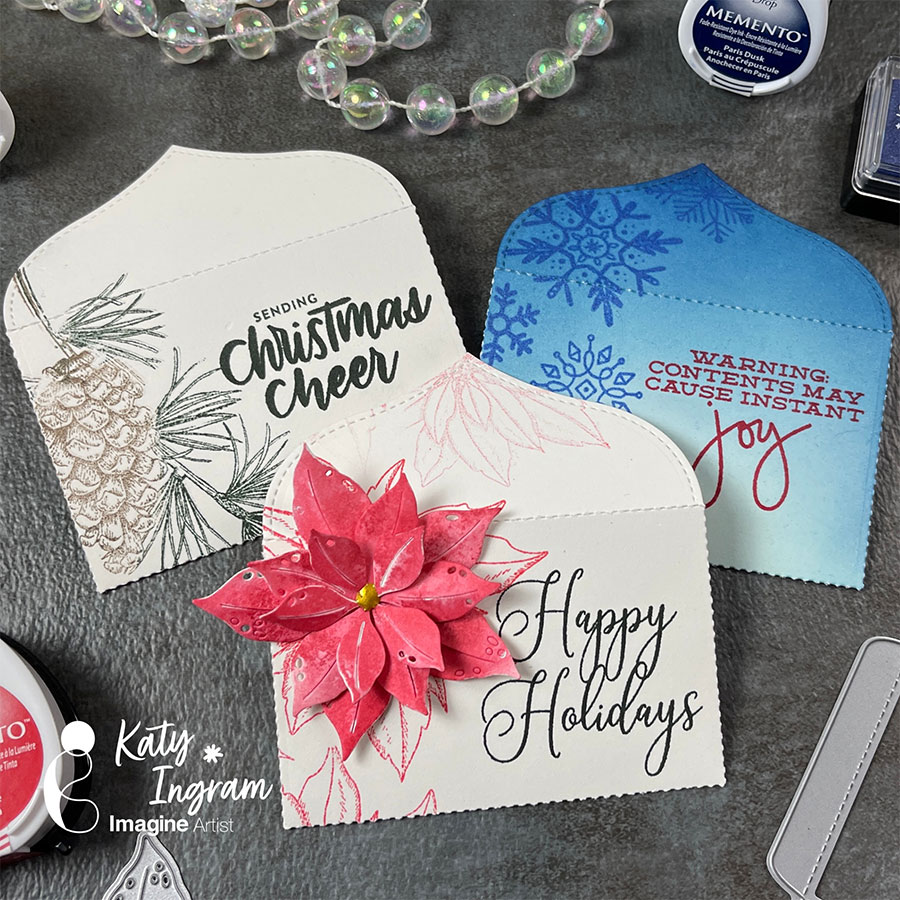
Hello Friends! Katy here and for todays project I am sharing a few simple gift card envelope holders, great for the holidays or really any gift giving occasion.
In todays video tutorial you will see how easily these envelopes came together using some Memento and Delicata Inks. Using an envelope die makes quick work of this project and will give you more time to enjoy the holiday season.
I hope you enjoy and are inspired to take those plain gift cards and create an envelope to dress them up.
Hello Friends! Katy here and today I am creating place cards for my Thanksgiving table. Now I know some people may not do this, but I have added a bit of a twist to mine. On the inside I have included some encouraging and uplifting sentiments to let my loved ones know I appreciate and love them and that I am thankful and grateful to have them at my table for the holidays. Just a little something to make them smile this holiday season.
In today’s video tutorial you will see how easily these cards came together using some Memento Inks and I also share where my inspiration came from. I also mention these would be great tombstones for Halloween!
I cut a piece of heavyweight white card stock 2 3/4 inches wide by 8 inches long and scored at 4 inches and then used the number 8 arch die within the Spellbinders Essential Arches layering dies.
To create the card simply fold the card at the score line and place the arch of the die a bit above that folded line so the die is off the top of the card stock and then run it through your die cutting machine.
The video below has all the details. I hope you enjoy and are inspired to add some inspirational place cards at your table this holiday season.