Learn How To Create A Grungy Heart Notebook For Valentines

by Lori Warren

This project is all about making something out of nothing.  At least, nothing as in a piece of corrugated cardboard from a discarded box and lined paper from an old notebook.  These reuse items, paired with a few Imagine Fireworks sprays, create a beautiful notebook that would be a great gift for friends or family.  In the tip video, I will show you how to use Fireworks sprays with a liquid varnish to create a permanent finish.  This is a helpful tip especially if you are into Mixed Media.

Skill: Intermediate
Time: 2 hours

Directions


Step 1

Start by drawing a heart shape (approximately 4 1/4” x 4” in size) onto a piece of corrugated cardboard. Cut out shape.


Step 2

Trace the heart onto a piece of heavy weight cardstock and cut out.

Step 3

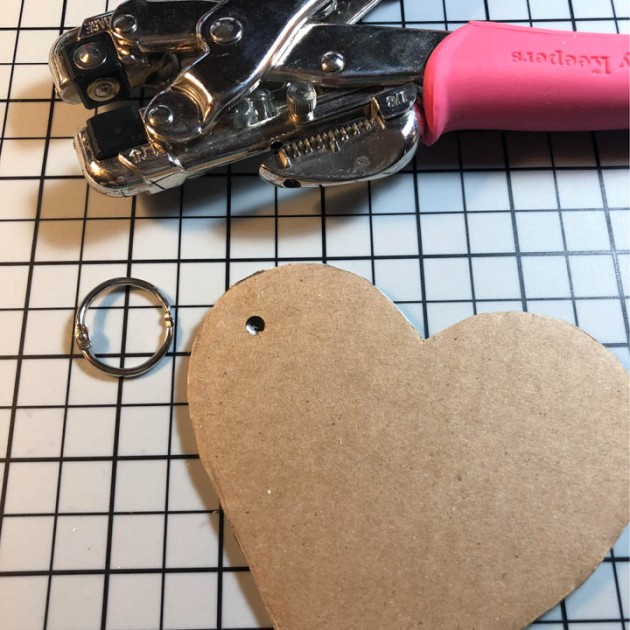
Line up the corrugated and cardstock heart shapes and punch a hole in the upper left hand corner.


Step 4

Tear off sections from top layer of paper on the corrugated heart, exposing he corrugated layer underneath.

Step 5

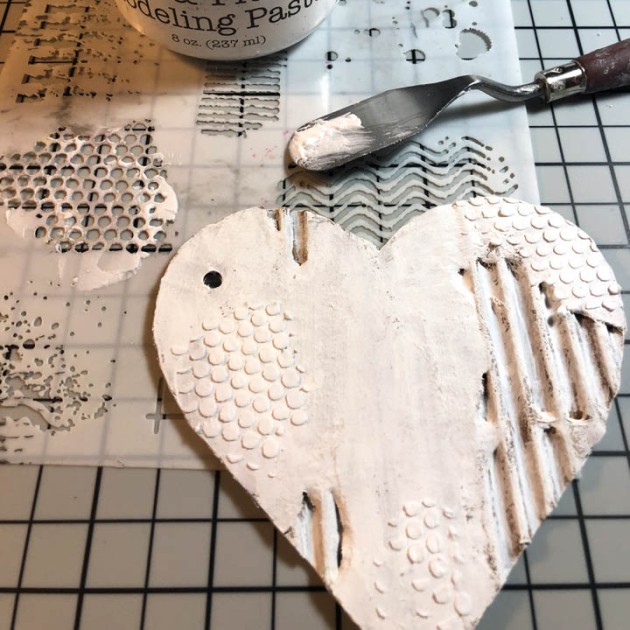
Paint a layer of Gesso over the front and back sides of the corrugated heart. Lay a stencil down over the corrugated heart and apply modeling paste. Only apply in small sections around the heart.


Step 6

On your craft mat, mix Rhubarb Stalk Fireworks with a liquid varnish (2 parts fireworks to 1 part varnish).

Step 7

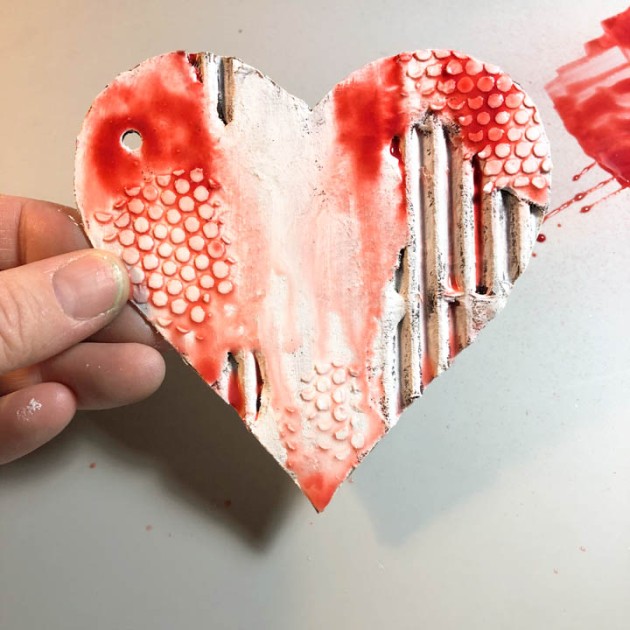
With a paint brush, add puddles of the Fireworks/varnish mixture to the top of the corrugated heart. Add/spray water onto the puddles of Fireworks mixture. Allow the mixture to run and drip down the heart.  Blot with a paper towel to stop run. Add more Fireworks mixture and repeat, as needed. Allow to dry in between layers.


Step 8

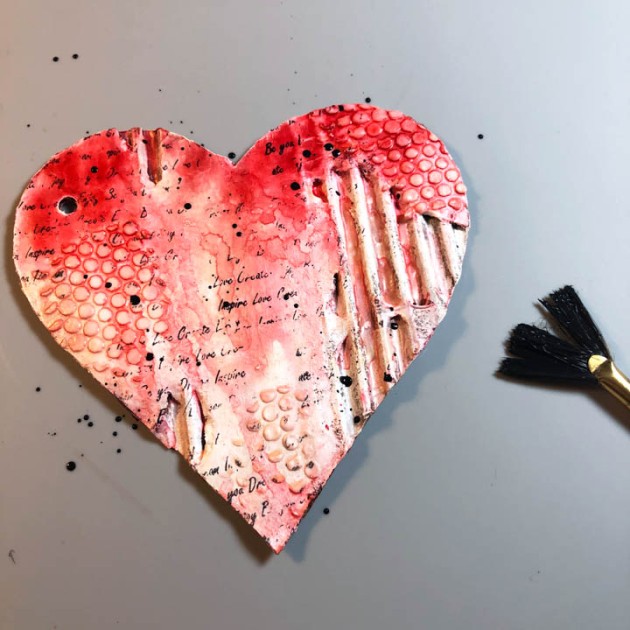
Repeat inking with Desert Sand Fireworks. Once the Fireworks mixture is completely dry, seal with a coat of liquid varnish. Stamp a script stamp randomly across the corrugated heart with Jet Black StazOn ink.

Step 9

Add splatters to the heart with some watered down black acrylic paint.

Step 10

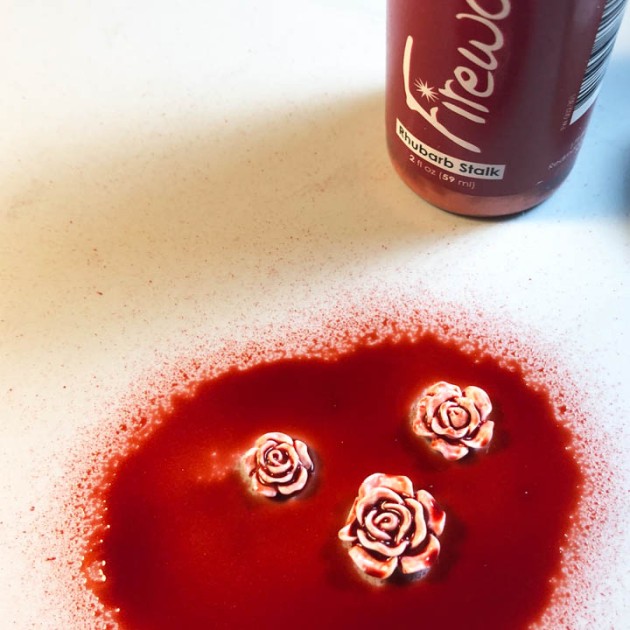
Spray a few resin roses with Rhubarb Stalk Fireworks and heat set. Repeat, a needed. Fireworks can also be applied with a paint brush, if preferred.

Step 11

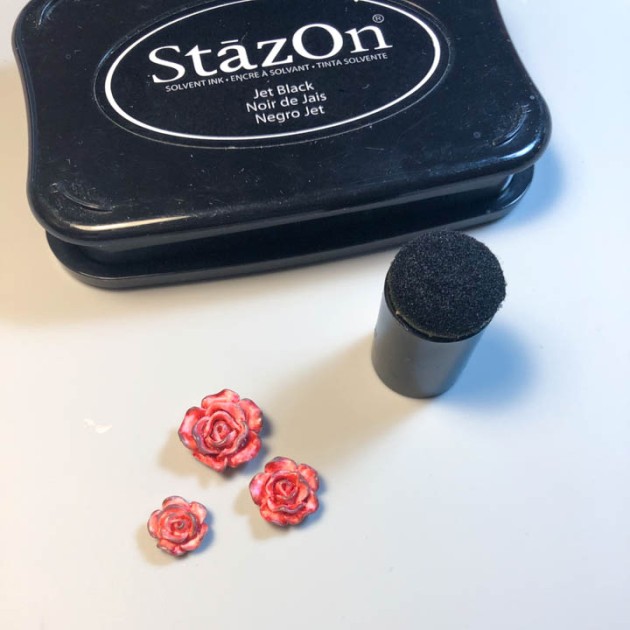
Once the Fireworks ink (on the resin roses) is completely dry, edge the roses with Jet Black StazOn inkpad and a dauber.

Step 12

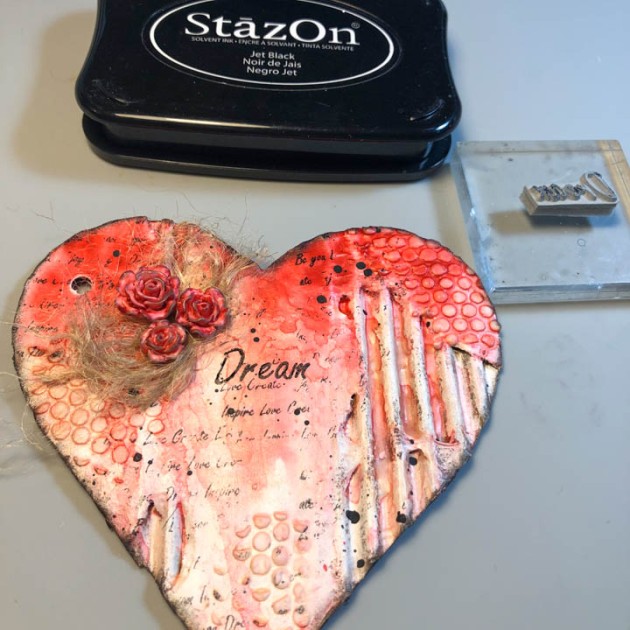
Edge the circumference of the corrugated heart with StazOn and a dauber as well. Deconstruct twine into individual threads and shred the fibers to create a “bed” for the resin hearts to sit on. Adhere the shreds of twine down into the upper left corner of the heart (be sure not to cover the punched hole). Then adhere the roses over the shredded twine.

Step 13

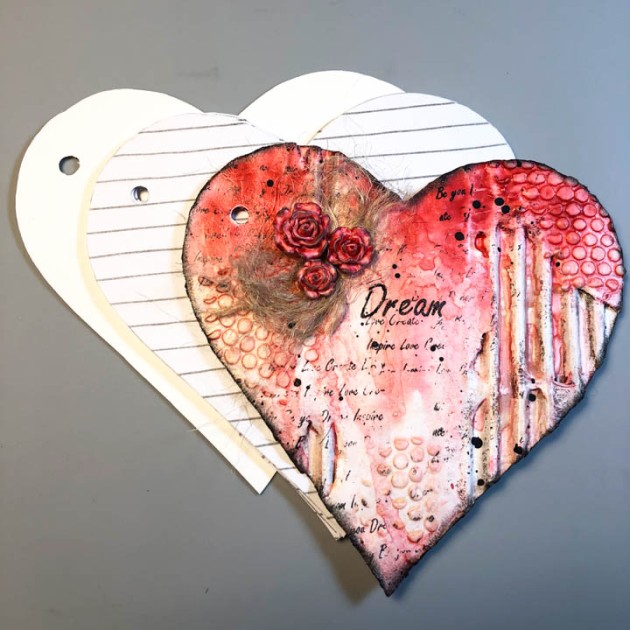
Stamp a title word onto the upper center portion of the heart with Jet Black StazOn ink. Trace the heart shape onto lined paper and cut out. To keep the paper from moving, staple about 4 to 5 sheets together prior to cutting. Repeat for more sheets, as needed (keep in mind the size of book binder ring that you are using). Line up the 3 booklet elements (front = corrugated heart piece, center = lined paper, back = cardstock heart) and attach a book binder ring. Finished!

Supplies

Imagine
Other
  • Corrugated Cardboard
  • Lined paper from old notebook
  • DecoArt Acrylic Paint – Americana Jet black, DuraClear Matte Varnish
  • Tim Holtz Idea-ology – Heirloom Roses
  • TCW – Stencil, TCW437, White Gesso, Light & Fluffy Modeling Paste
  • Lori’s Cards & Creations – Inspire background stamp set
  • White Cardstock
  • Book Ring
  • Twine
  • Crop a Dile Eyelet & Snap Punch

See How to Make Layers of Hearts for Valentines

by Kyriakos Pachadiroglou

See How to Make a Layers of Hearts for Valentines

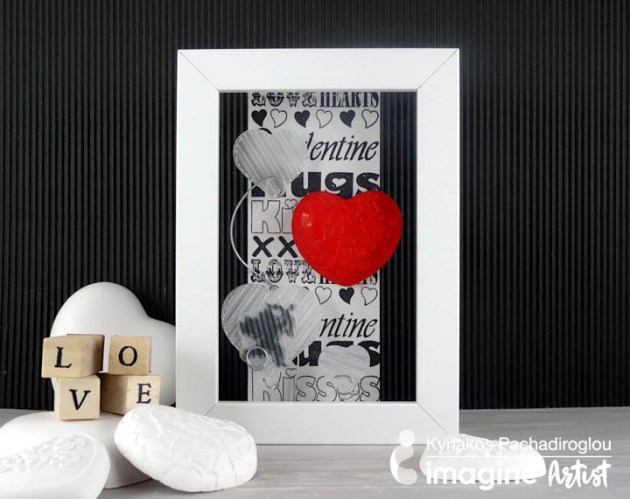
Make a layered dimensional love frame using a 5 x 7 deep picture frame and a bold red colored heart painted with All-Purpose Ink Poppy Red. This project centers around a simple concept—create layers of hearts and floating like sense with a background that allows light to pass through too. The Vertigo sheets create a blur effect without dominating the picture. The bold red heart stands out from all decorations used, enhancing the purpose of the frame.

Skill: Intermediate
Time: 1 hour

Directions


Step 1

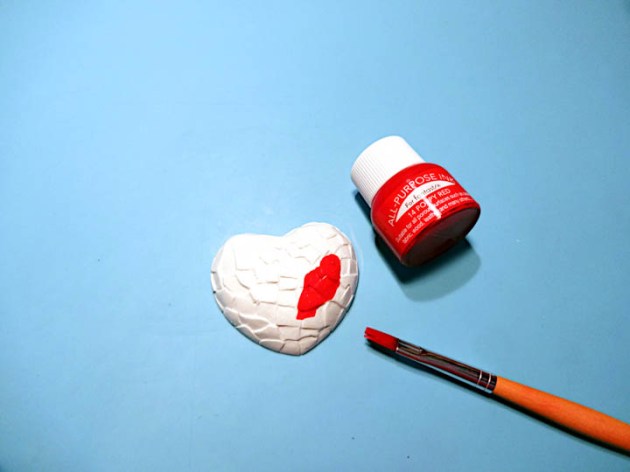
Make the hearts with a heart shaped mold and paper clay. After you cast the heart and let dry fully, color with the All-Purpose in Ink Poppy Red color. All-Purpose Ink works beautifully on all types of surfaces such as fabric and wood, so it is a natural fit for the paper clay.


Step 2

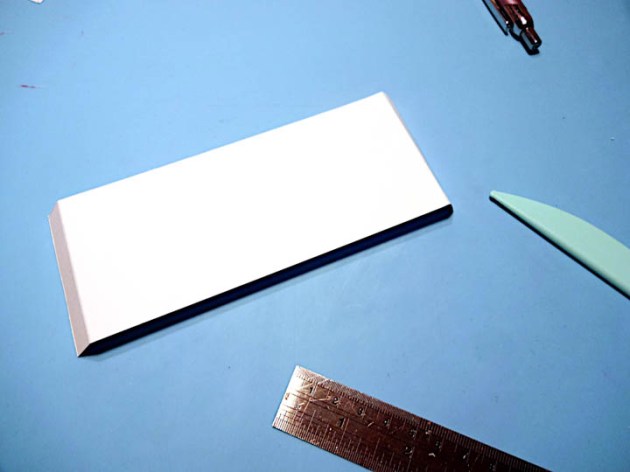
Cut a 2 ½ x 7-inch long piece of the white cardstock and fold in a border about ½ inches on the short edges. Adjust the folding to the inner dimension of your frame if different.


Step 3

Stamp the Valentine theme words from the stamp set with the VersaFine Clair Nocturne.


Step 4

Die cut Vertigo sheets in heart shapes (or cut with scissors).


Step 5

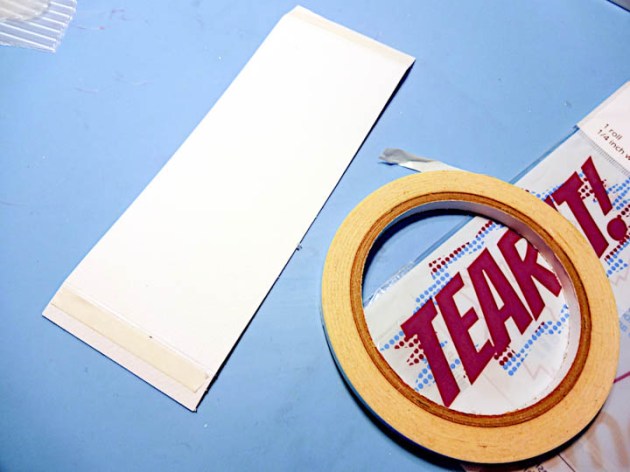
Place Tear It! Tape on the folded edges of the cardstock piece at the non-stamped side.


Step 6

Set the cardstock piece in the frame with the Tear It! Tape previously placed on the top and bottom sides of the frame.


Step 7

Glue the red heart in place as shown in the photo above.


Step 8

Twist pieces of wire (as springs) to use holders for the Vertigo hearts.


Step 9

Glue on the side to the inner bottom of the frame and place the Vertigo heart.


Step 10

Stamp the cupid design with the VersaFine Clair Nocturne on a piece of Vertigo sheet and set it on a heart inside the frame.


Supplies

Imagine
Other
  • Lightweight clay
  • Heart shaped mold
  • Heavy white cardstock
  • Penny Black – All about love stamp set
  • 5 x 7 deep white frame
  • Craft wire
  • Hot glue gun
  • Heart shape dies (optional)
  • Die cutting machine (optional)

Happy New Years! See What’s On the Horizon for Imagine

Happy New Years everyone! We are happy to have another year of crafty goodness rolling in and we are excited about what the New Year brings. This month, in particular, we are featuring Passion Red as our color of the month to set the tone for the New Year and prepare for one of the hottest cardmaking holidays — Valentine’s Day. Another big deal for the month of January is our participation in Creativation in Phoenix, Arizona. We will be announcing a couple of new product releases and encourage you all to stay tuned!

Join us January 17-21, 2019 at the Phoenix Convention Center in Phoenix, Arizona.

Education begins on January 17. The Trade Show opens on January 19.

What is Creativation? 

Creativation is THE crafting industry conference of the year for small business owners, instructors, buyers or professional crafters. This is the place to be if you are looking to define yourself as a crafting professional, business owner or improve your knowledge of the industry. Several arts and crafts companies, with who we collaborate or whose products we love such as Spellbinders, Waffle Flower Stamps, Rinea Foil, Fiskars, Glue Dots etc, present their new releases, teach workshops and give you specific one-on-one time with company representatives. If you are attending then please come our booth #1113 and chat with us about all of our current inks and mixed media products in our catalog and see what new products we have available in 2019.

From AFCI Creativation website– Why Attend?

​If you have a business – ​large or small – in the creative industry, then you don’t want to miss this event! Join thousands of professionals for the ultimate creative industries event in January 2019. AFCI is the heart of creativity and ​Creativation is the place to learn, connect and discover. Learn what’s new, what’s trending and how you can drive your business forward to success through seminars and workshops at Creativation University. Connect with new buyers, suppliers, designers, makers, bloggers, media and entrepreneurs from around the world as we grow our event. Discover new products, inspiration, ideas and innovations, and more that will change your business. We built a vibrant creative city on the Show floor – the capital of the creative products industry and you will be amazed!

Take a class with us!

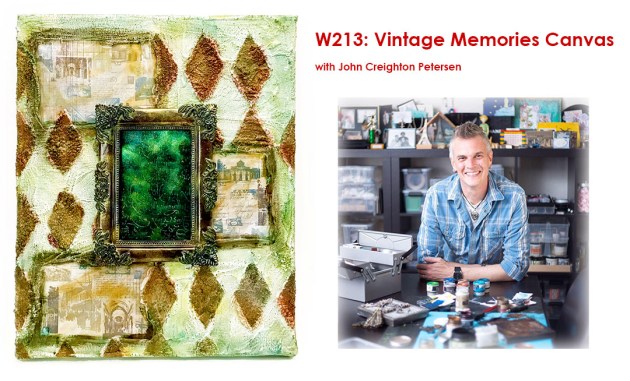
W213: Vintage Memories Canvas with John Creighton Petersen

Day + Time: 1/18/2019 8:00 AM – 10:30 AM
Room: 132AB
Difficulty Level: All Levels Welcome
Demographics: All Buyers, Designers, Retailers, Distributors, Professional Maker/DIY’er, Educator/Demonstrator, Digital Content Creator
Class Description: Discover how simple it is to create mixed media masterpieces with your favorite stamping products from Imagine and Tsukineko! Master the simple techniques needed for building color and texture to create this stunning vintage-inspired canvas. Learn how to color and texturize a variety of different surfaces, including metal and other found objects. This class will debut the latest product offerings from Imagine, so don’t miss your chance to be the first to experience the newest products!

To be sure you do not miss a beat! Sign up for the Imagine Newsletter!

Use VersaMagic and Brilliance Ink to Quickly Color a Card

by Arjita Sepaha Singh

For today’s card, I heat embossed a few images with white embossing powder and added color by rubbing the VersaMagic and Brilliance Dewdrop inks directly on them. The embossing created a resist and it was super duper quick to have colored elements ready for the card. I heat embossed sentiment on vellum and also created a wooden plank background using Versafine Clair ink. This was a quick card to create and you can do similar cards for your friends and family for any occasion.

Skill: Intermediate
Time: 15 – 20 minutes

Supplies

Imagine
Other
  • Cardstock – white, vellum, kraft
  • Powder Tool
  • Heat gun
  • Misti Stamping Tool
  • Scissors
  • Stamps – mason jar, warm winter wishes sentiment, trees

Make a Valentine’s Card Using New Dewlets

by Melissa Andrew

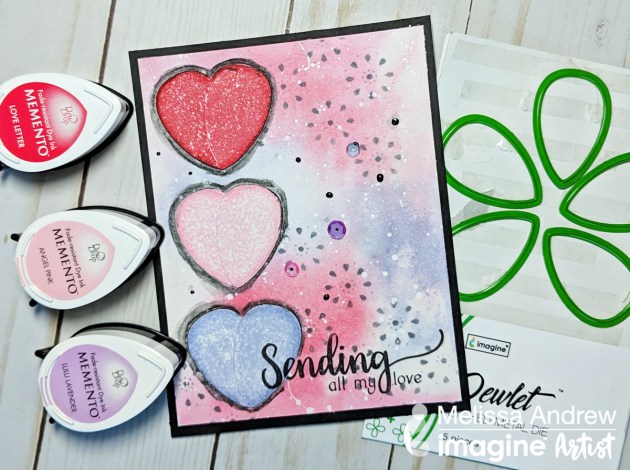
Make a Valentine's Card Using New Dewlets

In today’s video, I share a mixed media Valentine’s card using the fantastic new dies from Imagine, Dewlets! These adorable dies can be used to create a multitude of wonderful designs. I share how to create hearts using the Memento Dew Drop ink pads in combination with the Dewlets. Also, learn to create a fun watercolored background using the same Memento Inks.

Skill: Intermediate
Time: 30 minutes

Supplies

Imagine

• Dewlets 
• Memento DewDrops – Love Letter, LuLu Lavender, Angel Pink, Gray Flannel
• Sheer Shimmer Spray – Sparkle
• VersaFine Clair – Nocturne
• Sponge Daubers
• Pico Embellisher – Gray Flannel
• On Point Glue
• Tear It! Tape
• Craft Mat

Other

• SugarPea Designs Stamp Set
• Whimsy Stamps Stencil
• Misti Stamping Tool
• Paper Trimmer
• White Card Stock
• A2 Card Base
• Black Card Stock
• Bristol Smooth White Paper
• Aquarelle Water Soluble Pencil
• White Acrylic Paint
• Spray Bottle
• Watercolor Brush

Create A Valentine’s Day Card Using Dewlets

by Nadine Carlier

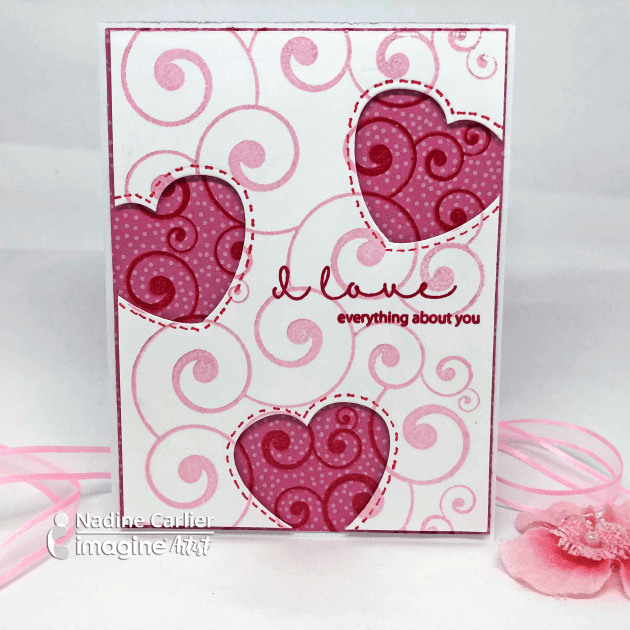
Valentine's Day Card by Nadine Carlier IC

Not only are the Dewlet dies great to use with DewDrop ink pads they also make perfect hearts.  Watch my video below to see how I created the hearts with the Dewlet dies and how I used Delicata and VersaFine Clair for the stamped images. Enjoy!

Skill: Intermediate
Time: 30 minutes

Supplies

Imagine
Other

Visit our YouTube Channel for more inspirational videos and subscribe to get updates when we post new videos.