Prepare for Thanksgiving with a Cardmaking Tutorial

by Steph Ackerman

Prepare for Thanksgiving with a Cardmaking Tutorial

It’s October but before you know it you will be packing away the costumes and preparing for Thanksgiving. Why not be ready by delving into the colors, signs, and beauty of the season. Selecting 4 – 5 colors of Fireworks Shimmery Craft Sprays you can easily achieve amazing color combinations that set the stage for your projects. See how quickly and easily these Fall cards go together using backgrounds created with Fireworks Sprays.

Skill: Intermediate
Time: 1 hour

Directions


Step 1

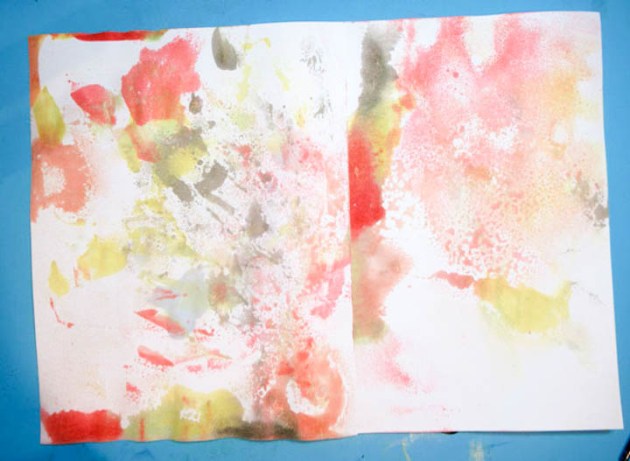
Spritz assorted colors of Fireworks! Shimmery Craft Spray on the craft mat. Be sure not to mix the colors – spritz them about the mat.

Step 2

Drag white cardstock across the craft mat. Spritz additional Fireworks on craft mat if necessary until the cardstock is covered.


Step 3

Allow the cardstock to dry, then spritz with Dandelion Fireworks adding color to the white spaces.

Step 4

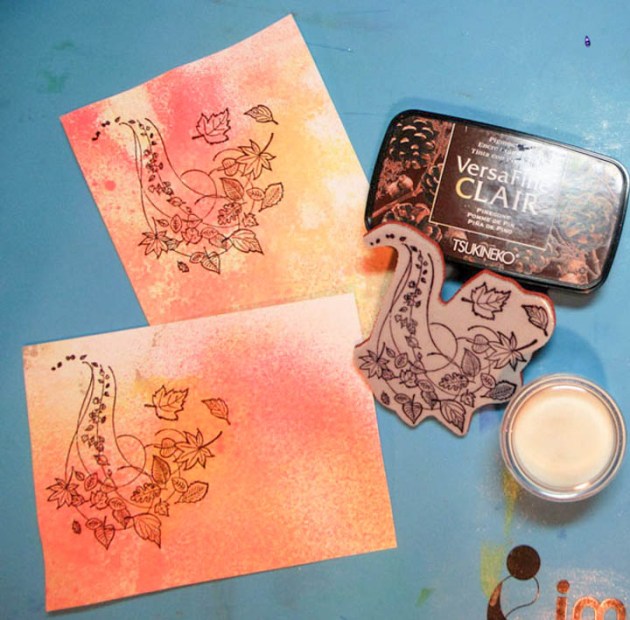
Cut cardstock into 2 panels, each 4″ x 5″. Stamp leaf flourishes on both panels with VersaFine Clair in Pinecone. Add clear embossing powder and heat set.


Step 5

Ink the edges of the panels with Brilliance Pearl Beige Ink, then mat with brown cardstock. Add the panels to the cards. Add color to some of the leaves using Memento Markers.


Step 6

Stamp Happy Thanksgiving on leftover strips of the cardstock with VersaFine Pinecone Ink. Add Clear Embossing Powder and heat set. Mat with cardstock.


Step 7

Adhere Happy Thanksgiving to the vertical card with foam adhesives. Cut apart Happy Thanksgiving for the horizontal card and adhere with foam adhesives.


Supplies

Imagine
Other
  • Stamps – So Suzy/Crackerbox Stamps
  • Cardstock – brown, white
  • Foam adhesives

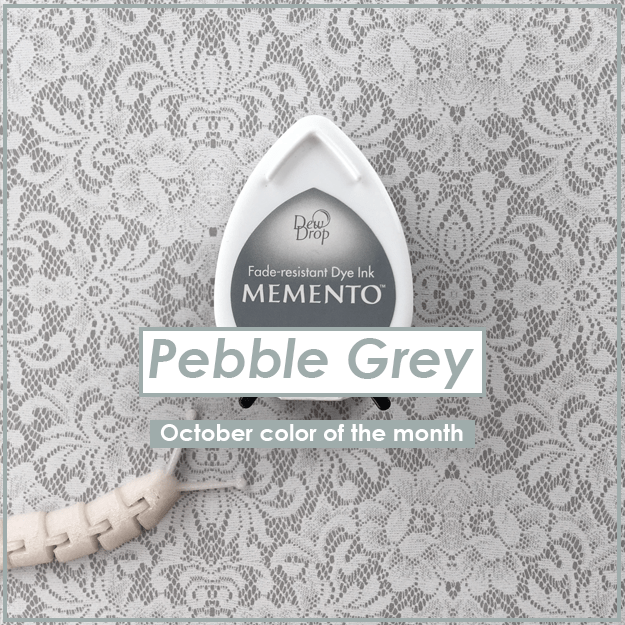
October Color of the Month is Pebble Grey

The Color of the Month is Pebble Grey. We choose this color of cool grey to express the moody change of the warm Summer colors to the cool Autumn breeze. Some of the ink colors from the Tsukineko brand that perfectly express this cool grey is Memento in London Fog, VersaFine Clair in Morning Mist and StazOn Midi in Cloudy Sky.

Another fabulous art event for October is Inktober! This is an illustration and ink based challenge started by Jake Parker. Each day in October has a word that illustrators and artist respond to with a drawing! We are excited to have some of our own artists participate!

To start us out Roni Johnson has #poisonous posted today!

And as usual, we will have some great card making and crafting inspiration! Here is a sneak peak of what is coming for the month of October.

Martha Lucia Gomez creates a beautiful “Believe” card. 


Create a Mixed Media Holiday Card with Memento

by Melissa Andrew

It’s time to get ready for the holidays! Today Melissa creates a gorgeous watercolor background with Memento and VersaColor Ink. She finishes her holiday card with gorgeous gold embossing powder. This is a quick and easy holiday card that can be mass produced for sending to loved ones this season!

Skill: Advanced
Time: 1 hour

Directions

Supplies

Imagine
Other

Create Quick and Easy Advent Calendar Gifts

by Roni Johnson

Create Quick and Easy Advent Calendar Gifts

It’s never too early to start preparing for the holidays to help avoid the rush. Today I have a fun and easy upcycled project for the little ones in your life – a Toilet Paper Roll Advent Calendar. Now I just have to save up 20 more toilet paper rolls!

Skill: Beginner
Time: 1 hour

Directions


Step 1

Buy or collect 25 paper rolls for the 25 days of the advent calendar.


Step 2

Bend the ends of each roll towards the center to make a “pillow box”.


Step 3

Spritz the rolls with Lady Bug, Bamboo Leaves and Wedding Dress irRESISTible Texture Spray. Let dry before moving on to another color.


Step 4

Dye rayon seam binding with All-Purpose Ink in Spring Green and Red Delicious.


Step 5

Stamp white cardstock with a variety of Christmas-theme images using VersaMagic inks. Die-cut circles from the stamped cardstock. Stamp a large number stamp in the center of each circle using VersaFine Clair ink.


Step 6

Sprinkle the circles with clear embossing powder, shake off excess and set with a heat tool. Die-cut scallop circles from Rinea Foiled Papers.


Step 7

Fill and assemble each pillow box with a treat; affix the ribbon around the box using Tear It! Tape and top it off with the number.

Supplies

Imagine
Other
  • Paper Rolls
  • Rinea Foiled Paper – Ruby/Gold Glossy Foiled Paper, Emerald/Gold Glossy Foiled Paper; Emerald/Emerald Starstruck Foiled Paper
  • Rayon Seam Binding
  • Rubber Stamp Tapestry Peg Stamps – Gingerbread Man, Gift, Candy Cane, Stocking, Holly Club Scrap – Number Stamps
  • Cardstock

Create a Reversible Naughty or Nice Christmas Stocking

by Jennifer Vanderbeek

Create a Reversible Naughty or Nice Christmas Stocking

Getting a head start on the holiday crafting rush, I decided to sew up a quick stocking and decorate the linen cuff with Fabrico markers, All-Purpose Ink, and some heat-embossed accents. While deciding just how I wanted to do the embossing I tried out a lot of products: VersaMark, Delicata, and Creative Medium to name the top three contenders, but I decided that the fine details that On Point Glue afforded made it the best choice for this project. Because of the heat embossing, you want to make sure that the area you’re decorating is a fabric that won’t melt when you hit it with the heat tool. Linen, cotton, canvas, or wool (the natural, sheepy stuff, not the polyester kind) should all work just fine, but you might want to test a small piece before getting too far into decorating your stocking.

Skill: Advanced
Time: 1 hour + dry time

Directions

Supplies

Imagine
Other
  • Stocking blank (or materials to make your own)
  • Pencil
  • Watercolor paper
  • Darice – Heat tool

Create a “Be Happy, Be Kind” Scrapbook Layout

by Jowilna Nolte

Create a "Be Happy, Be Kind" Scrapbook Layout

For this super fun scrapbook layout, I wanted to create a background using some of my favorite craft sprays—Fireworks! These amazing sprays create a color splash and shimmer which has a nice effect with a colorful “Be Happy, Be Kind” scrapbook layout like this one. As I created my background something truly magical happened with the ink and I really loved the end result. Scroll through the steps below to find out what it is!

Skill: Advanced
Time: 1 hour or more

Directions


Step 1

Gather at least 3 colors of Fireworks! Sprays to use on your background. I selected Lady Bug, Lilac Posies and Bahama Blue.


Step 2

First, I sprayed a patch of Bahama Blue in the middle of my layout and left it to dry for a few seconds. Then I added splats with all 3 of my colors. If you’d like colors to layer make sure you allow them to dry fully before using another color.


Step 3

Once the Fireworks splatter layer was dry, I added stamping texture with a mixed media feel using VersaFine Clair Nocturne ink.


Step 4

Add texture with a circle stencil and Creative Medium and let dry. I wanted to add more deliberate splats to create a layered effect. Drop large drops of Fireworks onto the background in Lady Bug.


Step 5

Then use Bahama Blue and drop some of the ink directly onto the red drop and let it pool for a few seconds.


Step 6

Then I added more drops of Lilac Posies on top of the blue and let the ink colors blend. Since Fireworks is a dye-based ink the blending will happen if all the inks are still wet.


Step 7

The ink created the most amazing puddles of shimmer once dry. I totally love the unpredictably of the effect these inks layered on top of each other have.


Step 8

I used the same color to spray some flowers that would perfectly match my layout background.


Step 9

Once I was happy with my background I assembled my layout with photo, cut out flower layers, inked flowers and other embellishments. You don’t always have to have tons of crafting inks to be creative – all you need is a plan and a few amazing inks.


Supplies

Imagine
Other
  • Cardstock – White
  • Short Cuts Craft – Stencil
  • Mixed Media Stamps
  • Scrapbook Flower pieces
  • Acrylic block
  • Photo
  • Scissors
  • Sentiment – Be Happy, Be Kind
  • Scrapbook page 12 x 12