By Jessica Lin
Skill: Beginner
Time: 30 minutes
Hi everyone! It’s Jessica here and today I am showing you a way to step up a simple technique:
heat embossing. Combine it with layering stamp sets to create images with extra dimension and
shine!

Step 1:
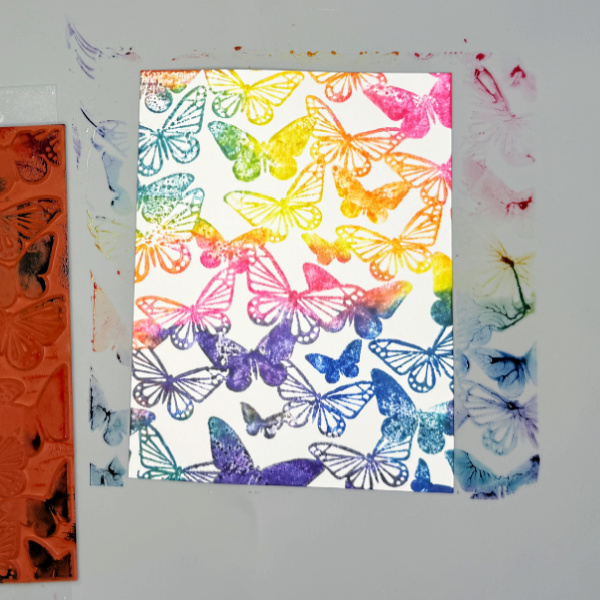
Die cut a butterfly and stamp the butterfly image with VersaMark ink pad. Cover the
stamped image with Jade Pearl Mboss powder. Heat set with a heat gun. TIP: To achieve
maximum coverage, re-stamp the butterfly image using a stamp positioning tool and heat set a
second layer of Mboss powder.

Step 2:
This Watercolor Wings stamp set contains many layering images. I stamped the second
layer with VersaMark ink also, but used the Gold Mboss powder this time instead.

Step 3:
Repeat the same steps for the third layer of the butterfly image. I used the Indigo Pearl
Mboss powder for this final layer. It’s a rich blue color that complements the lighter Jade color
very nicely.
This is the final look of the embossed butterfly. I really like the pearl shine from the Jade and
Indigo Mboss powders. If you have different colors and types of embossing powder, I highly
recommend using them with layering stamps!

Step 4:
For today’s project, I decided to decorate a gift box instead of making a card. I created a
belly band around the box using black cardstock and silver glitter tape. For the thin silver strips,
I cut two narrow pieces from the silver glitter tape and colored it with a grey Copic marker. You
can use any alcohol marker that you have.

I hope you enjoy this simple project and feel inspired to layer embossing powders to create new
looks. I really like this technique and I love experimenting with different color combinations.
Thank you so much for stopping by, I’ll see you in my next tutorial!
Imagine Supplies:
• VersaMark Dazzle – Champagne
• Mboss – Jade Pearl, Gold, Indigo Pearl
• StazOn Cleaner
• Craft Mat
Other Supplies:
• Stampin’ Up! – Stamps – Watercolor Wings
• Stampin’ Up! – Dies – Bold Butterfly
• EK Success – Tool – Antistatic Powder Tool
• Stampin’ Up! – Tool – Heat Gun
• We R – Tool – Precision Press
• Gift Box
• White and Black cardstock
• Silver Glitter Tape