Be Inspired With A Creative Design For Valentines Day

by Martha Lucia Gomez
Be Inspired With A Creative Design For Valentines Day

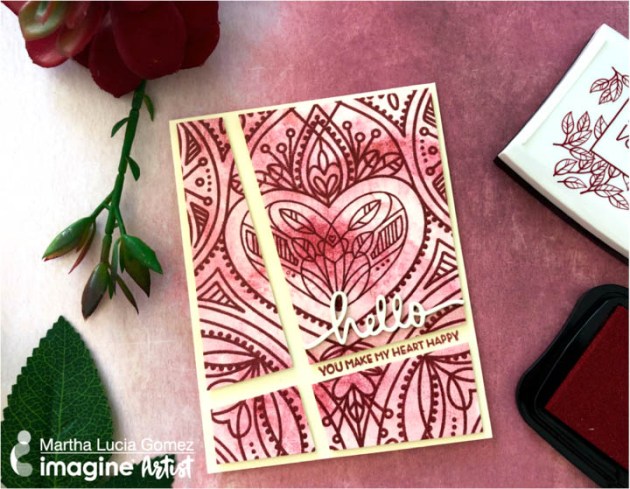
Hello friends! It’s a New Year and our next big cardmaking holiday is right around the corner. Today, I want to share a special Valentine’s card with a sentiment that expresses “You make my Heart Happy!” On this project you will see a few advantages of the new Craft Mat of Imagine.

Skill: Intermediate
Time: 1 hour

Directions

Step 1

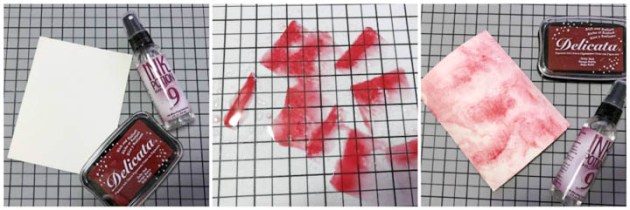
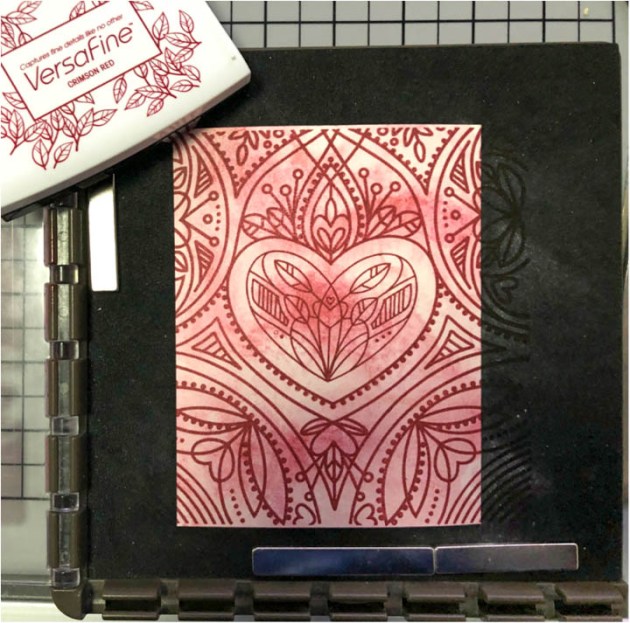
I am falling in love with the new craft mat, the grey color and the grid are perfect to work on any side and use it with your different mediums or inks. To create this card, I used Ruby Red Delicata Ink for the background texture and VersaFine Crimson Red to stamp the images. I took a piece of watercolor paper and over the mat I applied some touches of Delicata Ruby Red Ink and sprayed with Ink Potion No. 9, then I put the watercolor paper over the sprayed ink and created the texture. Maybe you don’t notice on the photos but the Delicata Ink give shiny touches to the paper and it looks very beautiful in person. I let the paper dry naturally but if you want to speed the process you can use the heat tool.

Step 2

I stamped an image using the background stamp Center Cut Heart Background from Simon Says Stamps with VersaFine Crimson Red. This is one of my favorites colors on this ink because it is a dark red and show up beautifully with the watercolor look. Also, I covered the freshly stamped background with Clear Embossing Powder and melted with the heat tool.

Step 3

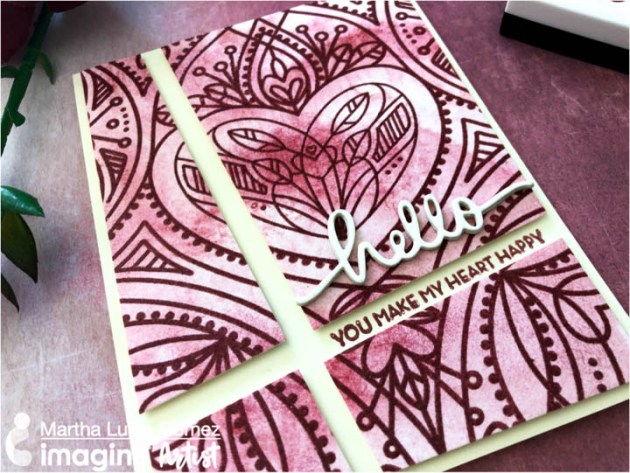
I resized the stamped layer to have it 3-3/4″x 5″ and made a diagonal die cuts over the layer to make the design more interesting. I pasted the layer over a very vanilla card base using white foam behind every piece and to finalize the process I added a sentiment from the stamp set Happy Heart of Altenew in between of the cut lines. As final touch, I added a die cut word “hello” that I cut several times to create a stacked die and pasted with On Point Glue. I love to have these kind of details to make my cards more interesting.

Supplies

Imagine
Other
  • Stamparatus or Misti Stamping Tool
  • Stamps – Center Cut Heart Background by Simon Says Stamps and Happy Heart from Altenew
  • Paper Trimmer
  • White Foam
  • “hello” die cut
  • Die cut machine


Use VersaMagic and Brilliance Ink to Quickly Color a Card

by Arjita Sepaha Singh

For today’s card, I heat embossed a few images with white embossing powder and added color by rubbing the VersaMagic and Brilliance Dewdrop inks directly on them. The embossing created a resist and it was super duper quick to have colored elements ready for the card. I heat embossed sentiment on vellum and also created a wooden plank background using Versafine Clair ink. This was a quick card to create and you can do similar cards for your friends and family for any occasion.

Skill: Intermediate
Time: 15 – 20 minutes

Supplies

Imagine
Other
  • Cardstock – white, vellum, kraft
  • Powder Tool
  • Heat gun
  • Misti Stamping Tool
  • Scissors
  • Stamps – mason jar, warm winter wishes sentiment, trees

Make a Valentine’s Card Using New Dewlets

by Melissa Andrew

Make a Valentine's Card Using New Dewlets

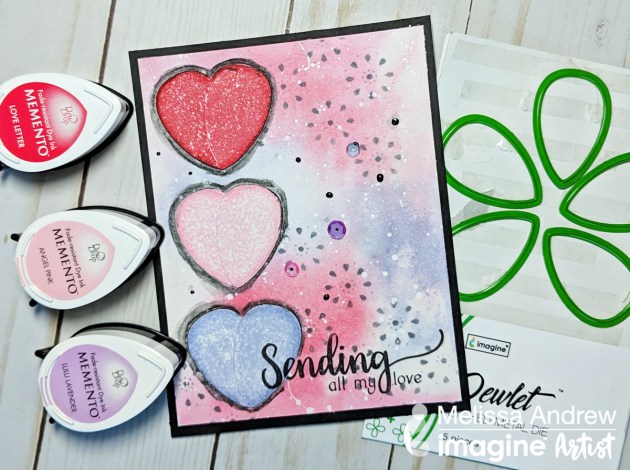
In today’s video, I share a mixed media Valentine’s card using the fantastic new dies from Imagine, Dewlets! These adorable dies can be used to create a multitude of wonderful designs. I share how to create hearts using the Memento Dew Drop ink pads in combination with the Dewlets. Also, learn to create a fun watercolored background using the same Memento Inks.

Skill: Intermediate
Time: 30 minutes

Supplies

Imagine

 Dewlets 
• Memento DewDrops – Love Letter, LuLu Lavender, Angel Pink, Gray Flannel
• Sheer Shimmer Spray – Sparkle
• VersaFine Clair – Nocturne
• Sponge Daubers
• Pico Embellisher – Gray Flannel
• On Point Glue
• Tear It! Tape
• Craft Mat

Other

• SugarPea Designs Stamp Set
• Whimsy Stamps Stencil
• Misti Stamping Tool
• Paper Trimmer
• White Card Stock
• A2 Card Base
• Black Card Stock
• Bristol Smooth White Paper
• Aquarelle Water Soluble Pencil
• White Acrylic Paint
• Spray Bottle
• Watercolor Brush

Create A Snowflake Theme Card To Say Thank You

by Jowilna Nolte

Create A Snowflake Theme Card To Say Thank You

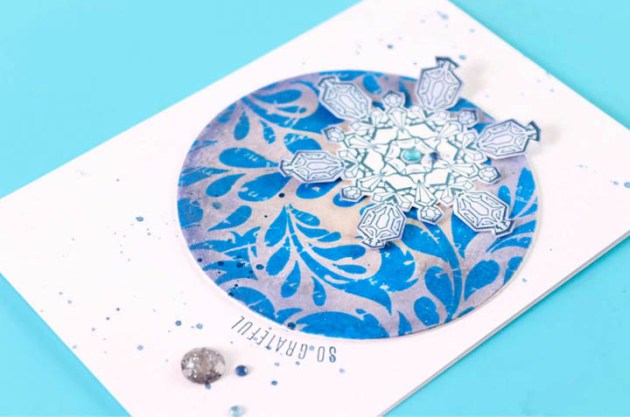
Create a beautifully layered snowflake element for a “So Grateful” greeting card using a variety of Tsukineko products that compliment each other in the Frosted Blue color scheme. This card theme makes a perfect thank you card to send to friends and family for Christmas gift-giving.

Skill: Beginner
Time: 30 minutes

Directions

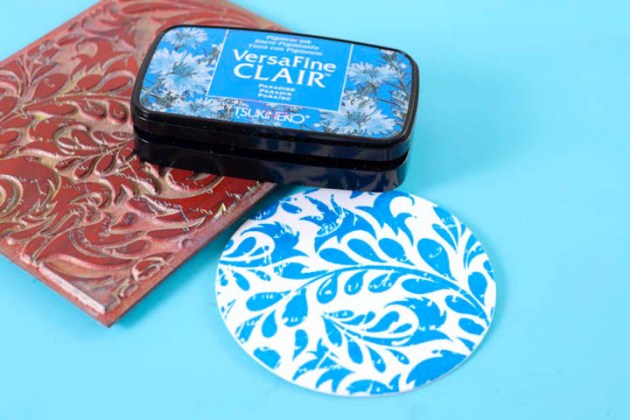
Stamp a background image onto white cardstock using VersaFine Clair in Paradise
Step 1

Stamp a background image onto white cardstock using VersaFine Clair in Paradise. Sprinkle with clear embossing powder and heat set until fully melted and shiny.

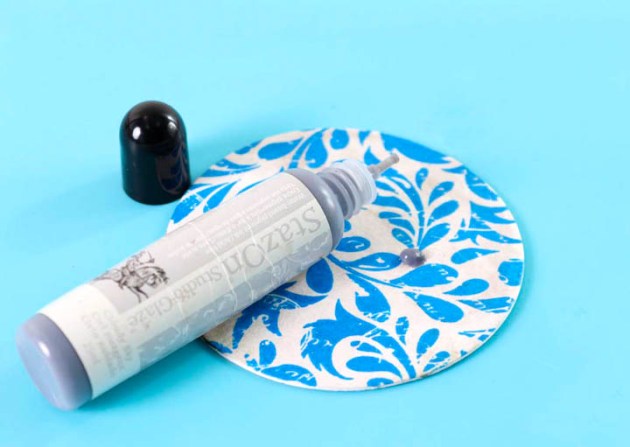
Add a few drops of StazOn Studio Glaze Cloudy Sky onto the embossed background
Step 2

Add a few drops of StazOn Studio Glaze Cloudy Sky onto the embossed background and smooth it out using your finger. The glaze just makes the white not as white and adds a nice finishing touch to it.

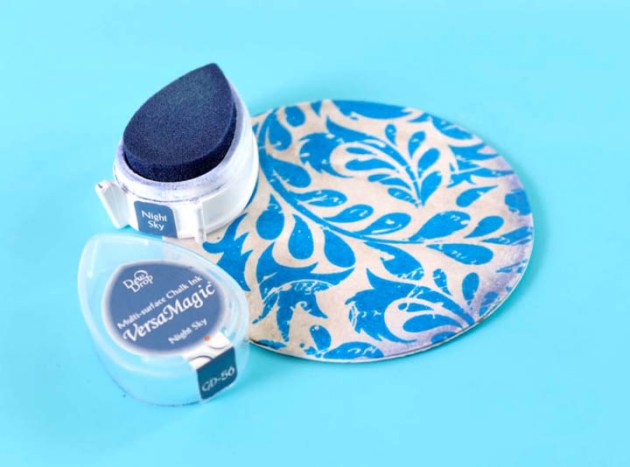
Ink the edges of the embossed disk using VersaMagic Night Sky
Step 3

Ink the edges of the embossed disk using VersaMagic Night Sky. Use a finger dauber to blend the edges should you have to. I used the ink pad directly.

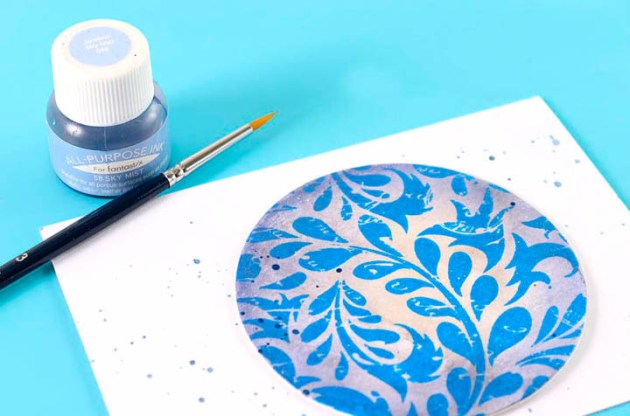
Use a small paintbrush and All-Purpose Ink in Sky Mist
Step 4

Adhere the embossed disk onto a folded card. Use a small paintbrush and All-Purpose Ink in Sky Mist to add some splatters to the background.


Step 5

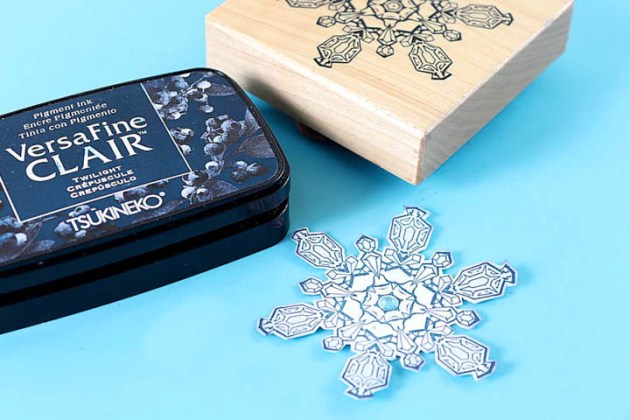
Stamp a large snowflake image onto white cardstock using VersaFine Clair in Twilight. Cut out the snowflake and add a diamanté to the center.


Step 6

Adhere the snowflake to the circle, add stamped sentiment in VersaFine Clair along the outside edge of the circle. Finish off your card with diamanté.

Supplies

Imagine

Other

  • Cardstock
  • Cardbase
  • Patterned paper
  • Heat Gun
  • Stamps – gratitude sentiment (your choice), snowflake image, floral images
  • Paintbrush
  • Diamante

Use Dewlets to Create a Unique Background

by Kassy Tousignant

Use Dewlets to Create a Unique Background

The new Dewlet etched metal die is so versatile! I have used it to create an interesting background in this card project. I stamped a beautiful pattern in VersaMagic and placed the Dewlet shapes on the background of the card.

Skill: Intermediate
Time: 1 hour

Directions

Supplies

Imagine

•  VersaFine Clair – Nocturne
•  Embossing Powder – Black
•  VersaMagic – Aquatic Splash, Turquoise Gem, Night Sky
•  Dewlet
•  Tear It! Tape

Other

• Visible Image – stamp
• Washi tape
• Embossing buddy
• Vellum
• Cardstock – kraft, matte silver, white
• Carabelle – stamp for background
• Water bottle
• Heat gun
• Glue Dots

Learn How To Make A Paper Flower Spring Card

by Elina Stromberg

Learn How To Make A Paper Flower Spring Card

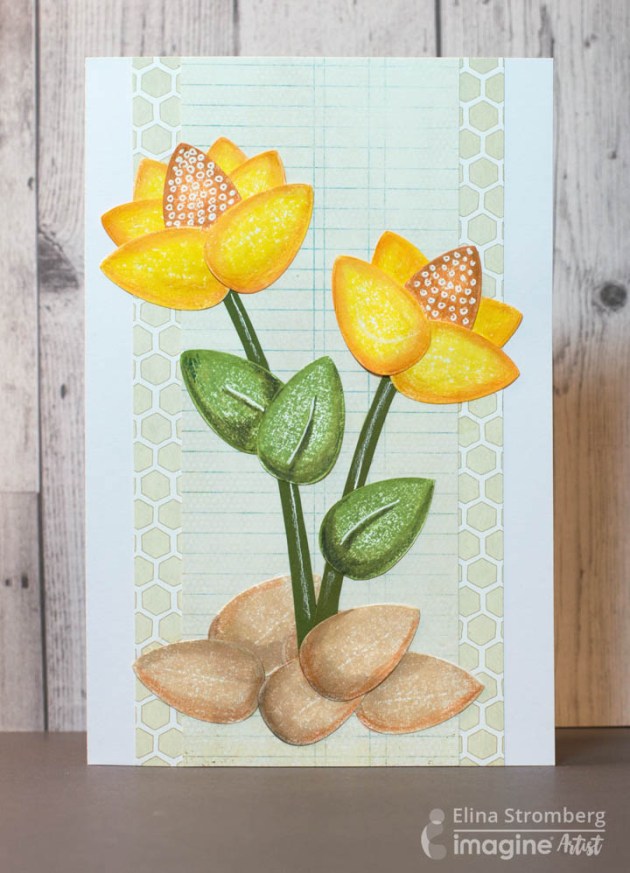
Have you had a chance to try out the new Dewlets? Those little metal dies match perfectly with the size and shape of Dew Drops ink pads, providing you new possibilities for creative use of your favorite ink pads. Just stamp and die-cut a pile of drops in your favorite colors, and let the fun begin: You’ll be surprised how many different shapes you can make out of them! In this project, I created a spring theme flower card.

Skill: Beginner
Time: 1 hour

Directions


Step 1

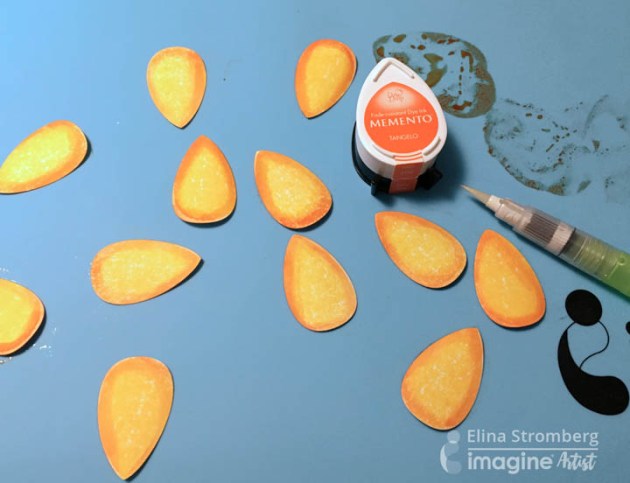
Press the DewDrop ink pad on paper to create a drop shaped stamped image. The white paper will replicate the ink color as it is, but you can create exciting variations by using colored and/or patterned papers. Die-cut the drop images with a die-cutting machine, using Dewlets dies.


Step 2

Highlight the drop edges by painting them with a darker ink and a water brush. Let dry.


Step 3

Layer background paper(s) on a white card base using two-sided tape or glue.


Step 4

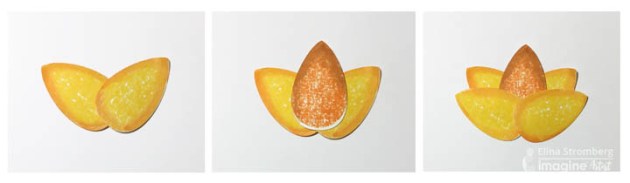
Assemble flowers. Cut flower stems from green paper. Glue on paper together with the flowers. Finish the project by decorating the flowers and leaves with a white gel pen. Optional: Add more contrast and shadowing with coloring pencils. Do not color the entire die-cut drop, but only add a hint of a darker shade on the edges.

Supplies

Imagine
Other
  • Card base – White
  • Patterned papers
  • Die-cutting machine
  • Water brush
  • Gel Pen
  • Glue or double-sided tape
  • Color pencils (optional)