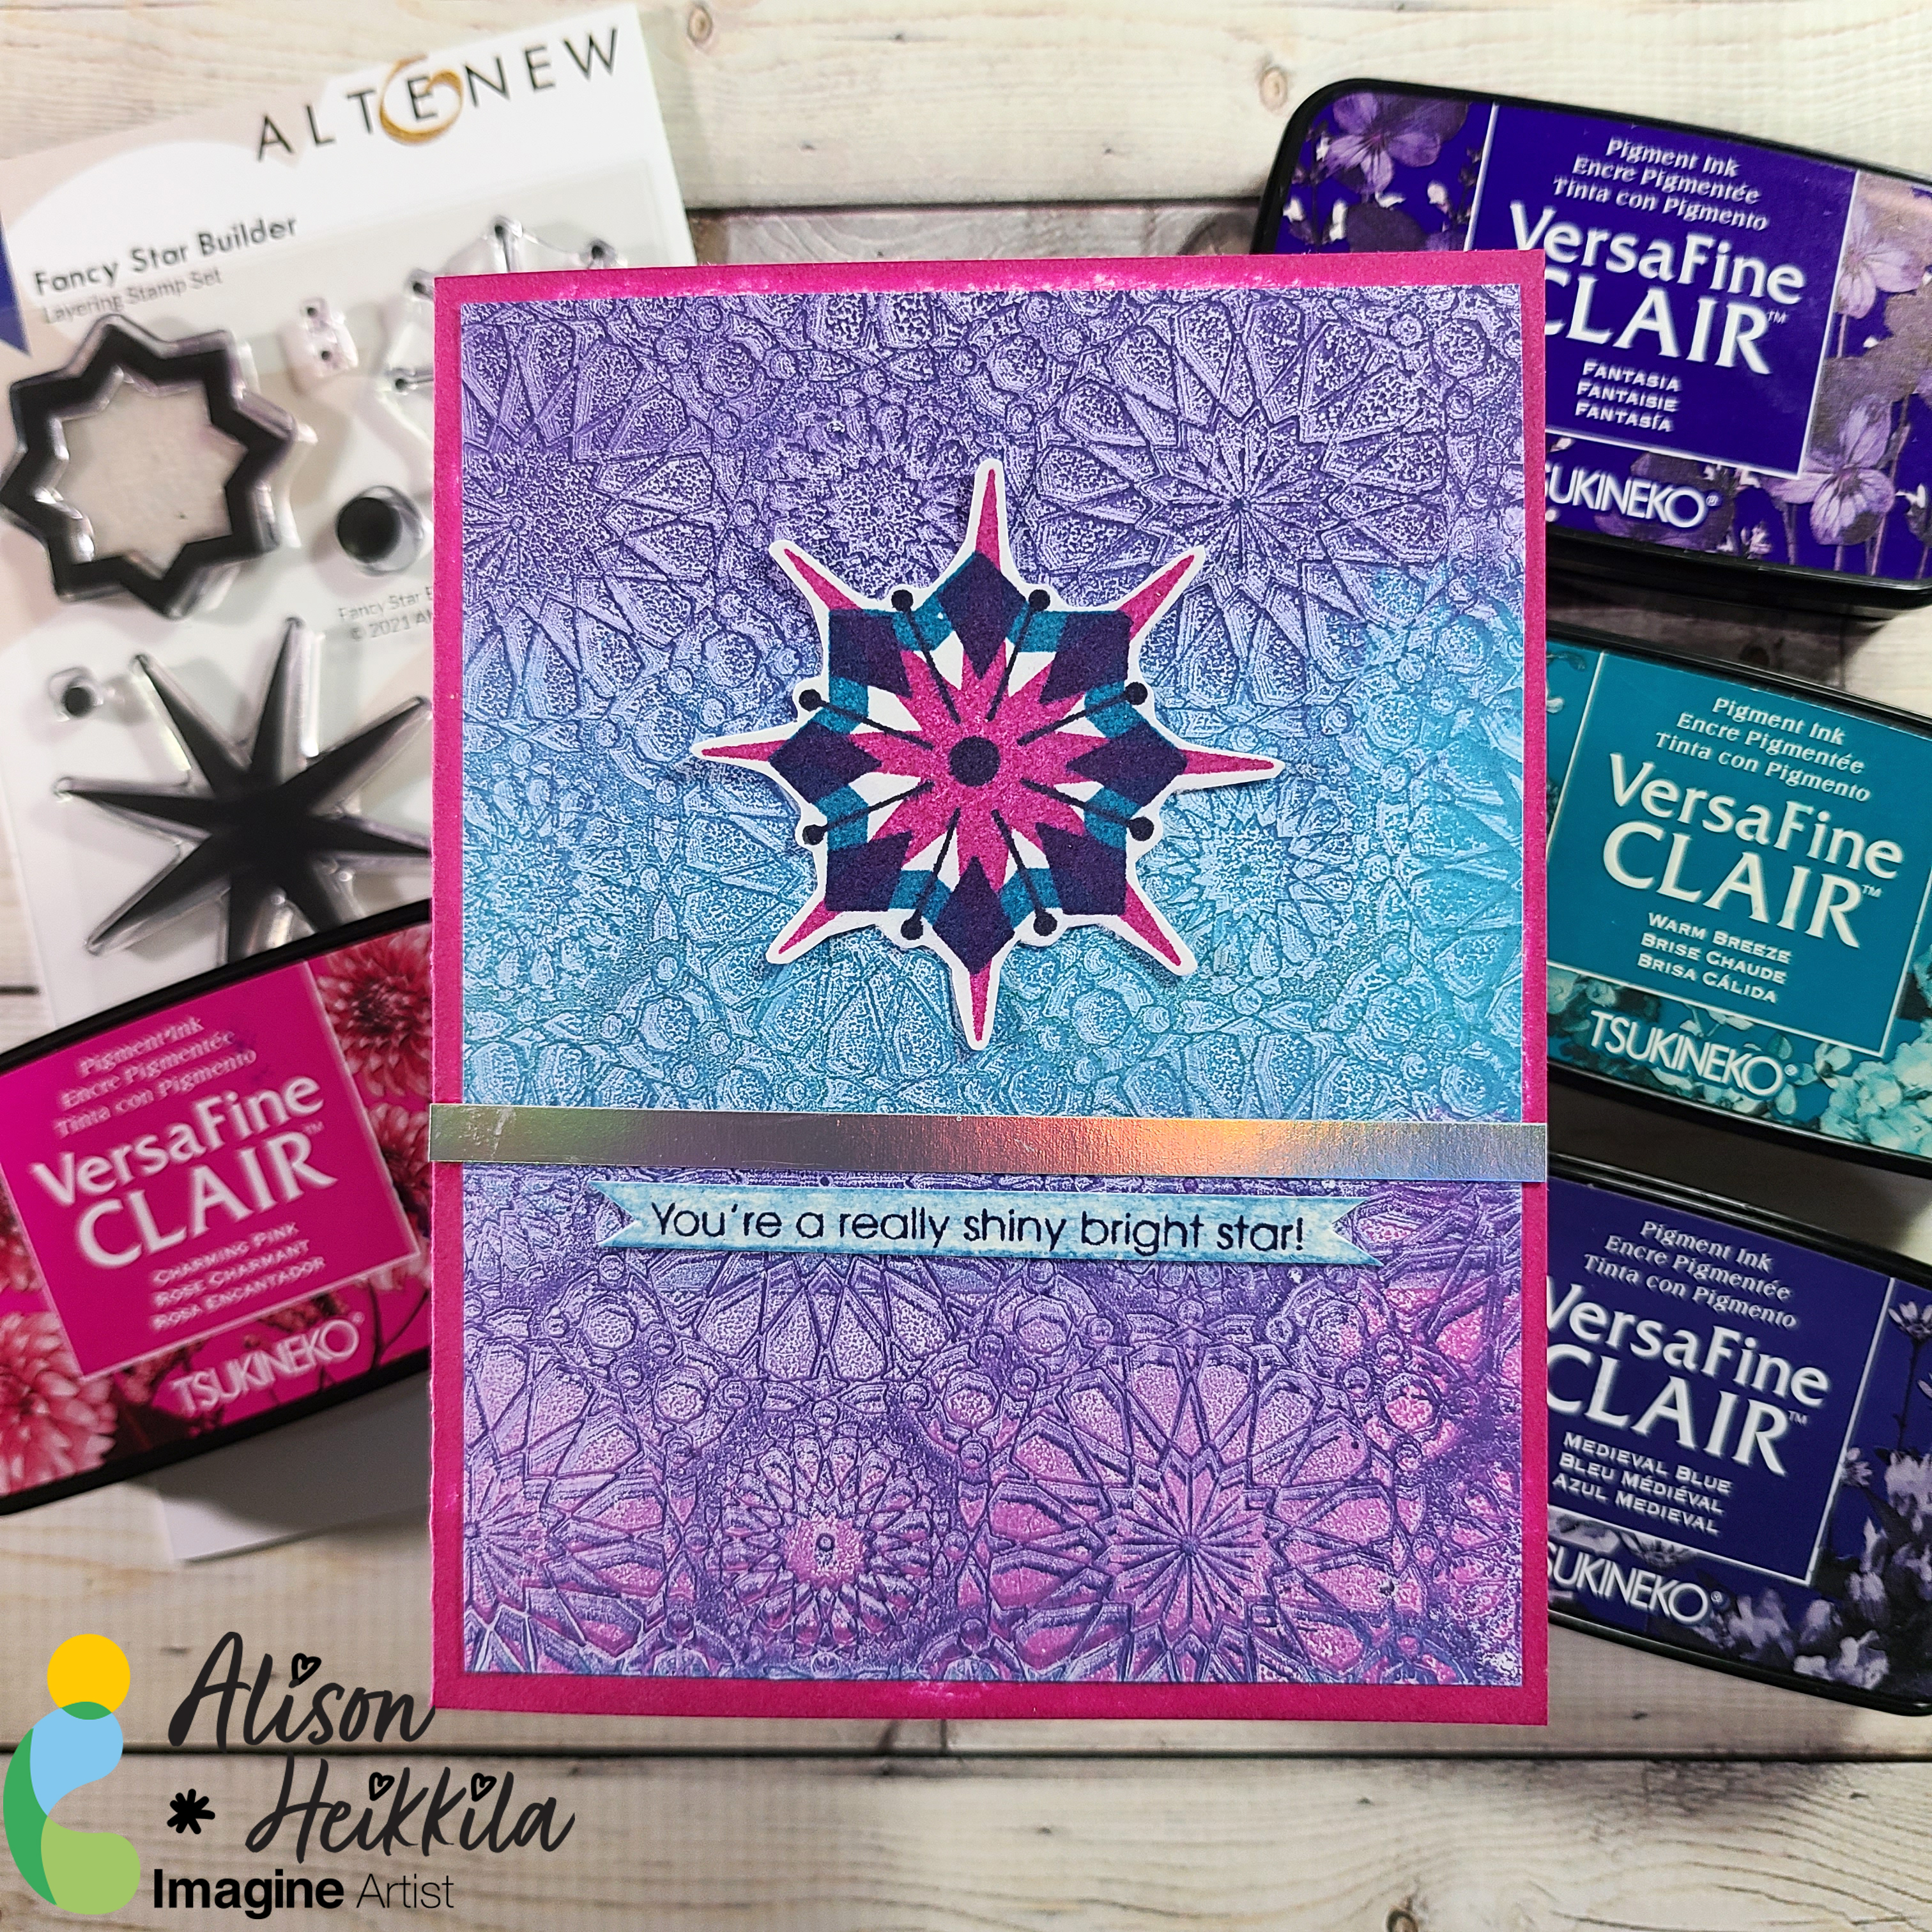
Hello! @AlisonHeikkila here and today and we’ll be focusing on a couple of fun ways to use VersaFine Clair Inks. I love experimenting with different ways to use inks, so I decided to play on my Gel Press Plate and use a detailed 3D Embossing Folder. VersaFine Clair Inks are also great with layering stamps because you can get such crisp images.
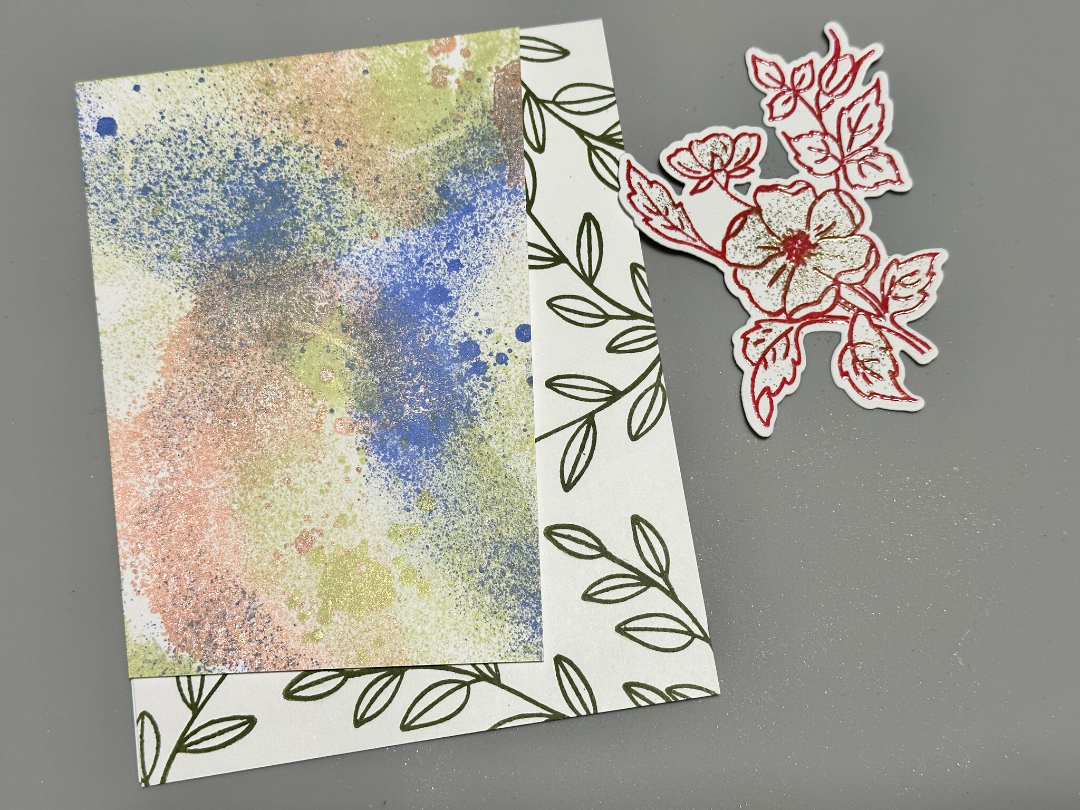
Hello there! Today’s tutorial is about texture with Fireworks and Embossing Powder! Do you know that you can create a splattered effect with the embossing powder? Let me share the project with you.
Skill: Beginning
Time: 60 minutes
Directions:
Step 1:
Take a selection of Fireworks! colors of your preference to create the first part of the splatter effect. First, spray a single color over your craft mat. Grab a piece of white smooth cardstock or any type of cardstock and press softly over the mat. Let the paper dry naturally or speed the process with the heat tool if you don’t want to wait a few minutes.
Repeat the above process with all the colors that you wanted to use on your background. In my sample, I used Potter’s Clay, Paris Dusk and Bamboo Leaves.
Step 2:
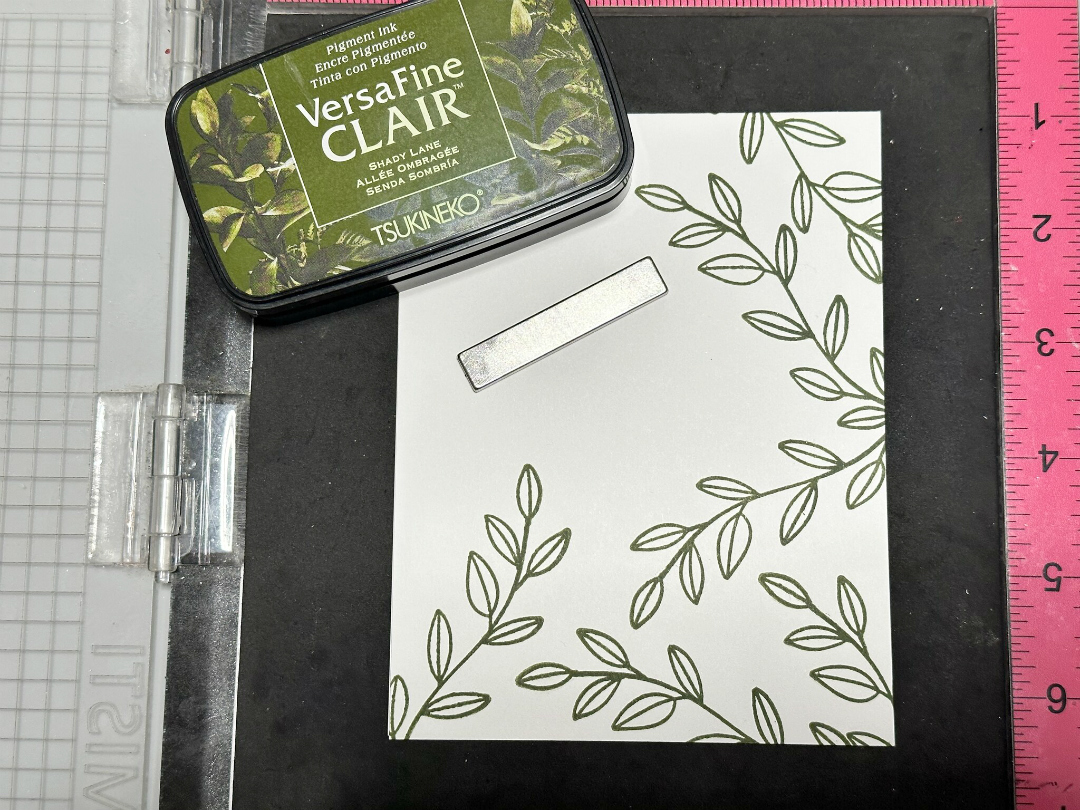
While the background is in drying process, you can work on the card base. Select a color of VersaFine Clair that coordinates with your background. Stamp lineal images over it. If you want, you can emboss it with clear embossing powder. In my sample, I used VersaFine Clair Shady Lane and don’t emboss de leaves.
Step 3:
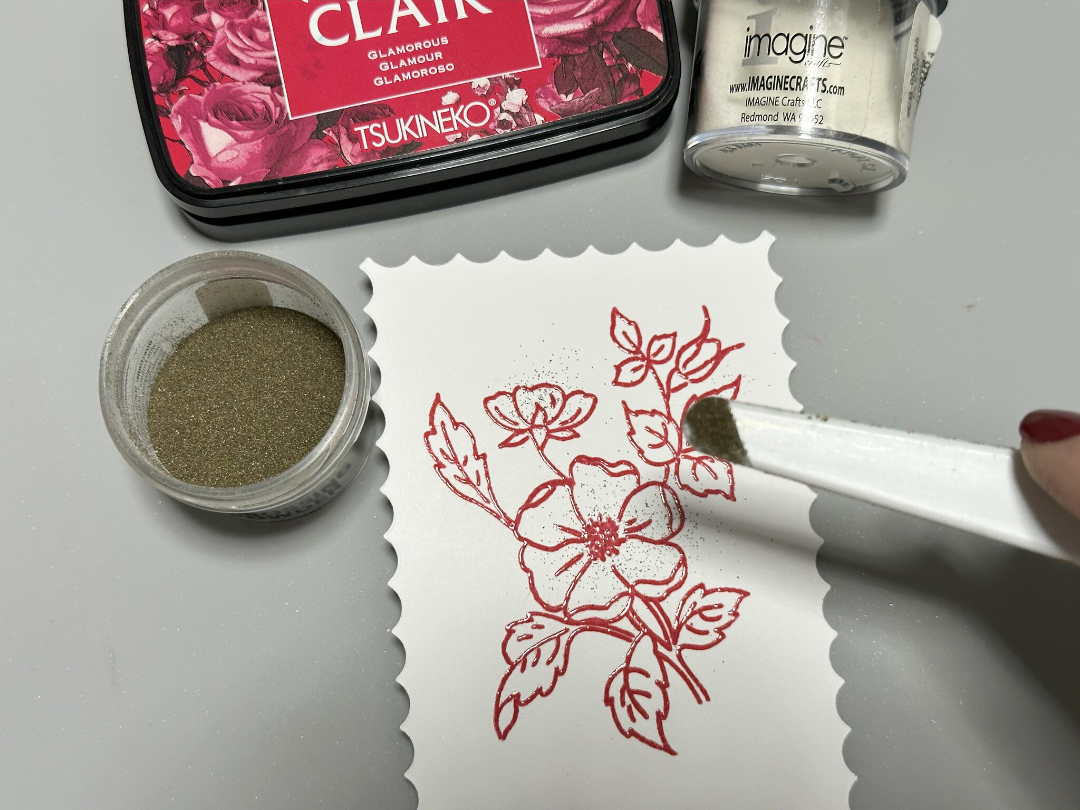
In a separate piece of White Smooth Cardstock, I stamped a floral image with VersaFine Clair Glamorous and then covered it with Clear Embossing Powder. Additionally, with a tiny spoon or spatula, I sprinkle Gold Embossing Powder over the flowers and leaves, trying to keep the powder inside of the lines.
Step 4:
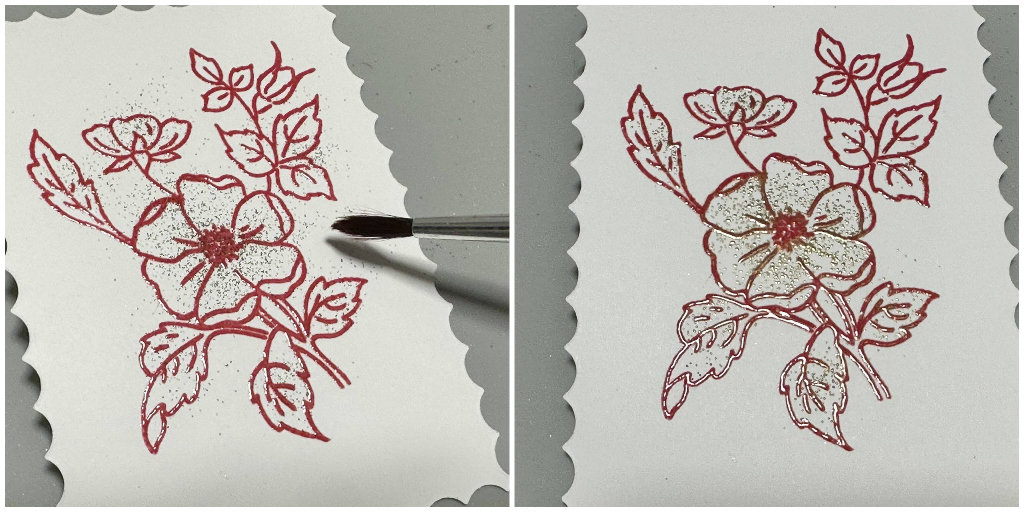
With a paint brush, I removed the excess of the powder around the borders of the flower and then, melted the powder with the heat tool.
As you may have noticed, to create the splattered effect, I didn’t use ink, just the powder.
Step 5:
To continue with the process, I resized the background layer in angle. Then, I die cut the floral image with a coordinated die. Additionally, I pasted all the pieces over the card base using crafty foam tape to add more
dimension to the card.
Step 6:
As final touch, stamp a sentiment in a different color and paste over the decorated card with crafty foam.
Thanks for stopping by and don’t forget that you can use different types of ink and embossing powders to create your own look!
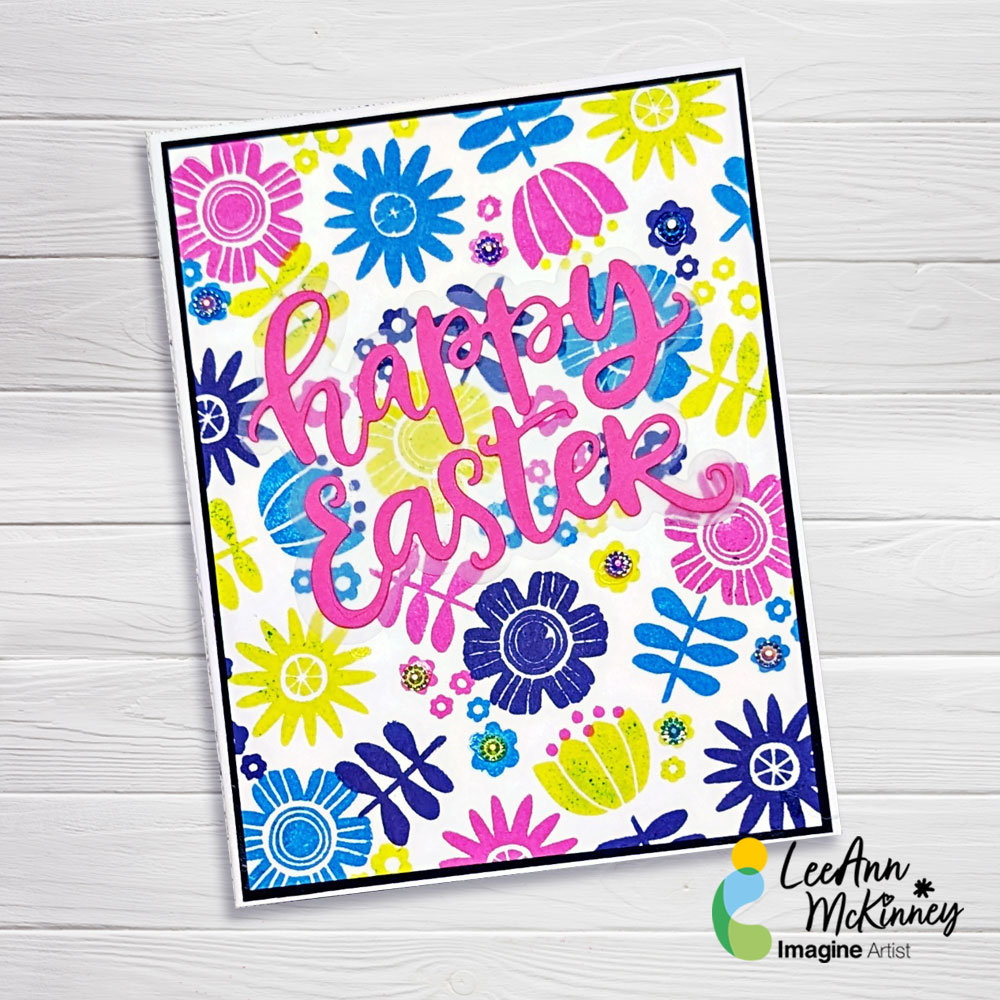
Hi there friends and fellow crafters. LeeAnn here with a fun Turnabout Stamping Project anyone can do. This is for all levels. With this stamp set you will start with a single piece of cardstock cut to 6″ x 6″ set up your stamp, ink up the full stamp in one color, turn your paper 1 turn to the right or left, and then ink in 2nd color, turn 1 turn again same direction as before and ink in next color, then one final turn in same direction, ink up again. Once dry cut panel to 4″ x 5.25″, apply to a card base that is 4.25 x 5.5″, I prefer top folding for this. Add your sentiment, some jewels and your project is complete.
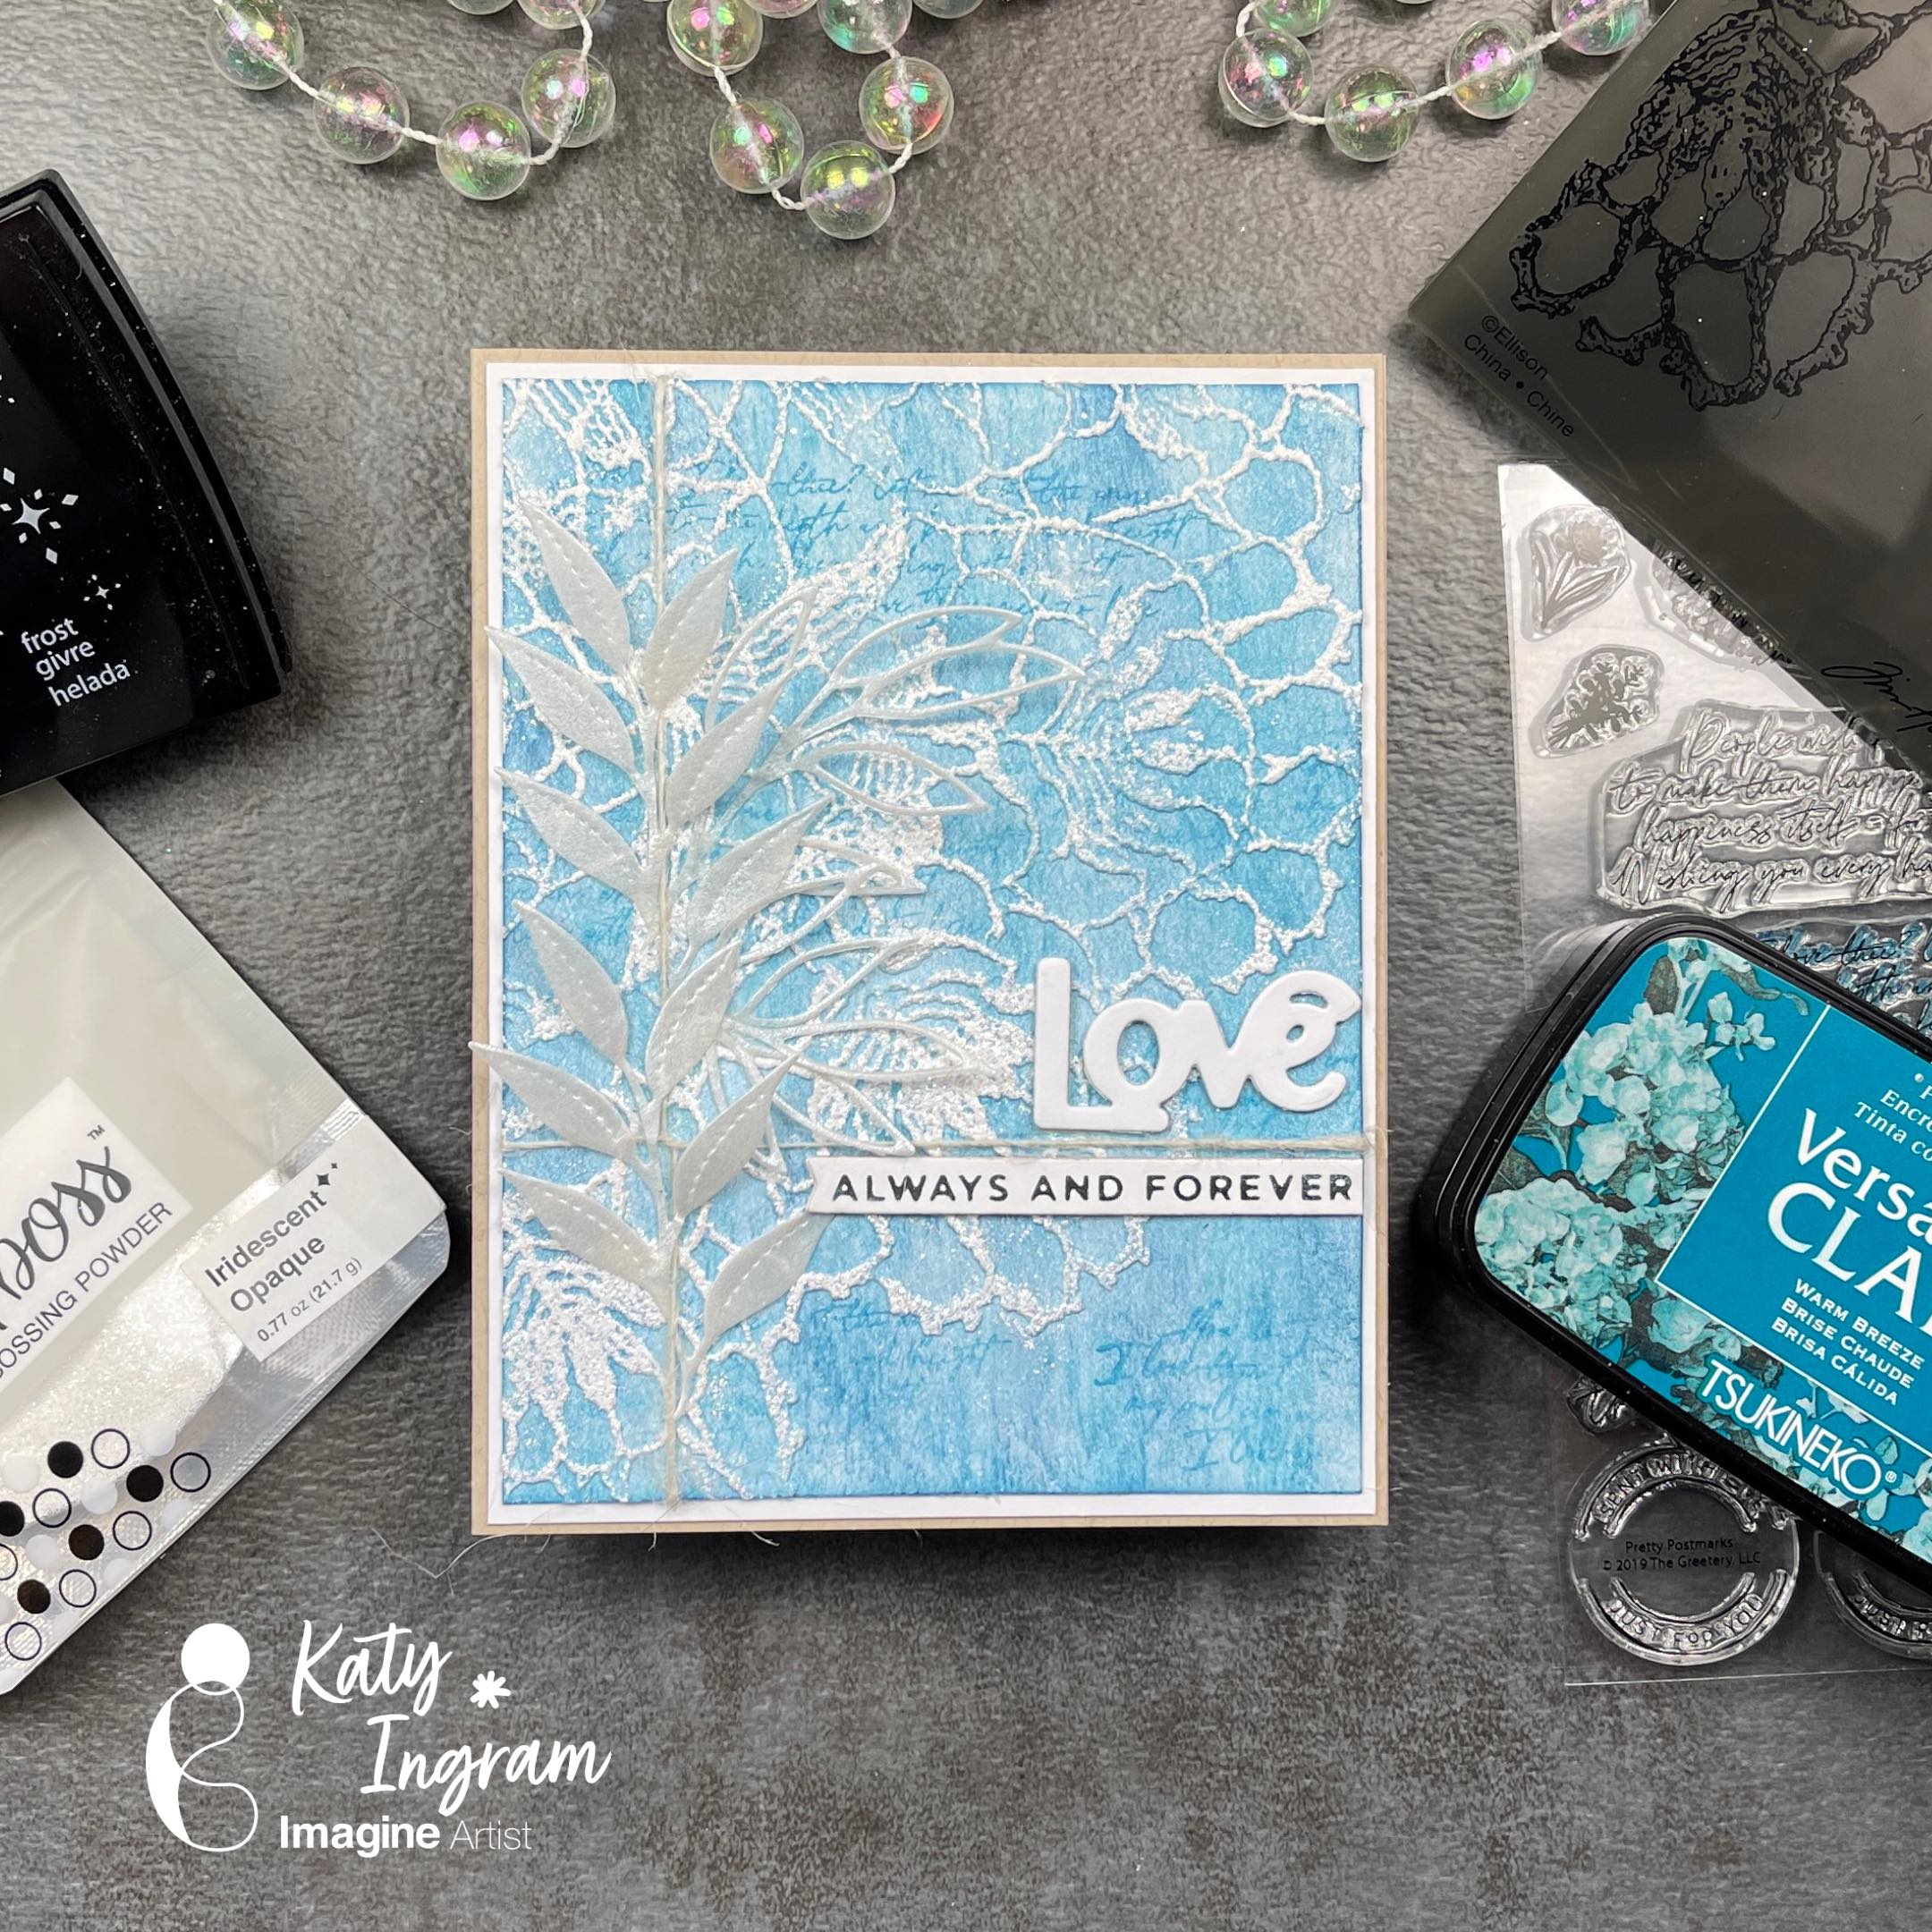
Hello Friends! Katy here and today I am excited to share this really cool background technique.
In today’s video tutorial I am sharing how I use a 3D embossing folder and iridescent opaque Mboss embossing powder to create a wedding or anniversary card. The colors I chose definitely give me a beachy vibe and I am loving it!
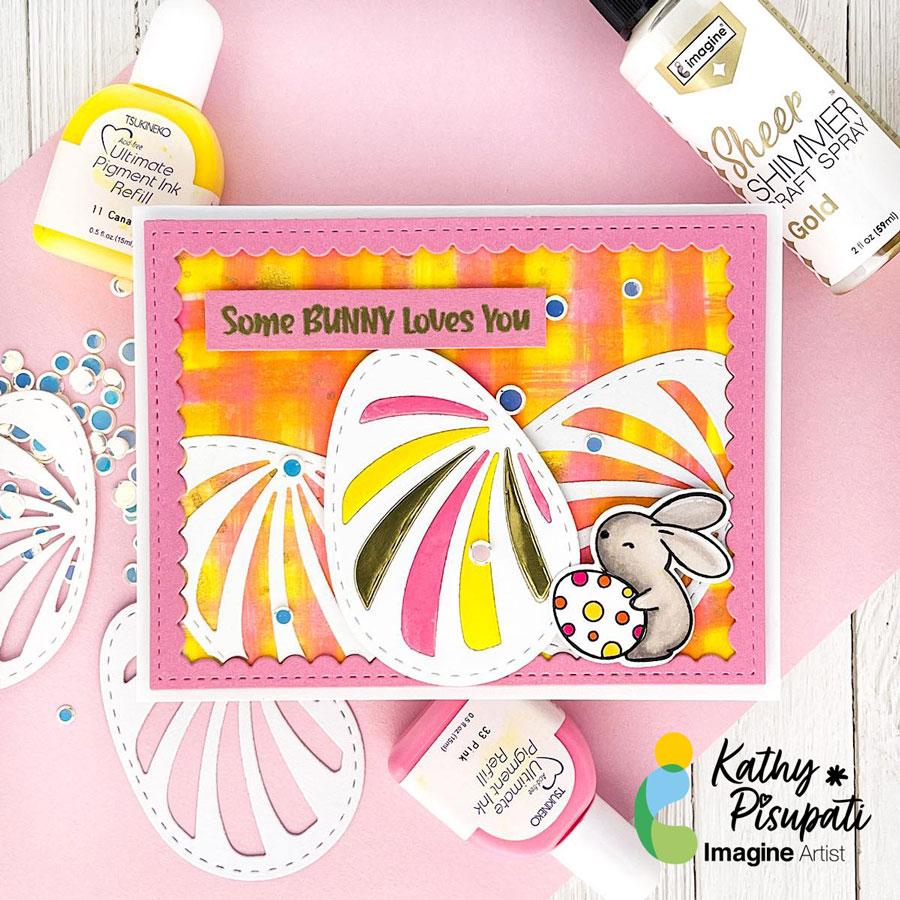
Good morning! Kathy here, creating art for Imagine Crafts! Today I have a new tutorial for you. Today’s project is an Easter card but it is also about creating your own backgrounds with Imagine Craft’s Ultimate Pigment Ink Refills! If you don’t have much patterned paper this is an easy background using the refills and baby wipes!
Skill Level: Easy
Time to complete: 1 hour
Step 1
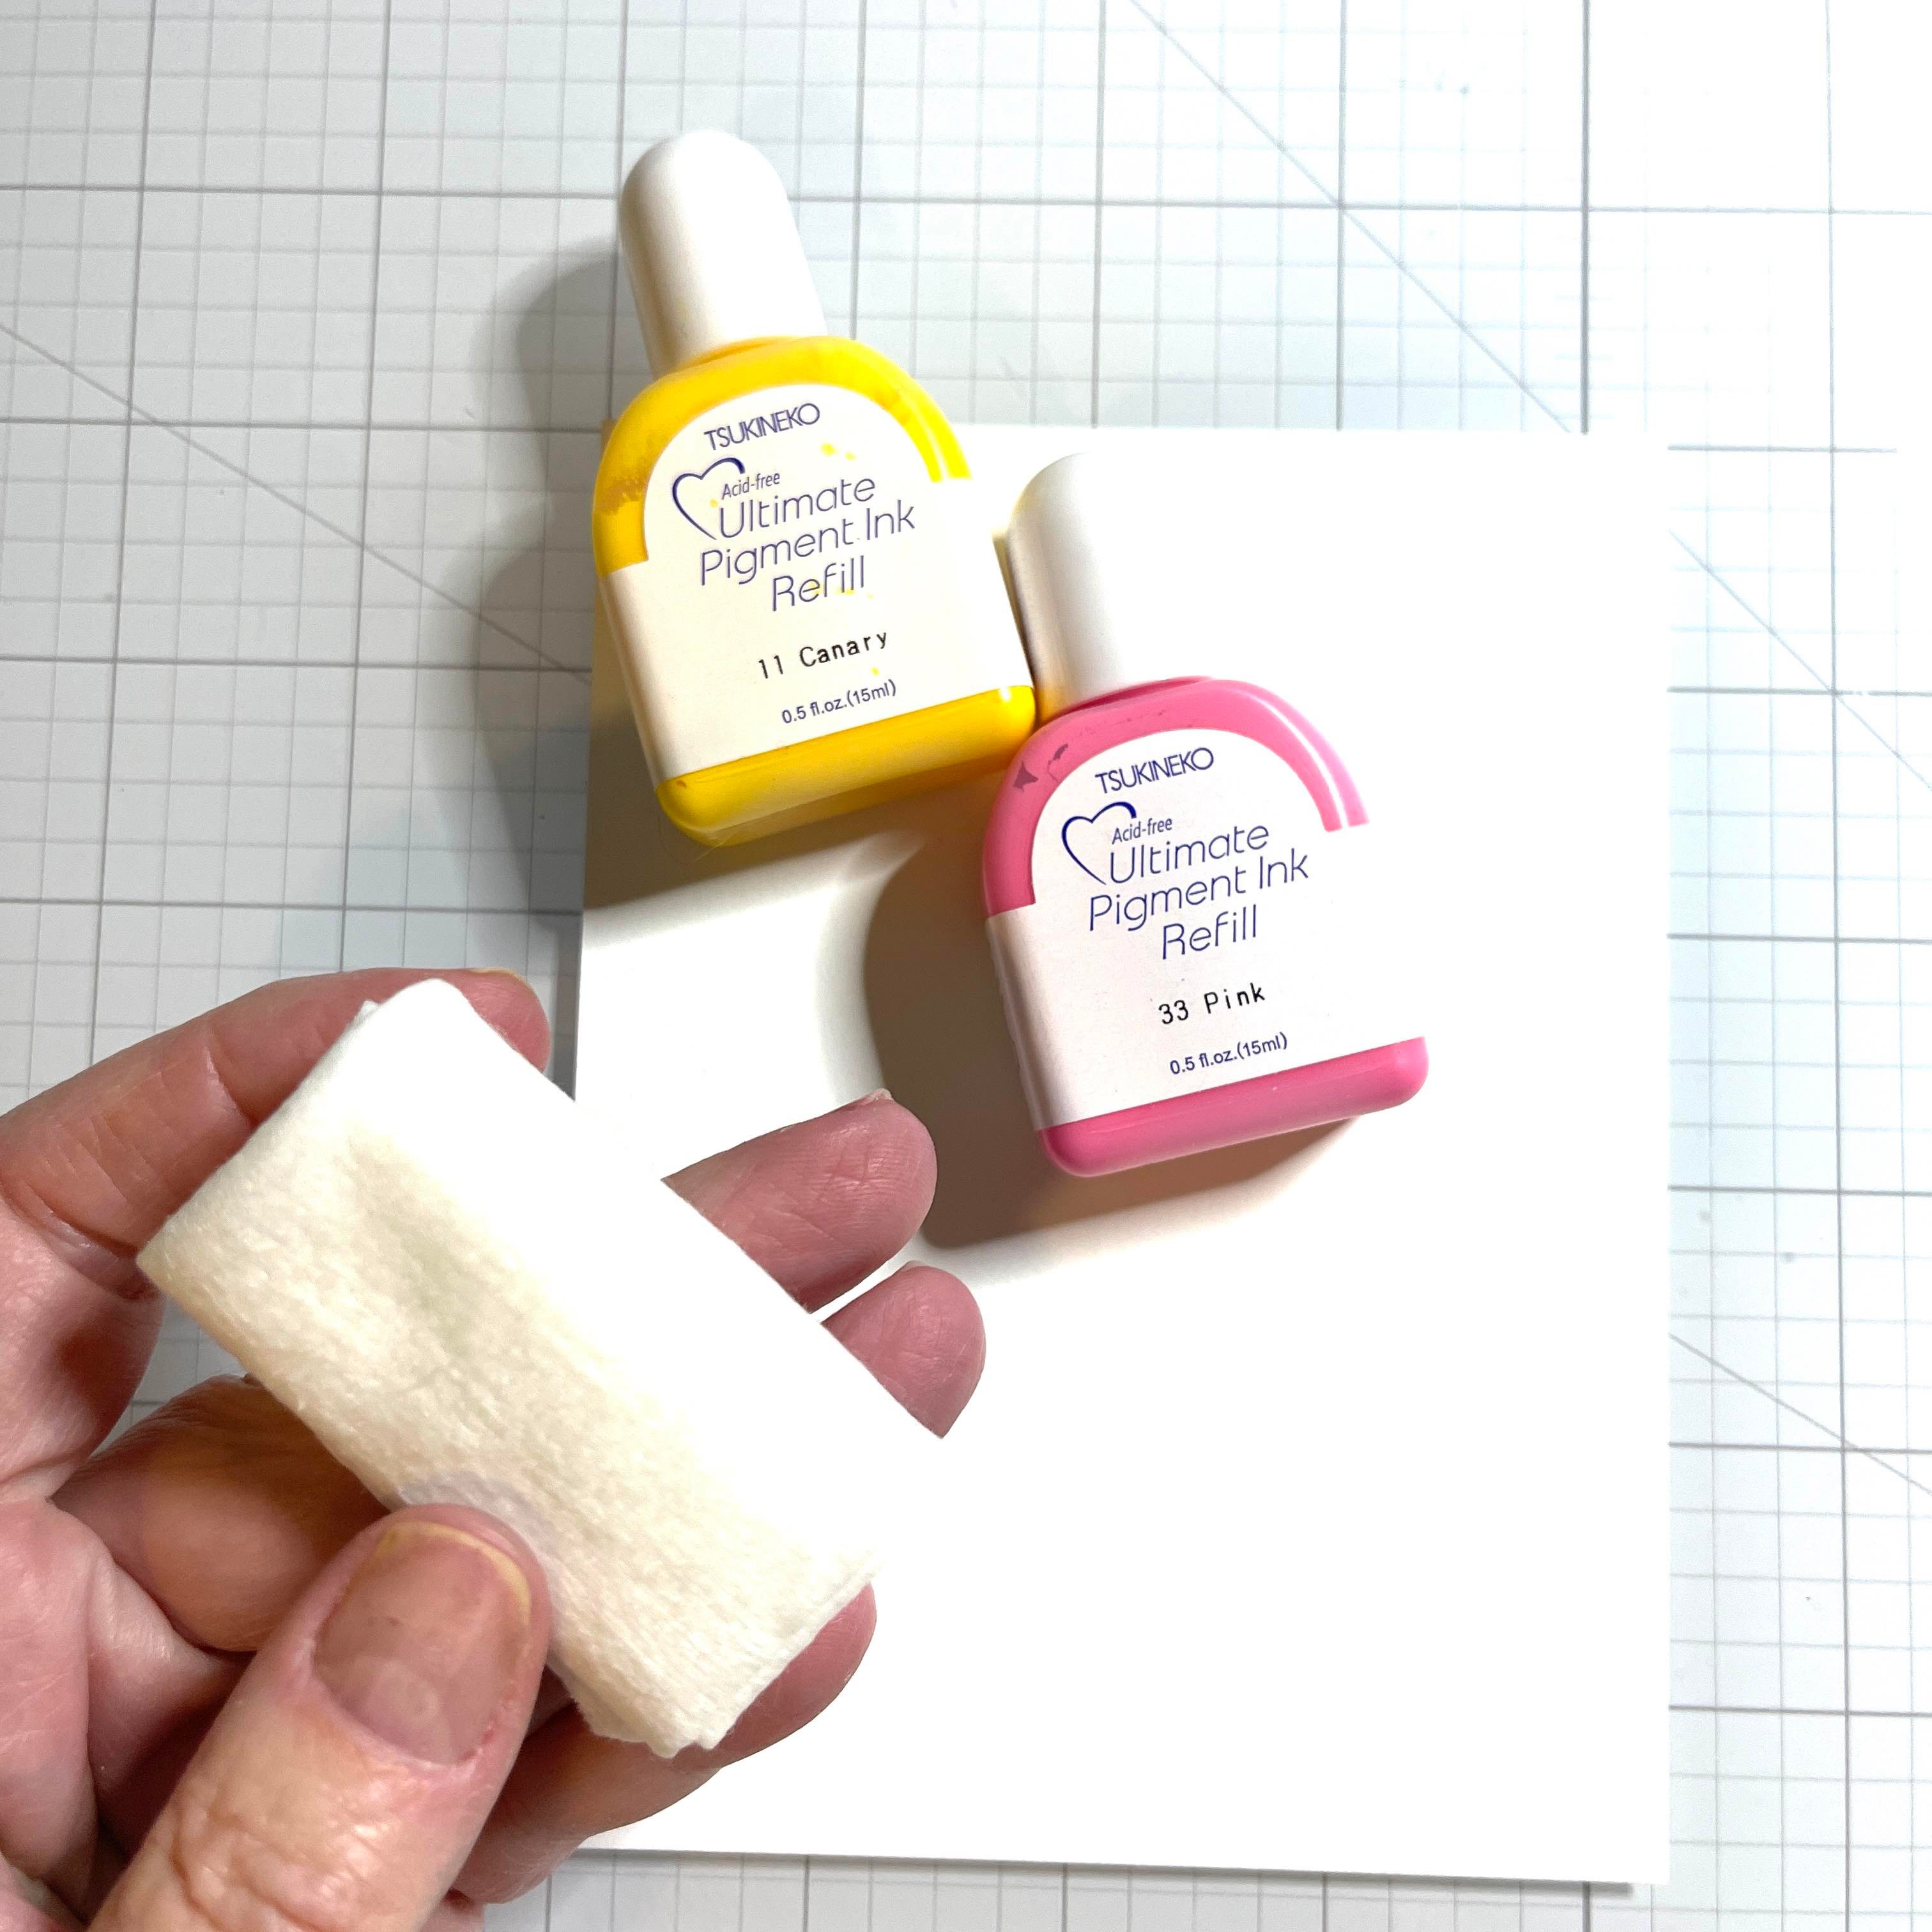
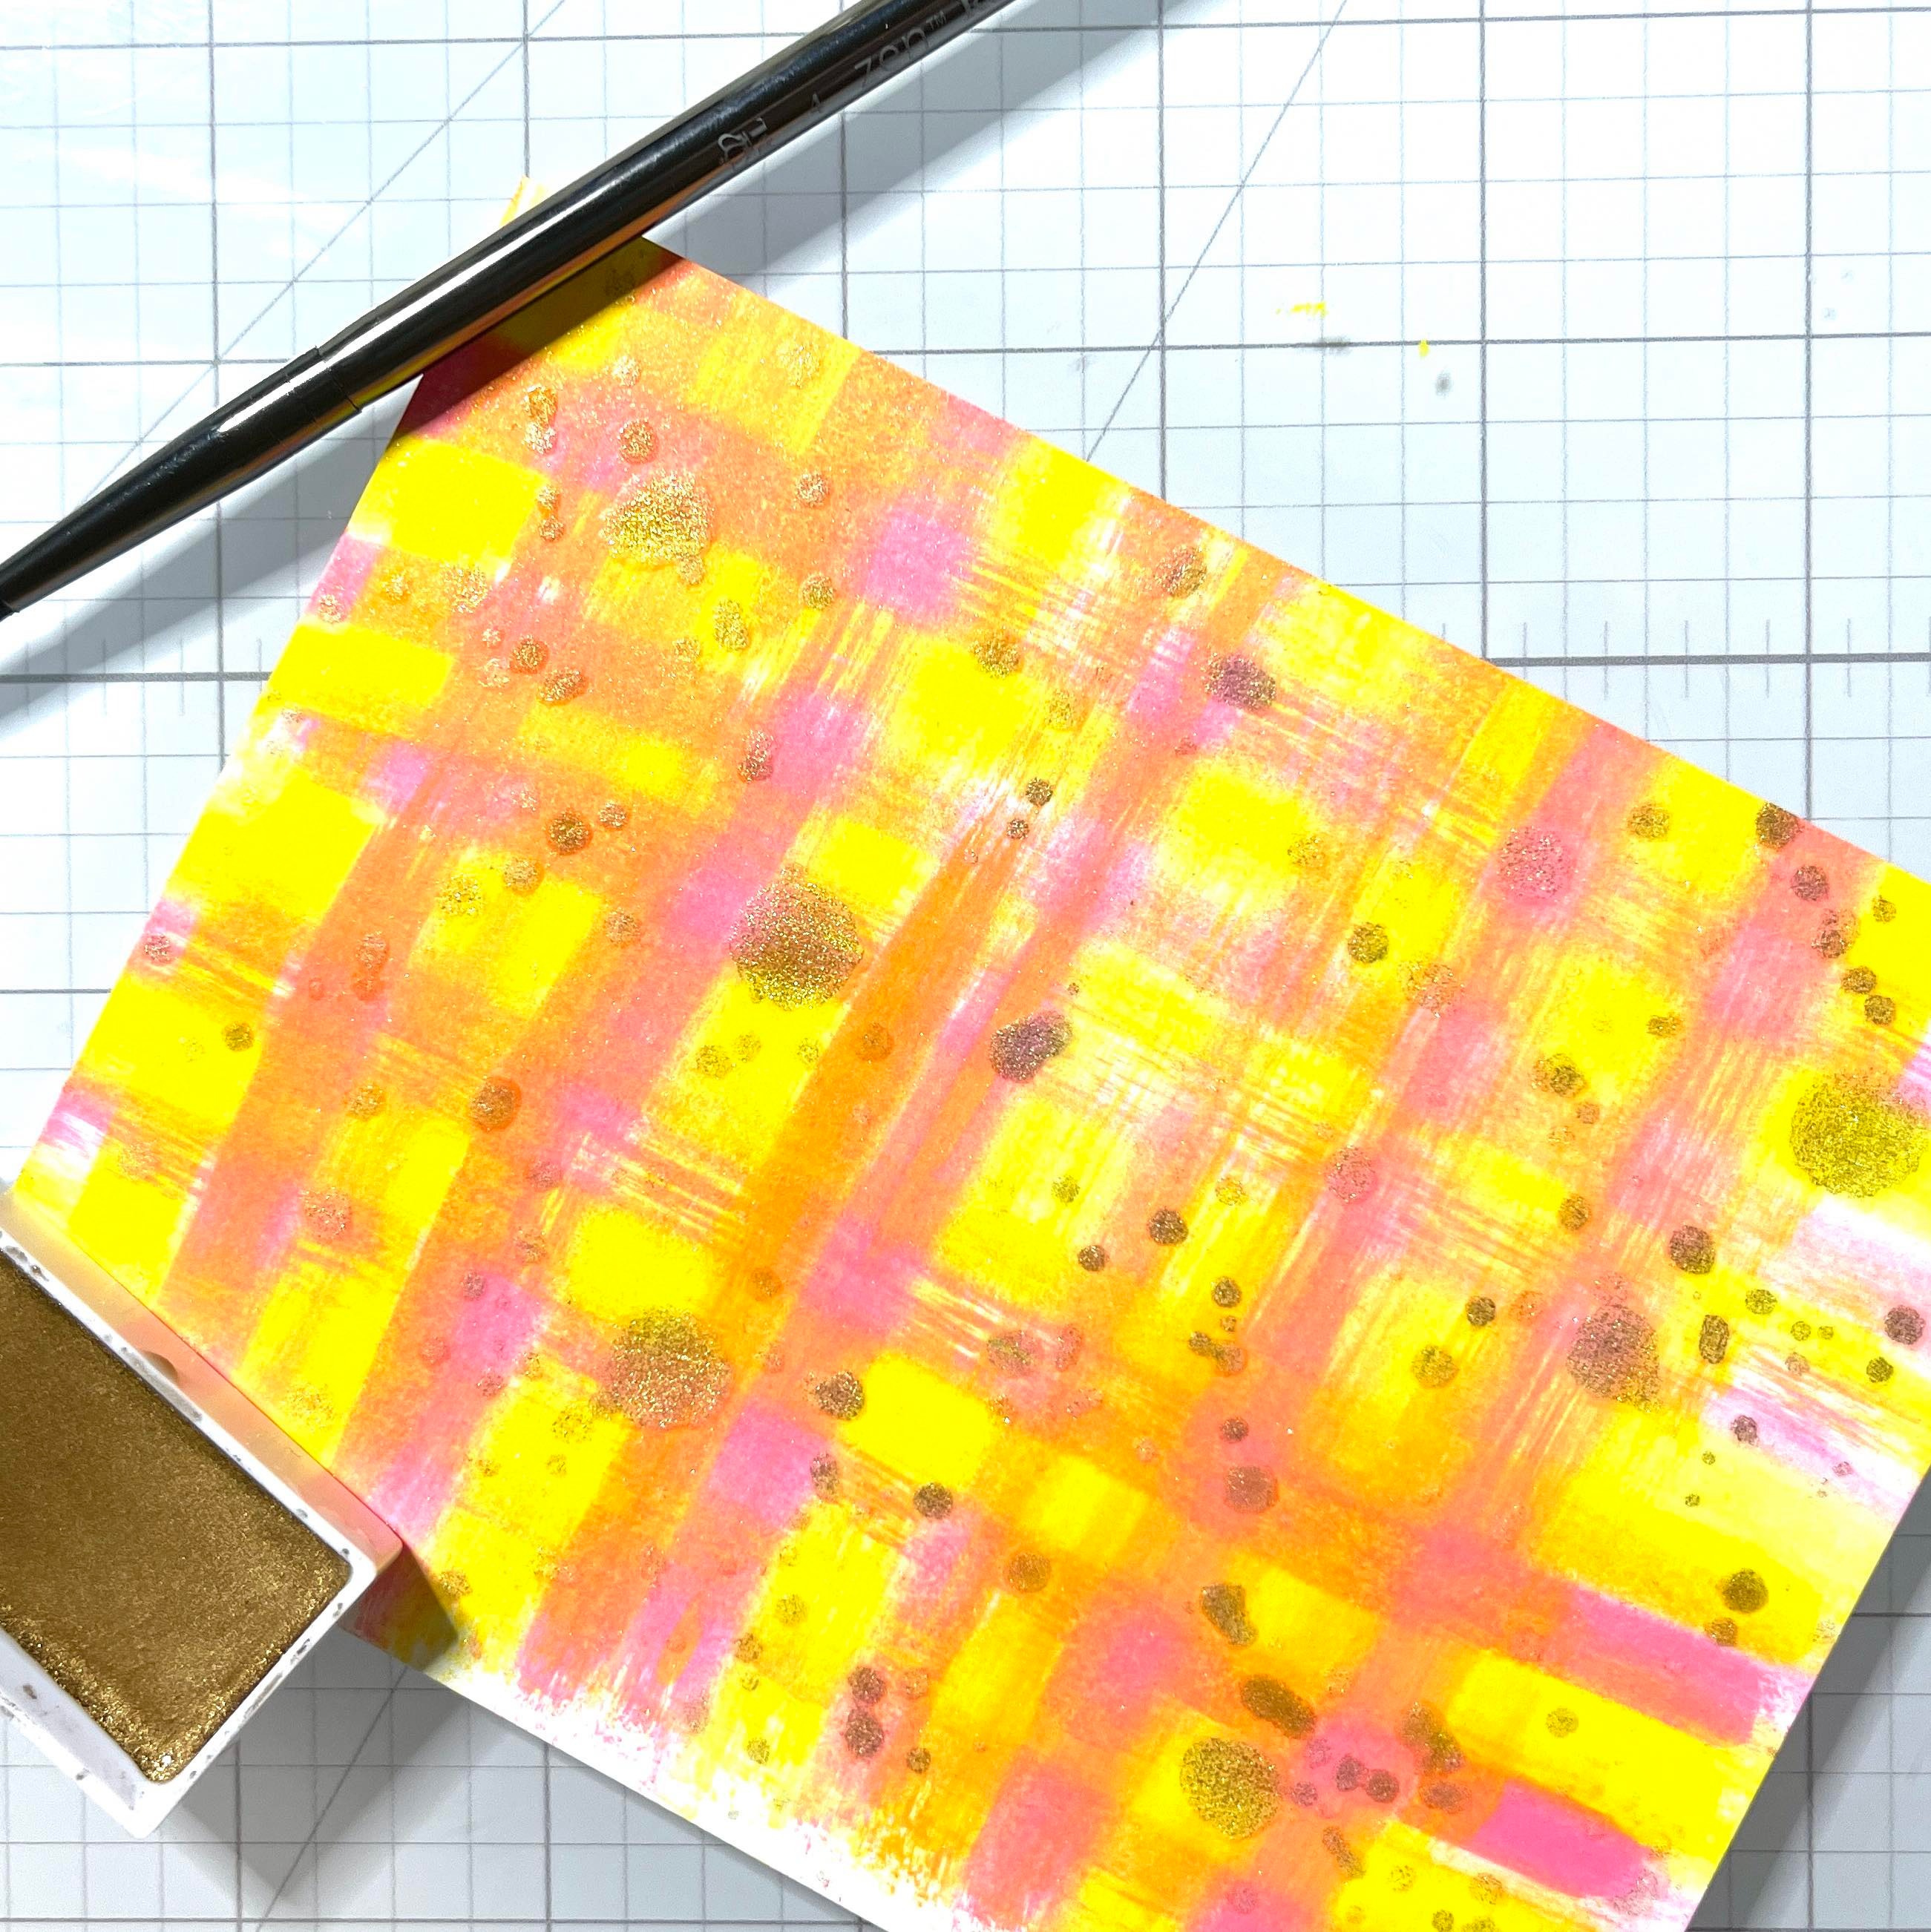
Cut a piece of a layering weight, white card stock to 4.25” x 5.5”. This will be enough for three holders. Grab your favorite ink refills. For today’s card I used Imagine Craft’s Ultimate Pigment Ink Refills in Canary and Pink. Grab a baby wipe and fold it up nicely.
Step 2
Dab your ink onto the baby wipe in an alternating order.
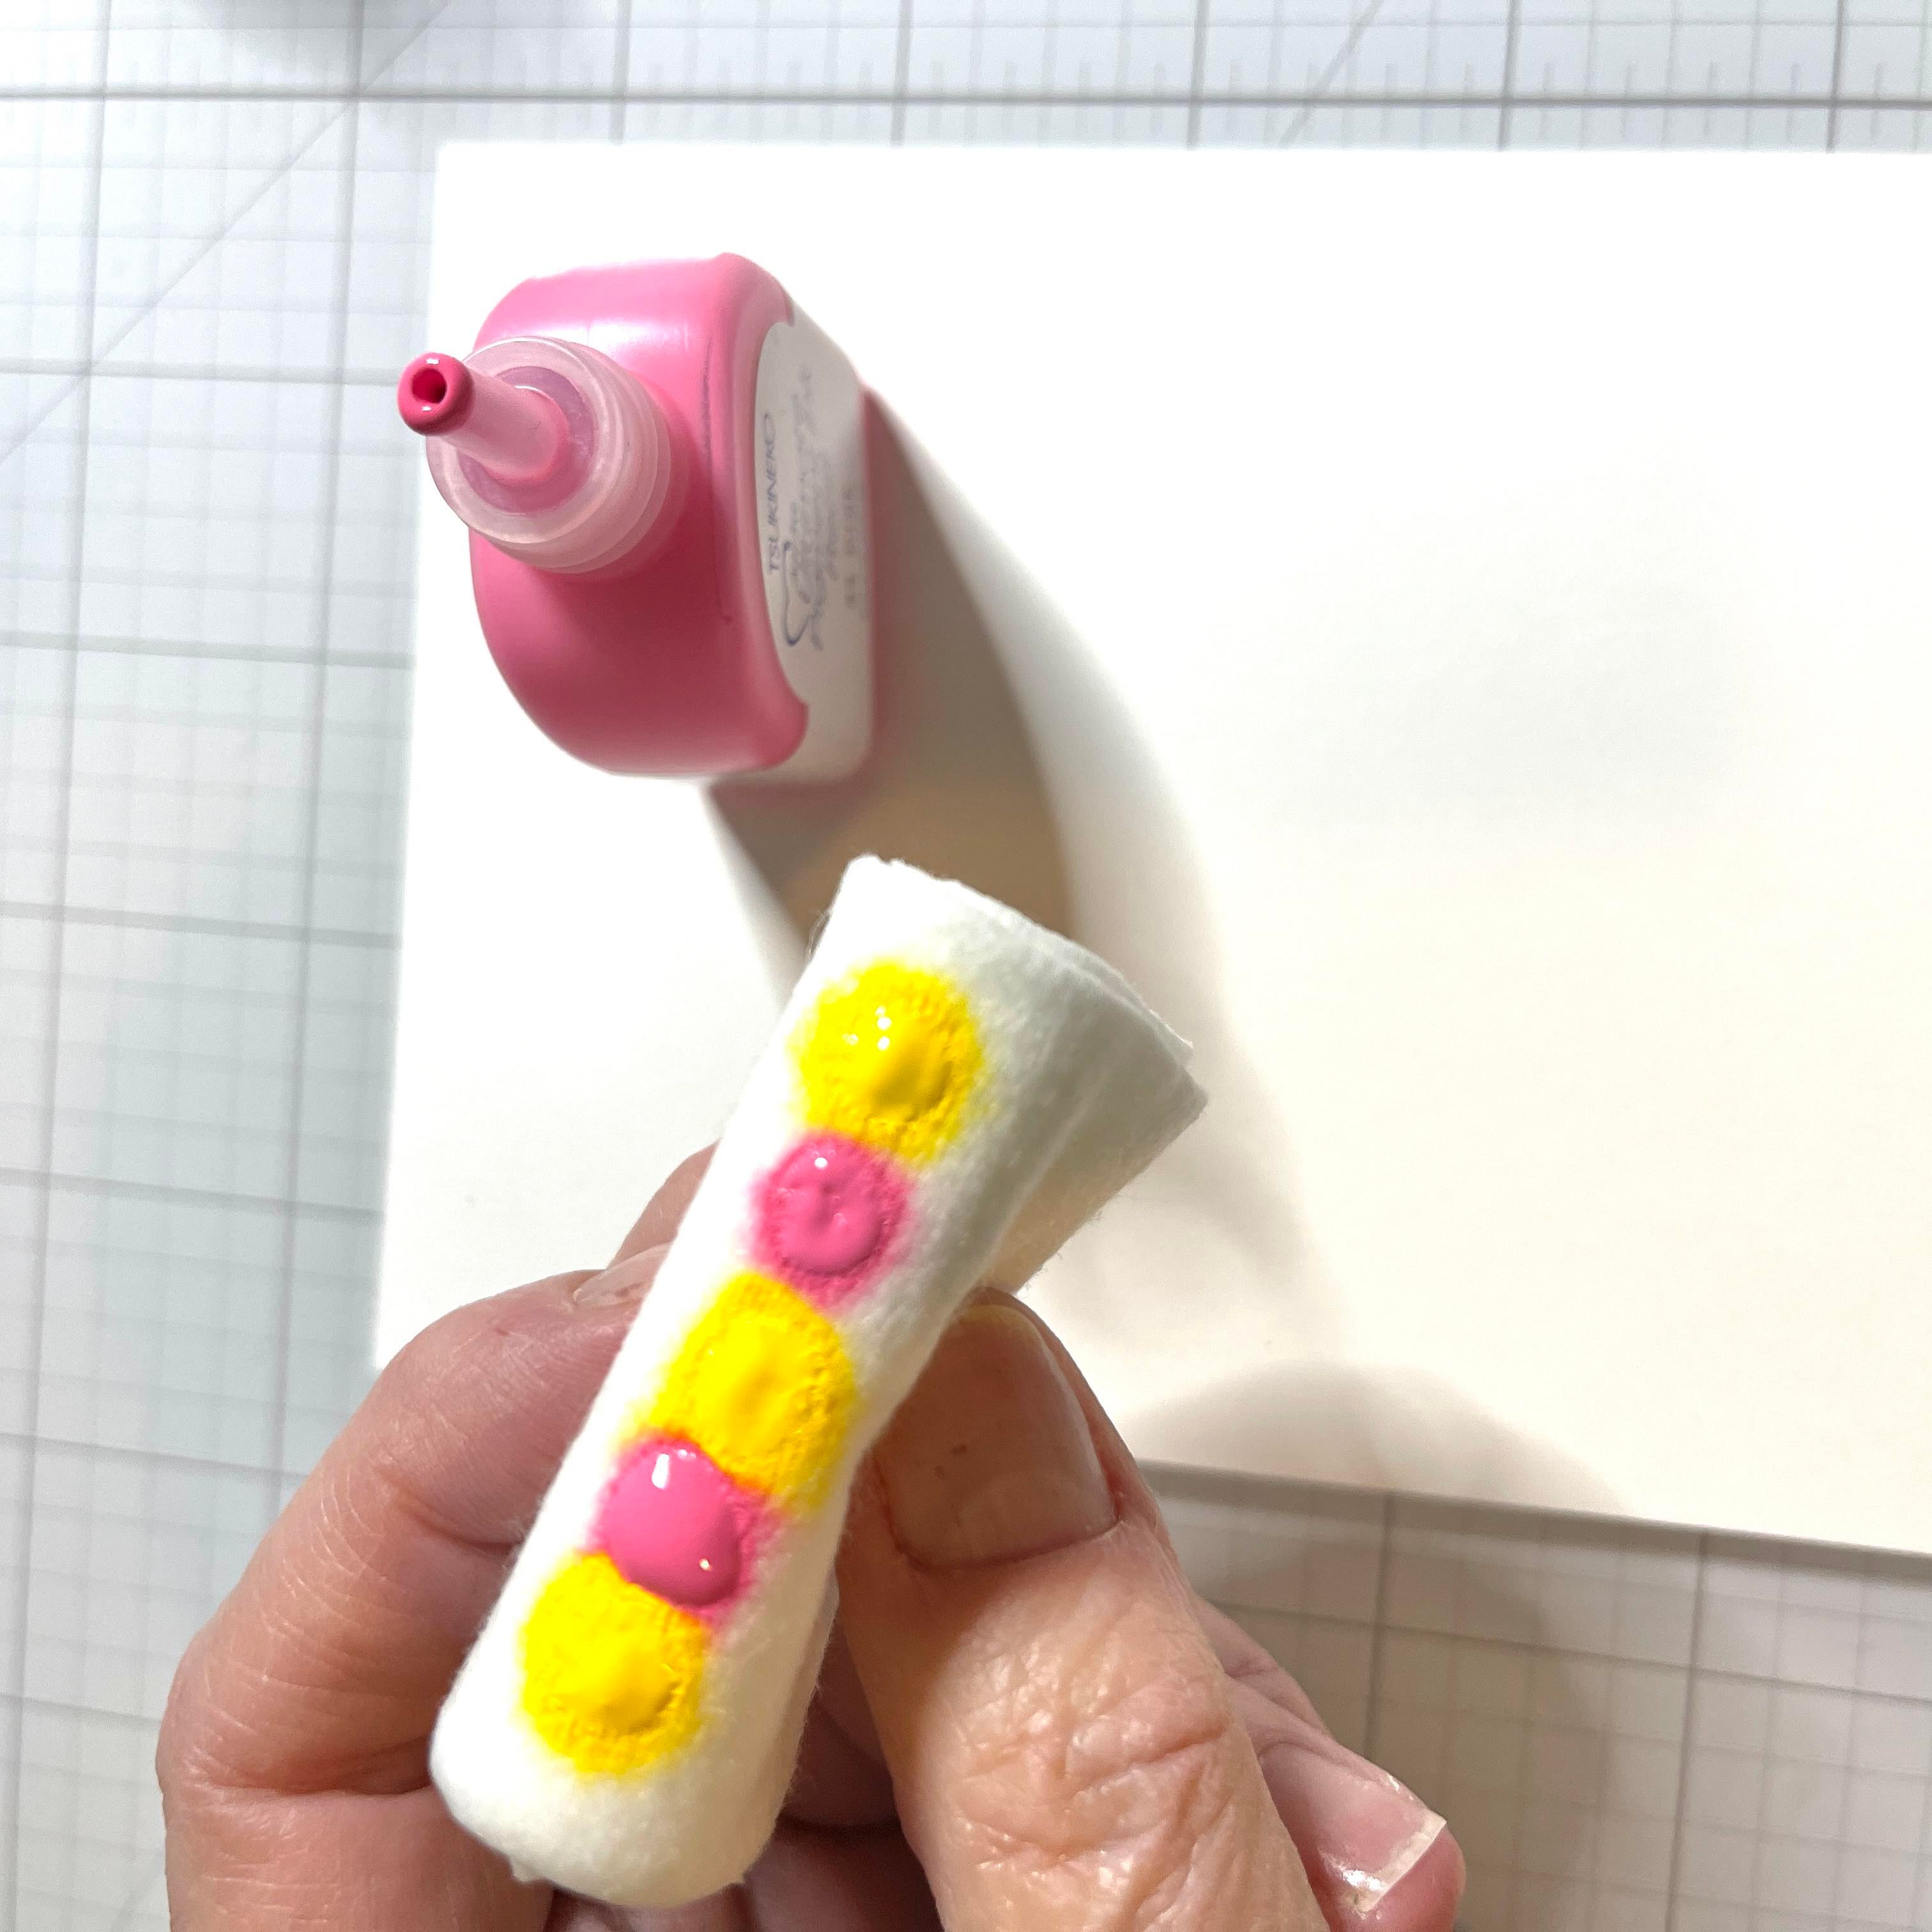
Step 3
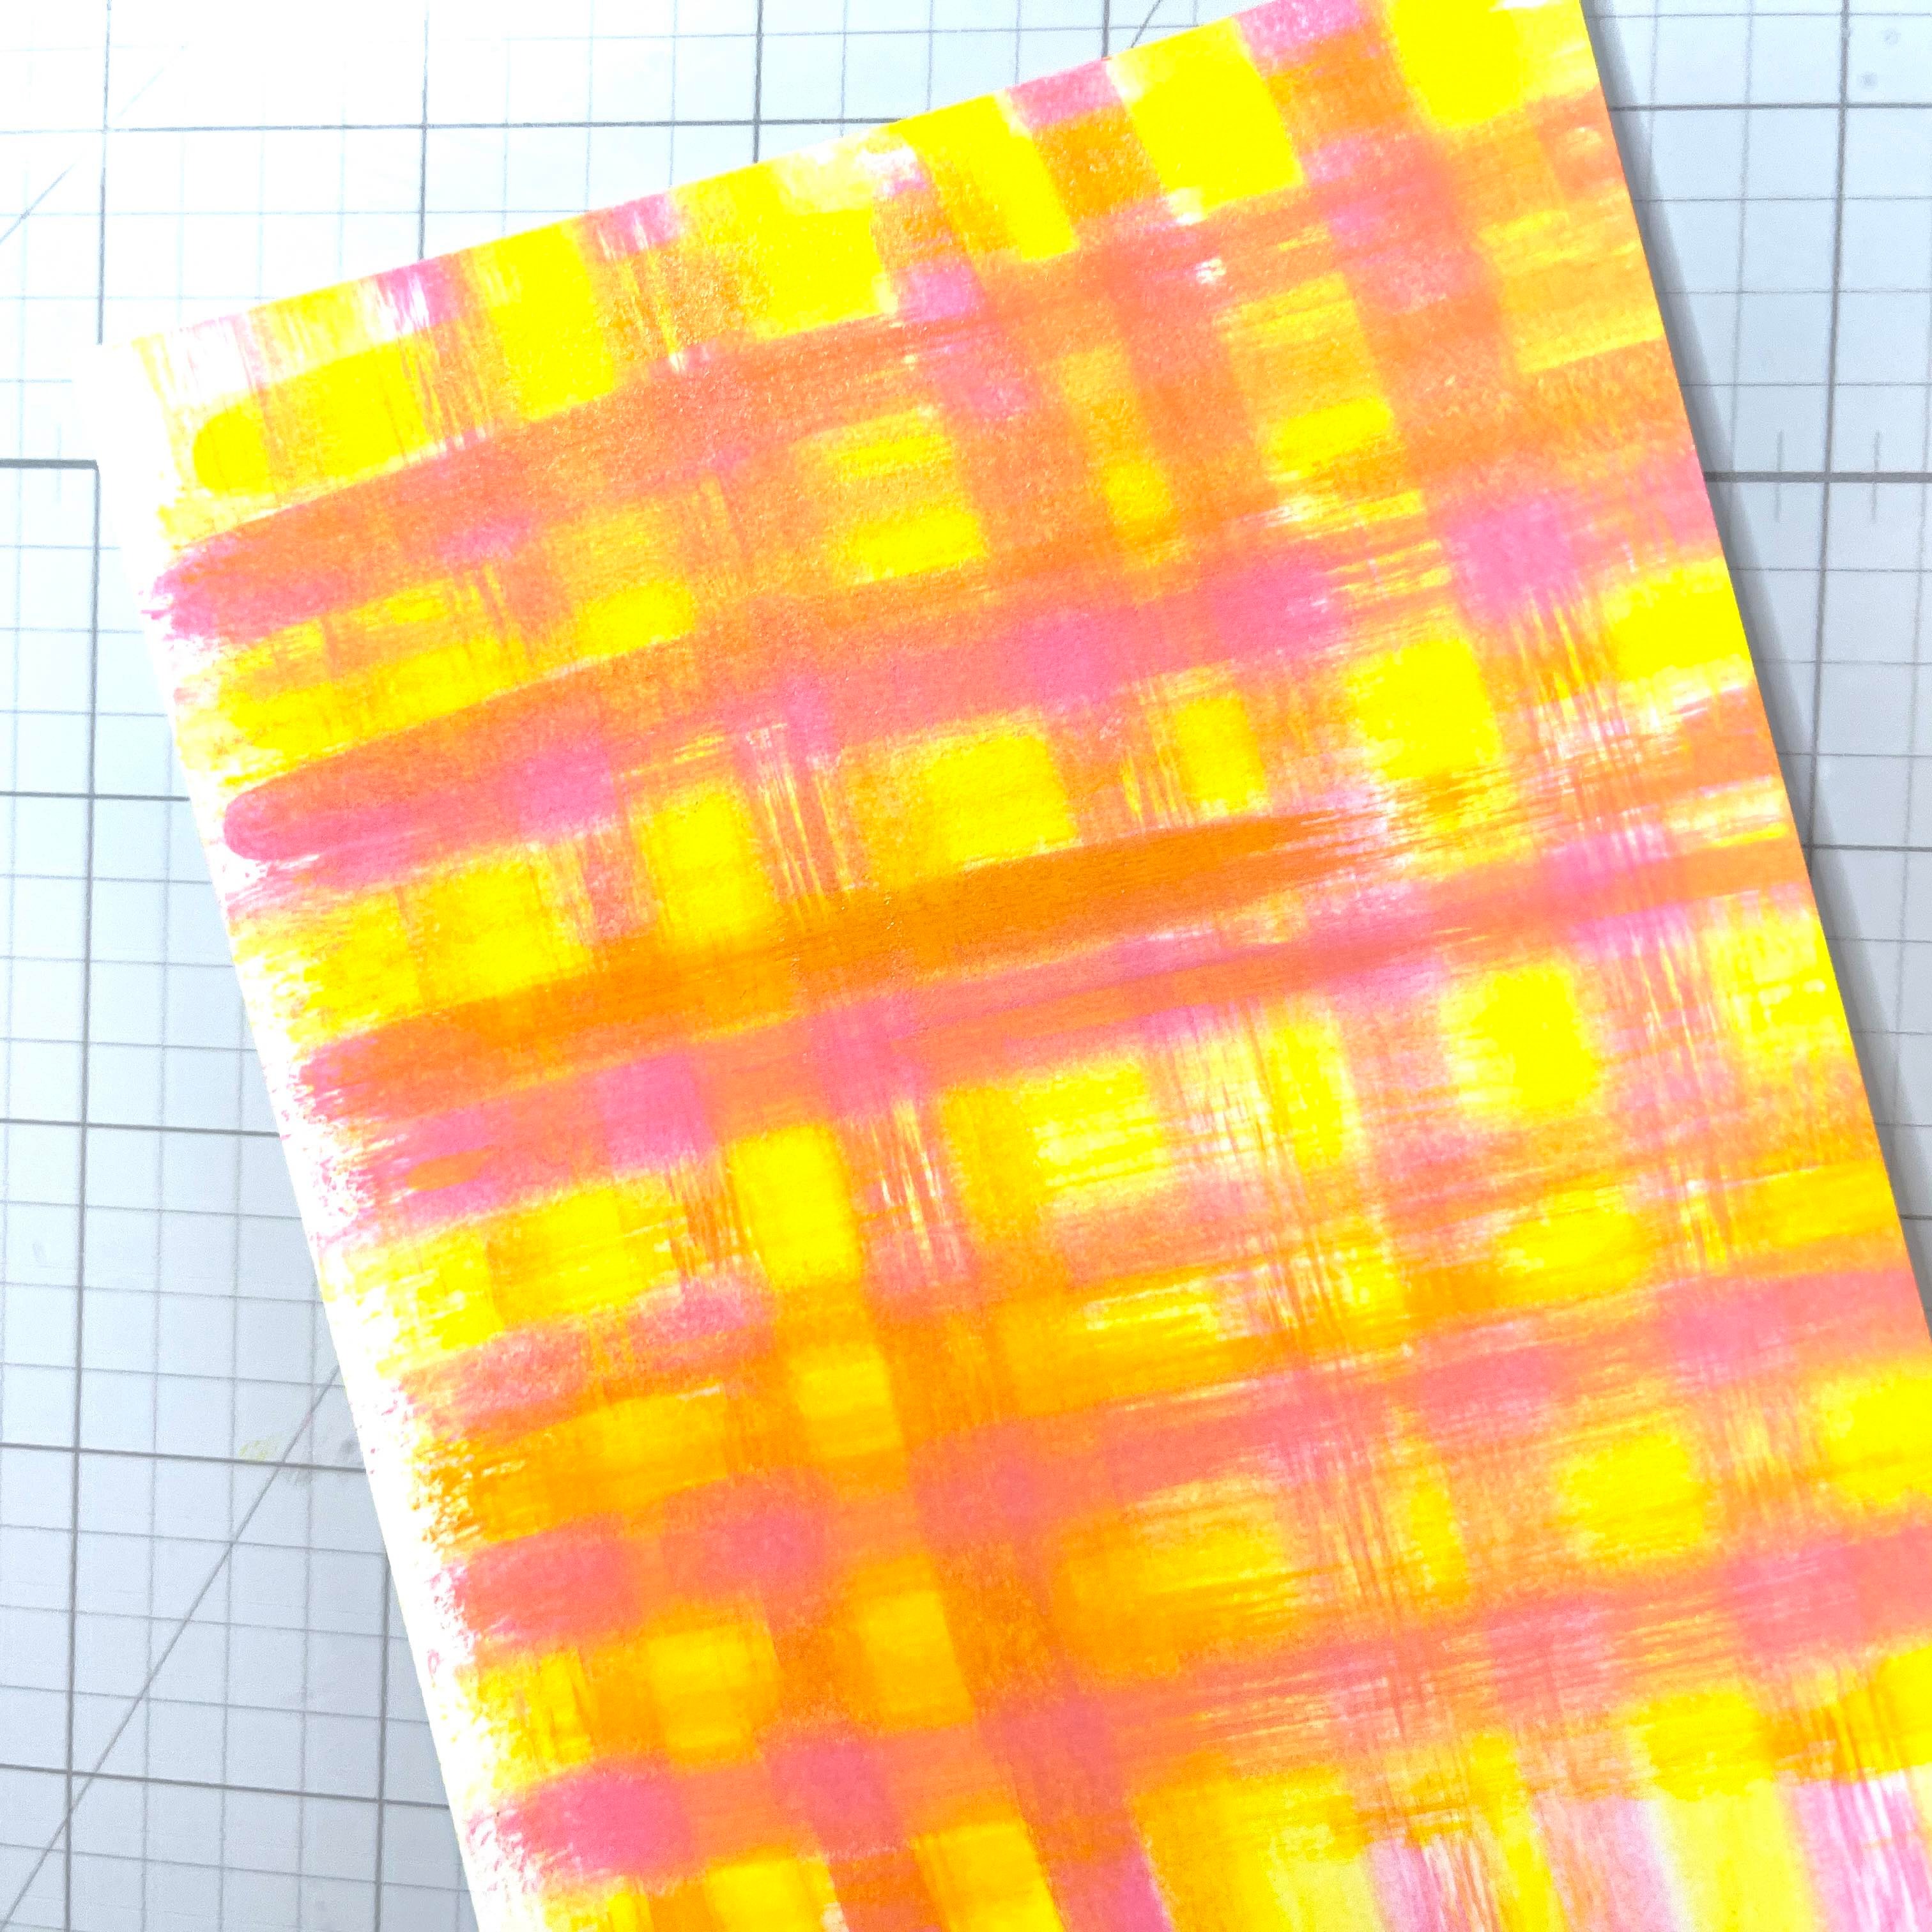
Now just swipe across your card stock. YES you will get messy! But it’s fun. You may need to add some more drops. Make sure when swiping that you line up your baby wipe with the last swiped color as you move along.
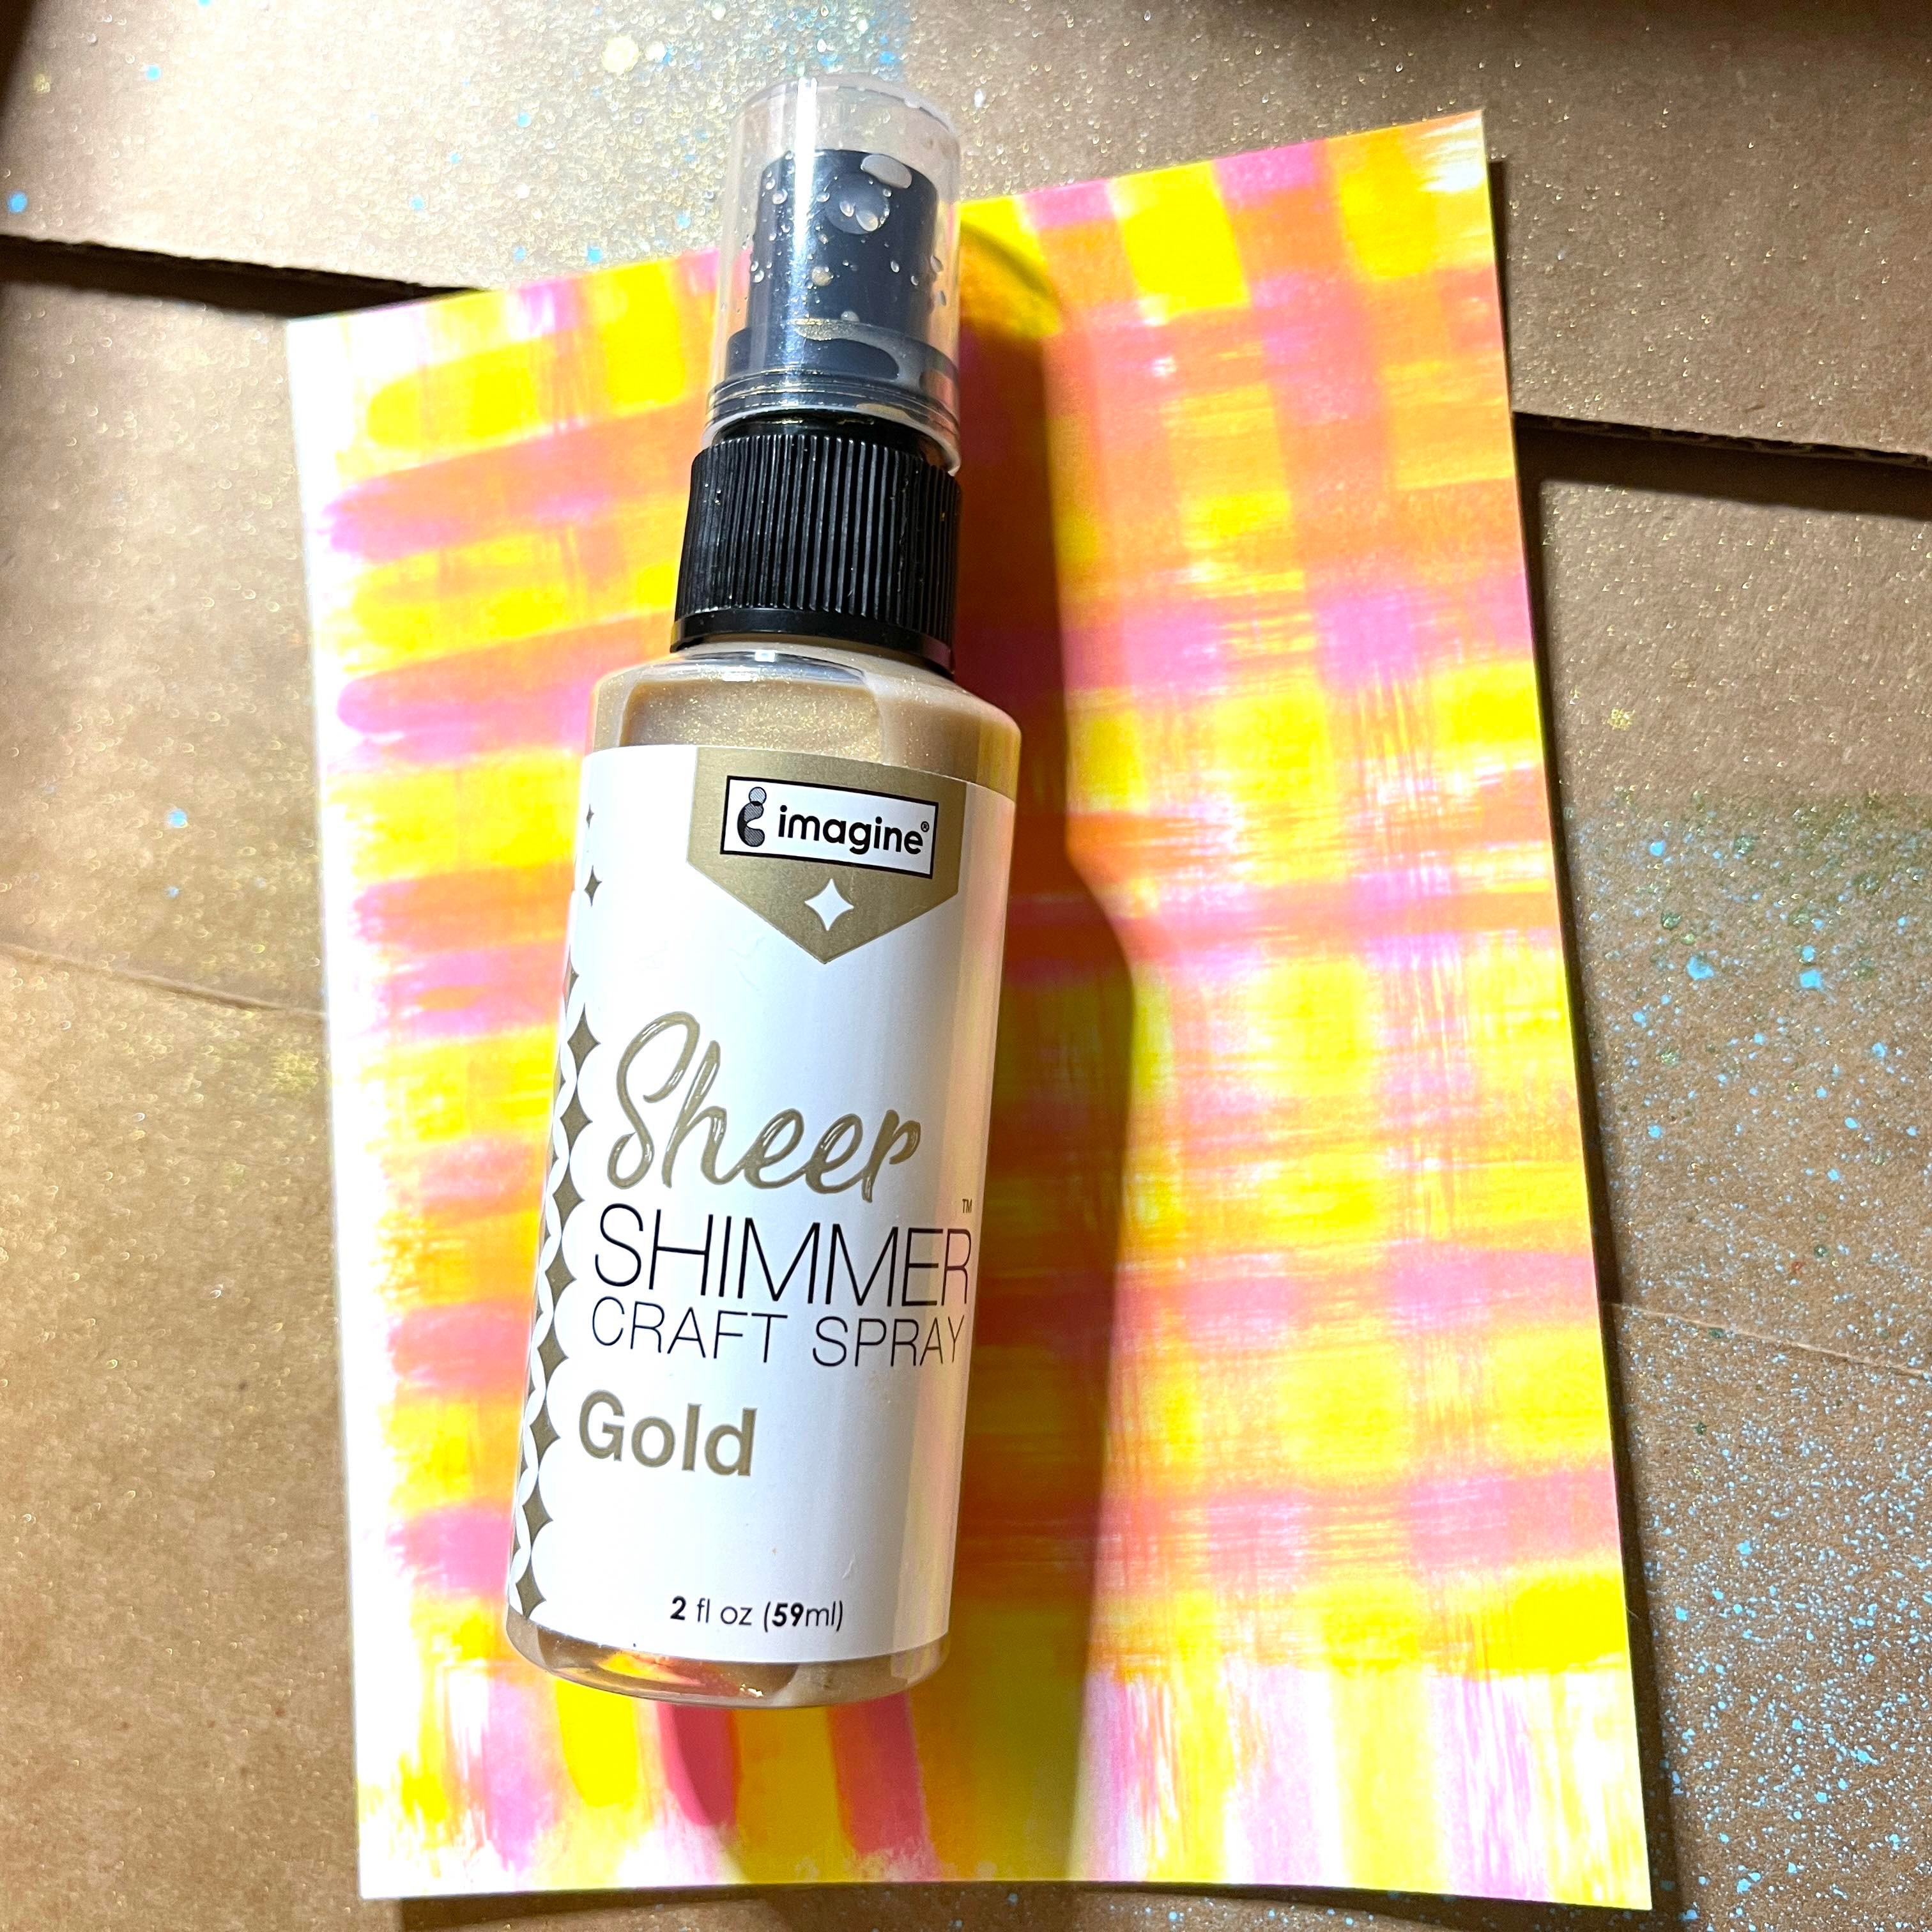
Step 4
Time to get messy again! We will spray Sheer Shimmer Spray in Gold all over the panel. I use an old box and lay the panel inside. This contains the spray a bit. The sparkle of these sprays is so pretty and available in so many colors!
.
Step 5
I also unscrewed the top of the Shimmer Spray and splattered some random spots. I splattered some small spots using metallic watercolor paint.
Step 6
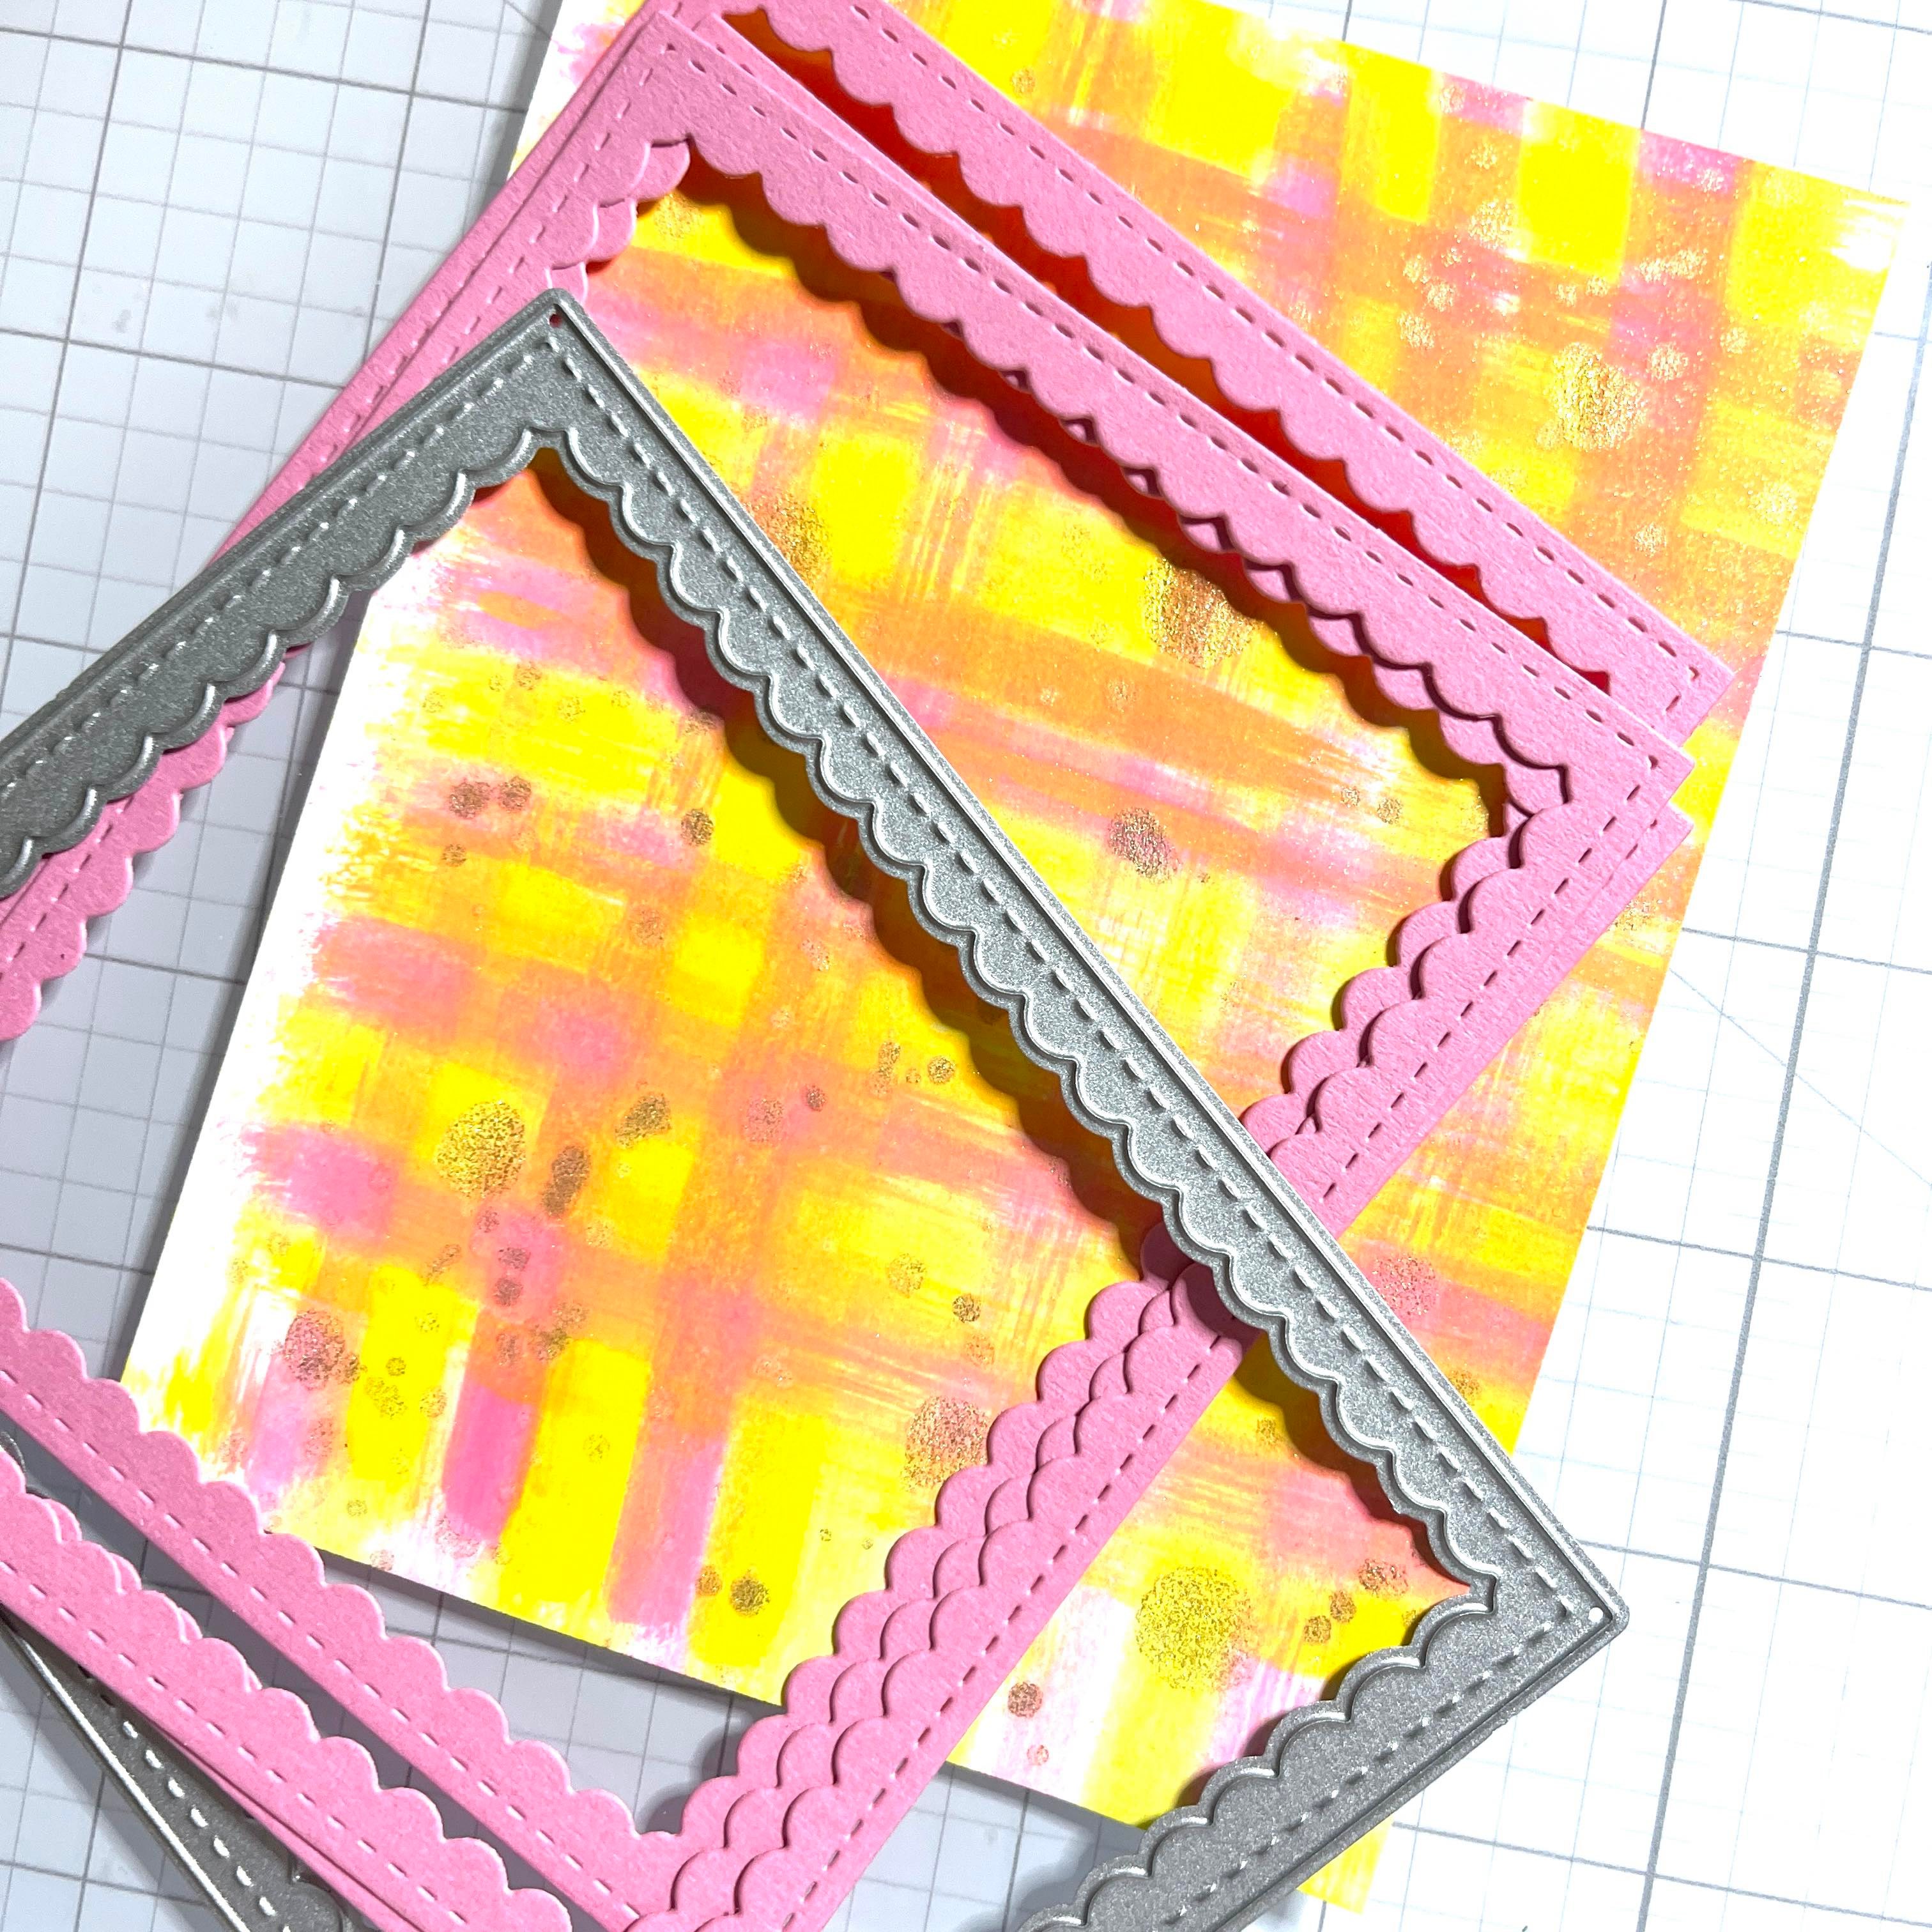
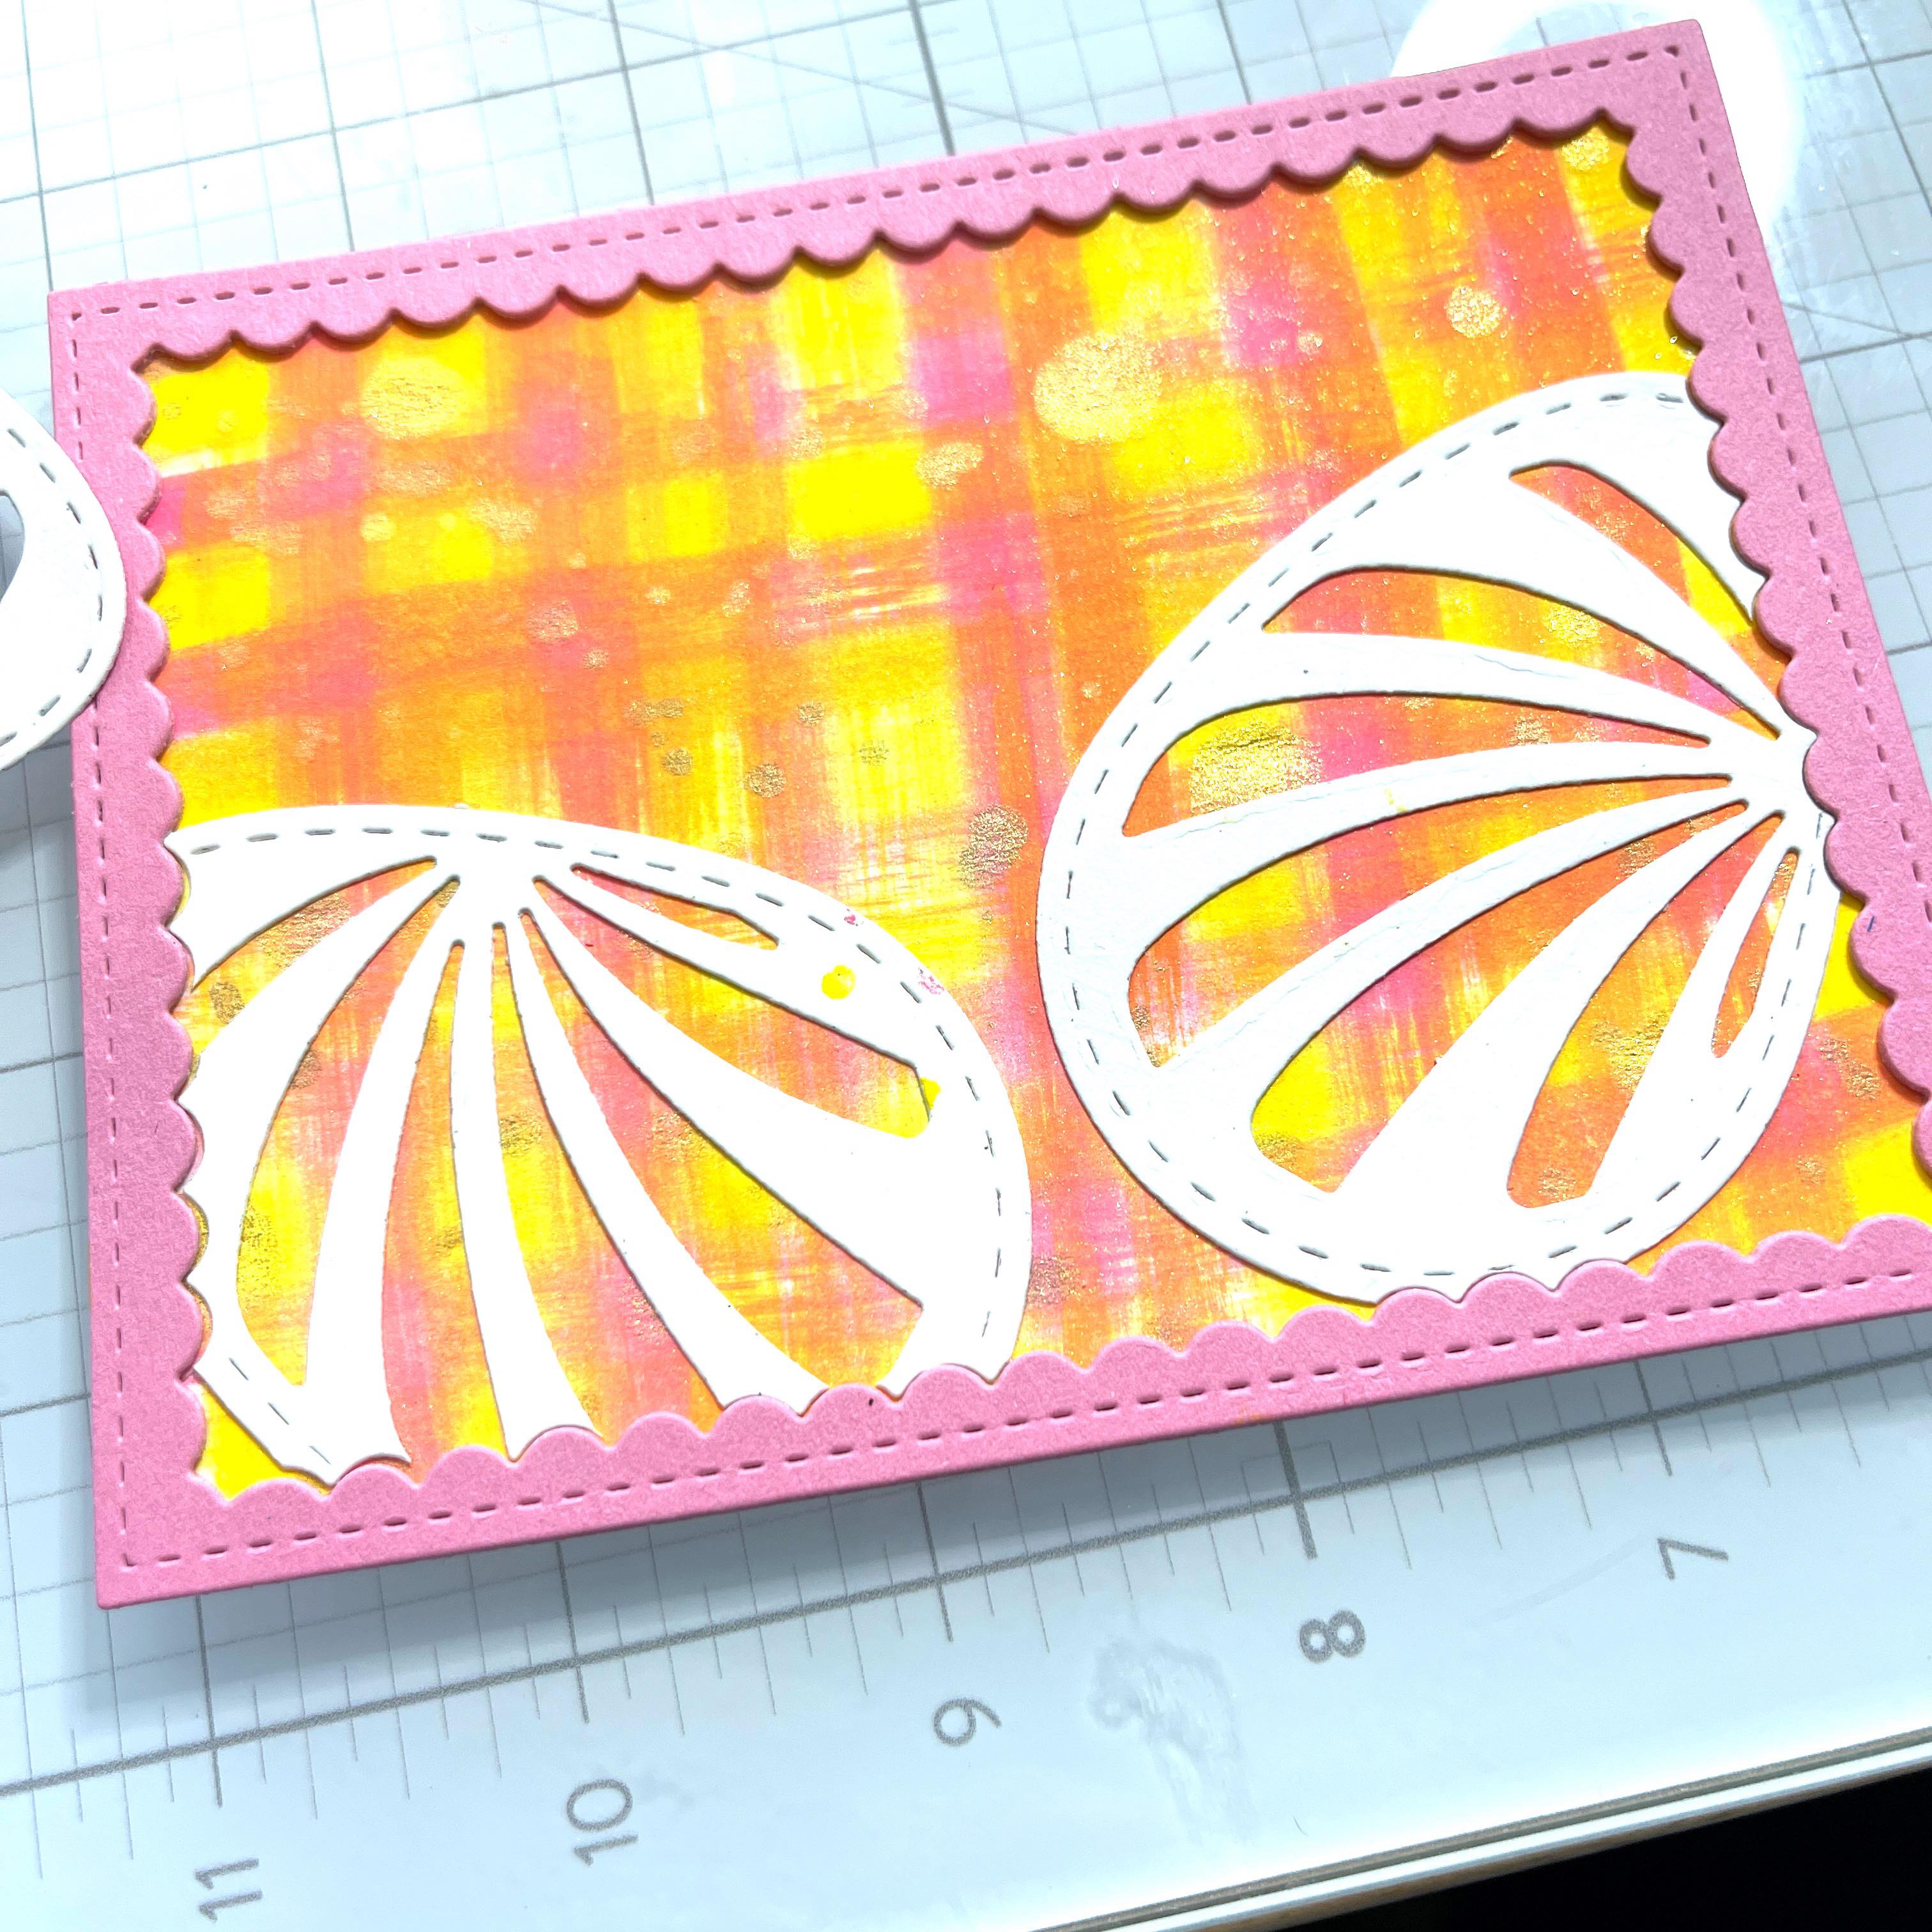
Next, I cut some scalloped frames and glued them together with On Point Glue. I used a coordinating pink card stock. Trim the background panel to fit behind the frame and adhere with On Point Glue from Imagine Crafts.
Step 7
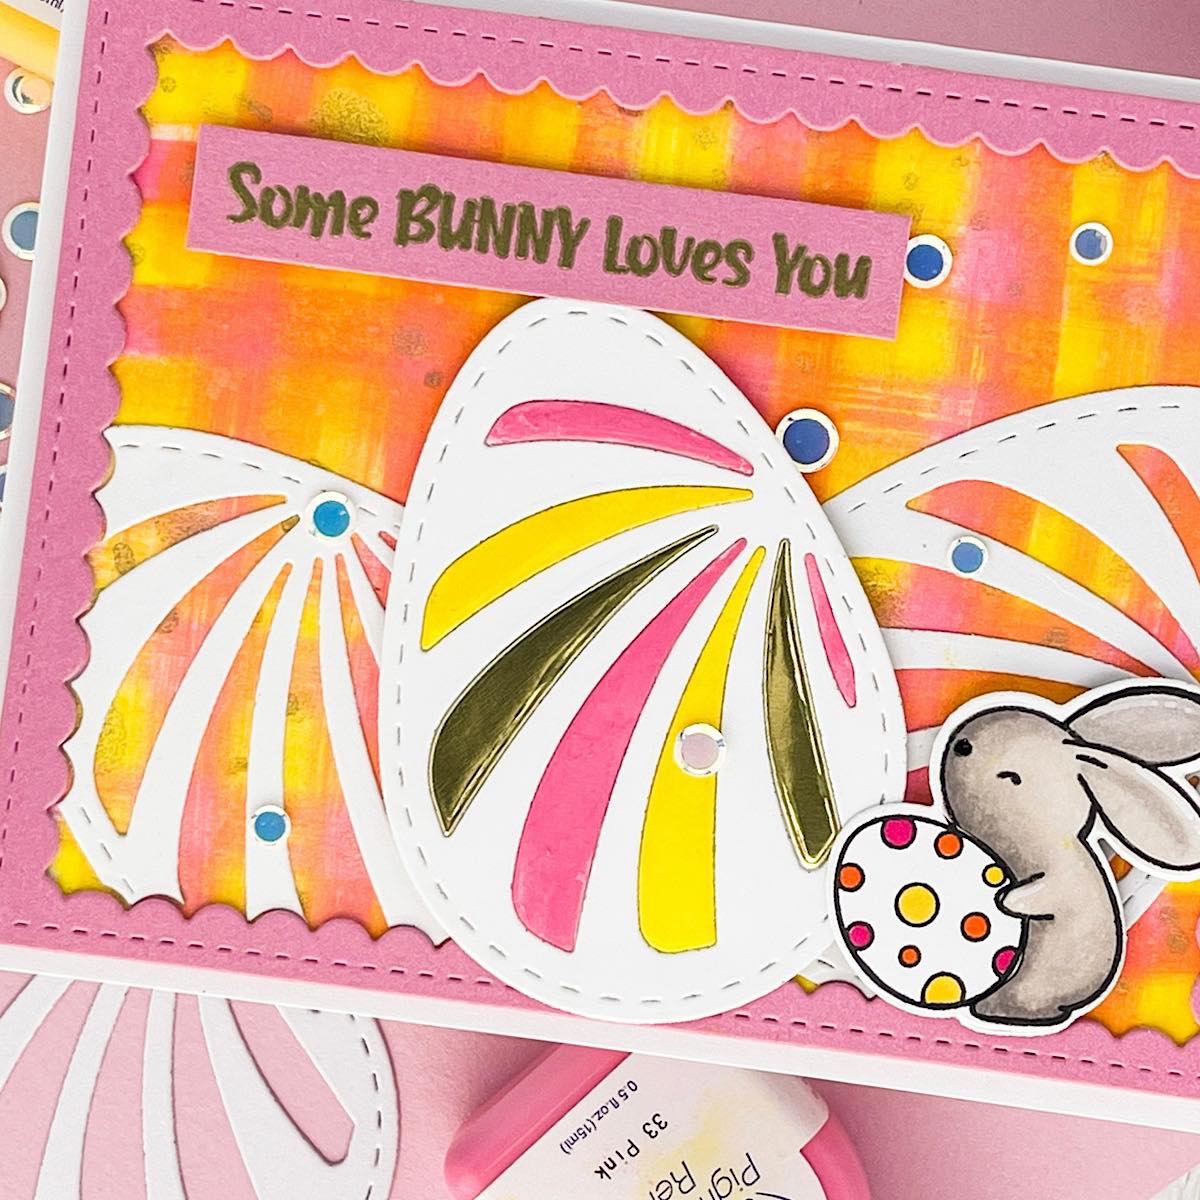
I die-cut some an Easter Egg I had in my stash several times. I used the scalloped frame to die-cut the edges so they would fit perfectly against the frame. I also cut an additional egg to use as the main focal point.
Step 8
I traced the actual die and cut a solid egg out. I adhered this behind the main egg and adhered with glue. I took the insides of the die cut and just painted some of the pink and yellow refill ink on alternating stripes I also added 2 gold stripes from a metallic card stock.
I stamped, colored and die-cut a cute bunny. I used alcohol markers but any coloring medium will work. I stamped the Easter sentiment on the same pink card stock. I used VersaMark Ink, covered with gold embossing powder and heated. The sentiment, main egg and bunny are popped up with foam tape. The entire panel is added to a horizontal folded A2 card base with foam tape as well. The last thing I did was add a few confetti sequins!
I hope you enjoy this card and the tutorial. Thanks for stopping by I appreciate all of you! Please head over to the Imagine Crafts website to see all the beautiful products. Here is the link IMAGINE CRAFTS.
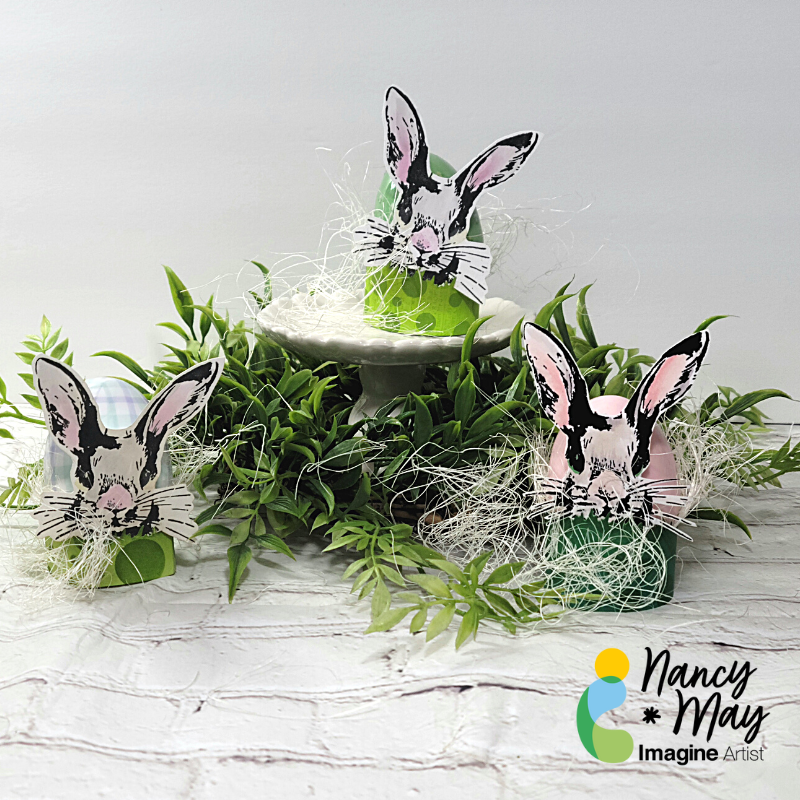
Hey y’all. I am going to share how you can create simple Easter egg holder rings that you can use to create an Easter display to match your style, your décor, etc. The sky is the limit! Let get to it!
~Nancy
==============
Skill: Beginner (but adaptable to more advanced learners)