Thanksgiving Card Tutorial: Ink Blend Directly on Your Stamps

By Katy Ingram

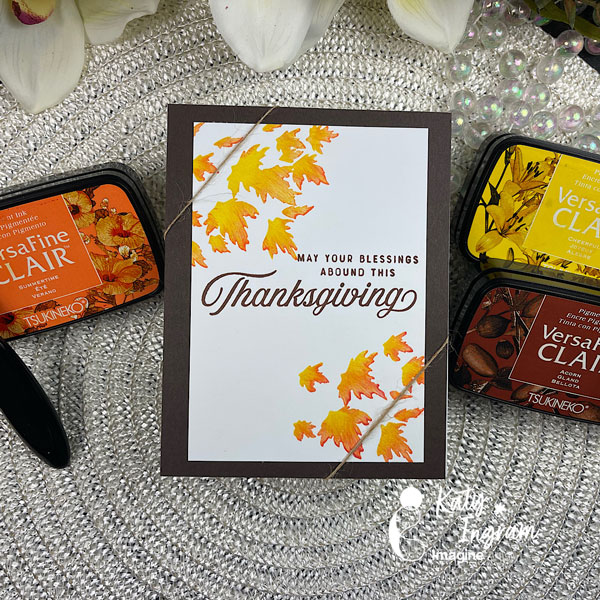
Hello Friends! Katy here with another quick project. In today’s video I create a simple Thanksgiving card and I share with you an easy way to ink blend directly on your stamp. This is a great technique to use on your silhouette stamps and a great way to change up the color from just basic black.

Video has all the details. Thanks for watching.

Skill: Beginner, Intermediate
Time: 15 minutes 

Art Supplies

Imagine Products

• VersaFine Clair
– Summertime
– Cheerful
– Strawberry
– Acorn
• On Point Glue 

Other Products Used

• The Greetery Autumn Sketches stamp set
• White Cardstock
• Brown Cardstock
• Twine
• Stamp positioner tool
• Skinny detail blending brush

Make a See-Through Thanksgiving Card

By Tracy Fear

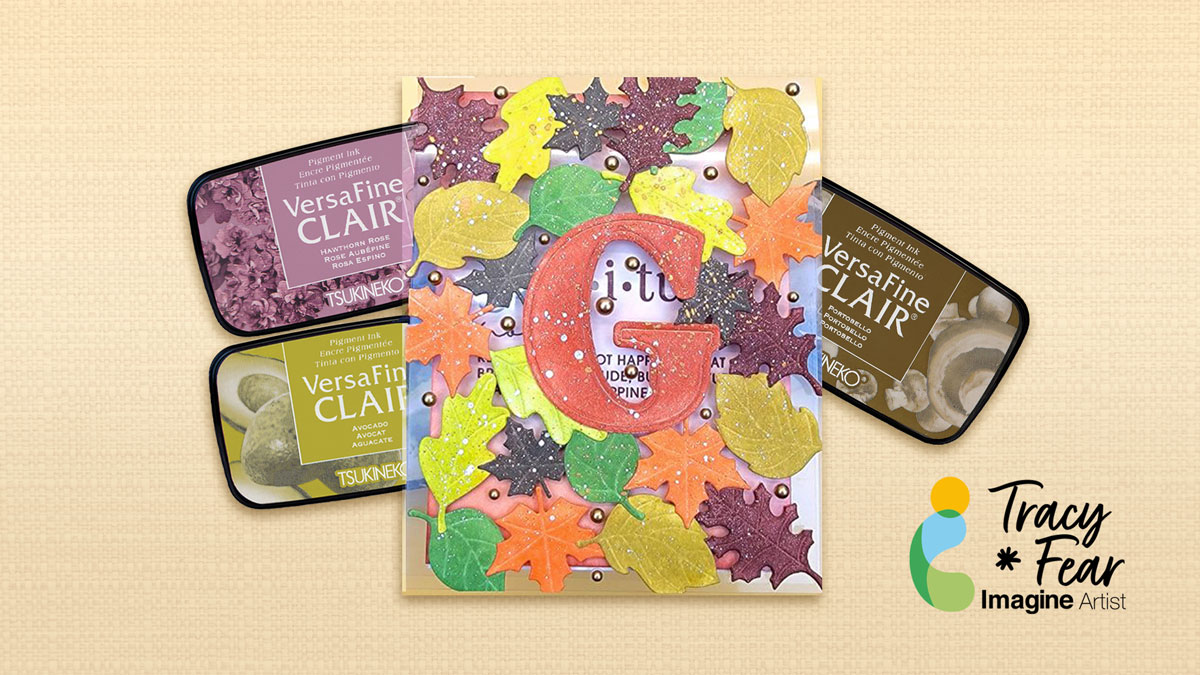
Hello Friends! Today we are going to have some fun and create a see-through Thanksgiving card with a sort of mosaic created from die cut leaves on a clear card base.

Tracy

Skill: Intermediate
Time: 90 Minutes

Art Supplies

Imagine Products
VersaFine Clair Acorn, Portobello, Avocado, Summertime, Golden Meadow, and Cheerful

Other Products Used
Scrapbook.com Stamps and die set Gratitude and die set Autumn Leaves
• Gold Flatback Pearls
• PVA Adhesive
• Leaf shaped die cuts
• Sentiment Stamp
• Die cut machine
• 100lb white paper
• Stencil Brushes or blending brushes
• Flatback Pearl Embellishments
• Adhesive
• Paint for splattering

ALTERNATIVE PRODUCTS THAT CAN BE USED TO RECREATE SOMETHING SIMILAR
Any Inks any combination of background stamps, dies, and feature stamps

Watercolor Technique for a Winter Wedding Card Using VersaFine Clair

By Katy Ingram

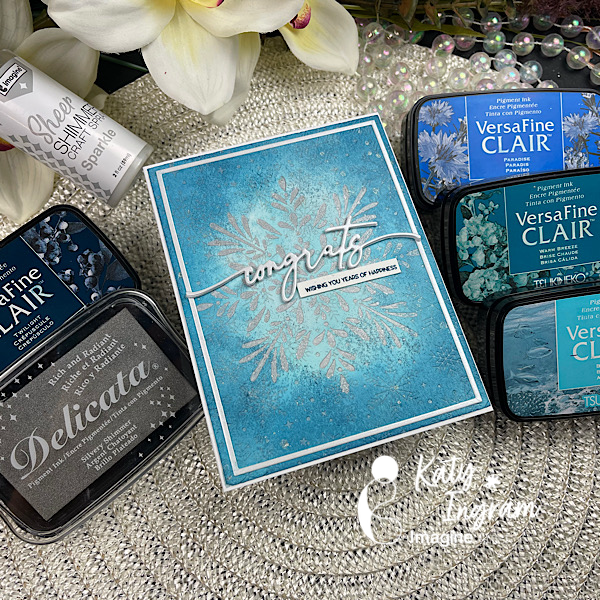
Hello Friends! Katy here with another project. In today’s video use my VersaFine Clairs with isopropyl alcohol to create a watercolor look. With this technique I created a wintry wedding card, but this will lend well to a birthday or holiday card as well.

Skill: Beginner, Intermediate
Time: 15 minutes

Art Supplies

Imagine Products

VersaFine Clair – Bali Blue, Warm Breeze, Paradise and Twilight
• Delicata Ink – Silvery Shimmer
• Brilliance – Starlite Silver
• Sheer Shimmer Spray – Sparkle
On Point Glue

Other Products Used

• The Greetery Sentiment Suite Love Stamp Set
• The Greetery Congrats Die
• White Cardstock
• Hot Pressed Watercolor paper
• Stamp positioner tool
• Isopropyl Alcohol

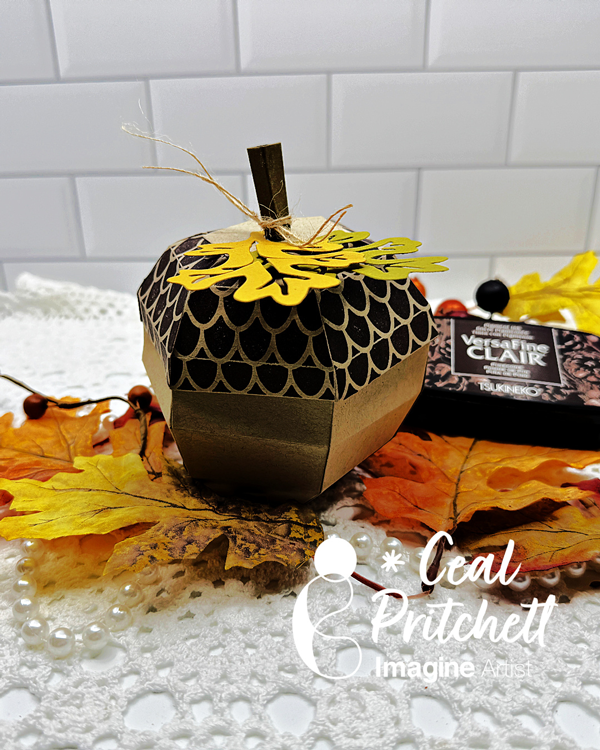
How to Make a Fall Acorn Box

By Ceal Pritchett

Hello crafty friends!
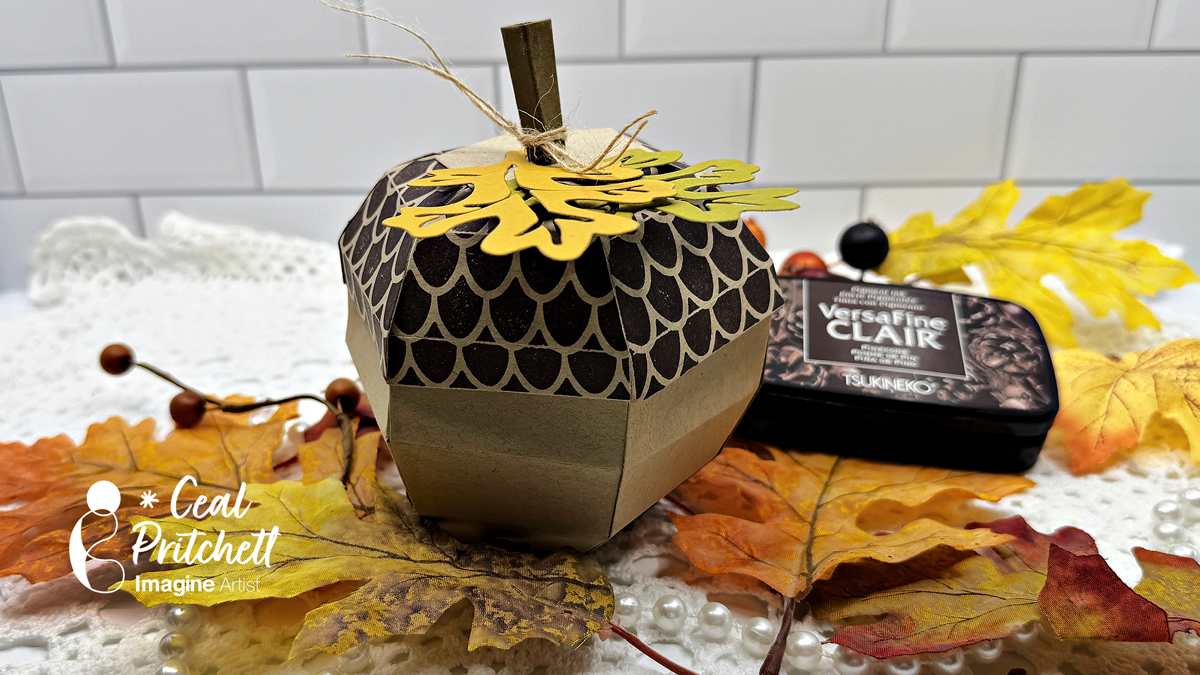
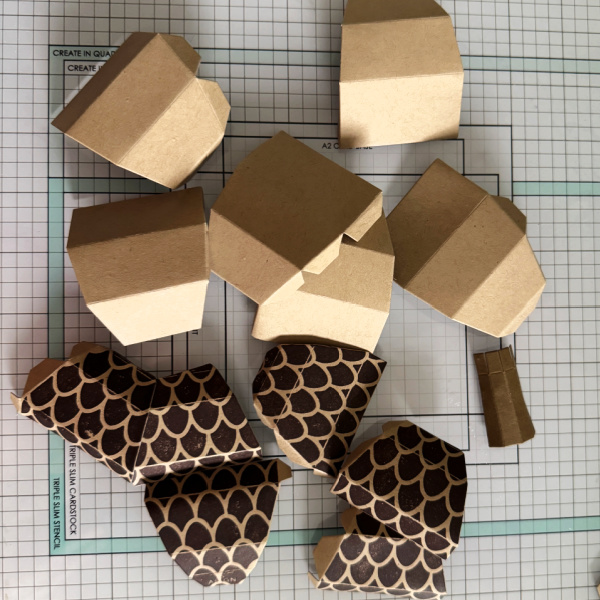
I’s Ceal, here. Today I am sharing a tutorial on how to make this acorn gift box.

Skill: Intermediate to Advanced
Time: 45 Minutes

Directions:

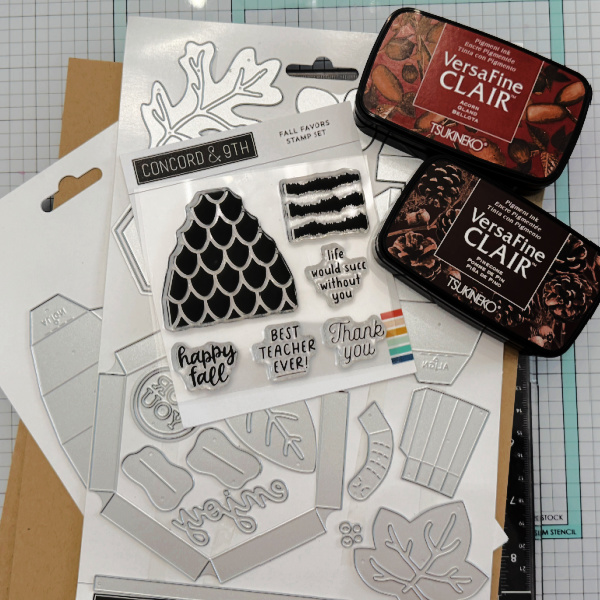
Gather your supplies. For this project you will need the Fall Favors Box die set and the coordinating stamp set. A dark brown ink (VersaFine Clair used here), Kraft and other colors of cardstock.

Step 1:
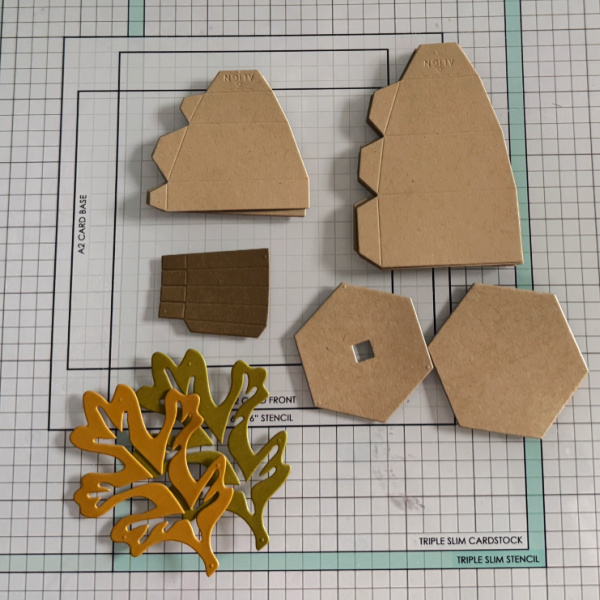
Out of kraft cardstock, cut six pieces each of the small (top) and large (bottom) of the acorn, along with the top and bottom hexagon pieces. Cut the stem out of a dark brown cardstock and the leaves out of your color of choice.

Step 2:
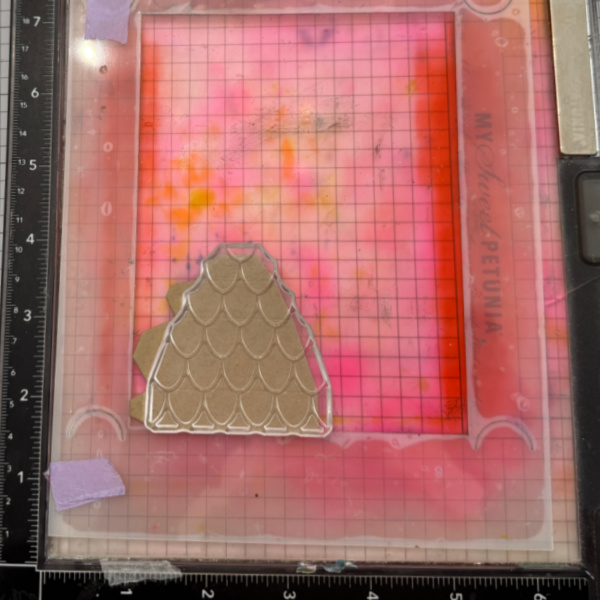
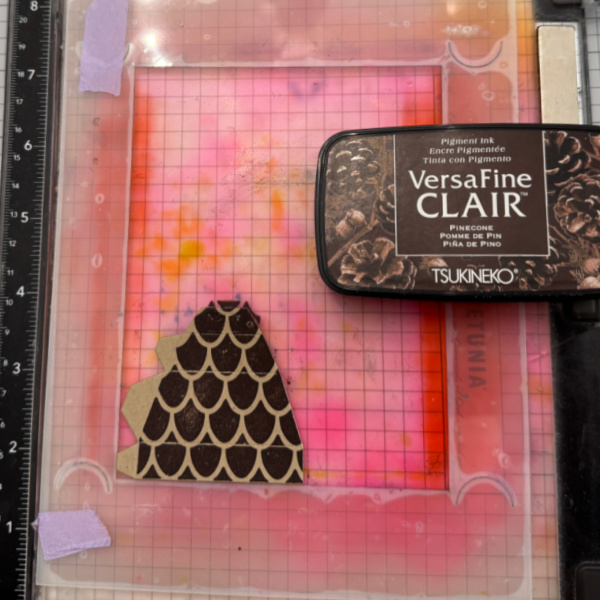
Line up the stamp that adds the detail to the acorn top and then stamp all six pieces with a dark brown ink, VersaFine Clair Pinecone used here.

Step 3:
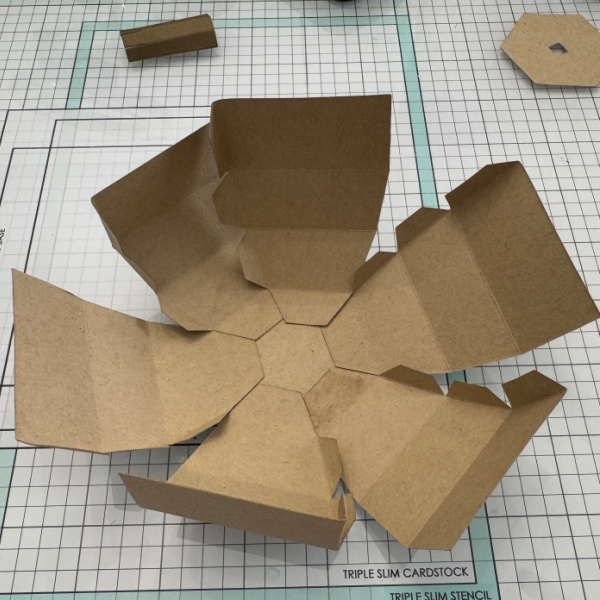
Crease all of the score line on all the die cut pieces. Do not use a bone folder, just simply crease them on the score lines.

Step 4:
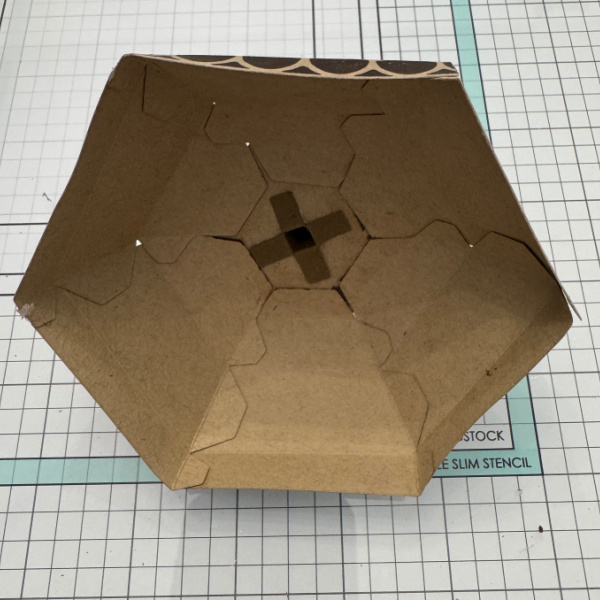
Align the large (bottom) pieces of the acorn on the hexagon as shown. Tip: I used liquid glue to allow me to move them as needed.

Step 5:
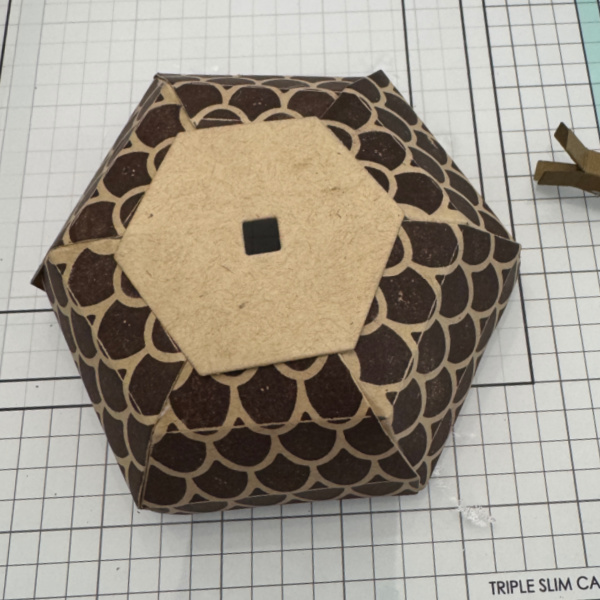
Align the small (top) pieces of the acorn on the hexagon with the square hole in it.

Step 6:
Fold the stem piece on the score lines and add h=glue to create the stem and then thread it through the square hole on the top. After threading it through the hole, fold back the tabs and glue down as shown.

Finish the project by adding the leaves and some twine.

Supplies:

Imagine Products

• VersaFine Clair: Nocturne
• VersaFine Clair: Pinecone
• On Point Glue

Other Products
• Fall Favors Box Dies – Concord & 9th
• Fall Favor Extras Dies – Concord & 9th
• Fall Favors Stamp Set – Concord & 9th

Trick or Treat… Let’s Made a Halloween Card

By Anna Escalada York

I’ve been really enjoying Halloween cards lately and it was so fun to use a bunch of sprays to make this one.

Skill: Intermediate
Time: 1.5 hours

Directions:
Step 1:
Die cut all of the pieces for the die cut pumpkin out of watercolor paper and then spray the two bottom pieces with Rich Cocoa Fireworks! Craft Spray (bottom-most layer) and Tangelo! Craft Spray (second-largest layer) and let dry.

Step 2:
Spray the other three die cut pieces: Dandelion Fireworks! Craft Spray on the middle die cut, Gold Sheer Shimmer Craft Spray on the upper part of the pumpkin’s body, and Bamboo Leaves Fireworks! Craft Spray for the pumpkin stem. Allow all the layers to dry.

Step 3:
Glue the layers of the pumpkin together and then ink blend the edges of the pumpkin with Nocturne VersaFine Clair ink and a sponge dauber.

Step 4:
Ink blend the pumpkin stem die cut with Nocturne VersaFine Clair ink and a sponge dauber.

Step 5:
Spray the whole pumpkin die cut with more Gold Sheer Shimmer Craft Spray and set aside to dry.

Step 6:
Spray the Dandelion and Tangelo Fireworks! Craft Spray onto a piece of acetate packaging and use it to watercolor smoosh a panel of watercolor paper. After the spray dries, die cut it with an A2-sized die cut.

Step 7:
Splatter Rich Cocoa Fireworks! Craft Spray onto the background panel with the stick from the bottle’s spray nozzle. Then use a Nocturne VersaFine Clair ink to partially stamp the panel as well as ink blend the edges. Heat emboss the cobwebs and ink blended edges with clear embossing powder

Step 8:
Press the Nocturne VersaFine Clair ink pad onto a small piece of watercolor paper to color it black.

Step 9:
Die cut the now black piece of watercolor paper to create the sentiment and spray it with Gold Sheer Shimmer Craft Spray.

Step 10:
Die cut a piece of vellum with the sentiment’s shadow and glue both layers together.

Step 11:
Assemble the card. Glue the pumpkin’s stem and the rest of the pumpkin together and glue it approximately in the center of the panel. Glue the sentiment on the right side of the pumpkin. Then add orange and yellow sequins onto the card. To finish the card, glue the whole card panel onto an orange A2-sized card base.

Art Supplies

Imagine

Fireworks! Craft Sprays- Bamboo Leaves, Dandelion, Rich Cocoa and Tangelo
Sheer Shimmer Craft Spray – Gold
VersaFine Clair ink – Nocturne
Sponge Dauber

Other

Pink and Main – die set – Notched Corners
Pretty Pink Posh – die set – Fringe Pumpkin
Simon Says Stamp – die cut – Trick or Treat 2
Simon Says Stamp – sequin mix – Autumn Leaves (retired)
Tailored Expressions – stamp – Spiderweb Cling & Clear Combo
A2-sized orange card base
Clear Embossing Powder
Watercolor paper
Die cutting machine Scissors
Glue

Create a Mini Halloween Bat Treat Box 

By Jessica Lin

Skill: Beginner
Time: 20 minutes

– Hi everyone! It’s Jessica here. Halloween is right around the corner and today I have a really quick & easy treat box idea for you. If you are interested in making mini treat boxes and dressing them up for Halloween, Christmas, or Easter, just keep reading!

Step 1:
Die cut a piece of Mint Macaron cardstock with Design a Treatbox die from Stampin’ Up. Fold along the score lines to create a mini treat box.

Step 2:
Die cut a piece of black cardstock with the bat wing die from the same set. Then spritzed it with a generous layer of Sheer Shimmer Craft Spray in Frost. The shimmer spray really adds a whimsical touch to the bat wings! You can compare it with the die cut in the back without the Sheer Shimmer Spray. Doesn’t it look so different?

Step 3:
Then I added a smiley face to the tab of the treat box with irRESISTible Pico Embellisher. The fine-tip nozzle was so easy to use to create fine details.

Step 4:
Die cut the box labels with mint patterned paper and white cardstock. The “trick or treat” sentiment is from Mama Elephant’s Meowlloween Extras set. I stamped it with Brilliance Starlite Black ink pad.

Step 5:
Since this is a mini treat box (holds 2 Hershey kisses), no tape or glue is required for the box assembly. Simply fold along the crease lines and hold it together with the flaps’ openings. This no-glue project is ideal for mass production and you could create many party favors in a short time!

Once the box is assembled, adhere the label dies to the front and slide the bat wings die between the top tabs. You could also create Christmas or Easter treat boxes with the other dies in this set.

Imagine Supplies:

Other Supplies:

  • Stampin’ Up! – Dies – Design a Treatbox
  • Stampin’ Up! – Tool – Mini Cut & Emboss Machine
  • Mama Elephant – Stamps – Meowlloween Extras