Create a Copper and Teal Father’s Day Steampunk Card

by Iris Rodriguez

Create a Copper and Teal Father's Day Steampunk Card

Mother’s Day is right around the corner, but I thought I’d get a head start on a steampunk/industrial Father’s Day card. Depending on the mom – it could be for either! These projects are always fun because you get to make things look grungy and metallic with inks, embossing powders and embellishments. By altering corrugated cardboard with different craft inks, you can transform scraps into a cool background. See how I made it!

Skill: Intermediate
Time: 1.5 hours

Directions


Step 1

Select a piece of corrugated cardboard.


Step 2

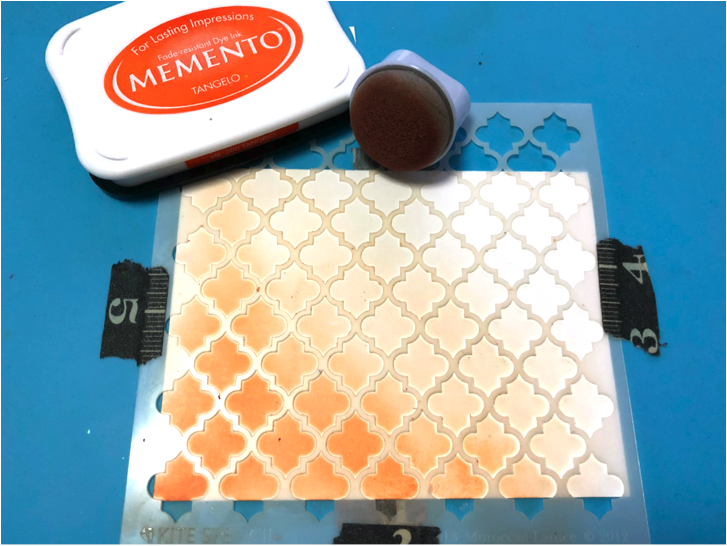
Spray Ink Potion No. 9 onto the corrugated cardboard. This helps the ink spread evenly and reduces harsh spray splotches. Spray Walnut Ink on the corrugated cardboard randomly. The ink will seep into the crevices. This imitates a timeworn metal look. To remove ink from the crevices use a dry brush to lift up the ink, then dry onto a paper towel. Dry paper.


Step 3

Rip the top and bottom edges.


Step 4

Ink the corrugated cardboard with Champagne Delicata and Turquoise Gem VersaMagic inks on the raised surface. The Turquoise Gem ink imitates a patina look while the Champagne ink imitates bits of metal shining through. Dry paper.


Step 5

Ink the edges with the Rich Cocoa Memento Luxe ink. Dry paper


Step 6

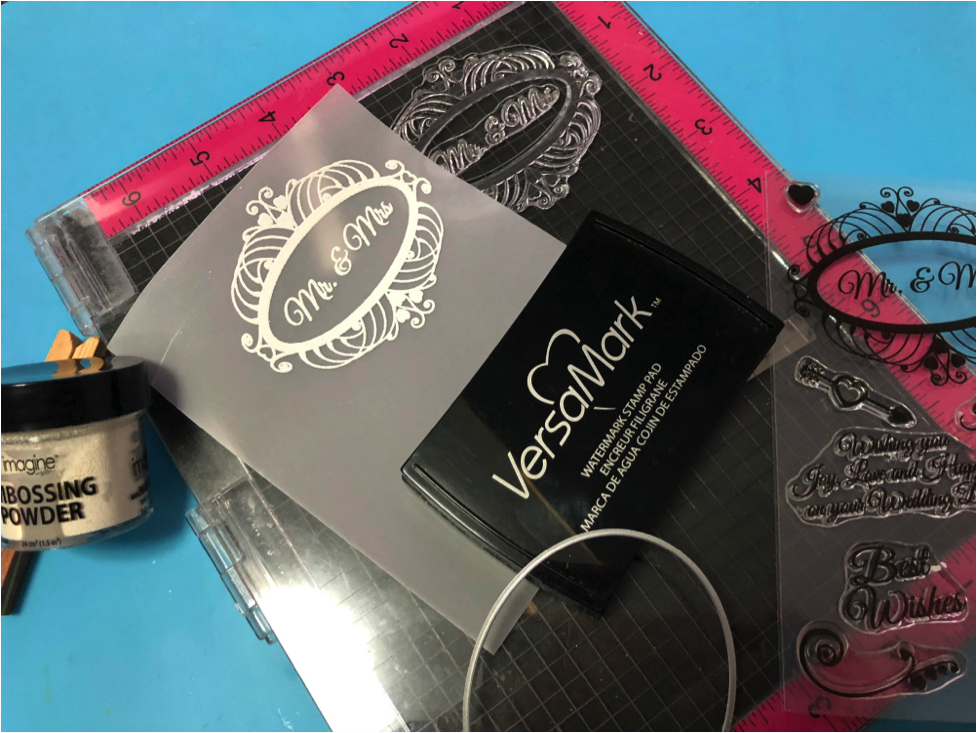
Ink gears with VersaMark ink, add Imagine’s Embossing Powder in Gold and heat set. Repeat this step using the Celestial Copper and Silver embossing powders.


Step 7

To vary the look of the gears, create a patina and copper gear. Ink the gear with Turquoise Gem VersaMagic ink.


Step 8

Add Imagine’s Embossing Powder in Copper on random areas.


Step 9

Add Imagine’s Embossing powder in Clear to the rest of gear and heat set


Step 10

Ink the card’s edges with Turquoise Gem VersaMagic Ink. Dry paper. Ink small areas randomly with the Celestial Copper Delicata ink.


Step 11

Adhere corrugated cardboard front to the card.


Step 12

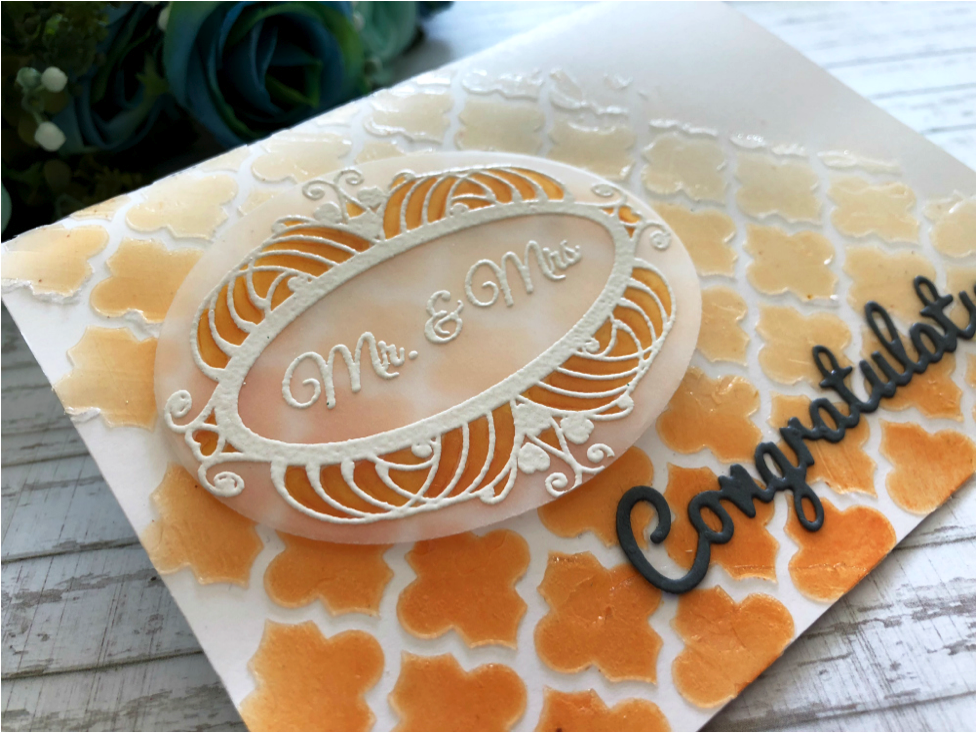
Adhere nailheads, studs, and gears. Stamp a “Happy Father’s Day” sentiment and cut out into a rectangle shape. Add small metal studs on the four corners of the sentiment card and mount to the front of the card. Essentially the card is finished at this point but you can continue to add little details to make it your own! Happy grungy cardmaking!

Supplies

Imagine
Other
  • Cardstock
  • Corrugated cardboard
  • Creative Embellishments – Chipboard Gears (1, 1.25. 1.5 inches); ‘Loose Parts’ set
  • Nailhead and stud metal embellishments
  • Happy Father’s Day sentiment stamp

Watch a Video Tutorial on How to Watercolor a Beautiful Yellow Rose

by Arjita Sepaha Singh

Do you have a friend who you would like to show appreciation? Water coloring stamped images is my favorite cardmaking style and I am always on a hunt for new mediums to use for the water colored effect. In this video, I used Altenew stamps, Gold embossing, and Fireworks Shimmery Craft Sprays to create this beautiful yellow rose friendship card and it turned out very pretty. This is a great crafting project for a best friend gift or to show someone you care.

Supplies

Imagine
Other
  • My Sweet Petunia – Misti Stamping Tool
  • Powder tool
  • Heat gun
  • Watercolor paper
  • Altenew – Floral Stamp set

Create a Collage Style Mother’s Day Card

by Steph Ackerman

Create a Collage Style Mother's Day Card

I love background stamps and find the collage style stamps provide amazing opportunities to create with. I have also found that collage style stamps can be tricky to color. For this Mother’s Day card, I used the VersaMagic DewDrops to color in detailed ways on the stamp. The inkpad’s top wedge makes it a perfect tool for this technique.

Skill: Intermediate
Time:  1.5 hours

Directions


Step 1

Ink the entire stamp with VersaMagic in Thatched Straw. Ink over the roses with VersaMagic in Purple Hydrangea and Aegean Blue. Ink over the leaf sprays with VersaMagic in Spanish Olive.


Step 2

Place the inked stamp on white cardstock and press evenly.


Step 3

Pour Imagine Embossing Powder in Clear over the entire image and heat set.


Step 4

Cut the panel to size and ink the edges with VersaMagic in Niagara Mist.


Step 5

Stamp sentiment on white cardstock using VersaMagic in Midnight Black and emboss with Imagine’s Embossing Powder in Clear.


Step 6

Mat stamped panel with green cardstock. Adhere to a purple card with foam adhesives. Die cut the sentiment using a circle die. Die cut a larger circle from purple cardstock. Place the sentiment on the card, cutting off the right edge.


Step 7

Repeat steps 1 – 5, cutting the panel into a tag shape. Mat with green cardstock cutting it into a tag shape.


Step 8

Die cut sentiment using a circle die. Die cut a larger circle from purple cardstock. Place the sentiment on the tag, cutting off the right edge. Punch a hole in the tag and add ribbon.

Supplies

Imagine
Other
  • Cardstock – white, green, purple
  • JustRIte Stampers – Background Stamp
  • Joy Clair – “Happy Mother’s Day” sentiment stamp
  • Spellbinders – Circle dies
  • May Arts ribbon

Make a Purple “Good Vibes” Shimmery Greeting Card

by Jowilna Nolte

Make a Purple "Good Vibes" Shimmery Greeting Card

Creating subtle interest on cards and other projects is easy with the amazing products from Imagine and Tsukineko. I have been experimenting and creating purple background ombre effects using VersaFine Clair and Memento Luxe ink pads as well as some older favorites like Creative Medium and All-Purpose Inks. Take a look at how to make this card.

Skill: Beginner
Time: 30 minutes

Directions


Step 1

Use a jumbo dauber and blend a pattern through a stencil using Memento Luxe Sweet Plum.


Step 2

Continue the same pattern using a darker shade of ink like Memento Luxe Elderberry.


Step 3

The blending creates a perfect ombre effect going from light to dark. Did you know that Memento Luxe has superior blending qualities? It makes for the most amazing blended effects with its creamy effortless application.


Step 4

Add a slight shimmer to the blended effect by adding Creative Medium in Shimmer over the blended pattern.


Step 5

To create a shade of purple, mix a couple of drops of All-Purpose Ink in Orchid Odyssey into the Creative Medium.


Step 6

Paint the colored Creative Medium over the pattern and leave to dry. The end result is a subtle shade of purple removing the bright white background, but also adding a beautiful shimmer to the card.


Step 7

Use VersaFine Clair Monarch and stamp the “Good Vibes” sentiment onto white cardstock and cut it out.


Step 8

Stamp the sentiment again but directly onto the stenciled background and sprinkle with glitter embossing powder. Heat set the embossing powder to give a beautiful shimmering sentiment on the shimmering background.


Step 9

Layer the stamped sentiment slightly off-set from the embossed sentiment onto the card using foam tape for added dimension. The embossed sentiment below makes the stamped sentiment really stand out and creates loads of interest. Add irRESISTible Neon Purple splats to finish off your card.

Supplies

Imagine
Other
  • Cardstock – White
  • Kaisercraft – Good Vibes stamp
  • Sewing machine
  • Jowilna Nolte – stencil
  • Embossing Powder
  • Heat Gun
  • Paintbrushes
  • Palette
  • Pipette

Express Love and Happiness in this Wedding Congrats Card

by Steph Ackerman

With the onset of spring, thoughts can turn towards weddings. When creating a wedding card, I love to incorporate the colors in the wedding party. Pairing the bold look of VersaFine Clair Inks with the soft shimmery look of Delicata Inks creates a bold and dramatic statement.

Skill: Beginner
Time: 1 Hour

Direction


Step 1

Cut white cardstock to fit an embossing folder and run the paper and folder through a die cut machine. Mask off the top of the panel and apply Shimmery Silver Delicata Ink across the bottom half of the embossed by skimming the inkpad over the papers surface.


Step 2

Mask the bottom of the panel and apply Fantasia VersaFine Clair Ink to the top half of the embossed panel.


Step 3

Mat embossed panel with purple cardstock. Wrap with white twine. Mat with silver cardstock.


Step 4

Stamp phrase with Fantasia VersaFine Clair and emboss with Clear Embossing Powder. Using oval nesting dies, eie cut and ink the edges with Shimmery Silver Delicata Ink. Mat with a larger die cut in purple and add to card with foam adhesives for dimension.


Step 5

Adhere the panel to a purple card with foam adhesives. Use On Point Glue to adhere half pearls to some of the flowers on the embossed panel.

Supplies

Imagine
Other
  • Cardstock – purple, silver, white
  • Embossing Folder
  • Joy Clair – Stamp
  • Spellbinders – Nesting Oval Dies
  • Die cut machine
  • Whisker Graphics – Twine
  • Pearls

Create a Beautiful “Mr & Mrs” Congratulations Card

by Martha Lucia Gomez

Create a Beautiful "Mr & Mrs" Congratulations Card

Stenciling with color and texture always makes for a stunning project. This concept is perfect for wedding cards as it keeps the look elegant and still unique. Make something special for the happy couple with just one design element and two different products: Memento and Creative Medium. Take a look at how to do it!

Skill: Intermediate
Time: 1 hour + dry time

Directions


Step 1

Secure the stencil over cardstock and using a jumbo dauber apply the Memento ink in circular motions. Try to create an ombre effect or gradient of color. Leave the stencil and paper where it is for step 2.


Step 2

Now apply Creative Medium Clear over the inked area. Not only will it add texture, but you will notice how it will intensify the color when it is dry. When you finish this step, remove the stencil immediately and wash with warm water. Let this dry completely before finalizing the card.


Step 3

On a piece of vellum stamp the wedding sentiment or image using VersaMark and White Embossing Powder. I used two images included in the stamp set Wedding Wishes by Joy Clair. Then I cut the stamped image with one Nesting Oval Infinity Die from Hero Arts and colored some details of it using colored pencils that match the Tangelo Memento ink.


Step 4

To finalize the card, paste the stamped oval using double-sided foam tape. To avoid seeing it through the vellum I put the foam under the embossed area. I also complimented the design with a Congratulations die cut word that I adhered using On Point Glue.

Supplies

Imagine
Other
  • Cardstock
  • Vellum
  • Kite – Moroccan Lattice Stencil
  • My Sweet Petunia – MISTI
  • Heat tool
  • Hero Arts – Nesting Oval Infinity Die
  • Joy Clair – Wedding Wishes Stamp Set
  • Congratulations Die Cut
  • Double sided foam tape or Dimensionals
  • Prismacolor – Colored pencils