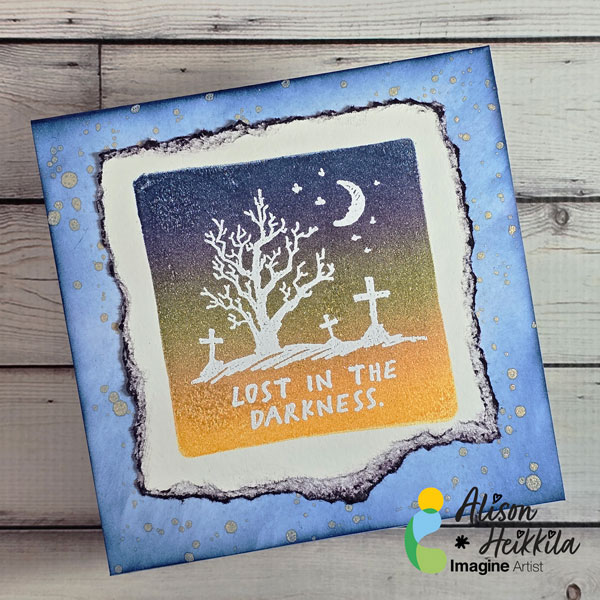
Hello! I’m Alison Heikkila. Kaleidacolor Inks come in beautiful color palettes and help you do some really fun techniques. I love to use my Kaleidacolor Inks with my Gel Press plates. In this case, we’re using one of the Petite Plates to get the look of a watercolored painting without actually watercoloring.
Skill Level: Beginner-Intermediate Time to Complete: 20-30 Minutes
*Some affiliate links are used in this post. That means that if you shop through these links, I may receive a small compensation, at no cost to you.
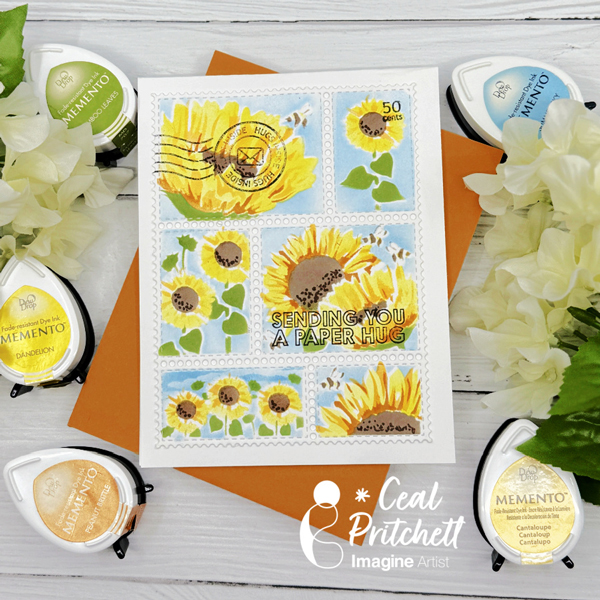
Hello crafty friends! It’s Ceal, here. Today I am sharing a card using a postage die and stencil. I love using stencils in my card making because I love using inks.
Skill Level: Beginner Time: 30 minutes
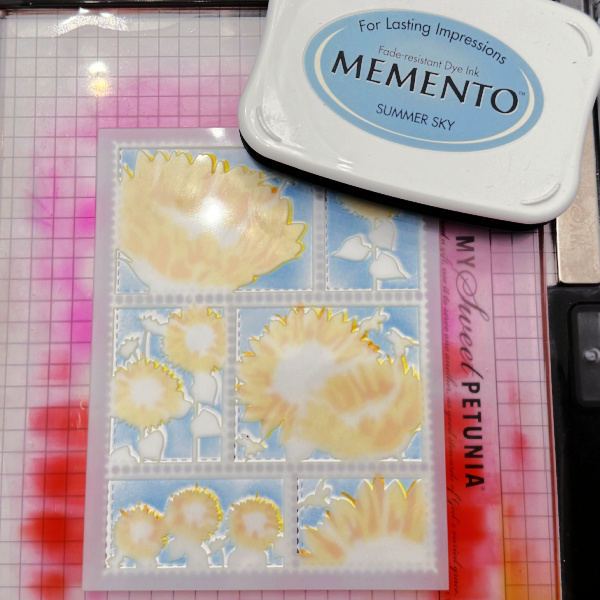
Directions: Gather your supplies. You will need several colors of ink, I used Memento inks. I used a layering stencil by The Ton and a postage stamp set also by The Ton
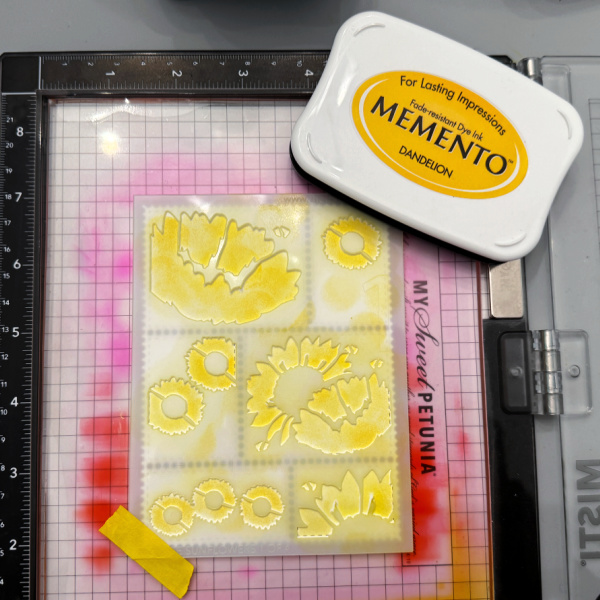
Step 1/Layer 1 Color in the layers with different colors of ink. The first layer is Dandelion, and I have added photos of the color for each layer.
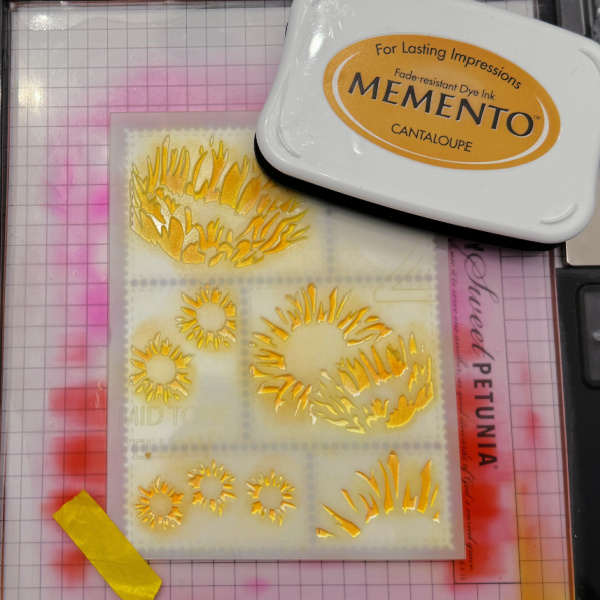
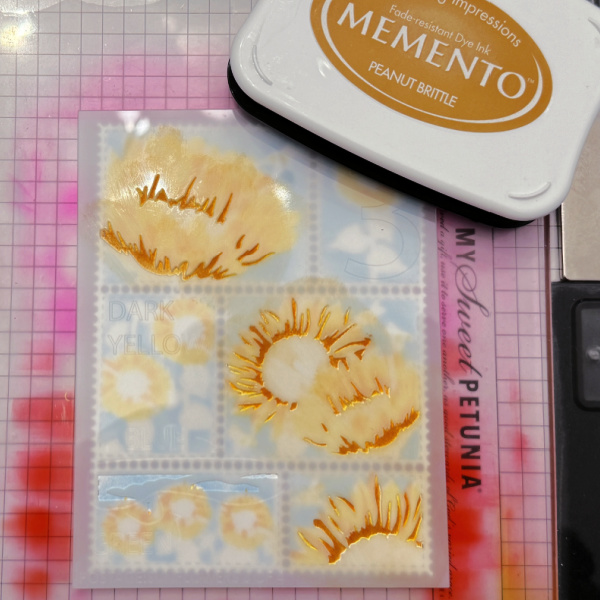
Step2/Layer 2
Step 3/Layer 3
Step 4/Layer 4
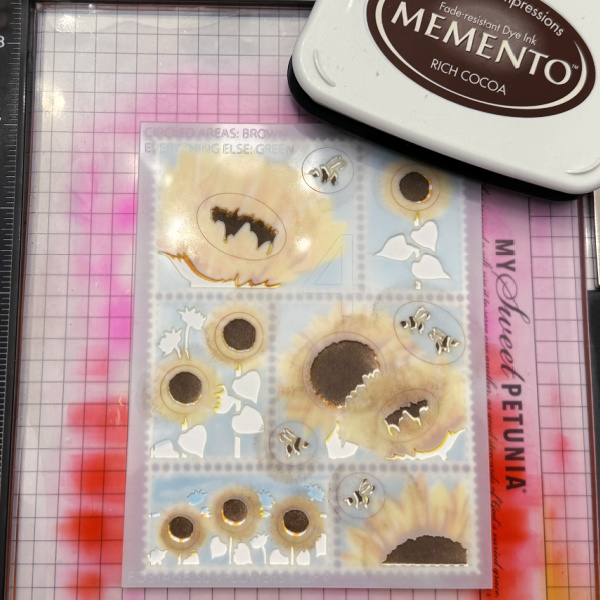
Step 5/Layer 5 using Rich Cocoa
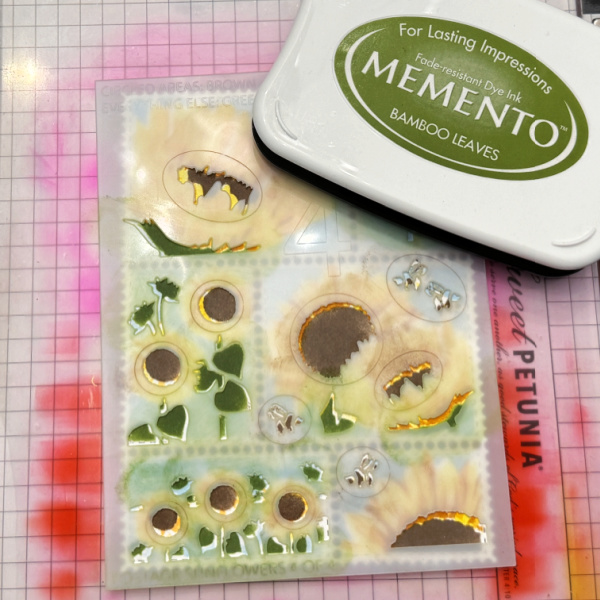
Step 6/Layer 5 using Bamboo Leaves
Step 7: Added sentiment and postage stamps. Adhere to card base.
Other Supplies: – Neenah Classic Crest Solar White 120lb – Neenah Classic Crest Solar White 80lb – Postage Die – The Ton – Sunflower Postage – The Ton – Not A Bill stamp set – The Ton
Hello crafty friends! The change of season is here and we can see how changes can bring some beautiful colors to our life. Today, I would like to share my Fall Mixed Media Tag.
Skill: Intermediate Time: 15-20 minutes
Direction:
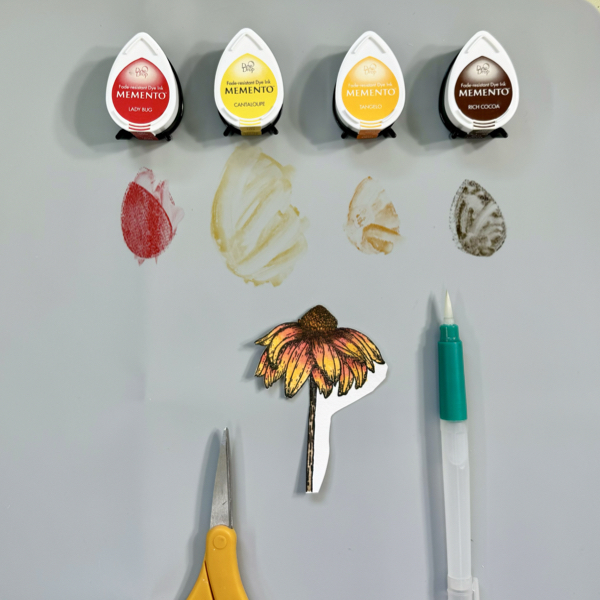
Step 1 Cut out a piece of cold-press watercolor paper for the Fall theme stamps.. Stamp the images with VersaFine Onyx Black ink pad using a stamping tool. Option, you can stamp a couple times to get crisper stamped images result on a watercolor paper.
Step 2 Memento inks (Full size and Dew Drop) are great for watercoloring! Simply add some of the Memento Dew Drop inks (Lady Bug, Cantaloupe, Tangelo, Rich Cocoa) on the craft mat. Use a water brush to pick up the pigment and color the flower. After coloring the image, use a craft heat gun to dry the watercolor inks. Cut the image using micro-tip scissors.
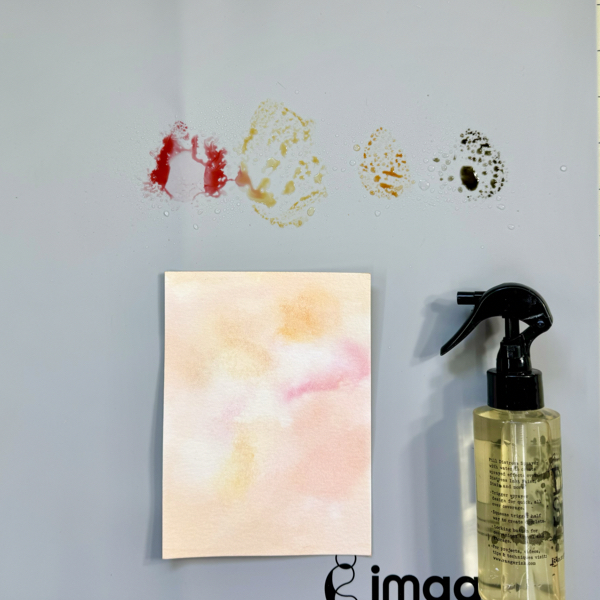
Step 3 Cut out another piece of the cold press watercolor paper. Add more of the Memento inks by dabbing the Memento Dew Drop on the craft mat. Spray lightly with some water and then smoosh the watercolor paper to the inks on the craft mat to create the watercolor wash background. You can repeat this step a couple times to get the colored background you like.
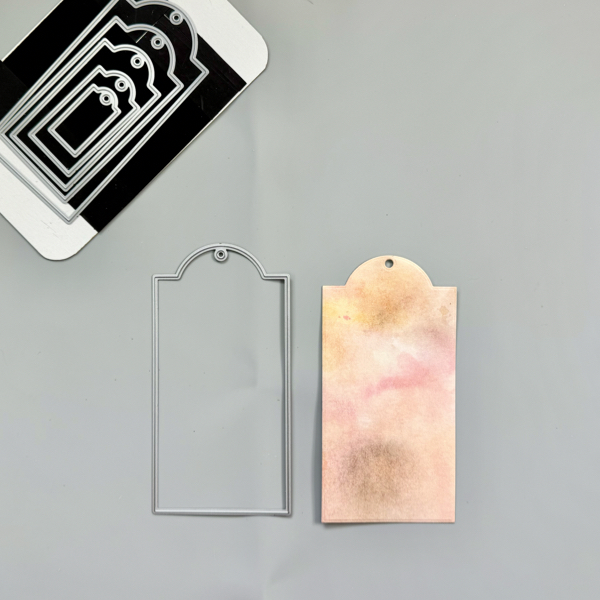
Step 4 Dry the watercolor background panel with a craft heat gun. Cut it out with a tag die. Or, If you do not have any tag die, you can trace any packing tag to it and cut it with scissors.
Step 5 Add some of the Memento Rch Cocoa ink around the edge of the tag with a sponge dauber for extra shadow and distress look. And then, add some of the Delicata Golden Glitz randomly around the edge of the tag with a sponge dauber for some extra shine to it. Dry the ink on the tag with a craft heat gun.
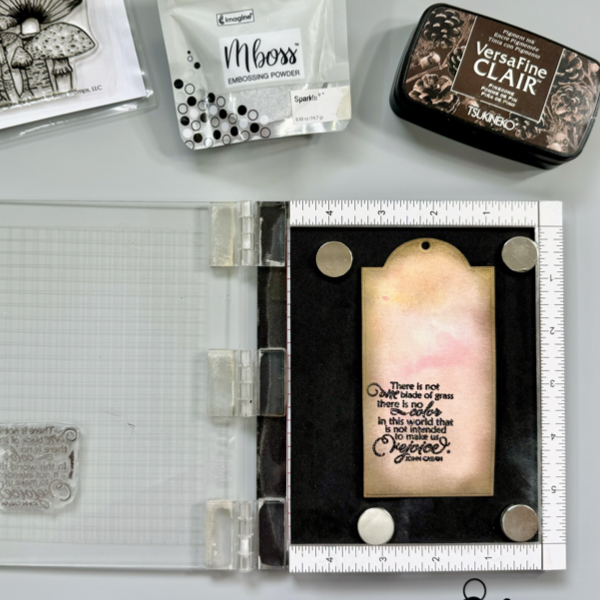
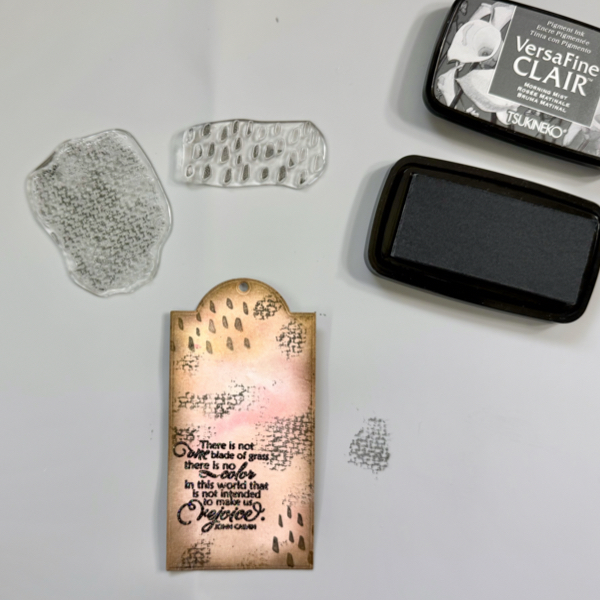
Step 6 Add some of the anti-static powder to the whole tag. Using a stamping tool, stamp the sentiment on the tag using the VersaFine Clair Pinecone ink pad. Right away while the ink is still wet, add some of the Mboss Sprakle embossing powder to the tag and heat set it with a craft heat gun. Gently wipe off the anti-static powder of the tag using a paper towel after the embossed sentiment cool off.
Step 7 Add some texture to the tag by stamping some patterns using the background texture stamps and VersaFine Clair Morning Mist. To get the uneven look on the background, stamp the image using your hand directly and not a stamping acrylic block.
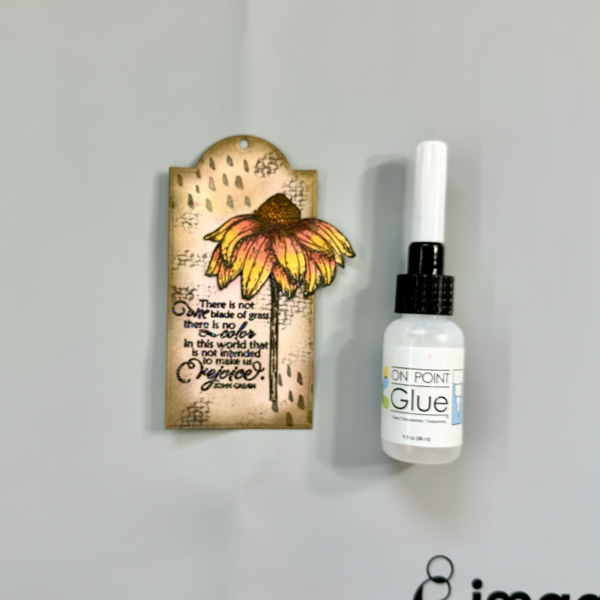
Step 8 Add some of the glue from On Point Glue to the half of the back of the watercolor flower and add it to the tag. Add a couple of acrylic stamping blocks on the flower for a couple minutes until the glue dried permanently.
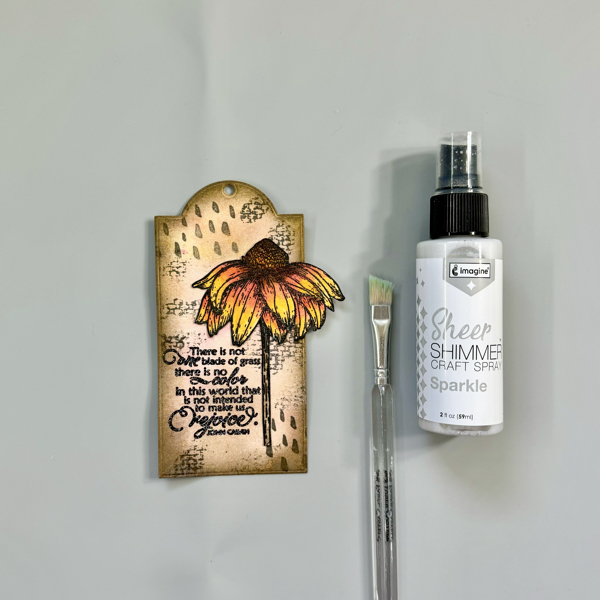
Step 9 This last step is an option. But I decided to add some extra sparkle to this Fall tag. Use a flat small brush to add some splatters of the Sparkle – Sheer Shimmer Craft Spray to the tag and then use a craft heat gun to dry it completely.
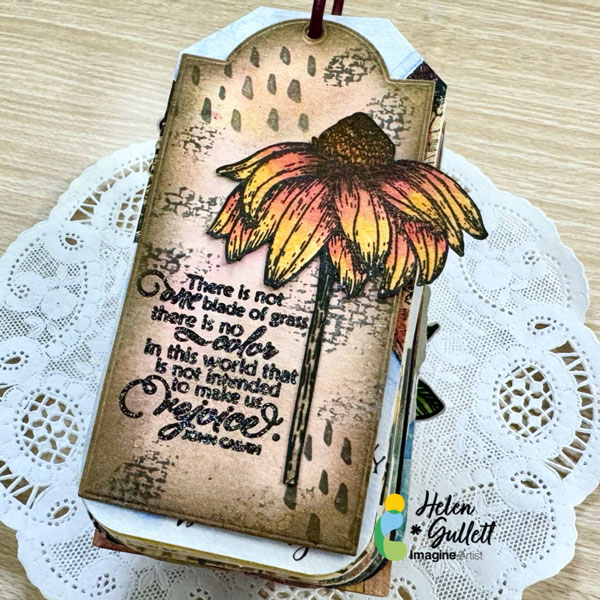
I love how this Fall mixed media tag turned out. The Fall colors plus some gold and sparkle to it makes me happy to look at it. It is now a new addition to my tag ring collection. I hope you’ll like this Fall tag project and give it a try with your own twist. Thank you for stopping by our blog today. Have a fabulous day!
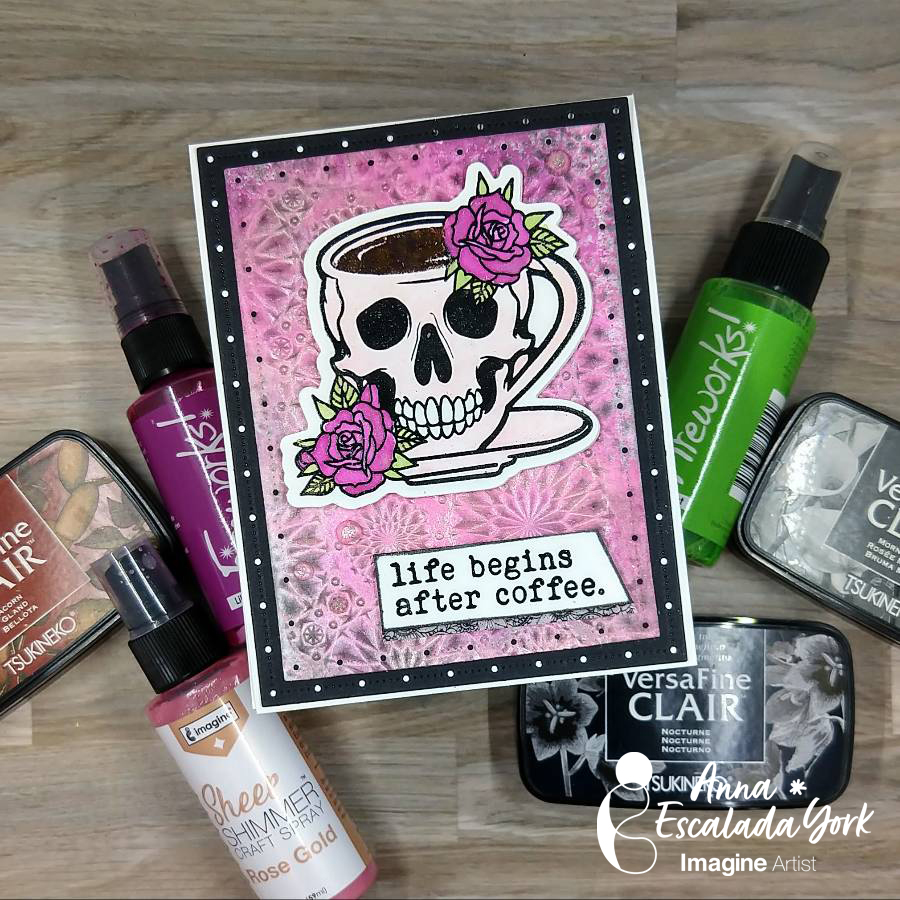
In today’s post, I made a card featuring earthy colors.
Skill: Intermediate Time: 1.5 hours
Directions:
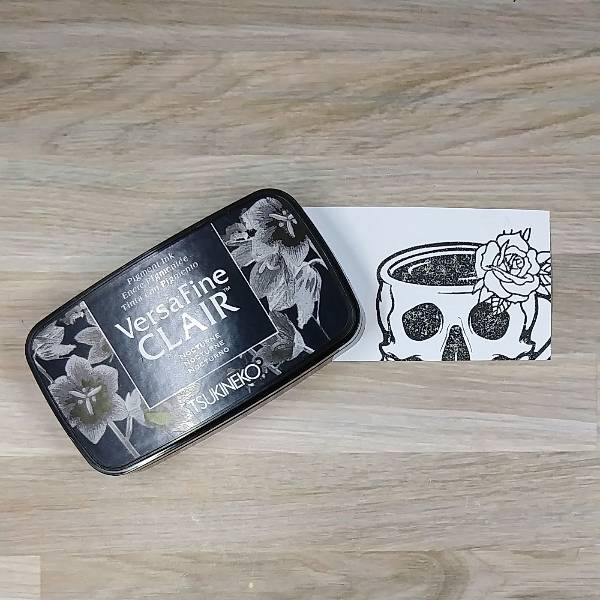
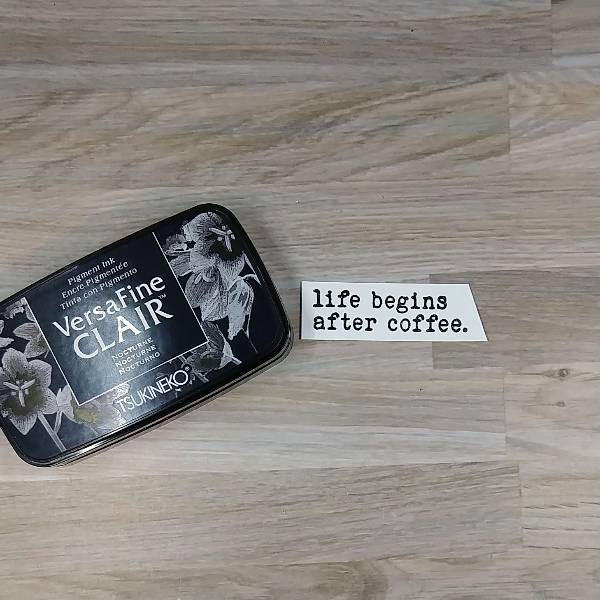
Step 1: Stamp the top part of the main stamped image onto a piece of masking paper with Nocturne VersaFine Clair ink. (If you don’t have masking paper, you can use a sticky note.) Cut out the coffee (or the inside part of the coffee cup) of the masking paper and place it onto a piece of watercolor paper over the corresponding part of the waterpaper.
Step 2: Stamp the coffee cup image onto the watercolor paper with Nocturne VersaFine Clair ink, making sure that the masking paper covered up the coffee in the cup. (Optional step: Heat emboss with clear embossing powder.)
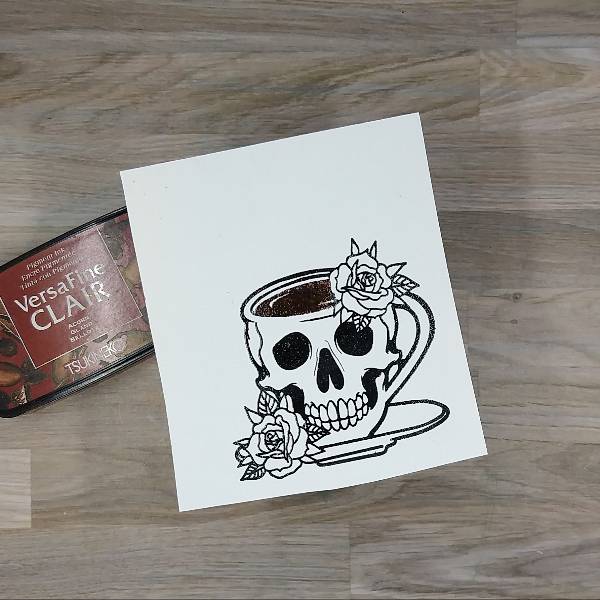
Step 3: Remove the masking paper. Stamp the coffee in the cup with Acorn VersaFine Clair ink. (I chose to mask the cup with the remaining masked paper before stamping.) (Optional step: Heat emboss the coffee with more clear embossing powder.)
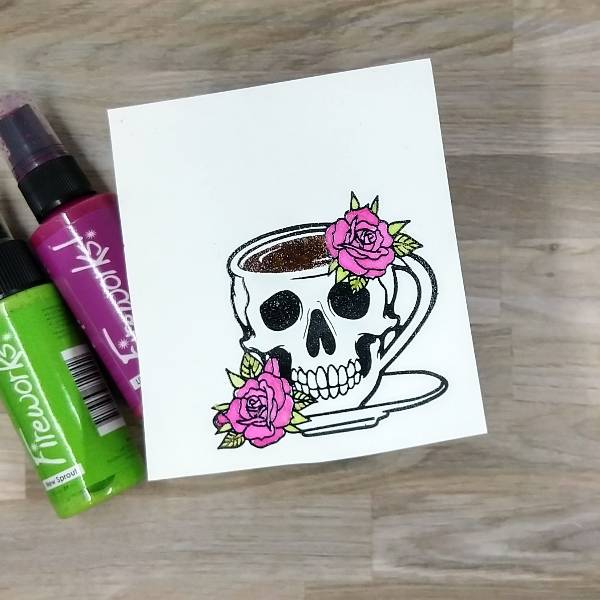
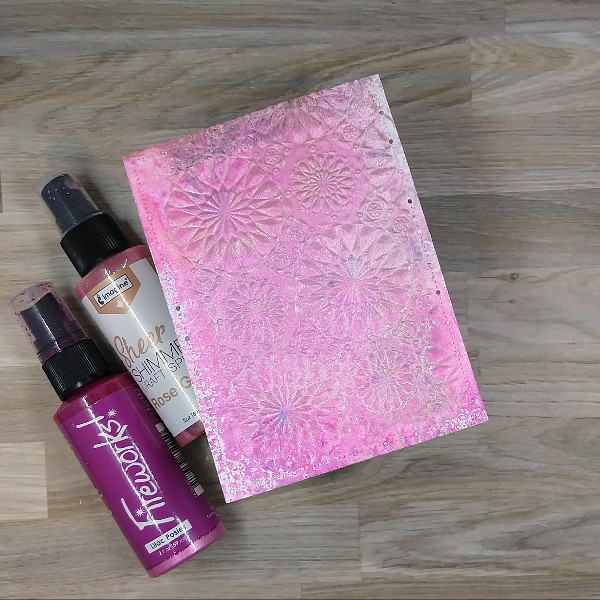
Step 4: Spray Lilac Posies Fireworks! Shimmery Craft Spray onto a piece of acetate packaging and use the spray to watercolor the stamped flowers surrounding the coffee cup. Repeat the process with New Sprout Fireworks! Shimmery Craft Spray to paint the leaves. Repeat the process one more time with Rose Gold Sheer Shimmer Craft Spray to paint the cup and saucer.
Step 4.5: Die cut the coffee cup with the corresponding die. (Sorry that the pictures got messed up and you couldn’t see the pink shimmer paint from the Rose Gold Sheer Shimmer Craft Spray or die cutting the cup. My camera was glitchy. You will see the rosy pink shimmer in the next few steps.)
Step 5: Die cut a piece of black watercolor paper (or black cardstock) for the matte layer of the card.
Step 6: Spray Lilac Posies Fireworks! Shimmery Craft Spray and Rose Gold Sheer Shimmer Craft Spray into an embossing folder and emboss a previously die cut watercolor panel. After removing the watercolor panel, spray more Rose Gold Sheer Shimmer Craft Spray around the panel and then allow the panel to dry.
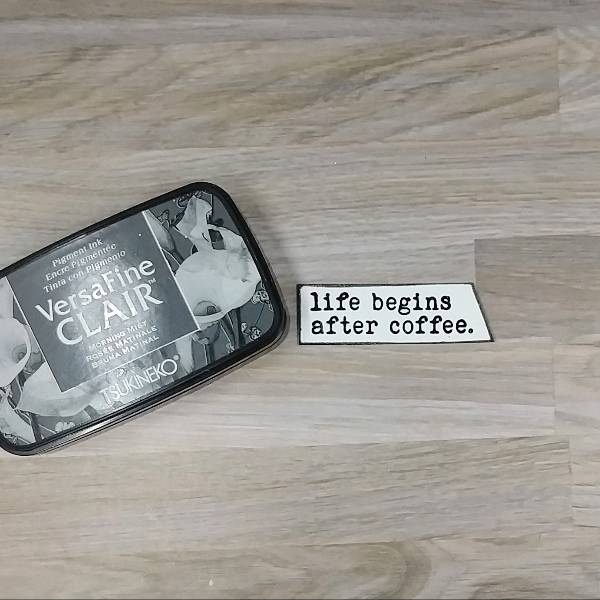
Step 7: Using a sponge dauber, ink blend the edges of the sprayed and embossed panel with Morning Mist VersaFine Clair ink.
Step 8: Stamp a sentiment on a piece of watercolor paper with Nocturne VersaFine Clair ink. Trim the edges with your paper trimmer. (Optional step: Heat emboss with clear Mboss embossing powder.) Then press the edges of the sentiment into the Nocturne VersaFine Clair ink to create a border.
Step 9: I decided that I wanted to change the color of the border, so pressed the edges of the sentiment into the Morning Mist VersaFine Clair ink pad. (Optional step: Heat emboss with more clear embossing powder.)
Step 10: Glue the two panels together. Glue the coffee cup onto the pink watercolor panel. Attach a piece of black and white washi tape just a little bit smaller than the sentiment strip and then glue down the sentiment strip.
Step 11: Glue sequins on the lower left and upper right corners of the card.
Step 12: Finish the care by gluing the matte layer to an A2-sized white card base.
Other Altenew – Masking Paper – Masking Paper Erin Lee Creative – Stamp set – Coffee or Die Erin Lee Creative – Stamp and die set – Stayin’ Alive Gina Marie Designs – Die set – Big and Little Chain Rectangle die set Legion – Paper – Stonehenge Black Aqua cold press watercolor paper Sizzix – Embossing Folder – Mini Kaleidoscope by Tim Holtz Trinity Stamps – Embellishments – Champagne Twinkle Stardust Rhinestones Black and white washi tape Watercolor paper Paper Trimmer Scissors Glue
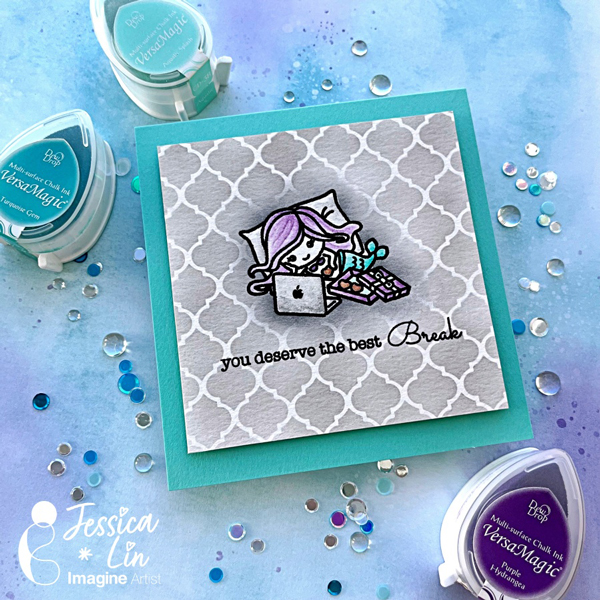
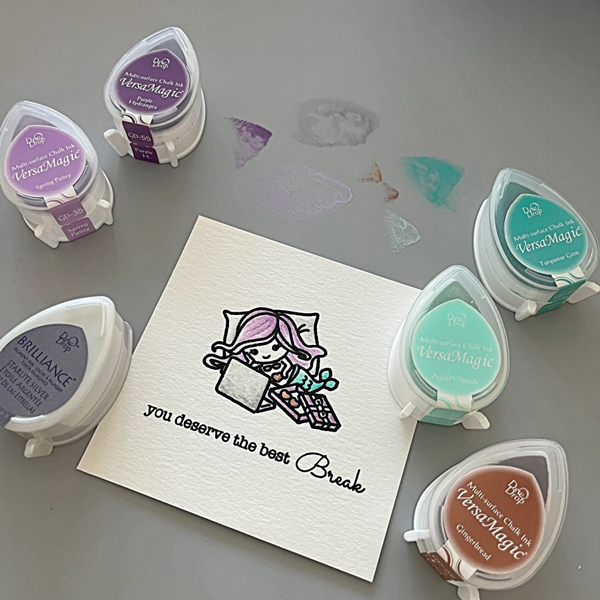
Hello hello! Back to school season is right around the corner, can you believe that summer flew by so quickly? Today I have a Teacher’s card to share with you and we are coloring with some of my favorite ink pads as well!
Step 1: Stamp the mermaid image using VersaFine Clair Nocturne ink pad and heat emboss with clear Mboss powder. I also stamped 2 sentiments partially to create a new phrase.
Step 2: Dab some ink on the Craft Mat and watercolor the image using a waterbrush.
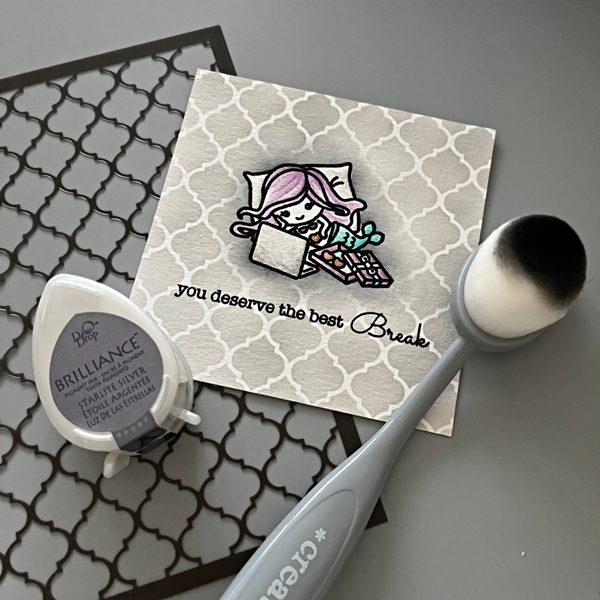
Step 3: Mask the image with masking tape and blend Starlite Silver ink across the moroccan stencil. I also blended Memento Tuxedo Black ink around the mermaid image to create a shadow-glow effect.
Step 4: Adhere the front panel to a square cardbase with foam tape, and the card is complete!
Hello crafty friends! Today, I wanna share this easy and quick card idea for you. You can use stamps to create a fun background and focal point using small image stamps. Let’s make it together.
Skill: Beginner Time: 15 minutes
Direction:
Step 1 Cut out a piece of 8.5 x 11 inch white heavyweight cardstock and make them your card bases.
Stamp the cloud image (or any small image stamp) directly on the front of the card base to create your background using Memento Ink (Summer Sky)
Step 2 It is easier to use a stamping tool when you use several stamps to build up an image. This stamping tool can help you to line up your image stamp perfectly.
For my rainbow, I used several small stamps to build it. I stamped each image one by one using VersaFine Clair ink pads (Tulip Red, Summertime, Cheerful, Verdant, Paradise, Fantasia)
Set aside for the inks to dry when you are done stamping, or you can use a craft heat gun to speed up the drying process.
Step 3 On another piece of white cardstock, stamp the cloud image outline and dots with VersaFine Clair (Warm Breeze)
Dry the stamped image with a craft heat gun and then fussy cut it with scissors.
Step 4 Trim the focal image into 3.5 inch x 3.5 inch.
Cut out a piece of dark blue cardstock slightly bigger than the focal image panel. I cut mine into 3 ¾ inch square mat.
Use the Tear It! Tape to add them to the front of the card.
Add some of the Teart It! Tape on a small piece of white fun foam to make your own 3D foam tape. I use it to add the cloud image on the card.
Isn’t that quick and easy to make this fun rainbow kindness card? I hope you will give it a try and send it out to encourage others with your handmade kindness card.
Thank you for stopping by our blog today. Have a fabulous day!