Create a Beautiful Spring Card Using VersaMagic Ink

By Alison Heikkila

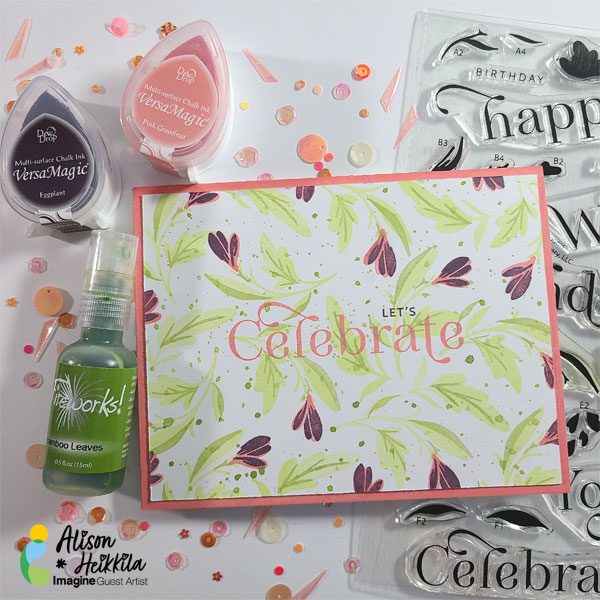
Hello! Today I am sharing how to create a beautiful card with layering stamps and VersaMagic Inks. I love this line of inks because of their soft, chalky finish. They blend beautifully, and the color range is just lovely. My card today uses the Birthday Blooms stamp set from The Greetery, which is a pretty layering stamp set that is easy to work with.

Skill Level: Beginner-Intermediate
Time: 30-45 Minutes

Directions:
Step 1:

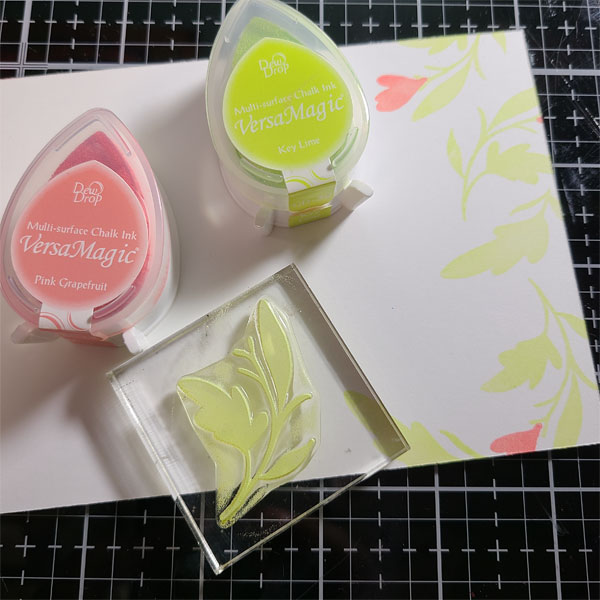
On a piece of 4″ x 5 1/4″ white cardstock, begin stamping the D1 and C1 images with Key Lime VersaMagic Ink. Work from one side to the other, or from top to bottom.

Step 2:

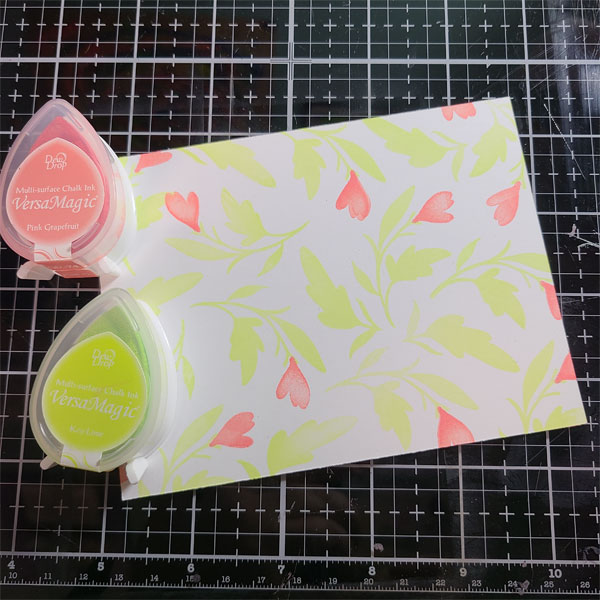
As you add foliage, also stamp D2, which is one of the blooms, in Pink Grapefruit VersaMagic ink, so that you ensure room for the blossoms.
 

Step 3:

Continue working across the entire panel with those three stamps until it is filled.
 

Step 4:

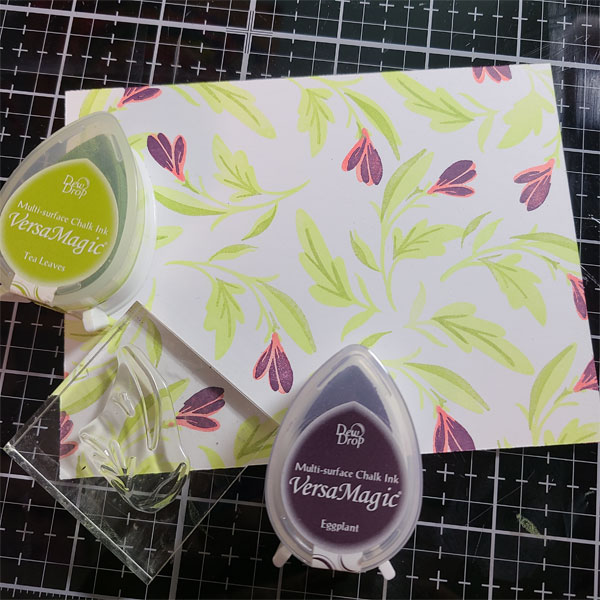
Apply stamps D4 and C2 to the foliage to create the veins and shadows with Tea Leaves VersaMagic ink.

Step 5:

Apply the D3 stamp to the blooms with Eggplant VersaMagic Ink.
 

Step 6:

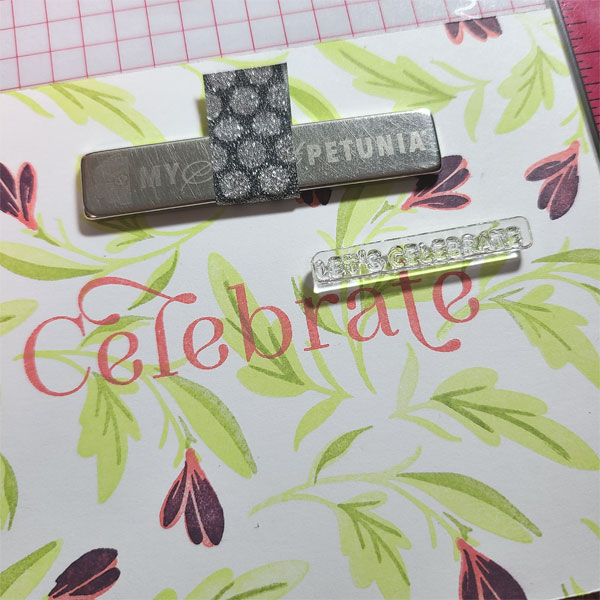
Stamp the Celebrate sentiment in the middle of the panel with Pink Grapefruit VersaMagic Ink.

Step 7:

Place the smaller “Let’s Celebrate” sentiment on top of the larger sentiment. We do not need the small “Celebrate,” so only apply Eggplant VersaMagic ink to the “Let’s.” Stamp the small sentiment on to the panel.
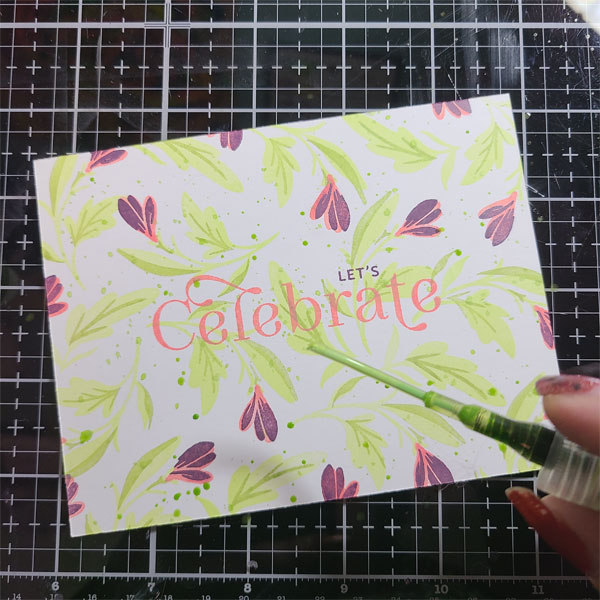
 

Step 8:

Shake up Bamboo Leaves Fireworks! Spray, and unscrew the sprayer. Tap the straw over the panel to get larger droplets on the card. Let dry.
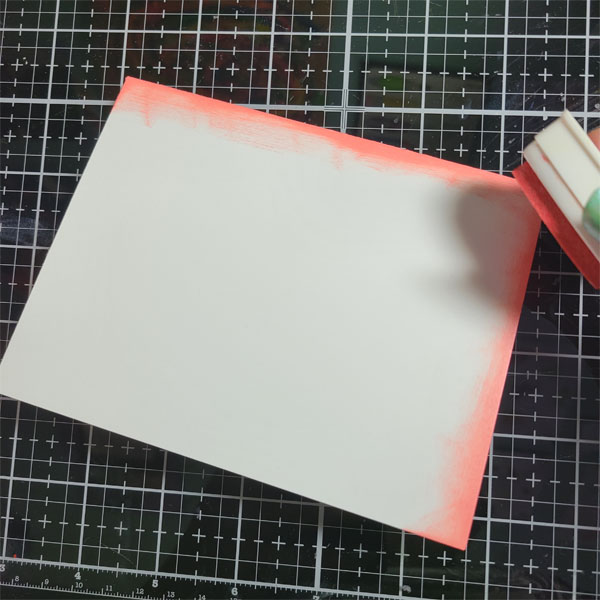
 

Step 9:

On your card base, ink the edges with Pink Grapefruit VersaMagic Ink.

Step 10:

Adhere the stamped panel to the card base.
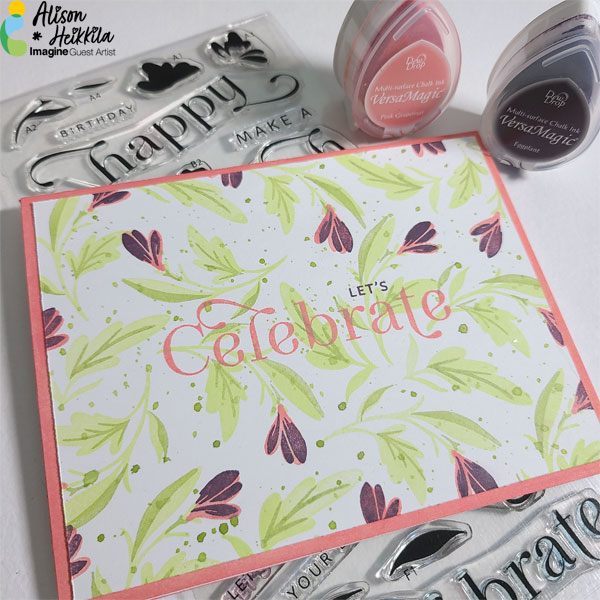
 

I love the soft tones of the VersaMagic Inks. They look so beautiful when layered on top of each other or blended. I hope you’ll give this technique a try! Thanks for stopping by. Have an inspiring day!


Art Supplies:

Imagine:

Key Lime VersaMagic Ink

Tea Leaves VersaMagic Ink

Pink Grapefruit VersaMagic Ink

Eggplant VersaMagic Ink

Bamboo Leaves Fireworks! Spray

Other:

The Greetery: Birthday Blooms Stamp Set

White Cardstock

Acrylic Blocks

Adhesive
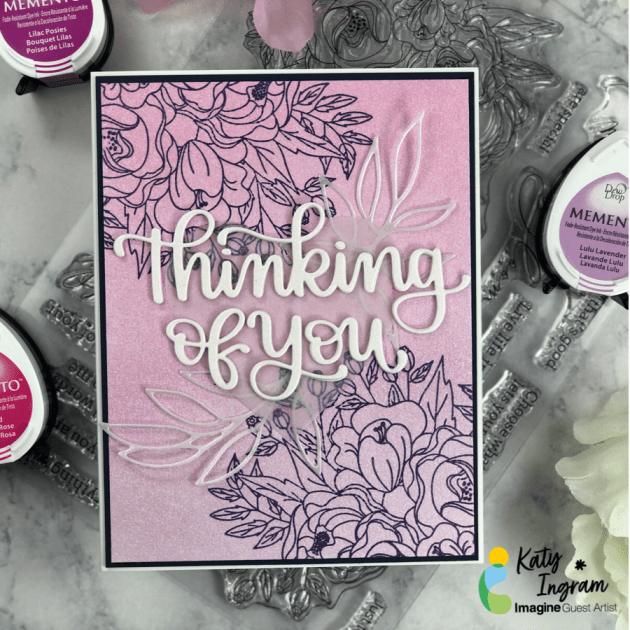
Learn How to Make a Spring “Thinking of You” Card with Ink Blending

By Katy Ingram

Hello my crafty friends! Katy here and in today’s crafting video tutorial, I show you how to make a floral “Thinking of You” card with 3 tips for easy ink blending using our Memento inks. This is a great project for the Spring season and by changing the sentiment this card can suit any spring-time occasion.

Skill: Beginner, Intermediate

Time: 30 minutes


Directions:


Art Supplies:

Imagine

• Memento Ink Pad – Rose Bud

• Memento ink Pad – Lilac Posies

• Memento Ink Pad – Lulu Lavender

• VersaFine Clair Ink Pad – Medieval Blue

Other

• Pinkfresh Studio – Blooming Bouquet Stamp Set

• Pinkfresh Studio – Leafy Branch die

• Simon Says Stamp – Thinking of You die

• Pink & Main – Mini Blending Brushes

• Gina K Designs – In The Navy Card stock

• Neenah – Classic Crest Solar White 110 lb Card stock

• Gmund – 100% Cotton Shiny Cream Card stock

Learn How to Make a Cupid Valentine’s Card with Brilliance Shimmery Inks

By Jessica Lin

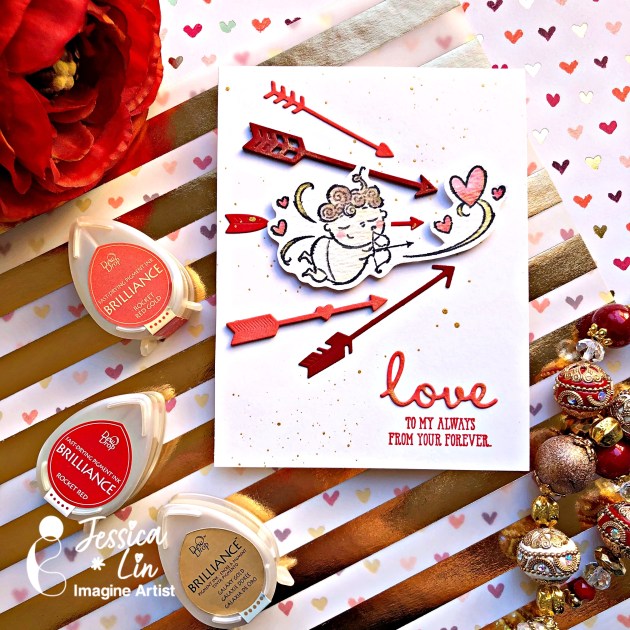
Hi everyone, it’s Jessica here. Did you know that you could watercolor with your shimmery ink pads? I tried watercolor with some Brilliance Dew Drop ink pads today and I was so amazed at the result! The shimmer and sparkle definitely add that extra detail to a simple card. Let me know if you have tried this before!

Skill Level: Intermediate

Time: 35 Minutes


Art Supplies

Imagine

• VersaMagic Ink Pad- Thatched Straw, Wheat

• Brilliance Ink Pad –  Rocket Red, Rocket Red Gold, Pearlescent Chocolate, Galaxy Gold, Moonlight White

• VersaFine Clair – Nocturne


Other Products

• Water brush

• Tim Holtz Watercolor Cardstock

• Stampin’ Up Flight of Fancy stamp set

• Stampin’ Up Well Said bundle

• Spellbinders Die Set – Shoot

• Red cardstock

New Techniques for Embossing Stunning Springtime Cards

By Neva Cole 

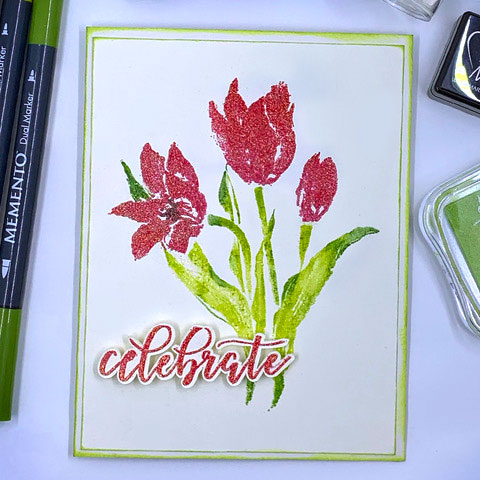
In today’s crafting tutorial, I will show you how to use various Imagine products to create a sparkly stunning springtime birthday card, featuring both Mboss Valentine, VersaMark Ink, and Embossing Powders. The tutorial will also show you how you can use VersaMark over other inks to create a cohesive embossed look for a card, even if you do not have embossing powders in additional colors.


Skill:  Intermediate

Time:  45 minutes

Directions:

Step 1

Trim card front to 4.75” x 6.25” to fit a standard A-7 card base.  It is important to use a stamp positioner platform for this technique to ensure that the image lines up properly on the finished card front.


Step 2

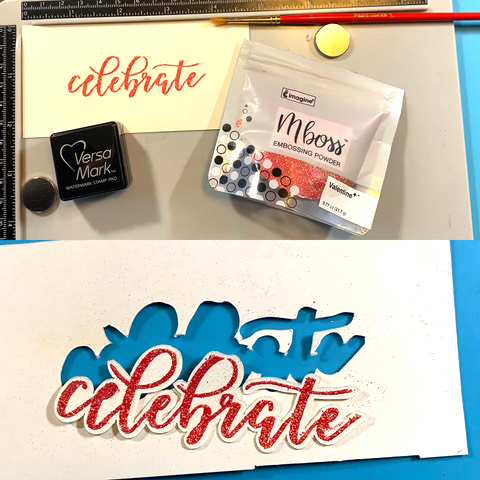
Color stamen portion of Penny Black First Waltz Tulip with VersaMarker and heat emboss with Black Mboss powder.

Pro tip: Use a dry fine tip paintbrush to remove any embossing powder that ends up on the card you do not want to emboss before heating.


Step 3

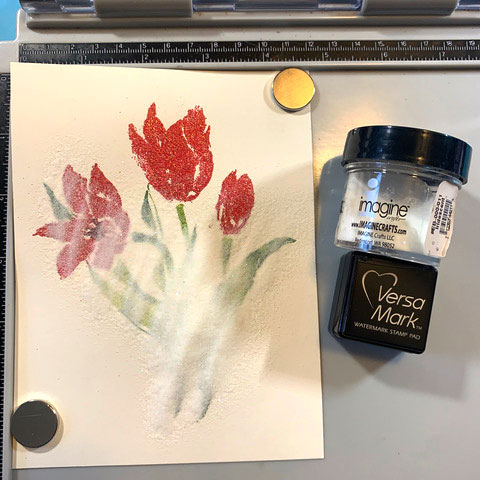
Use the Versa Mark small cube which allows you more precision in where you place the VersaMark ink to ink the flower portion of the image. Cover with Mboss Valentine, and carefully remove powder from the stamen area with a dry fine tip paintbrush then heat emboss.


Step 4

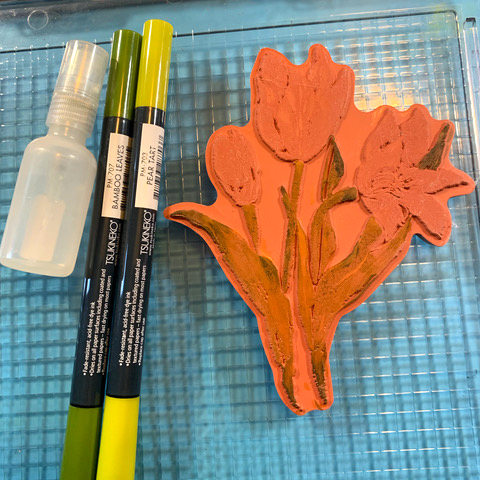
Color directly on the stem portion of the image with Memento Dual Marker in Pear Tart and Bamboo leaves.  Mist stamp lightly with water before stamping as this reactivates the ink to create a crisp image.


Step 5

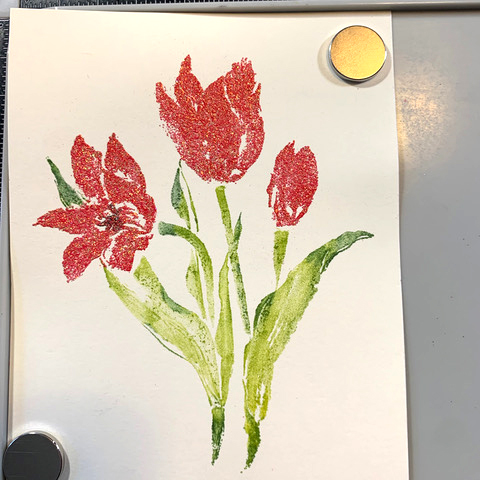
Clean leaf portion of the image and ink with VersaMark ink. Stamp over the previously colored and stamped image with VersaMark Ink and heat emboss with Iridescent embossing powder.


Step 6

Stamp the “Celebrate” sentiment in VersaMark Ink and heat emboss with Mboss in Valentine.  Die-cut the sentiment, I used my Brother Scan N Cut.


Step 7

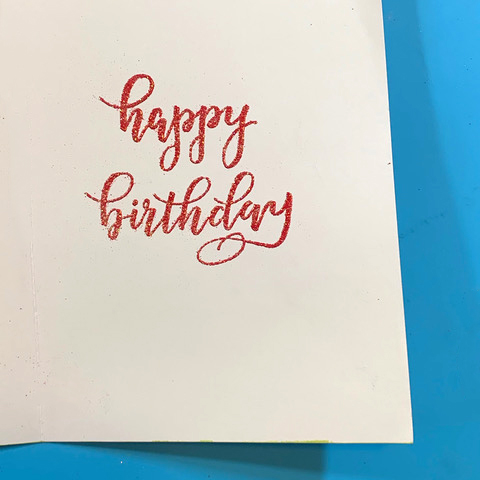
I also stamped the inside of the card, as I intend to send it to a special friend for her birthday. Stamp the sentiment in VersaMark Ink and heat emboss with Mboss in Valentine.


Step 8

Lightly ink the card base and card front with the Memento Luxe Pear Tart ink pad to add just a hint of green around both layers.  I ran the ink pad around the edges of the cardstock to create the light tint.


Step 9

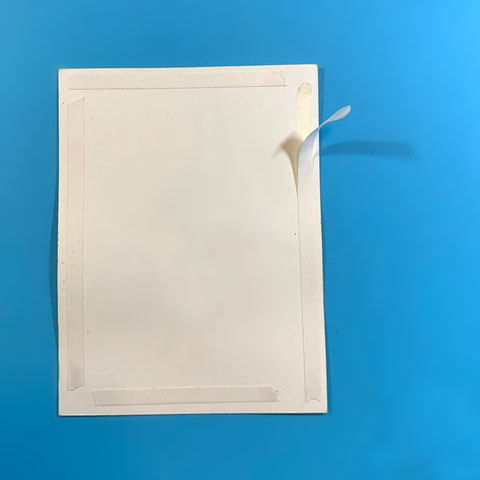
Apply Tear It! Tape to the back of the card front and adhere to the card base.


Step 10

Adhere the “Celebrate” sentiment to the card front using adhesive foam tape.


Art Supplies

Imagine

• VersaMark Ink

• VersaMarker

• Mboss – Valentine

• Memento Dual Tip Marker – Pear Tart, Bamboo Leaves 

• Embossing Powder – Black, Iridescent

• Memento Luxe – Pear Tart

• Tear It! Tape

• 0.5 fl oz Spray Bottle


Other

• Penny Black – First Waltz

• Kelly Creates – Traceable Celebration Stamps

• Brother Scan N Cut

• Stamp positioner

• Fine tip paintbrush


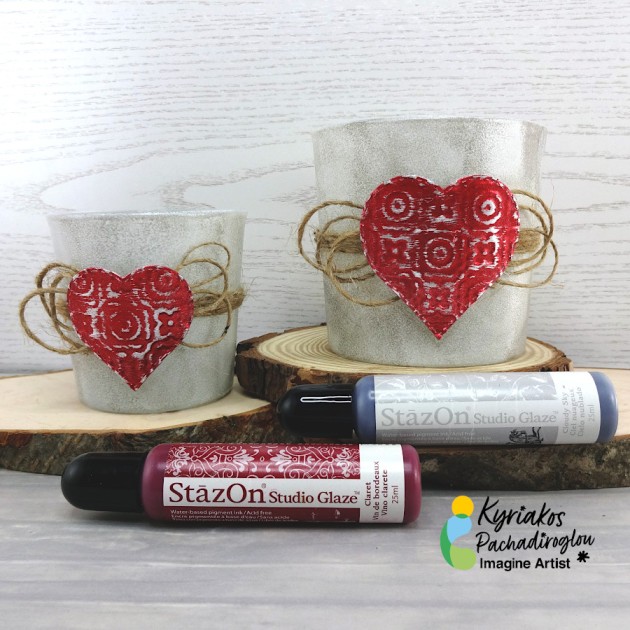
Learn How to Make Decorative Tea Light Candle Holders

By Kyriakos Pachadiroglou


Skill: Beginner, Intermediate, Advanced

Time: 45 min

Directions:

Cover glasses with All-Purpose ink and StazOn Studio Glaze to create frost and smoke effects. Die-cut and emboss SHEET metal to make embellishments that are covered with StazOn colors.


Step 1

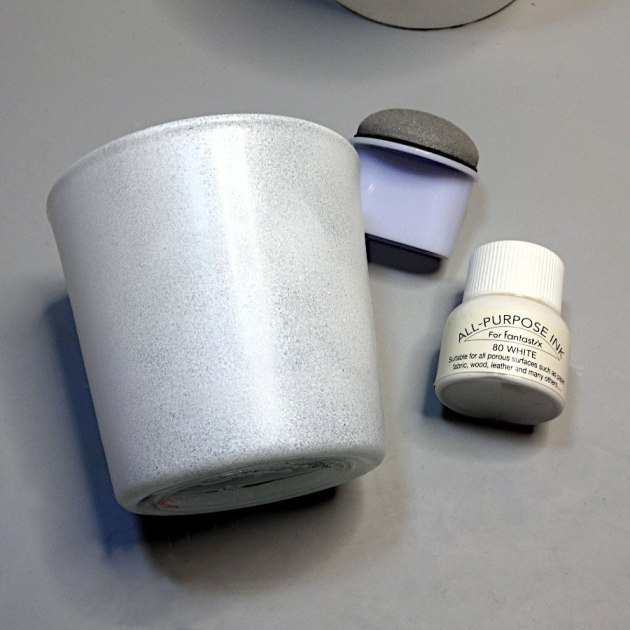
Cover the glass surface with All-Purpose Ink white using a Sponge Dauber and lightly pressing on it creating a frost effect. Let it dry. (Use a heat tool to speed up the process)


Step 2

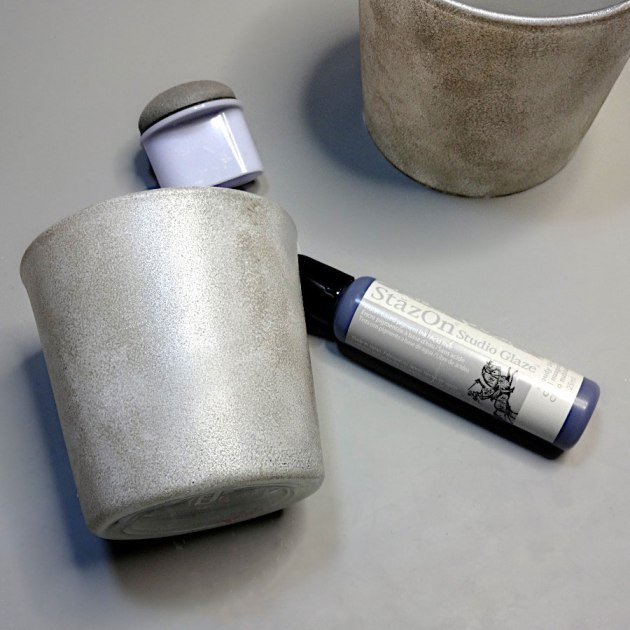
With a Sponge Dauber repeat the above using the StazOn Studio Glaze Cloudy sky.


Step 3

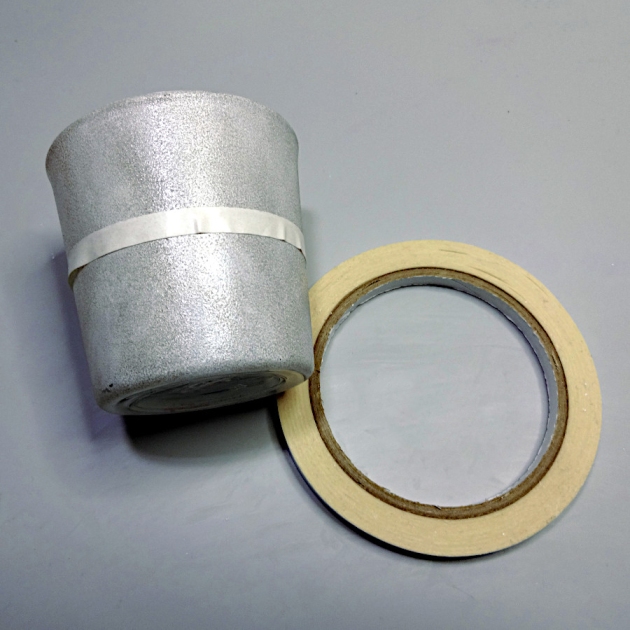
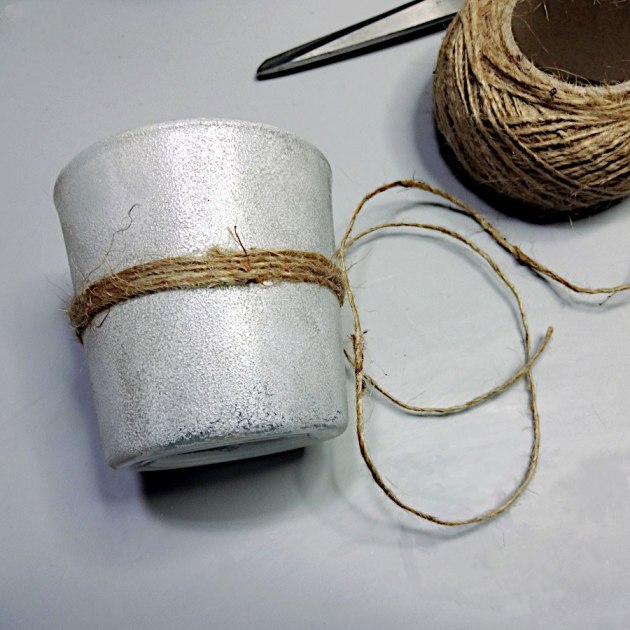
Place Tear It! Tape around the mid section of the glasses.


Step 4

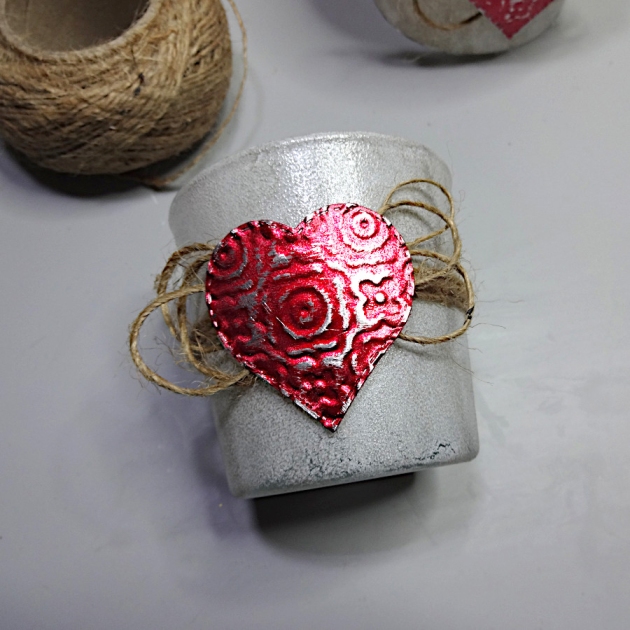
Place the jute cord over the Tear It! Tape and wrap around to cover.


Step 5

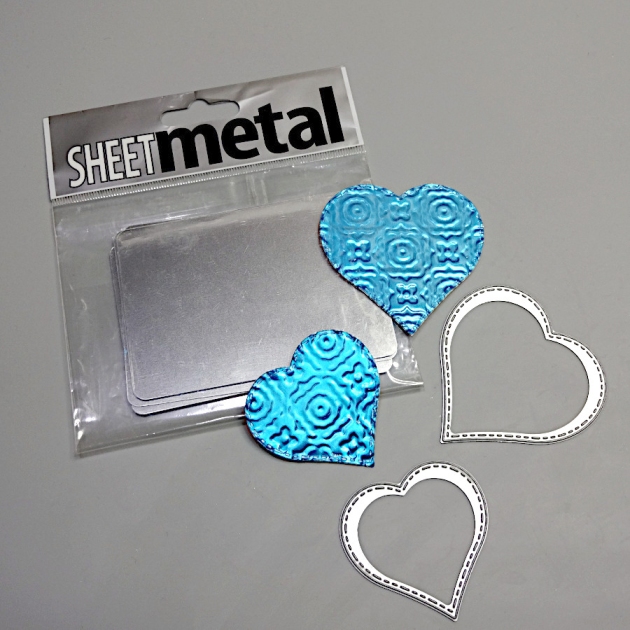
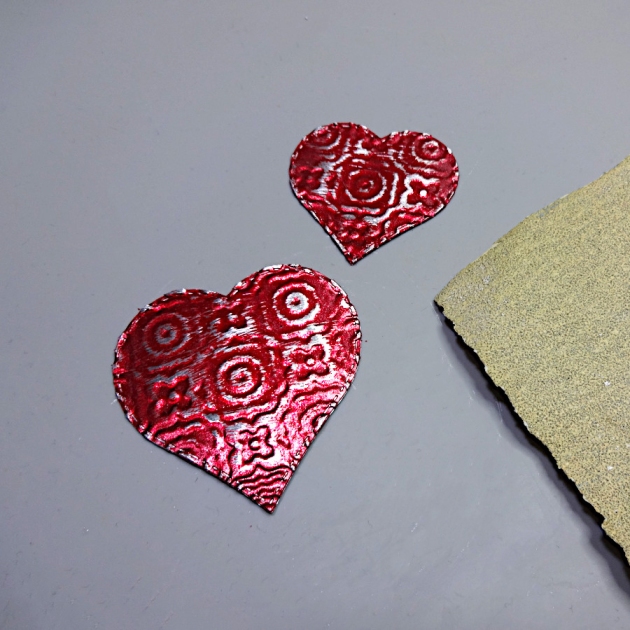
Die-cut heart shapes of the SHEET metal in two different sizes. (If you don’t have a die cutting machine, use scissors to easily cut heart shapes of the SHEET metal).


Step 6

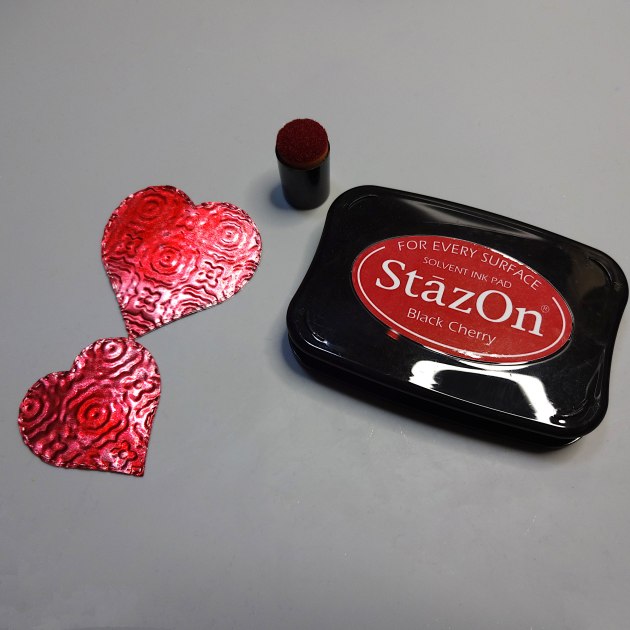
Cover with the StazOn Black Cherry using a Sponge Dauber.


Step 7

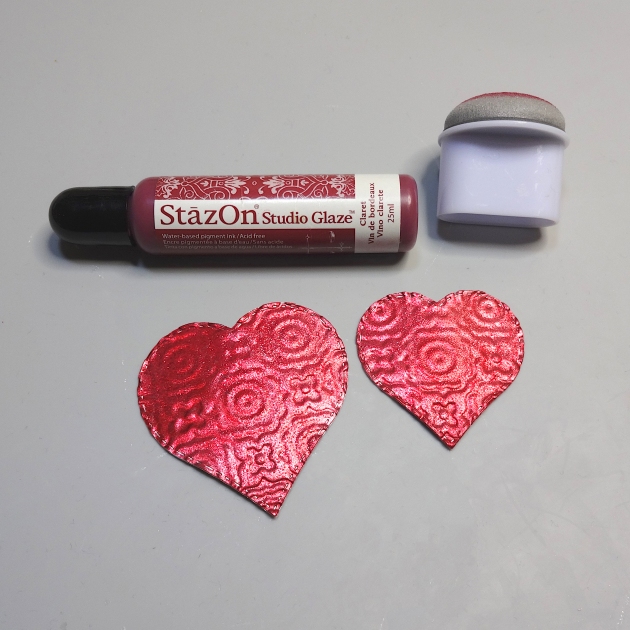
Continue with the StazOn Studio Glaze Claret.


Step 8

Lightly sand the SHEET metal hearts to reveal the silver color.


Step 9

Make some loops with the jute cord, glue them on the glasses and add the hearts.

Art Supplies

Imagine

SHEET Metal – ATC card 

All-Purpose Ink – White

StazOn Studio Glaze – Cloudy Sky, Claret 

StazOn – Black Cherry

Sponge Daubers

Tear It! Tape


Other

Heart Dies and die-cutting machine

Embossing folder

Glasses

Sanding paper

Jute cord

Hot glue

Stamp a Happiness-Filled Valentine’s Day Card

By Jessica Lin

Stamping on Acetate with StazOn Ink Pad

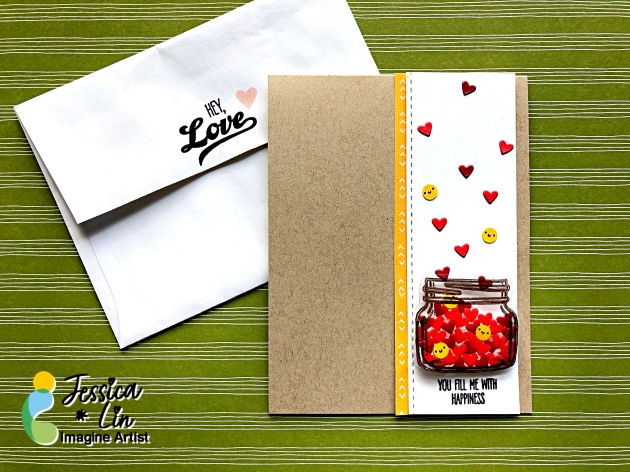
Hi everyone, it’s Jessica here with a fun Valentine’s Day card. I decided to create a glass jar filled with tiny hearts and smiley faces. StazOn inks are the best when it comes to stamping on non-porous surfaces. What kind of materials have you tried stamping on with StazOn inks?

Skill Level: Intermediate

Time: 45 Minutes

Art Supplies

Imagine:

• StazOn Ink Pad – Timber Brown

• VersaFine Ink Pad- Onyx Black

• Mboss – Clear

• On Point Glue

• Tear It Tape

• Craft Mat

• StazOn All-Purpose Cleaner


Other Products Used:

Stampin’ Up Jar of Love stamp set

Hole punch

Acetate sheet

Copic markers

Heat gun

Neenah Solar White cardstock

Neenah Desert Storm cardstock