Create a Shimmery Background with Fireworks!

Lion 1 600

By Alison Heikkila –

Hello! Fireworks! Spray from Imagine is a collection that coordinates with the Memento line of colors, but in a shimmery spray format. I love using the in ways that go well beyond just spritzing them, and today’s technique uses a brayer. The finished look has a glistening background that looks amazing when it catches the light. 

Skill Level: Intermediate
Time to Complete: 1 Hour

Directions:

Lion-2-600


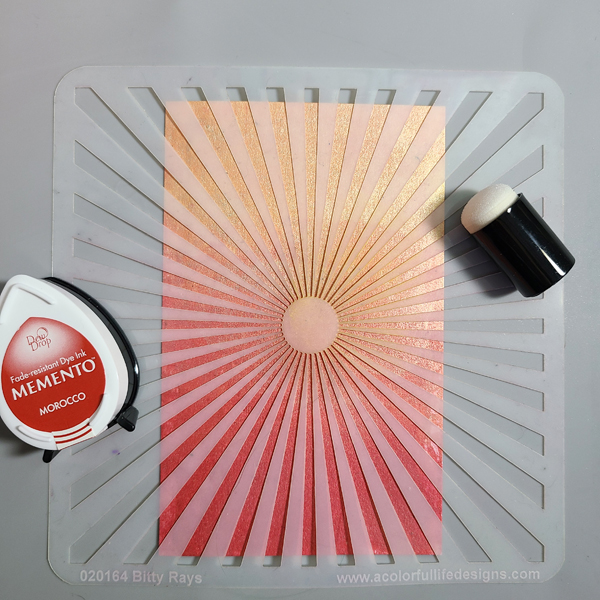
***Let me start my saying this background took a turn in the way I was planning on making it. I adore using my Gel Press Plates, but I was getting a better result with just using a brayer, so the photo above shows how I began the process, but I wound up changing my method as I went on.

Step 1:

I spritzed my 3×5 Gel Press Plate with Lady Bug, Tangelo, and Dandelion Fireworks Spray, keeping the colors separated so I would have distinct rows. I rolled the color out with my brayer. 
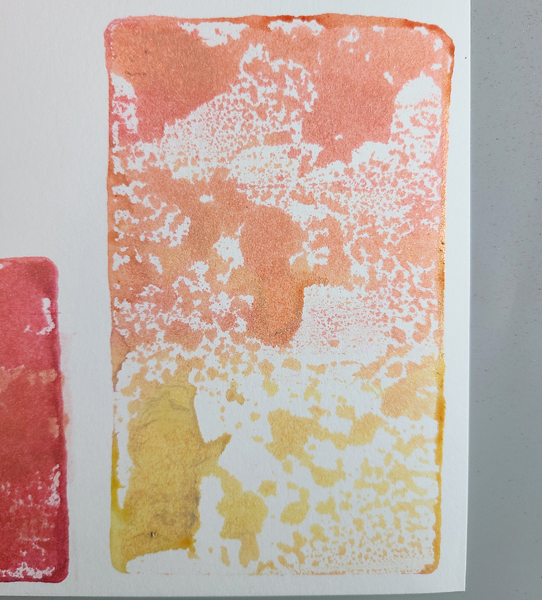
Lion 3 

Step 2:

I laid my cardstock on top of the Plate and pulled my print. It was pretty splotchy, which normally I like, but I wanted it to be more solid for this card. 
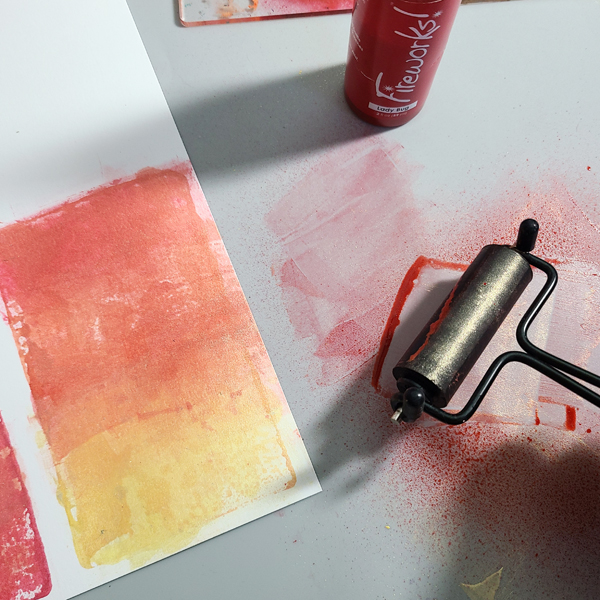
Lion 4

Step 3:

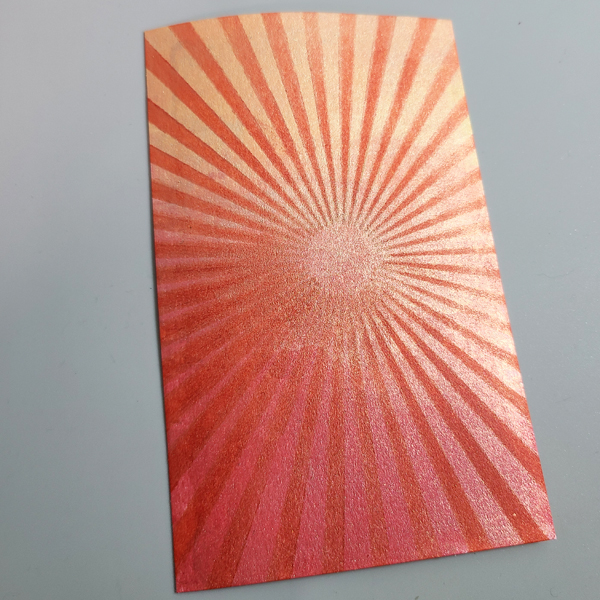
I decided at this point to just spray the color directly on my Imagine Craft Mat, roll the color on to my brayer, and then take it to my cardstock. After a few layers of color, I achieved the look I was going for. Solid, shimmery color with a gradation. 

Lion 5

Here is what the panel looked like after I trimmed it down. I really love the shine. 

Lion 6

Step 4:

I laid my stencil on top of the dry panel and began to apply Morocco Memento ink on top. I spread the color with my sponge dauber. 

Lion 7

I found it to be easier to spread the color on to the stencil itself, and then use the dauber to apply it to the cardstock. 

Lion 8

Here is the completed stenciled panel. 

Lion 9

Step 5:

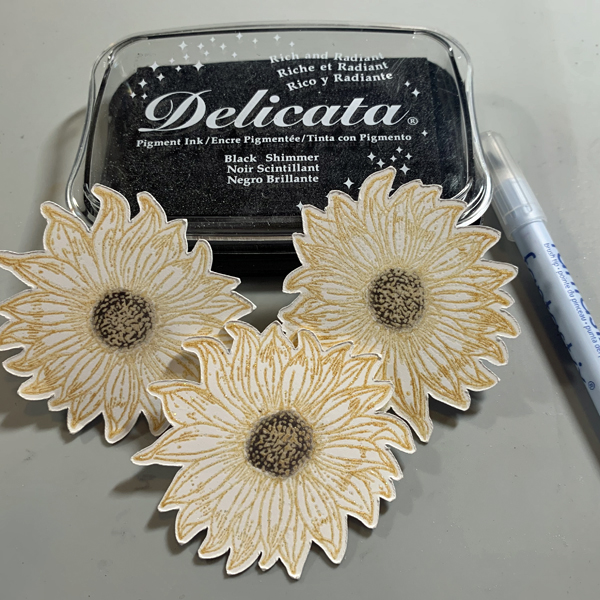
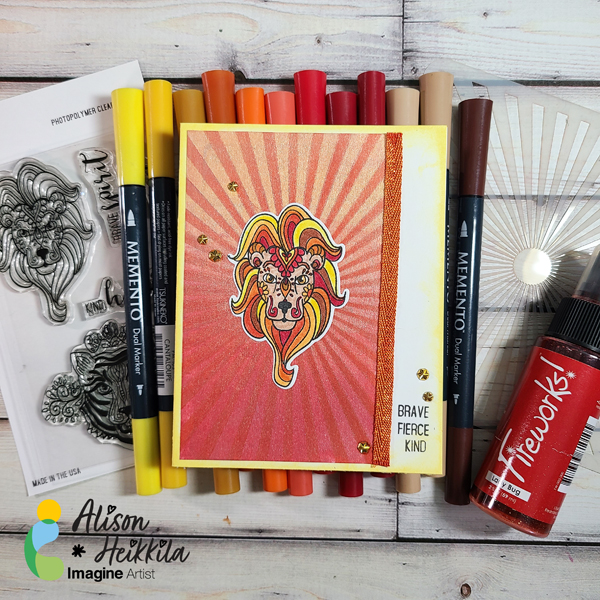
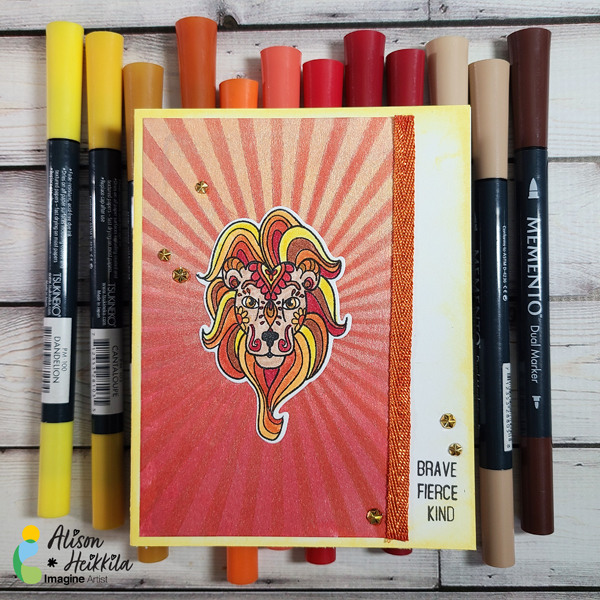
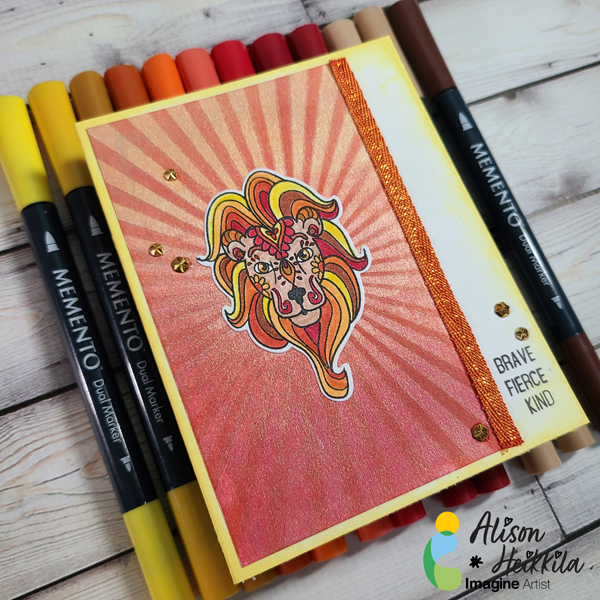
Time to color the lion using Memento Markers. The list of colors I used is in the supply list below. Then the colored image was die cut. 

Step 6:

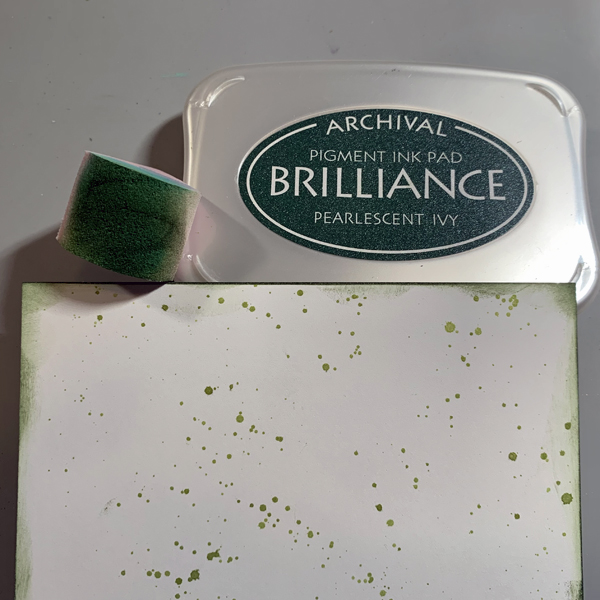
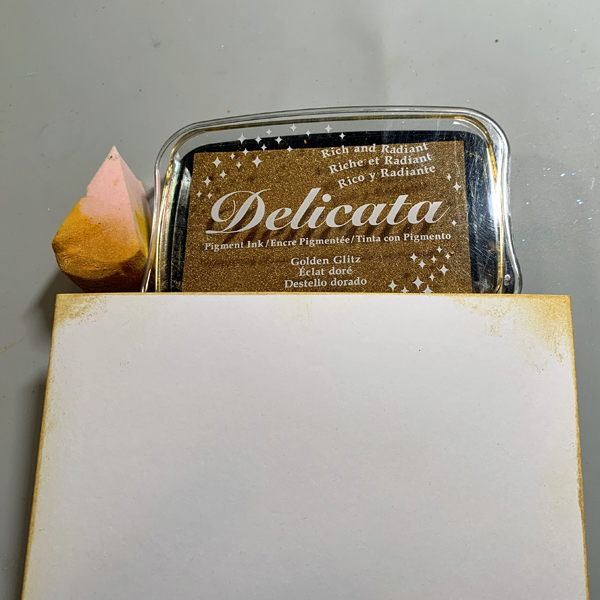
I inked the edges of the white card base with Sunflower Yellow Brilliance Ink. 

Step 7:

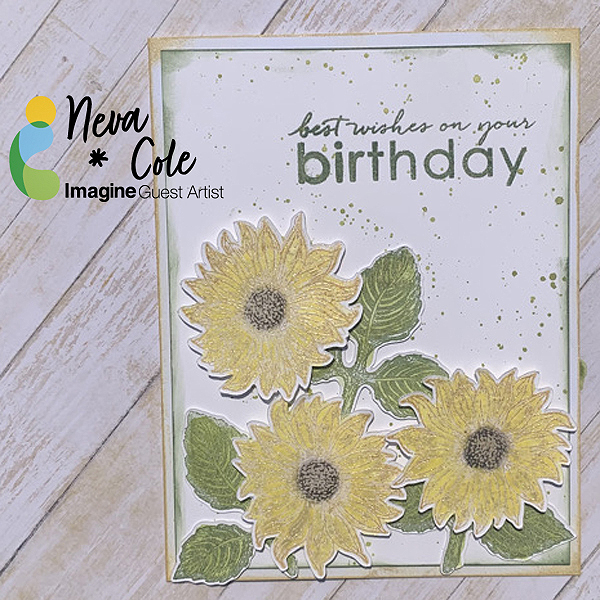
I assembled the card and stamped my sentiment with Fallen Leaves VersaFine Clair Ink. 


Lion 10Lion 11

Art Supplies:

Imagine:

Fireworks! Shimmery Craft Spray in Lady Bug, Tangelo, and Dandelion

Memento Ink in Morocco

Memento Markers in Rich Cocoa, Toffee Crunch, Desert Sand, Love Letter, Rhubarb Stalk, Lady Bug, Morocco, Tangelo, Potter’s Clay, Peanut Brittle, Cantaloupe, Dandelion

VersaFine Clair in Fallen Leaves

Brilliance Ink in Sunflower Yellow

Sponge Dauber

Craft Mat

On Point Glue


Other:

Gel Press: 3×5 Plate

Brayer

A Colorful Life Designs: Bitty Rays Stencil

Erin Lee Creative: Brave Fierce Kind Stamps

Doodles Paper Playground: Gold (and Silver) Starburst Rhinestones

Orange Ribbon

White Cardstock


Make a Cheery Birthday Card Using Fireworks! Shimmery Sprays

2021-Aug-Neva-Fireworks!-Bday-card-step7

By Neva Cole –

In today’s card making tutorial, I will show you how to use your Fireworks! Shimmery Spray inks in different ways rather than just spraying them!  All of the blooming sunflowers during my travels were the inspiration for this late summer birthday card.  It is very cool that sunflower heads follow the sun throughout the day, and they are always bright and cheery!

Skill:  Intermediate

Time:  1.5 hours

Directions:

2021-Aug-Neva-Fireworks!-Bday-card-Step1

Step 1

Stamp sunflower image in Delicata Golden Glitz and heat emboss with Iridescent Embossing Powder.  The Delicata Golden Glitz is one of the brightest gold inks, and works best for a sunflower.  Die cut with an electronic die cut machine, or fussy cut with scissors.

2021-Aug-Neva-Fireworks!-Bday-card-Step2
Step 2

Use a brush tip Fantastix to color in the center of the sunflower with Delicata Black Shimmer.

2021-Aug-Neva-Fireworks!-Bday-card-Step3

Step 3

Shake the Fireworks! spray until all of the shimmer is mixed in.  When the spray sits for awhile, the shimmer settles to the bottom and can be seen as a thin layer through the bottle.  Remove the spray lid and tap a bit of Fireworks! on your work mat from the end of the plastic tube.  Use a fine tip paint brush to paint the sunflowers a beautiful iridescent Dandelion Yellow.  Yellow ink is one of the more difficult inks to use, and this method solves that dilemma!

2021-Aug-Neva-Fireworks!-Bday-card-Step4

Step 4

Stamp the leaf image in Brilliance Pearlescent Ivy and heat emboss with Iridescent Embossing Powder.  Using embossing powder helps maintain the original ink color of the image while painting over with Fireworks! spray.  It also allows you to color inside the lines much more easily! Use a fine point paint brush to add Fireworks! in Bamboo Leaves.  Die cut or fussy cut the leaves.

2021-Aug-Neva-Fireworks!-Bday-card-Step5

Step 5

To get a finer sprinkling of more carefully located drops of Fireworks!, use the same paint brush and gently tap over the card stock to create a fine splatter pattern.  When using the spray nozzle, the color is denser on the cardstock.  Finish the edges by inking with an ink blusher and Brilliance Pearlescent Ivy.

2021-Aug-Neva-Fireworks!-Bday-card-Step6

Step 6

Edge the base card with an ink blusher and Delicata Golden Glitz.  Using inks throughout the card allows for perfect coordination.

2021-Aug-Neva-Fireworks!-Bday-card-step7

Step 7

Position the leaves and sunflowers on the card front to determine the location for the sentiment.  Stamp the sentiment in Brilliance Pearlescent Ivy and heat emboss with Iridescent embossing powder.  Adhere the layers of the card together.  The card front and leaves are adhered with Tear-It! Tape, and the sunflowers are adhered with thin dimensional foam adhesive.

Art Supplies

Imagine
Other
  • Auntie Amy Sunflower image
  • Heartfelt Creations Bold Leaf stamp
  • Technique Tuesday Large Birthday sentiment stamp
  • Fine point paint brush

Learn to Make a Colorful Hummingbird Birthday Card

2021-Jul-Neva-Hummingbird-Birthday-Card

By Neva Cole 

In today’s card making tutorial, I will show you how to make a multi-colored layered birthday cards using a plethora of great Imagine inks.  Hummingbirds can be iridescent, so Encore! Ultimate Metallic, Delicata, and Brilliance inks are used to create a beautiful hummer.  Ombre-hued Kaleidacolor inks are used to create the frame and background.

Skill:  Intermediate

Time:  2 hours

Directions:

2021-Jul-Neva-Hummingbird-Birthday-Card-Step1

Step 1

Stamp Hummingbird outline image and flower outline image in Encore! Ultimate Metallic Green.  Using a stamp positioner will allow more precise placement while stamping layers.

2021-Jul-Neva-Hummingbird-Birthday-Card-Step2
Step 2

Stamp next layer of Hummingbird in Encore! Ultimate Metallic Honeydew and the stem of the flower in Delicata Emerald Green.

2021-Jul-Neva-Hummingbird-Birthday-Card-Step3

Step 3

Stamp next layer of Hummingbird and flower stem in Encore! Ultimate Metallic Green.

2021-Jul-Neva-Hummingbird-Birthday-Card-Step4

Step 4

Stamp throat of Hummingbird in Brilliance Pearlescent Purple.

2021-Jul-Neva-Hummingbird-Birthday-Card-Step5

Step 5

Use a Memento Dual Tip Marker in Tuxedo Black to color eye.  Die cut with matching Frame Cut.

2021-Jul-Neva-Hummingbird-Birthday-Card-Step6

Step 6

Stamp the layers of the flower with Versa Color Heliotrope, Violet, and Orange.  Die-cut with matching Frame Cut.

2021-Jul-Neva-Hummingbird-Birthday-Card-Step7

Step 7

Trim cardstock to 3 1/2″ x 8 1/2″.  Use a foam brayer to ink the cardstock with Kaleidacolor in Fresh Greens.

2021-Jul-Neva-Hummingbird-Birthday-Card-Step8

Step 8

Die-cut Foliage Frame.

2021-Jul-Neva-Hummingbird-Birthday-Card-Step9

Step 9

Trim cardstock to 7 1/8” x 8 ½” and fold in half.  Use a foam brayer to ink the cardstock with Kaleidacolor in Blue Breeze.

2021-Jul-Neva-Hummingbird-Birthday-Card-Step10

Step 10

Place Foliage frame over blue background to determine position for sentiment.

2021-Jul-Neva-Hummingbird-Birthday-Card-Step11

Step 11

Stamp sentiment in the darkest color from the Kaleidacolor Blue Breeze ink pad.  It is easiest to do this with the pad expanded to get just the end inked section of the Kaleidacolor pad.

2021-Jul-Neva-Hummingbird-Birthday-Card-Step12

Step 12

Adhere layers of card together.  The Foliage frame is adhered with thin dimensional foam adhesive. The upper and lower flowers are adhered with On Point Glue, and the middle flower to thin dimension foam adhesive.  The hummingbird is adhered with thicker dimensional foam adhesive.

Art Supplies

Imagine
Other
  • Hero Arts Color Layering Hummingbird & Frame Cuts
  • Kat Scrappiness Slimline Card Foliage Frame
  • Sponge brayer
  • Dimensional Foam Adhesive
  • Stamp positioner

How To Create a 4th of July Card Using Fireworks Sprays

2021-Katy_Ingram-July-4th-600x600

By Katy Ingram

Hello my friends! Katy here and today I am going to show you how to create this super simple fourth of July card using Fireworks sprays in Danube Blue and Lady Bug, Memento Luxe ink in Wedding Dress and the Brushstix from Imagine. This card came together with several supplies, but when broken down into small steps anyone can create. Check out the video below to see how it all came together. I hope you enjoy. Thanks for watching.

Skill level: Beginner, Intermediate, Advanced

Time: About 40 minutes

Art Supplies:

Imagine

• Memento Luxe – Wedding Dress

• Memento – Paris Dusk

• Versafine Clair – Twilight

• Brilliance Ink Platinum Planet

• Delicata Ink – Black Shimmer

• Fireworks Sprays – Danube Blue

• Fireworks Spray – Lady Bug

• Imagine Brushstix

• On Point Glue

Other Products Used:

• 48 lb Vellum

• GMUND 100% Cotton Shiny Cream Cardstock

• Neenah Classic Crest 110lb Solar White Cardstock

• Concord & 9th Notable Numbers Stamp and Die set

• Concord and 9th Season Turnabout Stamp set

• Honey Bee Stamps Happiness Stamp set

• Simon Says Stamp – Basic Stripes Stamp set

• Kat Scrappiness – Distressed Edge Rectangle Die set

• Mama Elephant – Happy Die

• Hero Arts – Rsvp Cling Tiny Star Background Stamp

• Tim Holtz Watercolor Paper

Layered Stamping with VersaMagic Dew Drop Inks

All Things Fabulous IG

By Jessica Lin

Hi everyone, it’s Jessica here and I have a Spring-inspired Mother’s Day card to share with you. I have always loved stamp layering and decided to use this new floral stamp set. I paired it up with my all-time favorite ink – VersaMagic Dew Drop, which has great coverage and some of the prettiest pastel colors.

Skill: Intermediate

Directions:

Art Supplies

Imagine:

• VersaFine Clair – Nocturne

• VersaMagic Dew Drop

Pixie Dust, Pink Grapefruit, Pink Petunia (Malted Mauve works well too), Thatched Straw, Mango Madness, Aquatic Splash, Turquoise Gem, Aloe Vera, Tea Leaves

• Brilliance Dew Drop – Galaxy Gold

Other products:

• Beautiful Moments stamp set

• All Things Fabulous stamp set and dies

• A Wish for Everything stamp set and dies

• Neenah Solar White cardstock

• Vellum

Shimmery Ink Pads Comparison! Brilliance, Delicata, Encore Ink Pads

By Jessica Lin


Hi everyone! It’s Jessica here and today I have an ink pads comparison video to share with you. I have always loved shimmery ink pads, but with so many options available, it can be a little overwhelming. So I decided to swatch the colors and compare their shimmer properties.


Art Supplies

Imagine:

Brilliance Ink Pads

Delicate Ink Pads

Encore Ink Pads