By Kathi Rerek
Greetings! Its Kathi here to show you how to create an elegant CAS Love card using two colors of Delicata Shimmer ink, a stencil, and two stamps!
Skill: Beginner
Time: 30 minutes

Step 1:
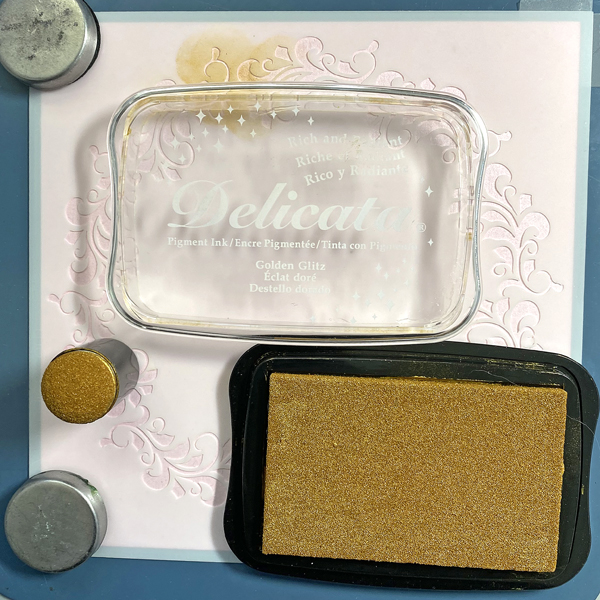
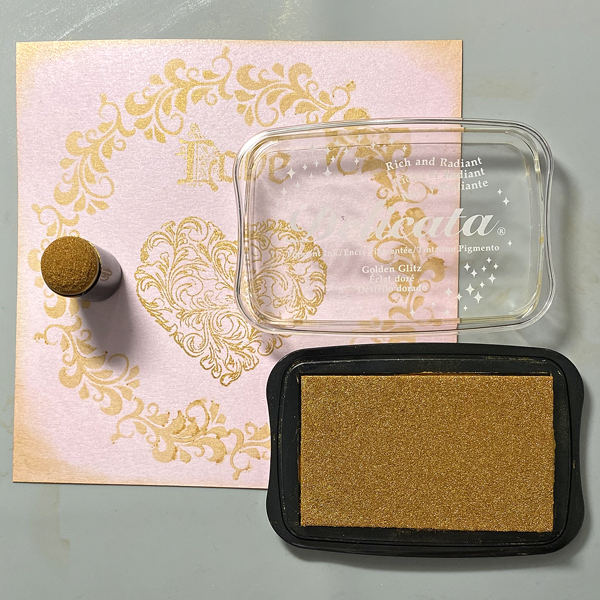
Cut a piece of Mixed Media paper to 5.75” square. Use an Ink Sweeper to apply Pink Delicata Ink to the entire paper panel. I heat set to expedite drying process but you can let it dry naturally.
Step 2:
Tape the inked paper panel to the back of the Floral Wreath stencil. Use a Sponge Dauber to apply Golden Glitz Delicata Ink over the stencil onto the ink panel.
Remove the stencil and heat set to dry.

Step 3:
Use Golden Glitz Delicata Ink and a stamping platform to stamp the heart and love within the stenciled Floral Wreath on the image panel. Heat set to dry.
Step 4:
Use a Sponge Dauber to roughly edge the image panel with Golden Glitz Delicata Ink. . Heat set to dry.

Step 5:
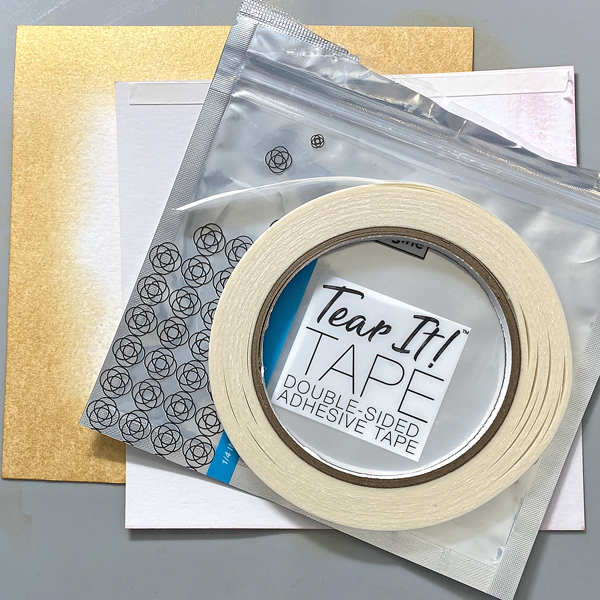
Cut a piece of 12” x 12” white cardstock in half. Score at 6” to form a 6” square card.
Place a piece of scrap paper inside the card.
Use a Sponge Dauber to apply Golden Glitz Delicata to the periphery of the front.
Heat Set to dry.
Step 6:
Use Tear It! Tape to adhere to the golden sponged 6” square card.

Art Supplies:
Imagine:
- Delicata Ink Pad – Pink Shimmer
- Delicata Ink Pad – Golden Glitz
- Ink Sweeper
- Sponge Dauber
- Tear It! Tape
Other:
- Mixed Media Paper by Strathmore
- Avalanche Cardstock by Bazzill Basics
- Floral Wreath Stencil by Joggles
- Dreams Come True Cling Stamp Set by Stamperia
- Heat Gun
- Stamping Platform by Tonic