Layered Stamping with VersaMagic Dew Drop Inks

All Things Fabulous IG

By Jessica Lin

Hi everyone, it’s Jessica here and I have a Spring-inspired Mother’s Day card to share with you. I have always loved stamp layering and decided to use this new floral stamp set. I paired it up with my all-time favorite ink – VersaMagic Dew Drop, which has great coverage and some of the prettiest pastel colors.

Skill: Intermediate

Directions:

Art Supplies

Imagine:

• VersaFine Clair – Nocturne

• VersaMagic Dew Drop

Pixie Dust, Pink Grapefruit, Pink Petunia (Malted Mauve works well too), Thatched Straw, Mango Madness, Aquatic Splash, Turquoise Gem, Aloe Vera, Tea Leaves

• Brilliance Dew Drop – Galaxy Gold

Other products:

• Beautiful Moments stamp set

• All Things Fabulous stamp set and dies

• A Wish for Everything stamp set and dies

• Neenah Solar White cardstock

• Vellum

Learn How To Make Easter Gift Tags

By Jowilna Nolte 

Today I am sharing a quick Easter Tag using some fun splats stamps and the gorgeous range of StazOn ink colors. Plain stamped images in bright and fun colors are a classic look and so versatile – making Easter decorations extra special with a touch of handmade.


Skill Level: Beginner

Time: 20 minutes


Directions:


Step 1

Use a splat stamp and stamp a sheet of white cardstock using different colors of StazOn ink. Stamp one color at a time and then clean your stamp using StazOn Stamp cleaner before inking your stamp with the second color. Repeat and stamp your third color.


Step 2

Once you have stamped all your StazOn colors, use a yellow VersaFine Clair ink and fill in any gaps on your cardstock.


Step 3

Cut your cardstock sheet into tag sizes measuring 3×6”. Then stamp your bunny and wording in VersaFine Clair Nocturne ink.


Step 4

Use Rose Gold Sheer Shimmer Spritz to add some ink splats across the tag and leave to dry. Tie onto a gift bag using baker’s twine.


Art Supplies

Imagine

StazOn full-size inkpad Cherry Blossom

StazOn full-size inkpad Caribbean Green

StazOn full-size inkpad Plum

Sheer Shimmer 7ml Spritzer Rose Gold

VersaFine Clair Full-size Inkpad Nocturne (black)

Other

White cardstock

Stamps: Joy Clair, Stampers Anonymous

Enamel dots


How to Create Some Fresh and Funky Cards for Valentine’s Day

By Jowilna Nolte 

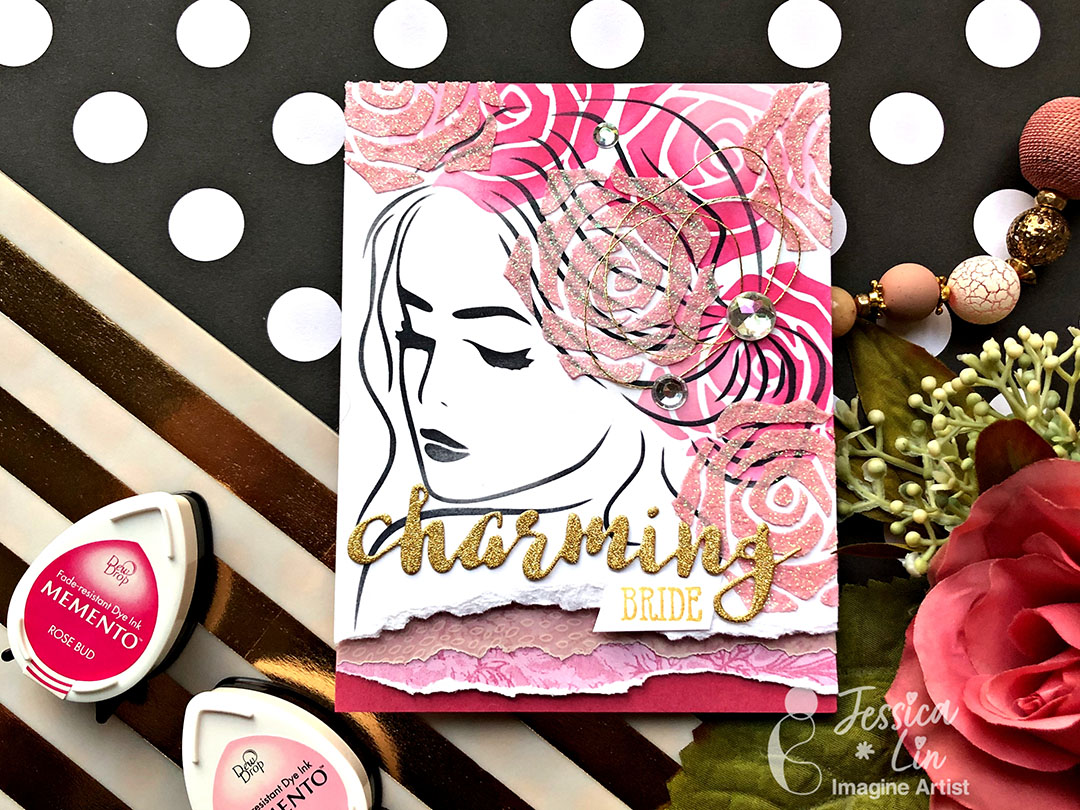
Hi everyone, on today’s blog, I am sharing some fun cards I created using StazOn Studio Glaze.
I love this stuff for the fun effects you can achieve as well as the vibrant and amazing colors in the range.

Skill Level: Beginner

Time: 20 minutes

Directions:

Step 1
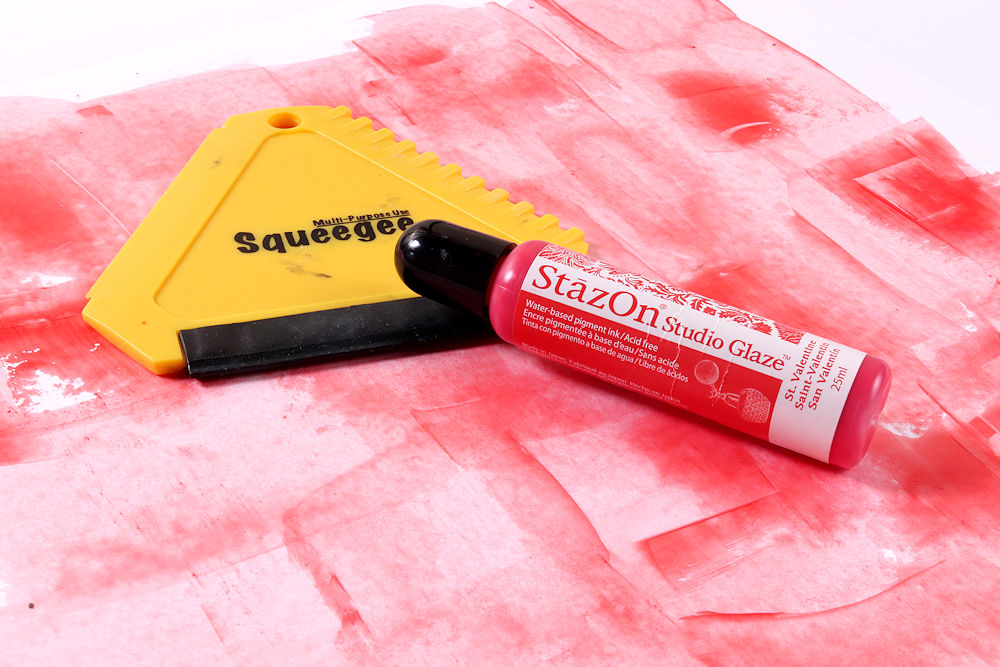
Squeeze some glaze onto your squeegee and swipe your first color over a sheet of smooth white cardstock.
You can leave this to dry for a few minutes.


Step 2
Apply a second color to your squeegee and swipe it over the first color. I use the rubber side on my squeegee but also sometimes use one of the other edges.
Both edges work perfectly, and you can always create some effects using the textured sides.


Step 3

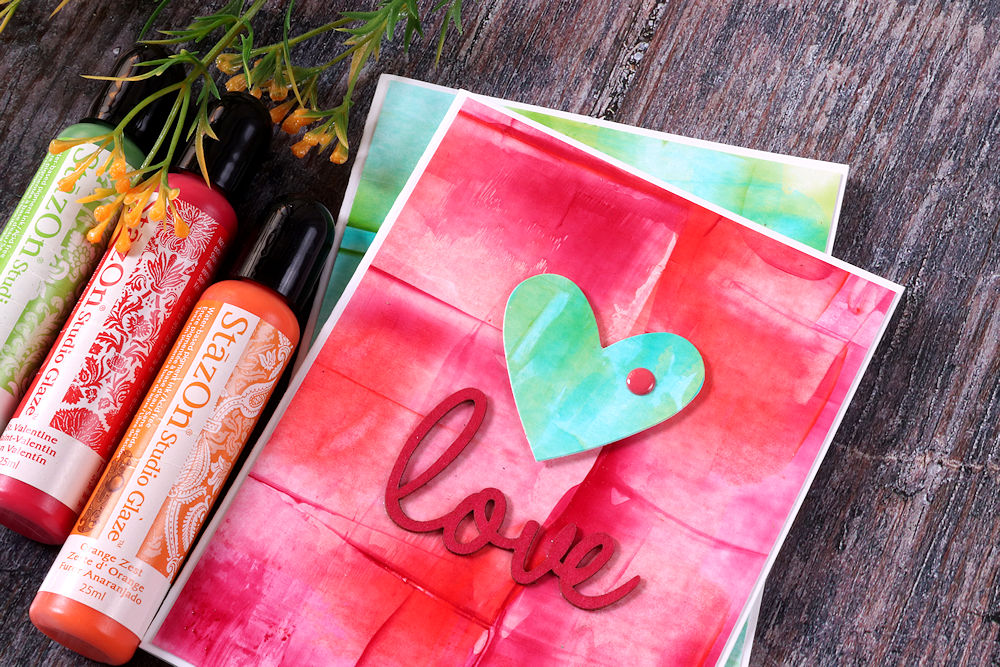
I also used a second color combination and created another sheet for a fresh spring look.


Step 4

Once your background is dry, use a heart or flower die-cut and die-cut some shapes using your die-cutting machine.


Step 5

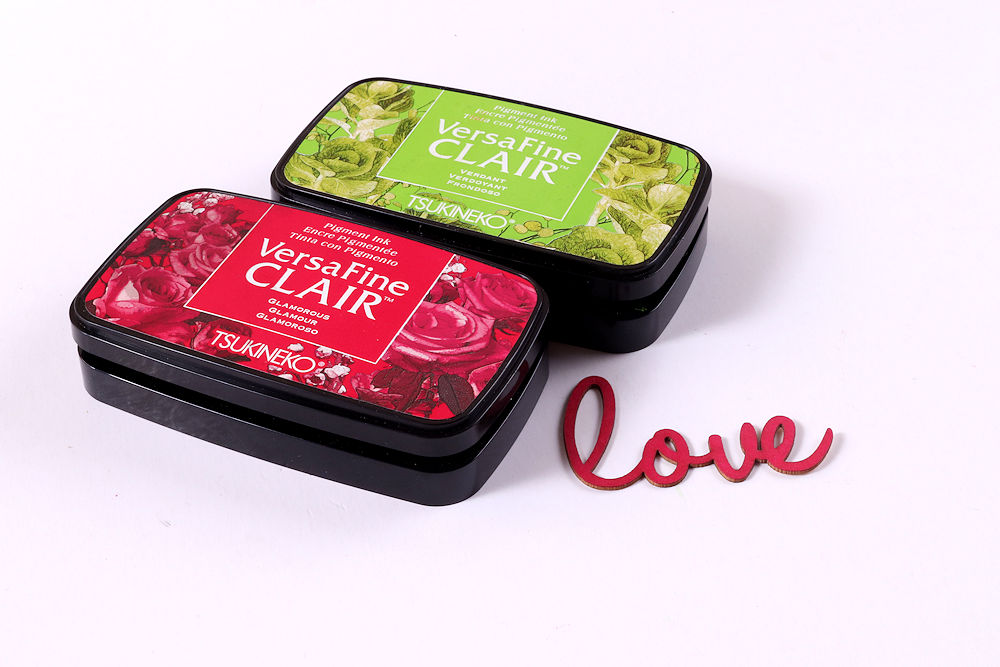
Use your VersaFine Clair ink and color some chipboard words by directly inking the words.
Once dry, you can adhere them to your card.


Step 6

Assemble your card by adhering the hearts to your background using foam tape.
Adhere the “love” word using On Point Glue and finish off your card with an enamel dot.


And in a few easy steps, you have a gorgeous set of cards using some fun backgrounds and hearts.

For me the shine, texture, and patterns achieved are what makes these cards so special, and I just love using these glazes.

Until next time – keep on creating!

Art Supplies

Imagine

• StazOn Studio Glaze Orange Zest
• StazOn Studio Glaze St. Valentine
• StazOn Studio Glaze  Emerald City
• Multi-Purpose Squeegee Blue
• On Point Glue
• VersaFine Clair Glamorous
• VersaFine Clair Verdant 


Other 

• White Cardstock
• Heart Die-Cut: Tim Holtz
• DIY Cuts Machine: Kaisercraft
• Chipboard Word: Kiriche Laser
• Enamel Dots
• Foam Tape
• Smooth White Cardstock

Learn How to Make a Cupid Valentine’s Card with Brilliance Shimmery Inks

By Jessica Lin

Hi everyone, it’s Jessica here. Did you know that you could watercolor with your shimmery ink pads? I tried watercolor with some Brilliance Dew Drop ink pads today and I was so amazed at the result! The shimmer and sparkle definitely add that extra detail to a simple card. Let me know if you have tried this before!

Skill Level: Intermediate

Time: 35 Minutes


Art Supplies

Imagine

VersaMagic Ink Pad- Thatched Straw, Wheat

• Brilliance Ink Pad –  Rocket Red, Rocket Red Gold, Pearlescent Chocolate, Galaxy Gold, Moonlight White

VersaFine Clair – Nocturne


Other Products

• Water brush

• Tim Holtz Watercolor Cardstock

• Stampin’ Up Flight of Fancy stamp set

• Stampin’ Up Well Said bundle

• Spellbinders Die Set – Shoot

• Red cardstock