Decorate Your Home for the Holidays with Clay Ornaments

by Kyriakos Pachadiroglou

Decorate Your Home for the Holidays with Clay Ornaments

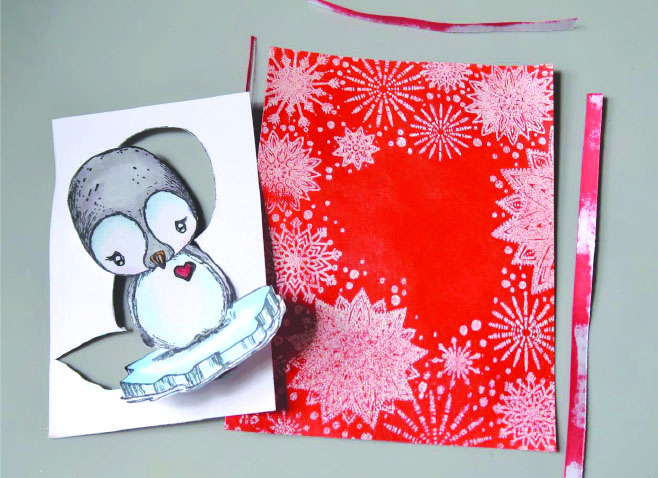
Light-weighted, these Christmas ornaments can be hung anywhere in the house to decorate during the festive holiday season. Use any Christmas theme casting mold to make the ornaments and if you don’t have any, a flat layer of clay with some cookie cutters can work too. They are easy to make and coloring is a breeze with All-Purpose Ink and StazOn Pigment inks.

Skill: Beginner
Time: 1 hour (excluding clay dry time)

Directions


Step 1

If you are creating the clay pieces yourself then allow clay of the Christmas shapes to fully dry. If you are using premade shapes then you are ready to start. Using a paintbrush, color the surface of the ornaments with All-Purpose Ink Poppy Red and Lemon Yellow. Premix the two colors or lay first the Poppy Red and add a layer of Lemon Yellow after. Let them dry.


Step 2

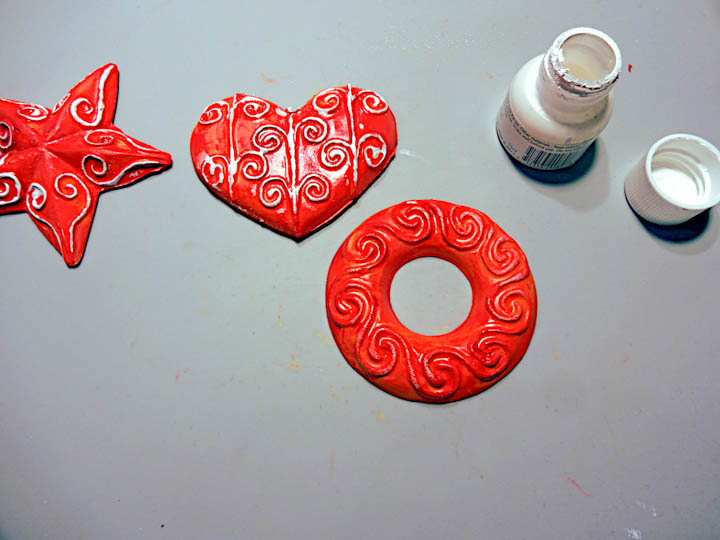
Cover the embossed details of the shapes with All-Purpose White to create a distressed or antique look. The easiest way to apply the color is by using a finger and lightly tapping on the embossed areas. Let them dry.


Step 3

Press the crystals directly on the StazOn Pigment ink pad, let them sit a bit to allow the ink to dry well and repeat for a good coverage. Cover on the backside only.


Step 4

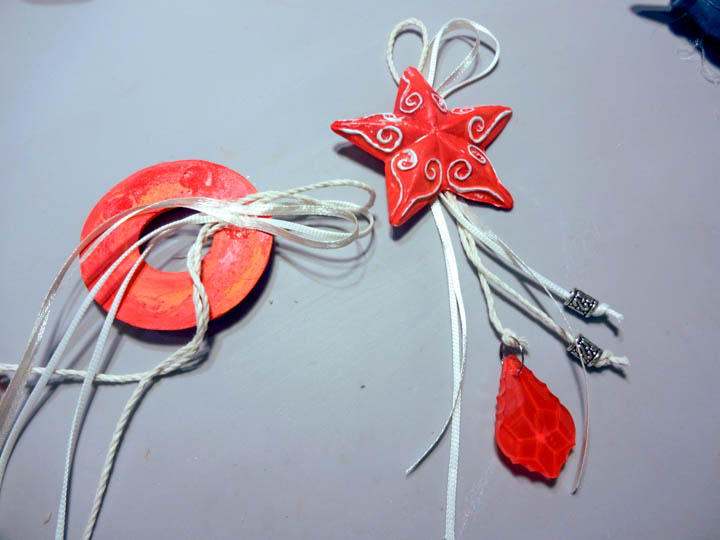
Use a hot glue gun to set ribbons on the clay shapes, add beads and crystals.

Supplies

Imagine
Other
  • Fimo casting mold – Christmas shapes
  • White clay
  • Ribbons
  • Silver color beads
  • Chandelier crystals
  • Hot glue gun

See How to Make a Fall Themed Birthday Shaker Card with VersaColor Ink

by Melissa Andrew

See How to Make a Fall Themed Birthday Shaker Card with VersaColor Ink

Today, I am showing you a wonderful property of the VersaColor pigment ink! This creamy pigment ink blends so beautifully with sponge daubers. The fall colors I used today created a smooth blend that made a perfect background for a fall card. In addition, I used Fireworks spray to help tone down the background for a gorgeous shimmer frame for a shaker card.

Skill: Advanced
Time: 1 hour

Directions

Supplies

Imagine
Other

Learn How to Create a Cute Penguin Greeting Card

by Roni Johnson

Learn How to Create a Cute Penguin Greeting Card

Red isn’t the first color you would normally associate with snowflakes and winter but I thought it would be fun to spice up a few Christmas cards with Imagine’s Color of the Month Chili Pepper! I did just that by combining Lady Bug Fireworks Spray and Summertime VersaFine Clair inks. Check it out!

Skill: Intermediate
Time: 30 minutes

Directions


Step 1

Cut a piece of white cardstock 4” x 5.25”. Stamp “Burst of Snowflakes” background stamp onto the card panel using VersaMark ink.


Step 2

Sprinkle the stamped image with MBoss Iridescent Opaque embossing powder. Shake off excess powder back into the pouch. Melt the powder with a heat tool and let cool.


Step 3

Spray the entire panel with Fireworks Shimmery Craft Spray in Lady Bug (red). Let the panel dry naturally or speed up drying with a heat tool.


Step 4

Once the Fireworks! spray has dried, sponge a layer of Summertime VersaFine Clair ink (orange) over the entire panel to give it that orange-red look of chili peppers. Wipe off any excess ink from the embossed areas.


Step 5

Stamp the Cuddlebug Penguin on a piece of white cardstock with VersaFine Clair Nocturne ink. Watercolor the image by scribbling the ink from Memento Dual Tip Markers directly onto the Craft Mat; blend and pick up the inks off of the mat using a waterbrush. After the image was dry I added a few details with a white gel pen.


Step 6

Trim both the image and the snowflake panel. Adhere the snowflake panel to a black card blank using Tear It Tape. Attach the penguin to the card using foam tape.


Step 7

Stamp the sentiment “Hello There” on a scrap of white cardstock and affix over the penguin.

Supplies

Imagine
Other
  • Unity Stamp Co – Cuddlebug Penguin, Burst of Flakes
  • Cardstock
  • Foam Tape
  • Heat Tool
  • Misti Stamping Tool or Acrylic Block

Quick & Easy: Create a Simple and Beautiful Collage on a Wooden Leaf


by Lori Warren

New to collage and mixed media?  Then this project is for you! Create a simple and beautiful collage on a wood leaf that can be used in card making and home décor projects.


StazOn Pigment
in Piano Black

Sheer Shimmer Stix in Gold

Tissue Paper

Stamp Set

StazOn Cleaner

Creative Medium

Wooden Leaves

Flat Paint Brush

Directions

Separate the top layer of a patterned paper napkin and tear it into large sections. The thin tissue paper is perfect for this project.

Using a flat paint brush, adhere the torn napkin pieces to wood leaf with Creative Artist Medium in Clear. Creative Medium is a light acrylic paste and can perform a lot like Modge Podge paste for this collage. What makes Creative Medium different than Mod Podge is that it is thick enough to form a stiff structure as well. So if you are using Creative Medium with a stencil then the shapes of the stencil will maintain their shape. Paint the Creative Medium layer on the wood shape first. Then lay the tissue paper down and apply another layer on top of the paper. Allow drying.

Stamp a fall theme saying or sentiment onto the leaves with StazOn Pigment in Piano Black. Use the StazOn stamp cleaner to clean your stamps once you are finished. Since the surface has the Creative Medium layer StazOn is the best choice here. Other ink brands might rub off or smear.

Apply Gold Sheer Shimmer Stix to edges of the leaf. The Shimmer Stix is a dauber top applicator and needs to be shaken well before use. The liquid shimmer should apply much like a marker. Test on a separate piece of paper before applying.

Repeat the process with different leaf-shaped.

Create an Inspiring Prayer Themed Card with an Ombre Background

by Lindsay Adreon

Create an Inspiring Prayer Themed Card with an Ombre Background

Watercolor is not my strong suit. Yet, I have found a way to watercolor that seems to work for me is with Memento Markers. Today, I want to share with you how to create watercolor ombre backgrounds easily to create a Prayer encouragement card. And I’m adding sparkle, because why not? I hope you all enjoy the tutorial!

Skill: Advanced
Time: 1 hour per card

Directions

Supplies

Imagine
Other

See How to Achieve Bliss with All-Purpose Ink and Embroidery

by Iris Rodriguez

See How to Achieve Bliss with All-Purpose Ink and Embroidery

I have a confession. I am not a sewing person, whatsoever. However, I do like textile arts and a friend, who destashed her crafting supplies, gave me a gallon bag of embroidery thread. Well, it was time to challenge myself with an embroidery project. I made this wall hanging using All-Purpose Inks to color the plain fabric and stitch some whimsical stitches.

Skill: Advanced
Time: 2-4 hours


Step 1

For this project, you will need fabric for embroidery. You have several options of fabric that will work; 100% cotton; linen, muslin or specialized needlework linen. I bought a piece of 100% cotton remnant from my local fabric store. You will also need embroidery hoops and thread. Fasten the fabric to the hoops.


Step 2

Spray water on the fabric. Place a small drop of Red Delicious All-Purpose ink.


Step 3

Spray water onto the drop of the All-Purpose ink. The color will spread out, creating cool effects and shapes.


Step 4

Repeat Step 3 with the rest of the All-Purpose Inks; Thyme, Wisteria, Blue Lagoon. Allow the project to dry. You can allow it to dry naturally or dry with an iron to speed up the process. At this point, you will find that the colors are lighter than when the fabric was wet. You can darken the color by adding more ink.


Step 5

Determine the embroidery thread you will use. I like to use a contrasting color.


Step 6

Use embroidery needles for your project. They are designed with wider holes than a regular needle.


Step 7

Embroider onto the fabric. If you are not familiar with embroidery stitching techniques as was the case with me. The internet is an excellent resource; do a general search, Pinterest has great pics of stitches and mini visual tutorials, YouTube has stitching videos as well. Above I choose some simple star and X-shape patterns. If you wish to add lettering or an image, it helps if you have a guide. Use a regular pencil to mark up the fabric. Stitch over the pencil mark.


Step 8

No matter the stitch you use, you must make a knot in the back when you are finished with a segment. Add different stitch types for added variation. Once you are finished. Cut the excess fabric. Glue the excess fabric onto the hoop.

Supplies

Imagine
Other
  • Fabric for embroidery; 100% cotton, linen, or muslin
  • Embroidery Thread
  • Embroidery Hoops
  • Embroidery Needles