Happy Holidays! Get Ready with some classic projects!

Happy Holidays everyone! We hope the Holiday and Christmas season is treating you all well. We are excited about what the holidays bring and all the crafting inspiration that comes with it. Be on the lookout for our tutorials featuring holiday cards, ornaments and wrapping paper as well as the announcement for our 2020 Design Team.

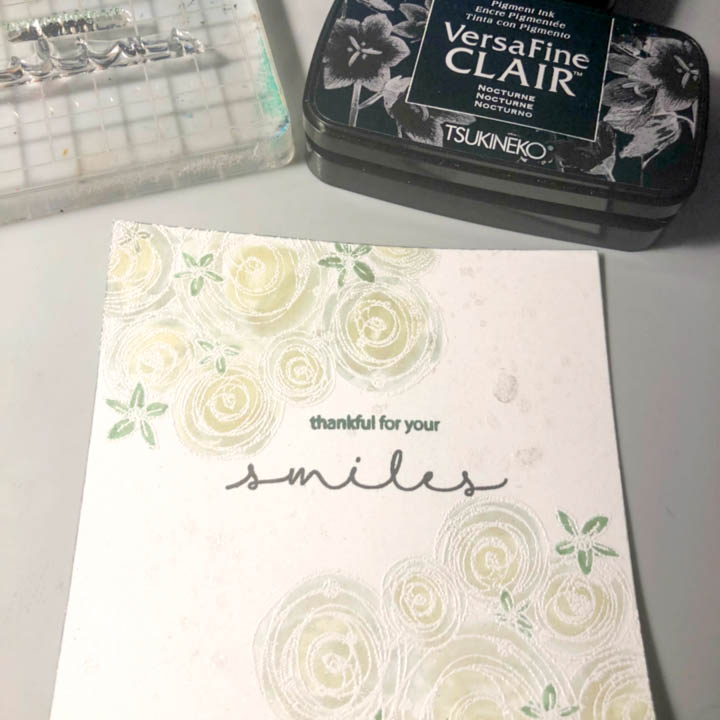
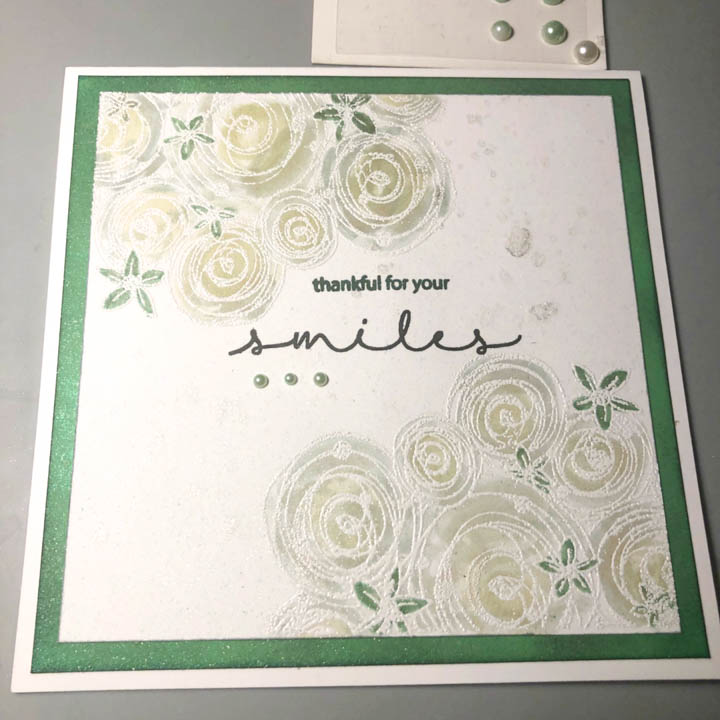
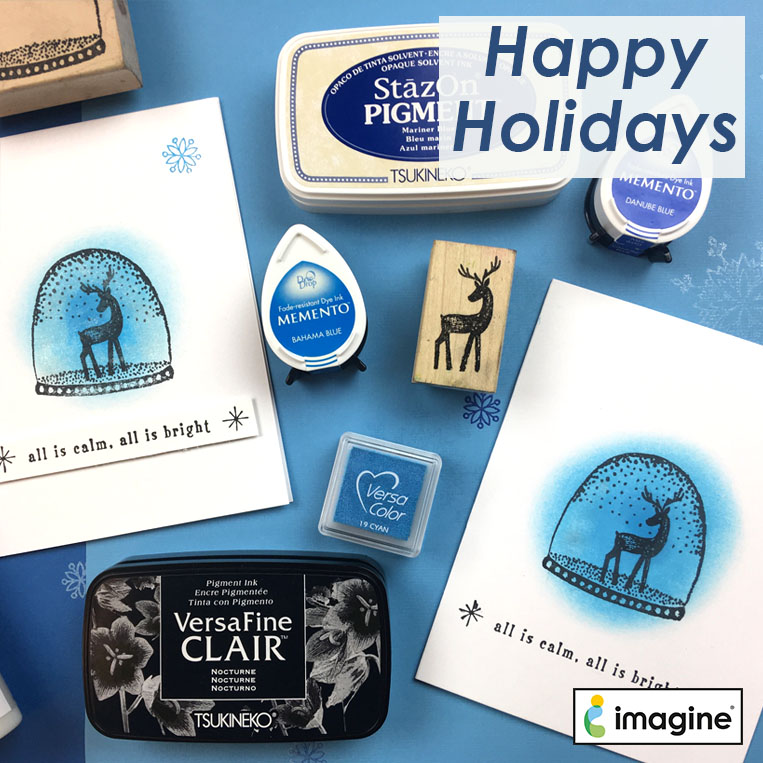
Some of the Must-Haves inks for the holidays include VersaFine Clair in Nocturne, Sheer Shimmer in Sparkle and Frost, and the color of your choice in VersaColor or Memento inks. Be sure to head over to these shop pages and check out our selection.

Since we cannot post all the cards for December right away and fast forward through the month to all the good stuff, we thought we would do a recap of some of our favorite cards and holiday crafts. See these projects on the Make section of our website. Click on Season and then on the Christmas link to browse through more!

warm winter wishes

This simple Mason Jar Holiday Card by Arjita Singh shows a lovely rustic winter effect. See more on the Make section >

Create light-up holiday houses with Jennifer Vanderbeek. See the full tutorial on Make Section >

Dress up a kraft cookie bag with a star stamp and embossing powder. See the full tutorial on the Make section >

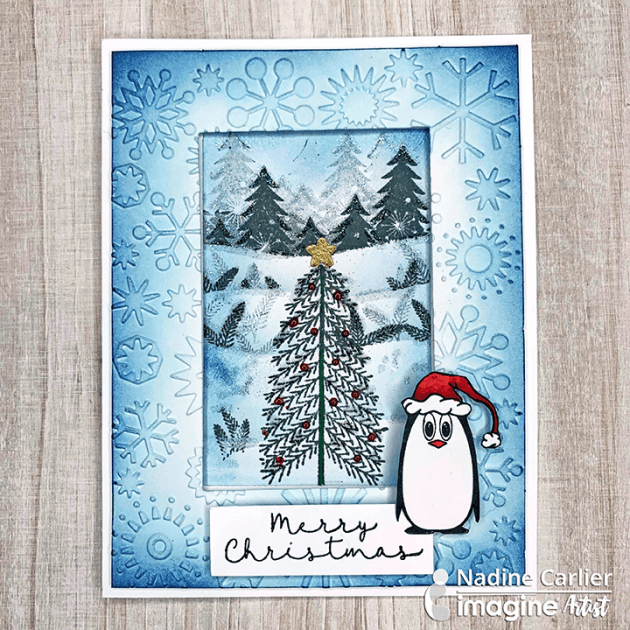
And if you do not know where to begin then try a very easy Christmas card featuring VersaFine Clair. Beginner Guide on Make section >

Use StazOn Pigment in Snowflake to Create Christmas Gift Tags

by Elina Stromberg

Use StazOn Pigment in Snowflake to Create Christmas Gift Tags

Very soon it is the time of the year again when we start wrapping Christmas gifts for our loved ones. A handmade gift tag makes the present even more special; it delivers a heartfelt message that the receiver is important to you. These adorable Christmas penguins by Joy Clair are the perfect addition to your personalized message. Just start by punching a pile of tags from leftover cardstock pieces, and soon you will have a pile of gift tags ready to spread out the Christmas feeling to your friends and family!

Skill: Beginner/Intermediate
Time: 1 hour

Directions


Step 1

Punch or hand-cut gift tags from light blue cardstock.

Stamp a snowy hill shape on each tag using white StazOn Pigment ink.
Step 2

Cut a wave shape from fun foam. Attach to an acrylic block using double-sided tape. Stamp a snowy hill shape on each tag using white StazOn Pigment ink.

Stamp Christmas penguins on white paper with black ink
Step 3

Stamp Christmas penguins on white paper with black ink. Color with markers or color pencils. Cut around the edges. To make the fuzzy cutting quick and easy you can cut out the little details on the wings and feet; those parts will be re-stamped later on the tag background.


Step 4

Stamp the penguins on the tags using black VersaFine Clair.


Step 5

Glue the fuzzy cut images on the tags, aligning the fuzzy cut and stamped penguin images. Decorate with a white gel pen.

Supplies

Imagine

StāzOn Pigment – Snowflake
Memento – Tuxedo Black
VersaFine Clair – Nocturne
Craft Mat

Other

• Joy Clair Stamps – Christmas Penguin
• Fiskars Tag punch
• Cardstock in light blue
• Piece of fun foam
• Double-sided tape. Glue
• Acrylic markers
• White gel pen
• Acrylic block for stamping
• Scissors

Inking & Masking Technique To Create A Wintery Scene

by Nadine Carlier

winter-theme-penguin-card-by-nadine-carlier-ic-web

Watch my video tutorial below to see how I used Memento Inks and a mask to create a wintery Christmas scene. Enjoy!

Skill: Intermediate
Time: 30 minutes

Supplies

Imagine
Other

Visit our YouTube Channel for more inspirational videos and subscribe. Make sure to click the bell to get updates when we post new videos.

Create Monochromatic Watercolor with Mboss Powder and VersaMagic

by Lori Warren

Create Monochromatic Watercolor with Mboss Powder and VersaMagic

A monochromatic color scheme can produce a lovely outcome; especially when framed with White MBoss Embossing powder.

Skill: Intermediate
Time: 60 minutes

Directions


Step 1

Color a 5” x 5” white cardstock panel with Fireworks! Cottage Ivy spray.


Step 2

Edge panel with VersaFine Clair Rain Forest.


Step 3

With a VersaMark Watermark stamp pad, stamp the floral image onto corners of a 4 ¾” x 4 ¾” white cardstock panel.


Step 4

Cover VersaMark stamped Image with White MBoss Embossing Powder and heat to set.


Step 5

Apply VersaMagic in Hint of Pesto to a craft mat, add water and use wet ink to color floral image (using a paintbrush).


Step 6

Spray panel with Sheer Shimmer Craft Spray in Sparkle. Allow drying.


Step 7

Edge panels with Memento Ink in London Fog.


Step 8

Stamp center of the panel with the sentiment using VersaFine Clair in Nocturne, Rain Forest.


Step 9

Layer panels onto a 5 ¼” x 5 ¼” card base and embellish with adhesive pearl.

Supplies

Imagine
Other
  • Joy Clair Stamps – Hugs and Smiles
  • Cardstock
  • Kaiser Craft – Adhesive Pearls in Ice Green
  • Acrylic Block
  • Paintbrush

Make a Fun Woodland Themed Magnetic Candy Tin

by Roni Johnson

Make a Fun Woodland Themed Magnetic Candy Tin

Christmas is quickly approaching so I have stocking stuffers on my mind. I knew the instant I saw the Deer Friends stamp set from Joy Clair it would make a perfect little magnetic playset. I have been saving magnetic sheets from my die purchases just for this purpose.

Skill: Intermediate
Time: 45 minutes

Directions


Step 1

Stamp two of each animal on magnetic sheets using Jet Black StazOn Ink.


Step 2

Carefully color the images using alcohol markers of your choice. Avoid touching the stamped lines with the markers as the alcohol in the markers will react with the StazOn ink. This can be used to your advantage though; if you use a brush-tipped marker you can pull a small amount of the Jet Black StazOn ink into the colored areas to create a shadow effect. Trim the excess magnet from the images and set aside.


Step 3

Rub desired color(s) of StazOn ink over scraps of the magnetic sheets; stamp the accessories using Jet Black StazOn ink. Trim and set aside.


Step 4

Affix Tear It! Tape to the top and bottom of the candy tin.


Step 5

Remove the backing paper from the tape and adhere a piece of pattern paper to the lid and bottom respectively.


Step 6

Trim away excess paper; sand the edges for a clean finish.


Step 7

Rub Chocolate Brown StazOn Pigment ink directly from the pad or using a sponge dauber along the edges of the tin and paper. Trace and cut inserts for the inside of the tin. Affix these inserts using Tear It! Tape. It’s time to enjoy!

Supplies

Imagine
Other
  • Joy Clair Stamps – Deer Friends
  • Magnetic Sheets
  • Candy Tin
  • Alcohol Markers
  • Echo Park – Dots & Strips Gingham Pattern Paper
  • Scissors
  • Sandpaper

Learn How to Create this Dynamic Looking Ruffle Necklace

by Kyriakos Pachadiroglou

Learn How to Create this Dynamic Looking Ruffle Necklace

In today’s tutorial, I crafted this lightweight ruffle necklace with Sheet Metal pieces and irRESISTible in Cottage Ivy. This necklace can be given as a gift or added to your collection of handmade jewelry.

Time: 1 hour
Skill: Beginner to Intermediate

Directions


Step 1

Spray the Sheet Metal pieces with the Irresistible Cottage Ivy color and let them dry. Irresistibles is an acrylic based gel that will adhere to the metal. Allow moderate dry time. Be sure to clean the nozzle after each use.


Step 2

Use pliers to bend and shape the Sheet Metal pieces to any shape avoiding breaking them.


Step 3

Imagine’s Sheet Metal comes with one hole punched at the top. To create the chain, open additional holes to allow jump rings connections. Sheet Metal is durable yet soft enough to punch holes easily.


Step 4

Start connecting the Sheet Metal pieces with jump rings and when you achieve the desired result, add the chain and the ending hooks.

Supplies

Imagine
Other
  • Jewelry chain, jump rings and hooks
  • Pliers
  • Piercing tool (or round hole punch)