Make It Happen with this Beautiful Art Journal Design

by Lori Warren

Make It Happen with this Beautiful Art Journal Design

Who wants to “Make things happen” in 2019?  I sure do and that is what inspired me to make this 4” x 6” Art Journal page featuring a variety of Imagine products. The tutorial includes how to use your Craft Mat to create a watercolor background effect with irRESISTible sprays as well as how to create a watercolor palette for detail coloring with Memento inks.

Skill: Beginner
Time: 1 hour

Directions


Step 1

Apply VersaFine Clair (Medieval Blue & Teal Zeal) to a 4” x 6” Art Journal panel with Jumbo Daubers.


Step 2

Spray panel with Ink Potion No. 9 and encourage the ink to blend.


Step 3

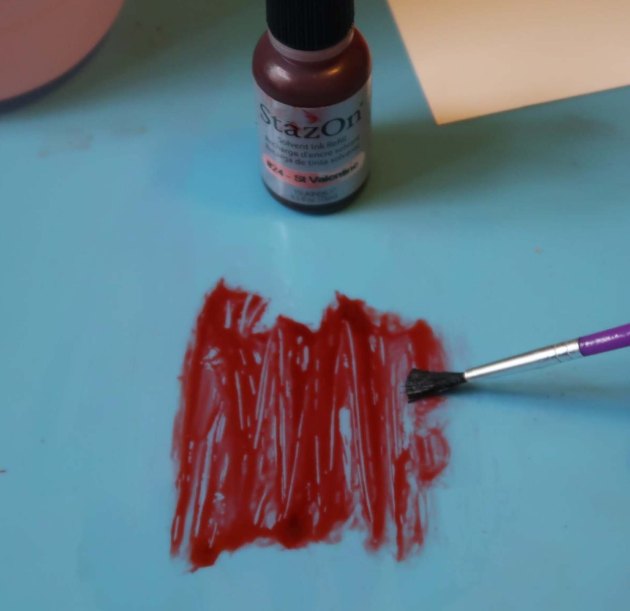
Spray Teal Zeal irRESISTible Texture Spray directly onto your Craft Mat.


Step 4

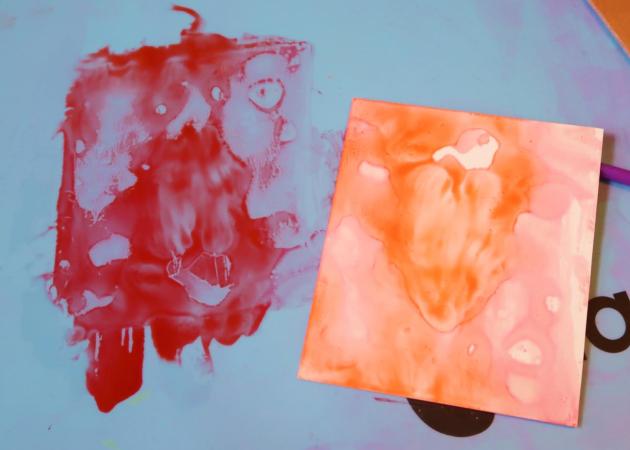
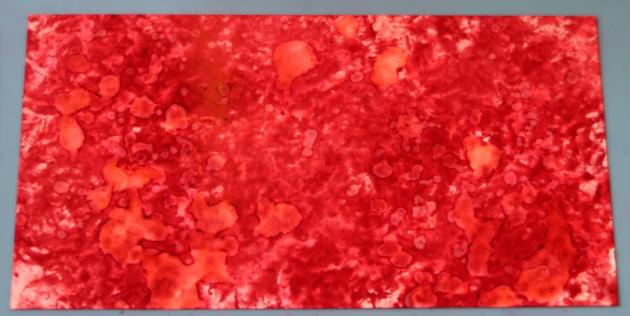
Lay the panel, facedown, into the wet ink and lift. Set aside and allow to dry.


Step 5

Spray Teal Zeal irRESISTible ink directly onto the panel in a few key areas. Allow to dry.


Step 6

With VersaFine Clair in Nocturne, randomly stamp script across the panel.


Step 7

Spray Art Journal Panel with Sheer SHIMMER Craft Spray in Sparkle. Allow to dry.


Step 8

Stamp the four-butterfly image (from the Tim Holtz Alterations French Flight stamp/die set) on to the panel with VersaFine Clair in Nocturne. Stamp the image just off center and then to the left of the panel.


Step 9

From the same Butterfly stamp set, stamp the large butterfly image into a piece of white cardstock with VersaFine Clair in Nocturne.


Step 10

Apply three colors of Memento (Morocco, Teal Zeal, Elderberry) directly onto your Craft Mat and then add water; use like you would watercolors to paint the butterfly image. Allow to dry.


Step 11

Spray the butterfly image with Sheer SHIMMER Spray in Sparkle.  Allow to dry.


Step 12

With the coordinating die from the stamp set, die cut the butterfly image.


Step 13

Adhere black thread, in a circle pattern, underneath the butterfly and then mount to panel with double-sided foam tape (directly over the previously stamped image).


Step 14

With a paintbrush, apply GooseBumps Clear Texture Spray to butterfly. Allow to dry.


Step 15

Edge panel with VersaFine Clair in Nocturne and then embellish with adhesive pearls.


Step 16

Add sticker sentiment “Make It Happen” below the colored butterfly.


Step 17

Add the pages, back panel and metal rings to transform this project into an art journal.

Supplies

Imagine
Other  
  • Mark Richards Pearls – Dark Grey
  • Tim Holtz Alterations Stamps – French Flight
  • Sizzix Thinlits – French Flight
  • Sizzix Sidekick – Brown & Black
  • Lori’s Cards & Creations – Inspire Background stamp
  • 3M Foam Mounting Tape

Show Your Love With a Mixed Media Wall Hanging

by Iris Rodriguez

Wooden wall hanging with a your are loved sentiment on a flying clay heart made with Tsukineko and Imagine color products.

This “You are Loved” stamp inspired this whole piece. Made me think of those around us that you love and think about every day. Then you think if they are happy, sad or going through a tough time. You so badly want them to know that no matter what is going on, they are loved. Send them a reminder this with wall hanging made using a wooden substrate with embellishments. Wanted to make a custom-made heart to fit the stamp; made it from polymer clay. The wooden substrate is treated with Walnut inks. Check out how this project is made.

Skill: Advanced
Time: 1.5 Hours

Directions


Step 1

Begin by selecting wooden untreated cradled board (shadowbox like frame) or other substrate that is made of untreated but finished wood.


Step 2

Using the palette knife and Iridescent Turquoise Creative medium stencil a background onto the board. On a light surface, the Creative Medium appears as an almost translucent off white. Allow the medium to completely dry.


Step 3

Spray on a layer of the Terra Cotta Walnut Ink, completely covering the substrate. Allow this layer to completely dry. Spray the Walnut Ink on random sections. Allow this layer to completely dry.


Step 4

To protect the ink from humidity in the wood, seal substrate with Varathane Polyurethane by brushing on a thin layer. One layer will suffice. It has a nice soft finish and will not alter the surface and comes in matte, satin and gloss.


Step 5

While the substrate dries, work on the embellishments. Begin by working on the heart. Stamp the sentiment on a plain piece of cardstock paper.


Step 6

Draw a heart shape. Do not worry if it’s not perfect; we’ll work on that later. This so you get an idea how big the heart will be.


Step 7

Fold the paper down the center of the heart. Cut along the heart line. You will end up with an even heart shape and a template to cut out the clay.


Step 8

Take the clay out of the package. Condition the clay in a pasta machine or use a roller. Roll out a sheet of clay to about 4 mm.


Step 9

Place the template over the clay and cut out the clay using a clay needle tool or knife. An alternative to using a template is to sculpt the heart or use a heart shaped cutter.


Step 10

Smooth out the edges and any other areas.


Step 11

Ink the stamp using Nocturne VersaFine CLAIR and stamp into the clay. Do use an acrylic block. Before stamping, clean up any ink that may have gotten onto outside the image, this will stain the clay. Press down evenly and firmly into the clay with your fingers. Ensure that your stamp is deep. Pigment and StazOn inks work best on polymer clay. If you get ink outside the stamped image, clean up with fingers right away or dab with a clean cloth into a tiny bit of rubbing alcohol and clean the clay. Use it sparingly, if you use too much, it makes the clay soft and sticky.Bake the clay according to the manufacturer’s instructions on the package.


Step 12

Ink the heart with the Ruby Red Delicata and ink the edges with the Tuxedo Black Memento Luxe ink. It really makes the heart vibrant and gives a sense of dimension. Heat set the ink with a heating tool or throw back in the oven for another 10 minutes. Seal the heart using a polymer clay sealer or polyurethane, the same one used to seal the substrate.


Step 13

Add the chipboard or other embellishments. Figure out placement; cut the chipboard to ensure fit.


Step 14

Color the chipboard pieces using white gesso using a sponge. The gesso will allow the ink to better adhere, plus you’ll get the inks true colors.


Step 15

Ink the butterfly wings using the Turquoise Gem VersaMagic ink. Heat set with a heating tool. Then ink with the Golden Glitz Delicata ink. Heat set with a heating tool. Add two layers of the Shimmer irRESISTible Pico Embellisher. This gives the wings dimension.


Step 16

Ink the rest of the chipboard embellishments using the Rocket Red Gold Brilliance ink. Heat set with a heating tool. Then ink with the Golden Glitz Delicata ink. Heat set the ink with a heating tool. By adding a darker, reddish color as a foundation really make the gold stand out. In the end, you will see more gold. Add two layers of the Gold irRESISTible Pico Embellisher. This gives the embellishment dimension.
All the pieces are done. Simply glue the pieces onto the substrate.

Supplies

Imagine
Other
  • Ampersand cradled wood board – 6×6 inches
  • Crackerbox and Suzy Stamps – You are Loved
  • Creative Embellishments chipboards – Circle Doodles frames; Flourish #12; Monarch Butterfly set
  • Sculpey Souffle – Cherry Pie (red)
  • Clay tools – roller, needle tool, knife
  • Varathane (indoor water based Polyurethane)

Learn How to Create a Layered Valentine’s Card with Cute Frame

by Kassy Tousignant

I just love using Imagine products with different finishes and textures together in a mixed media card.  The background of this Valentine card has shimmer from the Fireworks spray, dimension from the irRESISTible Pico Embellisher, and shine like no other from the Goosebumps spray!  Also, All Purpose Ink is fantastic for use on resin or clay shapes.  You can paint or spray it on for really great coverage.  The sparkle and shine from the embossing powder really makes the paper frame stand out!

Skill: Intermediate

Time: 1 hour

Directions

Supplies

Imagine
Other
  • Gesso
  • Foam tape
  • Heavy body gel
  • Cardstock – kraft, pre-printed sentiments or white
  • Prima Marketing – flowers, paper, embellishments
  • Resin heart shape

See How to Create a Mixed Media background with Self-Made Washi Tape

by Jowilna Nolte

See How to Create a Mixed Media background with Self-Made Washi Tape

Create a Valentines’ day card with a mixed media feel and matching washi tape that you make yourself in a few easy steps using your Imagine Craft Mat. Add interest with inks and textures layered to create interest.

Skill: Intermediate
Time: 1 hour

Directions


Step 1

Spray a piece of white cardstock with Fireworks Shimmery Craft Spray in Lady Bug and leave to dry.


Step 2

Use the direct-to-paper method and ink the remainder of the pane using Lady Bug and Lilac Posies Memento DewDrop inkpads.


Step 3

Use sponge daubers with ink to create a bokeh effect to the background. First, add red inked circles using Memento Luxe in Love Letter and then add white Brilliance circles over the top and slightly off-set for a fun effect.


Step 4

To create your own matching washi tape, adhere a strip of masking tape to your Craft Mat.


Step 5

Use Memento DewDrop ink pads to add color to the masking tape strip.


Step 6

Use VersaFine Clair in Morning Mist and a texture stamp to add script stamping to the tape. Leave the ink to dry before adhering the tape to your card.


Step 7

Carefully peel the masking tape off of your Craft Mat and adhere the washi tape to your card panel.


Step 8

Emboss the panel using a love-themed or Valentine’s Day themed embossing folder. Add a layered die-cut heart with a silver leafed heart on top. Finish off your card with ink splats and diamanté for a mixed media look and feel.

Supplies

Imagine

Other

  • Kaisercraft – Embossing Folder, Die-cutting machine
  • Heart die-cuts: Couture Creations
  • Masking tape
  • Wooden heart
  • Silver leaf material
  • Diamanté
  • Jowilna Nolte – Circle stencil and not square stencil

Create an Ombre Background Using VersaFine Clair and Vellum Flowers

by Arjita Sepaha Singh

Create an Ombre Background Using VersaFine Clair and Vellum Flowers

For today’s card, I heat embossed few flower images with white embossing powder on vellum. I used my sharp pair of scissors to cut them. To create the background I have used Versafine Clair inks which are very highly pigmented and also blend beautifully with each other. I used a jumbo dauber to add the colors. The sunset ombre looks so beautiful and then arranged the flowers on the card. To finish the card I added few splatters of the shimmer spray and a sentiment.

Skill: Intermediate
Time: 1 hour

Directions

Supplies

Imagine

• VersaFine Clair – Red Tulip, Summer Time, Cheerful
• Embossing Powder – White
• VersaMark
• Jumbo Sponge Dauber
• On Point Glue
• Sheer Shimmer Spray – Sparkle

Other

• Cardstock – White, Vellum
• Powder Tool
• Heat gun
• Misti
• Scissors
• Stamp – sentiment, flowers

How to Use Many Types of Ink on Yupo Paper

by Roni Johnson

Completed love art piece on Yupo paper made with many types of Tsukineko inks.

Yupo is a polypropylene medium that can take all sorts of abuse and still come out looking great. Today I wanted to show you how easy it is to use with StazOn, Memento and VersaFine Clair inks with a couple of other mediums thrown in for fun. Today’s technique is only one of many different ways to use inks on Yupo paper. Experiment, have fun and if you don’t like it simply wipe it off and start over! This is a truly forgiving medium to work with.

Skill: Advanced
Time: 45minutes – 1-hour +dry time

Directions

Step 1

Use a paint brush to paint a layer of rubbing alcohol onto the craft mat.

Step 2

Add one drop of St. Valentine StazOn ink to the rubbing alcohol and slightly blend.

Step 3

Press a piece of Yupo paper into the ink mixture and lift. Repeat this step with additional pieces of Yupo or plain cardstock to pick up the excess ink.

Step 4

Mix a drop of Rhubarb Stalk and rubbing alcohol on the craft mat.

Step 5

Pounce a piece of wadded up plastic into the ink mix.

Step 6

Pounce the inky plastic over the Yupo paper to create a variety of patterns.

Step 7

Repeat steps 4 – 6 until you achieve the desired look. Try adding other ink colors for a bolder look. For my final result I used StazOn St Valentine, Claret and a touch of Gothic Purple as well as Memento Rhubarb Stalk Ink.

Step 7b (optional)

Flick rubbing alcohol over the Yupo to create additional depth and dimension.

Step 8

Spread Gold Metallic Creative Medium through a stencil using spatula palette knife.

Step 9

After the Creative Medium has dried, scribble around the heart and edge with a Marabu Art Crayon.

Step 10

Smudge the art crayon markings with your finger. Affix letters to the Yupo with On Point! Glue.

Step 11

Randomly stamp text and hearts over the Yupo canvas with VersaFine Clair Morning Mist ink.

Supplies

Imagine
Other
  • Yupo Paper
  • Rubbing Alcohol
  • Marabu Art Crayon
  • Rinea – Text Stamp
  • Joy Clair – Heart Stamp
  • Simon Says Stamp – Heart Stencil
  • Sizzix – Letters