Use Natural Elements to Color a Greeting Card

by Iris Rodriguez

Use Natural Elements to Color a Greeting Card

Got tea? I do and I like to make art with the left-over tea bag paper. After the tea bags dry, you can take out the dried leaves you are left with an awesome substrate. Tea bags are versatile, translucent, luminous, and have an awesome vintage look and feel. I made a card using tea bags and Walnut Inks Cornflower and Willow; both awesome inks look great on tea bags. Not only are you making cool cards, but you are upcycling your tea bags.

Skill: Beginner
Time: 1 day for drying tea bags, 30 mins for the card, 5 mins to take apart and clean one tea bag

Directions


Step 1

Begin by allowing your tea bags to dry. I place my tea bags on a ceramic plate with a paper towel and allowed them to dry for several days. The color of your tea bag will be determined by the type of tea use. On this project, I started with a light color tea bag because it is Ginger tea.


Step 2

The tea bags are very delicate so a soft touch will be required to take them apart. Remove the tag by pulling it off. Remove the tiny staple with your nails. Rip open the seams. Take out the dried leaves by sloughing it off. Tear off the seams, otherwise, you’ll see it in your art. Do so, by tearing off the edges on the long side of the rectangle.


Step 3

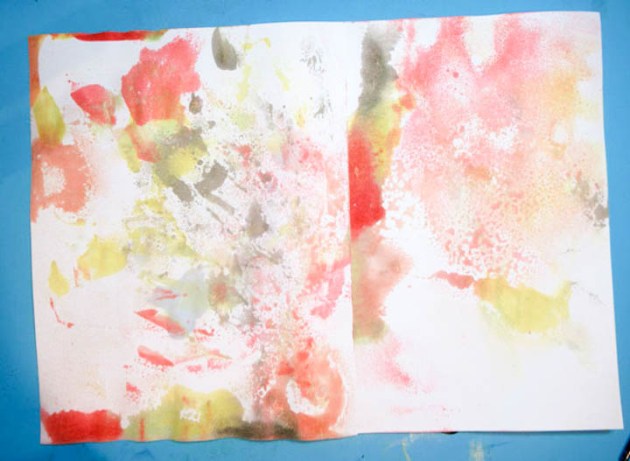
Lay the tea bag on a nonstick surface; such an as craft mat, or wax paper. Spray a small amount of the Cornflower Walnut Ink on your craft mat and mix with water. Brush on the ink. Allow the bag to dry or use a heat tool.


Step 4

Repeat the same process in step 3, using the Willow Walnut Ink.


Step 5

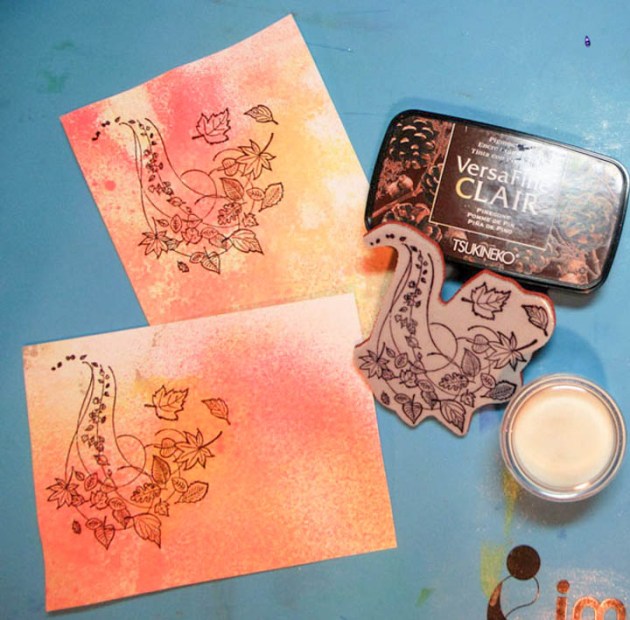
Stamp or stencil images over a piece of scrap paper. The ink will go through the tea bag and stain your paper; it’s best not to stamp on your main card. The Willow Walnut inked tea bag was used to layer an image over the main substrate tea bag. Heat set.


Step 6

To adhere the stamped tea bag to the watercolor paper or main card, brush on a very thin layer of GlazOn Clear Layer Protectant to the back of the stamped tea bag. Finish the card by adhering it to the main card. I hope you enjoyed this project and will give it a try.

Supplies

Imagine
Other
  • Used tea bags
  • Watercolor paper – 140 lbs
  • Joy Clair – Butterfly Kisses stamp set
  • Key Stamp
  • Crafter’s Workshop – Bird On Branches, Moving Vines – (6 x 6 inches)
  • Hero Arts Stamp – Old French Writing

Mythbusting – StazOn Ink & StazOn Cleaner with Clear Stamps

by Nadine Carlier

StazOn ink is a solvent ink that can be used on plastic, glass, metal, paper, and a host of mixed media surfaces and ephemera. So it is natural to assume that it might damage your stamps. We asked Nadine to talk a little bit about why StazOn is totally safe to use with any stamp set!

Supplies

Other

Prepare for Thanksgiving with a Cardmaking Tutorial

by Steph Ackerman

Prepare for Thanksgiving with a Cardmaking Tutorial

It’s October but before you know it you will be packing away the costumes and preparing for Thanksgiving. Why not be ready by delving into the colors, signs, and beauty of the season. Selecting 4 – 5 colors of Fireworks Shimmery Craft Sprays you can easily achieve amazing color combinations that set the stage for your projects. See how quickly and easily these Fall cards go together using backgrounds created with Fireworks Sprays.

Skill: Intermediate
Time: 1 hour

Directions


Step 1

Spritz assorted colors of Fireworks! Shimmery Craft Spray on the craft mat. Be sure not to mix the colors – spritz them about the mat.


Step 2

Drag white cardstock across the craft mat. Spritz additional Fireworks on craft mat if necessary until the cardstock is covered.


Step 3

Allow the cardstock to dry, then spritz with Dandelion Fireworks adding color to the white spaces.


Step 4

Cut cardstock into 2 panels, each 4″ x 5″. Stamp leaf flourishes on both panels with VersaFine Clair in Pinecone. Add clear embossing powder and heat set.


Step 5

Ink the edges of the panels with Brilliance Pearl Beige Ink, then mat with brown cardstock. Add the panels to the cards. Add color to some of the leaves using Memento Markers.


Step 6

Stamp Happy Thanksgiving on leftover strips of the cardstock with VersaFine Pinecone Ink. Add Clear Embossing Powder and heat set. Mat with cardstock.


Step 7

Adhere Happy Thanksgiving to the vertical card with foam adhesives. Cut apart Happy Thanksgiving for the horizontal card and adhere with foam adhesives.


Supplies

Imagine
Other
  • Stamps – So Suzy/Crackerbox Stamps
  • Cardstock – brown, white
  • Foam adhesives

Create a Mixed Media Holiday Card with Memento

by Melissa Andrew

It’s time to get ready for the holidays! Today Melissa creates a gorgeous watercolor background with Memento and VersaColor Ink. She finishes her holiday card with gorgeous gold embossing powder. This is a quick and easy holiday card that can be mass produced for sending to loved ones this season!

Skill: Advanced
Time: 1 hour

Directions

Supplies

Imagine
Other

Create Quick and Easy Advent Calendar Gifts

by Roni Johnson

Create Quick and Easy Advent Calendar Gifts

It’s never too early to start preparing for the holidays to help avoid the rush. Today I have a fun and easy upcycled project for the little ones in your life – a Toilet Paper Roll Advent Calendar. Now I just have to save up 20 more toilet paper rolls!

Skill: Beginner
Time: 1 hour

Directions


Step 1

Buy or collect 25 paper rolls for the 25 days of the advent calendar.


Step 2

Bend the ends of each roll towards the center to make a “pillow box”.


Step 3

Spritz the rolls with Lady Bug, Bamboo Leaves and Wedding Dress irRESISTible Texture Spray. Let dry before moving on to another color.


Step 4

Dye rayon seam binding with All-Purpose Ink in Spring Green and Red Delicious.


Step 5

Stamp white cardstock with a variety of Christmas-theme images using VersaMagic inks. Die-cut circles from the stamped cardstock. Stamp a large number stamp in the center of each circle using VersaFine Clair ink.


Step 6

Sprinkle the circles with clear embossing powder, shake off excess and set with a heat tool. Die-cut scallop circles from Rinea Foiled Papers.


Step 7

Fill and assemble each pillow box with a treat; affix the ribbon around the box using Tear It! Tape and top it off with the number.

Supplies

Imagine
Other
  • Paper Rolls
  • Rinea Foiled Paper – Ruby/Gold Glossy Foiled Paper, Emerald/Gold Glossy Foiled Paper; Emerald/Emerald Starstruck Foiled Paper
  • Rayon Seam Binding
  • Rubber Stamp Tapestry Peg Stamps – Gingerbread Man, Gift, Candy Cane, Stocking, Holly Club Scrap – Number Stamps
  • Cardstock

See How to Make Rose Petal Using Creative Medium

by Kyriakos Pachadiroglou

See How to Make Rose Petal Using Creative Medium

Working with the Creative Medium on some of my crafting projects, I noticed how it shows when it gets dry on the craft mat. Combining the nonstick feature of Imagine’s Craft Mat with the elasticity of the Creative Medium, I thought it could create a new kind of project–rose petals! Leaving a thick coat of the Creative Medium on the Craft Mat, it gives you a material for dimensional creation. The roses crafted with it can be part of the decoration on a festive table, attached on gift boxes, gifted as they are, or be an inspiration to use on various craft projects. The Creative Medium can be also mixed with different inks to make multiple colors of flowers.

Skill: Advance
Time: 1 hour + drying time

Directions


Step 1

Use a palette knife to lay a thick layer of Creative Medium on the Craft Mat making circles. Let the Creative Medium dry well. For each rose, you will need 7 circles to create the petals.


Step 2

When the Creative Medium dries, remove the circles and start rolling one to make the center of the rose.


Step 3

Continue by attaching more circles forming them to petals. Note that you may need to trim around a bit the circles if the Creative Medium is not spread nicely on the craft mat.


Step 4

While you attach more petals, bend the edges a bit and hold them to keep the shape of the petal. The Creative Medium is sticky enough to keep the petals together with no need of extra glue.


Step 5

Press the branches on the VersaMark inkpad, cover with Imagine’s Embossing Powder in Gold and heat set.


Step 6

Cut small pieces of the florist brown tape and trim the edges to form triangles.


Step 7

Press lightly the branch in the rose, secure with hot glue and cover with the trimmed tape. Add more tape around them for a better presentation.


Step 8

Color the fabric roses with the VersaFine Clair Chanti ink pad and then distress them with the irRESISTible Pico Embellisher in Gold. When they dry, glue them on the branches.


Supplies

Imagine
Other
  • Thin branches
  • Faux/fabric rose leaves
  • Florist brown tape
  • Scissors
  • Hot glue gun