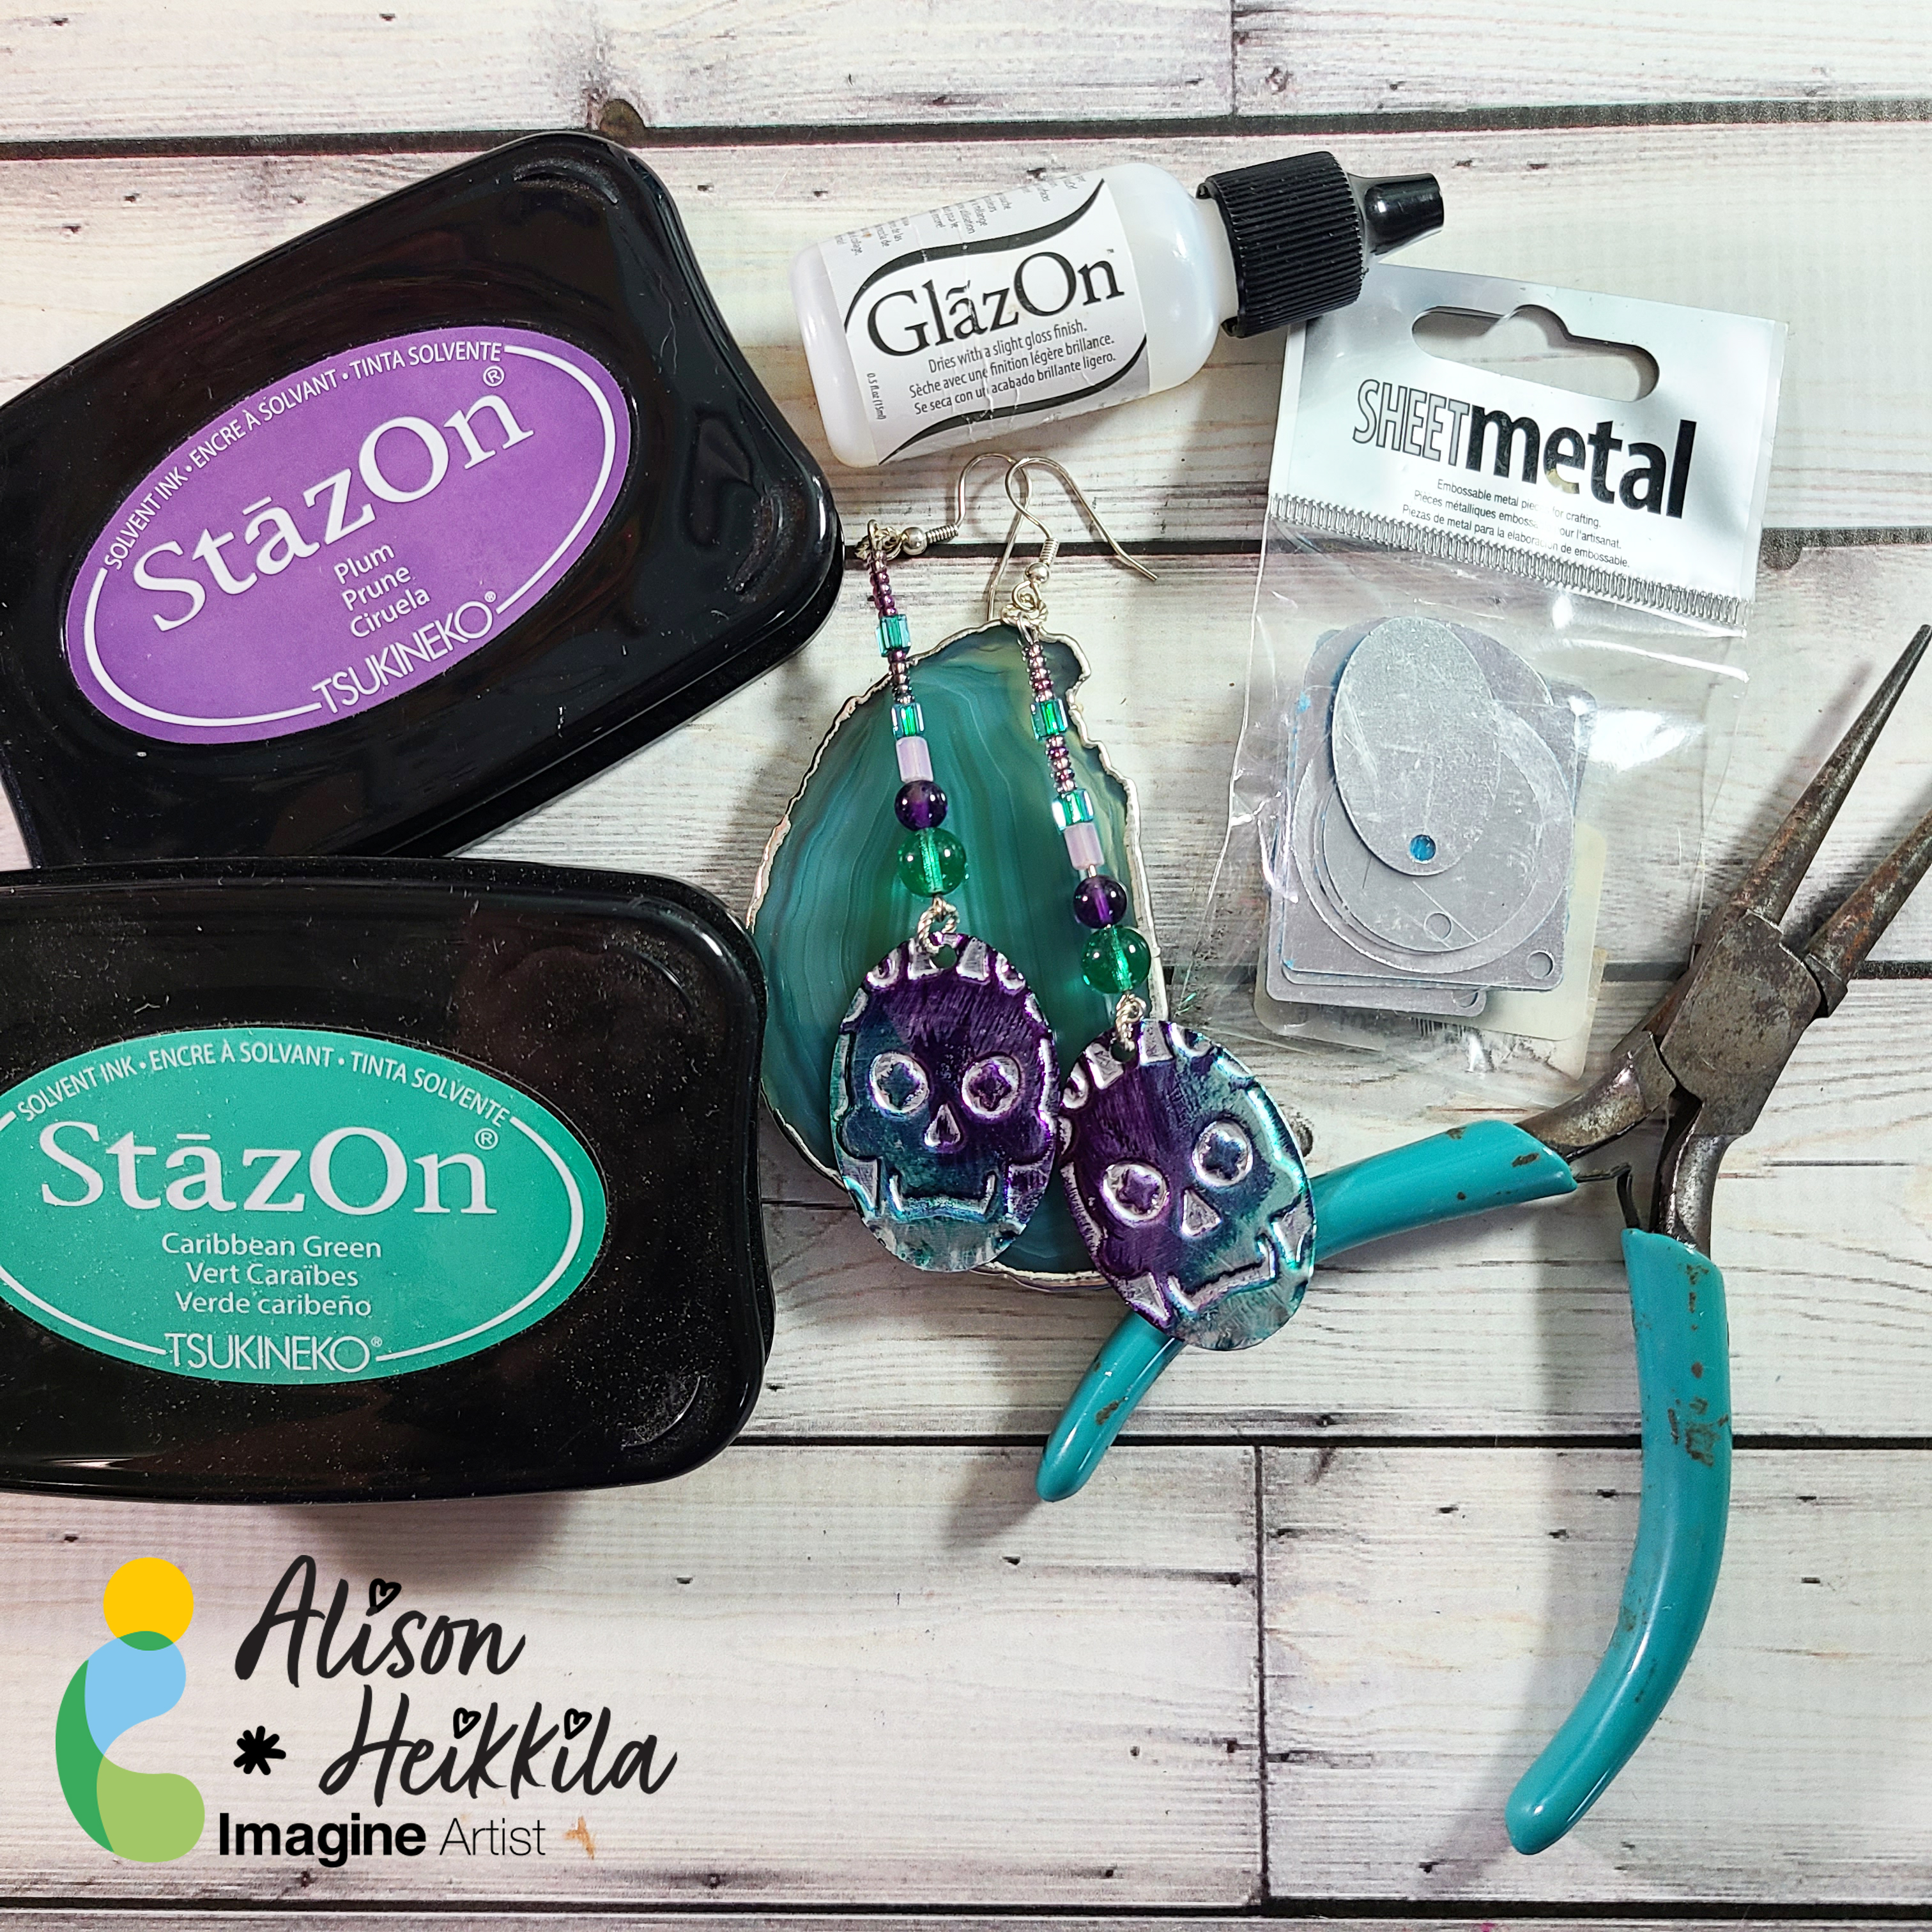
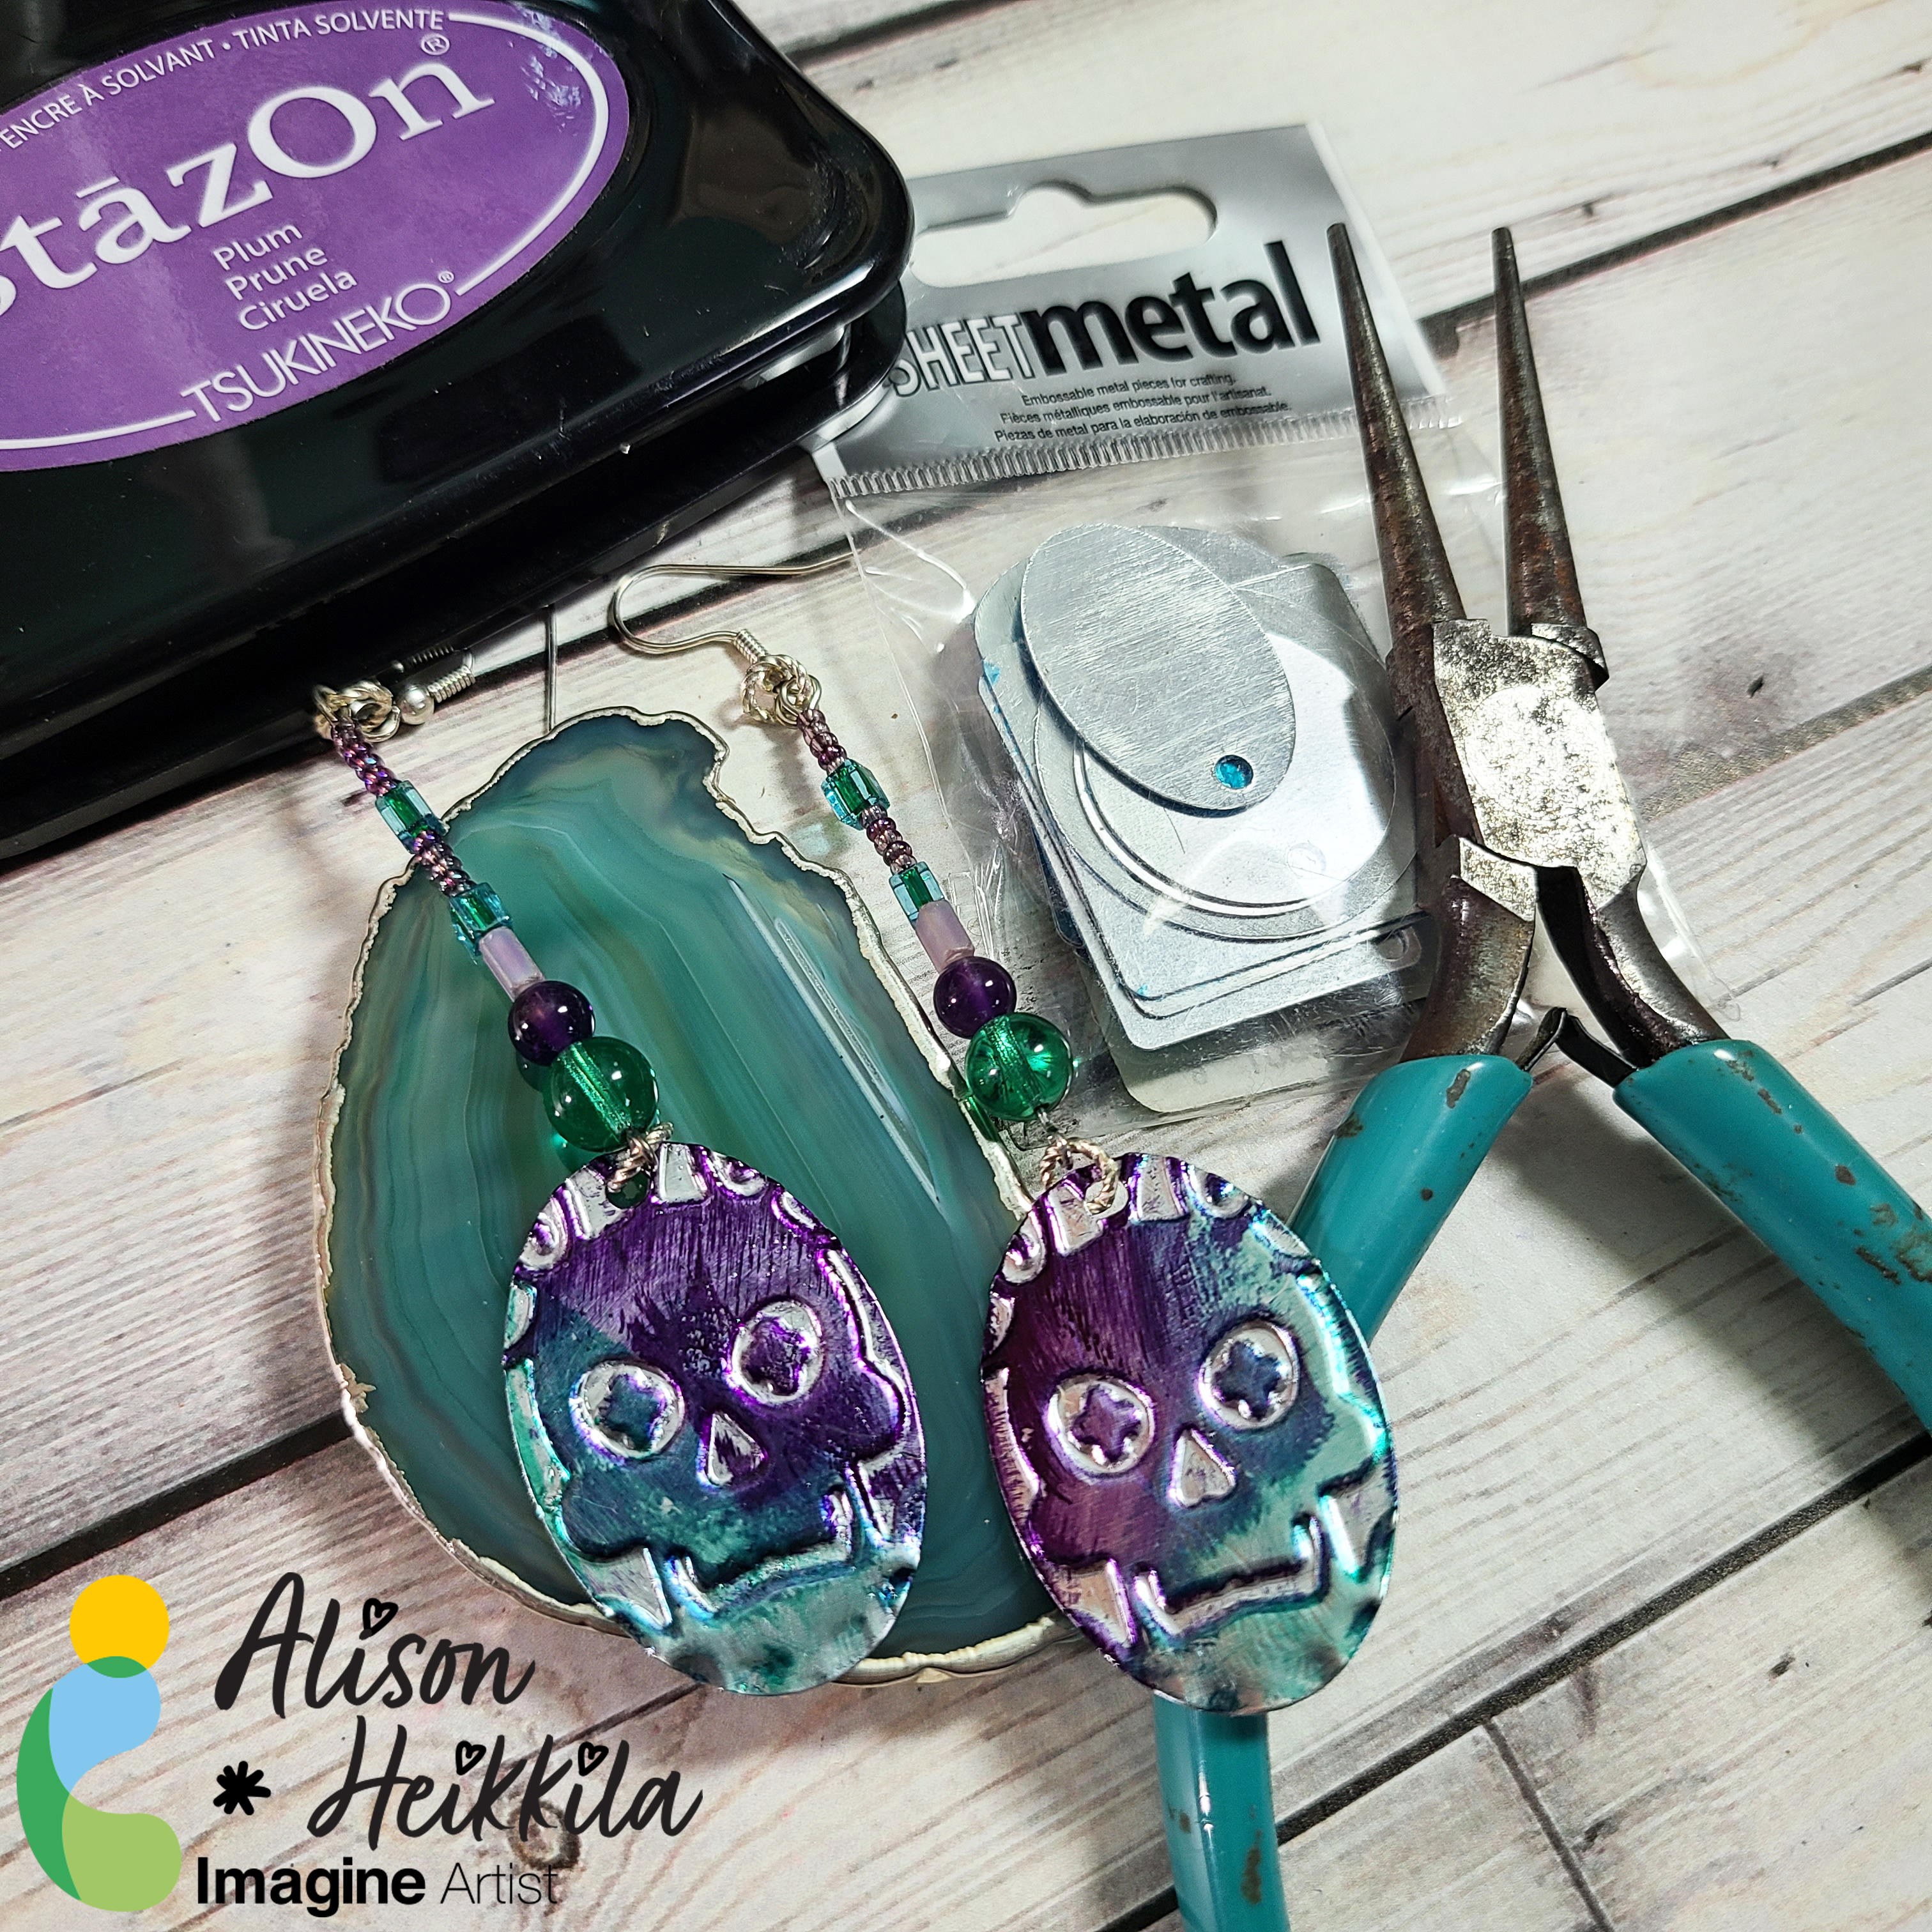
Hello! I’ve got a fun YouTube video for Imagine today that shows a fun way to use embossing folders…for jewelry! We’ll be using Sheet Metal pieces and StazOn to make fun earrings. This is a simple technique that can really be jazzed up depending on how you finish the jewelry.
Skill Level: Intermediate Time to Complete: 20 minutes
I made them pretty long, but again, make your jewelry however you like! I love wearing long earrings with lots of movement.
I just love how these came out. I’ll definitely be wearing them all year round. I hope you give this a try and expand the use of your embossing folders. Thanks so much for stopping by. Have an inspiring day!
Babies are born all year, so why not ghost themed Hello Baby cards? And all things are better with a little bling. Let’s use Imagine Tear it! Tape and Creative Medium to add some shiny foil to a couple Hello Baby cards.
– I’ve been experimenting with 91° Isopropyl Alcohol to blend inks and decided to see what would happen with Kaleidacolor Ink. I’m totally thrilled with the results!
Skill Level: Beginner to Intermediate
Time: 1.5 hours
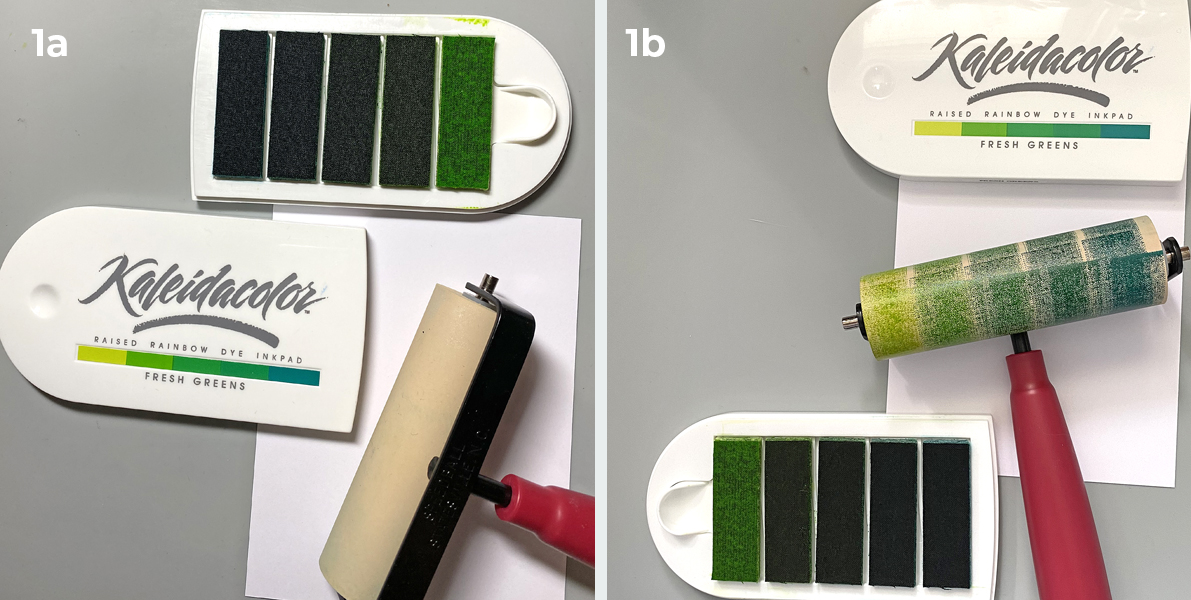
Step 1.
Keeping the Kaleidacolor’s ink pads separate, apply ink to the brayer.
Step 2:
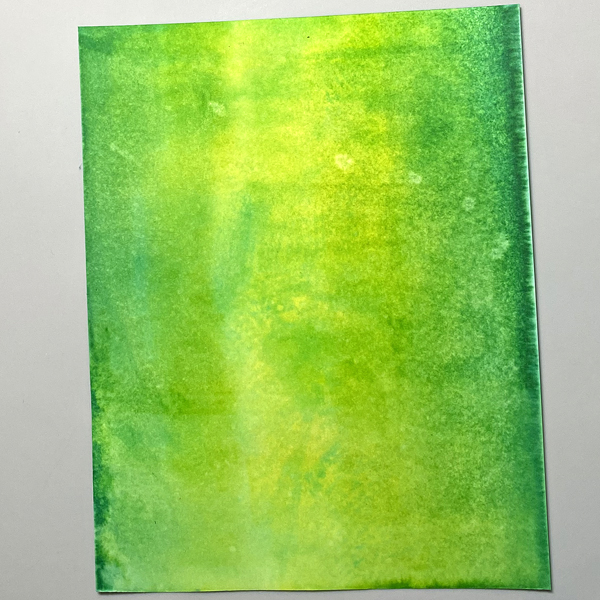
Use the brayer to roll the ink onto one side of a 4.25” x 5” panel of white cardstock. Re-ink the brayer if necessary. Notice that the lightest green is in the center of the paper.
Flip the paper 180° and repeat. It’s always a good idea to create more than one panel of inked cardstock!
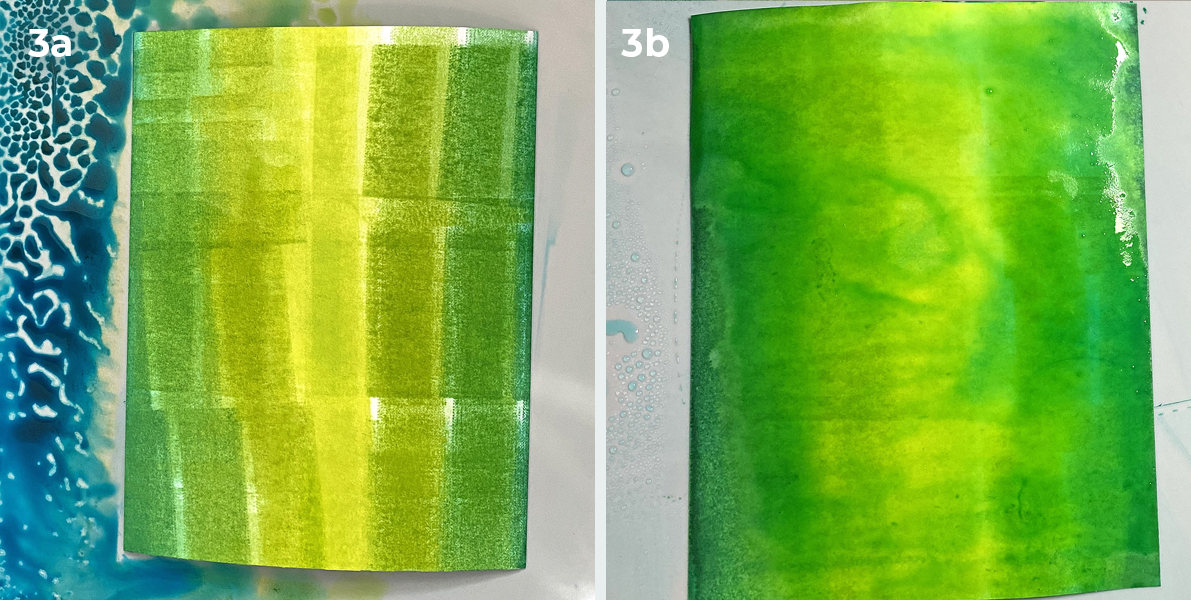
Step 3:
Spray the inked cardstock with Isopropyl Alcohol until the paper is completely saturated. Tilt the paper so that the alcohol moves the ink around. Note that whereas the paper is wet, it is not pilling!
Safety Warning: Be sure to have good ventilation when using any kind of solvent!
Pro Tip:
Place a piece of white seam binding or ribbon into the puddle of ink to create perfectly matching trim!
Step 4:
Mist the cardstock with water to add white speckles and blotches. Heat set.
Step 5:
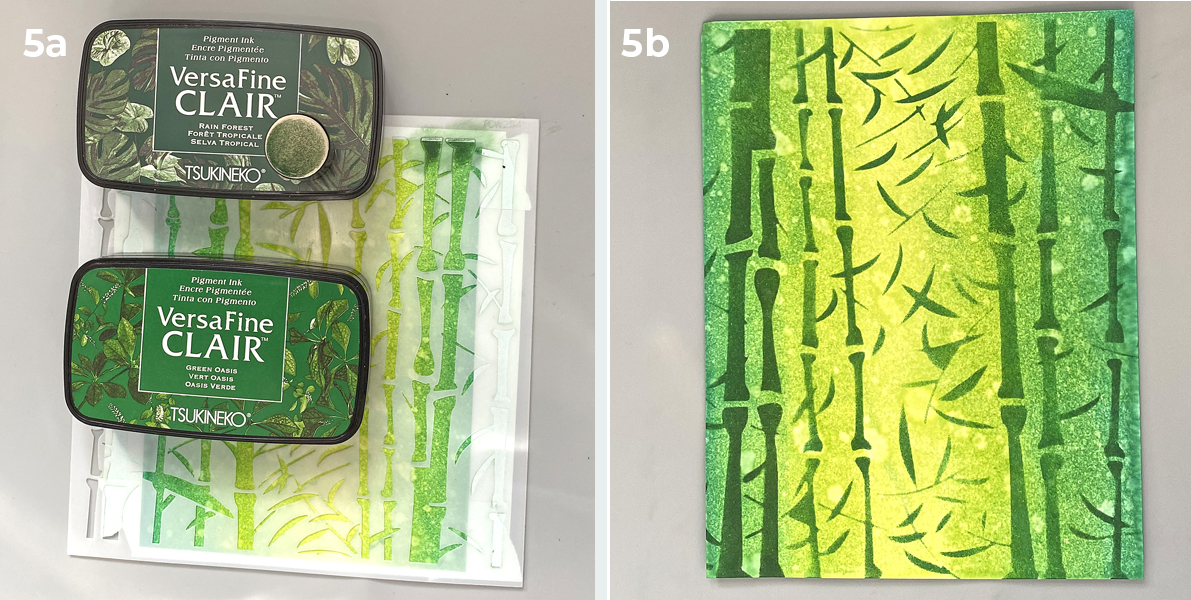
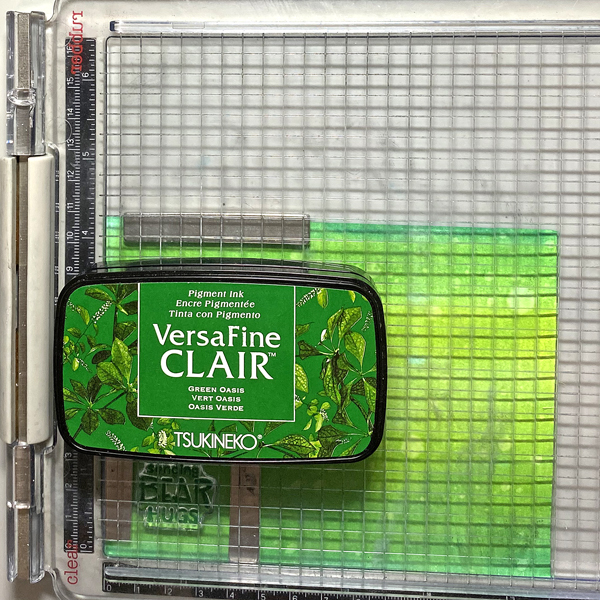
Tape the inked cardstock to t he back of the bamboo stencil.
Sponge Rainforest and Green Oasis VersaFine Clair Inks over the stencil onto the inked cardstock. Heat set.
Step 6:
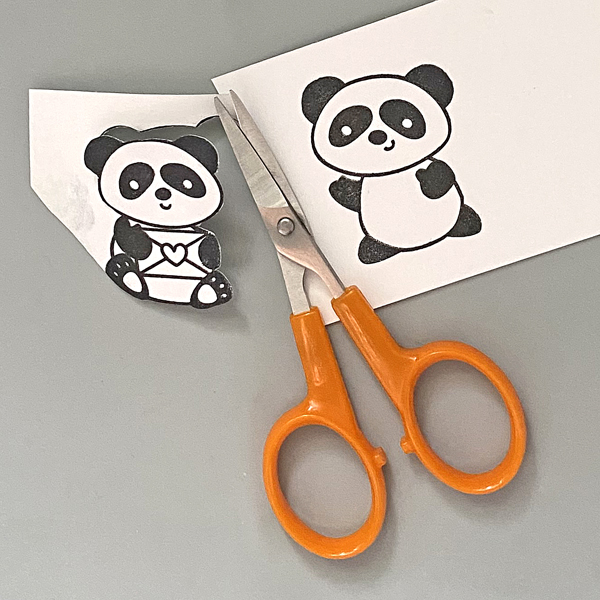
Use Nocturne VersaFine Clair Ink to stamp two of the pandas from the Pandamonium Clear Stamp Set. Heat set.
Step 7:
Fussy-cut both pandas.
Step 8:
Smoosh Rose Bud, Angel Pink, Summer Sky, and Dandelion Dew Drop Inkpads onto a craft mat. Mist with water. Use a fine paintbrush to color the pandas.
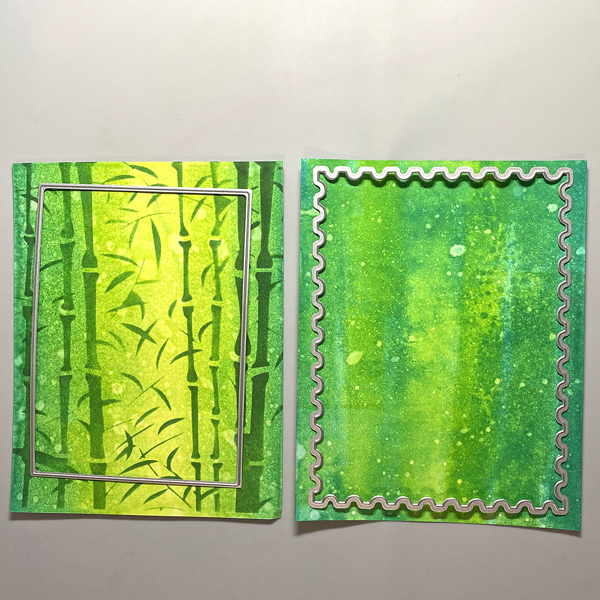
Step 9:
Use a plain rectangle and a postage edged rectangle dies to cut inked panels.
Step 10:
Place a piece of paper tape across the bottom of the stenciled cardstock.
Heavily sponge Rain Forest VersaFine Clair Ink below the tape to cover the stenciling. Use the ink to edge the piece as well.
Step 11:
Use Green Oasis VersaFine Clair Ink to stamp the sentiment.
Step 12:
Use a Postage Edged die to cut the sentiment.
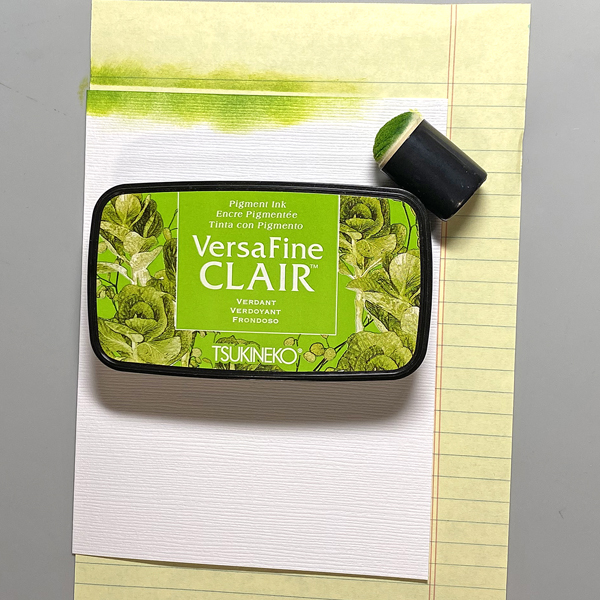
Step 13:
Create an A2 card from Avalanche cardstock. Apply Verdant VersaFine Clair Ink around the edges of the white cardstock. VersaFine Clair Ink works really well with textured cardstock!
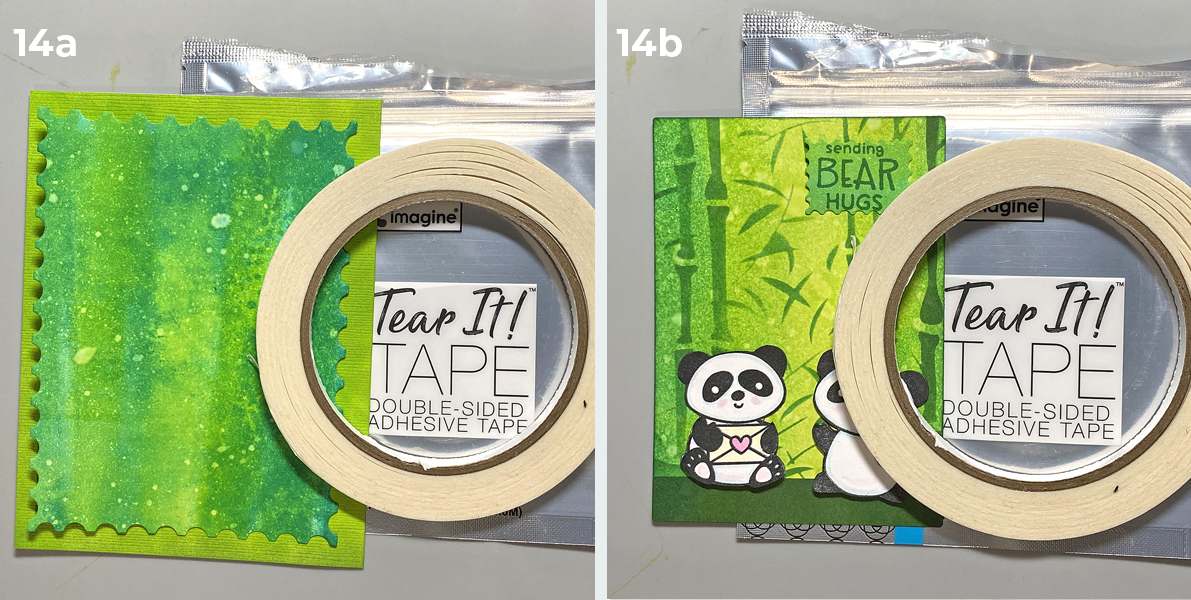
Step 14:
Use Tear It! Tape to attach the postage edged die-cut to the card.
Adhere the pandas and the sentiment die-cut to the stenciled panel, then adhere the stenciled panel to finish the card.
Pyrography is the art of wood burning and it has a very distinctive look. This stamping technique has a very similar look. Be sure to use watercolor card or this technique will likely not work. You will also need a stamping platform, water mister and a water reactive dye ink like VersaMagic, and a non-water reactive pigment ink, like VersaFine Clair. Let’s get into it.
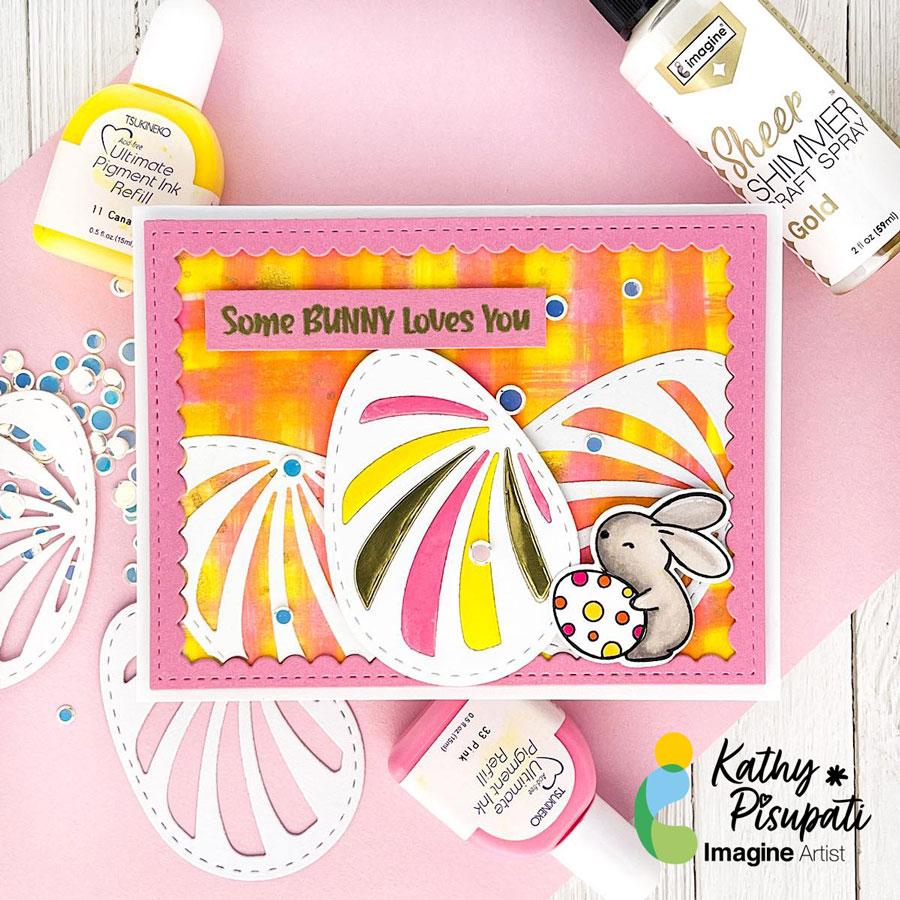
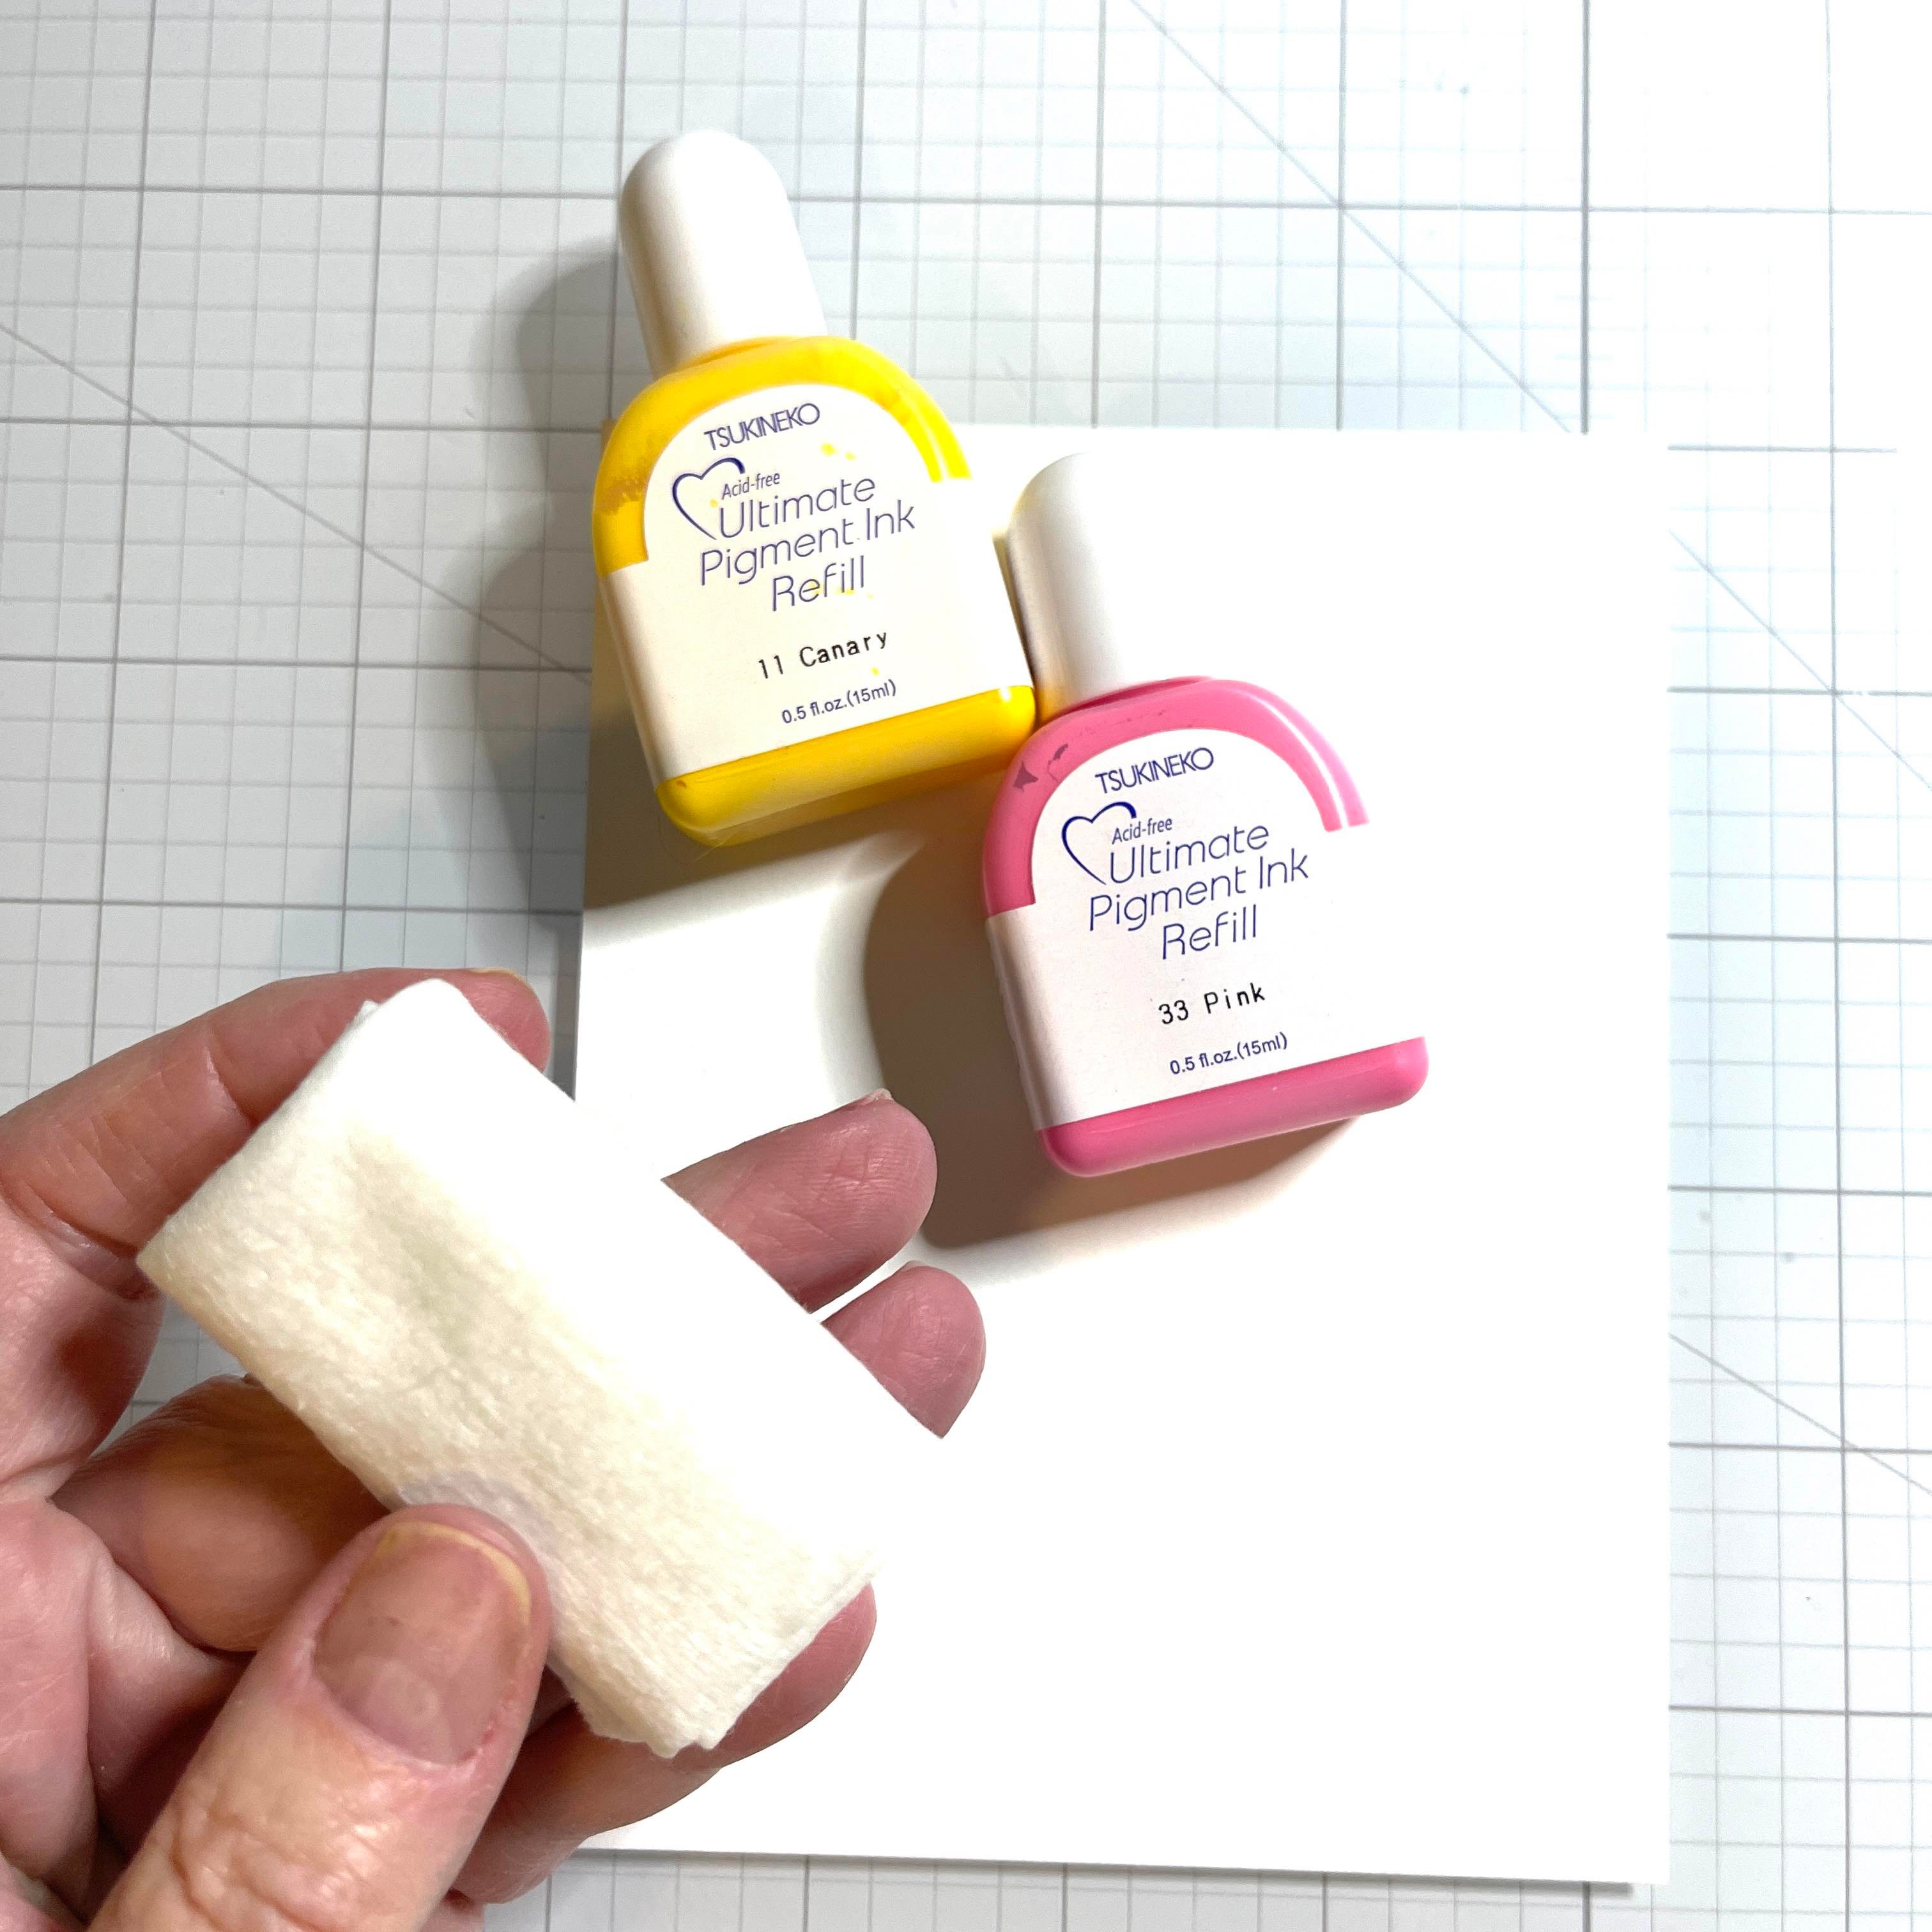
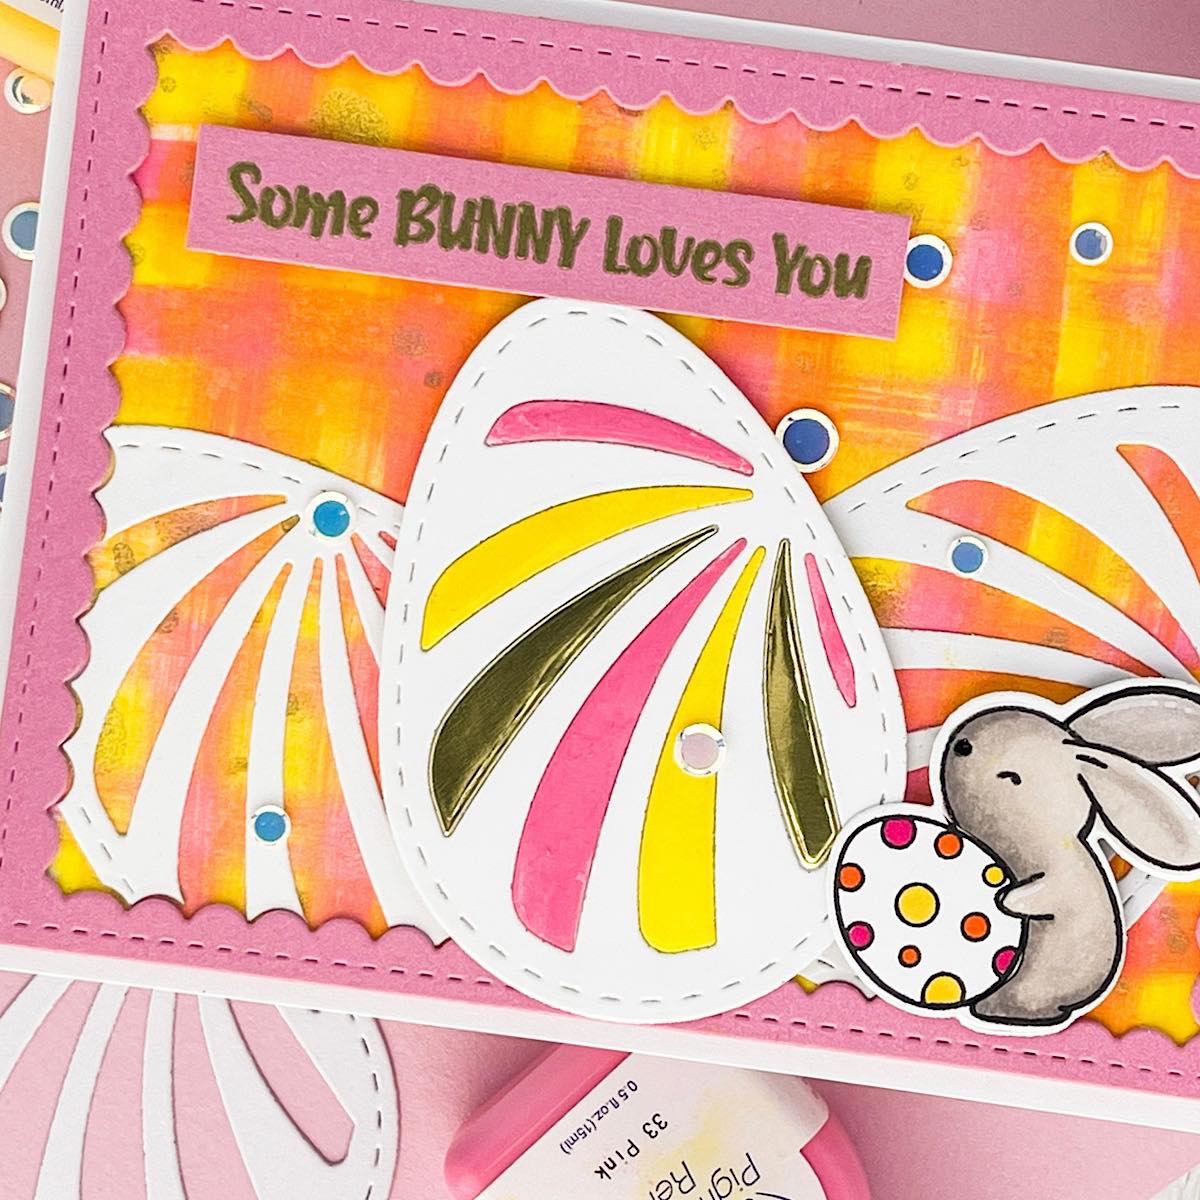
Good morning! Kathy here, creating art for Imagine Crafts! Today I have a new tutorial for you. Today’s project is an Easter card but it is also about creating your own backgrounds with Imagine Craft’s Ultimate Pigment Ink Refills! If you don’t have much patterned paper this is an easy background using the refills and baby wipes!
Skill Level: Easy
Time to complete: 1 hour
Step 1
Cut a piece of a layering weight, white card stock to 4.25” x 5.5”. This will be enough for three holders. Grab your favorite ink refills. For today’s card I used Imagine Craft’s Ultimate Pigment Ink Refills in Canary and Pink. Grab a baby wipe and fold it up nicely.
Step 2
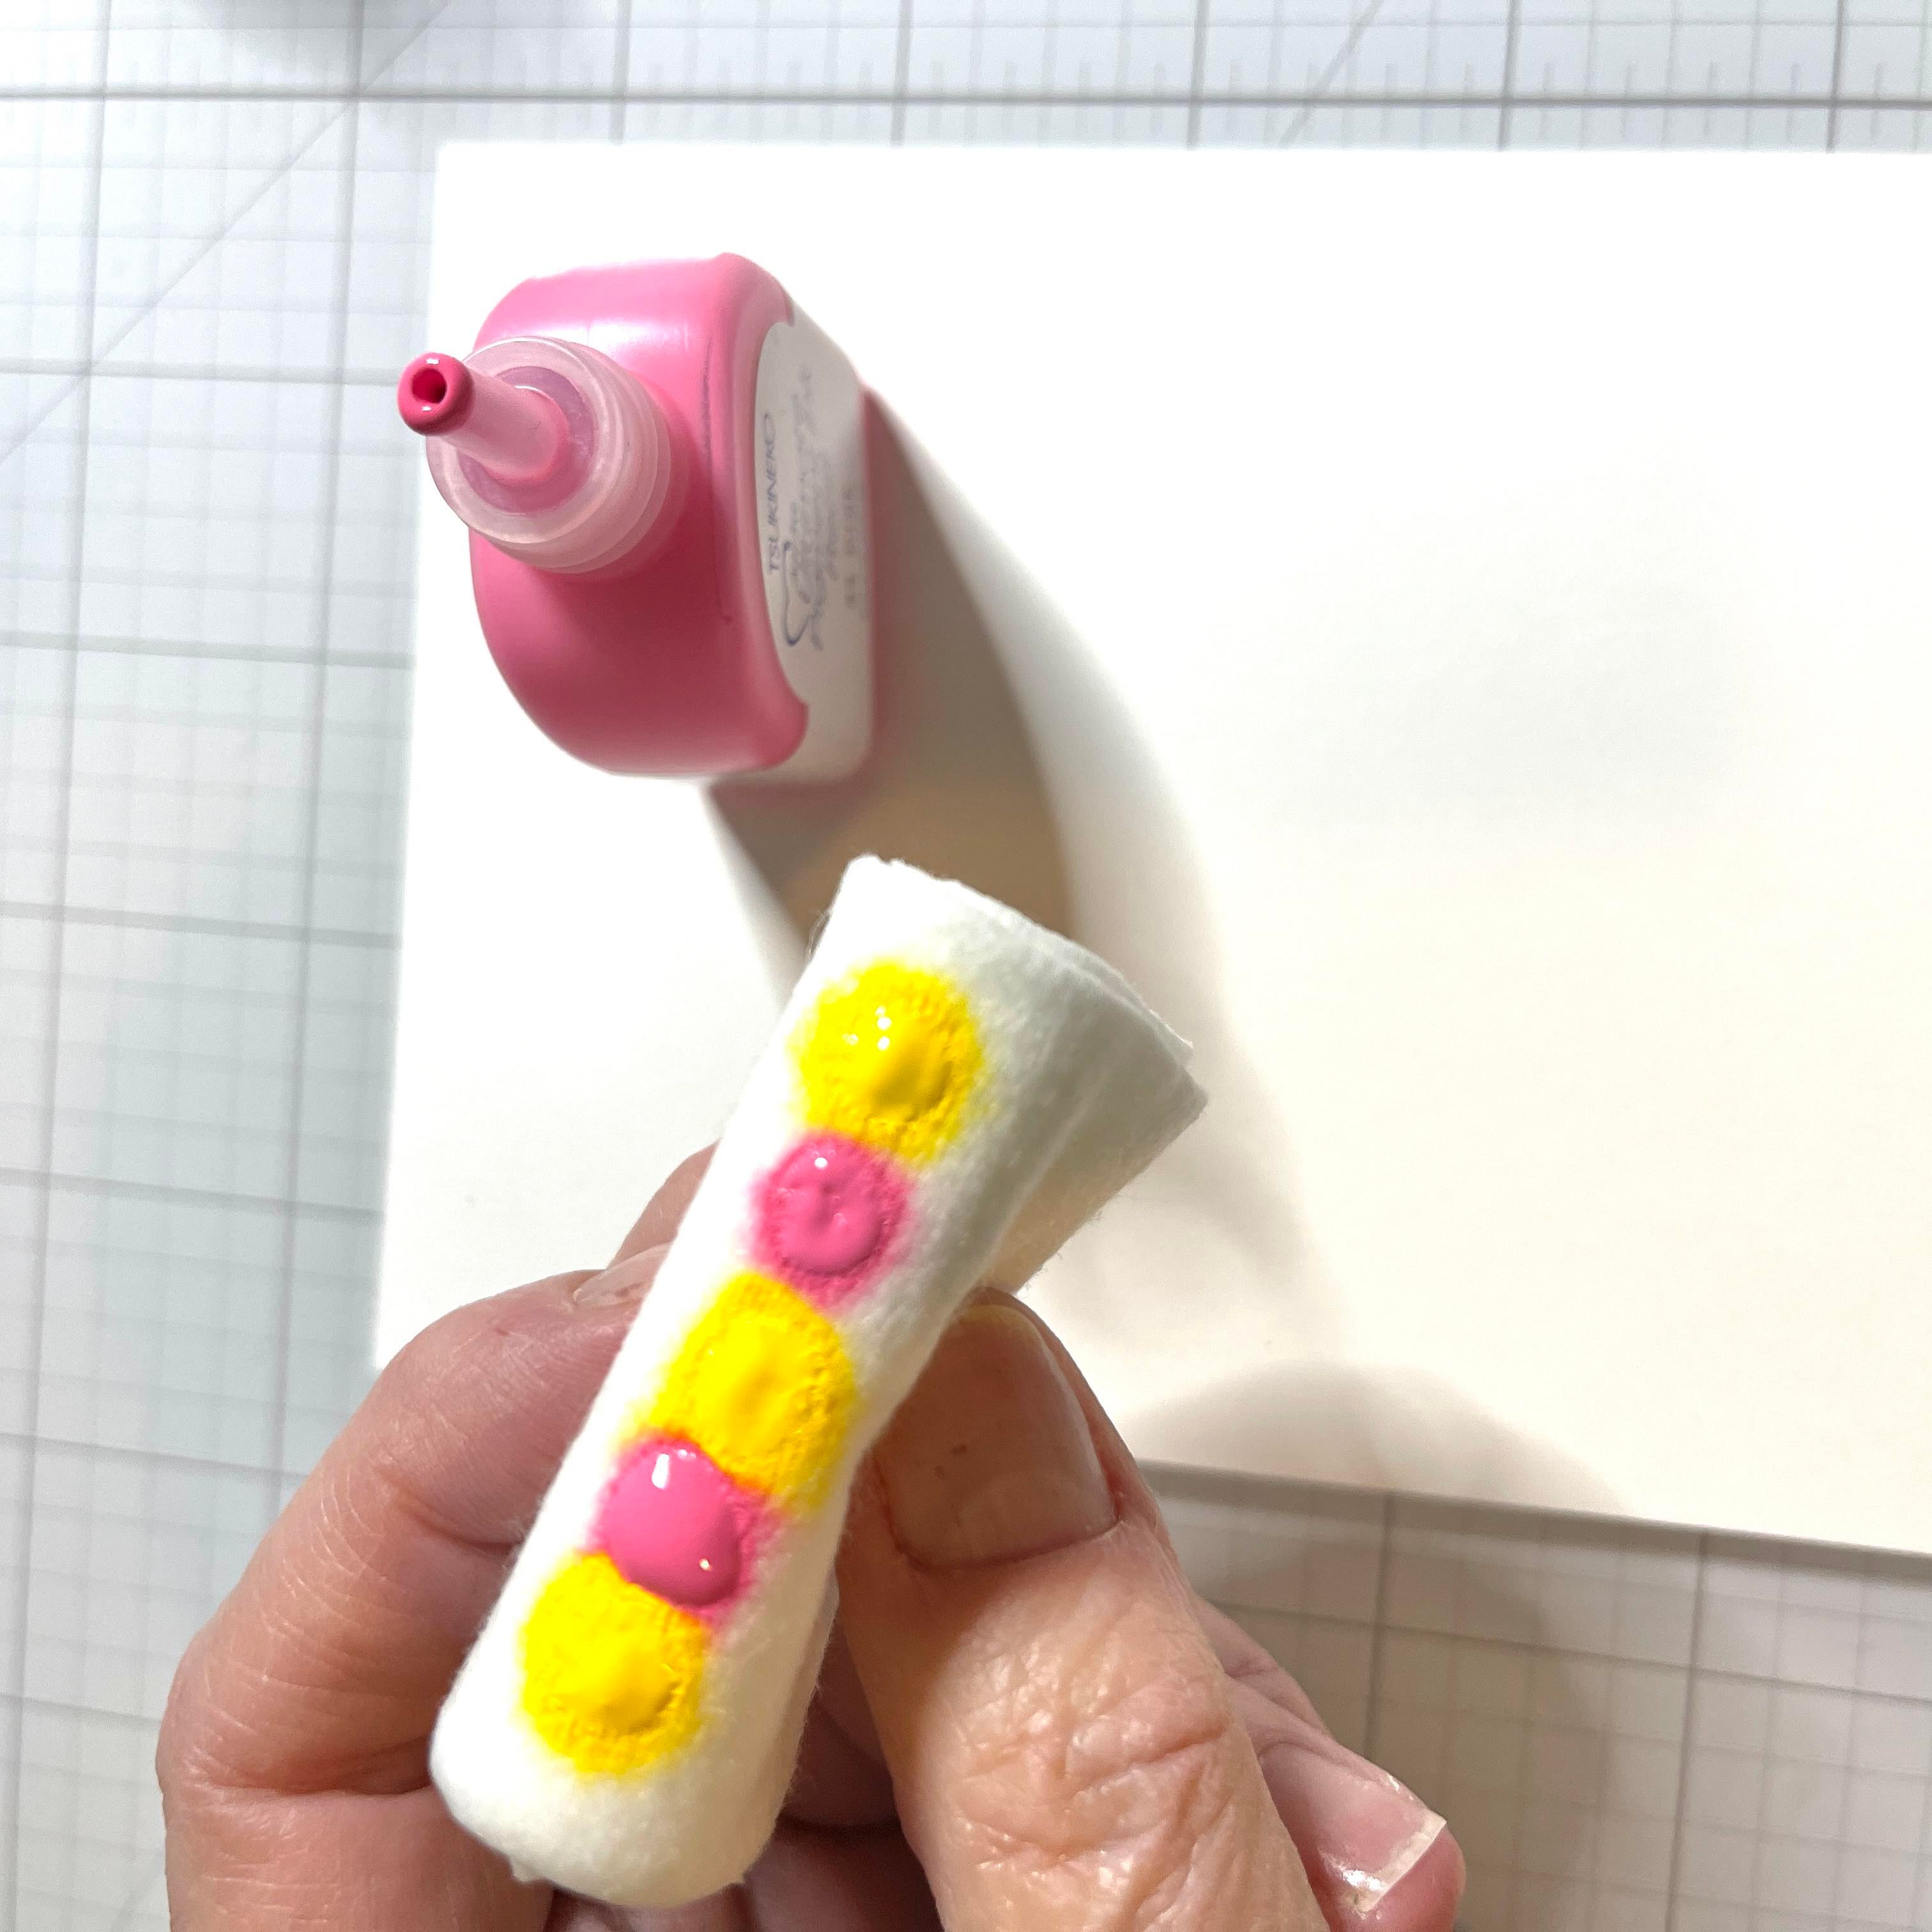
Dab your ink onto the baby wipe in an alternating order.
Step 3
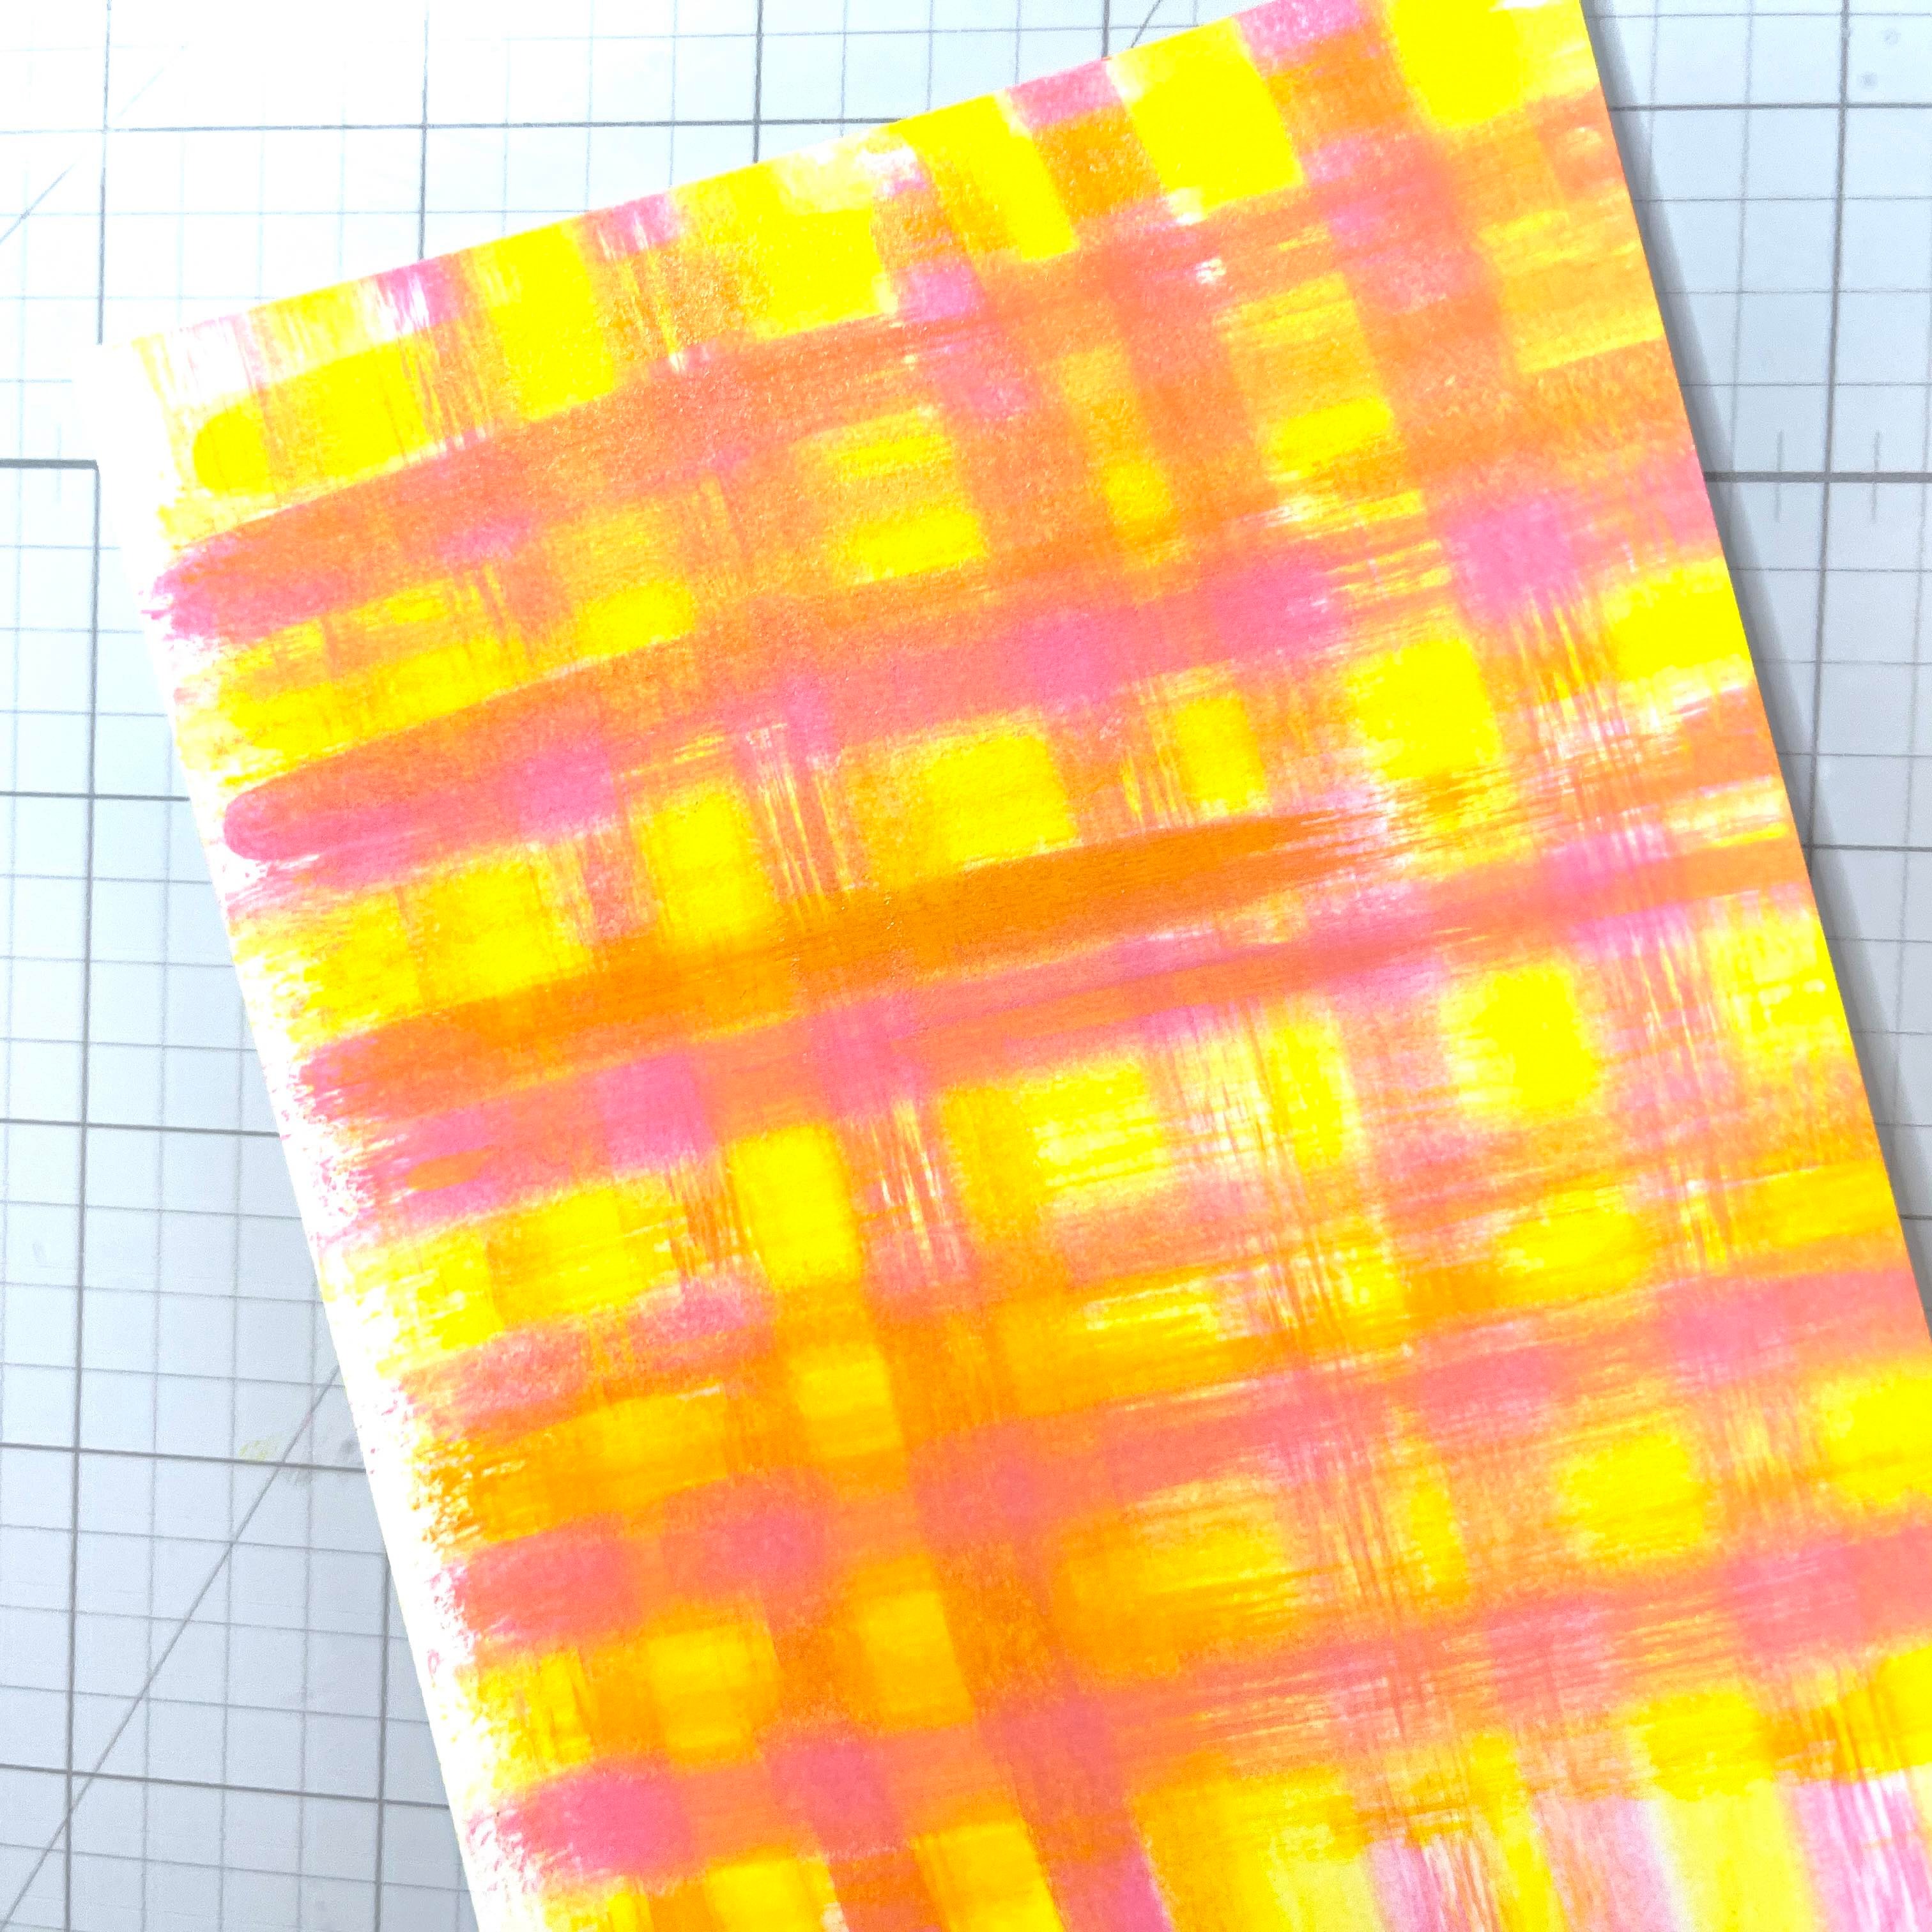
Now just swipe across your card stock. YES you will get messy! But it’s fun. You may need to add some more drops. Make sure when swiping that you line up your baby wipe with the last swiped color as you move along.
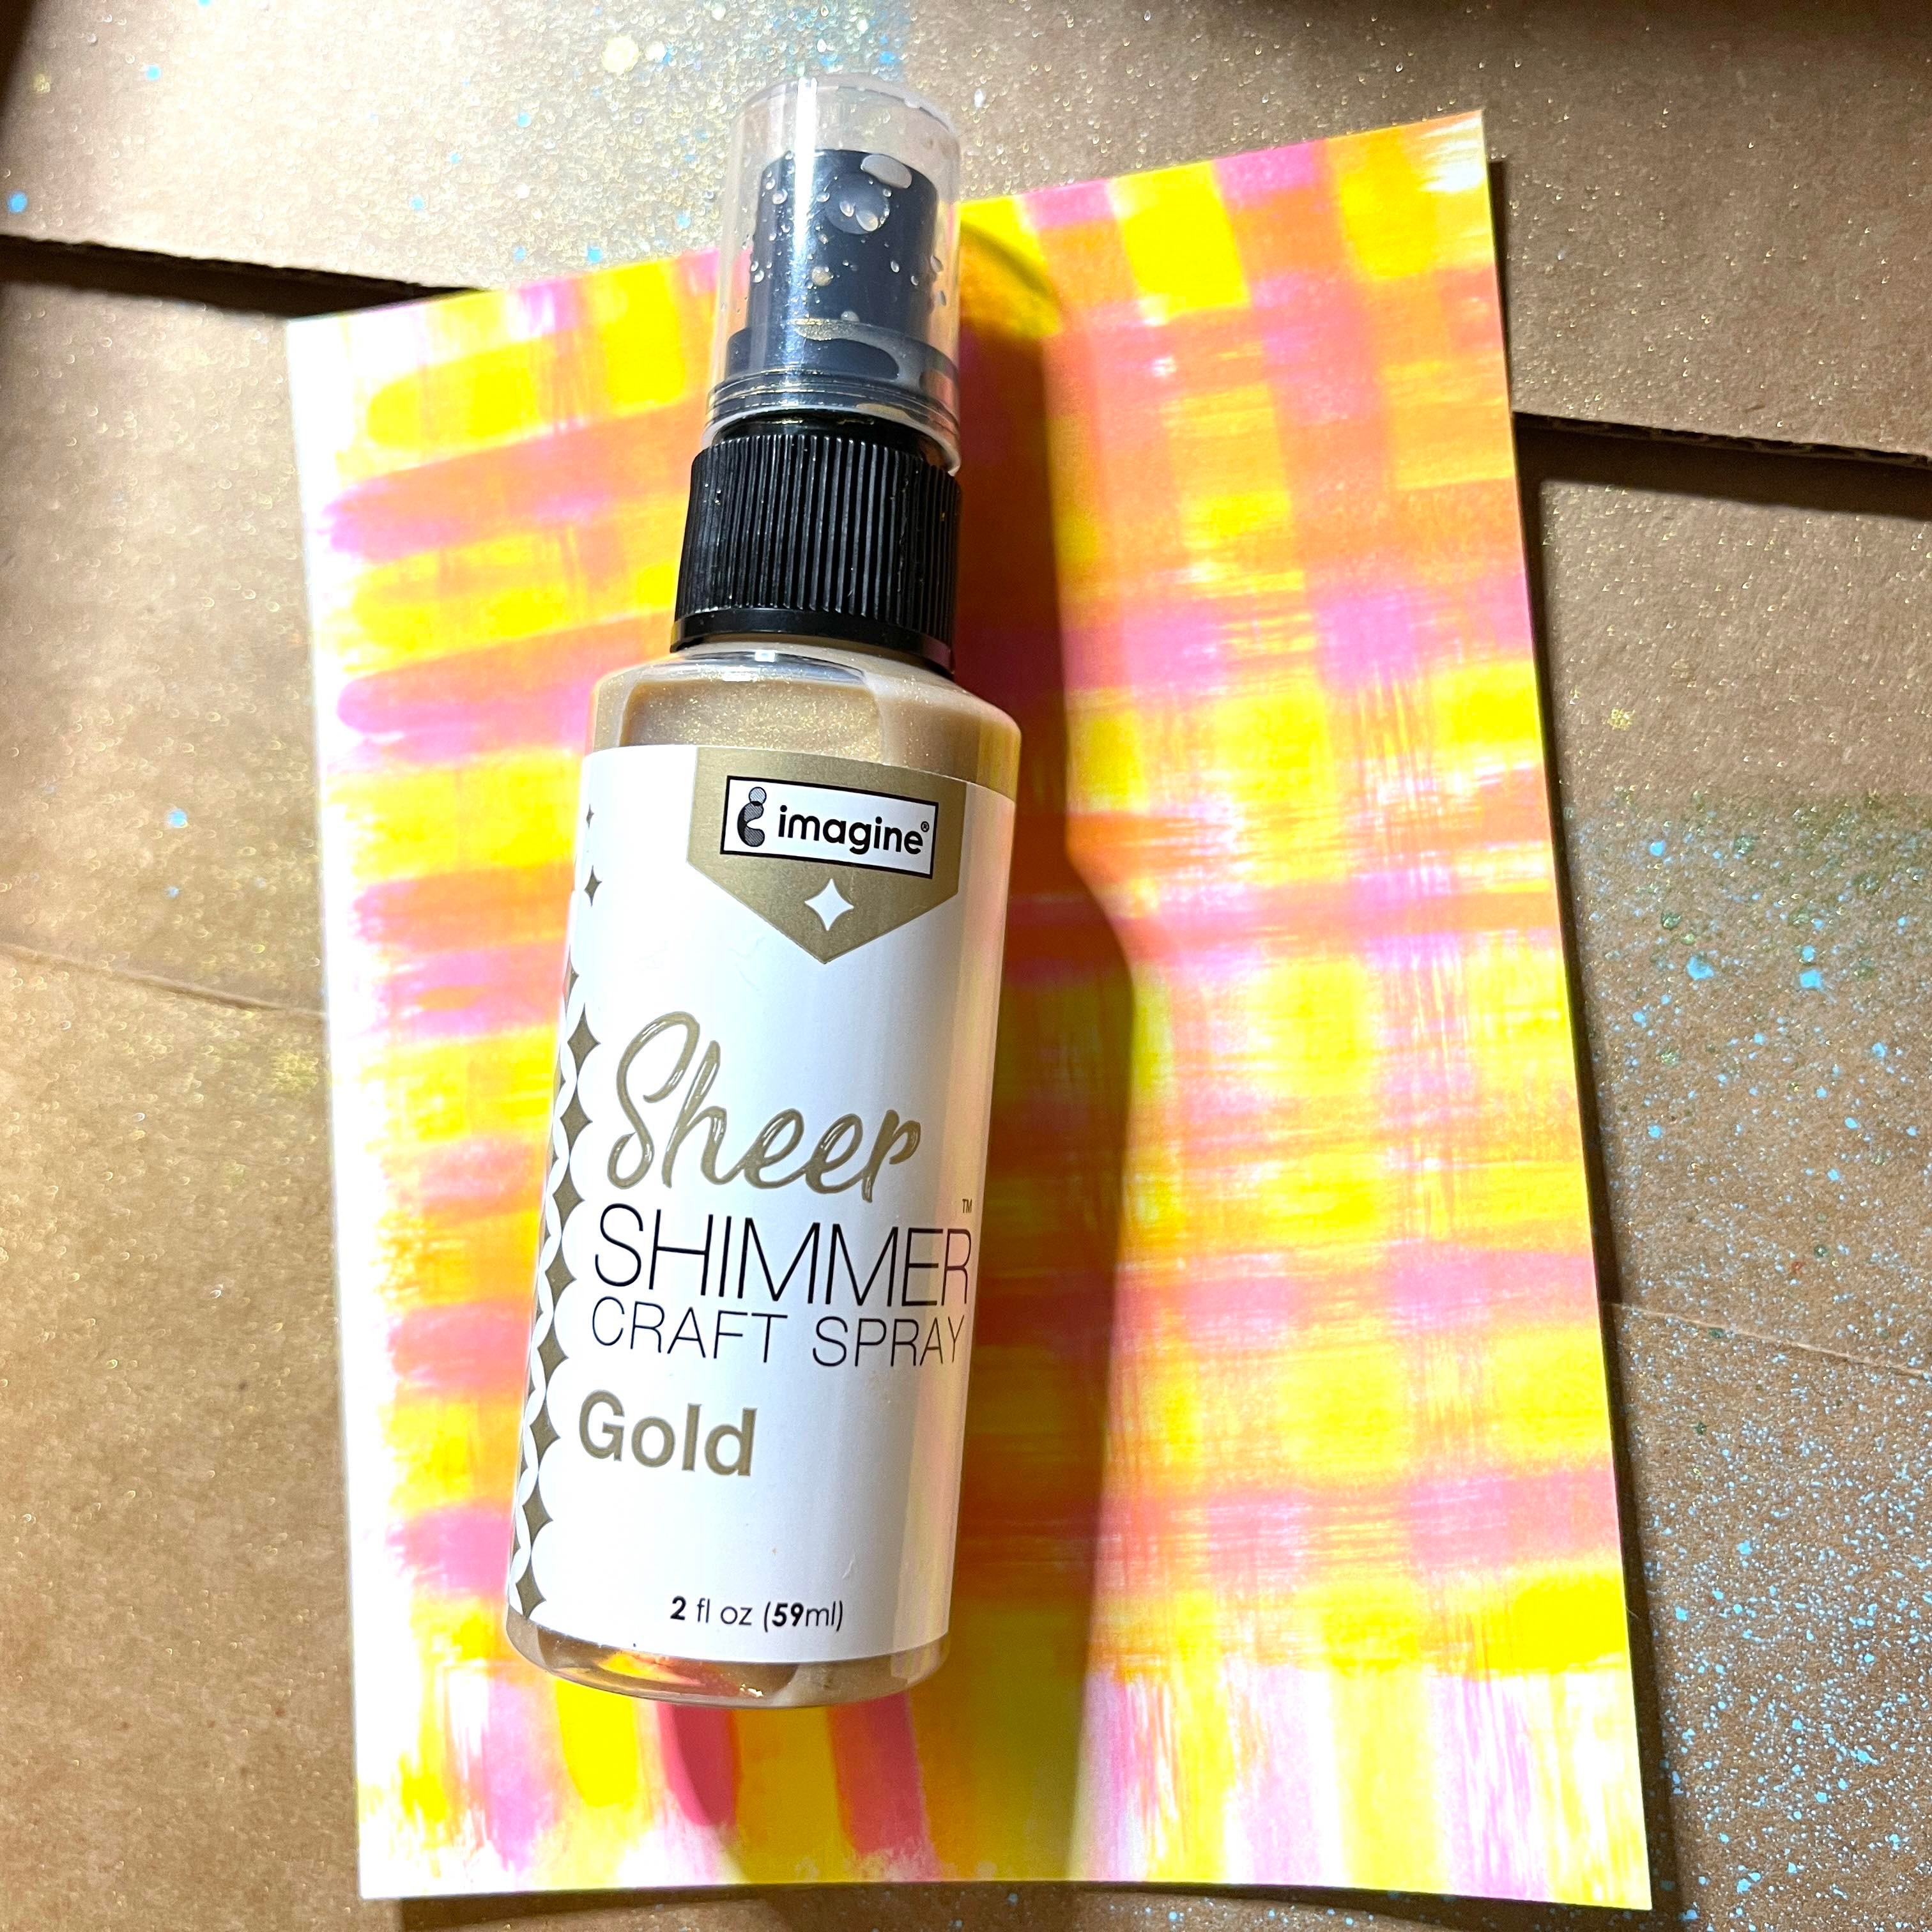
Step 4
Time to get messy again! We will spray Sheer Shimmer Spray in Gold all over the panel. I use an old box and lay the panel inside. This contains the spray a bit. The sparkle of these sprays is so pretty and available in so many colors!
.
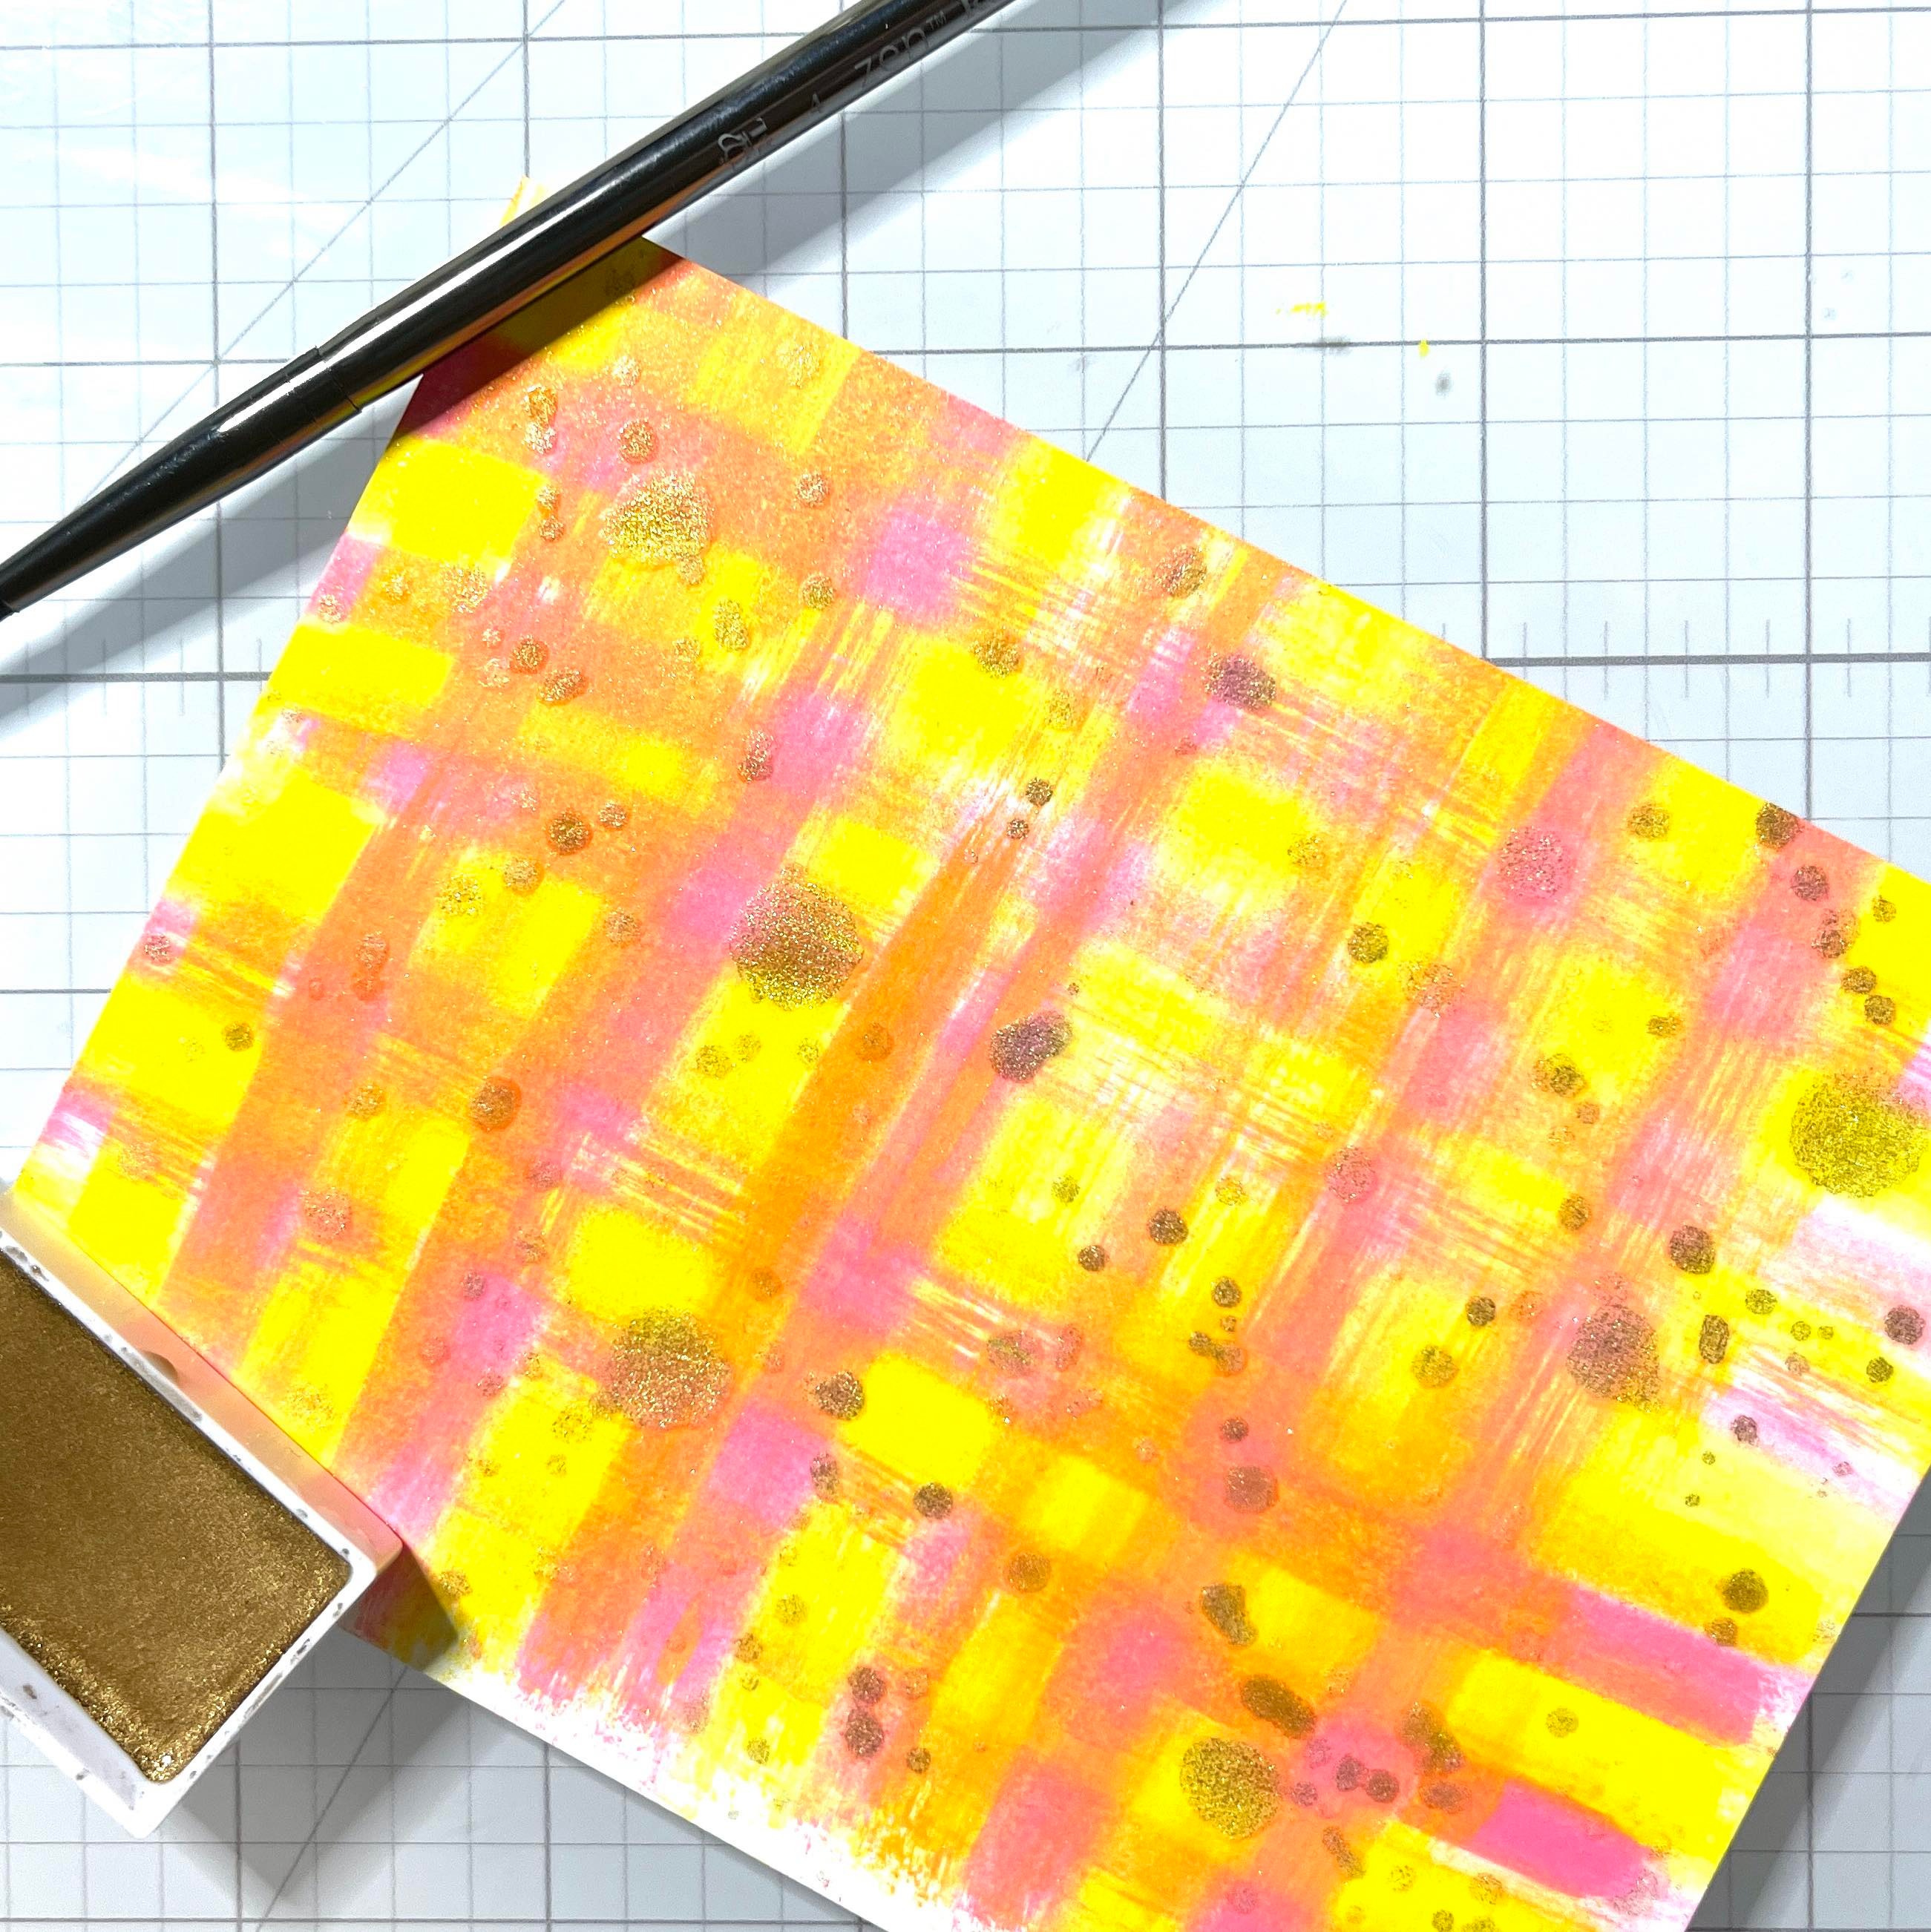
Step 5
I also unscrewed the top of the Shimmer Spray and splattered some random spots. I splattered some small spots using metallic watercolor paint.
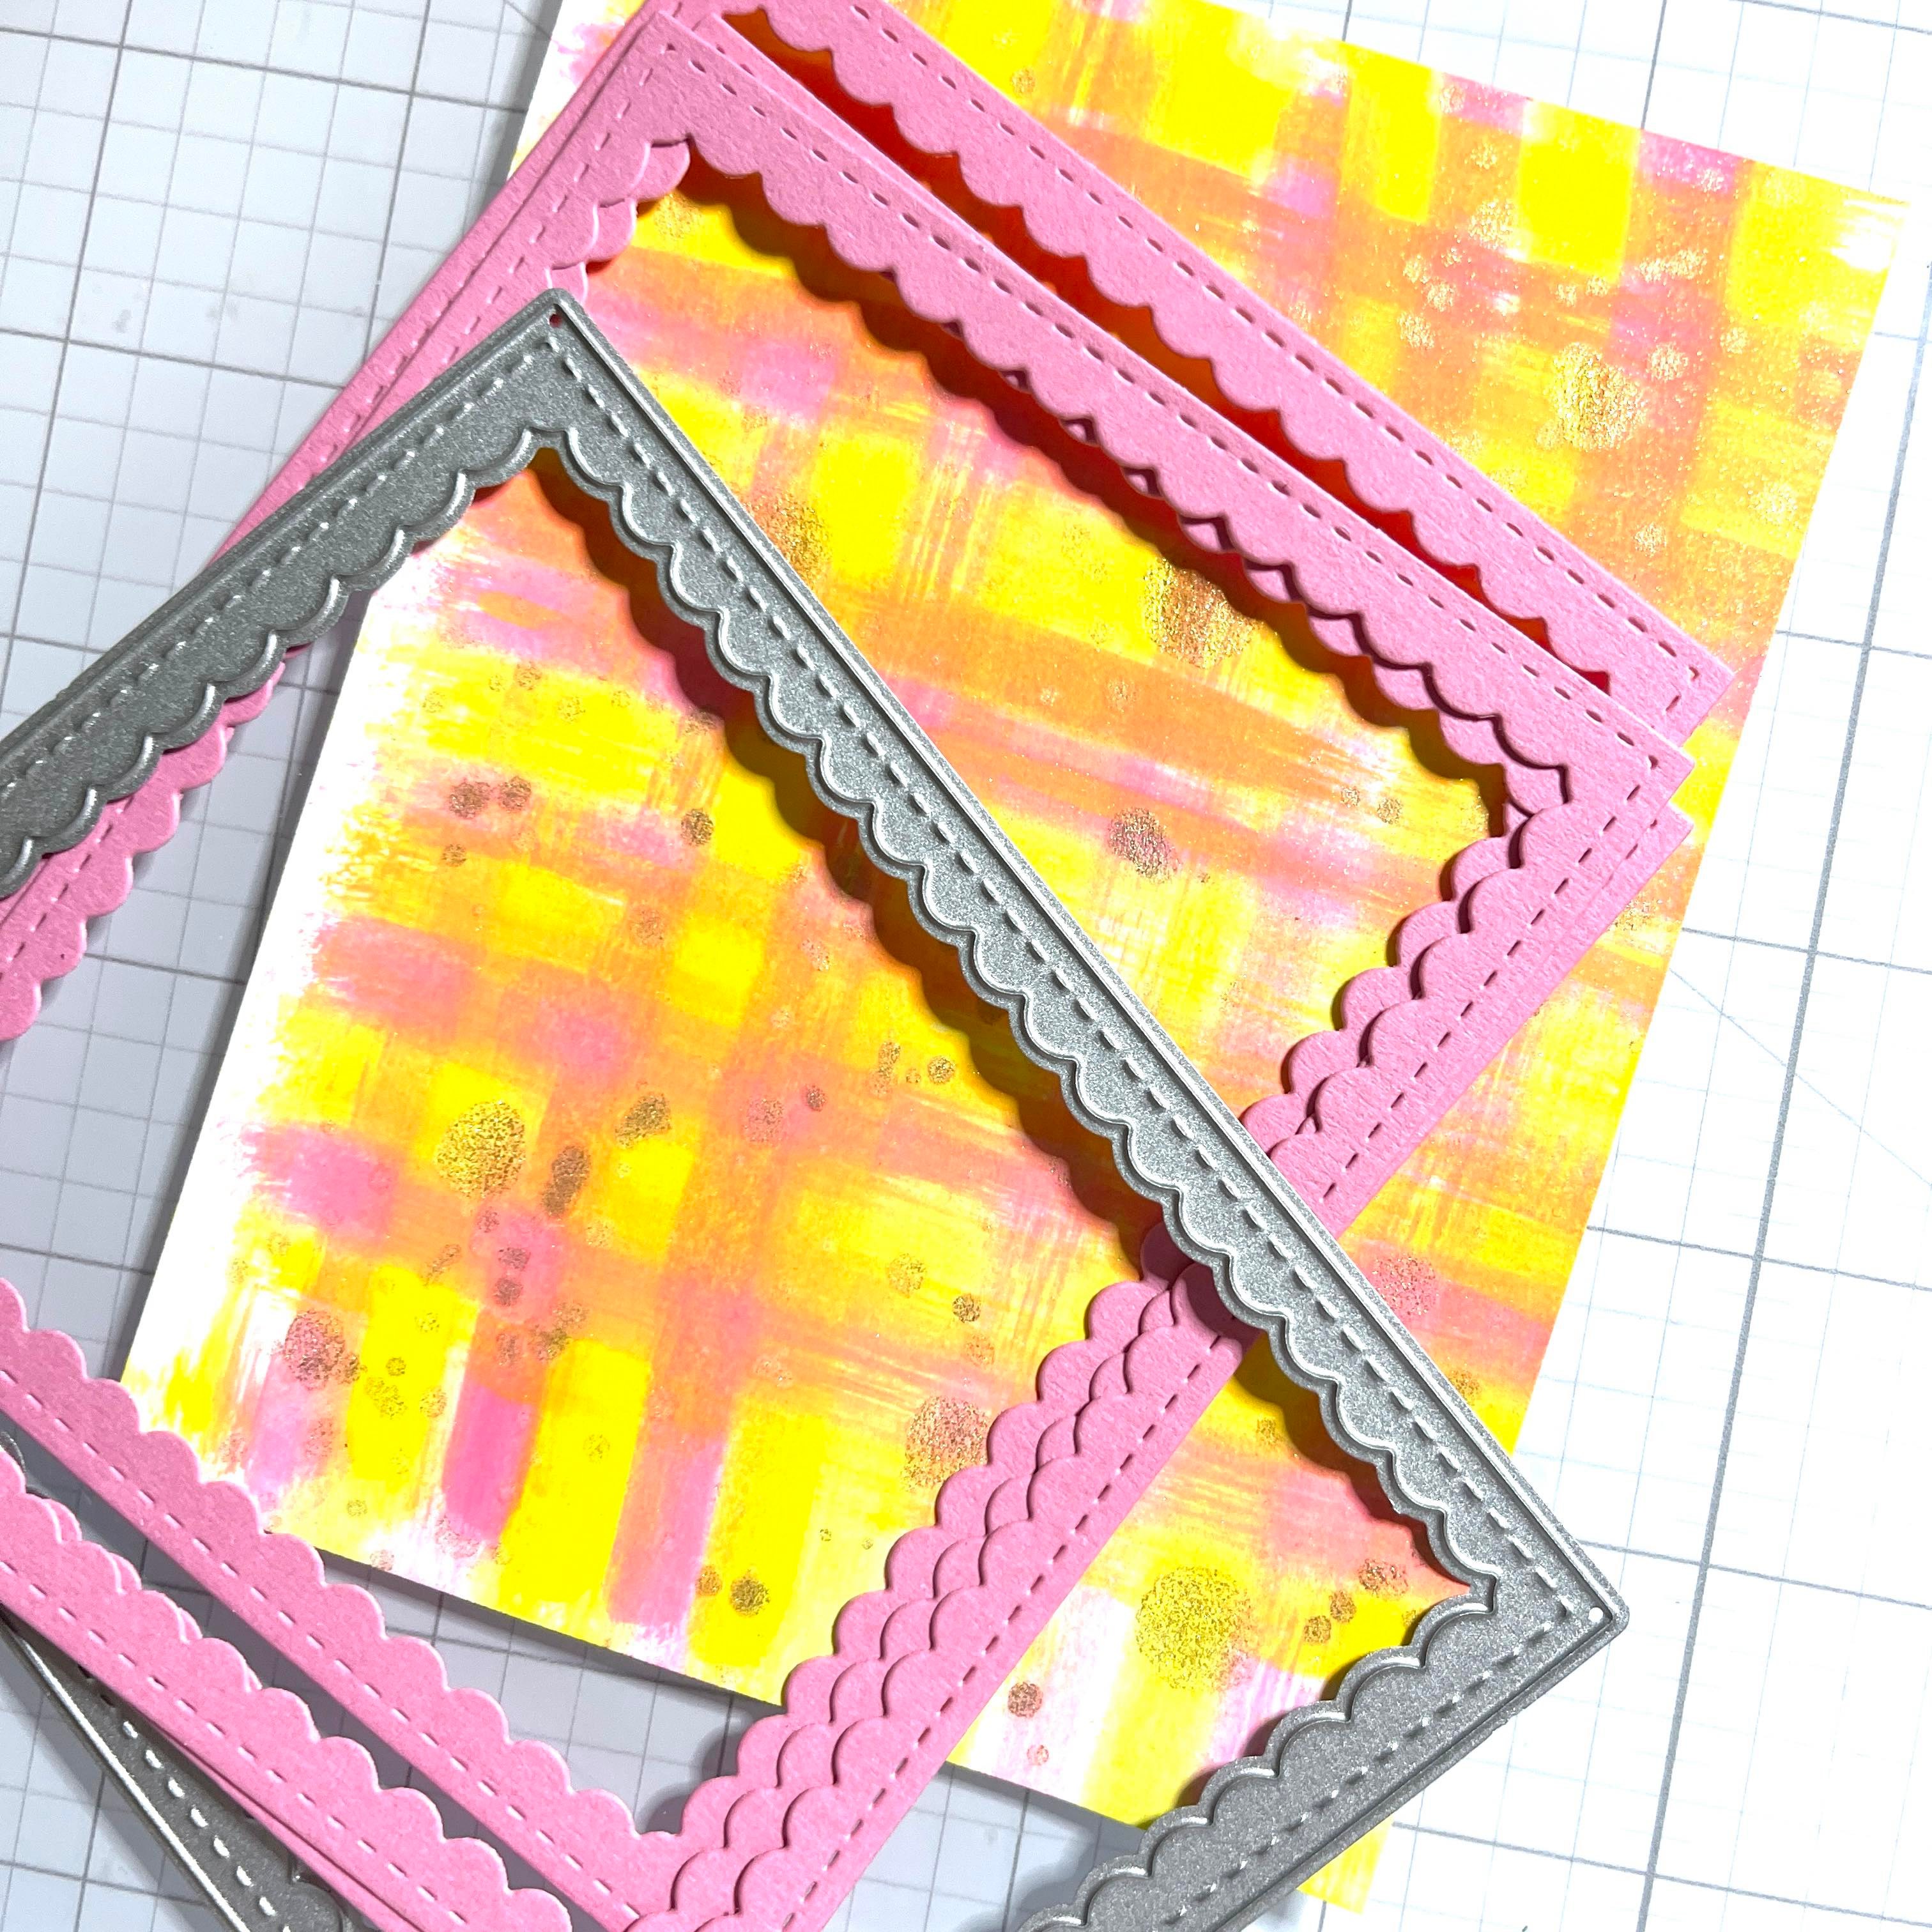
Step 6
Next, I cut some scalloped frames and glued them together with On Point Glue. I used a coordinating pink card stock. Trim the background panel to fit behind the frame and adhere with On Point Glue from Imagine Crafts.
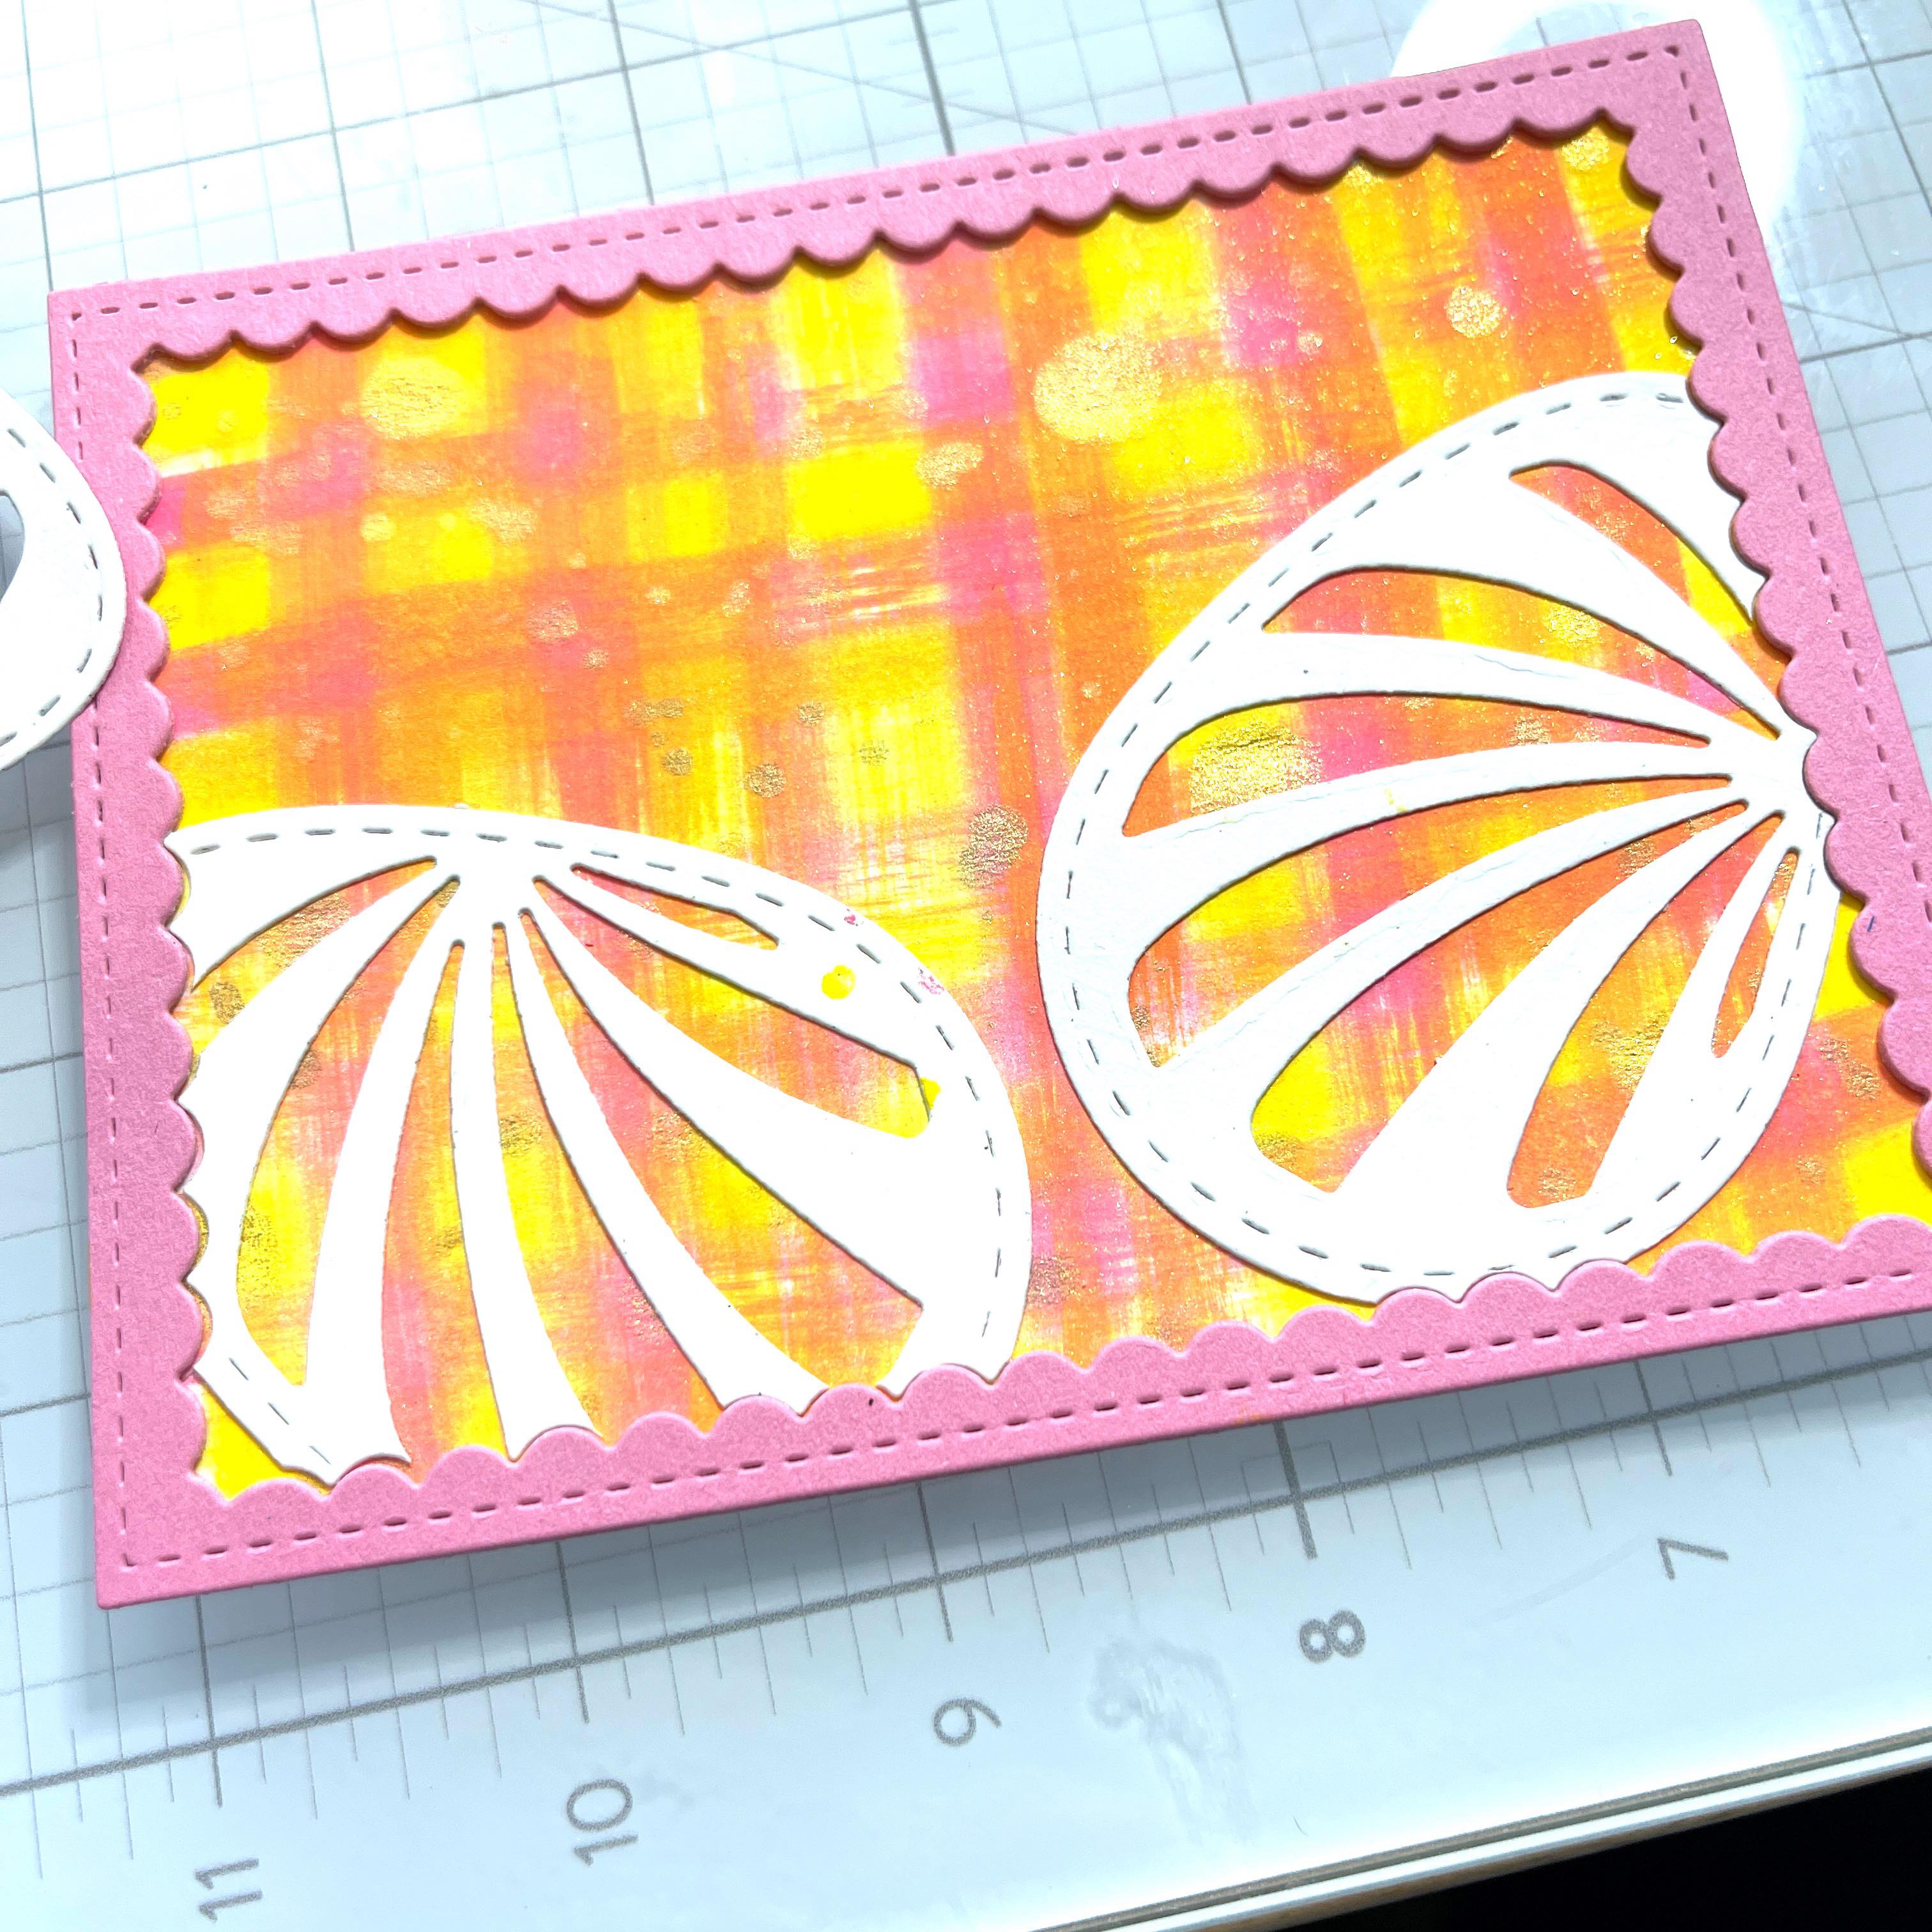
Step 7
I die-cut some an Easter Egg I had in my stash several times. I used the scalloped frame to die-cut the edges so they would fit perfectly against the frame. I also cut an additional egg to use as the main focal point.
Step 8
I traced the actual die and cut a solid egg out. I adhered this behind the main egg and adhered with glue. I took the insides of the die cut and just painted some of the pink and yellow refill ink on alternating stripes I also added 2 gold stripes from a metallic card stock.
I stamped, colored and die-cut a cute bunny. I used alcohol markers but any coloring medium will work. I stamped the Easter sentiment on the same pink card stock. I used VersaMark Ink, covered with gold embossing powder and heated. The sentiment, main egg and bunny are popped up with foam tape. The entire panel is added to a horizontal folded A2 card base with foam tape as well. The last thing I did was add a few confetti sequins!
I hope you enjoy this card and the tutorial. Thanks for stopping by I appreciate all of you! Please head over to the Imagine Crafts website to see all the beautiful products. Here is the link IMAGINE CRAFTS.
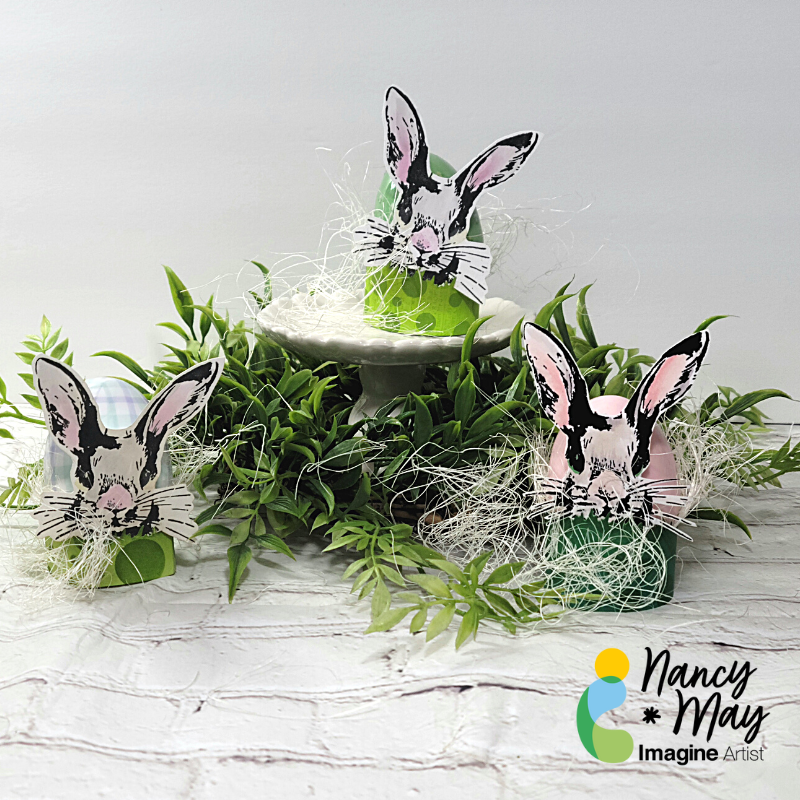
Hey y’all. I am going to share how you can create simple Easter egg holder rings that you can use to create an Easter display to match your style, your décor, etc. The sky is the limit! Let get to it!
~Nancy
==============
Skill: Beginner (but adaptable to more advanced learners)