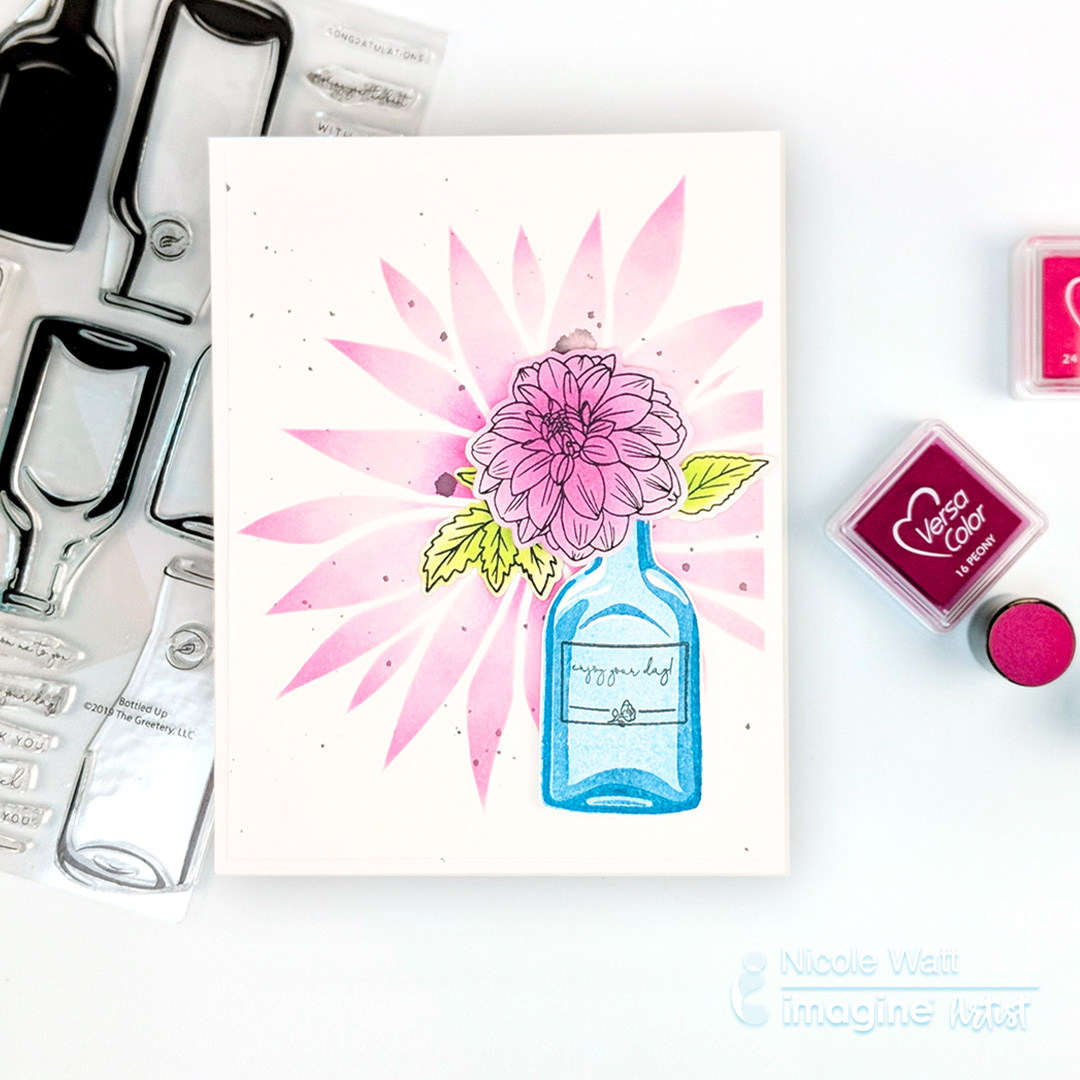
Beginner Guide: Mboss Clear in Matte Finish


by Imagine staff

Many of you may have heard of embossing powders by now. There are plenty of introductions on how to heat emboss. In fact, we feature a great introduction to embossing on a metal tin by Nicole Watt. Check it out! But there is no end to the many uses of this unique product. So, in today’s post, we thought we would highlight a fun technique with one of the cool powders that Imagine has in stock — Mboss in Clear Matte!

Directions


Step 1

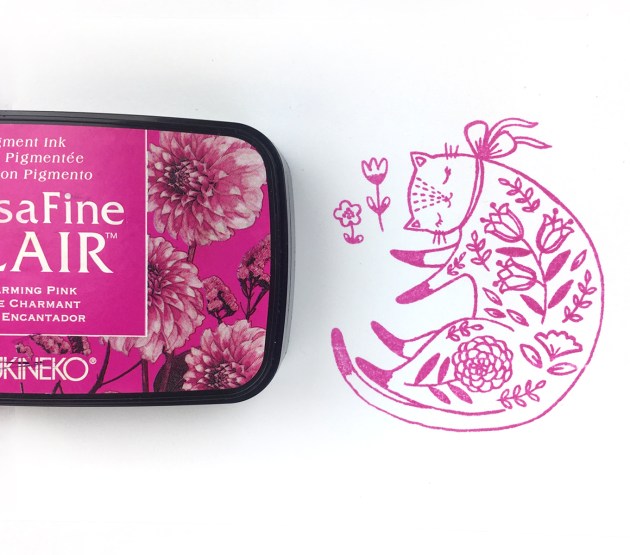
Choose a pigment ink and a stamp. Here I picked VersaFine Clair in Charming Pink and a Waffle Flower stamp.


Step 2

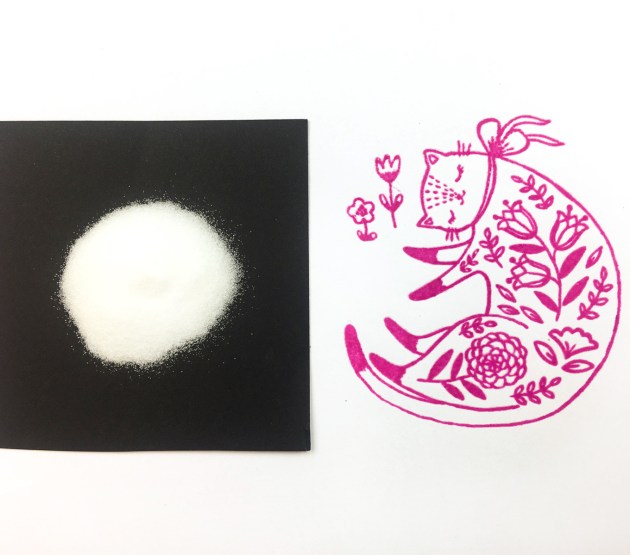
Emboss the stamped image with Mboss Matte Clear. Notice how the Matte Clear deepens the Charming Pink color. With a regular clear embossing powder, a high gloss would show. With the Matte Clear, it simply enhances the stamped image without the high gloss. If you wanted to leave it as is then this is a great technique for enhancing a stamp. For embossing powders, you will need a heat tool. We listed a purchase option in the supplies below. 


Step 3

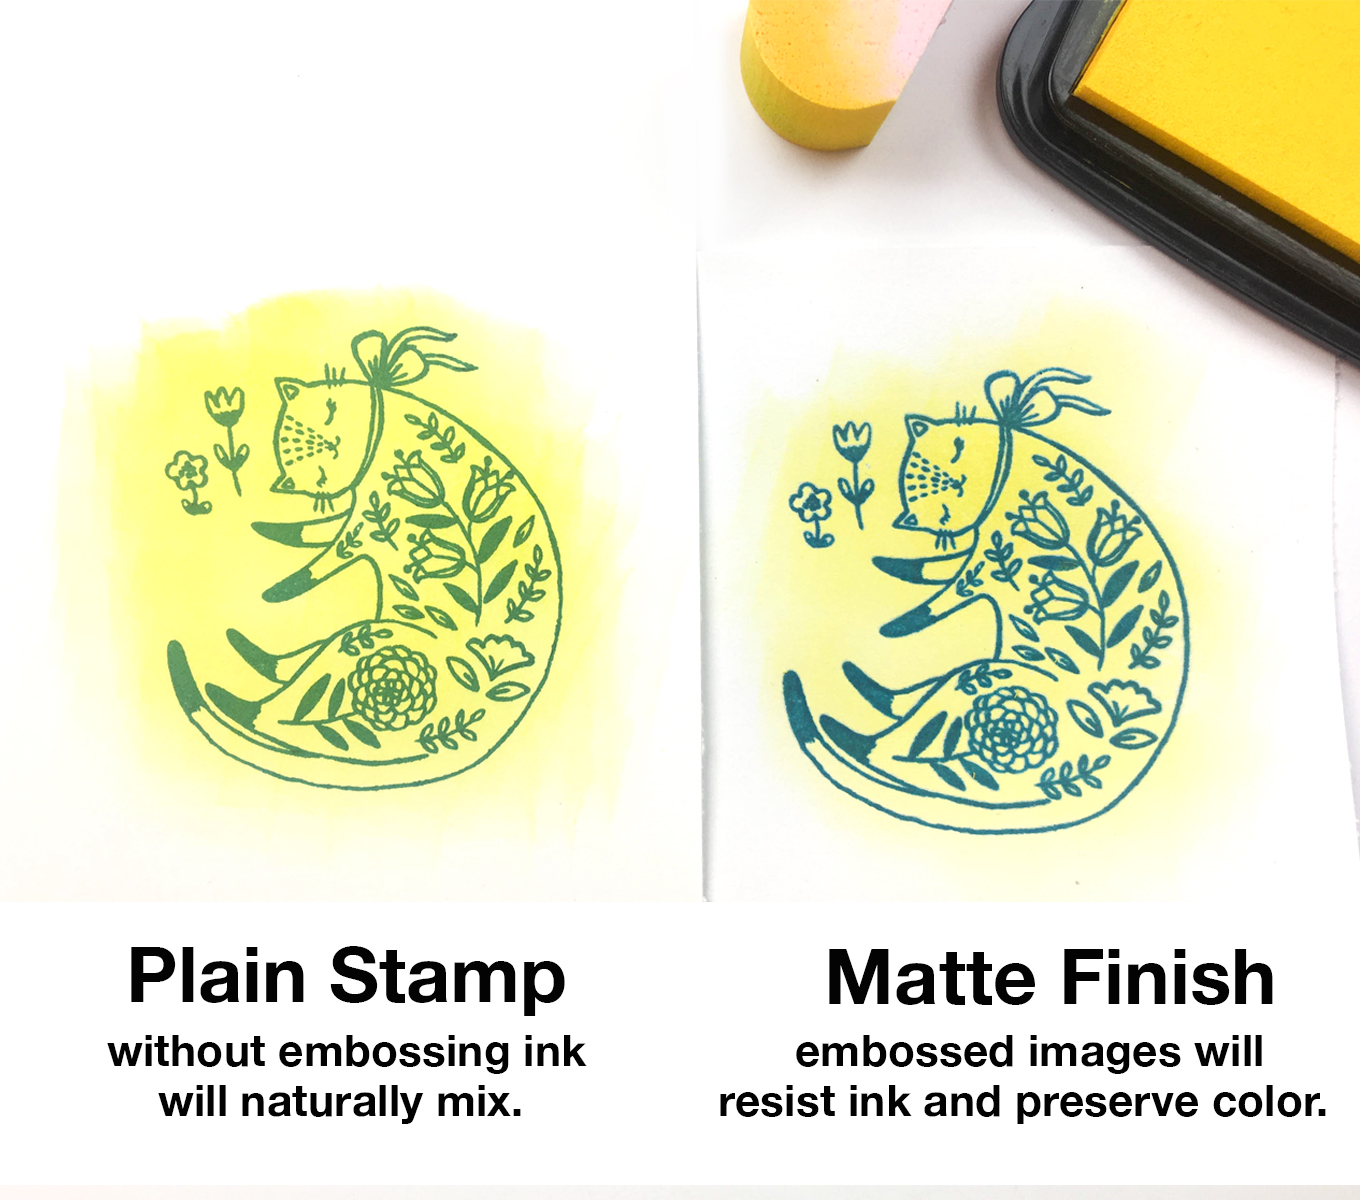
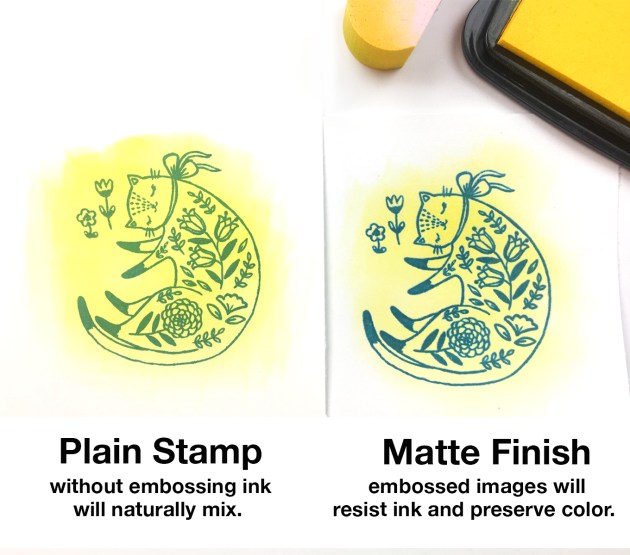
To take it a bit further, here is an embossing technique that can really intensify any papercraft or cardmaking project. In the sample above you can see the stamp inked with Warm Breeze in VersaFine and then inked again with VersaColor in Canary Yellow. One benefit of embossing is to lock the color of the first stamped image to the paper. It can be inked over with additional colors without affecting it. The plain stamp blends a bit and turns the image to a green hue. The embossed image keeps it’s turquoise color perfectly.

Last example again with VersaFine in Charming Pink — you can see the luster of the embossing keeps the deep pink color intact! Inked with VersaColor can turn the Charming Pink into a coral color (which is beautiful). With the Mboss the Charming Pink pops through the yellow background.

Other

Beginner Guide: Memento Dye verses Memento Luxe Pigment Ink


Beginner Guide: Memento Dye verses Memento Luxe Pigment Ink

Lisa shares a quick comparison between Memento Dye Inks and Memento Luxe inks. Stamping, water coloring, and stenciling between dye inks and pigment inks can produce different results. Learn some beginner basics to understand which inks are best for your projects.


Other
  • Strathmore – 300 Series Bristol Board Pads | BLICK Art Materials
  • Arches Watercolor Paper Pad – 140 lbs, Cold Press, 9″x12″
  • Neenah Classic Crest – 80lb/216 GSM, Solar White, 97 Bright,
  • Neenah Classic Crest Cover Solar White – 110# 8-1/2×11 250/pkg

Create an Artsy Book Cover with All Purpose Inks

by Lori Warren

Creating an Artsy book cover is easy with All-Purpose Ink and Ink Droppers. This project will walk you through the step by step process of creating a unique background paired with a large word stamped (with StazOn Pigment Ink) as a focal point. 

Skill: Intermediate
Time: 20 minutes

Directions

Part 1: Create an Artsy book cover with All-Purpose Inks.

Part 2: Color Scheme Tag Journal

  1. Start with a blank hardcover book.
  2. Place a piece of paper under the book cover to protect the pages below.
  3. Using ink droppers, draw up a small amount of All-Purpose Ink into the dropper and release (splatter) the ink onto the cover. Repeat with different colors.
  4. After the ink has dried, stamp “ART” onto the cover using StazOn Pigment ink.
  5. Apply StazOn Ink directly to each edge of the book cover.
  6. Step two – Create Color Swatch Tag
  7. Cut a tag using the Waffle Flower Tag Die.

Supplies

Imagine

Other

Retro Floral Card Using Various VersaColor Ink Techniques

by Nicole Watt

Versacolor ink to make a card

Join Nicole as she creates a retro-looking floral card using VersaColor inks. She’ll show you a few different ways you can use this versatile water-based pigment ink to create different effects.

Skill: Intermediate
Time: 20 minutes

Directions

Supplies

Imagine
  • VersaColor – Peony, Opera Pink, Pink, Lime, Cyan, Lapis Lazuli, Mountain Lake, Black

Other

  • Bottle Up Stamp Set (The Greetery)
  • New Beginnings Stamp Set (Altenew)
  • Bursting Dahlia Stencil (Altenew)

A Gift for Someone Special – Create a Chipboard Pendant with StazOn

by Lori Warren

A Gift for Someone Special –  Create a Chipboard Pendant with StazOn. A beautiful teal and blue jewelry piece that features a paintbrush image and reads "create".

This mixed media project is a great example of how you can use different inks and mediums to create a piece full of texture and color. It’s a step by step layering technique to add depth and interest to mixed media artwork.

Skill: Intermediate
Time: 30 minutes

Directions

Written Instructions:

  1. Cut chipboard into a pendant shape and punch a hole at the top. Place a piece of paper under the book cover to protect the pages below.
  2. Cover the front and back of the chipboard piece with white gesso.
  3. Cover the front and back of chipboard piece with white gesso.
  4. Stamp chipboard pendant with VersaFine CLAIR.
  5. Cover pendant with a stencil and apply Creative Artist Medium – Clear.
  6. Stamp brush onto watercolor paper with StazOn Pigment Ink – Piano Black.
  7. Add color to the tip of a brush with StazOn Pigment –Peacock Feathers.
  8. Sponge StazOn Pigment onto Pendant to highlight stencil pattern.  Adhere stamp brush image.
  9. Highlight elements of the pendant with ALL PURPOSE INK – Frost White (using a Doodlestix)
  10. Apply splatters in ALL PURPOSE INK – Tropical Lagoon.
  11. Cover element with GlazOn – Slight Gloss Finish.
  12. Add MBOSS Powder to pendant while GlazOn is still wet.  Heat set.  Round corners of the pendant.
  13. Edge pendant with StazOn Pigment Ink – Piano Black.
  14. Adhere sticker saying.
  15. Use the Waffle Flower – Clear Dies and Combo Swatch Tag Die to record color scheme for this project.

Supplies

Imagine

All-Purpose Ink – Vegas Gold, Tropical Lagoon, Frost White

Creative Medium

Mboss Embossing Powder

Sheer Shimmer Spray – Sparkle

Father’s Day Call for Art

Call for Father’s Day Art

Father’s Day is coming up and we would love to open our blog and Instagram up to papercrafts and cardmaking projects for Father’s Day.

Submit an attractive 600 x 600-pixel square or 900 x 900-pixel square photo of your project, a short description, and a link to your Instagram profile or blog to marketing@imaginecrafts.com. Submissions are due by Wednesday, June 17th, 2020

We will review all submissions and post a collection in one blog post and will share it on our social media platforms. Potential reach = 10,000 followers.