Learn How to Build a Papercrafted Wreath with Dewlets

by Roni Johnson

Learn How to Build a Papercrafted Wreath with Dewlets

I love my Dew Drop ink pads…they are just the right size. They are small enough that they take up less space yet big enough to hold lots of ink for all of my projects. Imagine has come up with an ingenious idea of using these Dew Drops not only as ink but as the main component of a project using the brand new Dewlets dies! These little dew drop shaped cutting dies are perfect for all sorts of projects including the Laurel wreath I made for you today.

Skill: Advanced
Time: 4 hours

Directions


Step 1

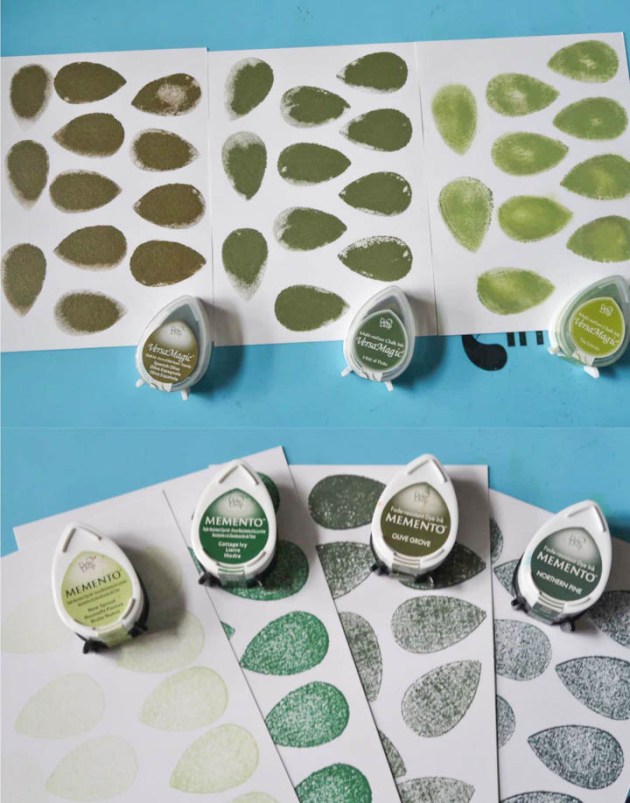
Stamp out dozens of dew drops using several colors of Memento and VersaMagic inks. In addition to these Dew Drop shapes, I also rubbed Delicata Golden Glitz and Emerald Green inks onto white cardstock.


Step 2

Die-cut all of the dew drops using the Dewlets dies. Cut out dew drops from the cardstock covered with Delicata inks as well.


Step 3

Rub VersaFine Clair in Shady Lane along the pointy edges of the Dew Drops to help “bring ‘em all together”.


Step 4

Tear strips of brown craft paper into 1.5 – 2” wide strips. Wrap these strips around a foam wreath until the whole wreath has been covered.


Step 5

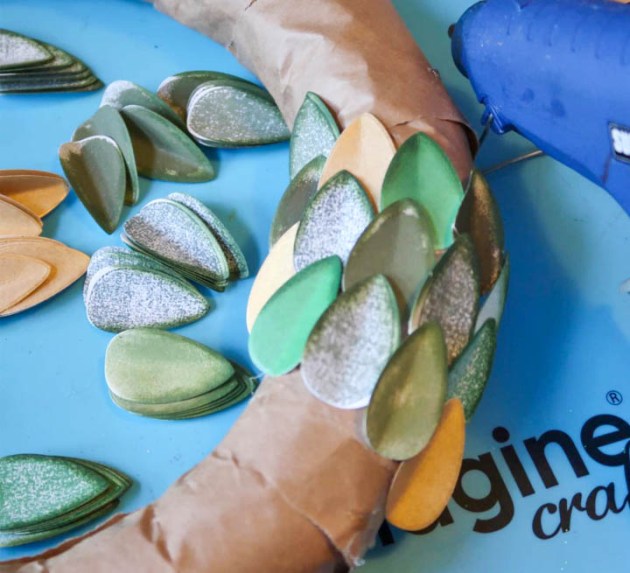
Begin gluing the laurel leaves to the wreath in a diagonal line.


Step 6

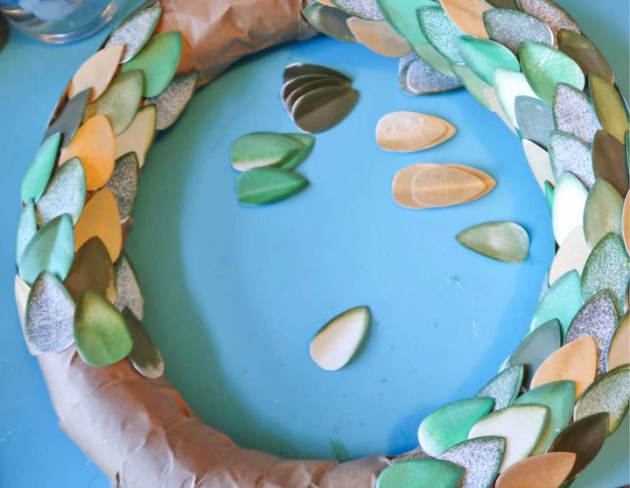
Continue gluing on leaves until the wreath is covered.


Step 7

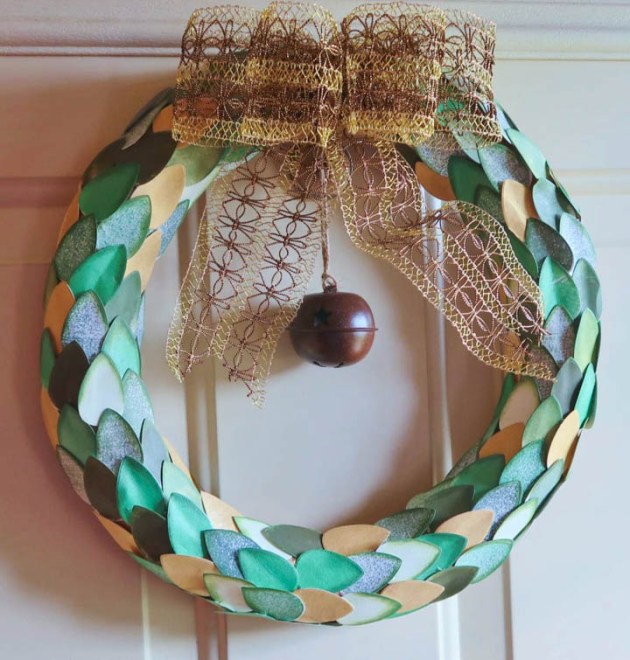
Affix a bow and rusty jingle bell (if desired).

Supplies

Imagine
Other
  • Styrofoam Wreath
  • White Cardstock
  • Kraft Paper
  • Glue Gun & Glue Sticks
  • Ribbon
  • Rusty Bell

Create a Frosted Blue Season’s Greetings Card

by Martha Lucia Gomez

Create a Frosted Blue Season's Greetings Card

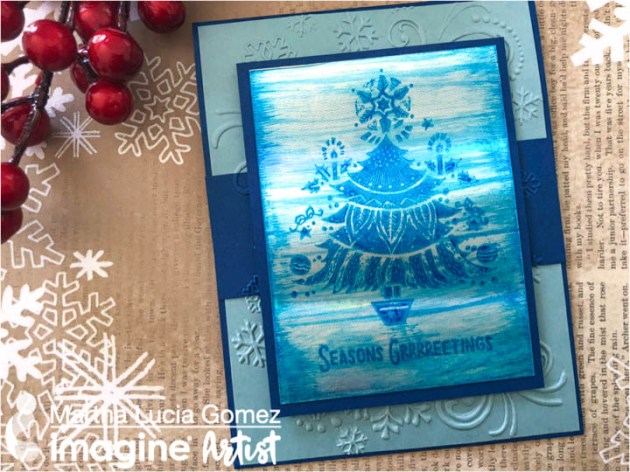
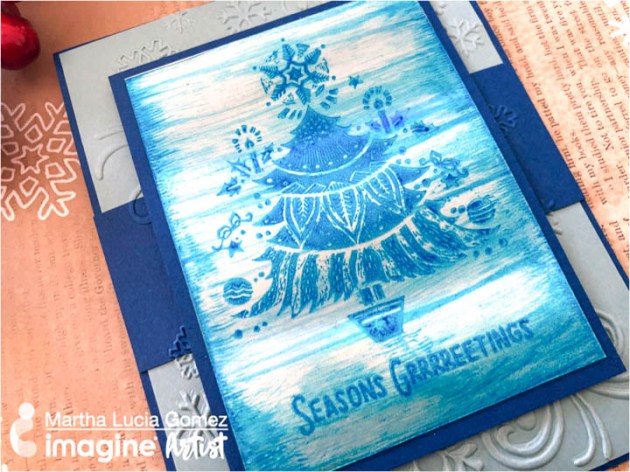
Today I have something “cool” to make! I use an ice technique and “frosted blue” color challenge to create a Season’s Greetings holiday card. To make this technique you only need StazOn Ink, metallic paper, VersaMark and embossing powder to obtain a good shine in your project.

Skill: Intermediate
Time: 30 minutes

Directions


Step 1

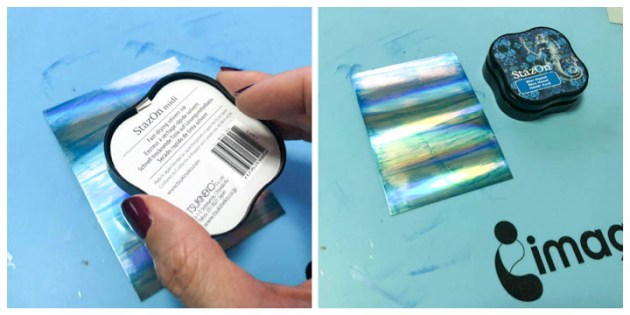
I started with a piece of Silver Foil Sheet from Stamping Up. I decided in advance which stamps I wanted to use and I cut the paper a little bigger of the stamps to create the ice look. Then I applied the ink directly with the StazOn Inkpad Blue Hawaii from left to right and then repeated the process but from right to left.


Step 2

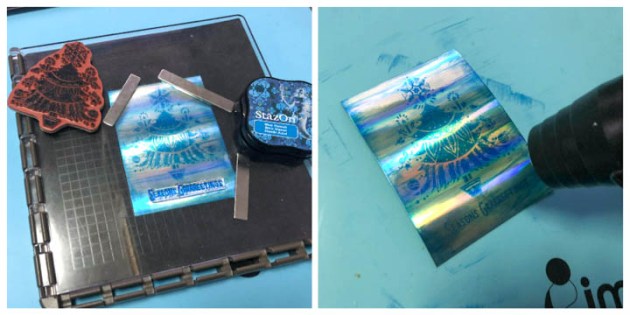
The idea is to create intermittent horizontal lines and have the borders a little darker. Depending on the brand of the foil paper that you are using, you will need to use a stamping tool to stamp the images with the same StazOn Ink Blue Hawaii. Sometimes the first attempt is not the best definition of the image but it depends on the paper. After stamping your images, you need to dry the ink with the heat tool. Don’t put you heat tool too close to the surface to avoid burning your paper. You can use rubber stamps or clear stamps with StazOn Ink, don’t think that it will damage your clear stamps, it is a false assumption with this brand (see Nadine’s Myth Buster video). Just use StazOn stamp cleaner after to keep your stamps in good condition.


Step 3

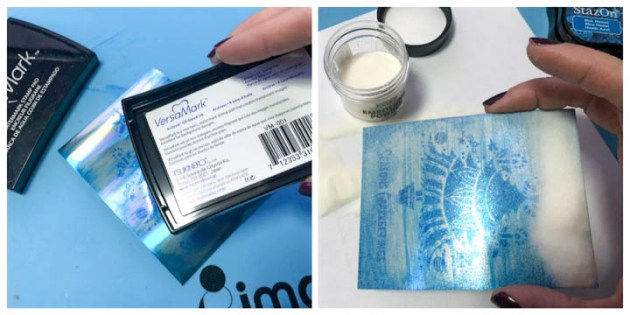
When the StazOn ink is totally dry, take the VersaMark and apply the ink directly over the stamped images. Cover the entire surface with Clear Embossing Powder and activate the powder with the heat tool. You will have a glossy and shiny look that will create the icy look over the blue. You can mat this piece using cardstock to notice the difference of materials.


Step 4

To finalize my card, I created a card base using Blueberry Bushel Cardstock for the card base and Coastal Cabana for the second layer. I embossed the second layer with an embossing folder and created a belt using the same color of the card base and aligned a piece with the same embossing folder.

Supplies

Imagine
Other
  • Tree Stylish Stamp by Crackerbox & Suzy Stamps
  • Big Shot or any die cut machine
  • Embossing Folder
  • Stampin Up – Silver Foil Sheet, Blueberry Bushel cardstock, Coastal Cabana cardstock
  • Dimensionals or double-sided foam tape

Create a Glittery Snowflake on Glowing Red Background

by Arjita Sepaha Singh

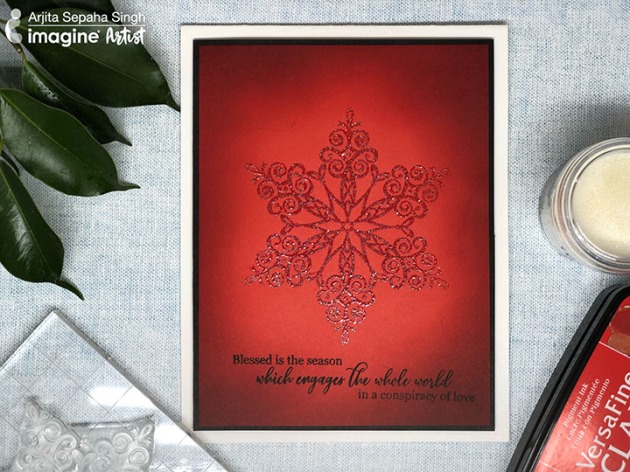
For today’s card, I used the Sparkle Embossing Powder to create the beautiful snowflake on a bright red cardstock. I used VersaMark Embossing Ink to stamp the snowflake. Once the embossing powder was melted I blended some red inks with a sponge dauber around the edges of the card. This adds a beautiful glow to the card and I finished the card with a sentiment in black. This is a perfect project to be mass-produced for your Christmas cards.

Skill: Beginner
Time: 20 minutes

Directions

Supplies

Imagine
Other
  • Card Stock – White, Black, Red
  • Powder Tool
  • Heat gun
  • Misti Stamping Tool

December Color of the Month and Artists in Residence for 2019

December Color of the Month and Artist in Residence for 2019

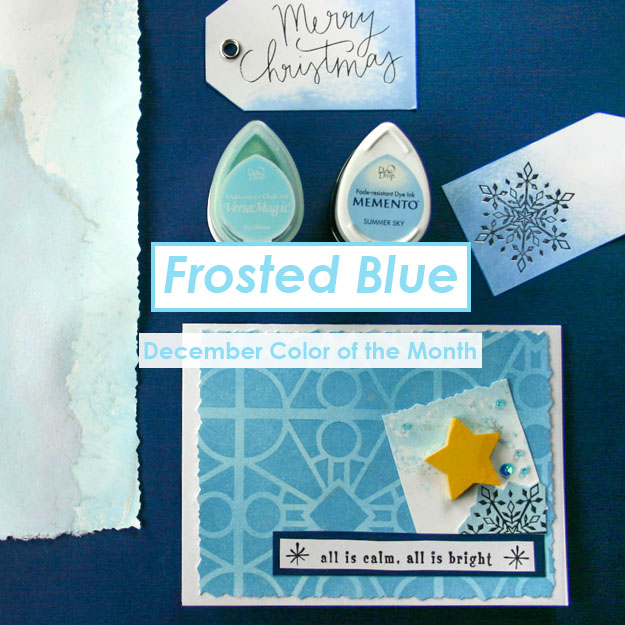
December Color of the Month is Frosted Blue! We love the bright icy blue color in Christmas decor, Christmas ornaments, and wintery snowflake themed art. Tsukineko and Imagine feature several products in their catalog that are perfect for this color theme. Memento Dye inkpad in Summer Sky, Fireworks Shimmery Craft Spray in Summer Sky, VersaMagic in Seabreeze and any of these inks can be spritzed with Sheer Shimmer Spray in Frost!

Also, stay tuned for craft projects featuring the Dewlet! We are so excited for what our team has cooked up.
We are happy to introduce our Artists in Residence for 2019

Meet the team!

Arjita Sepaha Singh

Arjita works in the early childhood education field but enjoys crafting above everything else. She gets plenty of inspiration for her 12-year-old daughter and hopes to show even the most novice of crafters how to make beautiful things in her crisp and short videos.

“I strongly believe that a creative crafter is like a bee that is always busy with focus, dedication & perseverance to create beautiful things.”


Elina Stromberg

Elina grew up crafting and paper is her favorite material. She likes to focus on layouts and colors that are sure to be eye-pleasing. Inspiring other crafters is the greatest reward for her.

“I love the fact that this hobby is all about learning something new every day.”


Iris Rodriguez

Iris is an arts and crafts enthusiast who has never met an art medium she didn’t like. A short list of her favorites include inks, paper, acrylic paint, sprays, metallic waxes, texture mediums, clay, and metal.

“As it happens to some us, as adults we tend to temporarily abandon our creative endeavors because of this little thing called life. About seven years ago I decided to get back to being creative and have not looked back since.”

clay bowls stamped with versamagic and stazon ink


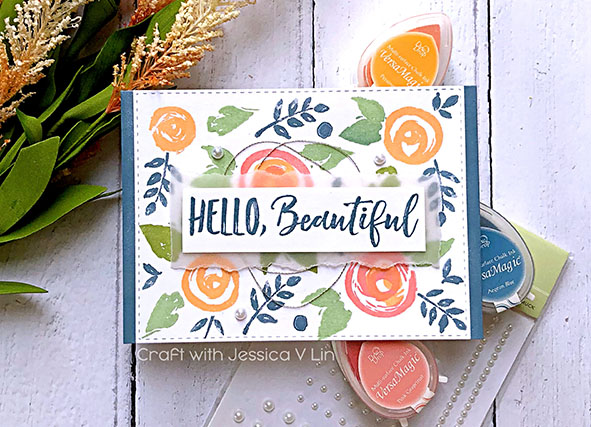
Jessica Lin

Jessica grew up in Taiwan but now lives in California. She started stamping at a young age and if she’s not busy with work, you will find her in her craft room creating something fun and new.

“I generally like to pack my cards with techniques and unique ideas… I also like to think of creative ways to stretch my supplies!”


Jowilna Nolte

Jowilna sees scrapbooking as a natural extension of her love for card making and stamping that also accommodates her love and passion for photography. Jowilna loves to teach new techniques and share with others on her creative journey.

“Creating can be a wonderful journey & therapy—making sense of things where life cannot, and I have turned my life into this philosophy.”


Kassy Tousignant

Kassy grew up surrounded by a family of makers and artists. A longtime believer in the fact that a handmade card is the best type to give, she has recently delved into mixed media and 3D arts; she loves playing with color and texture.

“Creativity is good for the soul and I believe there is room for it in everyone’s life. My goal is to inspire others to find their creative voice.”


Kyriakos Pachadiroglou

Kyriakos challenges himself to find alternative ways to use materials and set them into daily life. He uses mixed media to create everything from simple to complex pieces that are always sure to please.

“When I design my projects I like to make something that goes further of being beautiful to be useful and special to someone.”


Linsday Adreon

Lindsay lives in a small town in Iowa with her husband and two kids. She’s always been a crafter, but really got into card making and stamping after becoming a mom.

“My favorite craft is cardmaking and stamping, but I also enjoy crocheting, home decor projects, and a bit of wood crafting as well.”
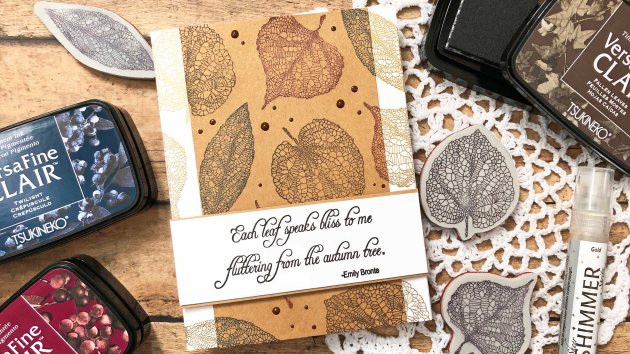

Lori Warren

Lori is a mixed media artist, designer, and instructor. Her art often features a combination of collage, texture, and assemblage. Crafting has always been a family adventure for her, and she loves sharing this tradition with her grandchild.

“I enjoy incorporating the use of stencils and stamps into my projects along with reuse items, repurposed materials and other found objects. There is something about bringing the old and new together that just fascinates me.” 


Martha Lucia Gomez

Imagine crafts tsukineko blog artist

Martha Lucia works in public relations by day but has loved crafting always. She finds working with paper to be the best therapy, and if you are looking for a great Spanish language crafting blog, she’s one to follow.

“I love to create cards, 3D projects and alter different objects. I am looking forward to continuing to share my passion with all of you.”

Melissa Andrew

Melissa is a scientist and mother of three who still finds time to devote to her crafting and card making. She is ready to take the inspiration she has received from so many others and pay it forward to all of you.

“I feel my science background allows me to understand the chemical properties of a number of my craft products and therefore I am able to experiment and play without hesitation.”


Nadine Carlier

Nadine has spent a couple of decades trying and loving all things crafty. Scrapbooking, handmade cards, mixed media, and altered art projects make the list of her favorite things to create. 

“I love getting messy, trying new techniques, inspiring others and being inspired.”


Roni Johnson

When she’s not helping run the family farm, Roni can be found creating. There is no term that encompasses all the styles and project types that Roni shares with us, but the joy she finds in creating them always comes through.

“I enjoy teaching others about the joys of ink, paper, and altered arts!”


Create an Inspiring Card with Rinea Foil

by Jowilna Nolte

Create an Inspiring Card with Rinea Foil

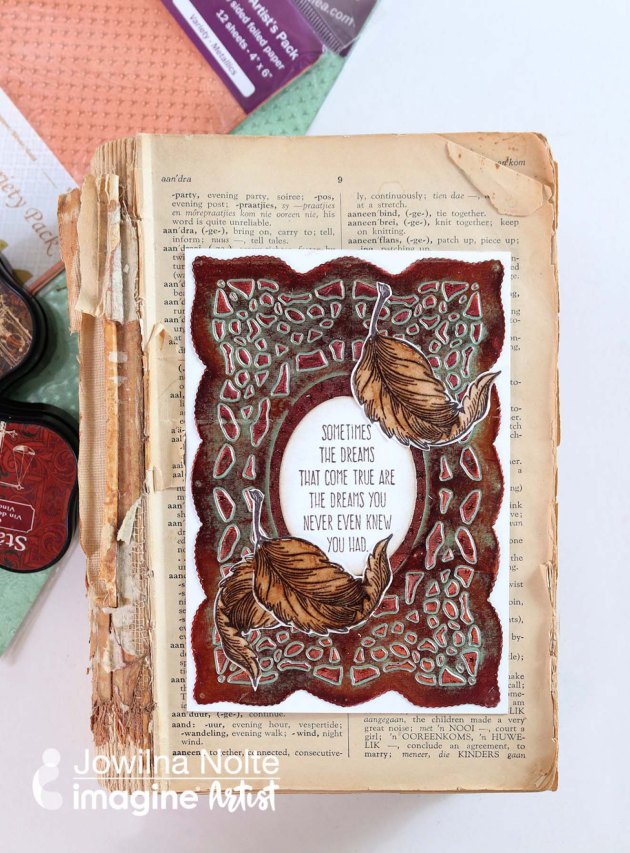
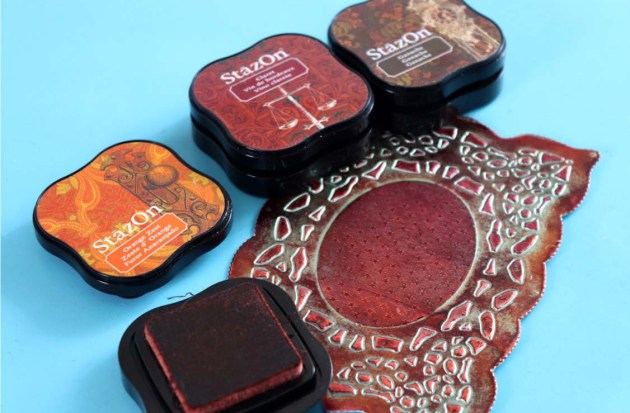
What perfect way to create an Autumn inspired card than using the wonderful range of StazOn inks from Imagine and Rinea Foils. These foils are great for coloring and die-cutting and together make for a stunning effect. Take a look at how I achieved this stunning end result using these amazing products.

Skill: Advanced
Time: 1 hour

Directions


Step 1

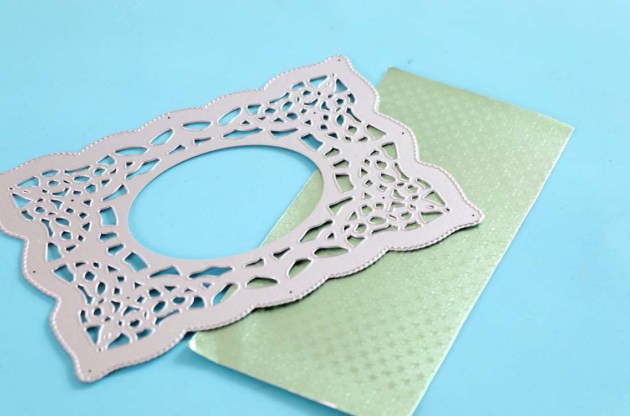
Add a layer of wide double sided tape to the back of a sheet of Rinea Foil and adhere it to a piece of plain cardstock to make it nice and firm for die-cutting.


Step 2

Use a frame die to cut the foil. Because of the added cardstock, the die did not cut through but rather created an embossed look. The double-sided tape also helps to keep all those little pieces intact adding to the overall look.


Step 3

Use your StazOn inks with the direct to paper technique to add color to the foils. Start with the lightest color first and then work your way to the darkest color. Repeat as necessary to add as much color as you like. The raised areas on the foil will pick up the color, but leave some of the green foil visible adding to the multicolored effect.


Step 4

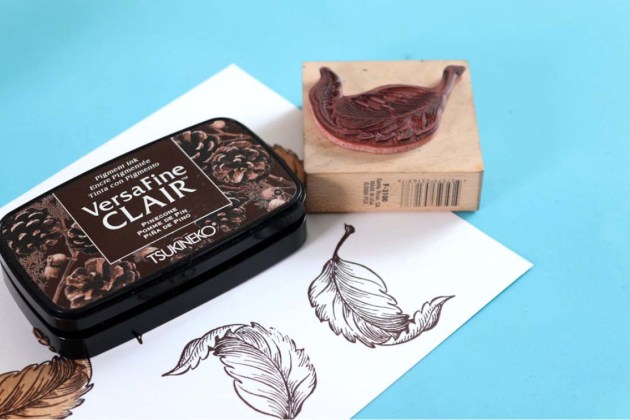
On smooth white cardstock stamp leaves using VersaFine Clair Pinecone ink.


Step 5

Mix Walnut Ink Crystals with water to create a liquid. Then use a water brush to paint your leaves. Create shading by adding plain crystals and then blend them with your water brush to dissolve them into a darker shade on your leaves. Cut out the leaves.


Step 6

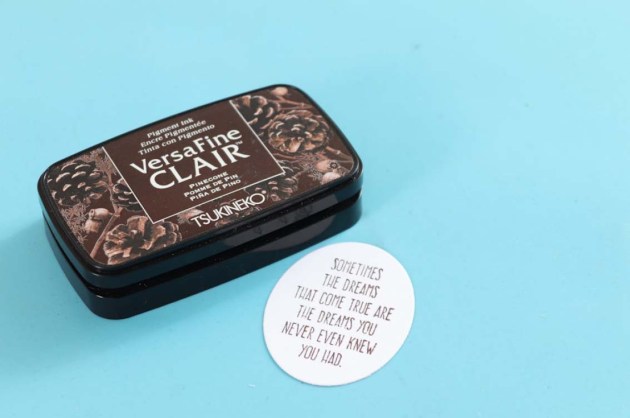
Stamp a sentiment on an oval card using VersaFine Clair in Pinecone. Lightly ink the edges with the same color and a sponge dauber.


Step 7

Adhere the foil panel to the front of your card, add the cutout leaves and then add a layer of GlazOn to the leaves and leave to dry. The foil adds a beautiful shimmer and together with all the colors you have just created a spectacular fall theme encouragement card.

Supplies

Imagine
Other
  • White cardstock
  • Stamps – feather, sentiment
  • Kaisercraft – Die-cut
  • Embellishments
  • Water brush
  • Double-sided Tape
  • Die-cut machine
  • Card base
  • Pattern Paper
  • Watercolor paint

Learn How to Create a Christmas Card with Rinea Foil Paper!

by Melissa Andrew

Learn How to Create a Christmas Card with Rinea Foil Paper!

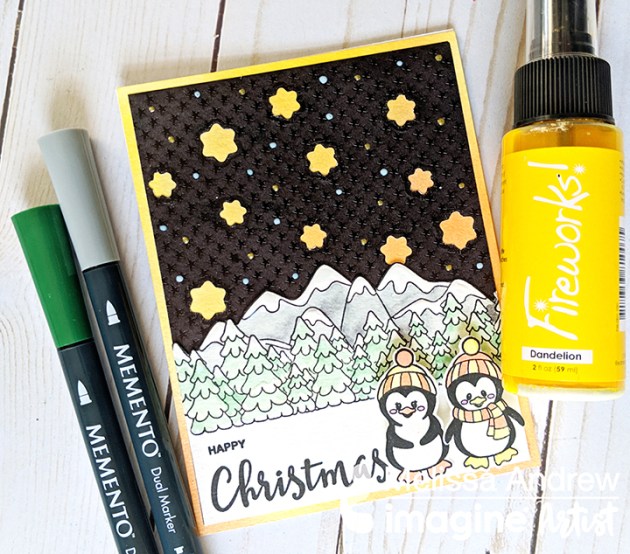
Today, I show you how to create a simple overlay background with Rinea foil paper over a Fireworks Shimmer Spray background for a Christmas card. In addition, I teach you how to use a simple masking technique to double your stamping effect as well as Memento markers to create dimension. Enjoy!

Skill: Advanced
Time: 1 hour +

Directions

Supplies

Imagine

• Fireworks Shimmery Craft Spray – Tangelo, Dandelion
• VersaFine Clair – Nocturne
• Memento Markers – Cottage Ivy, New Sprout, London Fog, Tuxedo Black
• Irresistible Pico Embellisher – Gold Shimmer, Wedding Dress White
• On Point Glue
• Tear It! Tape

Other

• Rinea Ebony Foil Paper – http://bit.ly/2zZa308
• Little Darlings Rubber Stamps – Tree line http://bit.ly/2PyzMHs and Mountains http://bit.ly/2ORquRI
• Whimsy Stamps – Everyday Scripted Sentiments http://bit.ly/2Ke3Sub
• Whimsy Stamps – Penguins Winter Adventure http://bit.ly/2A2uEku
• Paper Trimmer
• Scissors
• Masking Paper
• Watercolor Paper
• White Card Stock
• Heat Tool