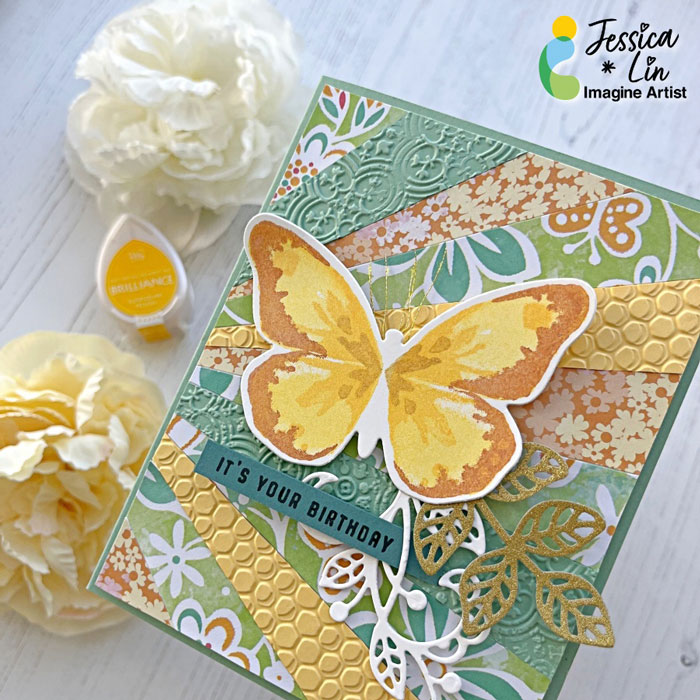
Hi everyone! It’s Jessica here and I’m excited to share a patterned paper trick with you today. If you like to save scraps of pretty paper, but are unsure how to use them, I highly recommend trying out today’s technique!
Skill: Intermediate Time: 30 minutes
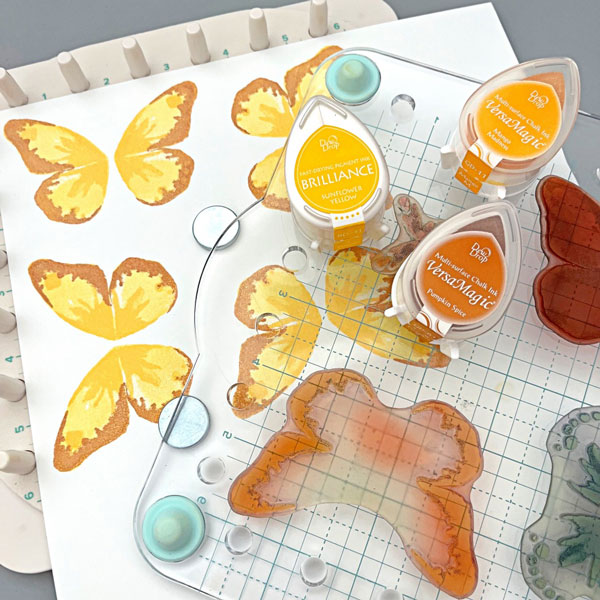
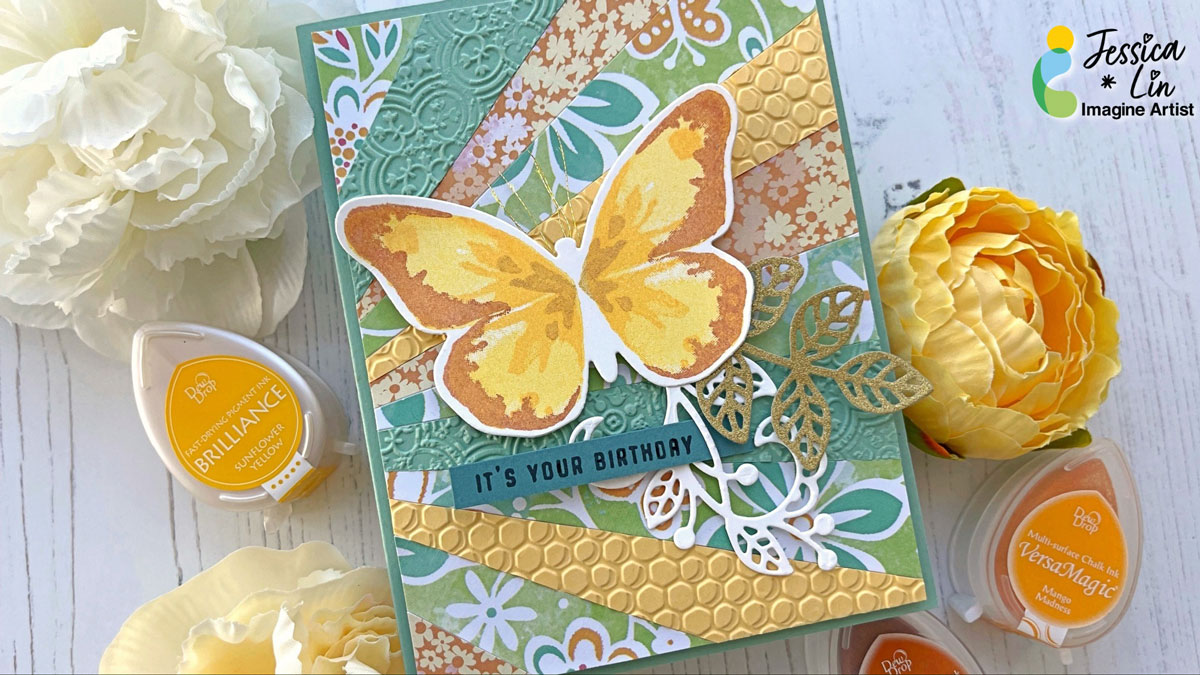
Step 1: The focal image of today’s card is this butterfly stamp from Watercolor Wings. It’s one of my favorite layering stamp sets of all time. I used Brilliance Sunflower Yellow for the base layer. Then I stamped the second and third layers with VersaMagic Mango Madness and Pumpkin Spice. I did add a fourth layer using Brilliance Galaxy Gold as well (not pictured).
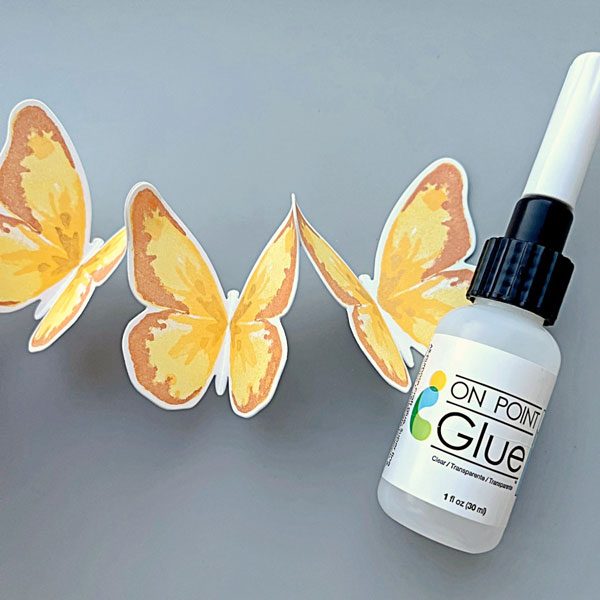
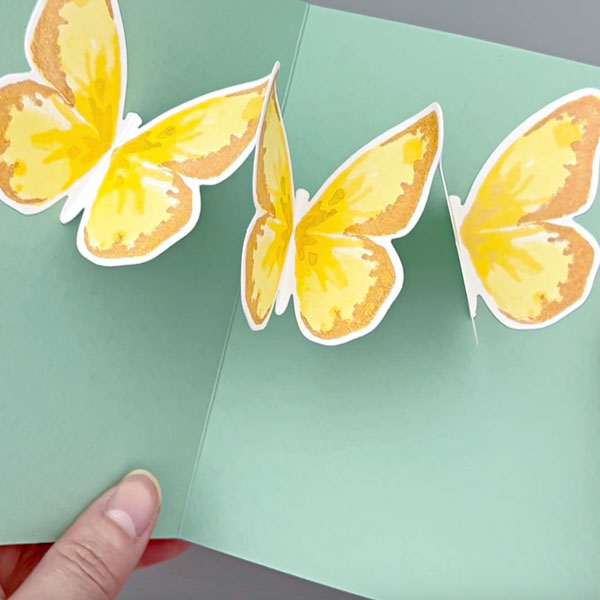
Step 2: Die cut the butterfly images with Bold Butterfly dies. Then adhere the tips of the butterfly die cuts with On Point Glue. This would create a string of butterflies for a surprise pop up mechanism inside the card (next photo).
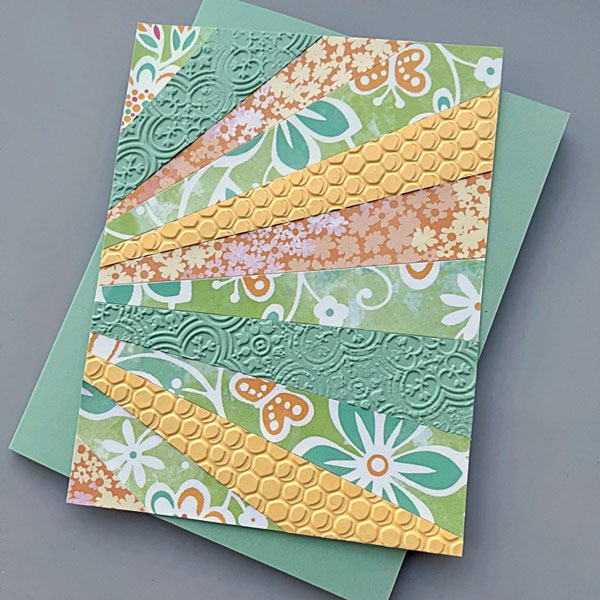
Step 3: To make the patterned paper background for the card front, trim your patterned paper scraps to 1 x 6’’. Then cut each piece diagonally to create long, triangular shapes. I used Stick It adhesive to cover the entire background panel and adhered the patterned paper pieces on top. However, you could use whichever adhesive you prefer. Once the entire panel is covered, trim off the hanging pieces on the edges.
Step 4: Lastly, adhere the last butterfly along with any additional foliage die cuts. And the card is complete!
Hi everyone! Are you ready to celebrate the Fourth of July? I made a sparkly, light-up card to celebrate the occasion. It’s been a while since I heat embossed with colorful embossing powders and I truly miss this simple and fun technique. Be sure to check out the supply list at the end to see the colors I used!
Skill Level: Advanced Time: 1 hour
Step 1: Stamp one image from MFT’s Festive Fireworks set with VersaMark ink pad. Then pour on embossing powder with the color of your choice. Repeat the steps if you would like to use different colors of embossing powders, making sure to heat set the powder before moving on to the next color. The colors I used today are Mboss – Valentine, Lucky Stars, Princess Party, and Shimmering Night Sky (not pictured here).
Step 2: Use Brilliance – Galaxy Gold ink pad to stamp the layering images. I used a stamp positioning tool so that I could restamp a couple of times and get good ink coverage. The gold stamped images look so well against the black background, don’t you think?
Step 3: I decided to add interactive elements to make this card even more festive! I used Chibitronics LED light stickers to create the light up circuit. If you are interested in making a light up card, feel free to check out the step-by-step video tutorial on my YouTube channel “Craft with Jessica V. Lin” and search for “How to Make a Fireworks Light Up Card with BLACK Cardstock”.
Step 4: For some finishing touches, I splattered some Sheer Shimmer Craft Spray to the background. I used the brush-over-acrylic-block flicking method, but you could use the spray nozzle to add a fine mist of shimmer as well. Then I adhered some sequins with On-Point Glue, and that completes the card!
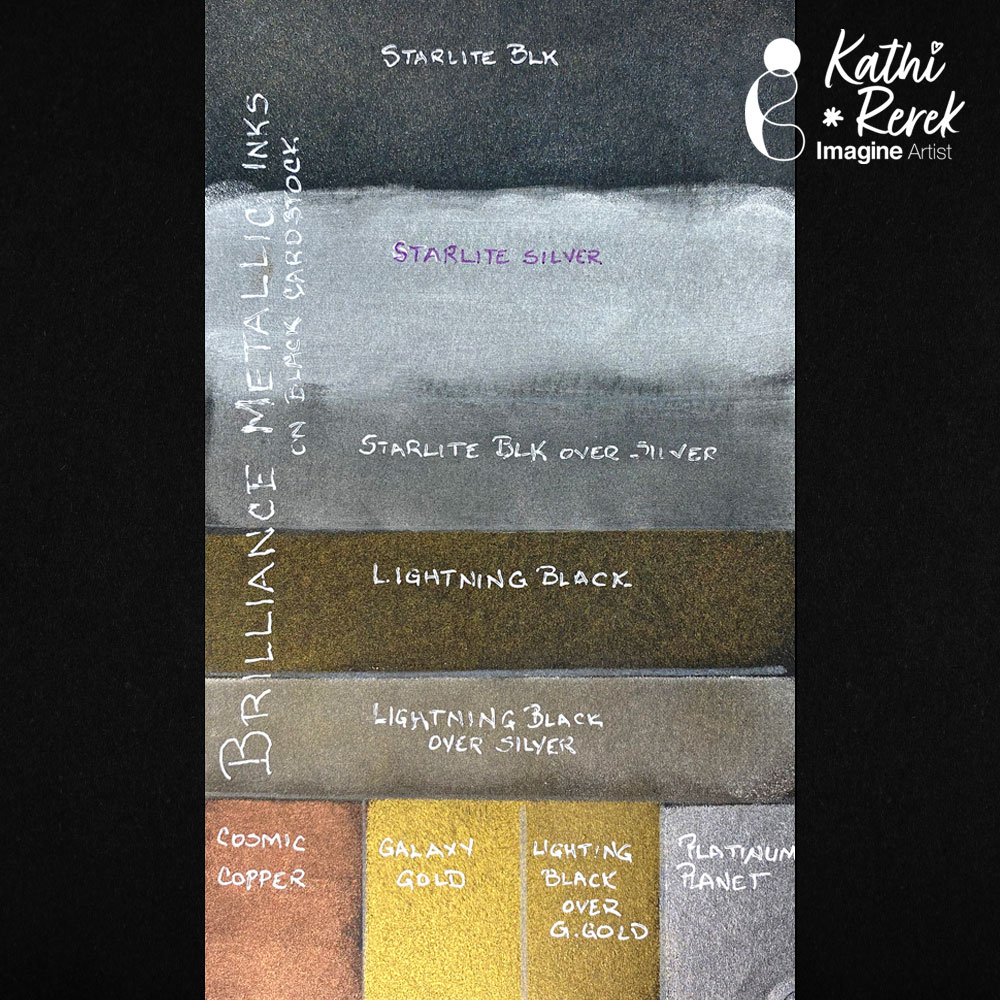
I recently shared a project using rich Brilliance Pigment Inks and a friend asked how they looked on black cardstock. I decided that it was a great idea to swatch them so that I’d have a reference.
Skill Level: Beginner Time: 30 minutes
Instructions:
I had a scrap of black mixed media cardstock leftover from a project. I used a Sponge Dauber or foam applicator to apply the inks singly or in combination onto black cardstock, then labeled them with a white gel pen and/or a purple Sharpie pen when the white didn’t show on the silver. I heat set after each application to avoid contaminating my ink pads.
Notes and Observations about Brilliance Ink:
Re-applying another layer of ink after heat setting intensified the opacity and metallic properties of the ink on black cardstock. I’d imagine building up several layers would continue to enhance the inks.
The bottom right hand corner of the cardstock was smashed. Applying metallic ink over the crush mark emphasized that textural component! Cool!
I applied Starlite Silver and Starlite Black Inks to a Gel Press with a brayer, then pulled a print with black cardstock, which resulted in a lovely silvery mottled metallic finish. Again, a second layer of ink deepened the silver and improved the coverage.
FYI: You can apply Brilliance Metallic inks over white chalk finish acrylic paint and over white gesso, which means you can use it on a variety of surfaces. I have not tried Metallic Brilliance Inks over transparent and/or black gesso or Matte Medium. Those will be experiments for another day.
Lastly, VersaMagic Inks can be applied over the Brilliance Metallic Inks and yield a nice matte finish.
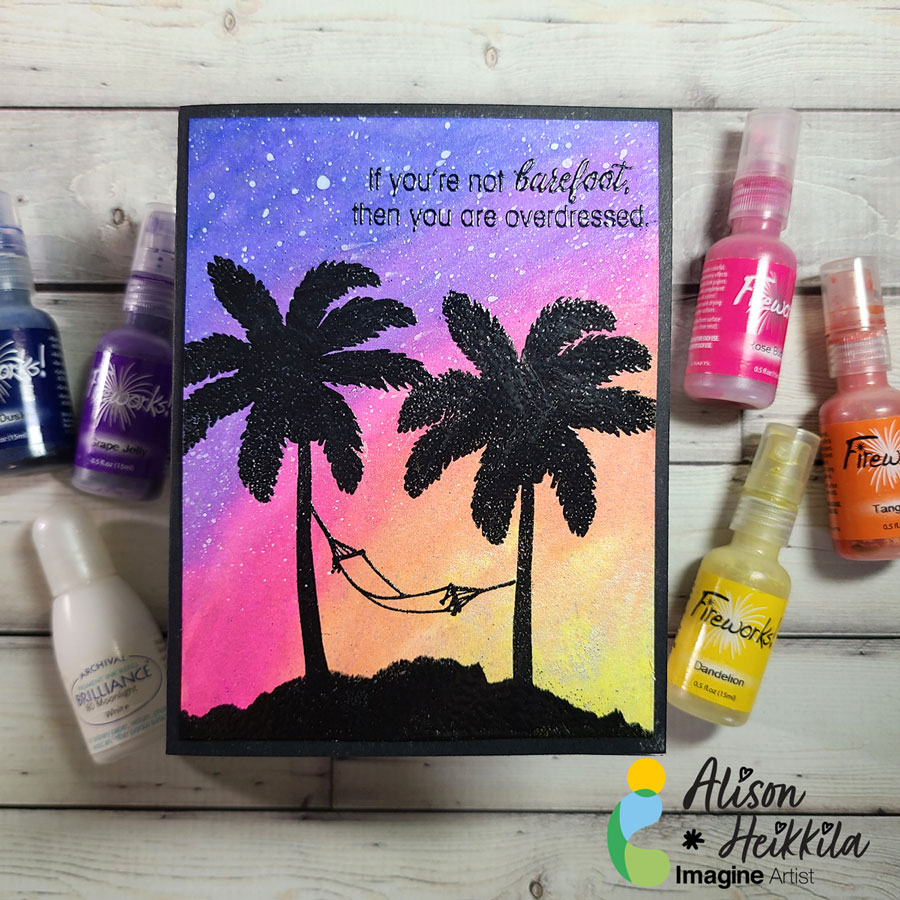
Hello! It’s Alison Heikkila. In my latest YouTube video for Imagine, we’re going to create a sunset with Fireworks! Sprays. These pigmented sprays also have mica in them, which help you to achieve beautiful shiny effects. Creating backgrounds with these are really fun, and we’ll use a couple of techniques to do it.
*Some affiliate links are used in this post. That means that if you shop through these links, I may receive a small compensation, at no cost to you.
Skill Level: Intermediate Time to Complete: 40 minutes
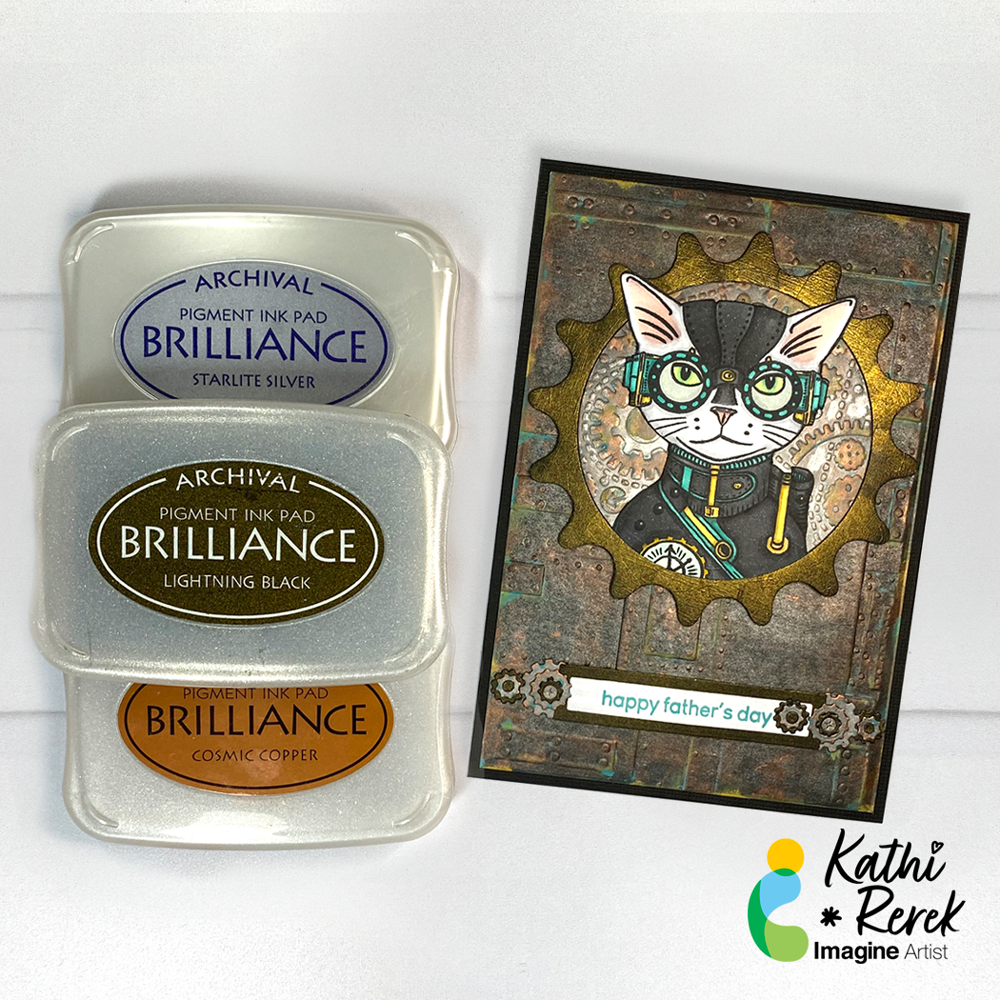
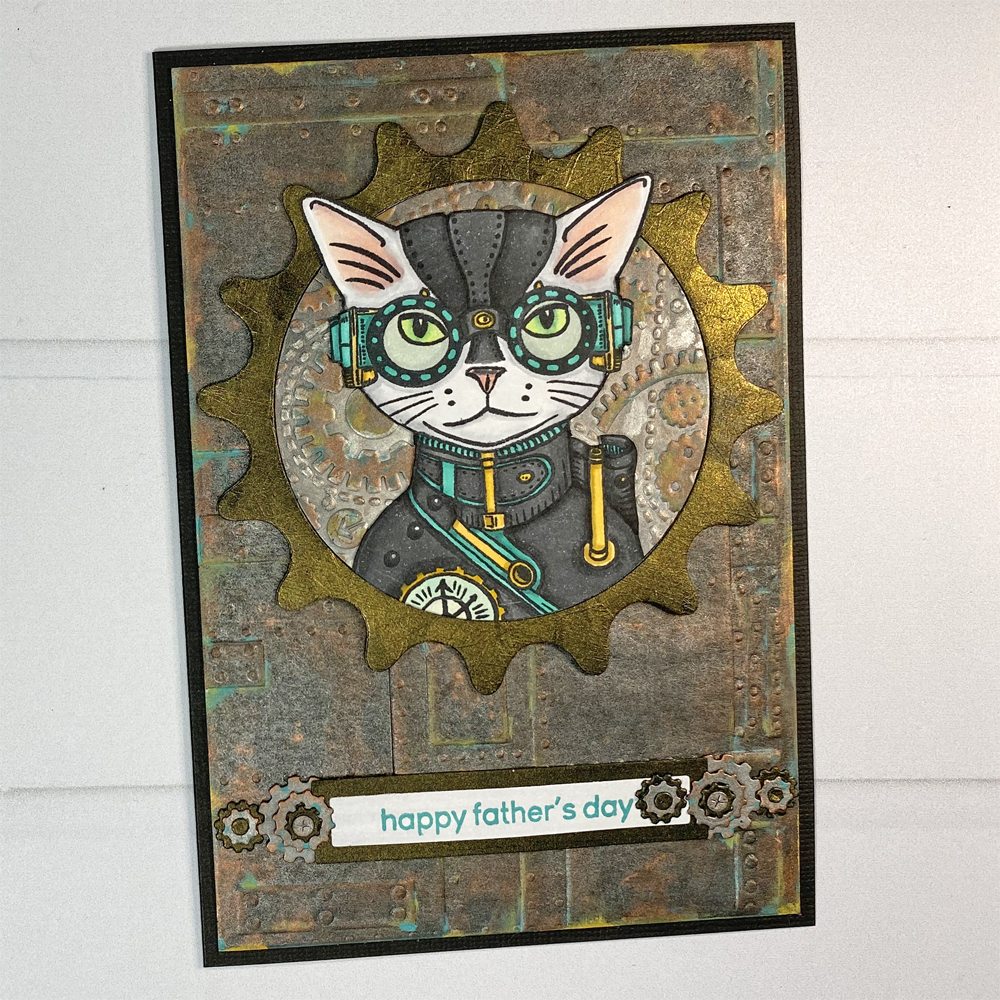
I’m continuing my experimentation with Metallic Brilliance Inks with this Father’s Day card using two of my favorite themes – cats and Steampunk!
Skill Level: Advanced Time: 2.5 Hours
Directions:
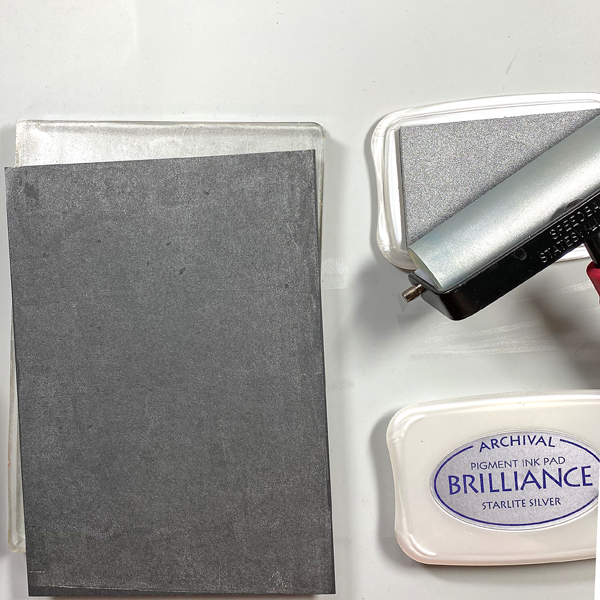
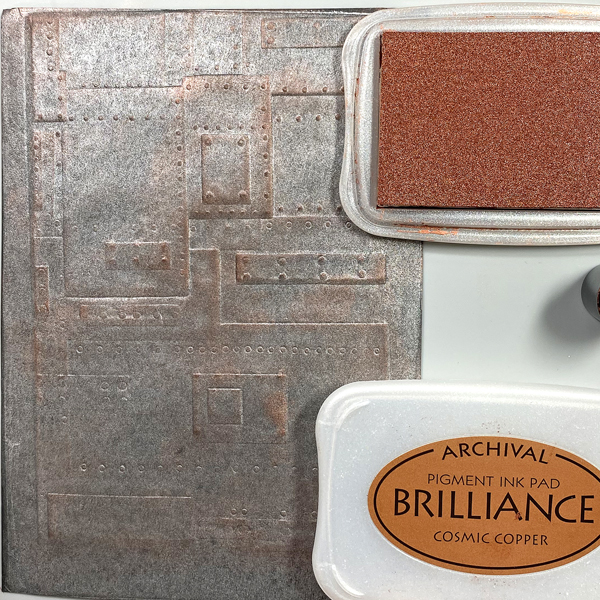
Step 1: Use a brayer to apply Starlite Silver Brilliance Ink to a 5” x 7” Gel Press. Place a piece of black mixed media paper onto the Gel Press. Smooth the back of the paper to transfer the in and pull a print.
Step 2: Repeat Step 1 to enhance the coverage.
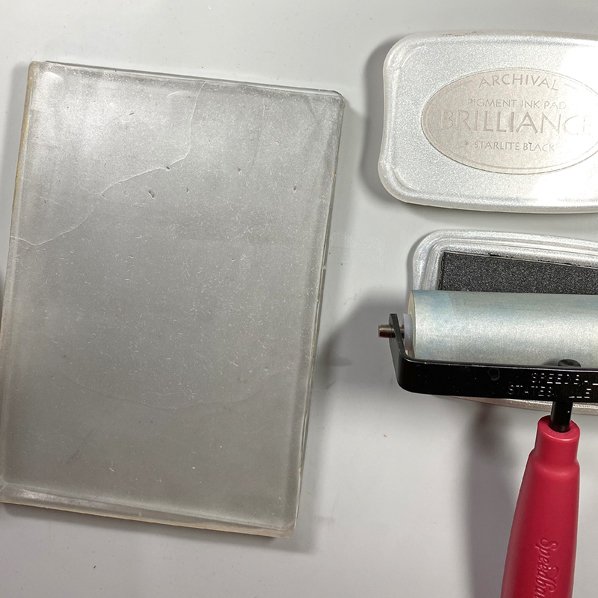
Step 3: Clean the brayer, then use it to apply Starlite Black Brilliance ink to the Gel Press. Place the print back onto the Gel Press inked side down. Smooth the back of the paper, then pull the print. Heat set the inked paper, then clean the brayer and the Gel Press.
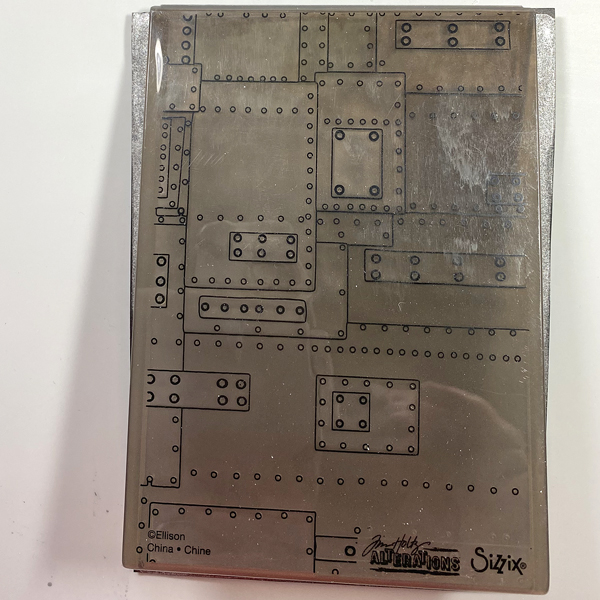
Step 4: Place the inked black mixed media paper into the Foundry 3D Alterations Embossing Folder. Spritz the back of the paper with water. Close the folder and run it through a die-cut machine.
Step 5: Use a Sponge Dauber to apply Cosmic Copper Brilliance Ink to the high points of the embossed paper. Heat set.
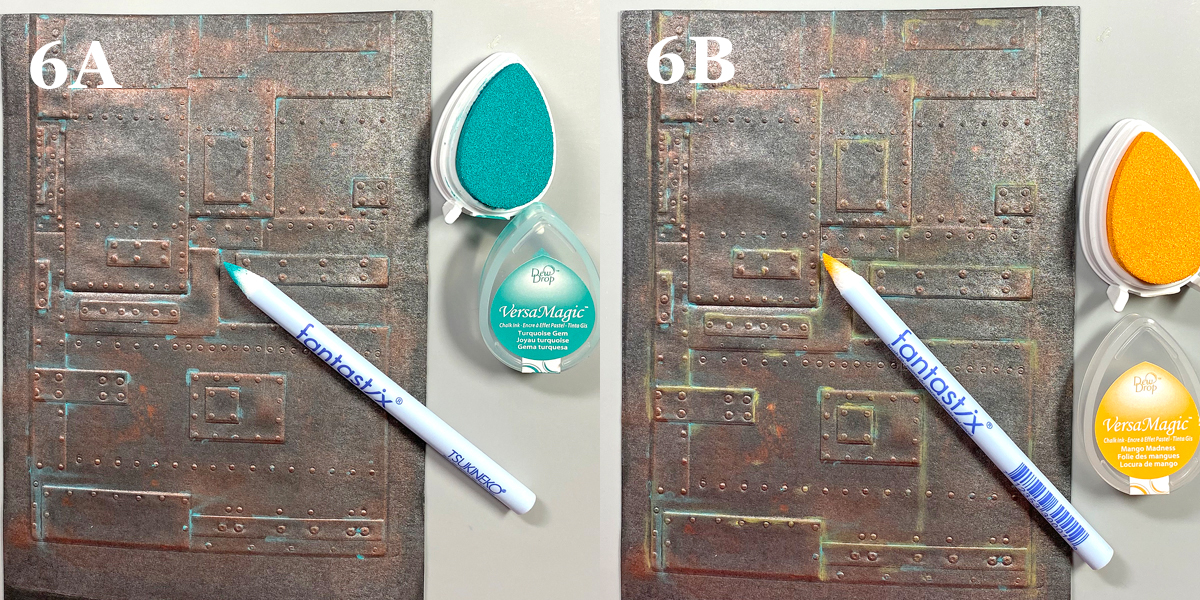
Steps 6A and 6B: Use Fantastix to apply Turquoise Gem VersaMagic Ink randomly to the high points of the embossed paper (6A). VersaMagic Ink has a matte chalk finish which comes out when it’s heat embossed.
Use another Fantastix to Apply Mango Madness VersaMagic Ink randomly to the high points of the embossed paper (6B). Heat set the panel and set aside.
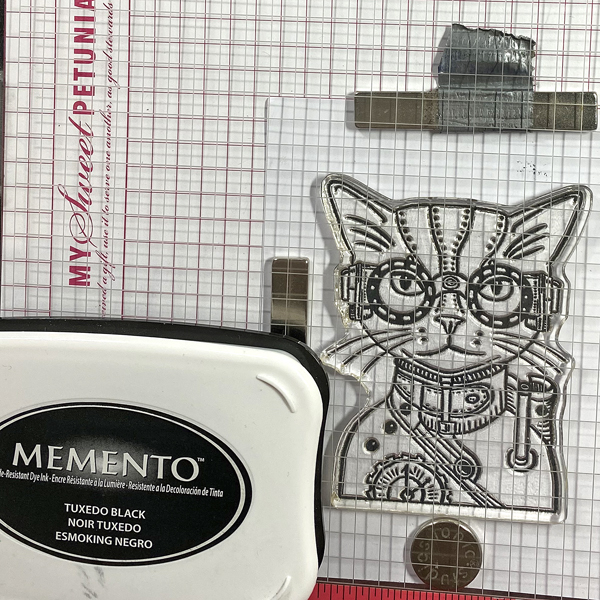
Step 7: Use Tuxedo Black Memento Ink to stamp the cat from the Steampunk Pets Clear Stamp Set onto white cardstock.
Step 8: Fussy-cut the image and use Copic markers to color it. Use a dark marker to edge the cut image. Set aside.
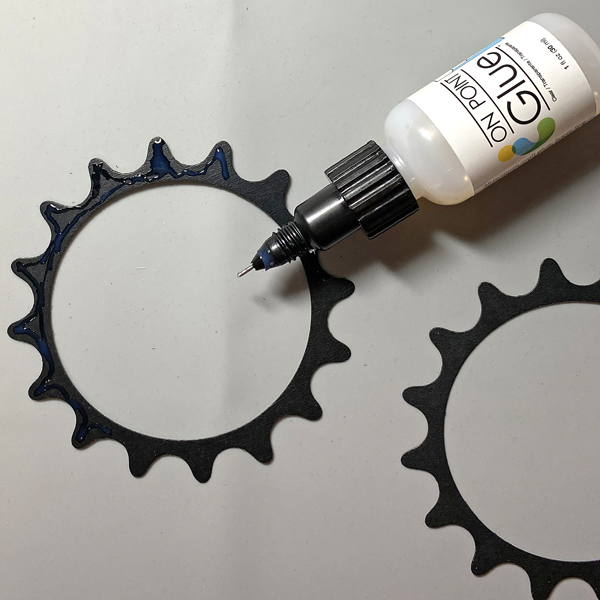
Step 9: Use the largest die from the Sprightly Sprockets Shapeabilities Die Set to cut black mixed media cardstock two times. You will end up with two cogs and two circles.
Step 10: Sponge Lightning Black Brilliance Ink over one of the cog die-cuts and one of the circles. Heat set both.
Step 11: Use On-Point Glue to adhere the inked cog atop the other one.
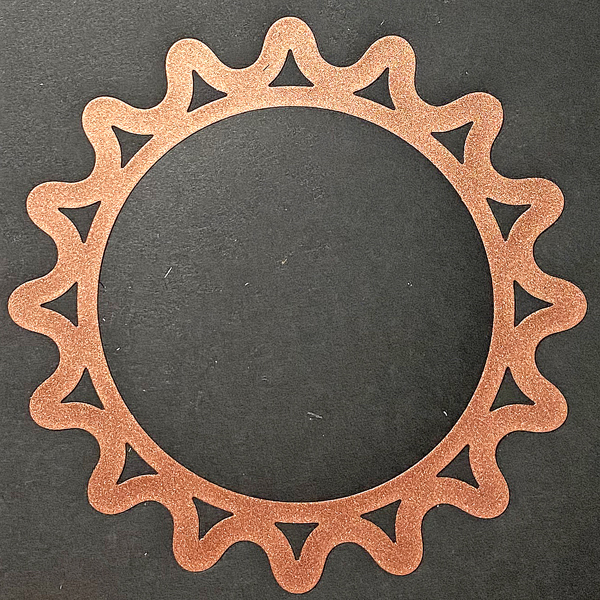
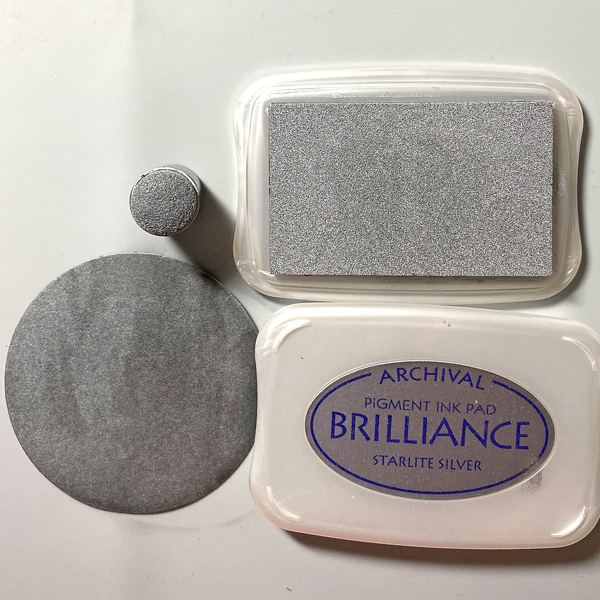
Step 12: Use a Sponge Dauber to apply Starlite Silver Brilliance ink to one of the circles from Step 9. Heat set.
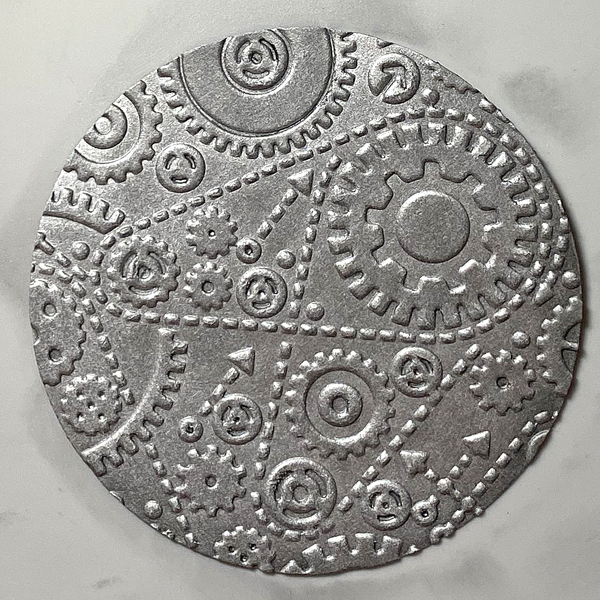
Step 13: Place the silver-inked circle into the Gears Alterations Folder and run it through a die-cut machine.
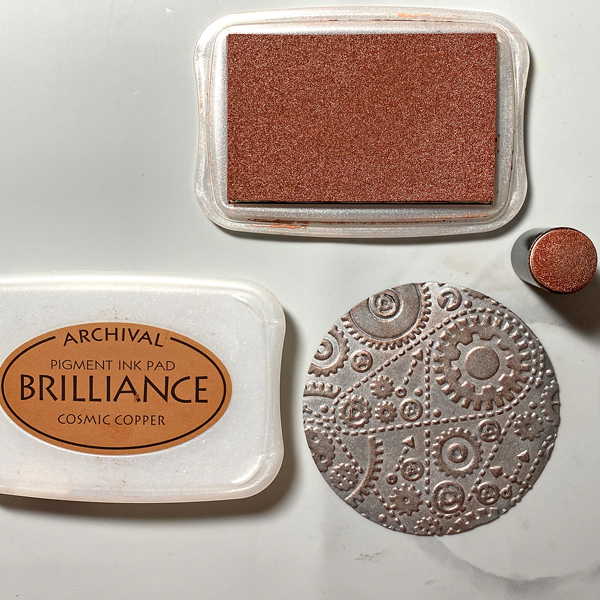
Step 14: Use a Sponge Dauber to apply Cosmic Copper Brilliance Ink to the high points of the embossed circle. Heat set.
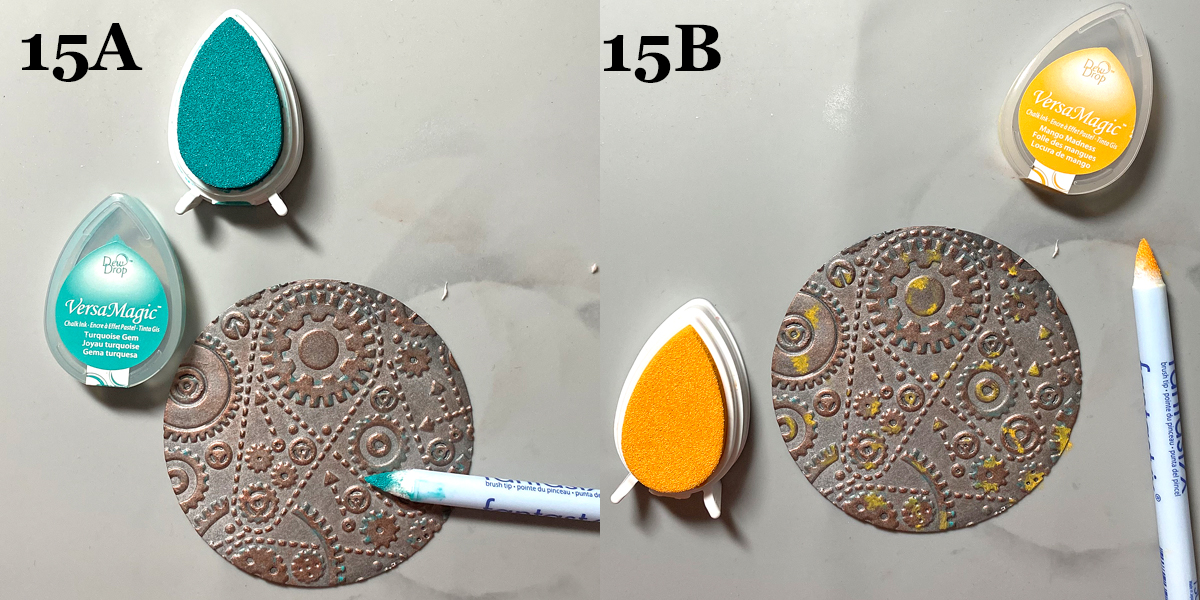
Steps 15A and 15B: Use Fantastix to apply Turquoise Gem VersaMagic Ink randomly to the high points of the embossed paper (15A).
Use another Fantastix to Apply Mango Madness VersaMagic Ink randomly to the high points of the embossed paper (15B).
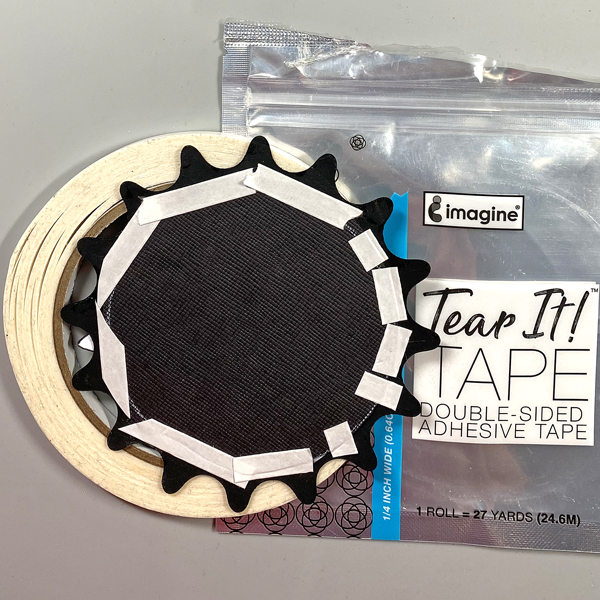
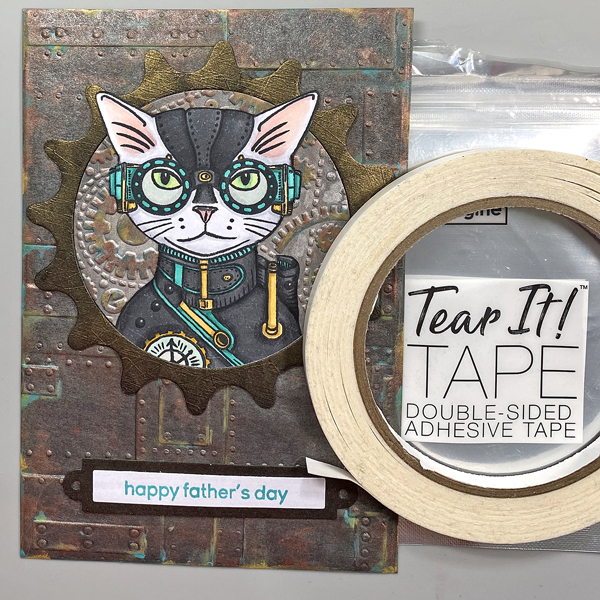
Step 16: Use Tear It! Tape to adhere a slightly larger circle to the back of the stacked cog die-cuts.
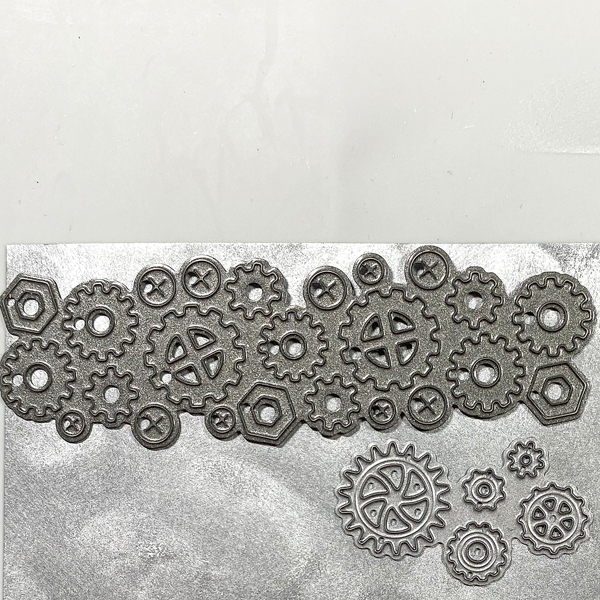
Step 17: Use a Sponge Dauber to apply Starlite Silver Brilliance Ink to a strip black mixed media paper. Sorry that there’s no photo. Use cog dies to cut the silver-inked black paper.
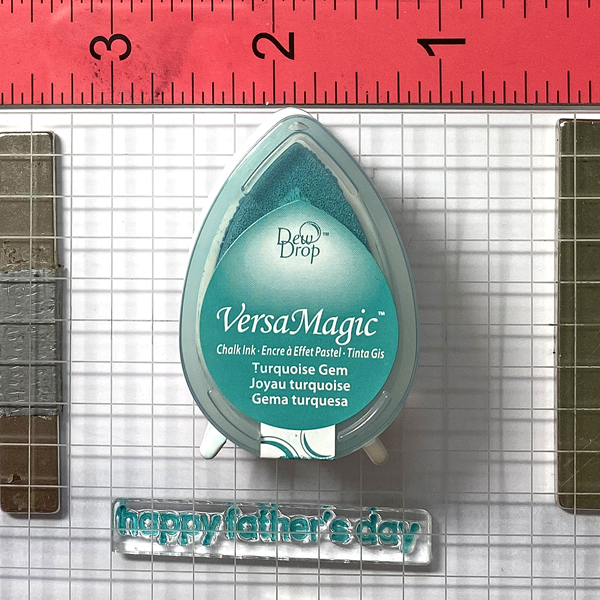
Step 18: Use a C2 Copic marker to color a piece of white cardstock. Use magnets to secure the colored cardstock onto a stamping platform. Place the “Happy Father’s Day” sentiment stamp facedown on the colored cardstock. Ink the stamp with Turquoise Gem VersaMagic Ink and stamp. Repeat inking and stamping if necessary to attain a good impression. Remove the stamped cardstock from the stamping platform and heat set the ink.
Step 19: Use a rectangle die to cut the sentiment. Use the matching nameplate die to cut the Lightning Black circle. Adhere the sentiment die-cut atop the nameplate die. Sorry that there’s no photo.
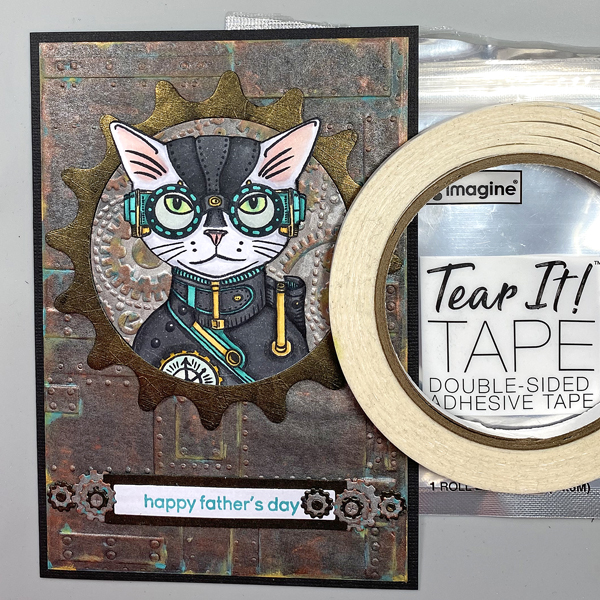
Step 20: Use Tear-It! Tape to adhere the embossed circle and the Steampunk Cat onto the cog die-cut. Use the tape to adhere the sentiment as shown.
Step 21: Use On Point Glue to adhere the gears, cogs, and screws to the sentiment die-cut.
Step 22: Cut black cardstock to 10” x 7”. Score at 5” and fold to form a 5” x 7” card. Use Tear-It! Tape to adhere the image panel to the front of the card.
Hi everyone! It’s graduation season. Do you have a gift card, a ticket, or even a polaroid photo you would like to send to someone who is graduating? Today I’m sharing my favorite way to send a gift card. It’s super easy and versatile; if you are interested, keep reading!
Skill: Advanced Time: 1 hour
Directions:
Step 1: Stamp the images with any waterproof ink. Many Tsukineko ink pads are waterproof when the ink dries; I am using VersaFine Nocturne today. Also, can we talk about how adorable these images are?! They are from It’s a Science stamp set and they’re totally perfect for any science majors. I thought they would look so cute for a graduation card.
Step 2: Watercolor with dew drop ink pads. I love to watercolor with my dew drop ink pads. You can choose from the VersaMagic (pigment ink), Brilliance (pigment ink) or Memento (dye ink) lines and they all work great! I smooshed some ink onto my craft mat and colored away!
Step 3: Fussy cut the images with scissors. If the stamp set has a coordinating die set, you could use that too!
Step 4: Stamp images with VersaMark ink pad to create details for the background panel.
Step 5: I actually decided to create a light up card by adding a LED light to the microscope image. If you are interested in seeing a video tutorial, you could follow my YouTube channel: Craft with Jessica V. Lin or search for “Interactive Gift Card Holder that Lights Up”. I’ll edit the video and post it soon.
Step 6: This is what the LED light looks like when the circuit is finished. It’s really not that complicated, and the result is so worth it!
Step 7: Finally, for the gift card holder, simply score an A2 card base at 4.5’’, 5.5’’ and 6.5’’. Adhere the bottom edge with Tear-It! Tape (make sure you don’t adhere the entire flap closed). Then, create a gift card opening by die-cutting along the edge of the middle flap. If you don’t have a die that works, you could also cut the opening with scissors.
And the gift card holder card is completed! I love this design since it’s super easy and you could easily swap the gift card with tickets (like the Disneyland ticket shown in step 7) or even a polaroid photo if you decided to keep it as a card instead. I hope you give it a try, thanks so much for stopping by!