By Kathi Rerek
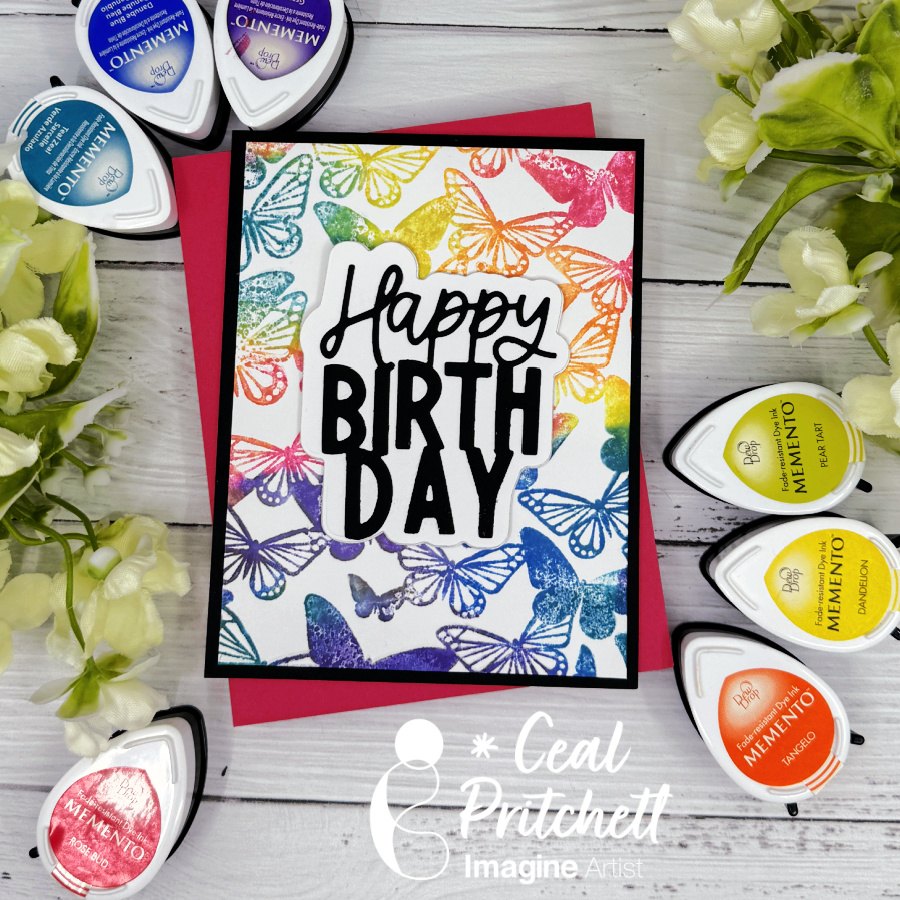
Use your paper crafting projects to make home decor, such as this wall hanging. It’s quick, easy, and fun to do. Best of all, these projects make great gives that are hand-crafted with love.
Skill Level: Intermediate
Time: 1 hour
Instructions
Step 1:
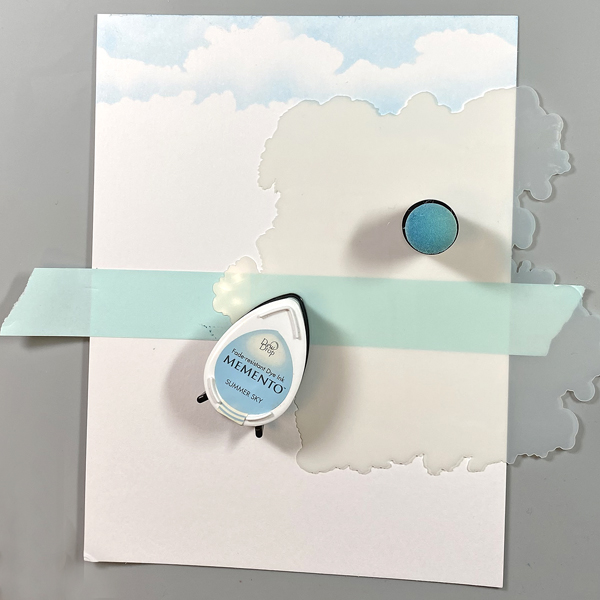
Place a piece of low-tack tape horizontally across a piece of Mixed Media paper. Place the Cloud Edger stencil slightly below the top of the paper. Use a Sponge Dauber to apply Summer Sky Memento Ink over the top of the stencil. Move the stencil downwards and rotate it, then apply Summer Sky Memento ink over the top. Repeat until the cloudy sky is complete.

Step 2:
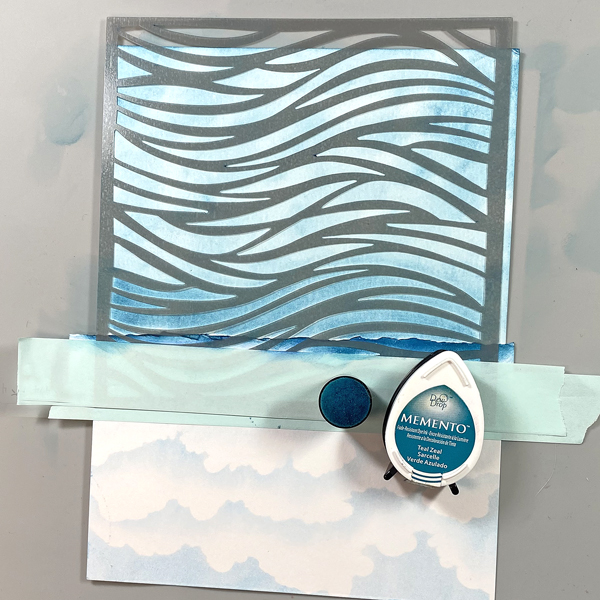
Tear a piece of scrap cardstock and place the torn edge horizontally under the cloudy sky, secured with low-tack tape. Flip the panel 180°. Use a Sponge Dauber to apply a light layer of Teal Zeal Memento Ink to cover the bottom portion of the panel.
Step 3:
Place the Water Ripples stencil over the sponged teal area and secure with low-tack tape. Use the Sponge Dauber to apply Teal Zeal Memento Inks over the stencil onto the image panel. Trim the panel to 5.25” x 7.75”.

Step 4:
Secure the image panel to the base of a stamping platform. Position the Caravelle stamp facedown on the top left of the image panel so that the bit of ocean at the bottom of the stamp is even with the top of the sponged sea. Ink the stamp with Nocturne VersaFine Clair Ink and stamp. Re-ink and stamp again if necessary to attain a good impression. Remove the stamp from the platform.
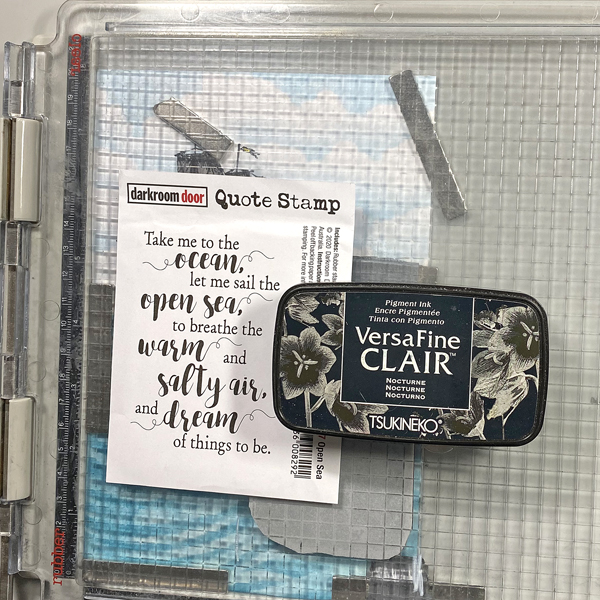
Step 5:
Position the Open Sea Quote Stamp facedown on the lower right part of the image panel. Ink the stamp with Nocturne VersaFine Clair Ink and stamp. Re-ink and stamp again if necessary. Remove the stamp and the image panel from the platform. Heat set the image panel.
Step 6:
Use pens to color the Caravelle. Sorry that there are no photos.
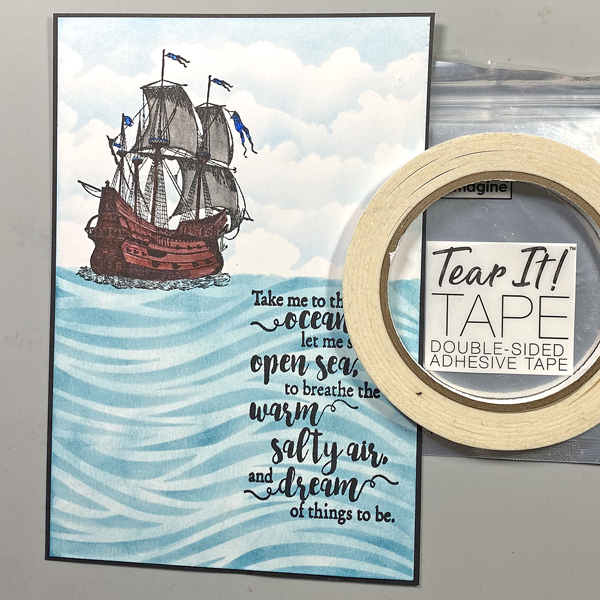
Step 7:
Use Tear-It! Tape to adhere the image panel to a piece of 5.5” x 8” black chipboard or heavy weight cardstock.
Step 8:
Wrap twine twice around the base of the piece and tie a knot.
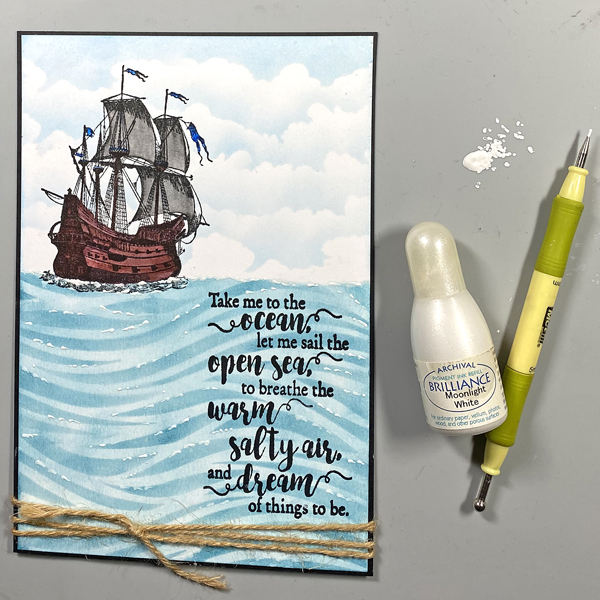
Step 9:
I decided that the sea looked kind of “blah”. I squeezed a few drops of Moonlight White Re-inker onto my craft mat and used a stylus to apply the re-inker to the sea to look like white caps.
Products Used
Imagine Supplies:
- Memento Dew Drop Ink – Summer Sky
- Memento Dew Drop Ink – Teal Zeal
- Brilliance Re-Inker – Moonlight White
- VersaFine Clair Ink – Nocturne
- Sponge Daubers
- Tear It! Tape
- Craft Mat
Other Supplies:
- 140 lb. Mixed Media Paper by Strathmore
- 140 lb. Black Mixed Media Paper by Strathmore
- Cloud Edger Stencil by A Colorful Life
- Water Ripples Stencil by La-La Land Crafts
- Caravelle Unmounted Mini 018 Red Rubber Stamp by Katzelkraft
- Open Sea Quote Stamp by Darkroom Door
- Brown, Mocha Brown, Dark Grey, and Cool Grey Zig Clean Color Brush Markers by Kuretake
- Blue Triplus Fineliner by Staedtler
- Heat Gun
- Stamping Platform by Tonic Studios