New Ink Blending Technique Using Eyeshadow Brushes With Memento and Delicata Inks


2022-jan-katy-new-year-new-beginnings-Blog

2022-jan-katy-new-year-new-beginnings-inside-Blog-2

By Katy Ingram –

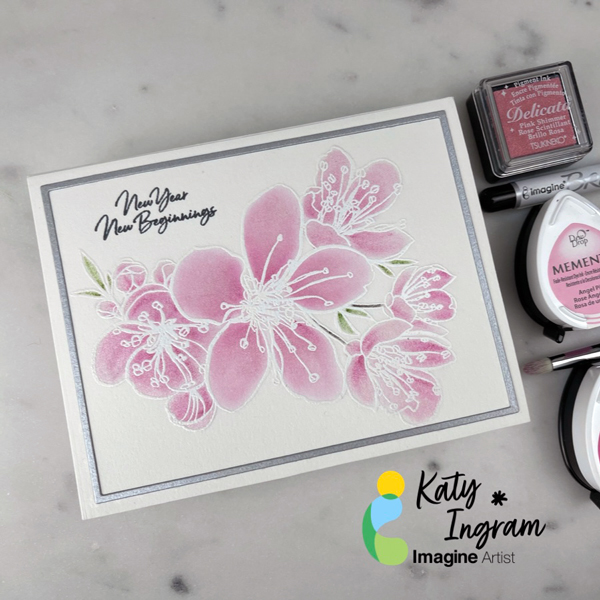
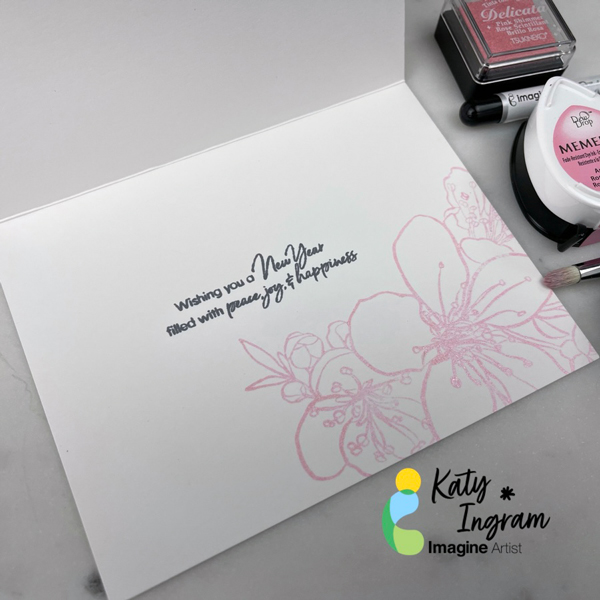
Hello Friends! I am so excited to be back with you for another year of card making and crafting here at Imagine Crafts. I know for many, Valentine’s Day cards are in full swing, but I thought it would be fun to start the year off with something a bit different. However; this card can also be turned into a Valentine or a Mother’s Day card which gives you some versatility. In todays video I show you how to use eyeshadow brushes to color your images using Memento and Delicata Inks. I hope you enjoy the video. Thanks so much for watching.

Skill: Beginner, Intermediate, Advanced
Time: 25 minutes


Art Supplies:

Imagine

• Memento Ink Pad – Angel Pink 

• Memento Ink Pad – Rose Bud

• Memento Ink Pad – Gray Flannel 

• Memento Ink Pad – Bamboo Leaves 

• Memento Ink Pad – Espresso Truffle 

• Memento Ink Pad – Rich Cocoa 

• Delicata Ink Pad  – Pink Shimmer 

• VersaMark Ink Pad 

• Mboss Embossing Powder – White 

• On Point Glue 

• Brushstix Chisel Tip 

Other Products Used:

• Ellen Hutson – Mondo Sakura Stamp Set

• Waffle Flower – New Beginnings Stamp Set

• Ellen Hutson – Essentials Rectangles Die Set

• Waffle Flower – A2 Layering Rectangle Die Set

• Stathmore 500 Series – Hot Pressed Watercolor Paper

• Stardream Metallic Silver

• Accent Opaque 110 lb Card Stock

• Misti Stamping Tool

• Couture Creations Precision Stamp Press

• Kaolin Clay Powder Tool


Make a “Sending My Love” Card for your Valentine

2022-LeeAnn-January-700x700

By LeeAnn McKinney

– Hey there friends, LeeAnn here with a fun project that the idea will work any time of year, but this one especially is for Valentine’s Day. I did direct ink to paper, and blending Rose Bud, Love Letter and Angel Pink Memento Dye Ink in dew drop form.

I then ran the panel through my Big Shot with a die that embossed stitching into the background and made the perfect a2 cut around the panel. I then did direct to paper with VersaMark which I the poured Gold Mboss and then took my heat tool to melt it. After using my Big Shot to cut out the sentiment with the embossed panel and 3 layers of white, I cut the shadow layer out of vellum.

Then I used On Point Glue to adhere the layers together, and attached to the card panel, I used Tear It Tape to attach the panel with my card base. I followed that up with a few drops of On Point Glue to adhere some flat backed Gold Pearls to my panel and spritzed it with Sparkle Simmer Spray. With that this 20 minute video was complete (actually 6 video’s spliced together) I sped it up and cut the messy parts and you now have more time to enjoy the rest of your day. Thank you for watching, and I would love to see what you make that perhaps this project inspired you with.


Art Supplies

Imagine:

• Memento Love Letter 

• Memento Angel Pink

• Memento Rose Bud 

• VersaMark Watermark Ink

• Mboss Gold 

• On Point Glue 

• Tear It! Tape 

• Sheer Shimmer Sparkle 

• Craft Mat 

• Miscellaneous  Stamp Cleaner  

Other Products:

• Kat Scrappiness Sending My Love Die with Shadow

• Kat Scrappiness Stitched Hearts Coverplate Die


Learn How to Make a Best Wishes Card

2022-Annie-January-Featured

By Annie Collins

– Hello Crafty Friends – Annie here with a fun card featuring a variety of Imagine Crafts products.

Directions:

Art Supplies:

Imagine

• Delicata Ink: Golden Glitz

• VersaColor Ink: Neptune

• VersaFine Clair Ink: Nocturne

• VersaMagic Ink: Spring Pansy, Pretty Petunia, Purple Hydrangea, & Night Sky 

• Mboss Embossing Powder: Gold

• Sheer Shimmer Craft Spray: Gold

• On Point Glue

• Tear It! Tape

Other:

Sunny Studios Die: Wishes

Fairy Hugs Stamp: Fantasy Flowers

How to Make a Quick Stenciled Christmas Card

Merry-Christmas-Poinsettia-Card-IG

By Annie Collins

– Hello Crafty Friends – Annie here with a quick and easy stenciled Christmas Card featuring a variety of Imagine Crafts Products.

Directions:

Art Supplies:

Imagine

• Brilliance Inks: Pearlescent Poppy and Gamma Green
• VersaMagic Ink: Hint of Pesto
• irResistable Texture Spray: Gold
• On Point Glue
• Tear It! Tape
• Craft Mat
• Ink Blushers
• StazOn All Purpose Stamp Cleaner

Other:

• Stampendous Stamp: Shapely Vase
• Maker’s Movement Thanks Die
• Gel Press 6×6
• Accent 80# Ultra Smooth Cardstock: Opaque White
• Recollections Brand Cardstock: 110# White, 65# Cream and 80# Dark Green
• Recollections Brand Rhinestones: Gold and Violet

Create Elegant Heart Embossed Holiday Cards

2021-Lee_Ann_Dec_Blog

By LeeAnn McKinney –

Hi there friends and fellow crafters, LeeAnn here. Today I am making 2 cards using one of my favorite techniques… HEAT EMBOSSING. So for the next 5 minutes please relax, and watch as I make these 2 cards. Actual crafting time was 17 minutes not counting the cutting of the cardstock which I did before turning on the camera.


Art Supplies

Imagine:

• Craft Mat

• Tear it! Tape

• Mboss

• VersaMark Watermark Ink


Other Supplies Used:

• CARD STOCK 8.5 X 11- White- Layering Weight – Gina K Designs

——— https://ldli.co/e/43kgz90 [ ginakdesigns.com ]

• STAMPS- Holiday Tapestry – Gina K Designs

• CARD STOCK 8.5 X 11- Black Onyx- Heavy Weight – Gina K Designs

• CARD STOCK 8.5 X 11- Red Velvet- Heavy Weight – Gina K Designs

• CARD STOCK 8.5 X 11- Blue Denim- Heavy Weight – Gina K Designs


Create a Beautiful Holy Night Card

2021-Nov-Neva-HolyNightCard_IG

By Neva Cole –

Today’s tutorial will feature several Imagine products, Delicata, StazOn, and Vertigo.  Using silhouette style die cut creates a stunning yet quick and easy Christmas Card.

Skill:  Beginner

Time:  30 Minutes

Directions:

2021-Nov-Neva-HolyNIghtCard-step1

Step 1

Trim black cardstock to 6 ½” x 9” and fold in half.  Center die on the front panel of the card base and die cut.

2021-Nov-Neva-HolyNIghtCard-step2

Step 2

Leave the die in place and stamp the starry background with Delicata Golden Glitz.

2021-Nov-Neva-HolyNIghtCard-step3

Step 3

Use a Fantastix Brush Tip to brush in details left open in the die.  Photo shows the die removed after this step.

2021-Nov-Neva-HolyNIghtCard-step4

Step 4

Trim a section of Taffeta Vertigo to 2” x 6 3/8”.  Use an Ink Blusher to build layers of color in StazOn Blazing Red and Midnight Blue.  As the color layers blend, the red, purple, and blue along with the Taffeta Vertigo creates a stunning night sky.

2021-Nov-Neva-HolyNIghtCard-step5

Step 5

Adhere Vertigo behind the opening in the die with small dots of On Point Glue.  I glued around the edge and behind each small portion of the die scene.  Trim white cardstock to 6 3/8” x 8 ¾” and fold in half.  Adhere to the inside back of the card with Tear It! Tape.

2021-Nov-Neva-HolyNIghtCard-step6

Step 6

Apply Tear It! Tape to the front inside of the card and fold card closed.  This allows the card to compensate for the two layers of cardstock.

2021-Nov-Neva-HolyNIghtCard-step7-2

Step 7

Stamp Oh Holy Night sentiment in Delicata Golden Glitz and heat emboss with Gold Embossing Powder.

Art Supplies

Imagine
Other
  • Gemini Follow the Star Die
  • Neto Stuff Star stamp
  • Recollections Christmas Sentiments
  • Black and White cardstock