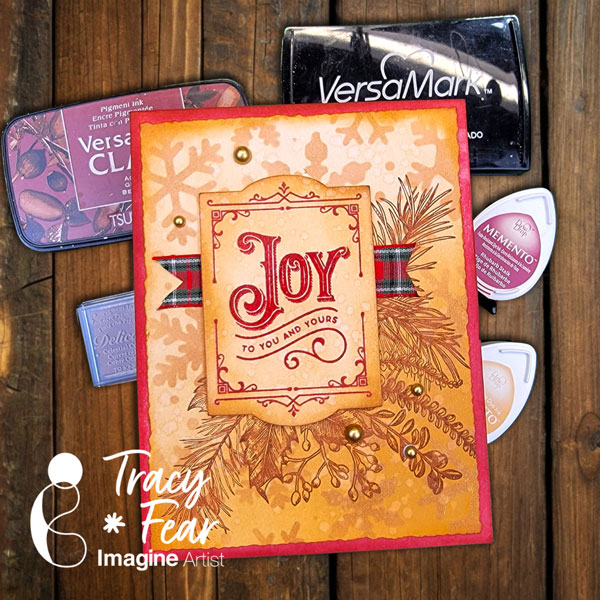
Hello Friends! Happy Holidays! There’s nothing I love more than a vintage Christmas card and that’s just what you will learn to create in the video! Follow along with me while we create this super easy Christmas Card!
• Acrylic stamping block or stamp platform • Snowflake Stencil • Stencil Brush • 100lb white paper • A2 Card Base • Clear embossing powder • Ribbon scrap • Embellishments • Water and a brush • Stamps of your choice • Antistatic Powder Tool • Embossing heat tool • Tim Holtz and Sizzix Dies Darling Deer, Arctic, and Festive Words • Glitter paper from my stash • White Gel Pen • Dr. PH Martin’s Bleedproof White Vellum from my stash
ALTERNATIVE PRODUCTS THAT CAN BE USED TO RECREATE SOMETHING SIMILAR Any Inks any combination of background stamps, dies, and feature stamps and stencil
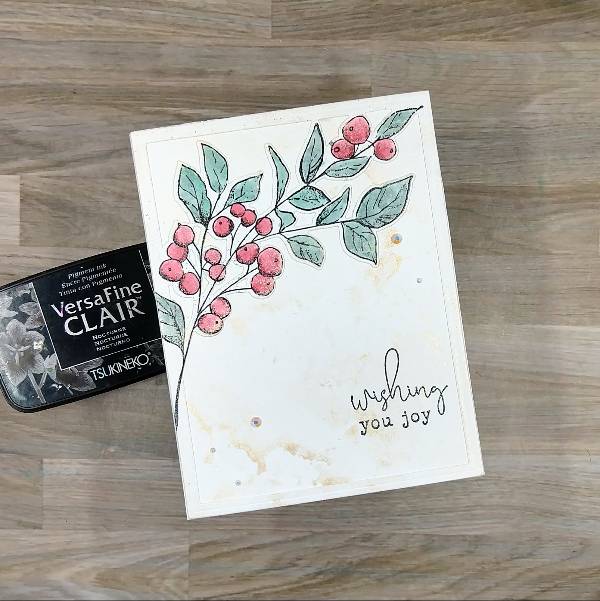
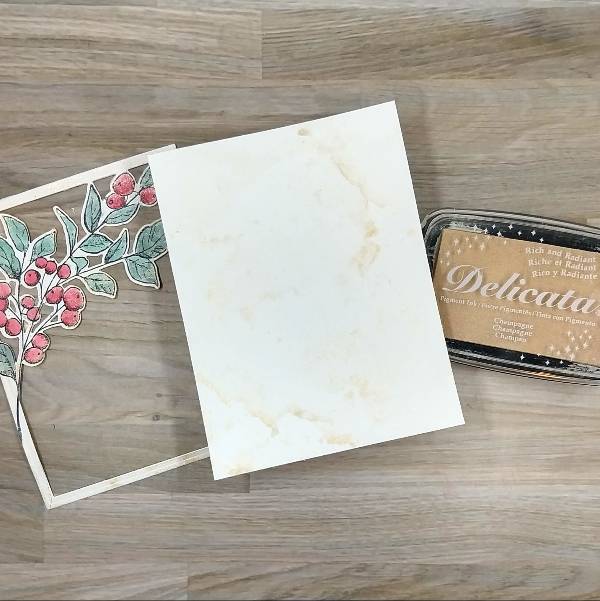
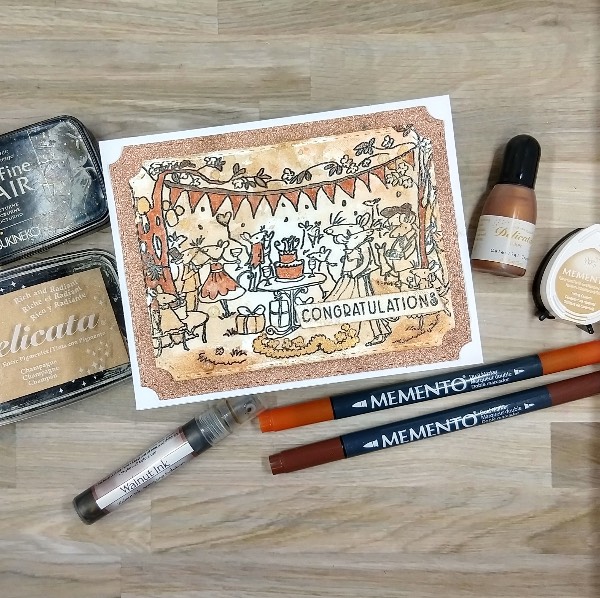
I was inspired to make a minimalist holiday card to allow the main botanical image to shine as the focal point. But I also knew that I wanted it to be shiny, so pulled out my current favorite Delicata color-Champagne- to add some subtitle shine.
Skill: Intermediate Time: 1 hour
Directions:
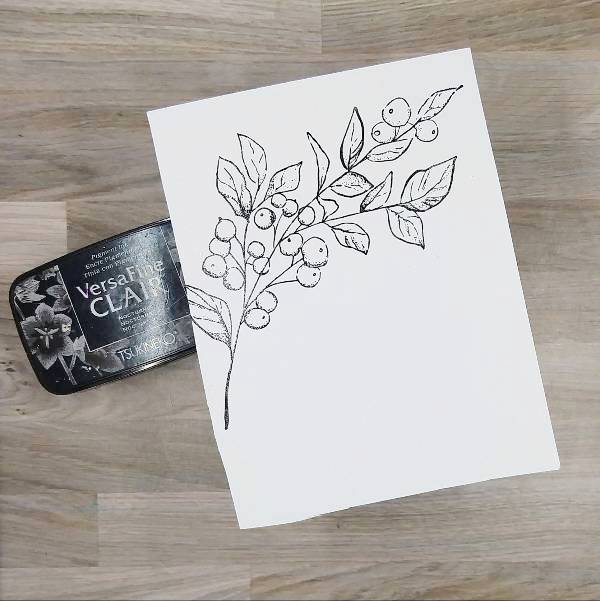
Step 1: Stamp the large botanical image on a piece of watercolor paper with Nocturne VersaFine Clair ink. Then heat emboss with clear embossing powder.
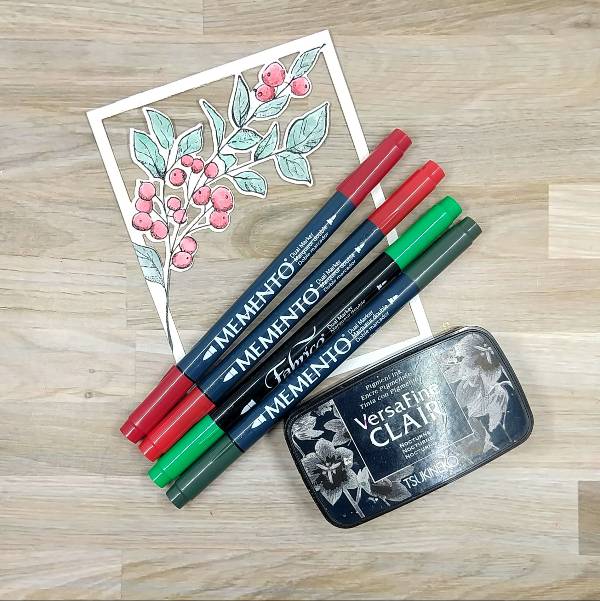
Step 2: Use markers to color in the berries and leaves. Use the Rhubarb Stalk Memento Dual Marker to color over the shaded areas of the berries. Then color a piece of acetate packaging with Lady Bug Memento Dual Marker and spray with water, use this to watercolor in the berries. While watercoloring, make sure to watercolor over all of the berries to blend in the watercolor with the darker red marker already colored in the berries. Then color another area of the acetate packaging with both the Emerald Fabrico Dual Marker and the Northern Pine Memento Dual Marker and spray with more water. Mix the two colors together to create a blend of the two colors and then watercolor the leaves. Allow to dry.
After all of the image dried, die cut the image with the corresponding die.
Step 3: Trim a second panel of watercolor paper in the papertrimmer the same size as the die cut frame created in step 2. Then press the Campagne Delicata Ink pad onto acetate packaging and spray with water to watercolor smoosh both the panel and the botanical image/frame to add sparkle to both.
Off camera, I got a small smudge on the frame with my finger. To fix this, I used some of the leftover green watercolor I made for step 2 to splatter green over the frame.
Step 4: Glue the frame onto the watercolor panel. Then stamp a sentiment on the lower right corner of the panel with more Nocturne VersaFine Clair ink and heat emboss with clear embossing powder. Glue the panel onto an A2-sized white cardbase. Glue white rhinestones on the lower left and upper right parts of the card panel to finish the card.
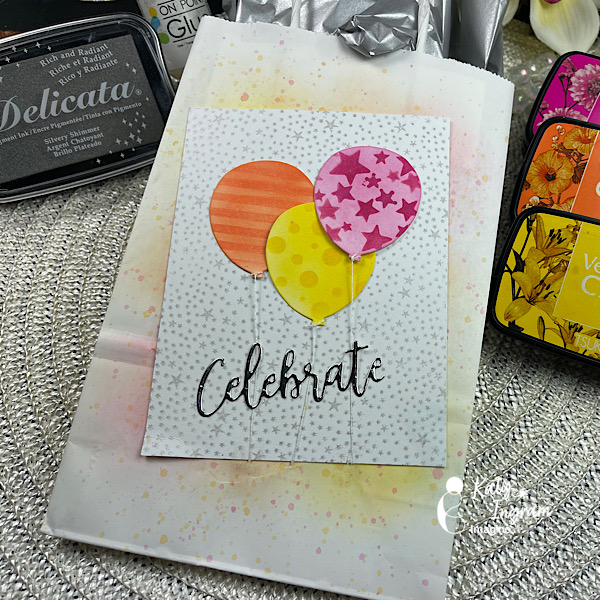
Hello Friends! Katy here with another quick project. In today’s video we are going to take a plain white gift bag and use our inks and some die cuts to decorate it. Great for treat bags, gift bags and any little party bag you may need.
Other Products Used Gift bag (made with scoreboard or purchased) Blending Brushes White Cardstock Stencils- Stars, Stripes, Dots, Hearts…anything you like Balloon Die Cut String Stars Background Stamp
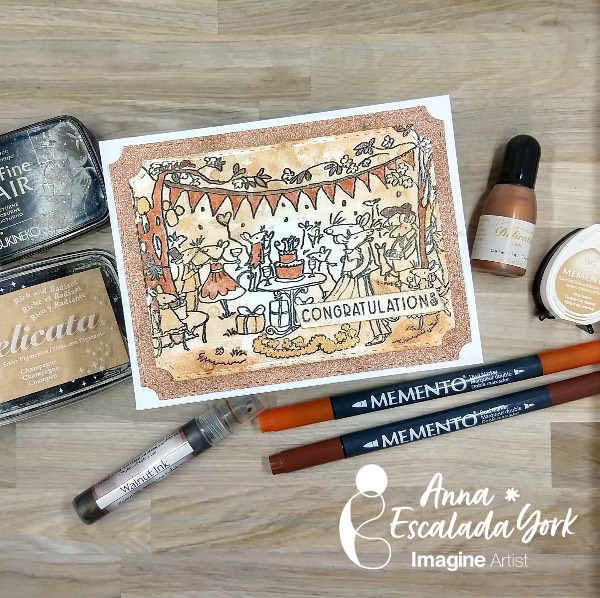
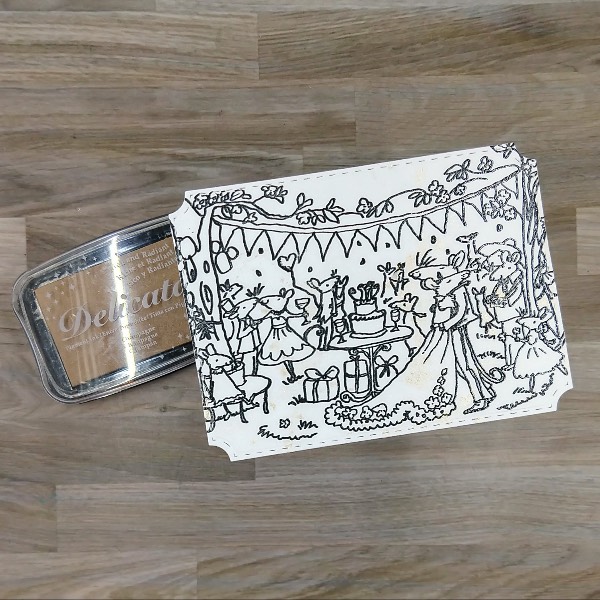
Before making this card, I had no idea all of the different winter wedding color palates there are! I needed to make a winter wedding card, and decided to use some products in a new way (at least for me). Before I share how I made this card, I wanted to share a winter wedding color palate that inspired me:
Skill: Intermediate Time: 2 hours
Directions:
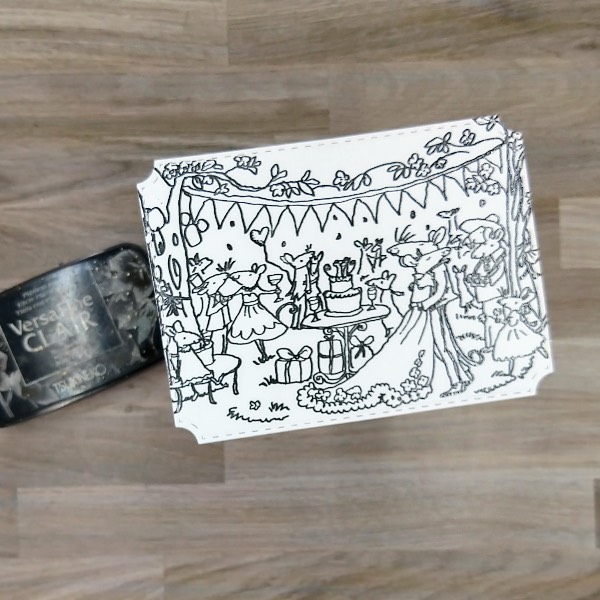
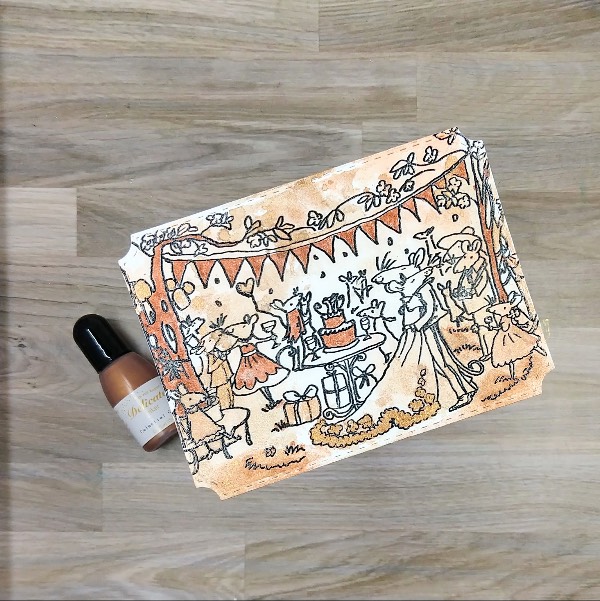
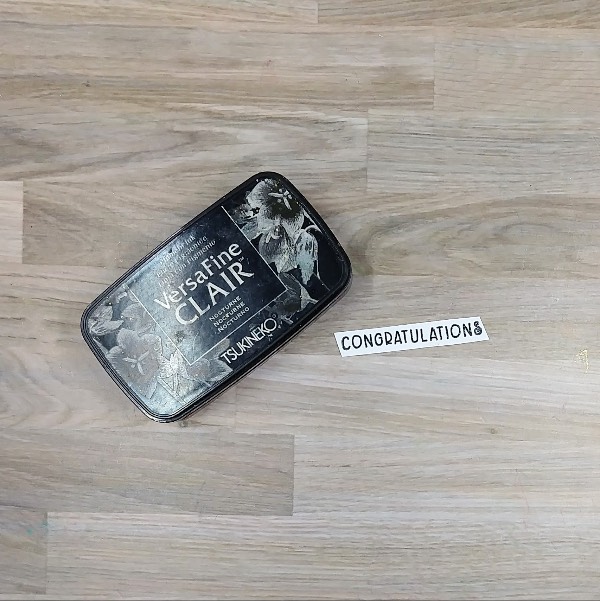
Step 1: I stamped a large wedding scene stamp on a die cut piece of watercolor paper with Nocturne VersaFine Clair ink and then heat embossed it with clear embossing powder.
Step 2: Press a Champagne Delicata ink pad onto a piece of acetate packaging and then mix with water. Press the acetate onto the stamped wedding image. (This is very hard to see in the image, but there is a faint sheen on the wedding dress and in other parts of the panel.) Allow to dry.
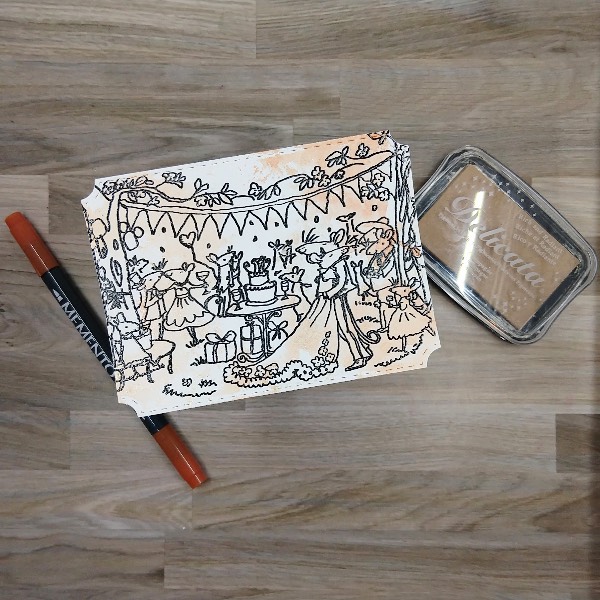
Step 3: Watercolor smoosh the panel with a second layer of the Champagne Delicata ink. Then scribble Potter’s Clay Memento Dual Marker onto the acetate and spray with water. Then press the acetate onto the panel. Allow these layers of color to dry on the panel.
Step 4: Press the Toffee Crunch Memento ink pad onto the same acetate, spray with more water and then watercolor smoosh the panel again.
Step 5: Color in parts of the panel with Potter’s Clay Memento Dual Marker.
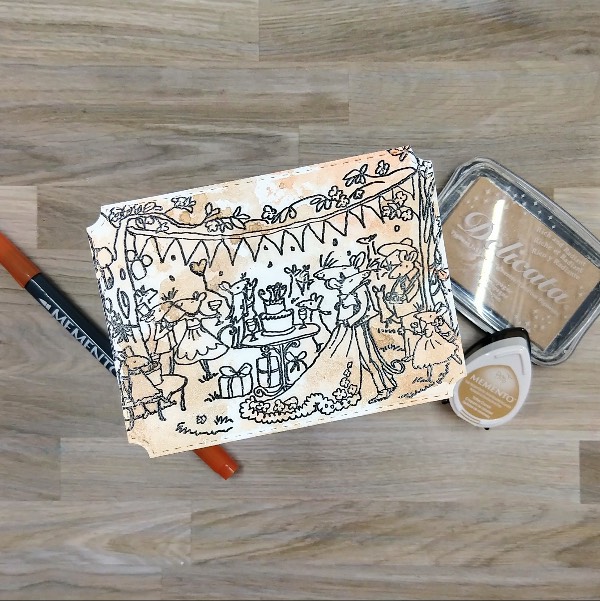
Step 6: Add a small amount of Celestial Copper Delicata Inker onto the same acetate packaging and use a small paintbrush to mix with water to thin out the reinker. Then use the paintbrush to paint the trim of the bride’s dress, some of the presents, and some other images with the coppery mix.
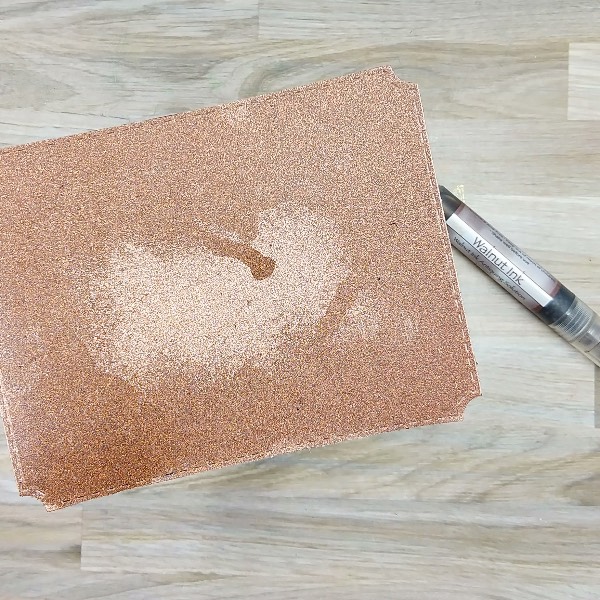
Step 7: Spray Walnut colored Walnut Ink Antiquing Solution onto die cut glitter cardstock to make it darker. (Please note that the panel took a long time to dry. The next time I do this, I plan on adding embossing powder to help it dry more quickly.
Step 8: Color the tree leaves, the pennant ribbon and a couple of the hats with Rich Cocoa Memento Dual Marker.
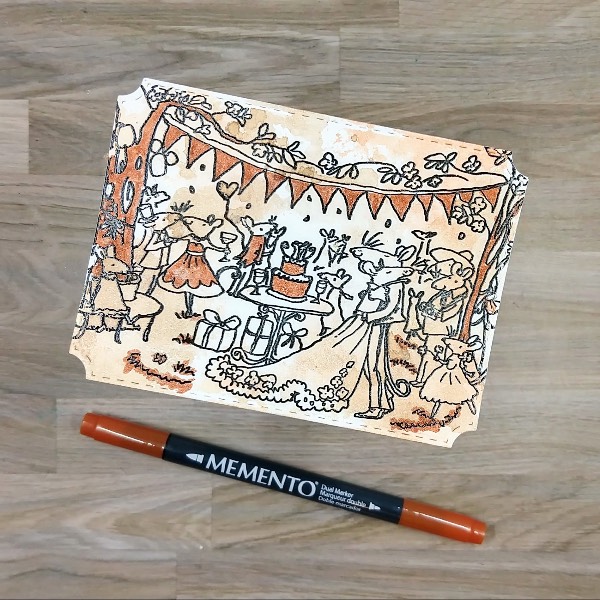
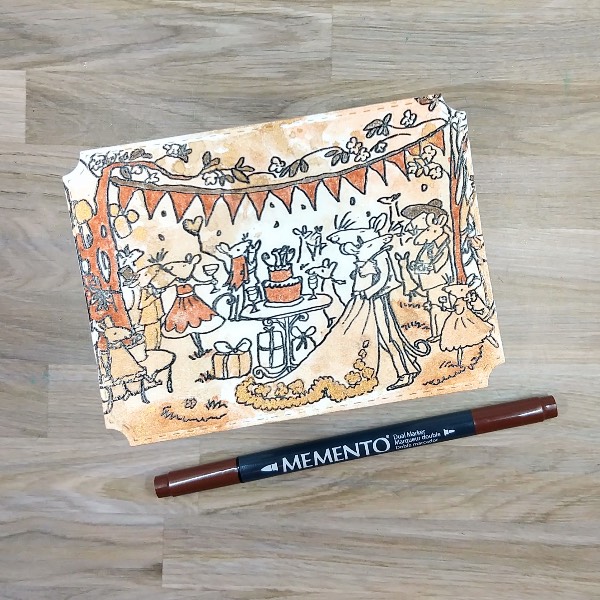
Step 9: Stamp the sentiment from the same stamp set with Nocturne VersaFine Clair ink and heat emboss with clear embossing powder. Trim the sentiment into a thin strip with the edges at an angle.
Step 10: Press the edges of the sentiment strip into a Toffee Crunch Memento ink pad to color the borders.
Step 11: Press a Champagne Delicata ink pad onto the acetate packaging and then spray with water. Watercolor smoosh the sentiment strip and allow to dry.
Step 12: Assemble the card. Glue 2 strips of scrap cardstock behind the sentiment and glue the sentiment on the lower right corner of the stamped panel. Then glued the stamped panel onto the sprayed glitter cardstock panel. Glue the whole thing onto an A2-sized white card base.
Glue gems on the bottom left and upper right corners of the card.
Other • Colorado Craft Company – stamp set – Happily Ever After by Anita Jeram • Pink and Main – die set – Notched Corners • Trinity Stamp Company – embellishments – Champagne Twinkle Stardust Rhinestone mix • A2-sized white card base • Clear Embossing Powder • Watercolor paper • Glitter cardstock • Die cutting machine • Paper trimmer Scissors • Glue
Hello Friends! Katy here with another project. In today’s video use my VersaFine Clairs with isopropyl alcohol to create a watercolor look. With this technique I created a wintry wedding card, but this will lend well to a birthday or holiday card as well.
• The Greetery Sentiment Suite Love Stamp Set • The Greetery Congrats Die • White Cardstock • Hot Pressed Watercolor paper • Stamp positioner tool • Isopropyl Alcohol
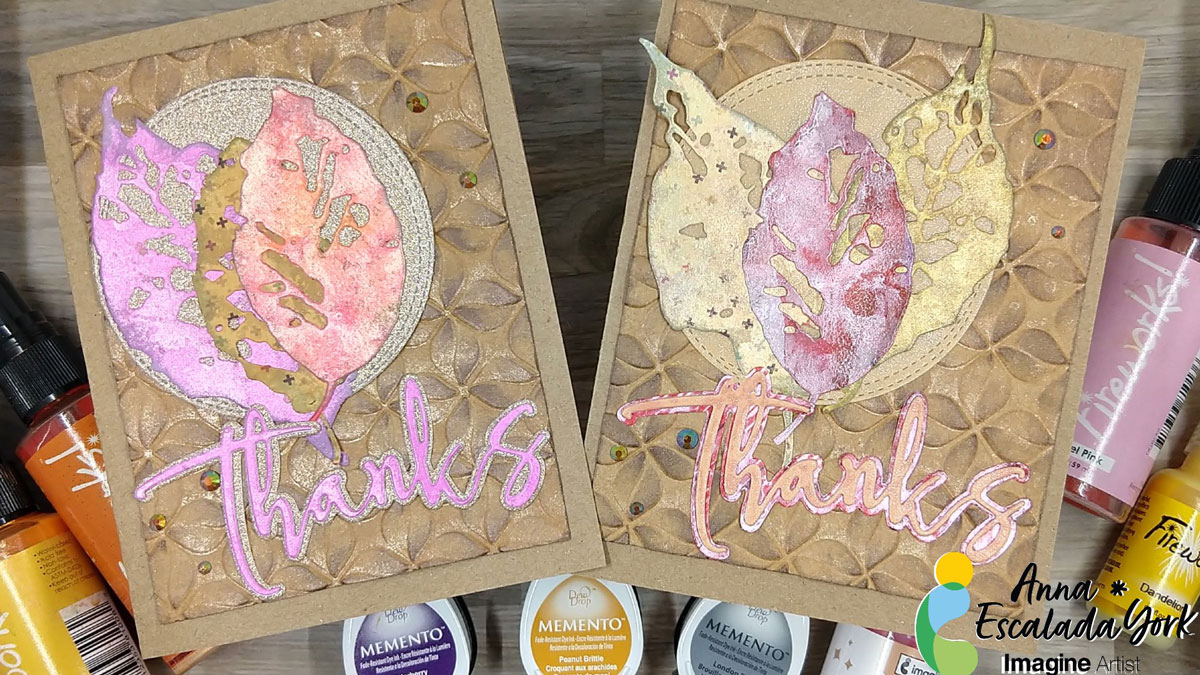
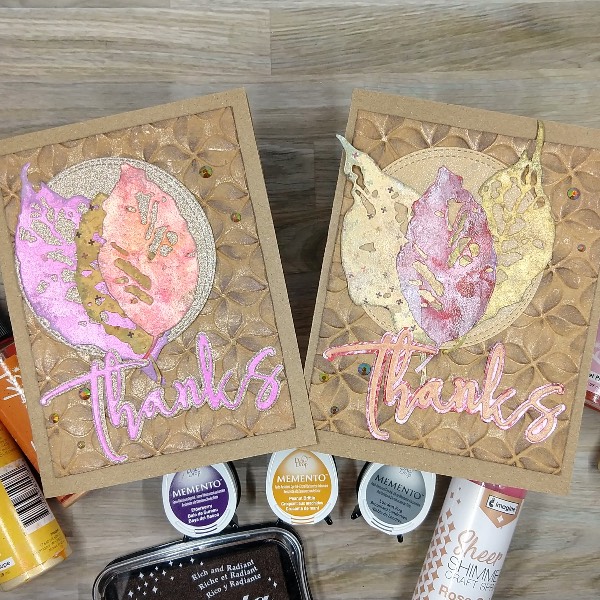
To me, Thanksgiving is mostly about food but also an excuse to say thank you to those people who are a part of my personal and professional life. So I decided to make a thank you card to let people know that I am grateful for them. I decided to use some paper scraps because I always have too many and to enhance them with sprays or ink to transform them. At first, I was planning on making one card with a lot of leaves, but changed my mind after die cutting the leaves, so ended up making two.
Skill: Intermediate Time: 1.5 hours
Directions:
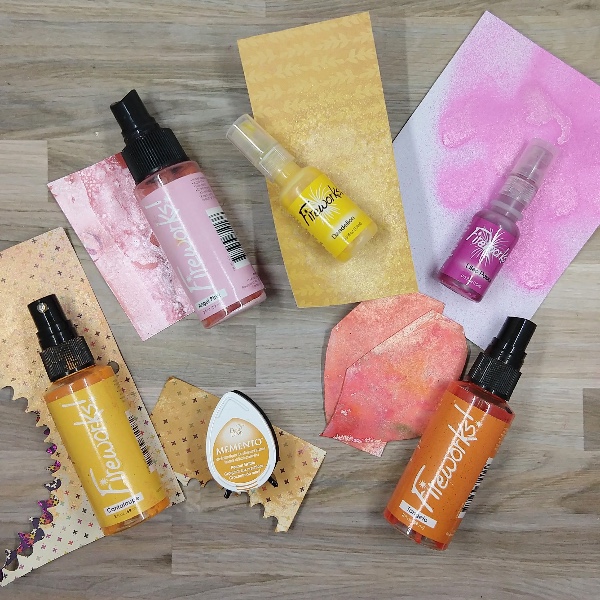
Step 1: Pull out some scraps of paper from your stash and a variety of sprays and ink. Spray the scraps with the sprays. My scraps were colored with Cantaloupe, Angel Pink, Dandelion, Lilac Posies, and Tangelo Fireworks! Craft Sprays as well as Peanut Brittle Memento Ink. After the spray dried, die cut the scraps of paper with leaf dies. Reserve some of the sprayed paper for later.
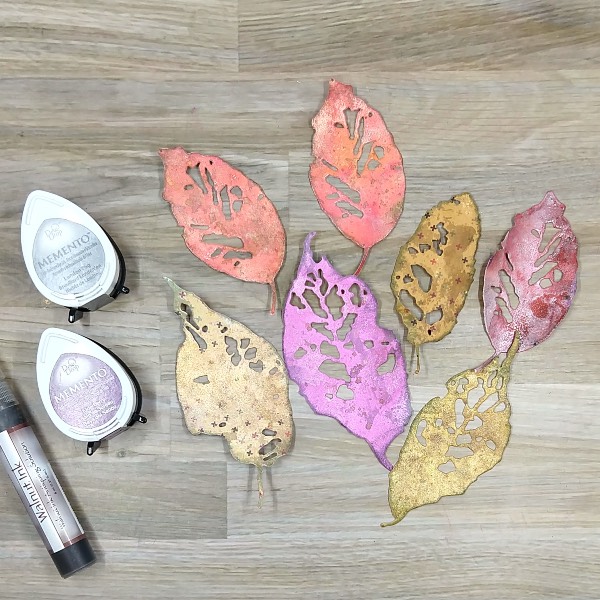
Step 2: Press Walnut Ink colored Walnut Ink Antiquing Solution as well as Elderberry Memento ink onto acetate packaging. Add water to the different parts of the acetate and splatter the die cut leaves with the Elderberry Memento ink. Then watercolor smoosh the leaves with both the Elderberry Memento ink and the Walnut Ink Antiquing Solution. After the leaves dried, rub the edges of the leaves with the London Fog Memento ink pad. Allow everything to dry again.
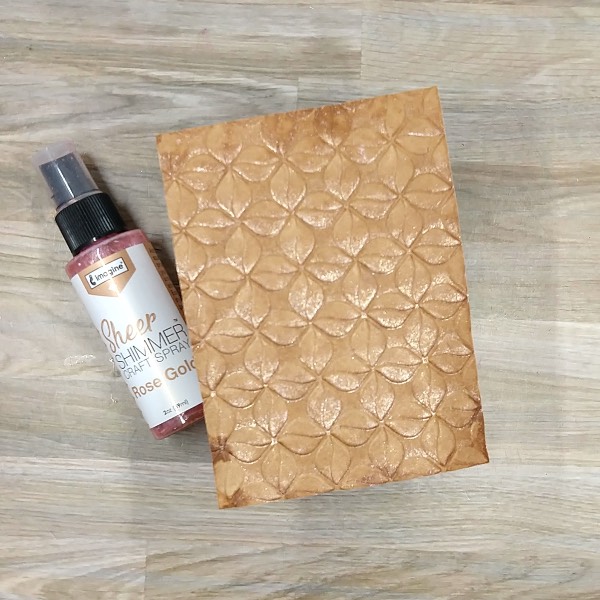
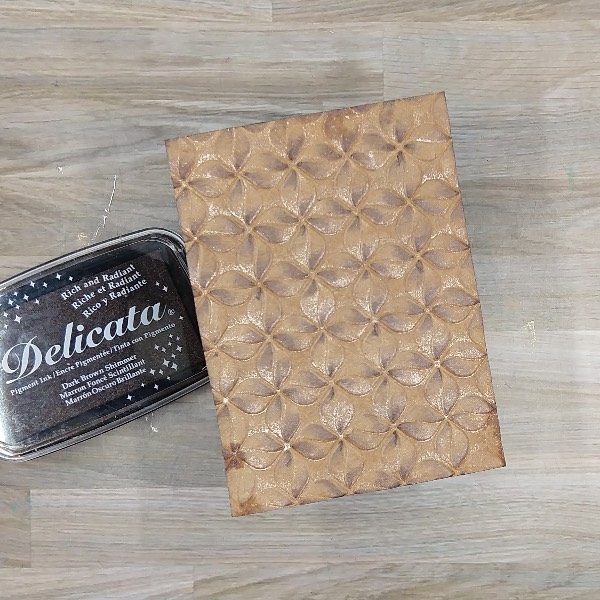
Step 3: Trim a piece of kraft cardstock with a paper trimmer to about 5 x 3.75 inches. Then spray Rose Gold Sheer Shimmer Craft Spray directly into an embossing folder. Place the kraft cardstock panel into the embossing folder and then run the whole thing through a die cutting machine.
Allow the panel to dry.
Step 4: Use Dark Brown Shimmer Delicata ink to add some color to the panel by brushing the panel lightly across the embossed paper. The raised part of the embossed panel will pick up the dark brown ink, while the other areas will be untouched. Then press the edges with the same Dark Brown Shimmer Delicata ink panel to add color to the border.
Step 5: I die cut a scrap piece of rose gold glitter cardstock with a stitched circle die as well as the shadow die of a two-layer sentiment die. In addition, I die cut another piece of the lilac (purple) sprayed cardstock from step 1 with the top layer of the two-layer sentiment die. I also die cut two pieces of scrap cardstock with the same sentiment die. The layers of the sentiment die were glued together to give dimension and then they were glued on the rose gold shadow die cut.
Then the card was assembled. I glued three of the leaves onto the glitter cardstock die cut circle and then glued the whole thing onto the embossed panel. Next, the sentiment was glued onto the panel. Sequins were glued onto the panel. Finally, the whole thing was glued onto a kraft cardbase.
A second card was made with the leftover die cut leaves in the same manner. The only changes were that I used a light orange vellum and some more of the sprayed scrap paper from step 1 to create the die cut circular background and the sentiment.
• Alex Syberia Designs – die set – Large Thanks • HAI Supply – embellishments – Cola Crystalline gems • Simon Says Stamp – Embossing folder Modern Loop • Sizzix – die set – Leaf Fragments by Tim Holtz • Circular die • A2-sized kraft card base Clear Embossing Powder Kraft cardstock • Glitter cardstock • Light orange sparkly vellum • Patterned paper scraps and magazine pages • Die cutting machine • Paper trimmer Scissors • Glue