Create A Fashion Forward Birthday Card With Mboss

by Iris Rodriguez

Create A Fashion Forward Birthday Card With Mboss

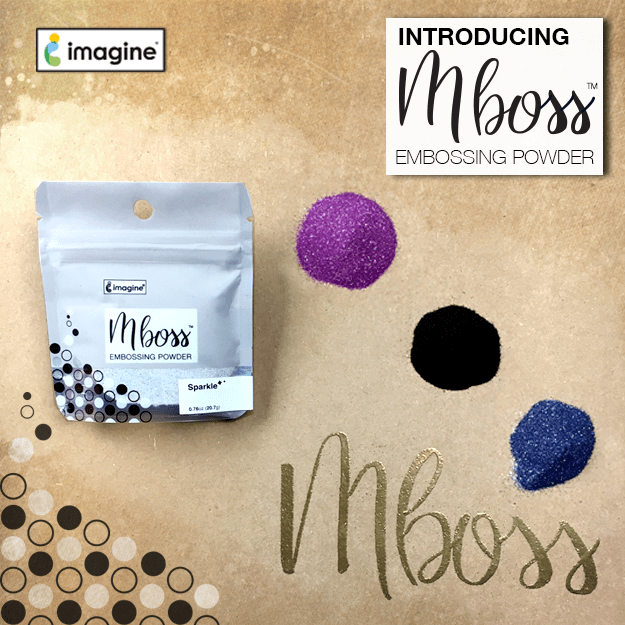
This month I had the pleasure of using Imagine’s new Mboss embossing powders for my projects. They are fine embossing powders that come in a lot of colors and glittery combinations, for instance: Valentine which is red and gold, New Year’s Eve which is black and gold, as well as special effect powders like gold metallic and new solid colors. In this project, I used glittery color combinations Valentine for the dress and New Years Eve for the background, purse, and sentiment. Check it out!

Skills: Beginner
Time 30 minutes

Directions


Step 1

Using a dress template or die cut, cut out a dress from watercolor paper.


Step 2

Place dress on foam and burnish the back side of the dress with a stylus. The dress will take on a curved shape giving it a dimensional look.


Step 3

Ink the front of the dress with the VersaMark ink.


Step 4

Apply Valentine Mboss Embossing Powder and using a heat tool, melt the powder. These new embossing powders come in a bag, in this image I added some powder onto a dish so that you can get a good view of this awesome color.


Step 5

Using the VersaMark ink, stamp a background image. Apply New Years Eve Mboss embossing powder and melt the powder with a heat tool. Do the same on the “Happy Birthday” sentiment and purse.


Step 6

Adhere a ribbon sash to the waist of the dress. Apply On Point Glue to the edges of the dress only and glue onto the card base. This will help to keep its dimension.


Step 7

Assemble the card with the dress, birthday sentiment, and matching card base.

Supplies

Imagine
Other
  • Watercolor paper
  • Scissors
  • Stylus
  • Cardstock – white, black or print of choice
  • Large Background stamp
  • Ribbon
  • Birthday sentiment stamp

Sparkle And Shine With This Jellyfish Theme Birthday Card

by Jowilna Nolte

Sparkle And Shine With This Jellyfish Theme Birthday Card

Thinking back when I did my first heat embossing, it was pure magic. That feeling of amazement and wonder hasn’t left but has been ignited once again with the amazing Mboss from Imagine. The new embossing colors are simply amazing and really are over the top beautiful! You have to get some for your stash to experience true magic! Take a look at how I used mine for a fun color-blocked effect.

Skill: Intermediate
Time: 30 minutes

Directions


Step 1

Tape off areas using washi tape on a white cardstock panel.


Step 2

Use your VersaMark inkpad and ink the taped off sections only by tapping the ink pad onto the cardstock.


Step 3

Use the Mboss packet and sprinkle the powder over the inked areas. Peel off the washi tape and then heat set the Embossing Powder using a heat gun.


Step 4

Use StazOn Pigment Piano Black and stamp Happy Birthday sentiment onto a blank area of the embossed panel.


Step 5

Stamp elements onto white cardstock and cut out. Add a little color using Memento Markers.


Step 6

Adhere the stamped elements onto the embossed panel with On Point Glue. Add diamanté and finishing touches.

Supplies

Imagine

Other

  • White cardstock
  • Washi tape
  • Joy Clair stamps
  • Diamanté and/or sequins

3 Techniques using the VersaMark Ink Pad with Mboss Embossing Powder

by Jessica Lin

3 Techniques using the VersaMark Ink Pad with Mboss Embossing Powder

Hi everyone! Today’s video highlights the VersaMark ink pad, which I’m sure most of you have heard of. (If not, come join the party!) It’s the sticky, clear ink that makes heat embossing super fun and easy. But did you know that you could also stamp with the VersaMark ink pad, and even use the “direct-to-paper” technique? Click on the video and learn how you can stretch the use of your VersaMark ink pads by using it 3 different ways. Two of the techniques are paired with Imagine’s new Mboss Embossing Powder. These two products are a match made in heaven!

Skill: Intermediate
Time: 1 hour

Directions

Supplies

Imagine
Other

• Cardstock
• Card base
• Die cut machine
• Stamping tool or platform
• Scissors
• Heat Tool
• Adhesive sheet
• Bone folder

Introducing Mboss Embossing Powder

Introducing Mboss Embossing Powder

Mboss is high-quality embossing powder available in new and revolutionary packaging that will make using it a breeze. Mboss embossing powder is great for sentiments and large area coverage. The large color range includes classic primary, metallic, pearlescent, and super fun glittery combinations. We had the crafter in mind with a unique selection of holiday and seasonally focused colors. The new packaging is very functional with a wide mouth for easy powder return.

Clear 013, Clear Matte 014, White 015, Black 016, Gold 017, Copper 018, Silver 019, Champagne 020, Red 021, Orange 022, Yellow 023, Green 024, Blue 025, Violet 026, Rose Gold 027, Metallic Berry 028, Metallic Orchid 029, Emerald 030, Icy Blue 031, Sapphire 032, Amethyst 033, Jade Pearl 034, Amber Pearl 035, Indigo Pearl 036, Gold Glitter 037, New Years Eve 038, Sparkling Champagne 040, Valentine 041, Lucky Stars 042, Sparkle 043, Black Hologram 044, Hologram 045, Birthday Party 046, Princess Party 050, Blue Icicle 047, Iridescent 048, Iridescent Opaque 049, Shimmering Night Sky 051

High quality all-purpose embossing powder

• Available in a wide range of colors with a holiday & seasonal focus for card makers
• Wide-mouthed resealable bag makes it easy to use and store at home
• Large color range includes classic primary, metallic, pearlescent, and glittery combinations

Check out our website to buy or learn more about Mboss.

Learn How To Create A DIY White Wedding Invitation With Texture

by Martha Lucia Gomez

Hello everyone, today I have a quick and elegant card. This technique would be perfect for a wedding invitation. I create the shimmer and texture using the new Sheer Shimmer Stix in Frost and an embossing folder. The base of my card is Whisper White cardstock and I cut a second layer using the same color of cardstock, but apply the shimmer-texture technique for a very cool tone on tone look.

Skill: Beginner
Time: 30 minutes

Directions


Step 1

Determine the area that you want to paint and add texture. I used post it tape to obtain a straight line.


Step 2

Evenly apply the Sheer Shimmer Frost with the Stix Dauber. Let the paper dry naturally, it takes a few seconds only.


Step 3

Without removing the post it tape, take an embossing folder of your preference and align the borders to only emboss the painted area. Pass the sandwich through your cutting machine.


Step 4

Remove the post it tape and stamp your message on the upper area. I used VersaMark and embossing powder in Gold to stamp my message. It is an image included on the stamp set Happily Ever After from The Rabbit Hole Designs.


Step 5

Resize your layer and paste it directly over the card base. If you want to add more decorations or details you can do it before to paste the decorated layer on to the card base.

Supplies

Imagine
Other
  • Card Stock – Whisper White
  • Embossing Folder
  • Die Cutting Machine
  • Post it Tape
  • The Rabbit Hole Designs – Happily Ever After Stamp Set

See How To Create A Dynamic Looking Wedding Invitation

by Martha Lucia Gomez

See How To Create A Dynamic Looking Wedding Invitation

Hi there! Today, I have a unique wedding card technique to share with you. By using this technique each wedding invitation will have its own unique subtleties. I used Desert Sand Memento Ink but you can use the colors used in your wedding decor. Embossing folders can be used in several ways and it is fun and simple. Now that you can get wedding invitations in craft stores you can add your personal touch to the make it more special just by pasting the decorated layer on top.

Skill: Intermediate
Time: 20 minutes

Directions


Step 1

Select an embossing folder, ink the flat layer of the folder with the color of ink of your preference. Since this is a wedding card, I used Desert Sand Memento Ink because it matches well with gold and enhances the white. You can apply the ink directly with the ink pad or using a brayer. Insert the card stock on your embossing folder and pass the sandwich through your cutting machine.


Step 2

On a separate piece of card stock with the same color of the card base, stamp the couple image using VersaMark. Sprinkle Gold Embossing Powder and use a heat tool to set.


Step 3

To create a matching frame for the couple image, I inked the edges of a rectangle with the VersaMark inkpad.


Step 4

Then I sprinkled a heavy amount of Gold Embossing Powder and melted the powder with the heat tool.


Step 5

If you want to add more details this is the moment. In my sample, I tie a bow in the ribbon around of the embossed background and pasted it directly over the card base. Then I pasted the main stamped image over the decorated card base using double-sided foam tape.

Supplies

Imagine
Other
  • Cardstock – Whisper White
  • Die Cutting Machine
  • The Rabbit Hole Designs – Happily Ever After Stamp Set
  • Embossing Folder
  • Satin Ribbon
  • Heat Tool
  • Double-sided foam tape