How To Make A Quick and Easy Mother’s Day Card

Mom Card - Blog

by Annie Collins

Hello Crafty Friends – Annie Collins here with a fun and easy Mother’s Day card featuring Stazon and VersaMagic Inks.

Directions

Art Supplies

Imagine
Other
  •  
  • Recollections Brand 110# Cardstock: White
  • Accent Brand 80# Cardstock: Opaque White
  • Aspire Pellatics 80# Cardstock: Shimmer Gold
  • AcetateFoam Tape

Layered Stamping with VersaMagic Dew Drop Inks

All Things Fabulous IG

By Jessica Lin

Hi everyone, it’s Jessica here and I have a Spring-inspired Mother’s Day card to share with you. I have always loved stamp layering and decided to use this new floral stamp set. I paired it up with my all-time favorite ink – VersaMagic Dew Drop, which has great coverage and some of the prettiest pastel colors.

Skill: Intermediate

Directions:

Art Supplies

Imagine:

• VersaFine Clair – Nocturne

• VersaMagic Dew Drop

Pixie Dust, Pink Grapefruit, Pink Petunia (Malted Mauve works well too), Thatched Straw, Mango Madness, Aquatic Splash, Turquoise Gem, Aloe Vera, Tea Leaves

• Brilliance Dew Drop – Galaxy Gold

Other products:

• Beautiful Moments stamp set

• All Things Fabulous stamp set and dies

• A Wish for Everything stamp set and dies

• Neenah Solar White cardstock

• Vellum

Make Two Mother’s Day Cards Using StazOn On Trend Ink Colors and Pearl Vellum

By Katy Ingram

Hello my friends! Katy here and today I am going to show you how to create two cards with the same stamps and ink that give you a bold look and subtle look. Check out my video below to see how these cards came together. I hope you enjoy.

Skill level: Beginner, Intermediate, Advanced

Time: About 1 hour

Art Supplies:

Imagine

• VersaFine Clair – Chianti

• StazOn Ink Pad – Cherry Blossom

• StazOn ink Pad – Bordeaux

• On Point Glue

Other

• Kat Scrappiness – Condensed Uppercase Die Set

• Cut Cardstock – Stardream Metallic Ruby

• Cut Cardstock – Curious Translucent Pearl

• Simon Says Stamp – Fog Cardstock

• Spray Adhesive

• Simon Says Stamp – Beautiful Flowers Stamp Set

• Simon Says Stamp – Incredible Women Stamp Set

• Simon Says Stamp – Pretty Peony Bouquet Background Stamp

Shimmery Ink Pads Comparison! Brilliance, Delicata, Encore Ink Pads

By Jessica Lin


Hi everyone! It’s Jessica here and today I have an ink pads comparison video to share with you. I have always loved shimmery ink pads, but with so many options available, it can be a little overwhelming. So I decided to swatch the colors and compare their shimmer properties.


Art Supplies

Imagine:

Brilliance Ink Pads

Delicate Ink Pads

Encore Ink Pads

Stamping on Soap for Kids and Grown Ups

By Baerbel Born


In this video guest designer, Baerbel Born shows you how you can customize your favorite soap. It’s also a great project for kids crafting.

With a few materials everyone can find in his or her stash you can create stunning effects on many surfaces. Today we will stamp on soap bars. Fun!


Art Supplies

Imagine :

Memento Luxe Pigment Pad, Tuxedo Black (or any other color of your choice)

Other supplies:

• German stamps: Kulricke (Bärbel Born Design)

• Tissue or paper napkin (look for sturdy ones)

• Colored pencils (soft and blunt)

• White glue

• Soft bristle brush

Create Beautiful Florals with Memento Markers

By Alison Heikkila

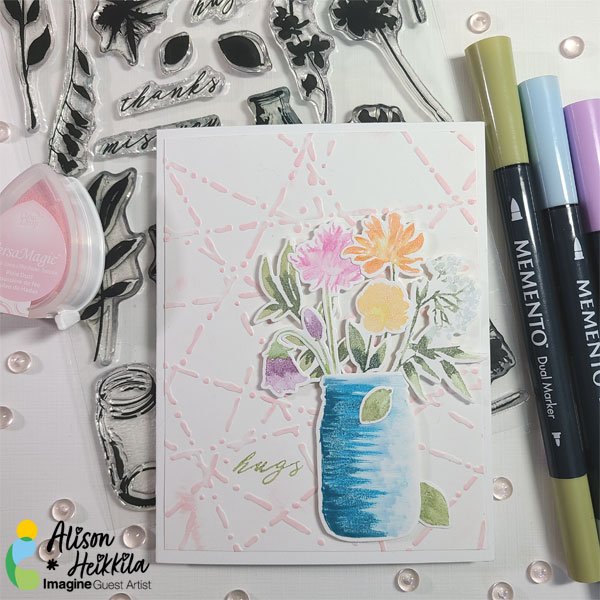
Hello! Today I’m going to show you how you can use Memento Markers to create beautiful florals. They look like they’ve been watercolored but you really just have used silhouette stamps.


Skill Level: Basic to Intermediate

Time: 30-45 Minutes


Directions:

Step 1

Apply your first silhouette stamp to an acrylic block or stamping tool. For all of these images, I thought using a block was easier.


Step 2

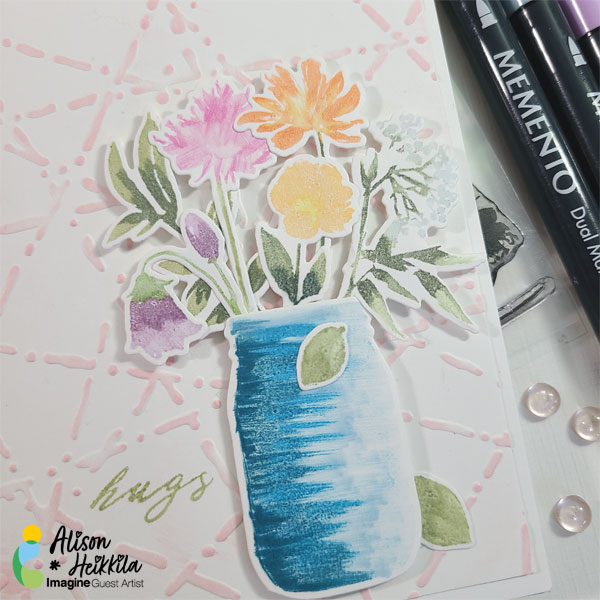
Color in the silhouette stamp using Memento Markers. I went with 2 shades of green for the foliage, and two colors on each flower. I recommend applying the lighter color first, and then the darker one. Be sure to overlap the colors to blend them together.


Step 3

Stamp the colored image onto white cardstock. If you take a while coloring in your image, you may want to “huff” or breathe on to the stamp before applying it. This helps to remoisten the inks.
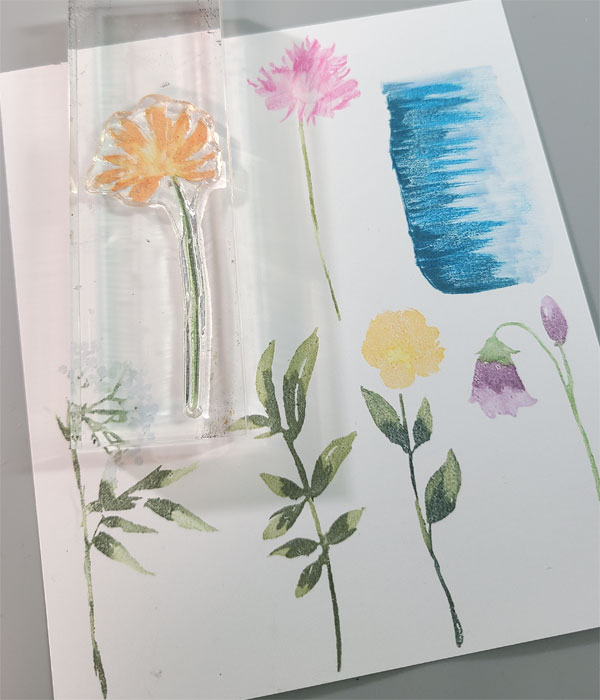
 

Step 4

Try to change up the strokes you use when coloring the images, especially if you have florals with different textures like I do. Some I kept super streaky to resemble petals, some have a much smoother blend. Don’t be afraid to add extra detail with the Memento Markers after you’ve stamped the images. I did this, for example, on the mason jar.


Step 5

Stamp all of your images out, keeping them spaced apart a bit for die-cutting.
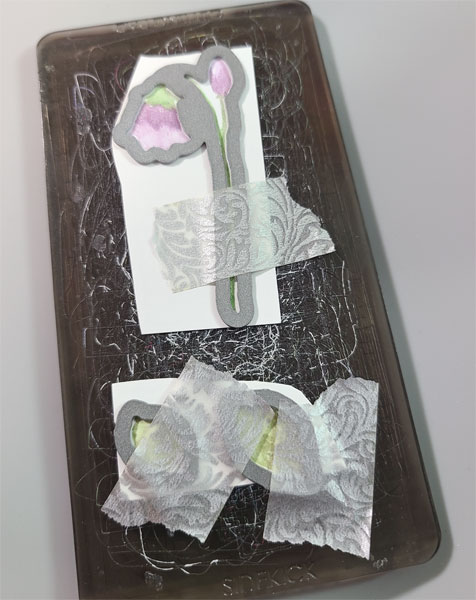
 

Step 6

Die-cut all of your elements. I adhered multiple images to my cutting plate at once to save time. I taped them down with a low-tack tape to make sure they wouldn’t move.
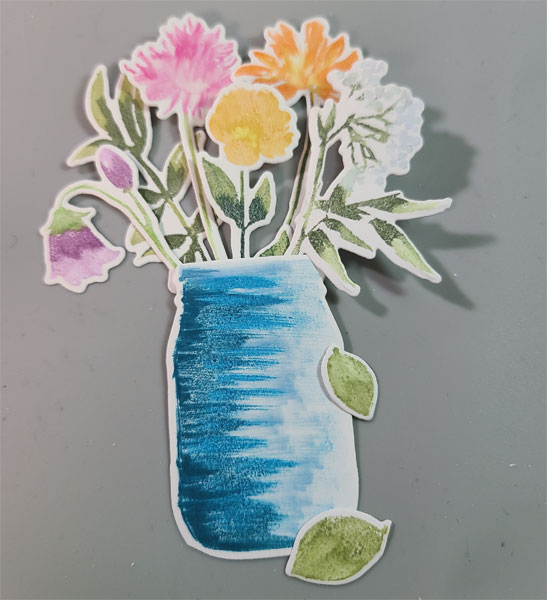
 

Step 7

When all of your images are cut out, arrange them in different ways until you like how they look. Snap a photo of the arrangement so that when you go to glue them, you can put them back where you like them. If you have Press ‘N Seal, you can apply that to the top of the images to temporarily hold them in place while you apply On Point Glue to the parts that are “in” the mason jar.


Step 8

Take a piece of 4″ x 5 1/4″ white cardstock and run it through your die-cut machine with an embossing folder.


Step 9

Lightly apply Pixie Dust VersaMagic to the raised design of the cardstock.
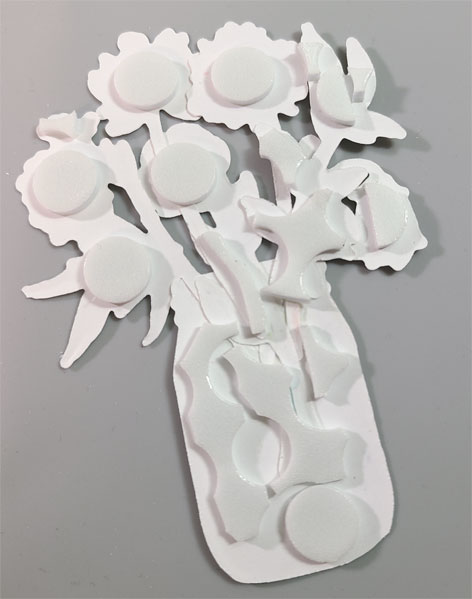
 

Step 10

Adhere foam dots or foam tape to the back of the mason jar and flowers.


Step 11

Stamp the sentiment near the mason jar.


Step 12

Adhere the panel to a white card base.


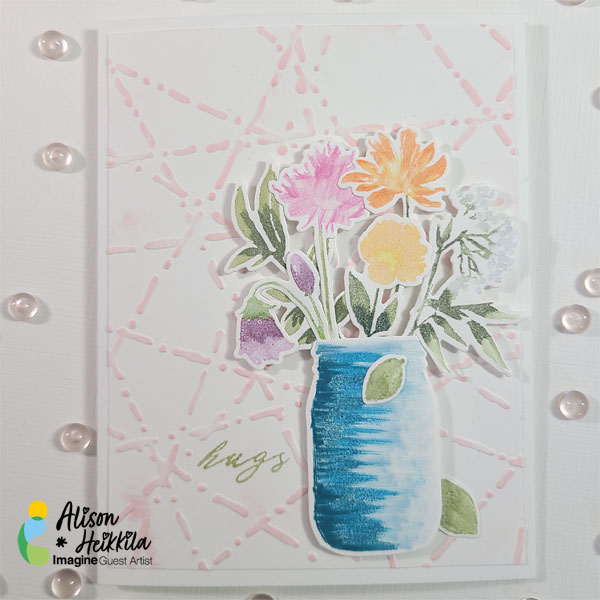
I love the completed card. Using Memento Markers directly on stamps gives a very different look than when using ink pads. What kind of silhouette stamps do you have in your stash? Flowers like these? Animals? Geometric shapes? You can use any of them with this technique! Thanks so much for stopping by. Have an inspiring day!


Art Supplies

Imagine

• Memento Markers: Angel Pink, Tangelo, Sweet Plum, Summer Sky, Pistachio, Bamboo Leaves, Danube Blue, New Sprout, Teal Zeal, Cantaloupe, Olive Grove, Northern Pine.

• VersaMagic: Pixie Dust

• On Point Glue

Other

• Altenew: Garden Silhouette Stamps and Dies
• Spellbinders: Set Apter Texture Plate- Laser Beams
• Foam Dots
• White Cardstock
• Adhesive