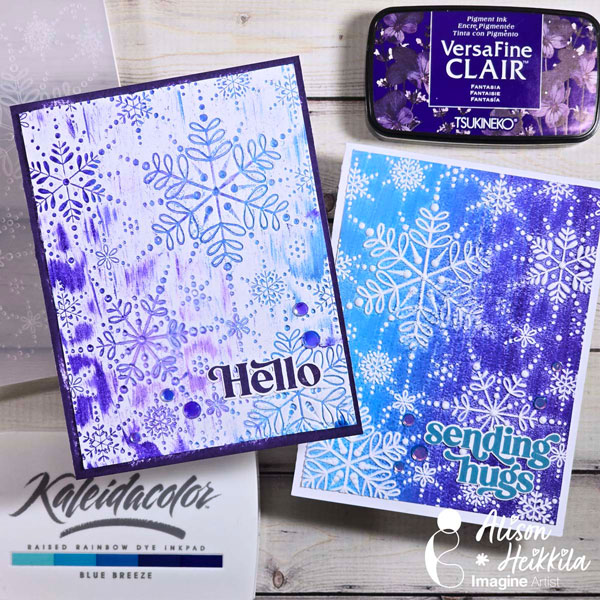
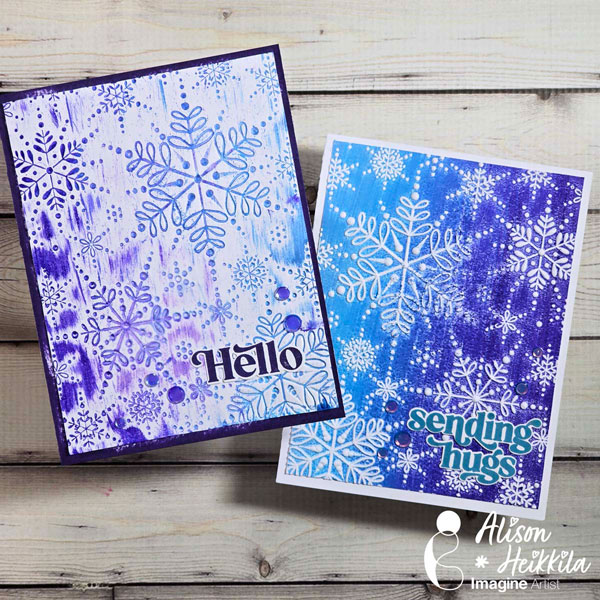
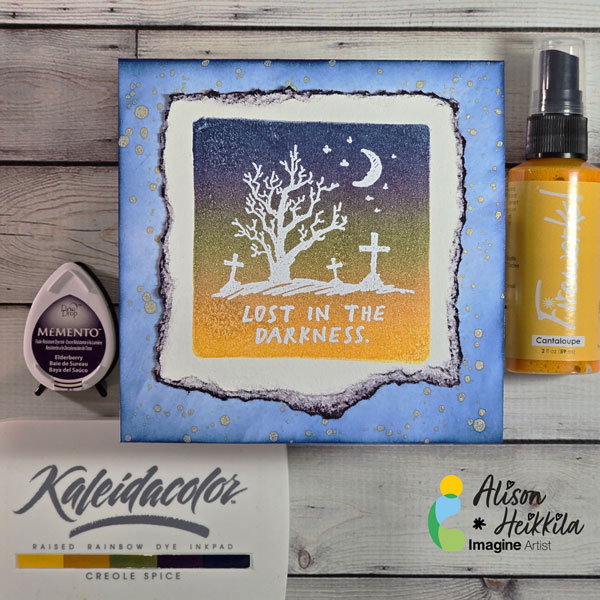
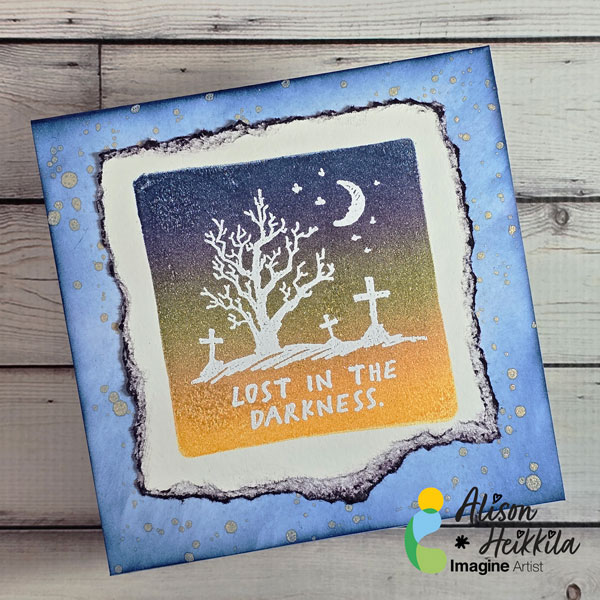
Hello! Alison Heikkila here. Let’s make 2 fun cards with 1 embossing folder and a Kaleidacolor Ink Pad lickety-split! This is so much fun, it’s perfect for beginners, and will work with pretty much any embossing folder you may have.
Skill Level: Beginner-Intermediate Time to Complete: 10-15 Minutes
*Some affiliate links are used in this post. That means that if you shop through these links, I may receive a small compensation, at no cost to you.
Here is the YouTube video. If it doesn’t play properly, please click HERE.
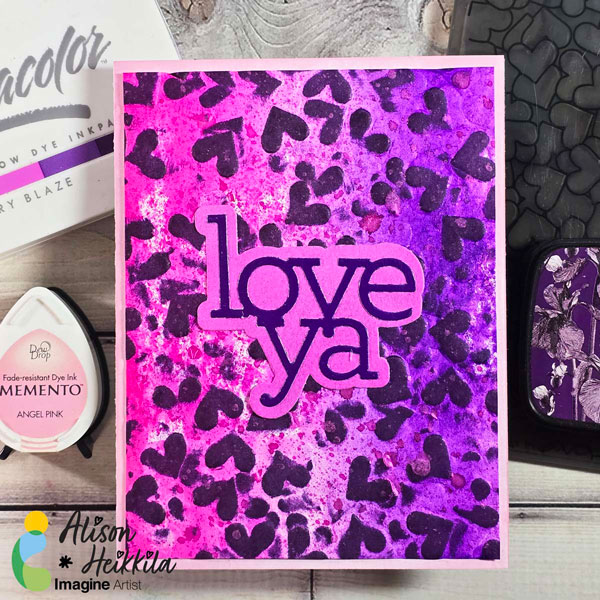
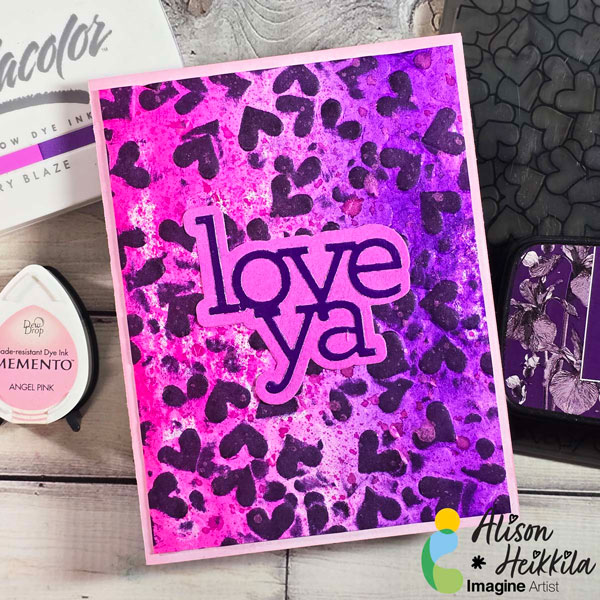
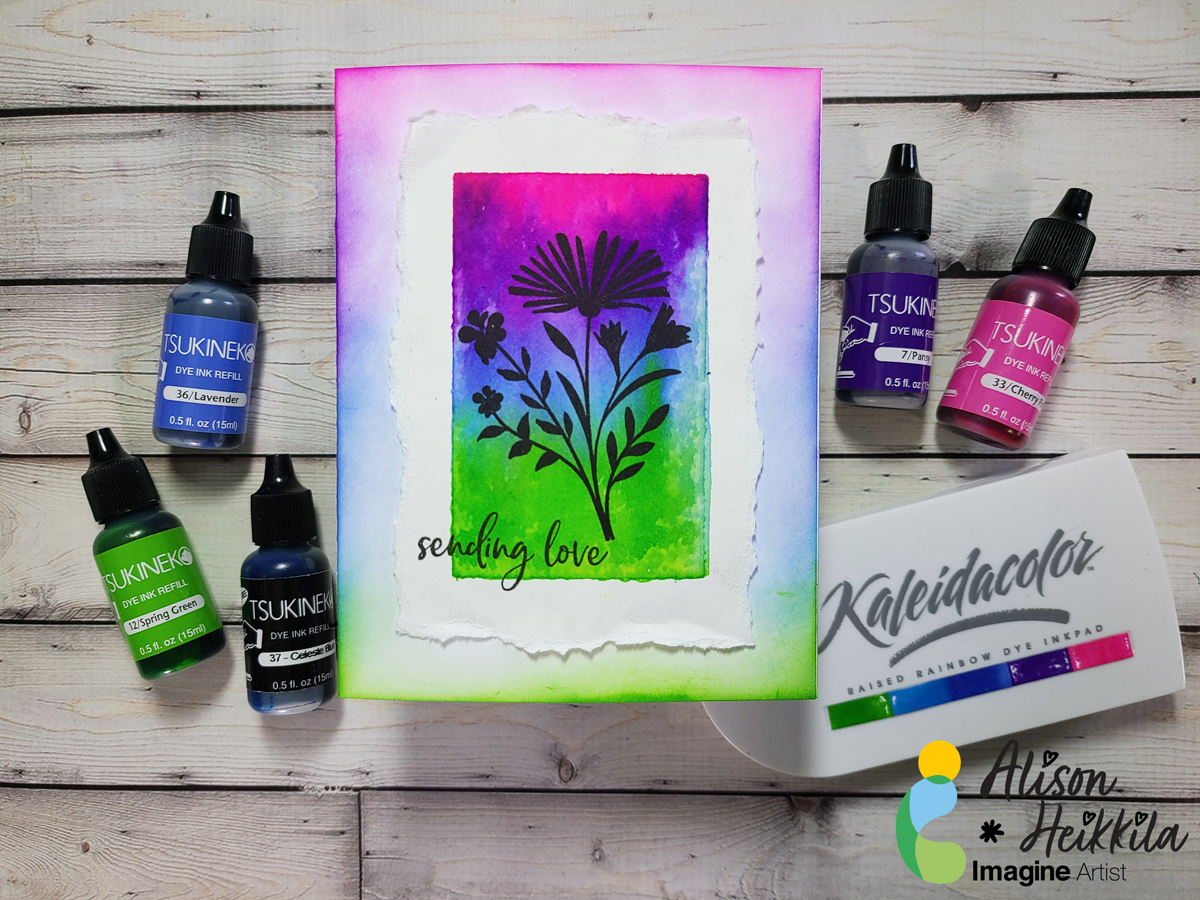
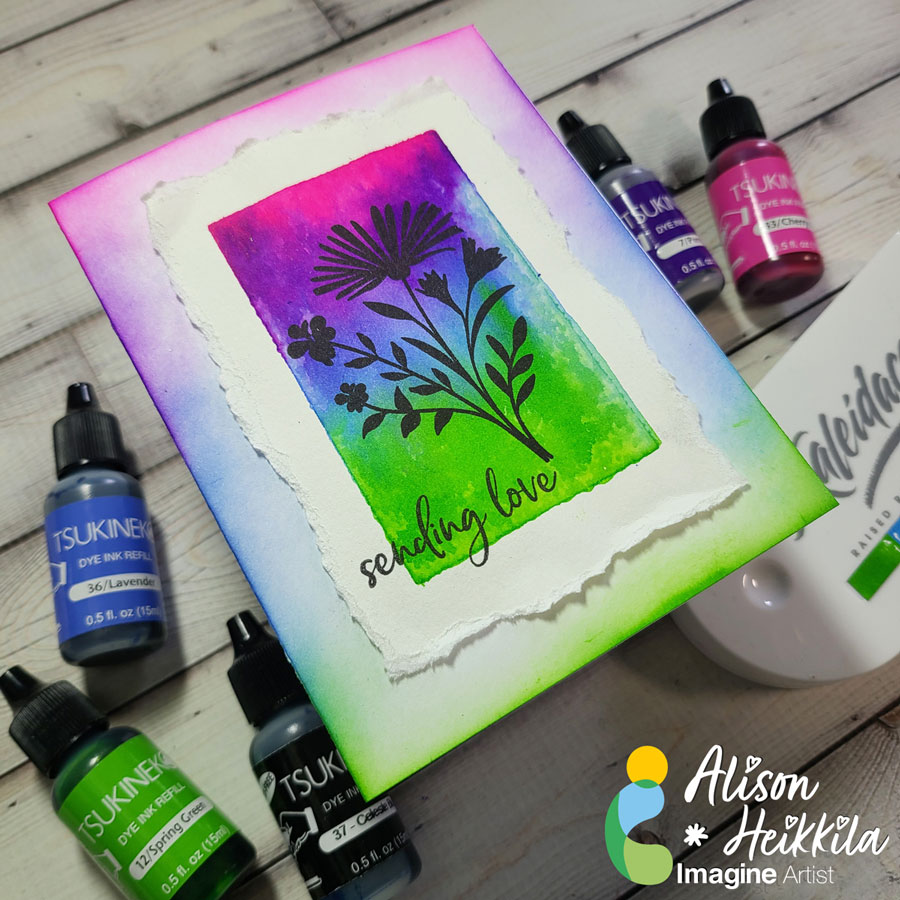
Hello! Alison Heikkila here. Today we’re making a love-themed card, but not really a romantic card. This can totally be used for your spouse or partner, but I intended it to be more for your bestie, a sibling, etc. The colors and textures of this card are really impactful…even more so in person.
Skill Level: Intermediate Time to Complete: 15-20 Minutes
*Some affiliate links are used in this post. That means that if you shop through these links, I may receive a small compensation, at no cost to you.
Here is the YouTube video. If it doesn’t play properly, please click HERE.
This card is pretty quick to make, and the splatters and imperfections of the inks make the card really interesting and unique. You can change up the colors, embossing folder, and the sentiment to suit your needs! Thanks so much for stopping by. Have an inspiring day!
Hello! I’m Alison Heikkila. Kaleidacolor Inks come in beautiful color palettes and help you do some really fun techniques. I love to use my Kaleidacolor Inks with my Gel Press plates. In this case, we’re using one of the Petite Plates to get the look of a watercolored painting without actually watercoloring.
Skill Level: Beginner-Intermediate Time to Complete: 20-30 Minutes
*Some affiliate links are used in this post. That means that if you shop through these links, I may receive a small compensation, at no cost to you.
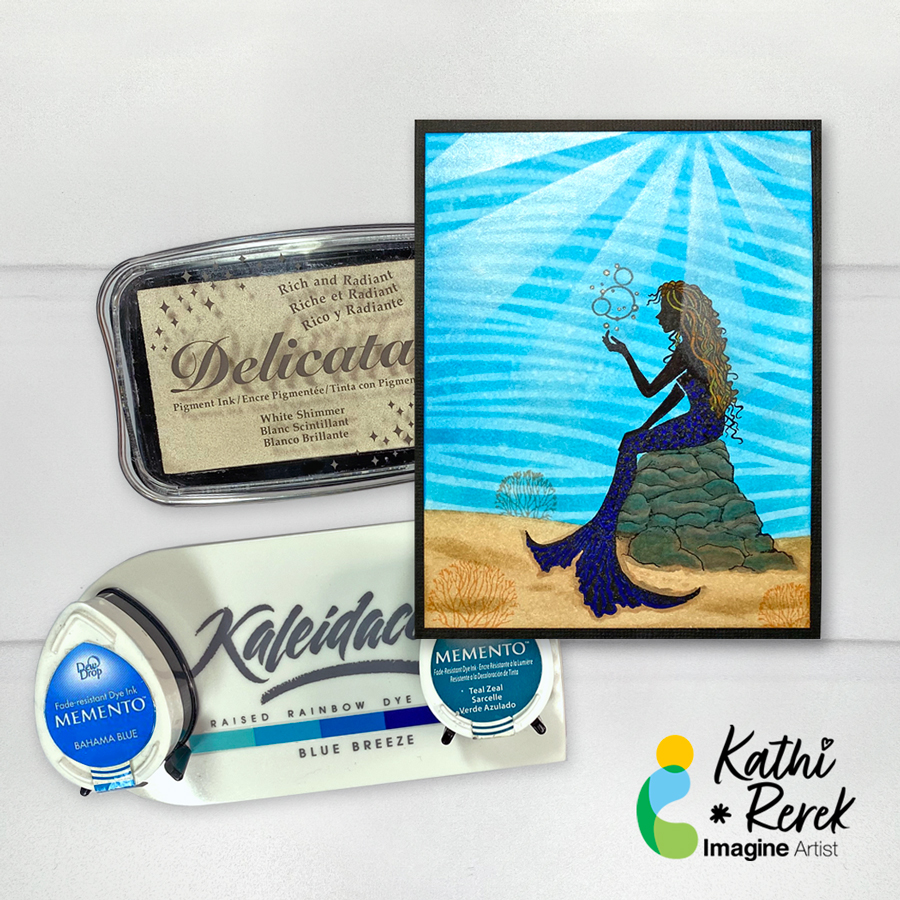
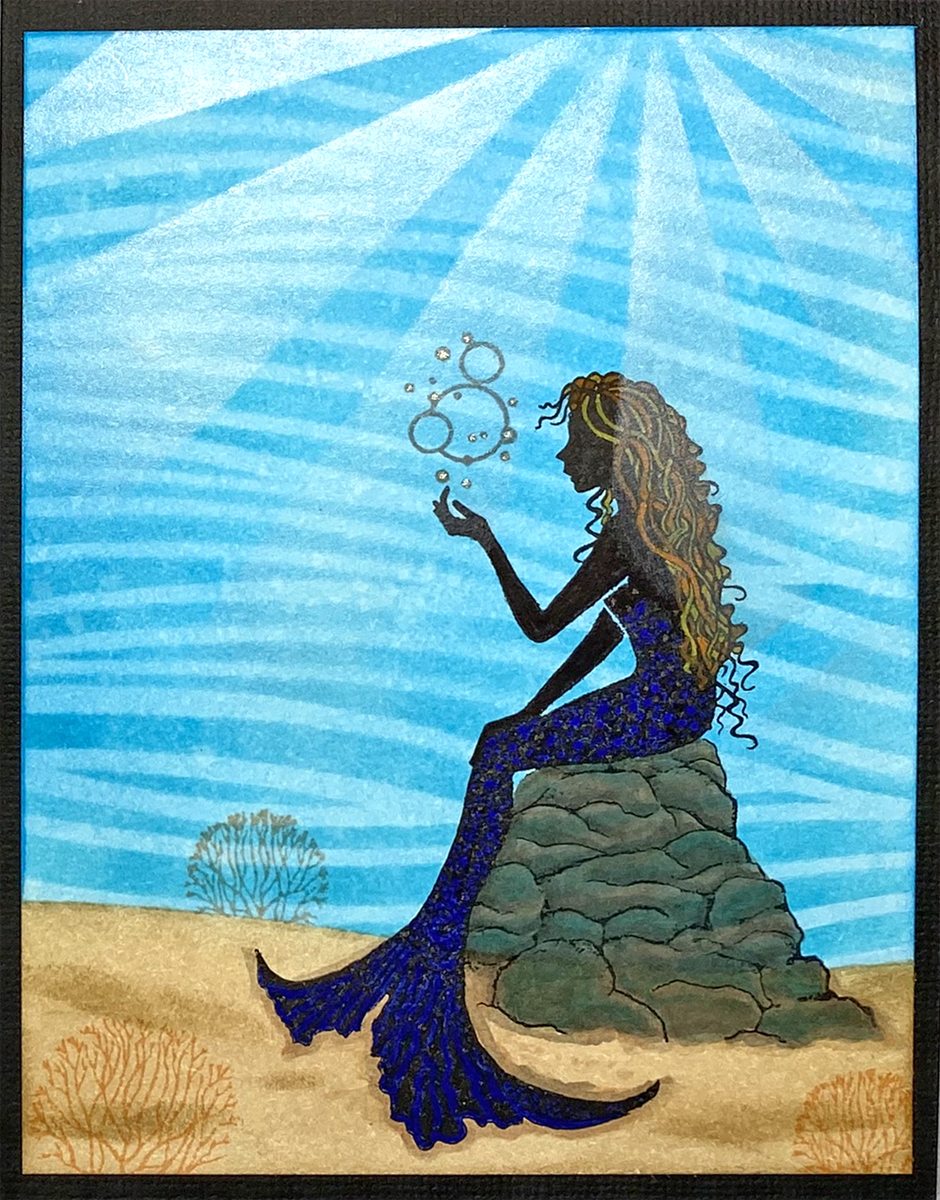
It’s summer, which makes me want to go to the beach to cool off in the ocean and pretend I’m a mermaid. Let’s make a card that fulfills those dreams using inks, stencils, and stamps!
Skill Level: Intermediate Time: 1.5 hours
Instructions:
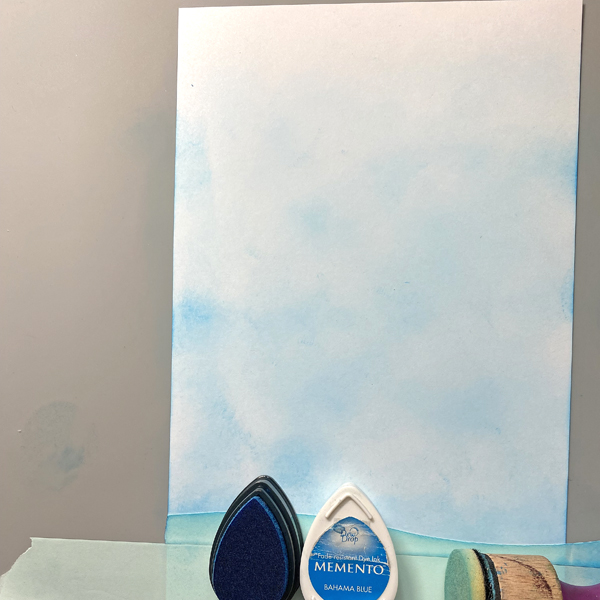
Step 1: Use a craft knife to cut a piece of Low-tack tape in a curved pattern. Place the tape at the bottom of a 5.5” x 8.5” piece of white cardstock (no photo).
Lightly apply Bahama Blue Memento Ink to the white area of the cardstock.
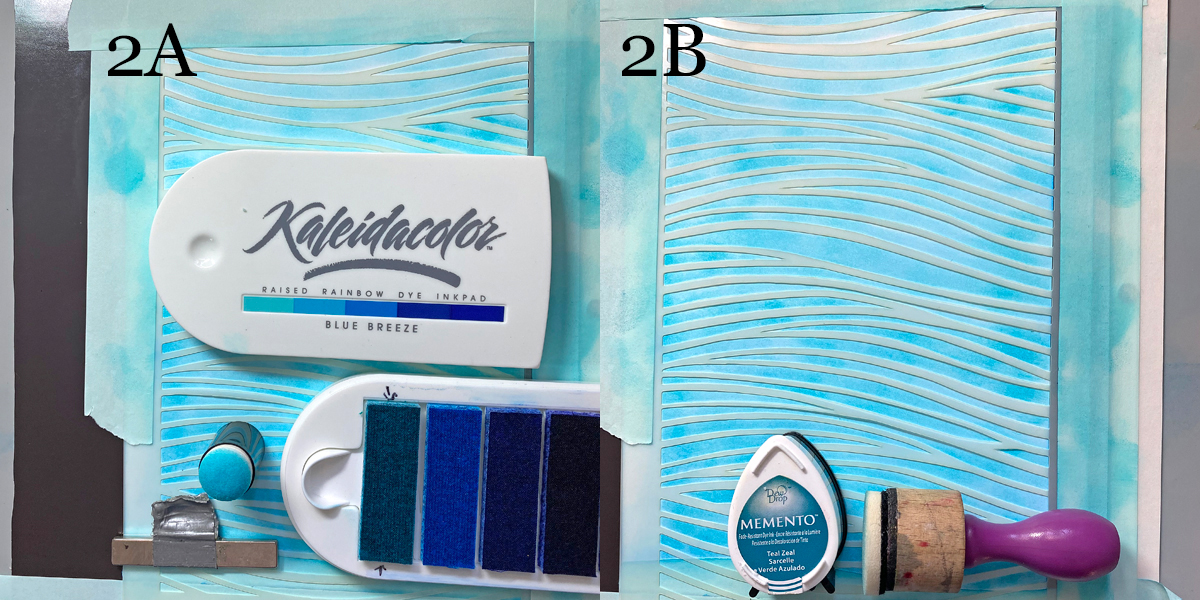
Steps 2A & B: Place a magnetic page onto the craft mat. Use low-tack tape to secure the cardstock panel to the magnetic page. Use magnets and low-tack tape to secure the Currents Stencil to the cardstock panel. Use a Sponge Dauber to apply the lightest blue ink from the Kaleidacolor Blue Breeze Ink pad over the stencil onto the cardstock panel (2A). Randomly apply Teal Zeal Memento Ink over the stencil onto the cardstock to deepen the colors.
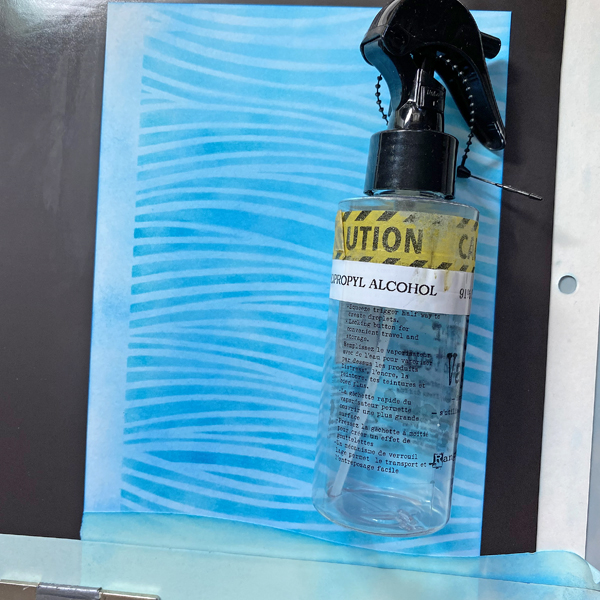
Step 3: Remove the stencil, then spritz the panel with 91% Isopropyl Alcohol to blend the inks and add white splatters and splotches.
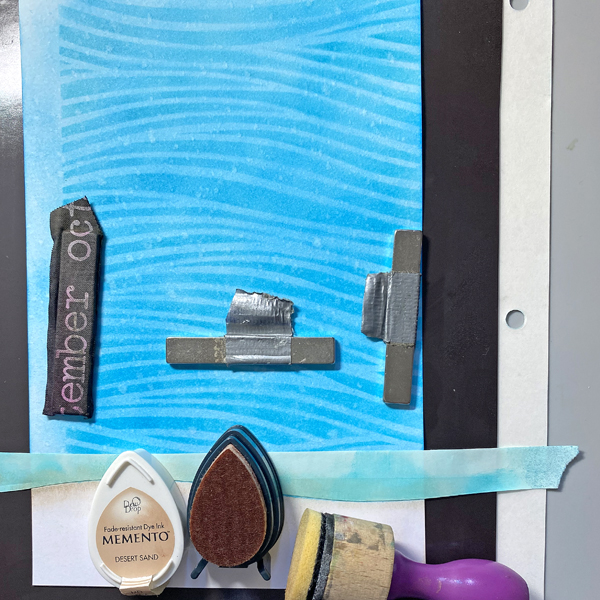
Step 4: Remove the low-tack tape and replace with the negative part of the tape cut in Step 1. Sponge Desert Sand Memento Ink over the tape onto the image panel to create the sea floor. Remove the tape.
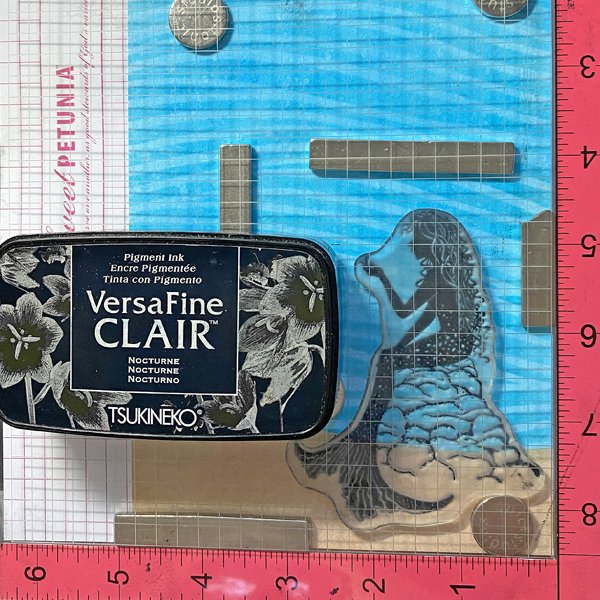
Step 5: Place the panel onto the base of a stamping platform and secure with magnets. Position the mermaid stamp from the Guinevere Clear Polymer Stamp Set so that it’s face down along the lower right side of the image panel. Press the platform’s lid onto the back of the stamp, lift, and ink the stamp with Nocturne VersaFine Clair Ink. Stamp. Re-ink and stamp again if necessary to attain a good impression.
Remove the panel and thoroughly heat set the ink.
Step 6: Use Copic markers to color the mermaid’s rocky throne. Usually I don’t use Copic markers with any ink other than Memento, but since I had duplicate markers, I gave it a shot and it worked! Sorry! No photos!
Step 7: Use Triplus pens to color the mermaid’s hair. Use Marine and Black Stardust Glitter Gel Pens to add detail the mermaid’s scales. The ink of both pens work well with most inks. Sorry! No photos again!
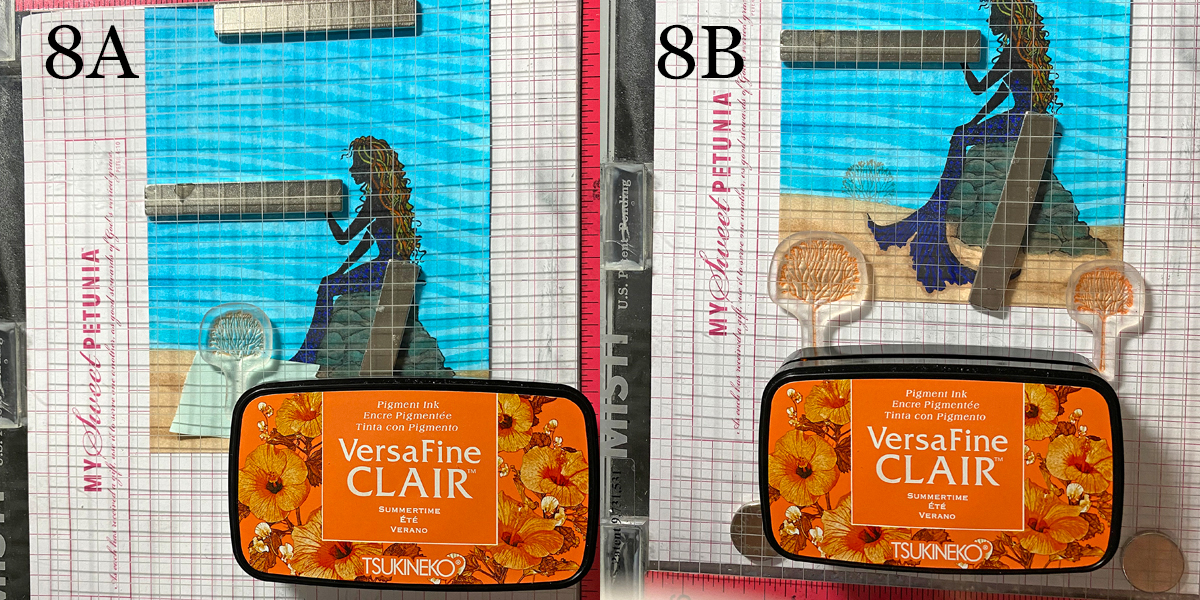
Steps 8A & B: Place the image panel back onto the base of the stamping platform and secure with magnets. Use low-tack tape to cover the top of the ocean floor to the left of the mermaid.
Position the mid-sized Skeleton Tree stamp from the Skeleton Tree Clear Stamp Set facedown on the top left. Press the lid of the platform onto the back of the stamp and lift. Ink the stamp with Summertime VersaFine Clair Ink and stamp (8A). Remove the tape.
Remove, clean and dry the stamp. Reposition the mid-sized Skeleton Tree stamp so that it’s facedown on the bottom left of the image panel. Position the smallest Skeleton Tree Stamp from the facedown on the bottom right of the image panel
Press the lid into the back of the stamps and lift. Ink both stamps with Summertime VersaFine Clair Ink and stamp (8B). Remove the stamps from the platform.
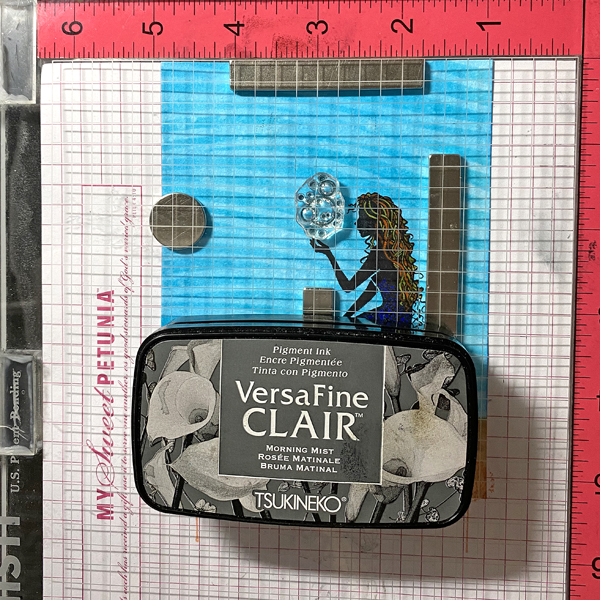
Step 9: Position the bubbles stamp from the Faerie Clear Polymer Stamp Set facedown on the image panel slightly above the mermaid’s outstretched hand. Press the lid into the back of the stamps and lift. Ink the stamp with Morning Mist VersaFine Clair Ink and stamp. Remove the panel from the platform. Heat set the panel.
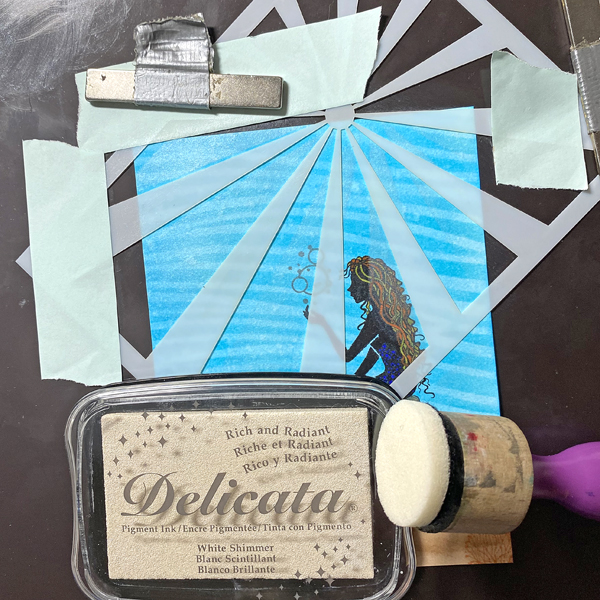
Step 10: Place the image panel back onto the magnetic page. Use magnets and low-tack tape to secure the Sunshine Small Stencil over the image panel as shown. Sponge White Shimmer Delicata Ink over the stencil onto the image panel. Remove the panel and heat set.
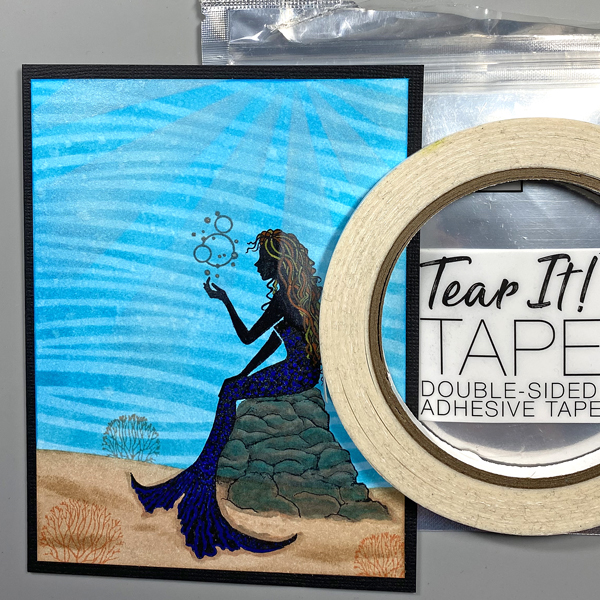
Step 11: Use Tear-It! Tape to adhere the image panel to a black A2 card.
Hello! I love the Kaleidacolor Ink Pad line from Imagine. There are so many beautiful color combinations, but I have wanted to create my own. Did you know that you can get an empty Kaleidacolor Ink Pad so that you can fill it with any colors you want? It’s really easy! I’m going to show you how, then we will create a really simple card that has a lot of impact using our freshly inked pad.
*Some affiliate links are used in this post. That means that if you shop through these links, I may receive a small compensation, at no cost to you.For more information, please see my Affiliates page, where I also have some coupon codes.
Skill Level: Beginner-Intermediate Time to Complete: 5 minutes to ink the pad, 15-20 minutes to make the card, plus setting and drying time.
Hello! I’m Alison Heikkila. The weather by me has been really beautiful, and it’s enhanced by the changing colors of the leaves. I decided to pull out a few Kaleidacolor Ink Pads and my 5×7 Gel Press Plate and show you how easy and fun it can be to make prints with different types of foliage.
*Some affiliate links are used in this post. That means that if you shop through these links, I may receive a small compensation, at no cost to you. For more information, please see my Affiliates page, where I also have some coupon codes.
Skill Level: Basic Time to Complete: As long as you feel like playing!
I didn’t want to stop making prints! This process can be very addicting. I hope you give it a try and find it fun and relaxing. Thanks so much for stopping by. Have an inspiring day!