Quick & Easy: Easy Watercolor Technique

by Jowilna Nolte

I love cool watercolor effects achieved by artists in making cards and stamping. With a few stamps and a good water brush, it is easy to make a beautiful card. But the real magic happened when I figured out I can use something as simple as a plastic packet or an acrylic block with inks I owned to create those looks I so love. Take a look at how easy it is…


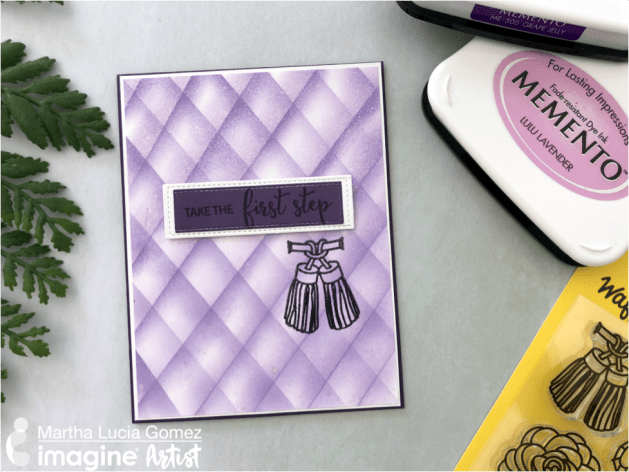
Memento DewDrop in Grape Jelly

VersaFine Clair in Nocturne

Acrylic Block by Stampin’ Up


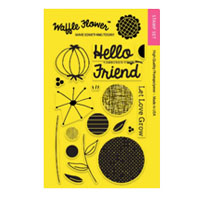
Waffle Flower Stamp Set

Stampin Up Cardstock


Directions

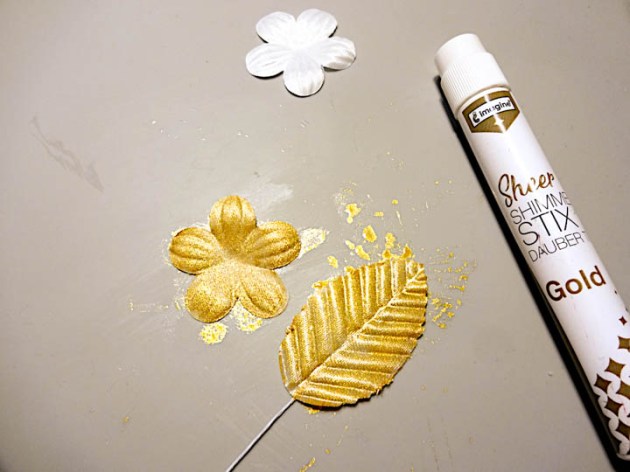
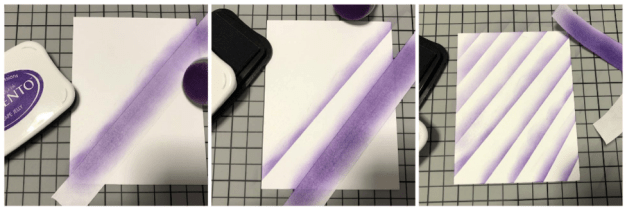
Dab Memento Dew Drop inkpad onto a piece of plastic. I used Grape Jelly (purple). Mist the ink with water until the color starts to pool. Lift the packet carefully, flip it over and stamp the ink onto the cardstock.

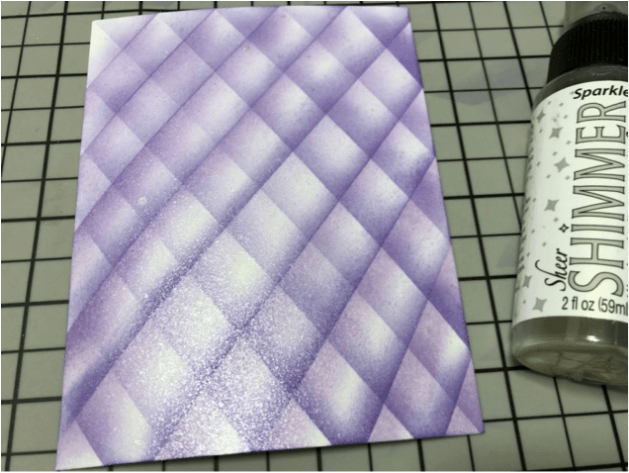
Stamp the ink onto the front of the folded card and leave to dry naturally. Do not put the packet down flat, but rather keep it curled up with both hands and manipulate and stamp the ink where you want to.

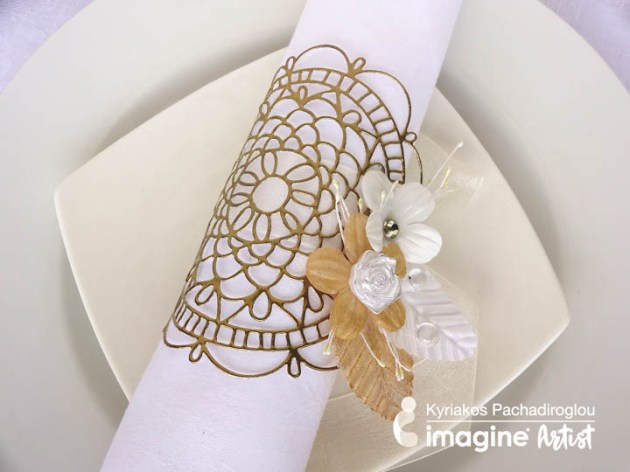
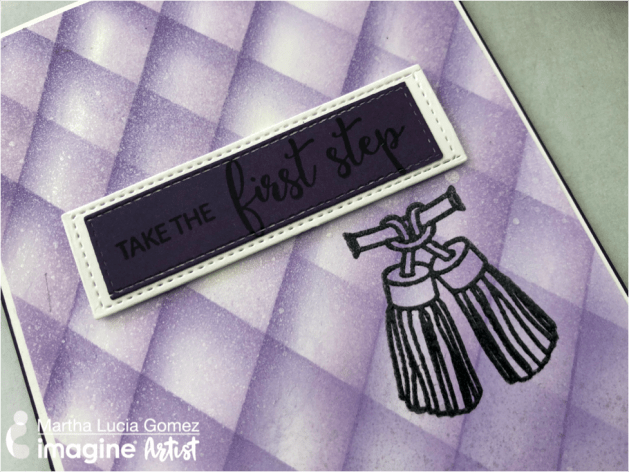
Leave the ink to dry on the background and then add your stamped flower and the “Happy Birthday” sentiment. VersaFine Clair is a great stamping ink and layers nicely over the Memento. This quick and easy card design is complete!

Create Soft and Simple Backgrounds for Your Cards with Fireworks Shimmer Spray

by Melissa Andrew

Create Soft and Simple Backgrounds for Your Cards with Fireworks Shimmer Spray

Today I share a very simple technique using the soft Fireworks Shimmer Spray colors to create a gorgeous simple background. Using the softest of colors allows an image that’s colored on white to really pop. The additional shimmer really makes this simple card shine! I paired this technique with the adorable Waffle Flower Stamp set called Always for a gorgeous soft creation.

Skill: Intermediate
Time: 30 minutes

Directions

Supplies

Imagine
Other

Learn How to Make a Napkin Ring from a Waffle Flower Doily Die-cut

by Kyriakos Pachadiroglou

Learn How to Make a Napkin Ring from a Waffle Flower Dolly Die-cut

The fine detailed Doily die from Waffle Flower is versatile to use beyond card making. Covered with Mboss embossing powder in Gold, it gives the look of a true metallic made piece that works as the main body of the napkin ring. By choosing from any of the colors of the Mboss embossing powder you can match your table theme. Simple and easy to make, this napkin ring shows excellent around a white cloth napkin.

Skill: Beginner to Intermediate
Time: 1 hour per four pieces

Directions


Step 1

Die-cut a doily circle with the Waffle flower die. Waffle Flower dies work with any brand of machine such as Spellbinders or Sizzix.


Step 2

Press the VersaMark watermark ink pad on the die-cut dolly, cover with the Mboss gold embossing powder and heat set. Repeat once more to create a thick texture.


Step 3

Glue the organza ribbon to the middle back of the gold embossed dolly cut.


Step 4

Color the white leaves and flowers with Sheer SHIMMER STIX gold.


Step 5

Use the hot glue gun to set the flowers and the leaves onto the doily.


Step 6

Add the flower embellishments with the On Point Glue.

Supplies

Imagine
Other
  • Waffle FlowerDoily Circle die
  • White cardboard
  • Organza ribbon
  • Satin flowers and leaves
  • Sparkletz embellisments
  • Die-cutting machine
  • Heat tool
  • Hot glue gun

Learn How to Create an Amethyst Diamond Background Pattern

by Martha Lucia Gomez

Learn How to Create an Amethyst Diamond Background Pattern. Martha Lucia Gomez shows you a step-by-step process.

Hi there, Martha Lucia here! Today, I have a fun project to create using your Memento Inks and Waffle Flower stamps. This month we are featuring the color Amethyst a beautiful purple hue. I am using Memento Ink in Grape Jelly and Lulu Lavender to create my faux diamond Amethyst background.

Skill: Intermediate
Time: 45 minutes

Directions


Step 1

I started with a whisper white piece of cardstock and a strip of masking tape. I just created diagonal lines of color using a jumbo dauber and the Grape Jelly Memento Ink. This is a technique that you can use with any color of ink, but for this color scheme, I started with the dark purple. I used the grid side of my Craft Mat to determinate space in between each line. Mine are around 3/4″ of each in between.


Step 2

When I was satisfied with the look, I just turn the inked cardstock 180 degrees and repeat the process but this time using a lighter color of ink, Lulu Lavender Memento Ink, just to create the shadow.


Step 3

I sprayed the entire inked piece with Shimmer Sheer Sparkle to give the shimmering touch that a pair of shoes deserve. Yes, to finalize my card, I used images from the stamp set First Steep from Waffle Flower. This is a gorgeous stamp set that includes a pair of shoes with many embellishments and great encouraging sentiments.


Step 4

I just stamped one of the embellishments included in the First Step stamp set directly over my faux diamond background with VersaFine Clair Nocturne and Clear Mboss Embossing Powder. Then I combined two sentiments and stamped them over a piece of Gorgeous Grape cardstock that I cut and mat with whisper white cardstock using the Stitched Sentiments Strips Dies from Kat Scrappiness.

Thank you for stopping by and if you want a suggestion, try to use this faux diamond technique using opposite colors of ink and share your creations with us!

Supplies

Imagine
Other
  • Waffle Flower – First Step Stamp Set 
  • Card Stock – Whisper White, Gorgeous Grape
  • Masking Tape
  • Kat Scrappiness – Stitched Sentiments Strips Dies

Create a Beautiful Wedding Dress Card with Heat Embossing on Rinea Foil

by Jessica Lin

Create a Beautiful Wedding Dress Card with Heat Embossing on Rinea Foil

Hey there, crafty friends! Today, I have an exciting wedding card project to share with you. I’m a big fan of stretching my craft supplies and finding new, creative ways to use them. In today’s video, I’m teaching how you can combine dry and wet embossing on Rinea Foil Paper to create a new technique! It’s simple, but there are no limits to what you can create because you can choose from a wide array of embossing folders and embossing powders. I hope you feel inspired to give this technique a try. If you liked it, be sure to leave a like or comment to let me know!

Skill: Advanced
Time: 1 hour

Supplies

Imagine
Other
  • Rinea Foil Variety Pack – Metallics
  • EK Success Anti-Static Powder Tool
  • Heat Gun
  • Stampin’ Up Wonderful Moments
  • We R Memory Keepers Next Level Embossing Folder – Bouquet
  • Stampin’ Up Embossing Folder – Country Floral
  • Cardstock – White, Navy, Jade

See How to Heat Emboss on Rinea Foil Paper

by Martha Lucia Gomez

Hi there, Martha Lucia here! Today I am featuring one of my favorite techniques, heat embossing over Foiled Paper. During this month the teams of Imagine and Rinea are working together to promote the combination of these brands. The base of my card is Sahara sand card stock and the second layer is Mocha/Gold Glossy Rinea Foil Paper. Let me share with you the entire process.

Skill: Intermediate
Time: 30 minutes

Directions


Step 1

Cut the base of your card. Mine is 4-1/4″x11″ with the score in 5-1/2″. Cut a second layer using your favorite color of Rinea Foiled Paper. Mine is Mocha/Gold Glossy. Select the embossing folder that you want to use. Mine is Tile Patterned from Darice. Ink a brayer with VersaMagic Cloud White or any pigment ink. The brayer will make the color uniform.


Step 2

Ink the de-bossing side of the folder with VersaMagic Cloud White or any other pigment ink. Rub the Rinea foiled paper with an anti-static bag or embossing buddy.


Step 3

Put the Rinea foiled paper inside of the inked embossing folder and pass it through your die cut machine.  Remove the embossed foiled paper and cover it with white embossing powder. Melt the powder with the heat tool, taking care of not burn your foiled paper.


Step 4

If you consider necessary to make a few retouches of the embossed layer, you can use the VersaMark pen and cover the area with the same color of embossing powder. In this case, white.


Step 5

Paste the embossed layer over the card base and finalize the decoration of your card. I decided to add a thick word die cut and for that, I cut several layers of the die-cut in card stock and one on Marigold Starstruck Rinea Foiled paper.  I am using the With Love Word Die from Lil’Inker Designs.


Step 6

Paste and stock all the word die cuts using On Point Glue.


Step 7

Paste the decorated word over your decorated card with glue dots.

Supplies

Imagine
Other
  • Rinea Foiled Paper – Mocha Gold Glossy, Marigold Starstruck
  • Cardstock
  • Darice – Embossing Folder Tile Pattern
  • Lil’Inker Designs – “With Love” die
  • Big Shot or Die Cutting Machine
  • Brayer