See How To Use Dura-Lar Matte Film To Make A Card

by Iris Rodriguez

See How To Use Dura Lar Matte Film To Make A Card

For this month, it’s was such a pleasure to make projects with Tsunkineko’s new StazOn Pigment Inks. These ink behave like pigment inks, however, they are permanent like the original StazOn ink. As if it does not get any better; this ink also takes details incredibly well. For this card, I used Dura-Lar film (it’s like vellum paper) to create a dimensional effect by stenciling bird images with the Peacock Feathers color of StazOn Pigment. I overlaid the stenciled film on a moonlit night background; also created with StazOn Pigment inks. It made for a great backdrop for the Peacock colored birds.

Skill: Beginner
Time: 30 minutes

Directions

Step 1

Stencil the birds onto the Dura-Lar matte film. This film looks like vellum, except that it’s archival. It’s very strong, you can remove your images with rubbing alcohol or water as many times as you want and it does not warp. Permanent inks, like StazOn Pigment inks, do not rub off. I like using it because you can create layered dimensional effects.

Step 2

Cut out a circle for the moon. This will be used as a mask when inking the background.

Step 3

Place the circle over the cardstock paper and ink the background using the Piano Black StazOn Pigment ink.

Step 4

Ink the background with the Snowflake and Koala Gray StazOn Pigment inks.

Step 5

Add a little color to the background with the Peacock Feathers StazOn Pigment ink. Ink lightly and in random areas, do not ink the entire background.

Step 6

Spray the tacky spray to the background and adhere the Dura-Lar sheet.


Step 7

Lightly ink sections of the Dura-Lar background with the Koala Gray and Peacock Feathers StazOn inks. Do not ink over the birds. Stamp the sentiment.

Supplies

Imagine
Other
  • Crafter’s Workshop – Birds 6 x 6 stencil
  • Joy Clair Stamps – Butterfly Kisses
  • Dur-lar Archival Film – Matte
  • Aleene’s All-Purpose Tacky Adhesive Spray

Learn How To Create A Grungy Heart Notebook For Valentines

by Lori Warren

This project is all about making something out of nothing.  At least, nothing as in a piece of corrugated cardboard from a discarded box and lined paper from an old notebook.  These reuse items, paired with a few Imagine Fireworks sprays, create a beautiful notebook that would be a great gift for friends or family.  In the tip video, I will show you how to use Fireworks sprays with a liquid varnish to create a permanent finish.  This is a helpful tip especially if you are into Mixed Media.

Skill: Intermediate
Time: 2 hours

Directions


Step 1

Start by drawing a heart shape (approximately 4 1/4” x 4” in size) onto a piece of corrugated cardboard. Cut out shape.


Step 2

Trace the heart onto a piece of heavy weight cardstock and cut out.


Step 3

Line up the corrugated and cardstock heart shapes and punch a hole in the upper left hand corner.


Step 4

Tear off sections from top layer of paper on the corrugated heart, exposing he corrugated layer underneath.


Step 5

Paint a layer of Gesso over the front and back sides of the corrugated heart. Lay a stencil down over the corrugated heart and apply modeling paste. Only apply in small sections around the heart.


Step 6

On your craft mat, mix Rhubarb Stalk Fireworks with a liquid varnish (2 parts fireworks to 1 part varnish).


Step 7

With a paint brush, add puddles of the Fireworks/varnish mixture to the top of the corrugated heart. Add/spray water onto the puddles of Fireworks mixture. Allow the mixture to run and drip down the heart.  Blot with a paper towel to stop run. Add more Fireworks mixture and repeat, as needed. Allow to dry in between layers.


Step 8

Repeat inking with Desert Sand Fireworks. Once the Fireworks mixture is completely dry, seal with a coat of liquid varnish. Stamp a script stamp randomly across the corrugated heart with Jet Black StazOn ink.


Step 9

Add splatters to the heart with some watered down black acrylic paint.


Step 10

Spray a few resin roses with Rhubarb Stalk Fireworks and heat set. Repeat, a needed. Fireworks can also be applied with a paint brush, if preferred.


Step 11

Once the Fireworks ink (on the resin roses) is completely dry, edge the roses with Jet Black StazOn inkpad and a dauber.


Step 12

Edge the circumference of the corrugated heart with StazOn and a dauber as well. Deconstruct twine into individual threads and shred the fibers to create a “bed” for the resin hearts to sit on. Adhere the shreds of twine down into the upper left corner of the heart (be sure not to cover the punched hole). Then adhere the roses over the shredded twine.


Step 13

Stamp a title word onto the upper center portion of the heart with Jet Black StazOn ink. Trace the heart shape onto lined paper and cut out. To keep the paper from moving, staple about 4 to 5 sheets together prior to cutting. Repeat for more sheets, as needed (keep in mind the size of book binder ring that you are using). Line up the 3 booklet elements (front = corrugated heart piece, center = lined paper, back = cardstock heart) and attach a book binder ring. Finished!

Supplies

Imagine
Other
  • Corrugated Cardboard
  • Lined paper from old notebook
  • DecoArt Acrylic Paint – Americana Jet black, DuraClear Matte Varnish
  • Tim Holtz Idea-ology – Heirloom Roses
  • TCW – Stencil, TCW437, White Gesso, Light & Fluffy Modeling Paste
  • Lori’s Cards & Creations – Inspire background stamp set
  • White Cardstock
  • Book Ring
  • Twine
  • Crop a Dile Eyelet & Snap Punch

Learn How to Make a Silver Tree Christmas Card

by Iris Rodriguez

Learn How to Make a Silver Tree Christmas Card

Make minimalist, truly handmade Christmas card with IrRESISTibles Pico Embellishers. This texture medium fitted with a fine-tipped applicator makes it easy to draw a Christmas tree or any other Christmas/Holiday doodles. Simply add embellishments and stamp a sentiment to arrange a unique design.

Skill: Beginner
Time30 minutes

Directions


Step 1

Spray water on the watercolor paper. Spray Fireworks Craft Shimmery Sprays in Summer Sky then spray Danube Blue.


Step 2

Using VersaFine Clair in Blue Belle with the Jumbo Dauber ink the paper in random sections, and along the edges. Then ink with VersaMagic Cloud White.


Step 3

Draw the Christmas tree with the irRESISTible Pico Embellisher in Silver by drawing a series of connected swirls.

I decided to paint some of the rhinestones with the StazOn ink in Blue Hawaii
Step 4

I have to admit I wanted to add blue and clear rhinestones to the tree to make it look like ornaments. However, I did not have blue rhinestones. So I decided to paint some of the rhinestones with the StazOn ink in Blue Hawaii. StazOn is permanent ink and it won’t rub off.

Adhere the rhinestones with On Point Glue
Step 5

Adhere the rhinestones with On Point Glue. Stamp the sentiment and mount to the card base.

Supplies

Imagine
Other
  • Watercolor paper
  • Sentiment stamp
  • Rhinestones

Create a Glittery Snowflake on Glowing Red Background

by Arjita Sepaha Singh

For today’s card, I used the Sparkle Embossing Powder to create the beautiful snowflake on a bright red cardstock. I used VersaMark Embossing Ink to stamp the snowflake. Once the embossing powder was melted I blended some red inks with a sponge dauber around the edges of the card. This adds a beautiful glow to the card and I finished the card with a sentiment in black. This is a perfect project to be mass-produced for your Christmas cards.

Skill: Beginner
Time: 20 minutes

Directions

Supplies

Imagine
Other
  • Card Stock – White, Black, Red
  • Powder Tool
  • Heat gun
  • Misti Stamping Tool

November Color of the Month is Gingerbread

November Color of the Month is Gingerbread

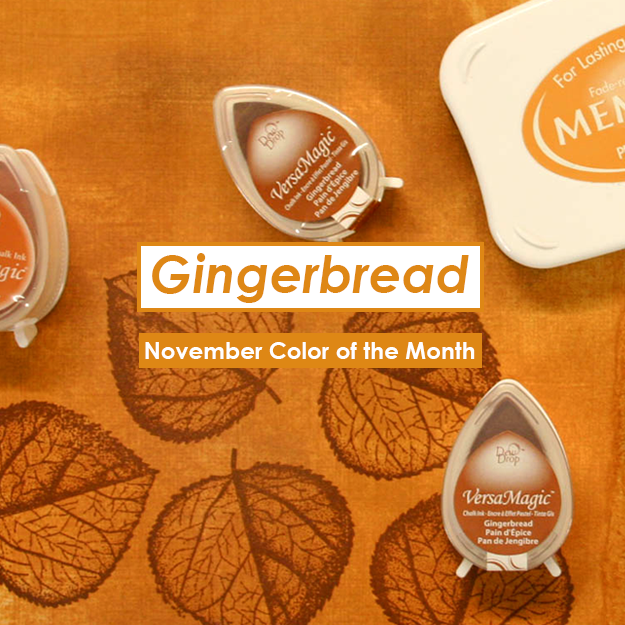
Color of the Month for November is Gingerbread. We love this toasty burnt orange-brown color that reminds us of the all the yummy treats and eats that are created for the holidays. For papercrafting, we have a collection of ink colors that perfectly compliment the Gingerbread color. Some of these inks include VersaMagic in (ready for it…) Gingerbread, Memento in Peanut Brittle, and VersaMagic in Pumpkin Spice. These dark orange colors are a great addition to your ink collection.

To start us out for the month of November, we have a super cute cardmaking tutorial by Elina Stromberg. Enjoy!

Cute Birthday Card by Elina Stromberg

As a scrapbooker and card maker, I have lots and lots of beautiful patterned papers. However, very often I prefer using just plain white mixed media papers and creating the background patterns myself. That way I can both enjoy the creative process of inking, stamping, and stenciling but also create patterned papers that have exactly my needed colors. This cute birthday card was inspired by our November color ‘Gingerbread’. Even if I used only a limited color palette I think the card doesn’t look boring at all. Several layers of eye-catching patterns and cute stamped and colored images were a perfect combo!

Skill: Beginner
Time: 1 hour

Directions


Step 1

Stamp and fuzzy-cut the main images.


Step 2

Apply Memento in Desert Sand (light brown) on a piece of mixed media cardstock/watercolor paper. Do not cover the entire sheet but leave some areas white.


Step 3

Stencil VersaMagic in Gingerbread on top of.


Step 4

Stamp circle patterns with VersaFine Clair in Acorn.


Step 5

Add the final layer of patterns by stamping small dots with Memento in Potter’s Clay.


Step 6

Apply a thin layer of white gesso on those areas where the main images will be placed. This will highlight the fuzzy cut images, preventing them from blending into the busy background. Let dry.


Step 7

Glue main images on the card front. Mat card on brown cardstock and attach to white card base. I used the very same techniques for creating a matching ATC. I think it looks quite nice, too!

Supplies

Imagine
Other
  • White mixed media paper
  • Brown cardstock, white card base
  • White gesso
  • Carabelle Studio: ‘Les Mini OUF 2’ Stamp, Mini Textures
  • VivaLasVegaStamps! – Doodle Dots
  • Ranger Dyulusions – Fresh Dots Small Stencil
  • Promarkers for coloring the images
  • American Crafts – Number stickers

Create a Beautiful Lavender Mosaic with Ink and Stencils

by Roni Johnson

Create a Beautiful Lavender Mosaic with Ink and Stencils

There are so many fun techniques that you can use with stencils. So many techniques that I couldn’t decide which one to use so I decided to see how many I could incorporate into a single creation! Of course, these don’t include everything you could do with a stencil but it’s a pretty good start to get the creative juices flowing. Try the entire project or perhaps just a few stenciling techniques!

Skill: Beginner
Time: Individual Techniques 2-15 minutes each or Entire Canvas 2 hours

Directions


Step 1

Beginning with the easiest technique, sponge a single color of ink through the stencil.


Step 2

Randomly sponge 2 or more inks through a stencil. Here I used Memento which is a dye ink and VersaMagic which is a pigment ink.


Step 3

Sponge a pigment ink over a stencil; remove the stencil; sprinkle with embossing powder and heat to set. The second example was made by flipping the inked stencil onto a piece of cardstock to transfer the excess pigment ink. It was then sprinkled with embossing powder as well.


Step 4

Spray Fireworks Shimmery Craft Spray in Lulu Lavender over a stencil. Flip the wet stencil onto a fresh sheet of cardstock for a reverse impression.


Step 5

Spread Creative Medium over a stencil using a palette knife and carefully remove the stencil; set aside to dry. Before the medium dries press the stencil over onto a fresh sheet of cardstock to remove the excess Creative Medium from the stencil. This makes a grungy reverse image of the stencil.


Step 6

Use a pen or marker to trace the stencil onto cardstock. Doodle inside of the traced image. Sponge ink overall or select areas of the stenciled image for added interest.


Step 7

Position stencil over cardstock. Stamp the desired image over the stencil and smudge the excess ink off the stencil into the individual sections of the image.


Step 8

Sponge or brayer ink onto a sheet of cardstock. Place stencil over inked cardstock wet a sponge dauber with Ink Potion No.9 and pounce the dauber over the stencil. Remove the stencil and heat to speed drying.


Step 9

Sponge a dark color of ink over a stencil. Slightly shift the stencil to one side, ink with a lighter color of ink. Close up of the shifted stenciled pattern.


Step 10

Sponge dark ink over a piece of cardstock. Position the stencil over the inked cardstock and sponge white ink over the surface. Heat emboss with white embossing powder for a more pronounced difference.


Step 11

Brayer ink through a stencil, use a Kaleidacolor ink pad for a fun, vibrant look.


Step 12

Pounce desired colors of ink on craft mat; spritz with water or Ink Potion No.9. Create a monoprint by pressing the cardstock into the ink mixture, set aside to dry. Once the monoprint has dried, brayer ink over a stencil, press the inked stencil over the monoprint for an interesting contrast.


Step 13

To create the canvas, trim the stenciled samples into 2” x 2”; 2” x 3” and 2” x 4” pieces. Ink the edges with VersaFine Clair Fantasia and a sponge dauber. Adhere each piece in a random pattern onto a piece of thick book board or cardboard. Embellish as desired.

Supplies

Imagine
Other