Let’s Make a Fun Inspirational Card

Lee_Ann_Aug_600x600

By LeeAnn McKinney –

Hey there friends and fellow crafters, LeeAnn here with a fun Inspirational Card I made using my absolute favorite technique, and those of you that have been here for a while know I love Kaleidacolors.

Skill level: Beginner

Time: 30 minutes


Art Supplies

Imagine:

• Imagine Craft Mat

• On Point Glue

• Tear It! Tape

• StazOn Stamp Cleaner

Desert Heat Kaleidacolor Dye Ink

• VersaFine Clair Nocturne

Other Products:

• Accent Opaque 120lb Cardstock 

• Kromecote Paper Marco’s Paper

• Stampers Anonymous Motivational 2 Stamps

Make an Inspiration Card Using Kaleidacolor

Grateful-1-600_main

By Alison Heikkila

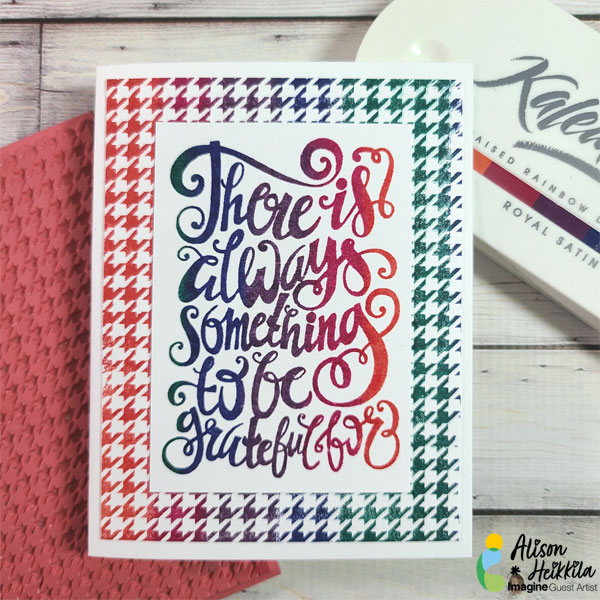
Sometimes we need a card- fast! Here’s an easy way to make an inspirational card with only 2 stamps and one Kaleidacolor ink pad. You can change up the stamps to suit your needs. Make sure you read to the bottom of the post to see this card done with different colors.

Skill Level: Beginner

Time: 5 Minutes

Directions:

Grateful-3

Step 1

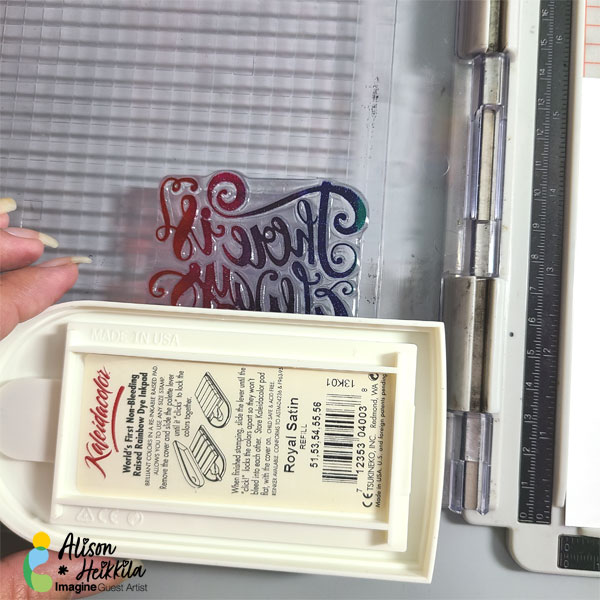
Using the Kaleidacolor Ink Pad of your choice, ink up your sentiment stamp. It’s a good idea to use a stamp positioner in case you need to ink it up more than once. Be sure to close the tab on the pad so that the colors “click” together. I chose Royal Satin Kaleidacolor. I recommend using using a palette that has deeper tones, as it may be harder to read a sentiment done in pastels.

Step 2

Stamp the image to make a solid impression. If there are any areas that need more ink, reink the stamp and restamp the image.

Step 3

Trim your sentiment.

Grateful-4

Step 4

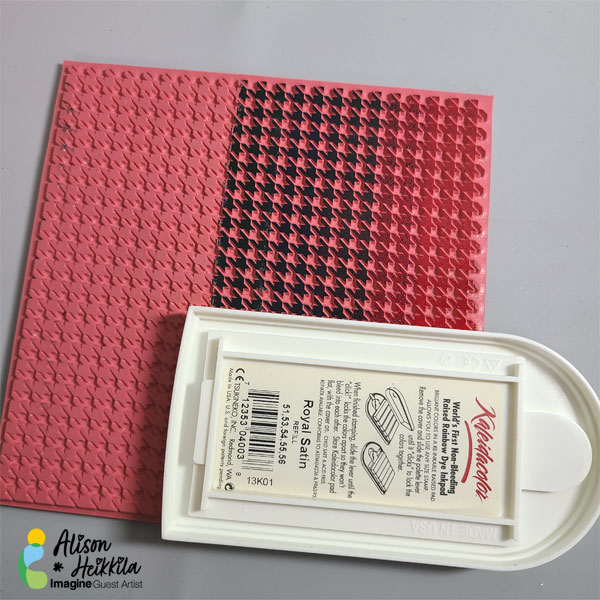
Using a background stamp, click together the colors again and ink the stamp. I have the tabbed area hanging off the edge of the stamp. You’ll only be able to ink up a little more than half the stamp this way, so flip the pad around to ink up the other side.

Grateful-5

Step 5

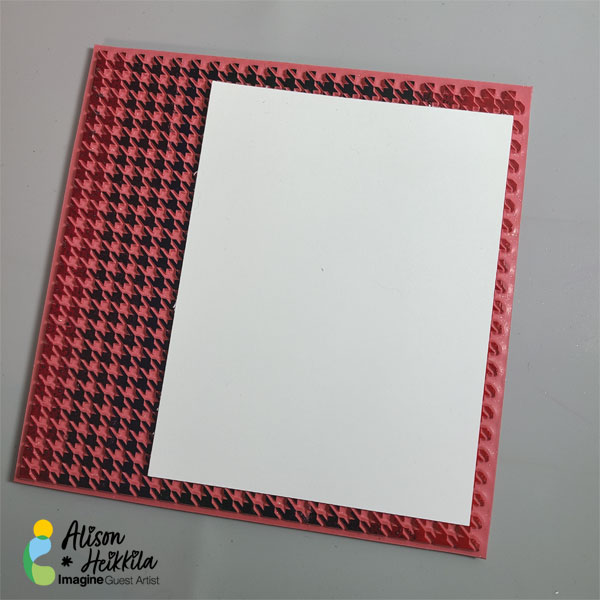
Place a piece of 4″ x 5 1/4″ cardstock on top of the inked background stamp.

Step 6

Apply pressure with your hands on to the cardstock to make an impression. If you don’t want inky fingers, grab a piece of scrap paper, lay it on top of the entire background stamp, and rub to get an impression.

Grateful-6

Step 7a

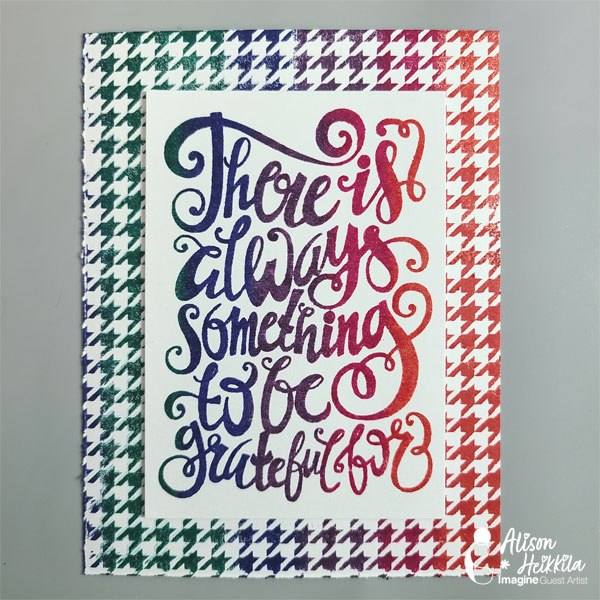
Now you need to decide if you want your background colors to match the order of colors on your sentiment. Above, you can see the colors aligned.

Grateful-7

Step 7b

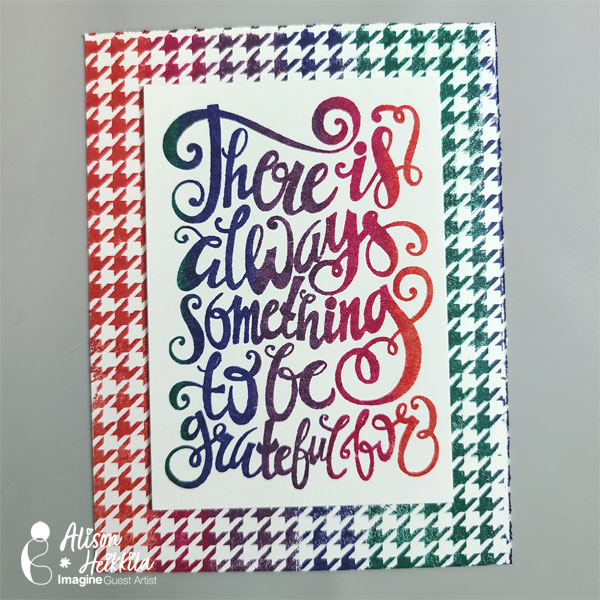
Here, you can see I reversed the colors, which I personally prefer. This is how I decided to make my card, but you can choose either option.

Grateful-9-600

Step 8

Glue your layers to a standard white A2 card base.

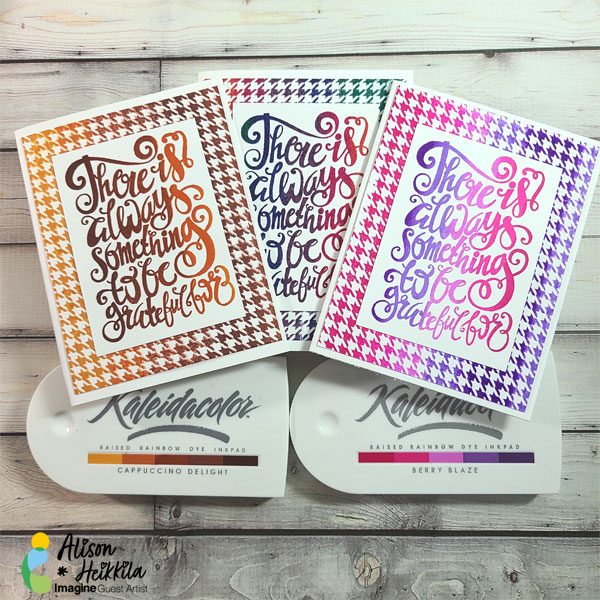
That’s it! You’re done, and you’ve made a card in about 5 minutes. If you make a pack of these, they would be a wonderful gift. Here are some other color versions.

Art Supplies

Imagine

Kaleidacolor Ink Pad (I used Royal Satin, Cappuccino Delight, and Berry Blaze)

Other

Brutus Monroe: There is Always Something to be Grateful For stamp
Erin Lee Creative: Houndstooth 6×6 Stamp
White Cardstock
Stamping Platform

See How To Use Dura-Lar Matte Film To Make A Card

by Iris Rodriguez

See How To Use Dura Lar Matte Film To Make A Card

For this month, it’s was such a pleasure to make projects with Tsunkineko’s new StazOn Pigment Inks. These ink behave like pigment inks, however, they are permanent like the original StazOn ink. As if it does not get any better; this ink also takes details incredibly well. For this card, I used Dura-Lar film (it’s like vellum paper) to create a dimensional effect by stenciling bird images with the Peacock Feathers color of StazOn Pigment. I overlaid the stenciled film on a moonlit night background; also created with StazOn Pigment inks. It made for a great backdrop for the Peacock colored birds.

Skill: Beginner
Time: 30 minutes

Directions

Step 1

Stencil the birds onto the Dura-Lar matte film. This film looks like vellum, except that it’s archival. It’s very strong, you can remove your images with rubbing alcohol or water as many times as you want and it does not warp. Permanent inks, like StazOn Pigment inks, do not rub off. I like using it because you can create layered dimensional effects.

Step 2

Cut out a circle for the moon. This will be used as a mask when inking the background.

Step 3

Place the circle over the cardstock paper and ink the background using the Piano Black StazOn Pigment ink.

Step 4

Ink the background with the Snowflake and Koala Gray StazOn Pigment inks.

Step 5

Add a little color to the background with the Peacock Feathers StazOn Pigment ink. Ink lightly and in random areas, do not ink the entire background.

Step 6

Spray the tacky spray to the background and adhere the Dura-Lar sheet.


Step 7

Lightly ink sections of the Dura-Lar background with the Koala Gray and Peacock Feathers StazOn inks. Do not ink over the birds. Stamp the sentiment.

Supplies

Imagine
Other
  • Crafter’s Workshop – Birds 6 x 6 stencil
  • Joy Clair Stamps – Butterfly Kisses
  • Dur-lar Archival Film – Matte
  • Aleene’s All-Purpose Tacky Adhesive Spray