Use Different Inks to Make a Congrats Graduation Card

by Iris Rodriguez

Use Different Inks to Make a Congrats Graduation Card

Graduation season is upon us. As much as it a joyous time in anyone’s life, you feel the pressure of the final exams, think about that next phase of your life and probably make a big move. Don’t forget the grad in your life, and make him/her a fun, grungy card. I will show you how you can create a simple, yet layered background with fun ruler embellishments and matching sentiment.

Skill: Beginner
Time: 30 minutes

Directions


Step 1

Smoosh the Turquoise Gem VersaMagic ink onto the Imagine Craft Mat.


Step 2

Spray water over the ink. Smoosh the watercolor paper and create a random background. Dry the paper.


Step 3

Stencil the gears with the Vintage Sepia VersaFine ink and Inkblusher.


Step 4

Using the palette knife and modeling paste, stencil another image.


Step 5

Spray some Walnut Ink, then brush the ink with a wet brush. Dry paper.


Step 6

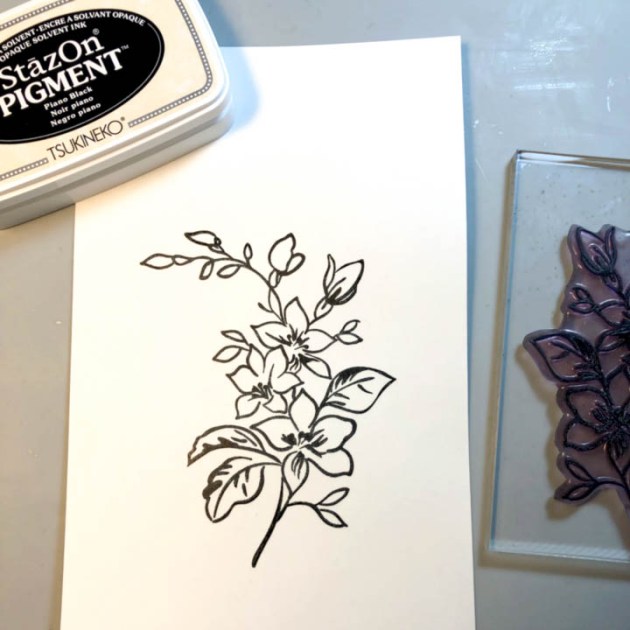
Stamp the ruler stamps with the Piano Black StazOn Pigment ink.


Step 7

Cut out the rulers and ink the edges with the Piano Black StazOn Pigment ink.
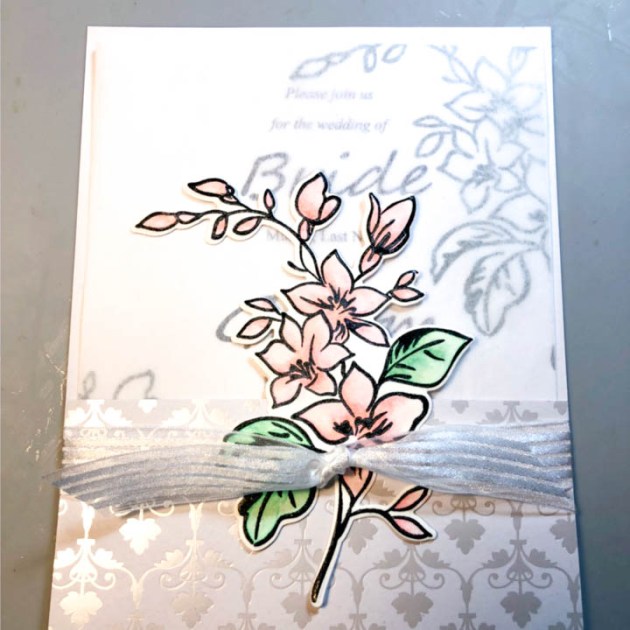
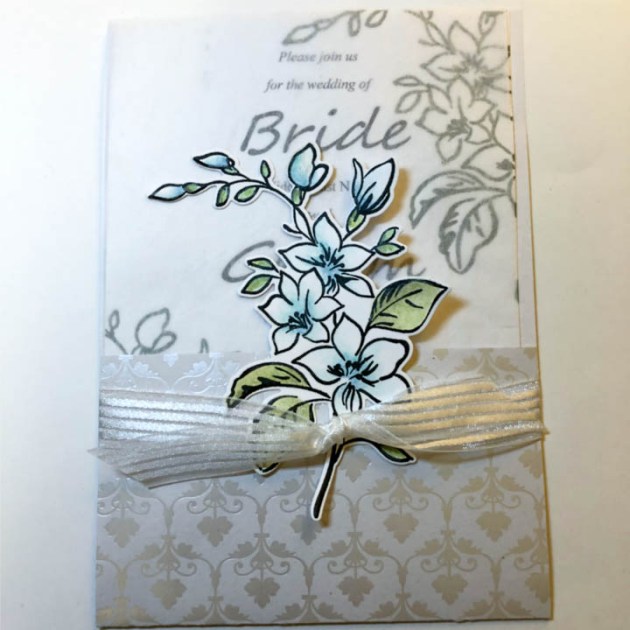

Step 8

Assemble card. Glue on the rulers and add a sentiment.


Supplies

Imagine
Other
  • Watercolor Paper
  • The Crafters Workshop – 6×6 Gears stencil
  • Carabelle Studio – Steampunk Metre stamp
  • Stampendous – Ruler stamp
  • Liquitex – Modeling Paste

Create a Quick, Easy and Elegant Wedding Invitation

by Lori Warren

Did you know that, according to Wikipedia, there are 2.5 million weddings in the United States each year? Wow, who knew?! That means that there are a lot of individuals out there planning for their big day! It’s a good thing that this project is designed to inspire those planning for their special day to create quick, simple and elegant handmade wedding invitations.

Time: 30 minute
Skill: Beginner/Intermediate

Directions


Step 1

Cut a piece of decorative cardstock to size, 5 ¼” x 10”.  Fold up at 3” from the bottom.


Step 2

Tie sheer ribbon around the bottom portion of the folder.


Step 3

Print wedding announcement on a 5”x 7” piece of cardstock.


Step 4

Stamp floral image with Memento London Fog at top right and bottom left of invitation.


Step 5

Create a template to cover printed words and spray with Sheer Shimmer Craft Spray.


Step 6

Cut tissue paper to cover invitation.


Step 7

Slide invitation, with tissue cover, into the previously made folder.


Step 8

Stamp floral design on cardstock with StazOn Pigment ink in Piano Black.


Step 9

Using watercolor pen and VersaMagic ink, water-color floral image.


Step 10

With matching die, cut out floral image.


Step 11

Adhere to the bottom portion of folder front, see the example for placement. Try the same design in different color schemes.

Supplies

Imagine
Other
  • Celebrate 360 – Sheer Ribbon
  • Alta New – Best Mom Stamp and Die set
  • Recollection – White Satin 12” x 12” paper
  • Paper Source – Invitation Tissue Paper


Learn How To Craft A Beautiful Card With Feathers

by Elina Stromberg

Learn How To Craft A Beautiful Card With Feathers

I hope you will soon get the chance to try the new StazOn Pigment inks. They are amazing! Like the standard StazOn inks, StazOn Pigment inks work well on various surfaces, they dry quickly and are super easy to use. Beautiful and bright colors are opaque and ‘juicier’ than the standard StazOns, giving you a crisp image every time.

I was curious to test the new inks on a bit glossy, non-paper surface, but instead of going for an acetate sheet or a glass jar I remembered a pack of feathers I had purchased several years back. What if I decorated the feathers with stamped patterns to give them a fun and interesting look?

Skill: Beginner
Time: 1 hour

Directions


Step 1

Gently bend the feathers and separate the barbs by pulling them towards the quill until you have reached the look you want.


Step 2

Place the feather on a folded paper towel. This soft surface will ease the stamping over the hard shaft in the middle of the feather. Stamp patterns on the feather, using pattern stamps and ink colors of your choice.


Step 3

Add a hint of white with a gel pen. Let dry. StazOn Pigment ink will dry very quickly, but the gel pen color may need a few minutes for drying.


Step 4

Cut a diamond shape from black cardstock. Cutting lines drawn on the back of the cardstock will help in cutting a symmetrical shape.


Step 5

Tape the black diamond shape on a piece of grey/monotonous patterned paper. Glue the feathers on top. Using Tear It double sided tape mat the card front on a piece of matching color cardstock and adhere on a folded card base.


Step 6

Stamp the sentiment text “Congrats” on a paper strip and glue on the card. I used another stamped feather on a different card layout, and even if that design is even simpler, I think the card looks quite nice!

Supplies

Imagine
Other
  • Craft feathers
  • Pattern stamp of your choice (I used a stamp from ‘Mini Textures’ set by Carabelle Studio)
  • Letter stamps by Studio Calico
  • White gel pen
  • Tacky glue
  • Cardstock – Black, white, red, patterned grey
  • White/green folded card base
  • Pencil
  • Ruler
  • Scissors
  • Paper Towels

Use StazOn Pigment to Create a Beautiful Mixed Media Canvas

by Kassy Tousignant

Use StazOn Pigment to Create a Beautiful Mixed Media Canvas

I used the new StazOn Pigment ink in many of the gorgeous, vibrant new colors on a black chalkboard background and the colors look fantastic! You can even see the purple on black…WHAT?! You have to see for yourself. This project couldn’t have been created successfully without the new StazOn Pigment ink. It is opaque, so it shows up great on dark surfaces AND it has all of the wonderful properties that the original StazOn has—it can be applied to many different surfaces and dries quickly. I think I’ve found a new obsession.

Skill: Advanced
Time: 1 hour

Directions

Supplies

Imagine
Other
  • White gesso
  • Stencil
  • Stamps
  • Paintbrush
  • Metal embellishments
  • Resin face
  • Copper wire
  • White CS
  • Chalkboard Easel

How To Make A Shaker Card Using StazOn Pigment Ink

by Nadine Carlier

You Are Beautiful shaker card by Nadine Carlier IC

Have you tried the new StazOn Pigment Inks yet? They are amazing and work great to stamp on plastics like acetate for shaker cards. I also used it to stamp on Imagines Vertigo to make some pretty butterflies.
To see how I created my shaker card watch my video below. Enjoy!

Skill: Intermediate
Time: 30 minutes

Supplies

Imagine
Other

Visit our YouTube Channel for more inspirational videos and subscribe. Make sure to click the bell to get updates when we post new videos.

Watch a Video on How to Use StazOn Pigment to Stamp on Kraft Paper

by Kassy Tousignant

Watch a Video on How to Use StazOn Pigment to Stamp on Kraft Paper

The new StazOn Pigment ink is here!! Yay! I am so excited to share this wonderful new ink with you! I can hardly contain myself. I made a simple, springtime, gnome card to show you some of the versatility of this new ink. I stamped Peacock Feathers on kraft cardstock and Lemon Drop on a metal tag and both look great! This ink will work on porous and non-porous surfaces, dries quickly, and is OPAQUE, and sooo crisp! I really don’t know what else you need… Ok, I’m done gushing…for now. 🙂

Skill: Beginner
Time: 15 minutes

Directions

Supplies

Imagine
Other
  • Twine and string
  • 3d foam tape
  • Flowers
  • Patterned paper
  • Zots
  • Kraft Cardstock