Create a Fun Birthday Card with StazOn Pigment Ink

by Melissa Andrew

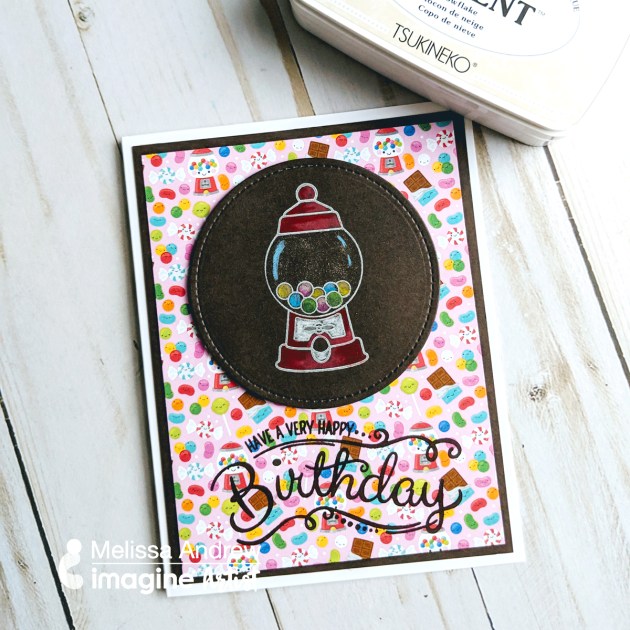
Today, I share with you a fun bubble gum theme birthday card using StazOn Pigment ink and the new Sheer Shimmer Stix. This theme features a simple gumball machine stamp and a fun candy pattern cardstock. I love the new StazOn Pigment ink as you can stamp on so many glossy surfaces. However, today I show you how fabulous it is on dark cardstock such as this lovely chocolate brown. Most of the time I reach for embossing powder for dark card, but not anymore, StazOn Pigment Snowflake works FABULOUSLY!

Skill: Intermediate
Time: 15 minutes

Directions

Supplies

Imagine
Other

See How To Upcycle A Tin With Stazon Pigment Ink

by Roni Johnson

See How To Upcycle A Tin With Stazon Pigment Ink

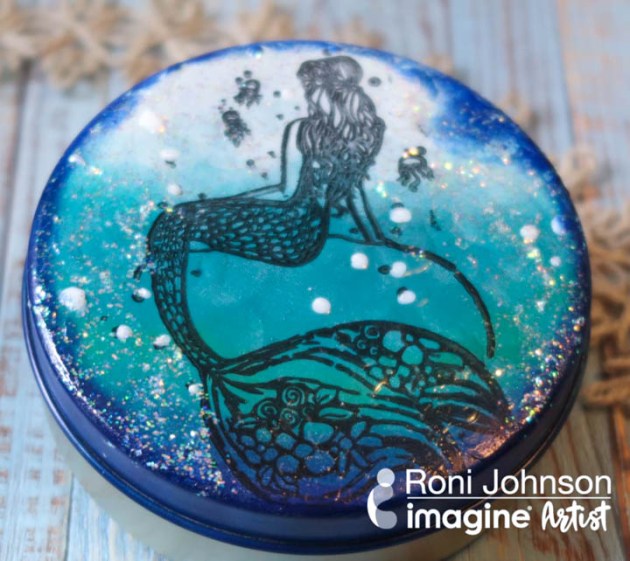
Did you hear about the new StazOn Pigment Ink? A quick drying opaque ink that you can use on all of the surfaces that you use the original StazOn ink. This will take your mixed media game to a whole new level of fun. Today am sharing a mermaid themed gift tin that I made for my daughter in law. It’s got layer after layer of StazOn Pigment Ink as well as a few other fun products from Imagine like Goosebumps spray, irRESISTible Pico Embellisher, On Point Glue.

Skill: Intermediate
Time: 1 hour

Directions


Step 1

Prepare the tin you will be working with by sanding off any artwork. 180 or 220 grit sandpaper works well for this process. Wash and dry the tin to remove dust, debris, and oils from your skin.


Step 2

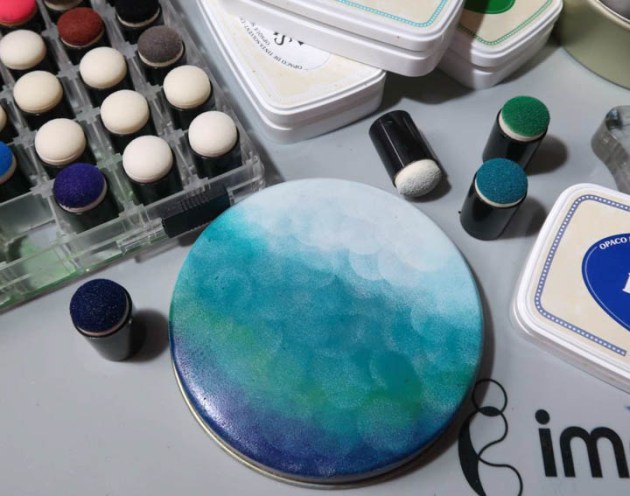
Use sponge daubers and StazOn inks to build layers of color beginning with the darkest layer on the bottom. Mariner Blue was applied to the very bottom rim of the lid to create the deepest and darkest part of the ocean. Let dry. Shamrock Green was the next layer which overlapped the Mariner Blue a bit and was applied approximately half way up the tin. Peacock Feathers was used for the third layer of ink, it was pounced darkest above the green but was also pounced over both the Shamrock Green and Mariner Blue to help blend the colors together. Snowflake was applied on the upper quarter of the lid, it was then lightly pounced into the Peacock Feathers to bring a look of natural gradation.


Step 3

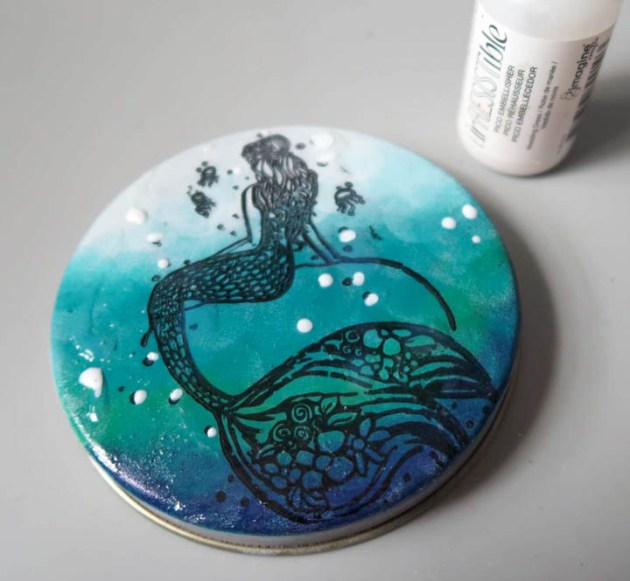
The mermaid stamp was inked with Piano Black StazOn Pigment ink and immediately stamped on the lid. Due to the fact that the lid has a slightly curved surface, I have found that it works best if you hold the lid in one hand and the stamp in the other and bring them together. This allows you to see that the stamp is making contact as you press the stamp around the contour of the lid. Let the ink dry completely.


Step 4

Spritz the lid with Clear Goosebumps Texture Spray to create an illusion of water. Let this medium dry before moving on. Use Wedding Dress irRESISTible Pico Embellisher to create bubbles in the water.


Step 5

Use a sponge dauber to color the side of the lid with StazOn Pigment in Mariner Blue and to frame the stamped image on top of the lid.


Step 6

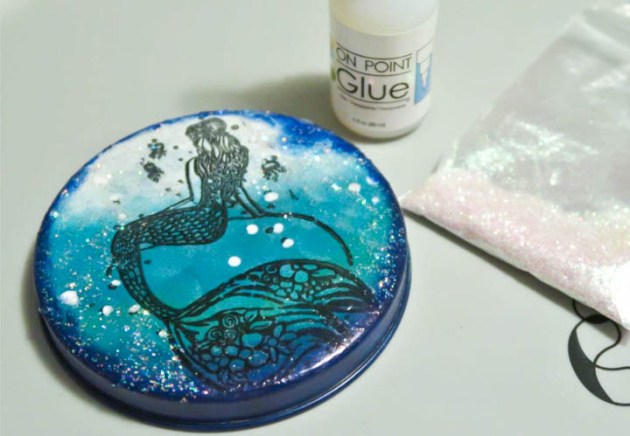
Selectively apply On Point Glue to the lid and lightly sprinkle glitter over the wet adhesive. Let the glue dry completely, shake off excess glitter and replace it for future use.

Supplies

Imagine
Other
  • Upcycled Tin Container
  • Sandpaper
  • Unity Stamp Co – Mystical Mermaid
  • Fine Glitter

Learn How To Create A Layered Rose Stamp With Stazon Pigment

by Arjita Sepaha Singh

Learn How To Create A Layered Rose Stamp With Stazon Pigment

I have used one of my all-time favorite Rose stamp for today’s card project. I love this stamp because of its realistic layering effect. To achieve this beautiful layering I used a couple of ink types today. I used the Memento Inkpads, our brand new Stazon Pigment inks, Radiant Neon inkpad, and VersaMagic inkpads & I was very happy to see the final outcome and the way they all work together.

Skill: Intermediate
Time: 30 minutes

Directions

Supplies

Imagine
Other
  • Altenew Stamp & Die set – Vintage Roses
  • Card Stock – White, Kraft
  • Scissors
  • Misti Stamping Tool
  • Double-sided Tape

Introducing StazOn Pigment

Introducing StazOn Pigment

We are so excited to announce a great addition to the StazOn family. The all new StazOn Pigment ink line has 12 vibrant, opaque colors of ink that work like the original. StazOn Pigment can be used on porous and non-porous surfaces and still has the lightning-quick dry time of the original.

StazOn Pigment comes in an ergonomic, easy to open, airtight case with a new felt pad that helps to produce very crisp stamped images. Any crafter or artist that likes to use acetate, metal, glass, or slick pastes will want to add StazOn Pigment to their stash. These colors really pop!

Learn more


Color Swatches Include


Colors include Lemon Drop 091, Orange Peel 071, Passion Red 021*, Pink Cosmos 081*, Grape Candy 011*, Mariner Blue 061*, Shamrock Green 051*, Peacock Feathers 062*, Koala Gray 032*, Chocolate Brown 041*, Snowflake 001*, Piano Black 031*

*Inker also available

Take a closer look at the colors in this video


Quick Facts about StazOn Pigment

  • Dries quickly on most surfaces
  • Works on all surfaces that original StazOn does
  • New style of felt pad produces crisp stamped images
  • Vibrant opaque colors of ink


shop-now-button-blog

How to Use Many Types of Ink on Yupo Paper

by Roni Johnson

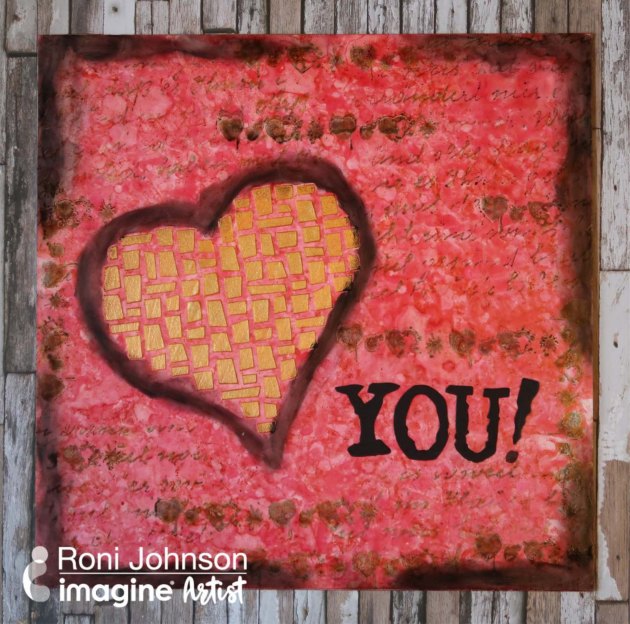
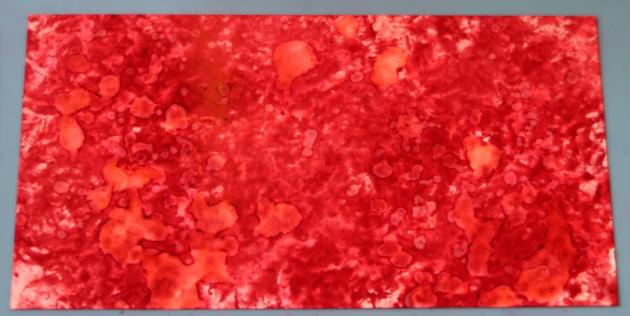
Completed love art piece on Yupo paper made with many types of Tsukineko inks.

Yupo is a polypropylene medium that can take all sorts of abuse and still come out looking great. Today I wanted to show you how easy it is to use with StazOn, Memento and VersaFine Clair inks with a couple of other mediums thrown in for fun. Today’s technique is only one of many different ways to use inks on Yupo paper. Experiment, have fun and if you don’t like it simply wipe it off and start over! This is a truly forgiving medium to work with.

Skill: Advanced
Time: 45minutes – 1-hour +dry time

Directions

Step 1

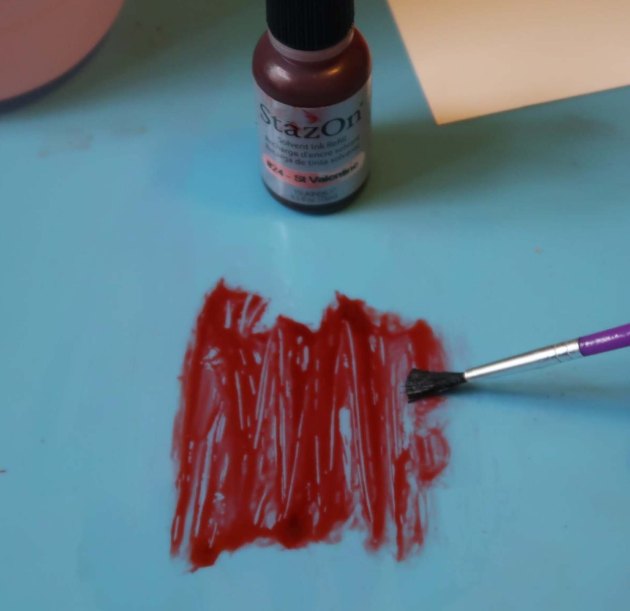
Use a paint brush to paint a layer of rubbing alcohol onto the craft mat.

Step 2

Add one drop of St. Valentine StazOn ink to the rubbing alcohol and slightly blend.

Step 3

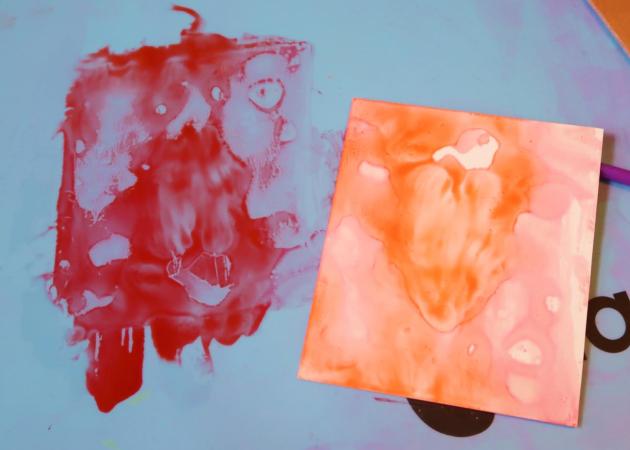
Press a piece of Yupo paper into the ink mixture and lift. Repeat this step with additional pieces of Yupo or plain cardstock to pick up the excess ink.

Step 4

Mix a drop of Rhubarb Stalk and rubbing alcohol on the craft mat.

Step 5

Pounce a piece of wadded up plastic into the ink mix.

Step 6

Pounce the inky plastic over the Yupo paper to create a variety of patterns.

Step 7

Repeat steps 4 – 6 until you achieve the desired look. Try adding other ink colors for a bolder look. For my final result I used StazOn St Valentine, Claret and a touch of Gothic Purple as well as Memento Rhubarb Stalk Ink.

Step 7b (optional)

Flick rubbing alcohol over the Yupo to create additional depth and dimension.

Step 8

Spread Gold Metallic Creative Medium through a stencil using spatula palette knife.

Step 9

After the Creative Medium has dried, scribble around the heart and edge with a Marabu Art Crayon.

Step 10

Smudge the art crayon markings with your finger. Affix letters to the Yupo with On Point! Glue.

Step 11

Randomly stamp text and hearts over the Yupo canvas with VersaFine Clair Morning Mist ink.

Supplies

Imagine
Other
  • Yupo Paper
  • Rubbing Alcohol
  • Marabu Art Crayon
  • Rinea – Text Stamp
  • Joy Clair – Heart Stamp
  • Simon Says Stamp – Heart Stencil
  • Sizzix – Letters

Learn How To Color Glass For A Valentines Gift

by Iris Rodriguez

The idea of sending a message in a bottle has been around since 310 B.C. The Greek philosopher Theophrastus used to plop sealed bottles in the sea to prove that the Mediterranean was formed by the inflowing Atlantic. In the 16th century, Queen Elizabeth I of England believed that some bottles might contain secret messages sent home by British spies or fleet. As a result, she appointed an “Uncorker of Ocean Bottles”; making it a capital crime for anyone else to open one.

Today the idea of message in a bottle is more of fun romantic notion, thanks to literature and Hollywood movies. Show some love with this heart shaped glass bottle containing a custom stamped message, on a ribbon, using StazOn ink. Embellish the bottle with StazOn Studio Glaze and other adornments.

Skill: Intermediate
Time: 1 Hour

Directions


Step 1

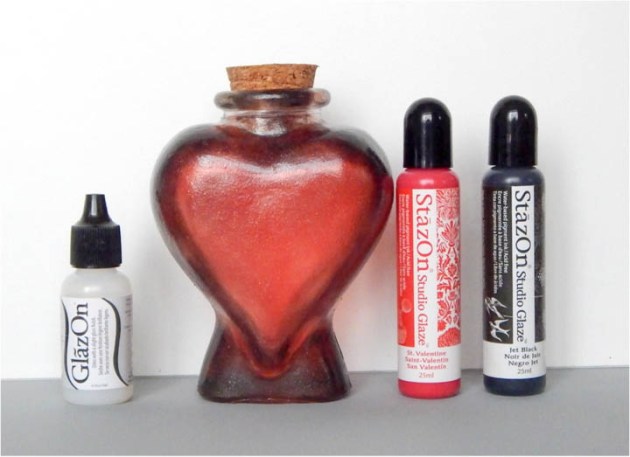
Begin by selecting a heart shaped bottle. I found this wonderful bottle at my local craft store. Working on glass can be a little tricky. For instance, getting some things to stick, getting an even texture (e.g. brush strokes) and color. It helps to prime the glass. For this project the glass is primed with on GlazOn. It is added to the glass; and in between the StazOn Studio Glaze layers. The Studio Glaze is a pigment ink medium. Start by brushing the GlazeOn onto the bottle. Brush using a crosshatch pattern; create X patterns without washing the brush. By doing a crosshatch pattern, allows you build up the GlazeOn evenly and eliminates brushstrokes. Brush on a section at a time. Let the glass dry completely. This product dries fast. Wash your brush in water right away. Dry the brush before using with the GlazeOn again. If you have water, it will active the GlazeOn or Studio Glaze and you will remove any medium you may have on the glass and get uneven surface.


Step 2

Squeeze out a small drop of the St. Valentine Studio Glaze on your grey craft mat. Using an Inkblusher sponge on the StazOn Studio Glaze, sponge one section at a time. Only place a few drops of the Studio Glaze at a time, then sponge. To increase color intensity, keep adding layers. Sponge one layer at a time, and allow each layer to completely dry. Brush on a thin layer of the GlazeOn in a crosshatch pattern. Ensure your brush is dry. Allow this layer to completely dry.


Step 3

Sponge on the Jet Black StazOn Studio Glaze on the sides and bottom of the heart. This adds dimension and interest. Allow the layer to completely dry. Brush on a thin layer of the GlazeOn in a crosshatch pattern. Ensure that the brush is dry. Allow this layer to completely dry.


Step 4

Squeeze a few drops of the Shimmer IrRESISTible Pico Embellisher, then sponge. This gives the bottle a slight shimmer. If not adding the Shimmer brush on a final layer of GlazeOn. Allow the layer to completely dry.

Step 5

The bottle is complete at this point. For added measure, once all layers have dried, seal the glass with a final sealer to protect the beautiful finish. Brush on a thin layer of Indoor water based Polyurethane. Any brand will do. Polyurethane is great for sealing art work on just about any surface. It comes in matte, satin, and gloss. It has a nice strong, but soft finish (does not have that plastic feel, looks natural.

Step 6

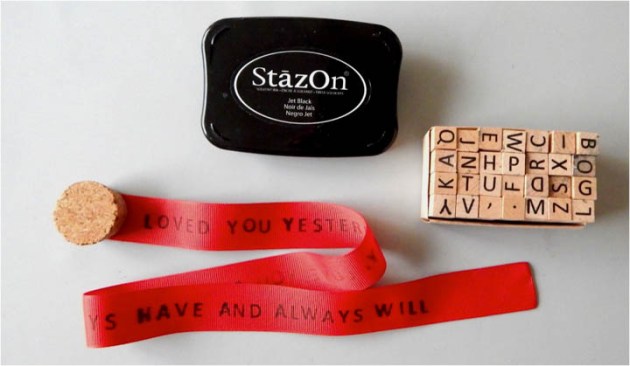
Stamp the message on the ribbon. This can be done while you wait for the products to dry on the glass. First a little about ribbons. Recommend using a Grosgrain ribbon. I tried stamping on satin and polyester ribbons, but the ink bled. The Grosgrain ribbon performed better due to its design; it’s heavy and tightly woven. This type of ribbon is widely available and comes in many colors and widths. Choose a size that will fit your alphabet stamps. I liked the one inch ribbon; it filled up the glass nicely and it fit my larger alphabet stamps as well.

This sounds silly to even say it, but before you begin to stamp your message, write it out on a piece of paper. There is something about concentrating on the stamping that makes you miss a letter here and there, if you’re not careful. You don’t want to send the wrong message (pun intended, lol!). Stamp the message while the ribbon is on the roll, you don’t know exactly how much ribbon your will need. Cut the ribbon after you finish stamping the message; leave a little extra ribbon at the end of the message.Singe the end of the ribbon with a cigarette lighter or it will unravel over time. The ribbon is flammable; singe by quickly running a cigarette lighter across the edge.


Step 7

Using heavy clear glue, adhere the ribbon to the center of the cork. Glue about ¼ inch of the ribbon.


Step 8

Allow the glue to dry. Use a piece of piece of tape or place something light on the cork to hold it in place while the glue dries.


Step 9

Place the cork and ribbon in the bottle and embellish.

Supplies

Imagine
Other
  • Heart shaped glass bottle
  • Embellishments
  • Grosgrain red ribbon- between ½ to 1 inch width
  • Alphabet rubber stamp
  • Varathane indoor water based Polyurathane